World Fitness Blog : Leading Global Bloggers

June 10, 2023

Lat Pulldown vs. Pull-Up: The Battle for a Bigger Back

Filed under: Fitness,Training — Tags: , , , , , — admin @ 2:22 am

The lat pulldown and the pull-up are staples across many training programs — sometimes even coexisting within the same workout. Both exercises train the “vertical pulling” movement pattern and can be highly effective for targeting your back muscles, which is why some lifters regard them as nearly interchangeable. Despite how visually similar the movements may seem, they can actually offer pretty significant and distinct benefits.

long-haired person in gym doing pull-ups

Credit: Microgen / Shutterstock

Whether you should focus on pulldowns or pull-ups can depend on a few factors, including your experience and your goals. From technique, programming, and step-by-step execution, here is everything you need to know about these foundational back-building exercises.

Lat Pulldown and Pull-Up

Exercise Differences

Recognising the differences between the lat pulldown and the pull-up can put you on the fast track for better results. Some key differences involve the equipment used, or lack thereof. Some relatively subtle, but significant, differences in programming can also be found.

Human Body vs. Machine

The major visual difference between the lat pulldown and pull-up is the fact that one is a bodyweight exercise and the other requires a full cable station. This brings with it two major considerations.

The lat pulldown uses a specialized cable stack pulley system to anchor your body in place while you move an adjustable weight stack, whereas the pull-up simply requires a fixed overhead bar that can support your body weight.

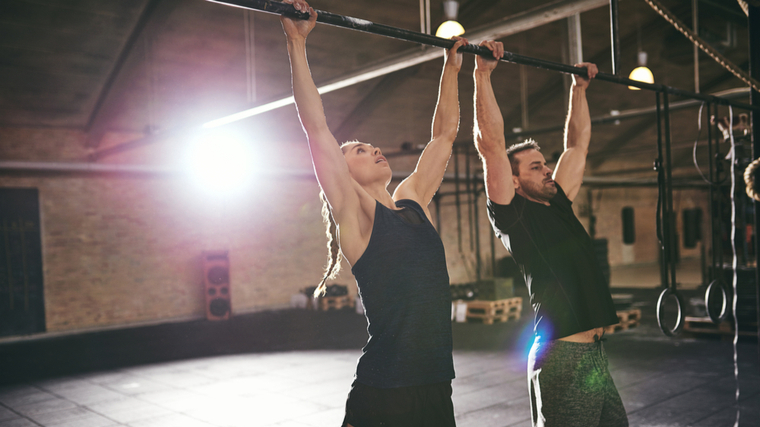
Two people in gym doing pull-ups on an overhead bar

Credit: Ground Picture / Shutterstock

This can affect the relative ease of implementing each exercise into your program based upon availability of equipment, as well as your own capabilities — body weight pull-ups may be too challenging for beginners, while pulldowns can accommodate lifters of any experience or strength level.

As a calisthenics exercise, the pull-up places a greater stabilization challenge on your entire body, from your back and shoulders through your core to your lower body. The stable machine and fixed anchor points provided by the pads on a lat pulldown machine make it tremendously easier to take a seat and get to work. The machine itself provides stabilization, so you can focus targeting your back muscles.

Loading

One of the largest differences between the lat pulldown and pull-up is the range of resistance you can use. The lat pulldown is a highly adjustable machine that simply requires you to add more plates or lower the pin on the weight stack further and further — sometimes exceeding a comparable pull-up load.

The lat pulldown is more scalable than a pull-up — the resistance can be quickly and easily reduced to allow relatively weaker lifters to perform the exercise. Aside from getting creative using resistance bands to assist a pull-up or having access to a dedicated assisted pull-up machine, it can be quite challenging to overcome the baseline level (your body weight) needed to perform a pull-up. This is especially true if you want to perform multiple repetitions per set.

Sets and Repetitions

Similar to the differences in loading, the lat pulldown and pull-up are often paired with distinct set and repetition schemes. For many people, the pull-up is an upper body strength movement that lives in a lower repetition range. Whereas, the lat pulldown typically exists as an effective muscle-building tool that thrives with more moderate repetitions.

You’ll often see pull-ups performed for two to three sets of anywhere from one to 10 repetitions. While the pulldown could be performed with much heavier weights for low-rep sets, it’s nearly impossible to maintain strict form with such programming due to poor leverage. Having your lower body and core locked into position becomes a limiting factor.

In contrast, a lat pulldown is typically done for two to four sets of eight to 12 repetitions. Reaching that type of volume with pull-ups is typically reserved for experienced lifters of a significant strength level, either performed with added weight or with body weight alone.

Exercise Similarities

While there can be several key differences, the lat pulldown and pull-up do share some significant overlaps to consider, as well. They will hit many of the same primary muscle groups, both require some degree of overhead mobility, and the exercises share many basic variations.

Muscles Worked

The lat pulldown and pull-up primarily target your latissimus dorsi — a large swath of muscle located on either lateral side of your back. While the latissimus dorsi (lats) are the prime mover, both exercises will also heavily involve your upper back, biceps, and varying degrees of core musculature to stay in an efficient pulling position.

Mobility Requirements

The vertical pulling pattern used in both exercises requires you to be able to successfully, comfortably, and safely get your arms fully extended overhead. While that may sound simple enough, shoulder mobility and joint health is a very important component of avoiding training-related aches or pains in the long-term.

Muscular man performing lat pulldown in gym

Credit: martvisionlk / Shutterstock

If you can achieve the overhead position effectively, both the lat pulldown and pull-up can be effective at maintaining your overhead mobility, especially when you focus on working through a full range of motion in the stretched (overhead) position.

Grip Variations

When it’s time to introduce exercise variety, the lat pulldown and pull-up can both allow narrow or wide hand positions, which can alter the muscle emphasis from your lats to your upper back or even your biceps. (1)

Both exercises can also be performed using unique grip orientations, from neutral-grip to overhand or even freely rotating (using individual handles or straps to allow your wrists to rotate during each repetition). Like grip width, changing the orientation of your hands and forearms is an effective way of altering muscle recruitment by making slight adjustments. (2)

Technique Differences

The lat pulldown and pull-up have some definitive technique differences. Because one is a calisthenics exercise and the other is performed while seated on a machine, your overall body position will affect exercise technique.

Hollow Body

The hollow body is a full-body bracing technique that helps to create a rigid body posture. The high level of total body tension it creates allows you to better control your movement through space. This technique is especially important during the pull-up, where you will be freely moving without any anchor points aside from your grip.

In order to successfully perform a pull-up, establishing a strong hollow body technique is essential to maintain stability. The lat pulldown, on the other hand, provides this stability on your behalf by offering leg pads to hold you in place.

Torso Angle

Your torso angle during each repetition is a major difference between the pull-up and lat pulldown. Because your lower body is secured under the knee pads, the lat pulldown allows you to manipulate your torso angle to target subtly different muscles. A greater degree of backward lean could emphasize more of your upper back, whereas a more vertical torso angle puts your upper back into a less advantageous position and emphasizes lat activation.

On the other hand, fairly consistent technique and upper body position is required for a proper pull-up. From a dead-hang position (gripping the bar with your arms fully straightened), you must set your shoulder blades by first “shrugging” yourself up. In doing so, you will be able to better leverage your latissimus dorsi to complete the rep and actually pull you up.

When you get this technical cue right, you will have a slightly backward-leaning torso angle while performing each repetition, but nowhere near the freedom of motion provided by the lat pulldown machine.

Lower Body Position

Your lower body positioning will certainly be a notable difference in each exercise. Similar to the stability requirements during the hollow body technique in the pull-up, your leg position will be affected by the need to stay rigid. Fully lock your legs out, leaving them either hanging straight down or angled slightly ahead of your body. You cannot achieve a strong, stable hollow body position with bent legs.

With a lat pulldown, you will be in a completely seated position with your feet flat on the ground driving your knees up against the pad. While some lifters disregard the knee pad and let their heels leave the ground during pulldowns, this poor form doesn’t add any benefit and only reduces your stability and upper body pulling power.

How to Do the Lat Pulldown

Sit on the lat pulldown machine and adjust the knee pads to snuggly anchor your legs in place with your feet flat on the ground. Stand back up and grab the lat pulldown bar evenly, about shoulder-width apart, with an overhand grip.

Brace your full body and sit down, securing your legs under the knee pads. Squeeze the bar tight, brace your core, drive your legs into the knee pads by performing a static calf raise.

Lean back slightly and pull the bar toward your chest. Focus on feeling your back squeeze in the bottom position before straightening your arms to return to the starting position.

Form Tip: Be diligent to avoid momentum. Secure your body in the machine and brace hard – only move the bar by squeezing your back and pulling with your arms. Do not excessively sway your torso backwards. 

Benefits of the Lat Pulldown

  • The lat pulldown has a high degree of stability, making it a more effective way to focus on the back muscles.
  • The pulldown machine offers highly scalable loading, making it easy to perform for lifters of all experience levels.
  • Multiple handle attachments allow many variations for different benefits.
  • It’s relatively safe to take this exercise close to muscle failure.

Lat Pulldown Variations

The majority of effective lat pulldown variations will capitalize on different handle attachments to slightly change your technique and alter muscle recruitment.

Close-Grip Pulldown

Close-grip pulldowns draw your hands slightly closer together than the standard, shoulder-width grip. This increases the amount of leverage your lats have and slightly increases the range of motion — both of which can lead to a stronger training stimulus.

The close-grip pulldown can make the exercise more effective when you’re just learning general technique by delivering a strong training stimulus without needing heavy weight.

Wide-Grip Pulldown

Wide-grip lat pulldowns place your hands slightly farther apart than the standard issue grip placement. This will put your lats at a greater disadvantage, making some of the supporting musculature in your upper back, shoulders, and arms contribute more. This will also reduce the load you’ll be able to lift.

This is a great exercise to fill gaps in your physique or in your strength development. By strengthening relatively weaker links, wide-grip pulldowns can also prolong the amount of time you can make progress before adding weight.

Dead-Hang Pulldown

The dead-hang style of lat pulldown will have you fully “relax” your shoulder blades and assume a completely upright torso between each repetition. Your teres minor (a small shoulder muscle) will get some added work helping to stabilize your shoulder for each repetition.

This is a great way to gain, and maintain, shoulder stability. The increased muscle recruitment will also help upper back development.

Single-Arm Pulldown

The single-arm lat pulldown turn the exercise into a unilateral (single-sided) version. This forces each side of your body to work independently of the other, which will greatly help to accommodate any body size or shape while addressing any natural asymmetries.

The single-arm pulldown is also a tremendously effective way to add more progression time to your lat pulldown exercise by essentially doubling the amount of load each side will have access to.

How To Do The Pull-Up

Perform the pull-up by grabbing a straight bar that is high enough for your legs to dangle freely without touching the ground. Use a small box or (safely) jump to grab the bar with an overhand grip approximately shoulder-width apart.

Perform a hollow body technique by flexing your core, depressing your shoulder blades, engaging your glutes, and locking your quads.

Engage your lats and flex your arms to pull your chest toward the bar. Once you have reached the highest point that you can pull yourself to, slowly lower back to the starting position using control. Maintain your brace and perform for your target repetitions.

Form Tip: Be diligent about maintaining hollow body tension and eliminating any lower body sway. Performing a pull-up gets exponentially more difficult when you have to counter any unneeded movement. Stay braced and aim to start each repetition from a motionless position. Swinging your hips and legs may help you perform more reps, but it reduces muscular stress on your back.

Benefits of the Pull-Up

  • The pull-up requires little-to-no equipment.
  • Bodyweight exercises can improve coordination and proprioception (body awareness) which can carryover to general athleticism.
  • Scalable to suit either strength or hypertrophy goals when appropriate programming and loading is used.

Pull-Up Variations

Pull-ups can be modified to attack a few different goals. Similar to pull-ups, changing your grip position can deliver some unique benefits.

Wide-Grip Pull-up

Wide-grip pull-ups place your upper back (teres minor) on blast. A wider grip will make it harder on your lats, but also put a bigger emphasis on your ability to maintain the right shoulder positioning for each repetition.

When you’re looking to train nearly your entire upper body, while also seriously roasting your shoulder stability, use the wide-grip pull-up.

Neutral-Grip Pull-up

On the opposite side of things, a neutral-grip pull-up places you in a much more inherently stable position. The relatively closer grip and neutral (palms facing in) hand placement will make it easier to harness your back muscles to pull you up, but also take some of the shoulder stability challenge away.

When you’re looking to go for moderate or higher reps, or build a foundation of strength and muscle, neutral-grip pull-ups are a great option.

Towel Pull-up

Towel pull-ups are a huge boost to your grip strength. This low-tech modification, draping a simple (but sturdy) towel over a bar, will seriously challenge your ability to simply hang on.

If you’re in the market for a stronger grip and bigger arms — and if you can already perform more than a handful of pull-ups — challenge yourself with towel pull-ups.

When to Program the Best Pulling Movement for Your Goal

There are several instances where either the lat pulldown or pull-up might be the better option. Your specific goals and training experience are unique factors to consider.

Beginner

When you’re a beginner, you’ll be looking to build a base of muscle and strength before eventually launching into a more structured and challenging program. With that in mind, you may struggle with pull-ups because they can be very unforgiving.

While there are ways to make pull-ups more accessible for beginner lifters, such as using resistance bands for assistance, oftentimes a pull-up is a bit of a tall order. Instead, spending some time building a super-strong lat pulldown can be a relatively lower barrier to entry. Once you’ve accomplished this, either option is freely available and effective.

Muscle Gain

Both the lat pulldown and pull-up can be very effective muscle-building tools, but there are some subtle differences that likely edge the lat pulldown ahead. The lat pulldown is a more stable training tool. This means that there will be less “moving parts” in your way while you chase highly stimulating sets that accumulate volume needed to build your back. (3)

The lat pulldown also allows for a slow, controlled, and incremental increase in loading which once again provides a boost to long-term muscle growth. The pull-up is great in its own right, but it’s hard to beat the lat pulldown for pure muscle gain.

Strength Gain

Gaining strength can be accomplished with both the lat pulldown and pull-up. However, the lat pulldown can more easily be loaded and trained for strength-focused results. With that in mind, it’s going to offer you more lat-specific strength.

On the other hand, the pull-up, as a bodyweight exercise, is more of a full-body exercise. In this instance, the pull-up will help build greater full-body strength. If you want better overall strength potential, emphasizing the pull-up will likely be the better option.

Limited Equipment

When you don’t have access to a gym, the choice is a simpler one. The lat pulldown literally requires a machine, which likely is only accessible through a commercial or home gym equivalent.

While a pull-up bar may seem mandatory for doing pull-ups, it is not actually required. A pull-up can, technically, be performed anywhere you have access to a strong, stable anchor point to safely grab. The pull-up wins when you have limited equipment. 

Advanced Athlete

If you’re an advanced athlete in nearly any sport, it’s a toss up. Once you’ve developed a strong base of muscle, strength, and coordination, both the pull-up and lat pulldown can be tailored to your needs.

Both can be loaded and progressed, both have unique variations to prolong your progress, and both are relatively easy to master after a short amount of focused time. Depending on your goals or needs, either the pull-up or lat pulldown (or even both) can be effectively programmed for athletic goals.

Prioritize Your Pulls

The lat pulldown and pull-up are both iconic staples of weight training. The exercises have unique benefits, times of superiority, and some clear drawbacks. Depending on your training age, goals, and available equipment, one option may jump out as the obvious choice. Review the information and make the best decision for your goals. Prioritize your pulls for some big gains and, one day, both classic movements may find their way into your program.

References

  1. Andersen, V., Fimland, M. S., Wiik, E., Skoglund, A., & Saeterbakken, A. H. (2014). Effects of grip width on muscle strength and activation in the lat pull-down. Journal of strength and conditioning research, 28(4), 1135–1142. https://doi.org/10.1097/JSC.0000000000000232
  2. Signorile, J. F., Zink, A. J., & Szwed, S. P. (2002). A comparative electromyographical investigation of muscle utilization patterns using various hand positions during the lat pull-down. Journal of strength and conditioning research, 16(4), 539–546.
  3. Schoenfeld, B. J., Contreras, B., Krieger, J., Grgic, J., Delcastillo, K., Belliard, R., & Alto, A. (2019). Resistance Training Volume Enhances Muscle Hypertrophy but Not Strength in Trained Men. Medicine and science in sports and exercise51(1), 94–103. https://doi.org/10.1249/MSS.0000000000001764

Featured Image: Tom Wang / Shutterstock
Source

April 22, 2022

Everything You Need to Know to Master the Pull-Up

The pull-up is the meat and potatoes of any back workout. It’s one of the few exercises that nearly every experienced lifter agrees is essential for building a foundation of size and strength. You’ll find it performed and praised by bodybuilders, strength athletes, and traditional sports athletes due to its wide benefits. 

This battle-tested exercise is unique since it delivers a stronger back and abs for huge carryover to almost every other major lift. Plus, bigger muscles in the back, shoulders, and arms will improve any physique. All while using only your bodyweight. You don’t need a gym to find plenty of gains.

How to Do the Pull-Up

Pull-ups are a great addition to any strength program. The simple movement of lifting yourself up to a bar will provide a great range of benefits that assist in general strength, posture, and core stability. 

Step 1 — Hang From a Bar

Man and woman hanging from pull-up bar

Credit: Flamingo Images / Shutterstock

Start hanging from a straight bar with your core stabilized to prevent your body from swaying. Set your hands so they’re a smidge wider than shoulder-width using a pronated (overhand or palms down) grip. To maintain balance and coordination, you can cross one foot over the other at your ankles.

Form Tip: When stabilizing your core, imagine someone is about to punch you in the stomach. The initial flinch of tightening your stomach will place you in an effective bracing position.

Step 2 — Pull Your Chest Towards the Bar

Man and woman performing pull-ups

Credit: Flamingo Images / Shutterstock

Take a breath before beginning to pull yourself towards the bar. Pull your shoulder blades together to recruit your upper back muscles. Maintain that squeeze while bending your elbows to raise your body. Exhale throughout the movement. Lean back very slightly on the way up.

When your neck is near the bar, you’ve completed the concentric (pulling) portion of the rep. In the top position, your torso should be angled slightly backwards with your elbows near your ribs.

Form Tip: To improve muscle coordination and muscle fiber recruitment, pause at the top for one or two seconds.

Step 3 — Lower Under Control

Muscular man performing pull-ups outdoors

Credit: oOhyperblaster / Shutterstock

Start the eccentric (lowering) portion of the rep by extending your elbows to lower your body. Breathe in and keep your core engaged. Do not swing to create momentum between each rep. Keep your legs hanging directly down.

Form Tip:To improve the quality of each rep and prevent any swaying, lower yourself over two seconds and pause at the bottom before beginning the next rep.

Pull-Up Mistakes to Avoid

The pull-up is a basic bodyweight exercise, but there are several common technique errors to avoid in order to build strength and muscle while reducing joint strain.

Not Using a Full Range of Motion

The half-rep pull-up is an all too common issue seen in many gyms. Some lifters smash out rep after rep while only descending halfway down before rushing straight back to the top. When it comes to maximizing strength and muscle gains, these half-reps are counterproductive.

Man performing pull-ups outside

Credit: Syda Productions / Shutterstock

The shortened range of motion reduces the muscle’s time under tension, which can reduce muscle growth and strength development.

Avoid it: Leave your ego at the door and focus on quality reps over quantity. Lower yourself into a fully stretched position before re-engaging your muscles to lift yourself back up.

Excessive Swinging

Stabilizing the body is crucial for minimizing stress on the shoulder joint. If you are trying to build strength and muscle, using an excessive amount of swinging is not going to help and may make things worse in the long run.

Man swinging from pull-up bar

Credit: baranq / Shutterstock

CrossFit training has popularized “kipping pull-ups”, a specific exercise variation which has the trainee deliberately swing the lower body back and forth throughout each rep. This generates momentum which helps to perform high-rep sets and turns the back-building pull-up into a full-body exercise. Kipping is a specific technique used for a specific purpose. It’s also a deliberately learned skill, it’s not meant to be an accidental way to perform basic pull-ups.

Avoid it: Focus on the core-engaging cue explained in step one of the setup. While hanging and before pulling, flex your stomach as if you were about to be punched in the gut. Maintain this ab tension throughout each rep.

Benefits of the Pull-Up

The pull-up is a second-to-none vertical pulling exercise. When performed correctly, it can emphasize the development of strength and muscle across the entire upper body, support overall posture, and help general shoulder and upper back mobility.

Three people performing pull-ups on wall-mounted bars

Credit: UfaBizPhoto / Shutterstock

Getting Bigger and Stronger

Because so many muscles are involved in the exercise, the pull-up delivers a serious bang for your buck. This one movement builds muscle through the entire back, shoulders, and arms. Even the abs get a solid workout. It is also a very easy exercise to progressively overload (make more challenging, often with added weight), which makes the exercise ideal for building strength. 

Carries Over to Multiple Exercises

The pull-up recruits and builds muscles which play key roles in many other lifts. Strengthening these support muscles translates to improvement in other exercises. For example, strengthening the lats, upper back, and middle back can carryover to the bench press where you need to retract your shoulder blades into the bench to create stability and control when pressing a heavy weight.

Better Grip Strength

While there are specific exercises to build a stronger grip, simply performing the pull-up strengthens your forearms and grip without additional wear and tear that may occur from more grip-focused exercises like the deadlift. Because you’re hanging from the bar supporting your bodyweight during each set, your grip strength is being consistently trained from the first rep to the last.

Muscles Worked by Pull-Up

The pull-up is a compound movement, meaning it involves multiple joints and recruits multiple muscle groups at once. Here’s a breakdown of the muscles worked by the pull-up.

Bodybuilder performing pull-ups in gym

Credit: Satyrenko / Shutterstock

Latissimus Dorsi

The lats are the largest back muscle, attaching at the upper arm and along the spine near the lower back. They serve two primary functions. First, they bring the arm closer to the body from out to the side. Second, they bring the arm closer to the body from out in front. This is why the lats are heavily activated when your arms begin overhead and pull down and in to raise your body during a pull-up.

Upper Back

The upper back (generally including the rear deltoid of the shoulder, the trapezius, and the rhomboids) functions to control movement of the scapulae (shoulder blades) and to support the shoulder joints under muscular stress, particularly in the bottom portion of the pull-up.

Trapezius

While sections of the traps fall into the “upper back” category, the trapezius is a large muscle on its own and serves a big role during pull-ups. The middle portion of the traps help to pull your shoulders back while extending your elbows behind you while also stabilizing your shoulders when you move your arms.Your lower traps are crucial to many other lifts and are highly activated during pull-ups. (1)

Biceps Brachii

The biceps are composed of two heads: a long head commonly referred to as the “outer” and a short head referred to as the “inner.” Both muscle heads originate at the scapulae and insert on the radius bone of the forearm. The biceps play a relatively smaller, but important, role during pull-ups to complete the top part of the movement. They are more significantly activated and play a larger role in the chin-up variation.

Lower Back

The muscles of the lower back, or lumbar spine, have been shown to be recruited during pull-ups even though they aren’t moved through a significant range of motion. Because these muscles control your torso bending at the hips, they work during the exercise to maintain a stable core position and keep a straight line from your shoulders to your knees or feet.

Rectus Abdominis

The abs are surprisingly worked to a very significant degree during pull-ups. While most lifters are more familiar with the abs’ role in flexing your torso in a curled position, they’re highly activated to maintain a stiff, solid torso. Similar to the lower back, the abs work to prevent bending at the hips.

Who Should Do the Pull-Up

Training for Bodyweight Strength

Many bodyweight training-focused lifters consider the pull-up to be an essential test of strength. Because strength is a skill, if you want to improve your pull-up numbers, you need to get better at the exercise itself. This skill comes from repeated efforts, rep after rep.

Training for Muscle

To increase muscularity, the pull-up should be a recurring movement in your workouts. The activation of multiple muscles combined with a long range of motion provide a muscle-building stimulus that very few upper body exercises can match. 

How to Program the Pull-Up

The pull-up can be programmed with a variety of sets, reps, and tempo schemes. The exercise is ideally performed at the beginning of your workout. This will make sure your body has the energy required to perform this comprehensive movement without sacrificing your technique or increasing injury risk.

Weighted, Low Repetition

To maximize basic strength in the pull-up, completing four to six sets in the three to six rep range is the place to start. Use a weight that leaves you with at least two reps left “in the tank” to avoid reaching muscular failure. A rest period of three to five minutes between each set will ensure you lift with maximum effort.

However, to ensure proper technique, you should only add weight once you can comfortably handle moderate to high-rep sets using your bodyweight. 

Unweighted, Moderate Repetition

To ensure growth in the working muscles, three to four sets in the six to 12 rep range will increase overall training volume, which is beneficial for building muscle. (2) The multiple sets and reps also allow you to improve your pull-up technique.

Modified Cluster Sets

Some lifters, especially beginners, may not be able to perform pull-ups for multiple sets of multiple reps. Even performing one or two reps may be challenging. This is where cluster sets are beneficial. Cluster sets allow a lifter to perform multiple low-rep “mini-sets” (or clusters) with a heavy weight while avoiding excessive muscular fatigue. You can apply the same technique to bodyweight pull-ups.

This modified cluster set method will have three sets of three reps in one cluster (if you can currently perform four or five reps with good form). Perform three reps, rest for 15 to 30 seconds, perform another three reps, rest for 15 to 30 seconds, and perform a final group of three reps. That entire series is one set. Take two minutes rest before repeating two more sets.

Because three sets of three cluster reps is comparable to performing nine reps in a single set. This will allow you to get stronger, maximize the recruitment of high-threshold muscle fibers (specialized muscle fibers which improve power output), and increase total working volume which can lead to more muscle.

Note: If you cannot perform three reps with good technique, you can use the cluster set method while performing one or two reps per cluster. 

Pull-Up Variations

The basic pull-up is staple in many experienced lifters’ routines, but simple variations can be used for specific goals. Even after you’ve mastered the pull-up, you can implement some of these variations into your training.

Negative Pull-Ups

To perform negative pull-ups, you will need to stand on a box or bench under a pull-up bar. Take hold of the bar with a basic shoulder-width grip and jump up to get your chin above the bar.

Take at least five seconds to lower yourself into the stretched position. Once fully stretched, put your feet on the box again, return to the top position, and repeat until you hit your target rep range.

Chin-Up

One of the most basic pull-up variations is simply reversing your grip. By grabbing the bar with a supinated (underhand or palm-up) grip, you more directly recruit the biceps.

This makes the exercise fit very well into a specific arm workout or it can add “extra” arm training to your back workout.

Wide-Grip Pull-Up

The wide-grip pull-up requires grabbing the bar several inches wider than shoulder-width. Pull yourself up as high as possible and lower yourself under complete control.

The different grip changes the arm position overhead, which changes the range of motion and puts the lats, upper back, and biceps under a different angle of stretch, which creates a unique training stimulus.

Pull-Up Alternatives

You might not be ready to complete a full set of pull-ups, which is no big deal because we all start somewhere. The first priority is understanding the prime movers involved in the pull-up and how to strengthen them. The muscles most activated in the pull-up are the lats, mid and lower traps, biceps, and your core. (3) The following exercises will help you build strength in these important muscle groups.

Scapula Pull-Ups

Scapula pull-ups can help strengthen your grip and lower traps which both play a large role in performing the full pull-up effectively.

Start by hanging from the bar with a shoulder-width grip. Keep your shoulders “shrugged” down away from your ears. Without bending at your elbows, pull your scapulae downwards while pulling your body up. It’s a very short but impactful range of motion. Hold for a slight pause at the top and lower yourself slowly by allowing your scapula to “open up” until you are at a full stretch.

To progress, start by increasing the amount of reps done in each set until you can handle 12 to 15. Once mastered, this exercise can be used within your general warm-up sequence before full pull-ups.

Kneeling Lat Pulldowns

The kneeling lat pulldown will help strengthen the lats, core, and biceps. Use a cable machine, kneeling on the ground while mimicking the exact same starting position as you would for the pull-up.

Keep yourself upright with your glutes flexed to provide stability and increase core activation. Every muscle must remain tight from the ground up.

To progress, you can introduce one and one-half reps — one full rep includes pulling all the way down, releasing the weight halfway up, pulling down again, and releasing to a full stretch. This is a great technique that can be used to emphasize the tension placed on the muscles from both the start of the pull-up and the end of the pull-up.

Inverted Row

The inverted row will help to strengthen the pulling strength of your lats, core, and arms while also emphasizing the mid-traps and upper back. A Smith machine is perfect for this exercise since you can easily adjust the height of the bar while also being in a stable, fixed position.

To progress, lower the height of the bar to adjust leverage and increase the challenge. Eventually you can elevate your feet to put your entire body into a more horizontal position.

Banded Pull-Ups

The banded pull-up is a great way to improve your muscle coordination from a neurological standpoint since strength is a skill built on repetition. (4) The banded pull-up is going to allow you to better prepare yourself to perform the concentric (pulling) portion of the movement since the bands will assist your strength in the bottom position.

Attach a resistance band to the top of a bar and get yourself into position with the band supporting your body, either with bent knees or keeping your legs straight.

To progress, make your way up resistance bands offering less resistance until you are ready to perform your pull-ups with full bodyweight.

FAQs

Can I get a six-pack from doing pull-ups?

No single exercise can give you a six-pack. That can only be achieved through a reduction in body fat, fat loss-focused training, and a calorie-controlled nutrition plan.

With that being said, pull-ups may help with improving the final look of your abs because they are heavily recruited during the exercise, as explained in the muscles-worked section. Pull-ups are an awesome and overlooked exercise for training your abs. You can expect a more prominent set of abs once you do get lean enough.

When can I start performing weighted pull-ups?

The exact timeframe can vary from individual to individual since some people are capable of performing pull-ups in a very short time. However, once you can accomplish three to four sets of 12 reps using your bodyweight, you’ve likely built the technique, coordination, and strength to tackle low-rep weighted pull-ups.

How many times per week should I perform pull-ups?

For building strength and muscle, and taking into consideration the recovery ability of the involved muscle groups, performing this exercise twice per week will be the best place to start. (5) Make sure to give yourself at least two or three days rest between workouts.

For the purpose of getting more technique practice and perfecting this movement, you can implement bodyweight pull-ups as a part of your general warm-up for upper body workouts or even for workouts where a back-focused exercise like the deadlift may be performed. The aim for this technique training would be not to fatigue your back muscles, but to mobilize and activate the associated muscles that are going to be used in those workouts..

References

  1. Youdas JW, Amundson CL, Cicero KS, Hahn JJ, Harezlak DT, Hollman JH. Surface electromyographic activation patterns and elbow joint motion during a pull-up, chin-up, or perfect-pullup™ rotational exercise. J Strength Cond Res. 2010 Dec;24(12):3404-14. doi: 10.1519/JSC.0b013e3181f1598c. PMID: 21068680.
  2. Schoenfeld BJ, Contreras B, Krieger J, et al. Resistance Training Volume Enhances Muscle Hypertrophy but Not Strength in Trained Men. Med Sci Sports Exerc. 2019;51(1):94-103. doi:10.1249/MSS.0000000000001764
  3. Hewit, Jennifer. (2018). A Comparison of Muscle Activation during the Pull-up and Three Alternative Pulling Exercises. Journal of Physical Fitness, Medicine & Treatment in Sports. 5. 10.19080/JPFMTS.2018.05.555669.
  4. Ochi, E., Maruo, M., Tsuchiya, Y., Ishii, N., Miura, K., & Sasaki, K. (2018). Higher Training Frequency Is Important for Gaining Muscular Strength Under Volume-Matched Training. Frontiers in physiology, 9, 744. https://doi.org/10.3389/fphys.2018.00744
  5. Schoenfeld, B. J., Ogborn, D., & Krieger, J. W. (2016). Effects of Resistance Training Frequency on Measures of Muscle Hypertrophy: A Systematic Review and Meta-Analysis. Sports medicine (Auckland, N.Z.), 46(11), 1689–1697. https://doi.org/10.1007/s40279-016-0543-8

Featured Image: UfaBizPhoto / Shutterstock

Source

March 13, 2021

The Ultimate Isometric Exercise Guide

The Ultimate Isometrics Manual is a nerd’s paradise, at least for this nerd. From the mind of Convict Conditioning author Paul Wade, and published by Dragon Door, this hefty 462 page book that is about as complete an overview of isometric training as you can get.

The Ultimate Isometric Exercise Guide - Reviews, bodyweight exercise, isometrics, functional strength, concentric-only training, contraction

Isometrics is about easily accessible and yet outside of a dedicated group of practitioners, not something that gets much press. It’s a shame because isometrics has broad applicability for all populations of strength trainees including novices and seniors.

That’s because isometric exercises force you to stay in your lane. By that I mean that they are not like lifting a barbell or dumbbell in so far as you can’t overload, or under load, an isometric set and the risk of injury is, overall, much lower than more traditional exercises.

Isometric exercise is only as effective as the effort and the effort can only be felt if you are properly positioned to create the tension demanded. That doesn’t mean you can’t screw up an isometric exercise but you have to be pretty motivated to get it wrong.

What is Isometric Exercise?

Isometric exercise relies solely on the creation of tension with concentric contraction of the muscle against an immovable object. That object may be a device like the isochain, it may be a door jamb, and it may be your own body.

Invariably, any discussion of isometrics will refer to the seminal study done by Hettinger and Muller in 1953 (Muscle capacity and muscle training). The German researchers found that a single daily effort of two-thirds a person’s maximum effort for six seconds at a time for ten weeks increased strength by about five percent a week.

Melody Schoenfeld wrote on these pages that isometrics is working at standstill or the the act of using force against resistance without changing your muscle length. For example, holding a bicep curl at a 90-degree angle for 30 seconds.

Logan Christopher wrote about legendary strongman Alexander Zass who was a big proponent of isometric exercise who believed the secret of isometric training was that it stored energy instead of dissipating it, and that it allowed him to work against very strong resistance helping to build up his stamina.

Zass had little to no access to weightlifting equipment in his life. He was a strongman who bent bars and broke chains. Bruce Lee was also known for his isometric work, as noted in Bruce Lee’s 3-Minute Workout by Shane Trotter.

Unpacking The Mysteries of Static Training

Hetting and Muller did seminal research on isometric training in 1953

Let’s get the biggest criticism of this book out the way: it’s a little overwrought in promoting the Isochain, an expensive isometric training device that isn’t being reveiwed here and isn’t needed to enjoy this book or take advatange of it.

You’d think that Paul Wade, the guy behind no equipment workouts would be less inclined to push a piece of equipment, but to be honest, his publishers should have done a better job of addressing this one minor flaw of the book.

To put it in perspective, this ebook is just under ten dollars and has plenty of great information and exercises that don’t need the Isochain. I’ll be generous and give the Isochain infomercial about 50 pages of overexposure, which leaves about 400 pages of other stuff.

Otherwise, I stand by my nerding out statement. I have a reference for isometric training. I have enough information to make an intelligent decision about its efficacy, and I have plenty of examples of how to apply isometric exercises.

More importantly, there is enough information here to justify exploring how isometric training can help increase weight and reduce the chance of injury.

I asked an older friend of mine, someone who is quite sedentary, to try 10 minutes a day of a set of isometric exercises that I had improvised for him during the lockdown, while he was working from home. Based on my sample of one, the impact of phenomenal.

Whether it was the 10 minutes a day only part of the routine or the actual palpable increases in strength that he experienced, my friend was sold and actually go the book himself.

Like everything else in the fitness industry, there are cycles, fads, and fashions. Isometric exercise isn’t fashionable or faddish, but it may need to have a refresh cycle and demands some modern-day appreciation. Paul Wade’s book may be all you need to freshen up your isometrics.

Source

March 8, 2021

How to Boost Your Pull Ups in 2 Weeks

How to Boost Your Pull Ups in 2 Weeks - Fitness, bodybuilding, goal setting, cardio, bodyweight exercise, HIIT, at home training, pull ups, fatigue, isometrics, consistency, training method, grease the groove, chin-ups, lockdown

There isn’t a secret or magic trick to increasing your pull ups, but it isn’t as difficult as many people believe. You may think that I’m another coach who can’t relate to your situation, but I can. I still remember when I was struggling to do 2-3 pull ups.

I struggled because I didn’t train for them, and when I did train for pull ups, I didn’t train properly.

I fear many people are making the same mistakes I made. I want to share how you can skip the frustration and master the pull up.

Your Training Should Match Your Goals

The majority of the fitness industry is all about HIIT, cardio, bodybuilding, or training until you puke.

I’m not a fan of this, not because there’s anything wrong with these training styles but because these methods get the most exposure. There are so many different ways to train, but your training should always match your goals.

The goal here is to increase the number of pull ups you can complete consecutively, and those methods I mentioned don’t work.

When I was learning to do pull ups:

  • I did it the common way of 3 sets of 5-10 reps.
  • The aim is to do 3 sets of 5 reps.
  • Then every week or two, you increase the reps 3×6, 3×7 until you reach your goal.
  • What generally happens is that in the first set, you can probably do five reps, but after that, you will struggle even to do 2-3 reps.
  • That’s what was happening to me, and I would also keep hitting plateaus—stuck at the same reps for a while.

If I could do it all over again, I would use a technique called Grease The Groove (GTG). This is how I teach my clients to get their first pull up and to increase the amount they can do in a row.

Grease the Groove for Better Pull Ups

How to Boost Your Pull Ups in 2 Weeks - Fitness, bodybuilding, goal setting, cardio, bodyweight exercise, HIIT, at home training, pull ups, fatigue, isometrics, consistency, training method, grease the groove, chin-ups, lockdown

For example:

  • Let’s say you can manage just about four reps in a row.
  • Throughout the day, you’ll do multiple sets (4-7 sets) at 50% of your max, which is two reps.
  • If one rep is your max, then do multiple sets of one rep.
  • Rest for a minimum of one hour between sets.
  • Perform this 4-6 days a week.

After two weeks, test your pull ups to see how many you can do in a row.

Learning a new movement pattern is just like learning a new skill.

The more you do something correctly, the better you get at it. By doing the reps at 50% intensity, you limit fatigue, and you’ll focus more on the correct technique.

It won’t feel like you’re doing much, but your body is learning the movement. Frequency and consistency are kings when it comes to learning.

In a week, you’ll accumulate a lot of reps.

You can do this in addition to your regular training but if you’re not recovering between sessions, then reduce the workload.

Pull Up technique:

Get Your First Pull Up

If you can’t do a pull up yet, you can still use this technique. In addition to your regular pull up training of 2-3 times a week, do GTG with these exercises. Focus on one for two weeks, rest for a week, and then do GTG with the other exercise.

Jump Negative Pull Ups:

  • Jump up as much as you need to pull yourself up.
  • Try and go slow when coming back down.
  • At first, you might drop straight down, but as you get stronger, you will be able to go slower.
  • If the jump is too much, jump from a box to assist you.

Isometric chin-ups:

Jump up and hold yourself at the top of the pull-up. Try to keep your chin over the bar.

You Can Handle Your Bodyweight

Some of you might think that you were never meant to do or will never be strong enough to do pull ups, but you are. Put the negative thoughts and feelings aside and do the work.

Pull ups are a natural movement that your body is well capable of doing.

Train your pull ups frequently throughout the week, and focus on the proper technique. Otherwise, you will only be cheating yourself. Be patient, and you will master your pull ups. You can use GTG to improve other exercises as well.

Source

November 30, 2020

How to Start Calisthenics Training

With the amount of information we’re exposed to, it”s easy to overcomplicate our training. When it comes to calisthenics, it appears to look unsafe because we see the end product from the best athletes, but calisthenics is for all levels.

There are various forms of calisthenics/bodyweight training that you can do, based on your goals.

It’s important to keep things simple. You need to ask yourself this question “Does my training match my goals?” I see many times that people aren’t training specifically for the goals they want.

They say they want apples, yet they are planting orange trees.

This article is meant to simplify calisthenics training, guide you from beginner to advanced, and show you how all levels can use the body as a paintbrush to create a masterpiece.

General Strength- Beginner to Intermediate

I know the temptation to advance as quickly as possible is significant, but it will only lead to injuries, massive weakness, burnout, and frustration.

If you haven’t done this style of training before, then start with the basics. Work on the big six:

  1. Pullups
  2. Dips
  3. Rows
  4. Pushups
  5. Handstands
  6. L-sit

These are the pillars of calisthenics training because they cover the muscle groups used in many advanced skills. Do this for 3-6 months.

It may seem long, but it is the quickest way to advance.

If you skip this vital stage in your development, you’ll still have to come back to it because the chinks in your armor will show, and progress will be slow.

During this phase, the aim is to learn your first pullup.

For example, get comfortable with doing 12 + reps. As you progress, begin implementing different variations of these moves in the free beginner calisthenics program, Bodyweight Strong.

Use this time to improve your mobility and flexibility so that it won’t restrict you later.

Keep in mind less is more. More time in the gym and more days of training will not make for better results.

As a beginner, train 2-4 days a week. One hour per session is enough time to put in good, quality work while allowing adequate time for your body to recover.

Specific Strength- Intermediate to Advanced

This is when you start to focus on specific goals like static skills, freestyling, and rings.

Choose 2-3 goals to focus on:

It really depends on what you want and where you want to take your training.

Design your program in 4-8 week blocks, with your overall training 3-6 days per week.

Mon Tues Wed Thurs Fri Sat Sun
High Intensity Low Intensity High Intensity Low Intensity High Intensity Rest Rest
Pulling Strength Handstand Balance Grip Pulling Strength Handstand Balance Core Pulling Strength    

For example, if your goal is the muscle-up and handstand pushups, each exercise you choose for your program should improve some aspect towards reaching those specific goals.

I see too many people trying to cover every movement pattern and work on every weakness.

Less is more. You can always change your focus in the next program.

Build Strength

The word strength is used too loosely in fitness, so let’s define it. When I mention strength, I refer to absolute strength as 1 rep max and maximal strength (85% to 90% of 1 RM).

The stronger you are, the more calisthenics skills you can do.

Understand that your body has three energy systems that it uses independently or simultaneously to contract your muscles.

  1. Creatine phosphate lasts 1-12 seconds and is used for high intensity and demanding tasks such as heavyweight or difficult bodyweight exercises that you can only do for low reps.
  2. The glycolysis and oxidative system are used for muscle building, conditioning, and endurance.
  3. The anaerobic system lasts for 10 seconds – 2 minutes. The aerobic system is low intensity and lasts for a long time. This is your endurance training or for daily tasks.

How to Start Calisthenics Training - Fitness, 1 rep max, Training, endurance training, bodyweight exercise, calisthenics, mobility, flexibility, rings, handstand, energy systems, static balance, pullups, handstand push up, rows, l-sit, hand strength, bodyweight workout

Strength training is taxing on the nervous system, requiring a minimum of 24 hours to recover between strength sessions.

  • Train 2-4 days per week.
  • Training your absolute strength to failure should be used sparingly to test your current level or gain that motivational boost.
  • You cannot train like this all the time because your nervous system will not recover between sessions, and it will ruin your progress.
  • Instead, train your maximal strength leaving 1 rep in reserve. If you know/ think that you can do 3 reps of an exercise max (e.g., muscle-ups), do 2 reps for all your sets.
  • This builds strength while not overtaxing the nervous system.
  • Train high sets in the 4-8 and 1-5 rep range.
  • For isometrics (during contraction, the muscles don’t noticeably change the length, and the affected joints don’t move), 1-12s.
  • Eccentrics (contraction caused by the muscle’s lengthening) 1-5 reps, each rep 7 seconds long.

Remember, if you feel the pump or burn in your muscles, you’re no longer training strength.

Build Muscle

Run from anyone who says, “You can’t build muscle with calisthenics.”

Your muscles don’t know the difference between bodyweight exercises, weights, or a table.

It can’t identify whether you’re picking up a 6 kg, 20 kg dumbbell, or bodyweight. Your body feels the resistance, intensity, and how taxing a movement is.

How does the training look? A rep range of 6-12 reps (working at 65-85% of 1 rep max) is the most effective way to stimulate muscle growth.

Instead of increasing the weight, you increase the difficulty of the bodyweight exercises.

Choose exercises that are challenging to you in this rep range.

When pullups become easy, do a harder variation such as close-grip pullups. Utilize the same muscle-building techniques you would with weights such as mechanical tension, eccentric damage, metabolic stress, push-pull splits, or drop sets.

The current culture wants to create a rivalry between calisthenics and weights when the reality is you can use both.

Gymnastics is a bodyweight sport, and they utilize weights in their training.

Many sports, football, basketball, athletics, use weights to improve performance, calisthenics is the same.

  • Doing weighted calisthenics, such as weighted pull-ups and weighted dips, is a great way to build strength and muscle.
  • Bodyweight exercises and weights are great for training compound movements (multiple muscle groups and joints).
  • There’s a wide variety of isolation exercises (multiple muscle groups and one joint). With isolation exercise, you can target certain muscles, which is great for improving aesthetics.

The lower-body is naturally powerful, so bodyweight training can only go so far. That’s why weighted squats, deadlifts, hip thrusts are excellent for building muscle.

Match Training to Goals

I always say there’s no perfect way to train. It depends on your abilities and goals.

Make sure your training matches your goals, and train specifically with them in mind.

Train like a powerlifter if you want to do those advanced calisthenics skills.

Train like a bodybuilder if you want to be in the best shape of your life.

Train like an athlete if you want to be crazy fit or do freestyling.

Source

Powered by WordPress