World Fitness Blog : Leading Global Bloggers

April 22, 2022

Everything You Need to Know to Master the Pull-Up

The pull-up is the meat and potatoes of any back workout. It’s one of the few exercises that nearly every experienced lifter agrees is essential for building a foundation of size and strength. You’ll find it performed and praised by bodybuilders, strength athletes, and traditional sports athletes due to its wide benefits. 

This battle-tested exercise is unique since it delivers a stronger back and abs for huge carryover to almost every other major lift. Plus, bigger muscles in the back, shoulders, and arms will improve any physique. All while using only your bodyweight. You don’t need a gym to find plenty of gains.

How to Do the Pull-Up

Pull-ups are a great addition to any strength program. The simple movement of lifting yourself up to a bar will provide a great range of benefits that assist in general strength, posture, and core stability. 

Step 1 — Hang From a Bar

Man and woman hanging from pull-up bar

Credit: Flamingo Images / Shutterstock

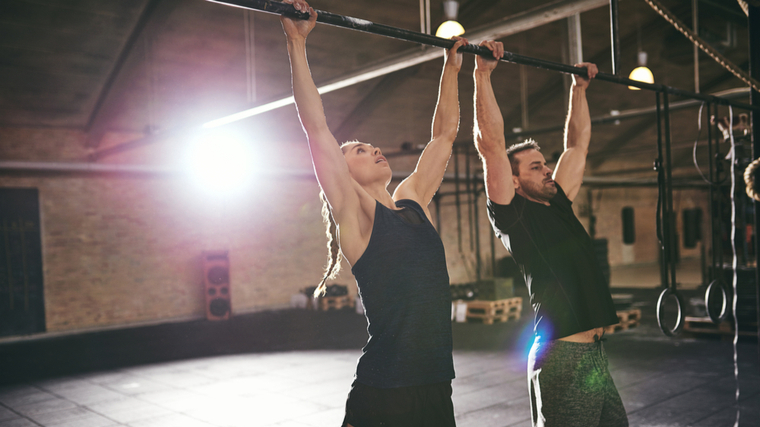
Start hanging from a straight bar with your core stabilized to prevent your body from swaying. Set your hands so they’re a smidge wider than shoulder-width using a pronated (overhand or palms down) grip. To maintain balance and coordination, you can cross one foot over the other at your ankles.

Form Tip: When stabilizing your core, imagine someone is about to punch you in the stomach. The initial flinch of tightening your stomach will place you in an effective bracing position.

Step 2 — Pull Your Chest Towards the Bar

Man and woman performing pull-ups

Credit: Flamingo Images / Shutterstock

Take a breath before beginning to pull yourself towards the bar. Pull your shoulder blades together to recruit your upper back muscles. Maintain that squeeze while bending your elbows to raise your body. Exhale throughout the movement. Lean back very slightly on the way up.

When your neck is near the bar, you’ve completed the concentric (pulling) portion of the rep. In the top position, your torso should be angled slightly backwards with your elbows near your ribs.

Form Tip: To improve muscle coordination and muscle fiber recruitment, pause at the top for one or two seconds.

Step 3 — Lower Under Control

Muscular man performing pull-ups outdoors

Credit: oOhyperblaster / Shutterstock

Start the eccentric (lowering) portion of the rep by extending your elbows to lower your body. Breathe in and keep your core engaged. Do not swing to create momentum between each rep. Keep your legs hanging directly down.

Form Tip:To improve the quality of each rep and prevent any swaying, lower yourself over two seconds and pause at the bottom before beginning the next rep.

Pull-Up Mistakes to Avoid

The pull-up is a basic bodyweight exercise, but there are several common technique errors to avoid in order to build strength and muscle while reducing joint strain.

Not Using a Full Range of Motion

The half-rep pull-up is an all too common issue seen in many gyms. Some lifters smash out rep after rep while only descending halfway down before rushing straight back to the top. When it comes to maximizing strength and muscle gains, these half-reps are counterproductive.

Man performing pull-ups outside

Credit: Syda Productions / Shutterstock

The shortened range of motion reduces the muscle’s time under tension, which can reduce muscle growth and strength development.

Avoid it: Leave your ego at the door and focus on quality reps over quantity. Lower yourself into a fully stretched position before re-engaging your muscles to lift yourself back up.

Excessive Swinging

Stabilizing the body is crucial for minimizing stress on the shoulder joint. If you are trying to build strength and muscle, using an excessive amount of swinging is not going to help and may make things worse in the long run.

Man swinging from pull-up bar

Credit: baranq / Shutterstock

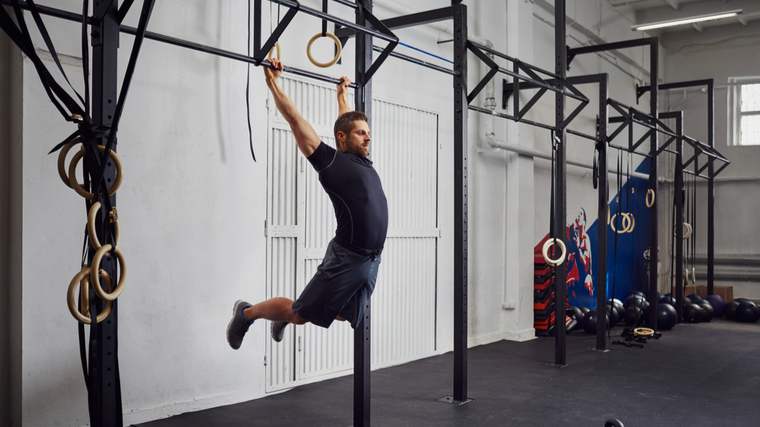
CrossFit training has popularized “kipping pull-ups”, a specific exercise variation which has the trainee deliberately swing the lower body back and forth throughout each rep. This generates momentum which helps to perform high-rep sets and turns the back-building pull-up into a full-body exercise. Kipping is a specific technique used for a specific purpose. It’s also a deliberately learned skill, it’s not meant to be an accidental way to perform basic pull-ups.

Avoid it: Focus on the core-engaging cue explained in step one of the setup. While hanging and before pulling, flex your stomach as if you were about to be punched in the gut. Maintain this ab tension throughout each rep.

Benefits of the Pull-Up

The pull-up is a second-to-none vertical pulling exercise. When performed correctly, it can emphasize the development of strength and muscle across the entire upper body, support overall posture, and help general shoulder and upper back mobility.

Three people performing pull-ups on wall-mounted bars

Credit: UfaBizPhoto / Shutterstock

Getting Bigger and Stronger

Because so many muscles are involved in the exercise, the pull-up delivers a serious bang for your buck. This one movement builds muscle through the entire back, shoulders, and arms. Even the abs get a solid workout. It is also a very easy exercise to progressively overload (make more challenging, often with added weight), which makes the exercise ideal for building strength. 

Carries Over to Multiple Exercises

The pull-up recruits and builds muscles which play key roles in many other lifts. Strengthening these support muscles translates to improvement in other exercises. For example, strengthening the lats, upper back, and middle back can carryover to the bench press where you need to retract your shoulder blades into the bench to create stability and control when pressing a heavy weight.

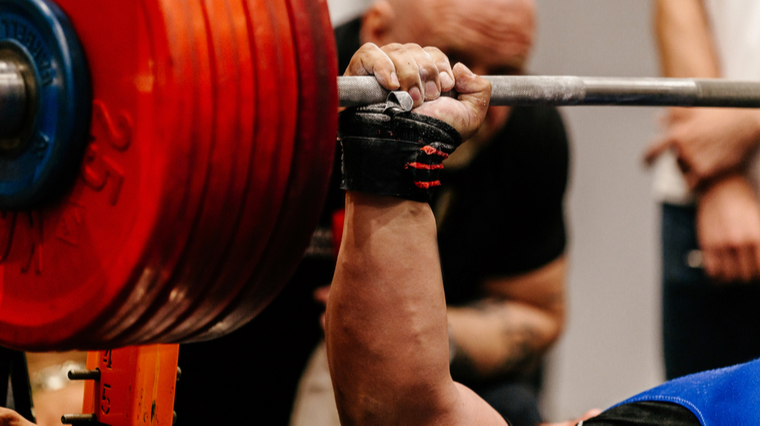
Better Grip Strength

While there are specific exercises to build a stronger grip, simply performing the pull-up strengthens your forearms and grip without additional wear and tear that may occur from more grip-focused exercises like the deadlift. Because you’re hanging from the bar supporting your bodyweight during each set, your grip strength is being consistently trained from the first rep to the last.

Muscles Worked by Pull-Up

The pull-up is a compound movement, meaning it involves multiple joints and recruits multiple muscle groups at once. Here’s a breakdown of the muscles worked by the pull-up.
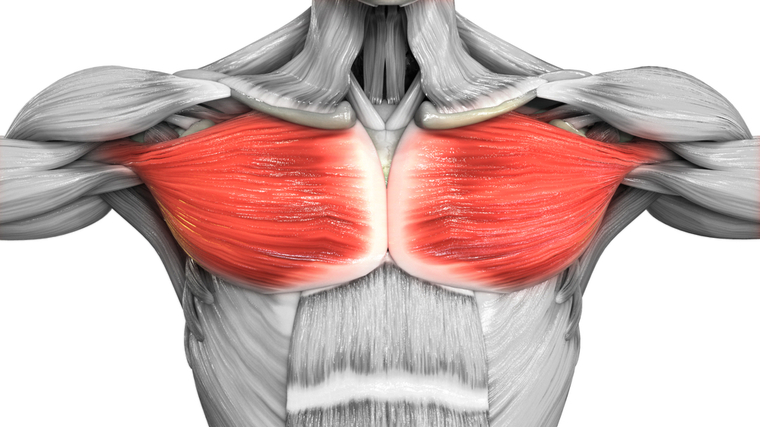
Bodybuilder performing pull-ups in gym

Credit: Satyrenko / Shutterstock

Latissimus Dorsi

The lats are the largest back muscle, attaching at the upper arm and along the spine near the lower back. They serve two primary functions. First, they bring the arm closer to the body from out to the side. Second, they bring the arm closer to the body from out in front. This is why the lats are heavily activated when your arms begin overhead and pull down and in to raise your body during a pull-up.

Upper Back

The upper back (generally including the rear deltoid of the shoulder, the trapezius, and the rhomboids) functions to control movement of the scapulae (shoulder blades) and to support the shoulder joints under muscular stress, particularly in the bottom portion of the pull-up.

Trapezius

While sections of the traps fall into the “upper back” category, the trapezius is a large muscle on its own and serves a big role during pull-ups. The middle portion of the traps help to pull your shoulders back while extending your elbows behind you while also stabilizing your shoulders when you move your arms.Your lower traps are crucial to many other lifts and are highly activated during pull-ups. (1)

Biceps Brachii

The biceps are composed of two heads: a long head commonly referred to as the “outer” and a short head referred to as the “inner.” Both muscle heads originate at the scapulae and insert on the radius bone of the forearm. The biceps play a relatively smaller, but important, role during pull-ups to complete the top part of the movement. They are more significantly activated and play a larger role in the chin-up variation.

Lower Back

The muscles of the lower back, or lumbar spine, have been shown to be recruited during pull-ups even though they aren’t moved through a significant range of motion. Because these muscles control your torso bending at the hips, they work during the exercise to maintain a stable core position and keep a straight line from your shoulders to your knees or feet.
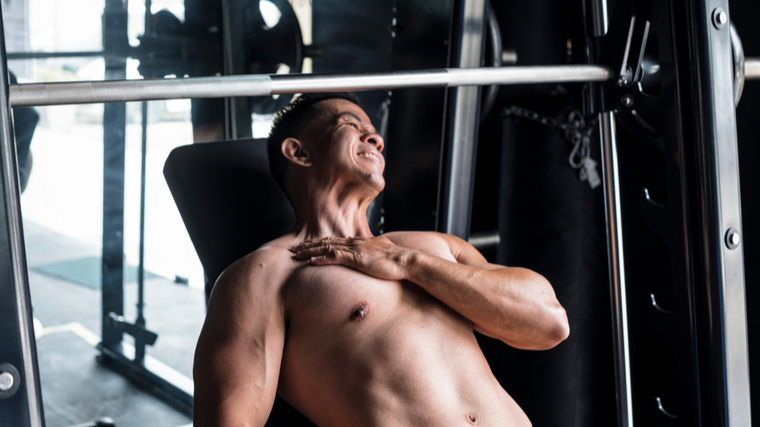
Rectus Abdominis

The abs are surprisingly worked to a very significant degree during pull-ups. While most lifters are more familiar with the abs’ role in flexing your torso in a curled position, they’re highly activated to maintain a stiff, solid torso. Similar to the lower back, the abs work to prevent bending at the hips.

Who Should Do the Pull-Up

Training for Bodyweight Strength

Many bodyweight training-focused lifters consider the pull-up to be an essential test of strength. Because strength is a skill, if you want to improve your pull-up numbers, you need to get better at the exercise itself. This skill comes from repeated efforts, rep after rep.

Training for Muscle

To increase muscularity, the pull-up should be a recurring movement in your workouts. The activation of multiple muscles combined with a long range of motion provide a muscle-building stimulus that very few upper body exercises can match. 

How to Program the Pull-Up

The pull-up can be programmed with a variety of sets, reps, and tempo schemes. The exercise is ideally performed at the beginning of your workout. This will make sure your body has the energy required to perform this comprehensive movement without sacrificing your technique or increasing injury risk.

Weighted, Low Repetition

To maximize basic strength in the pull-up, completing four to six sets in the three to six rep range is the place to start. Use a weight that leaves you with at least two reps left “in the tank” to avoid reaching muscular failure. A rest period of three to five minutes between each set will ensure you lift with maximum effort.

However, to ensure proper technique, you should only add weight once you can comfortably handle moderate to high-rep sets using your bodyweight. 

Unweighted, Moderate Repetition

To ensure growth in the working muscles, three to four sets in the six to 12 rep range will increase overall training volume, which is beneficial for building muscle. (2) The multiple sets and reps also allow you to improve your pull-up technique.

Modified Cluster Sets

Some lifters, especially beginners, may not be able to perform pull-ups for multiple sets of multiple reps. Even performing one or two reps may be challenging. This is where cluster sets are beneficial. Cluster sets allow a lifter to perform multiple low-rep “mini-sets” (or clusters) with a heavy weight while avoiding excessive muscular fatigue. You can apply the same technique to bodyweight pull-ups.

This modified cluster set method will have three sets of three reps in one cluster (if you can currently perform four or five reps with good form). Perform three reps, rest for 15 to 30 seconds, perform another three reps, rest for 15 to 30 seconds, and perform a final group of three reps. That entire series is one set. Take two minutes rest before repeating two more sets.

Because three sets of three cluster reps is comparable to performing nine reps in a single set. This will allow you to get stronger, maximize the recruitment of high-threshold muscle fibers (specialized muscle fibers which improve power output), and increase total working volume which can lead to more muscle.

Note: If you cannot perform three reps with good technique, you can use the cluster set method while performing one or two reps per cluster. 

Pull-Up Variations

The basic pull-up is staple in many experienced lifters’ routines, but simple variations can be used for specific goals. Even after you’ve mastered the pull-up, you can implement some of these variations into your training.

Negative Pull-Ups

To perform negative pull-ups, you will need to stand on a box or bench under a pull-up bar. Take hold of the bar with a basic shoulder-width grip and jump up to get your chin above the bar.

Take at least five seconds to lower yourself into the stretched position. Once fully stretched, put your feet on the box again, return to the top position, and repeat until you hit your target rep range.

Chin-Up

One of the most basic pull-up variations is simply reversing your grip. By grabbing the bar with a supinated (underhand or palm-up) grip, you more directly recruit the biceps.

This makes the exercise fit very well into a specific arm workout or it can add “extra” arm training to your back workout.

Wide-Grip Pull-Up

The wide-grip pull-up requires grabbing the bar several inches wider than shoulder-width. Pull yourself up as high as possible and lower yourself under complete control.

The different grip changes the arm position overhead, which changes the range of motion and puts the lats, upper back, and biceps under a different angle of stretch, which creates a unique training stimulus.

Pull-Up Alternatives

You might not be ready to complete a full set of pull-ups, which is no big deal because we all start somewhere. The first priority is understanding the prime movers involved in the pull-up and how to strengthen them. The muscles most activated in the pull-up are the lats, mid and lower traps, biceps, and your core. (3) The following exercises will help you build strength in these important muscle groups.

Scapula Pull-Ups

Scapula pull-ups can help strengthen your grip and lower traps which both play a large role in performing the full pull-up effectively.

Start by hanging from the bar with a shoulder-width grip. Keep your shoulders “shrugged” down away from your ears. Without bending at your elbows, pull your scapulae downwards while pulling your body up. It’s a very short but impactful range of motion. Hold for a slight pause at the top and lower yourself slowly by allowing your scapula to “open up” until you are at a full stretch.

To progress, start by increasing the amount of reps done in each set until you can handle 12 to 15. Once mastered, this exercise can be used within your general warm-up sequence before full pull-ups.

Kneeling Lat Pulldowns

The kneeling lat pulldown will help strengthen the lats, core, and biceps. Use a cable machine, kneeling on the ground while mimicking the exact same starting position as you would for the pull-up.

Keep yourself upright with your glutes flexed to provide stability and increase core activation. Every muscle must remain tight from the ground up.

To progress, you can introduce one and one-half reps — one full rep includes pulling all the way down, releasing the weight halfway up, pulling down again, and releasing to a full stretch. This is a great technique that can be used to emphasize the tension placed on the muscles from both the start of the pull-up and the end of the pull-up.

Inverted Row

The inverted row will help to strengthen the pulling strength of your lats, core, and arms while also emphasizing the mid-traps and upper back. A Smith machine is perfect for this exercise since you can easily adjust the height of the bar while also being in a stable, fixed position.

To progress, lower the height of the bar to adjust leverage and increase the challenge. Eventually you can elevate your feet to put your entire body into a more horizontal position.

Banded Pull-Ups

The banded pull-up is a great way to improve your muscle coordination from a neurological standpoint since strength is a skill built on repetition. (4) The banded pull-up is going to allow you to better prepare yourself to perform the concentric (pulling) portion of the movement since the bands will assist your strength in the bottom position.

Attach a resistance band to the top of a bar and get yourself into position with the band supporting your body, either with bent knees or keeping your legs straight.

To progress, make your way up resistance bands offering less resistance until you are ready to perform your pull-ups with full bodyweight.

FAQs

Can I get a six-pack from doing pull-ups?

No single exercise can give you a six-pack. That can only be achieved through a reduction in body fat, fat loss-focused training, and a calorie-controlled nutrition plan.

With that being said, pull-ups may help with improving the final look of your abs because they are heavily recruited during the exercise, as explained in the muscles-worked section. Pull-ups are an awesome and overlooked exercise for training your abs. You can expect a more prominent set of abs once you do get lean enough.

When can I start performing weighted pull-ups?

The exact timeframe can vary from individual to individual since some people are capable of performing pull-ups in a very short time. However, once you can accomplish three to four sets of 12 reps using your bodyweight, you’ve likely built the technique, coordination, and strength to tackle low-rep weighted pull-ups.

How many times per week should I perform pull-ups?

For building strength and muscle, and taking into consideration the recovery ability of the involved muscle groups, performing this exercise twice per week will be the best place to start. (5) Make sure to give yourself at least two or three days rest between workouts.

For the purpose of getting more technique practice and perfecting this movement, you can implement bodyweight pull-ups as a part of your general warm-up for upper body workouts or even for workouts where a back-focused exercise like the deadlift may be performed. The aim for this technique training would be not to fatigue your back muscles, but to mobilize and activate the associated muscles that are going to be used in those workouts..

References

  1. Youdas JW, Amundson CL, Cicero KS, Hahn JJ, Harezlak DT, Hollman JH. Surface electromyographic activation patterns and elbow joint motion during a pull-up, chin-up, or perfect-pullup™ rotational exercise. J Strength Cond Res. 2010 Dec;24(12):3404-14. doi: 10.1519/JSC.0b013e3181f1598c. PMID: 21068680.
  2. Schoenfeld BJ, Contreras B, Krieger J, et al. Resistance Training Volume Enhances Muscle Hypertrophy but Not Strength in Trained Men. Med Sci Sports Exerc. 2019;51(1):94-103. doi:10.1249/MSS.0000000000001764
  3. Hewit, Jennifer. (2018). A Comparison of Muscle Activation during the Pull-up and Three Alternative Pulling Exercises. Journal of Physical Fitness, Medicine & Treatment in Sports. 5. 10.19080/JPFMTS.2018.05.555669.
  4. Ochi, E., Maruo, M., Tsuchiya, Y., Ishii, N., Miura, K., & Sasaki, K. (2018). Higher Training Frequency Is Important for Gaining Muscular Strength Under Volume-Matched Training. Frontiers in physiology, 9, 744. https://doi.org/10.3389/fphys.2018.00744
  5. Schoenfeld, B. J., Ogborn, D., & Krieger, J. W. (2016). Effects of Resistance Training Frequency on Measures of Muscle Hypertrophy: A Systematic Review and Meta-Analysis. Sports medicine (Auckland, N.Z.), 46(11), 1689–1697. https://doi.org/10.1007/s40279-016-0543-8

Featured Image: UfaBizPhoto / Shutterstock

Source

March 24, 2022

The Best Chest Workouts for Muscle Mass, Strength, and More

A well-developed chest is a calling card of lifters who’ve spent months, if not years, dedicated to hard training. From lifters bench pressing jaw-dropping weight and bodybuilders hitting the classic “side chest” pose to beginners learning how to do a push-up, chest training has always been a high priority for anyone looking to build muscle or test their strength.

Whether you have limited equipment at home, access to a fully stocked commercial gym, or no equipment at all, you can find an effective chest workout to deliver the results you’re after. Take a look, choose your goal, and get training.

The Best Chest Workouts

  • Best Chest Workout With Dumbbells
  • Best Bodyweight Chest Workout 
  • Best Chest Workout for Muscle Mass
  • Best Chest Workout for Strength

Best Chest Workout With Dumbbells

Not all lifters have the opportunity to train in a commercial gym and have turned to training in a home gym with whatever equipment they can put together. Training at home can have some incomparable benefits. It’s open 24 hours a day every day of the year, the music is never grating, and the dress code is more lenient than most public gyms to the point of being entirely optional if you’re into that sort of thing.

The biggest compromise with a home gym is typically a lack of options since equipment must be prioritized to accommodate limited floor space. Home lifters should outfit their training area with the basics, and often forgo multiple benches dedicated to specific angles, oversized cable machines with a selection of pulleys, and all sorts of standalone single-purpose machines for flyes or presses.

Muscular man in dark gym lying on bench while pressing dumbbells

Credit: Srdjan Randjelovic / Shutterstock

Fortunately, as long as you have a basic bench and an adjustable dumbbell set or a few pairs of dumbbells, you can always train your chest with the right plan. And here’s the plan to follow.

The Dumbbell-Only Workout

This workout focuses on exercise variety and techniques to increase time under tension to get the most benefit from limited equipment. Perform all sets of each exercise before moving to the next exercise, and perform the workout once or twice per week depending on your overall training split.

Single-Arm Flat Dumbbell Press

  • How to Do it: Lie on a flat bench as if performing a standard dumbbell bench press, with a dumbbell in only one hand. The single-arm element makes this unilateral exercise an intense core drill while also recruiting the chest significantly.
  • Sets and Reps: 3 x 6-8 per side
  • Rest time: No rest between sides, 45 seconds rest between sets.

Neutral-Grip Incline Dumbbell Press

  • How to Do it: Set the bench to an incline angle. If the bench cannot adjust, place blocks or weight plates under the feet to elevate one side several inches. Keep the hands facing each other, not facing your feet, to slightly decrease shoulder stress and increase pec recruitment.
  • Sets and Reps: 4 x 10-12
  • Rest time: 60 seconds between sets.

Flat Dumbbell Press With Pause

  • How to Do it: Perform the classic flat dumbbell bench press, while pausing in the bottom (stretched) position of each rep for two seconds.
  • Sets and Reps: 3 x 8-10
  • Rest time: 60 seconds between sets.

Best Bodyweight Chest Workout 

Sometimes having no equipment to train with can be a blessing in disguise. It forces you to be creative in program design, think outside the box, and buckle down to focus on only the most effective exercises.

Bodyweight training has a bad reputation for being “lesser than” training with free weights, but if you know what you’re doing and actually push yourself with the right movements, you’ll never call bodyweight training “easy” again.

The Brutally Simple Bodyweight Workout

When you think of “bodyweight chest exercise”, you think of push-ups. You might also think of dips, but technically you need dip bars for those, so they’re not truly a bodyweight-only exercise.

This workout could not be more straightforward. Do 100 push-ups, no matter how long it takes. Three to five days later, do 100 push-ups again but get them done in less time. It’s basic density training — get the same amount of work done in less time or do more work in the same amount of time.

Bald man wearing headphones performing push-ups outdoors

Credit: Jacob Lund / Shutterstock

Because 100 is a nice round number, that’s the stationary target and you’ll focus on shaving down the time each session. Also, it’s just kinda cool to be able to say, “I knocked out 100 push-ups this morning.” Knocking out 105 push-ups sounds strange.

The most critical element here is that, no matter how fatigued you are, you cannot sacrifice form to squeeze out ugly reps. It’s 100 perfect-technique push-ups, not 36 perfect push-ups followed by 64 half-reps. Each rep should have the chest nearly touching the floor (depending on your shoulder mobility) at the bottom and arms locked out at the top.

Push-up

  • How to Do it: Support your body on your toes and hands, with your hands set slightly outside shoulder-width. While keeping a straight line from your neck to your ankles during each rep, bend your elbows to lower your entire body, and press to full lockout. To reduce shoulder joint strain, aim your elbows more towards your feet than your shoulders.
  • Sets and Reps: 100 reps total, broken down into as many or as few sets as necessary until completion.
  • Rest time: Rest as needed. Start a timer immediately before beginning the first rep and stop the timer immediately after completing the last rep. Record the total time and aim to improve by one second or more each workout.

Best Chest Workout for Muscle Mass

A muscle-building chest workout is a bodybuilder’s bread and butter. The typical lifter will reluctantly trudge through their leg day but channel that lack of enthusiasm into chest day, and that’s A-okay as long as they get their work done in each session.

Chest Day, Best Day

This is a time-tested, bodybuilding-style approach to training. Attacking a body part with multiple exercises and different angles, taking each set right up to muscular failure with high-intensity techniques, and ideally getting a serious pump in the target muscle by the end of the session.

Bodybuilder flexing chest and arm muscles

Credit: ALL best fitness is HERE / Shutterstock

This particular workout can standalone for a chest-only session or it can be followed by training the shoulders and triceps as part of a “pushing muscle” day. You can also get a complete upper body workout by training back immediately before chest or interspersing the exercises as supersets. 

Dip

  • How to Do it: Begin at the top position on a set of dip bars. Emphasize chest recruitment and stretch by leaning your upper body forward (not staying upright) as you bend your elbows and lower as far as mobility allows. Pause briefly before pressing back up.
  • Sets and Reps: 3 x 8-12
  • Rest time: 60 seconds between sets.

Pec-Deck With One-and-a-Half Reps

  • How to Do it: On a pec-deck machine, set the seat so your hands are gripping the handles below shoulder height and in-line with your mid-chest. Perform each set using the “one and a half rep” technique by lowering the weight into a full stretch, raising the weight to full contraction, then lowering the weight halfway down, bringing it up to full contraction again, and finally lowering it fully. That’s counted as one full rep.
  • Sets and Reps: 4 x 8-10
  • Rest time: No rest before moving to the next exercise.

Flat Barbell Bench Press

  • How to Do it: Take a beyond shoulder-width grip and lower the bar in-line with the mid-chest. If shoulder mobility allows, touch the bar to your chest briefly before pressing upwards. Be aware that the previous exercise will have pre-exhausted the chest muscles and they’re beginning this exercise already fatigued. Choose an appropriate weight and use a spotter if possible.
  • Sets and Reps: 4 x 8-12
  • Rest time: 90 seconds rest before returning to the previous exercise.

Smith Machine Incline Press

  • How to Do it: Position a 30 or 45-degree incline bench under a Smith machine so the bar is lined up with your upper chest/collarbone area. Grip the bar slightly wider than the flat barbell bench press grip. Perform repetitions smoothly with no pause at lockout or in the stretch position, bringing the bar to at least chin-level at the bottom.
  • Sets and Reps: 3 x 12-15
  • Rest time: 45 seconds between sets.

Best Chest Workout For Strength

“How much ‘ya bench?” might as well be gym-speak for “Hi, how are you?” It’s asked as often and it’s answered as honestly. Everyone’s always “fine, thanks” and everyone always benches “around 300.”

Regardless of the questionable reputation as an ego lift, the bench press is a genuine assessment of upper body pressing power. Building a strong and powerful chest is, has, and will always be a priority for most dedicated lifters. Here’s a simple and effective plan to build serious pressing strength.

The Bigger Bench Plan

A chest-focused strength workout will, appropriately, be centered around the flat barbell bench press. It’s one of the classic “big three” powerlifts for a reason, because it’s one of the very few ways to move significant weight with an upper body press.

Hand holding a barbell loaded with very heavy weights

Credit: sportpoint / Shutterstock

The once-a-week workout uses science-based explosive training, known as “post-activation potentiation”, to improve power output on the bench press, followed by specific accessory exercises to build strength in the chest and pressing muscles. (1)(2)(3)

Plyometric Push-up

  • How to Do it: From a basic push-up position (hands and toes touching the ground, with a straight line from neck to ankles), descend under control to the bottom position and explode upwards with maximum force. The hands should leave the ground briefly. Catch yourself and pause at the top before performing the next rep.
  • Sets and Reps: 5 x 5
  • Rest time: 60 seconds before moving to the next exercise.

Flat Barbell Bench Press

  • How to Do it: Take a beyond shoulder-width grip and lower the bar in-line with the mid-chest. If shoulder mobility allows, touch the bar to your chest briefly before pressing upwards. Pause at full lockout briefly before lowering the bar under control.
  • Sets and Reps: 5 x 3
  • Rest time: Three minutes before returning to the first exercise.

Floor Press

  • How to Do it: Lie on the floor with a bar set in a rack at arms length above your head. Keep the legs straight throughout the set. Unrack the bar and lower under control until your elbows delicately touch the ground (do not slam the weight down). Pause with the elbows on the ground for one second before pressing to full lockout.
  • Sets and Reps: 4 x 4-6
  • Rest time: Three minutes between sets.

Dip

  • How to Do it: Begin at the top position on a set of dip bars. Bend your elbows and lower to the bottom of the rep. The torso may be slightly upright during the movement to involve the chest, shoulders, and triceps. Pause briefly before pressing back up. Increase resistance with a weight belt, weighted vest, or by squeezing a dumbbell between your thighs above your knees.
  • Sets and Reps: 4 x 6-8
  • Rest time: Two minutes between sets.

The Chest Muscles

Many lifters design chest workouts with the intention of training “all parts of the chest”. That approach can certainly be effective, but it first requires knowing exactly what does, and what does not, make up “all parts of the chest.” Here’s a quick and useful lesson in functional anatomy.

Pectoralis Major

The pec major is the muscle everyone simply refers to as “the chest”. It’s the large chunk of muscle on the upper torso, above the abs and below the neck. Common bodybuilding lore says the body part is divided into the “upper chest”, “mid chest”, “lower chest”, “inner chest” and “outer chest”, while claiming each section can be targeted by specific exercises. This is wrong. Or at least, it’s a huge misinterpretation of how the body actually works.

Diagram of the human body focusing on the chest muscle

Credit: Magic mine / Shutterstock

The pec major is one muscle, just like the biceps are one muscle. However, just like the biceps include multiple heads which can be recruited differently to contribute to slightly different overall growth, the pec major contains two heads — the sternocostal and the clavicular.

The sternocostal head is responsible for the vast majority of movement and is recruited in all pressing exercises. The clavicular head is the region commonly referred to as “upper chest” and has been shown to be recruited more efficiently with exercises done at a 30 or 45-degree incline. (4) (5).

So, anatomically speaking, there’s “the upper chest” and “the rest of the chest”. The majority of exercises will work both heads, while inclined exercises prioritize the upper chest, and anyone who talks about targeting the “inner chest” or “outer-lower chest sweep” isn’t really talking about training the human body.

Pectoralis Minor

The pec minor lives underneath the pec major and attaches to the scapula (shoulder blade) to play a role in scapular movement. It’s involved in nearly every chest exercise, but is specifically called into action when the scapulae move forward, such as during a push-up or chest press exercise.

Due to its relatively small size, location, and function, it’s not likely to experience significant (or visible) muscle growth but serves an invaluable role for overall joint function and health.

Serratus Anterior

The serratus anterior is the finger-like cluster of muscles slightly below the chest, along the side of the ribs. Similar to the pec minor, they attach to the scapulae and play a role in scapular movement, stability, and health. (6) The serratus is also involved during chest pressing exercises, particularly toward the lockout position when/if the scapulae are allowed to “flex” forward (protraction).

Serratus muscle growth is minimal, but when the muscles are developed, and particularly when accompanied by low body fat, they can be a noticeable addition to an impressive physique.

A Chest Warm-Up is Essential

No matter your goal or training plan, a specific chest warm-up can help to improve overall performance and reduce the risk of injury. Pec tears, shoulder strains, and excessive elbow stress can occur when poorly planned workouts combine with inadequate warm-ups.

Man in gym holding injured chest muscle

Credit: MDV Edwards / Shutterstock

A thorough and effective warm-up can be time-efficient without compromising on benefits. Grab a resistance band and use this quick circuit to start any chest session.

The Complete Chest Warm-Up Circuit

  • Slow Push-up Plus: Perform a basic push-up taking two seconds to lower your body and two seconds to press up. When your arms are locked at the top of each rep, continue “pressing” to reach the shoulder blades towards the ground before performing the next rep (this added range of motion is the “plus” part of a “push-up plus”). Do three repetitions before moving immediately to the next exercise.
  • Push-up Plank Shoulder Tap: From the top of a push-up position, spread your feet slightly wider for support and alternate touching each shoulder with the opposite hand. Perform 10 reps total, alternating each hand, before moving immediately to the next exercise.
  • Band Pull-Apart: Take a resistance band with a palms-down grip, holding the band at arms-length in front of your body. Keeping a slight bend in your elbows, pull both hands back to perform a reverse flye movement with your shoulders and upper back until the band touches your chest. Return to the starting position under control. Perform 10 reps before repeating the first exercise. Do a total of four sets of the complete circuit.

Powerful, High-Performance Pecs

Whether you want to bench press a motorcycle, build a beach-worthy physique, or just get a great workout at home or on the road, you’re now armed with plenty of options to train what is arguably the most popular body part in the gym. Just be sure to follow a well-designed plan and never let your ego write checks your joints can’t cash.

References

  1. Krzysztofik, M., & Wilk, M. (2020). The Effects of Plyometric Conditioning on Post-Activation Bench Press Performance. Journal of human kinetics, 74, 99–108. 
  2. https://doi.org/10.2478/hukin-2020-0017Ulrich G, Parstorfer M. Effects of Plyometric Versus Concentric and Eccentric Conditioning Contractions on Upper-Body Postactivation Potentiation. Int J Sports Physiol Perform. 2017 Jul;12(6):736-741. doi: 10.1123/ijspp.2016-0278. Epub 2016 Oct 13. PMID: 27736266.
  3. Clark, Ross A1,3; Humphries, Brendan2; Hohmann, Erik3,4; Bryant, Adam L1 The Influence of Variable Range of Motion Training on Neuromuscular Performance and Control of External Loads, Journal of Strength and Conditioning Research: March 2011 – Volume 25 – Issue 3 – p 704-711 doi: 10.1519/JSC.0b013e3181c6a0ff
  4. Lauver JD, Cayot TE, Scheuermann BW. Influence of bench angle on upper extremity muscular activation during bench press exercise. Eur J Sport Sci. 2016;16(3):309-16. doi: 10.1080/17461391.2015.1022605. Epub 2015 Mar 23. PMID: 25799093.
  5. Rodríguez-Ridao, D., Antequera-Vique, J. A., Martín-Fuentes, I., & Muyor, J. M. (2020). Effect of Five Bench Inclinations on the Electromyographic Activity of the Pectoralis Major, Anterior Deltoid, and Triceps Brachii during the Bench Press Exercise. International journal of environmental research and public health, 17(19), 7339. https://doi.org/10.3390/ijerph17197339
  6. Castelein B, Cagnie B, Parlevliet T, Cools A. Serratus anterior or pectoralis minor: Which muscle has the upper hand during protraction exercises? Man Ther. 2016 Apr;22:158-64. doi: 10.1016/j.math.2015.12.002. Epub 2015 Dec 22. PMID: 26749459.

Feature Image: ALL best fitness is HERE / Shutterstock

Source

May 28, 2021

Prince Philip’s Timeless Bodyweight Workout That Birthed Modern Fitness Routines

Prince Philip was spry and walking without a cane right up until he died at 99 in April. What kept him walking tall? It was probably 5BX, the original functional fitness routine. Standing for Five Basic Exercises, it’s an 11-minute workout created for the Royal Canadian Air Force in 1956.

“[It] is designed to show you how to develop and hold a high level of physical fitness, regardless of where you are located,” reads the introduction booklet to the workout. “The 5BX Plan puts physical fitness within reach of every member of the RCAF.”

Several sources report the Duke of Edinburgh completed the simple regime of equipment-free exercises on a daily basis—the workout even made an appearance in an episode of The Crown, a Netflix series about the reign of Prince Philip’s wife, Queen Elizabeth II.

Prince Philip
Shutterstock

Canadian Bill Orban developed the routine based on research he conducted at the University of Illinois in the 1950s. By testing oxygen intake he realized duration of exercise was less important to overall fitness than intensity. The RCAF knew its personnel were not fighting-fit and hired Orban to develop an exercise regimen that troops could do anywhere, even in their barracks, and was short enough to do every day.

“To develop physical fitness, exercises must be balanced and planned,” explains the narrator in a 5BX promotional film. “They must be progressive. And, above all, vigorous and regular.”

The Five Basic Exercises include toe touches, situps, back extensions, pushups and running. To make it accessible and encourage continuous intensification, Orban included six charts that prescribed modification of each exercise and progress the number of reps. While the fitness, strength and stamina demands increase, the time spent on each exercise and the total workout length does not. For instance, on Chart One, the situp is done with legs flat and demands lifting the head “just high enough to see your heels.” A ‘D’ score is 3 reps in 1 minute; an ‘A’ is 18. On Chart Six, the hardest, it’s 35 to 50 V-sits in 1 minute.

The 11-minute duration and equipment-free nature of the workout were both controversial at the time, but RCAF testing bore out its effectiveness. Orban went on to develop a women’s-specific version called XBX, which included six moves completed in 12 minutes. And 5BX became popular inside the military and out.

5BX workout

In 1961, the RCAF released the workout to civilians by publishing a book called Royal Canadian Air Force Exercise Plans For Physical Fitness. Over the next 30 years it was translated into 13 languages and sold 23 million copies. Some credit it for kicking off the modern fitness culture and it definitely inspired modern fitness gurus and trends—it sounds like a CrossFit workout.

While Prince Philip may not be 5BXing anymore, his daily workout lives on. Prince Charles and Prince William reportedly practice the routine too.

For access to exclusive gear videos, celebrity interviews, and more, subscribe on YouTube!

Source

January 22, 2021

This At-Home Lower Ab Workout Will Crush Your Core

Your lower abs are high maintenance. It takes a clean diet and consistent regimen to make them pop. While your total-body sessions hit your core, it’s equally important to do a targeted lower ab workout at least once a week. Doing so can reduce and prevent low-back pain, and help correct posture and pelvic tilt issues. A strong core connection and understanding how to engage your lower abs will improve your everyday movements but also unlock greater strength gains whether you’re training at home or in the gym.

Over time, you’ll stop overworking the muscles you’re not trying to target—but often take over—and see more defined lower abs. Some tips before you attack the lower ab workout below: Targeting the lower abs can be thwarted by tight, overactive hip flexors; overdoing an exercise’s range of motion; and moving too quickly. But don’t get disheartened! The circuit below will give you the tips and confidence to get where you’re trying to go.


Best of all, this workout entirely comprises bodyweight exercises. All you need is a yoga mat and some will power.

Directions: Perform 1 round for a quick fire up or 3 rounds total for a full roast.

The Best At-Home Lower Ab Workout

1. Toe Taps x 10 reps each side

Lie on your back with arms actively pressing into the ground, head and neck relaxed. (Bonus: This move activates your triceps and opens up your chest). Raise legs into tabletop position with knees stacked above hips, shins parallel to the ground, feet relaxed. Inhale, then lower one foot at a time toward the floor, keeping the 90-degree bend at the knee. Tap the floor, then exhale to draw the leg back to the starting position. Alternate and perform on the other side; that’s 1 rep. To make it harder, take hands behind your head with elbows wide, lifting your shoulder blades off the floor. This spicy variation works the upper abs at the same time and add a stability challenge. Watch a video demonstration here on slide 1 (go to slide 2 for the advanced variation).

Pro tips: Go as slow as possible, and let a steady, consistent breath control the movement. A deep exhale will help engage your lower abs more. Watch that you don’t draw your knees in too close to your chest, always stop the knees a little farther away than you think (no closer than directly above hips) to keep the core engaged.

2. Forearm Plank With Knee Taps x 10 reps each side


Come into a forearm plank with forearms directly under shoulders, legs extended long. Activate your quads, engage your glutes, and stay on your toes by flexing feet and shifting weight forward. Draw your lower abs up and in—almost like you have an invisible tuck. This is subtle, but helps keep your back safe and engages your abs more. With everything fired up, start to gently lower one knee at a time to tap the floor. Use your lower abs and breath to control the movement. Your upper and lower body should remain still and stable. Alternate and perform on the other side; that’s 1 rep. Continue alternating on every rep. Watch a video demonstration here on slide 4.

Pro tip: To engage your serratus (the large muscle that extends from the outside of your ribs to just beneath your shoulder blades) and lats more, imagine you’re drawing your elbows back toward your hips.

3. Diagonal Dead Bugs x 10 reps each side

Lie on your back with arms straight up above shoulders, head and neck relaxed, knees stacked above hips, shins parallel to the ground, and feet flexed. Inhale, then extend your left arm and right leg away from you on a diagonal while keeping your right arm and left leg completely still. Exhale to come back to center. Alternate and perform on the other side, extending right arm and left leg; that’s 1 rep. Watch a video demonstration here on slide 4.

Pro tip: Move slow and controlled to get the most out of this exercise and keep your black flat to the ground but not fully pressed to the floor. This exercise will work your lower abs with the bonus of hitting your entire core. If you really nail the diagonal angle, you’ll feel your obliques fire fast!

4. Slow Reverse Crunch  x 20 reps

Lie on your back with arms pressed firmly into the floor, knees bent and feet close to glutes. It’s key you keep them here the entire time. With a tilt of your pelvis, use your lower abs to lift your hips an inch off the floor with knees coming in toward your chest. Lower back slowly with control so you can’t use momentum for your next rep (this is not a rocking movement). Watch a video demonstration here on slide 8.

Pro tip: Try not to shrug your shoulders or use your arms too much so you can really hit your core. You can get as little or as much as you want from this exercise so my top advice is to slow it down and control each rep.

5. Single-Leg Lower to Hip Lift x 10 reps each side

Lie on your back and raise legs into tabletop position with knees stacked above hips. Extend your left leg straight up toward the ceiling. Take both hands behind your head and roll up to the tips of your shoulder blades. Inhale, then extend your left leg down toward the floor as low as you can control it, then exhale and draw it straight back up. Once back at the starting position, use that pelvic tilt to lift the hips just off the floor. Complete all reps on one side, then switch. Watch a video demonstration here on slide 6.

Pro tip: Stay on the tips of your shoulder blades. This provides a killer stability challenge and upper ab scorcher from the head and shoulders being lifted. You’re welcome.

Kirsty Godso is a Nike Master Trainer and founder of Made Of Whey Protein Isolate

For access to exclusive gear videos, celebrity interviews, and more, subscribe on YouTube!

Source

November 30, 2020

How to Start Calisthenics Training

With the amount of information we’re exposed to, it”s easy to overcomplicate our training. When it comes to calisthenics, it appears to look unsafe because we see the end product from the best athletes, but calisthenics is for all levels.

There are various forms of calisthenics/bodyweight training that you can do, based on your goals.

It’s important to keep things simple. You need to ask yourself this question “Does my training match my goals?” I see many times that people aren’t training specifically for the goals they want.

They say they want apples, yet they are planting orange trees.

This article is meant to simplify calisthenics training, guide you from beginner to advanced, and show you how all levels can use the body as a paintbrush to create a masterpiece.

General Strength- Beginner to Intermediate

I know the temptation to advance as quickly as possible is significant, but it will only lead to injuries, massive weakness, burnout, and frustration.

If you haven’t done this style of training before, then start with the basics. Work on the big six:

  1. Pullups
  2. Dips
  3. Rows
  4. Pushups
  5. Handstands
  6. L-sit

These are the pillars of calisthenics training because they cover the muscle groups used in many advanced skills. Do this for 3-6 months.

It may seem long, but it is the quickest way to advance.

If you skip this vital stage in your development, you’ll still have to come back to it because the chinks in your armor will show, and progress will be slow.

During this phase, the aim is to learn your first pullup.

For example, get comfortable with doing 12 + reps. As you progress, begin implementing different variations of these moves in the free beginner calisthenics program, Bodyweight Strong.

Use this time to improve your mobility and flexibility so that it won’t restrict you later.

Keep in mind less is more. More time in the gym and more days of training will not make for better results.

As a beginner, train 2-4 days a week. One hour per session is enough time to put in good, quality work while allowing adequate time for your body to recover.

Specific Strength- Intermediate to Advanced

This is when you start to focus on specific goals like static skills, freestyling, and rings.

Choose 2-3 goals to focus on:

It really depends on what you want and where you want to take your training.

Design your program in 4-8 week blocks, with your overall training 3-6 days per week.

Mon Tues Wed Thurs Fri Sat Sun
High Intensity Low Intensity High Intensity Low Intensity High Intensity Rest Rest
Pulling Strength Handstand Balance Grip Pulling Strength Handstand Balance Core Pulling Strength    

For example, if your goal is the muscle-up and handstand pushups, each exercise you choose for your program should improve some aspect towards reaching those specific goals.

I see too many people trying to cover every movement pattern and work on every weakness.

Less is more. You can always change your focus in the next program.

Build Strength

The word strength is used too loosely in fitness, so let’s define it. When I mention strength, I refer to absolute strength as 1 rep max and maximal strength (85% to 90% of 1 RM).

The stronger you are, the more calisthenics skills you can do.

Understand that your body has three energy systems that it uses independently or simultaneously to contract your muscles.

  1. Creatine phosphate lasts 1-12 seconds and is used for high intensity and demanding tasks such as heavyweight or difficult bodyweight exercises that you can only do for low reps.
  2. The glycolysis and oxidative system are used for muscle building, conditioning, and endurance.
  3. The anaerobic system lasts for 10 seconds – 2 minutes. The aerobic system is low intensity and lasts for a long time. This is your endurance training or for daily tasks.

How to Start Calisthenics Training - Fitness, 1 rep max, Training, endurance training, bodyweight exercise, calisthenics, mobility, flexibility, rings, handstand, energy systems, static balance, pullups, handstand push up, rows, l-sit, hand strength, bodyweight workout

Strength training is taxing on the nervous system, requiring a minimum of 24 hours to recover between strength sessions.

  • Train 2-4 days per week.
  • Training your absolute strength to failure should be used sparingly to test your current level or gain that motivational boost.
  • You cannot train like this all the time because your nervous system will not recover between sessions, and it will ruin your progress.
  • Instead, train your maximal strength leaving 1 rep in reserve. If you know/ think that you can do 3 reps of an exercise max (e.g., muscle-ups), do 2 reps for all your sets.
  • This builds strength while not overtaxing the nervous system.
  • Train high sets in the 4-8 and 1-5 rep range.
  • For isometrics (during contraction, the muscles don’t noticeably change the length, and the affected joints don’t move), 1-12s.
  • Eccentrics (contraction caused by the muscle’s lengthening) 1-5 reps, each rep 7 seconds long.

Remember, if you feel the pump or burn in your muscles, you’re no longer training strength.

Build Muscle

Run from anyone who says, “You can’t build muscle with calisthenics.”

Your muscles don’t know the difference between bodyweight exercises, weights, or a table.

It can’t identify whether you’re picking up a 6 kg, 20 kg dumbbell, or bodyweight. Your body feels the resistance, intensity, and how taxing a movement is.

How does the training look? A rep range of 6-12 reps (working at 65-85% of 1 rep max) is the most effective way to stimulate muscle growth.

Instead of increasing the weight, you increase the difficulty of the bodyweight exercises.

Choose exercises that are challenging to you in this rep range.

When pullups become easy, do a harder variation such as close-grip pullups. Utilize the same muscle-building techniques you would with weights such as mechanical tension, eccentric damage, metabolic stress, push-pull splits, or drop sets.

The current culture wants to create a rivalry between calisthenics and weights when the reality is you can use both.

Gymnastics is a bodyweight sport, and they utilize weights in their training.

Many sports, football, basketball, athletics, use weights to improve performance, calisthenics is the same.

  • Doing weighted calisthenics, such as weighted pull-ups and weighted dips, is a great way to build strength and muscle.
  • Bodyweight exercises and weights are great for training compound movements (multiple muscle groups and joints).
  • There’s a wide variety of isolation exercises (multiple muscle groups and one joint). With isolation exercise, you can target certain muscles, which is great for improving aesthetics.

The lower-body is naturally powerful, so bodyweight training can only go so far. That’s why weighted squats, deadlifts, hip thrusts are excellent for building muscle.

Match Training to Goals

I always say there’s no perfect way to train. It depends on your abilities and goals.

Make sure your training matches your goals, and train specifically with them in mind.

Train like a powerlifter if you want to do those advanced calisthenics skills.

Train like a bodybuilder if you want to be in the best shape of your life.

Train like an athlete if you want to be crazy fit or do freestyling.

Source

Powered by WordPress