The best ab workouts aren’t just for those seeking chiseled physiques. Anyone looking to improve their core strength can utilize compound movements to maximize gains. Learning how to engage your core is crucial for protecting the spine during everyday movements, as well as while engaged in physical activity.
We’ve highlighted 50 abs exercises that you can mix and match to create an endless array of core workouts, including suggested reps and sets.
Related: 15 HIIT Workouts to Get You Shredded Fast
The 50 Best Abs Workouts
1. Ab-Wheel Rollout
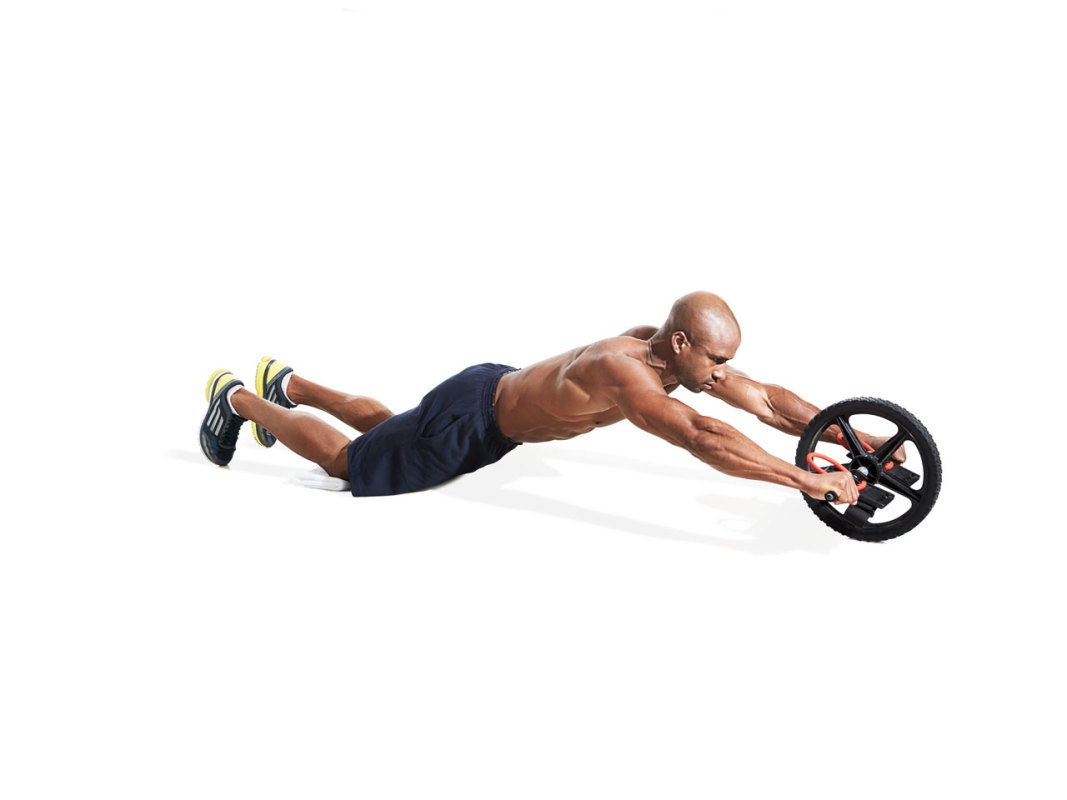
1. Ab Wheel RolloutHow to do it
- Kneel on the floor and hold an ab wheel beneath your shoulders.
- Brace your abs and roll the wheel forward until you feel you’re about to lose tension in your core and your hips might sag.
- Roll yourself back to start.
Reps: Do as many reps as you can with perfect form.
Sets: End the set when you think you might break form.
2. Arms-High Partial Situp
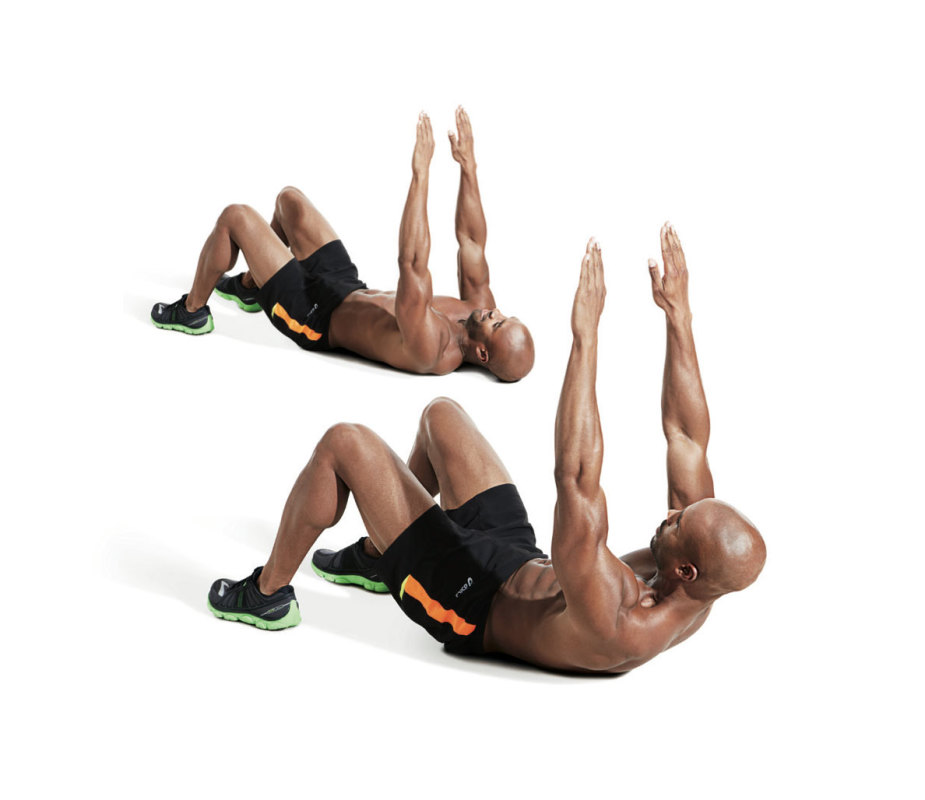
How to do it
- Lie on your back, knees bent at 90 degrees, and raise your arms straight overhead, keeping them pointing up throughout the exercise.
- Sit up halfway, then steadily return to the floor. That’s one rep.
Reps: 12-15
Sets: 3
Rest: 2-3 minutes between sets
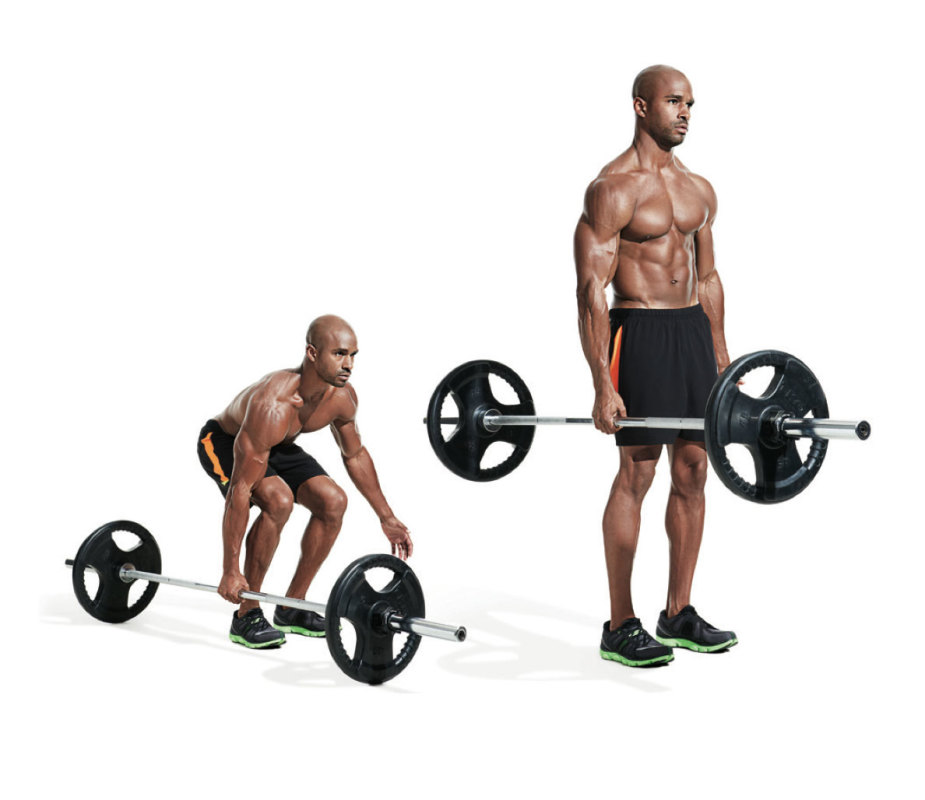
3. Barbell Rollout
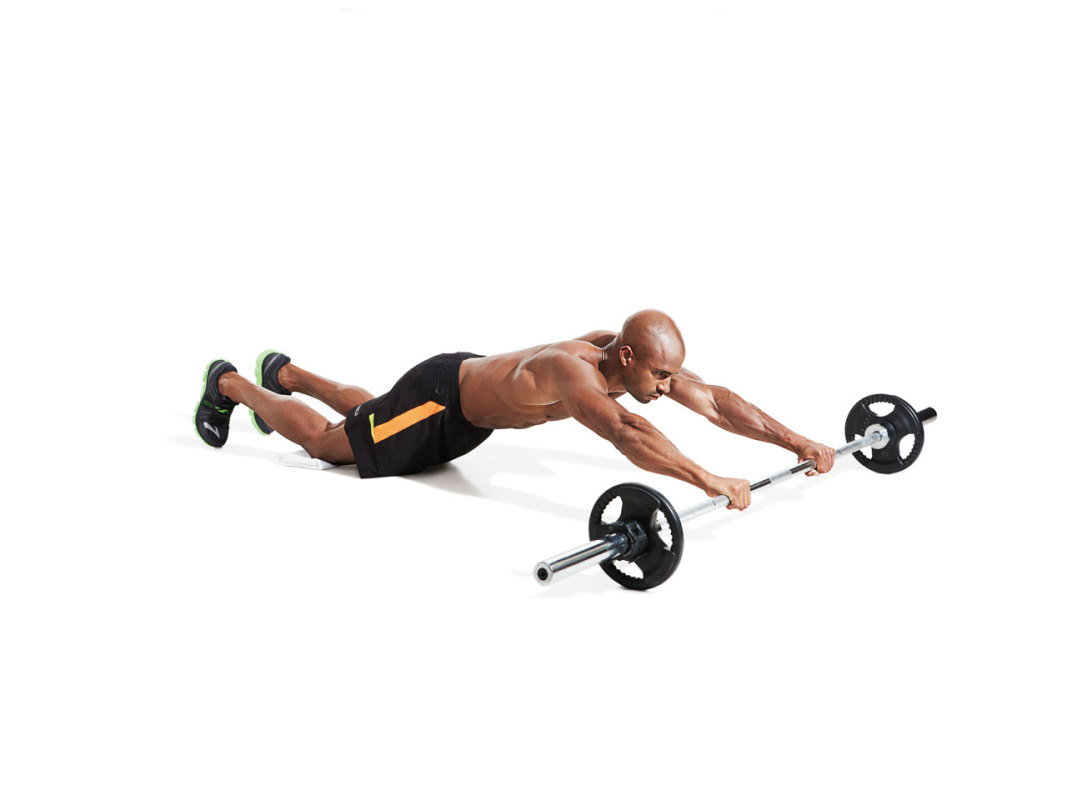
How to do it
View the original article to see embedded media.
View the original article to see embedded media.
- Load the barbell with 10-pound plates and kneel on the floor behind it.
- Your shoulders should be over the bar.
- Brace your abs and roll the bar forward, reaching in front of you until you feel your hips are about to sag.
- Roll yourself back.
Reps: 8-10
Sets: 3
Rest: 1 minute between sets
Get the gear: Sunny Threaded Chrome Barbell; CAP Standard Barbell Grip Plate
4. Barbell Russian Twist
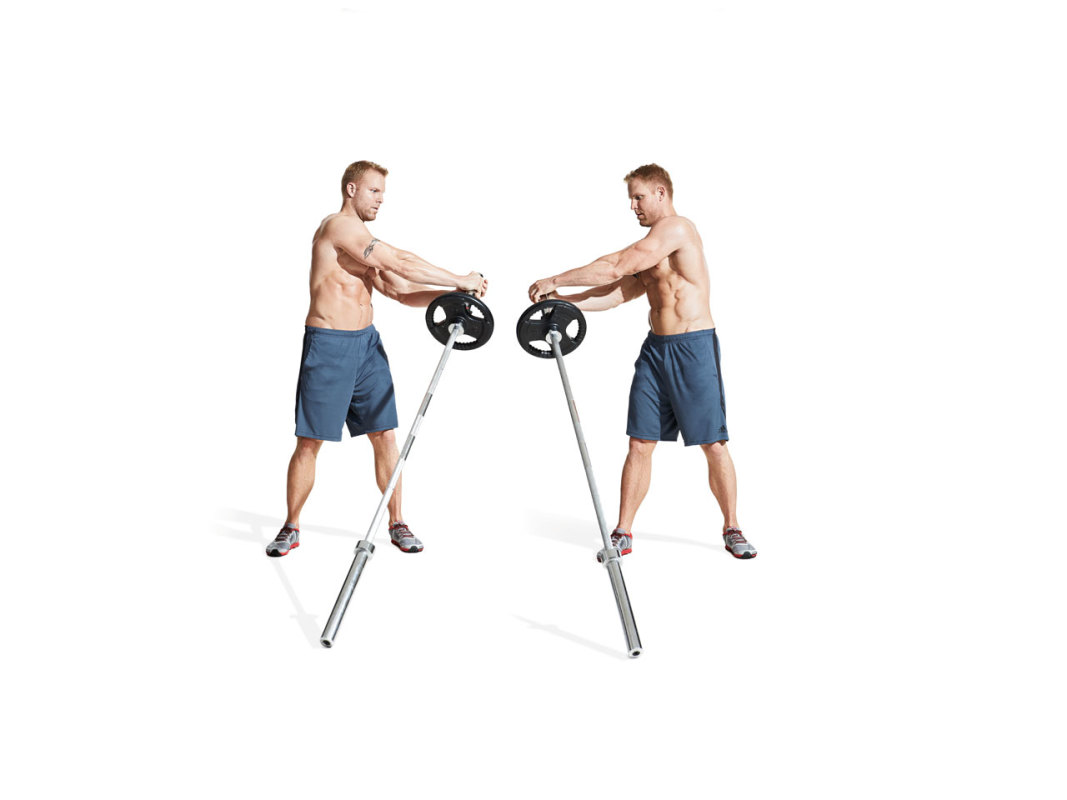
How to do it
View the original article to see embedded media.
- Grasp the barbell near the very end again—this time with both hands.
- Stand with feet at shoulder width.
- Swing the bar to your left, pivoting your feet as needed, then swing to your right.
Get the gear: Sunny Threaded Chrome Barbell
5. Swiss Ball Crunch
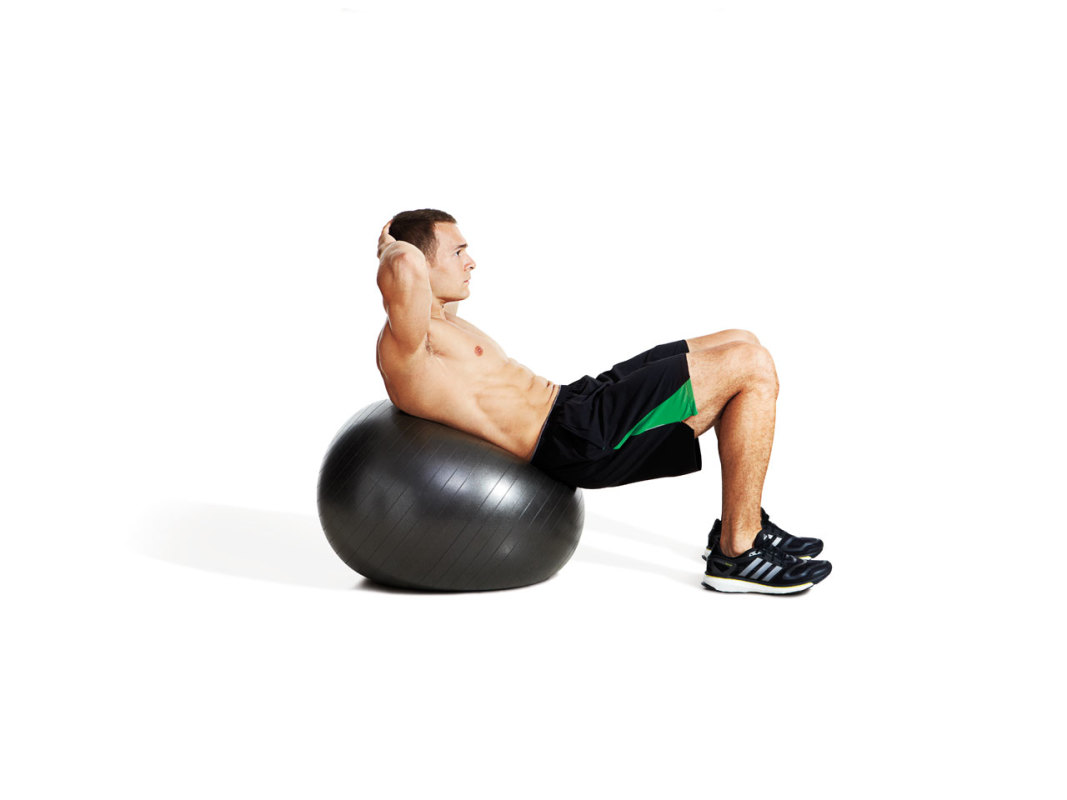
How to do it
View the original article to see embedded media.
- Lie back on the Swiss ball with feet shoulder-width apart on the floor.
- Your lower back should be supported by the ball.
- Place your hands behind your ears and tuck your chin.
- Curl your body up off the ball until you’re sitting up.
Get the gear: LuxFit Exercise Ball
6. Dip/Leg Raise Combo

How to do it
- Suspend yourself over the parallel bars at a dip station.
- Bend your knees slightly and raise your legs in front of you until they’re parallel to the floor.
- This will build you a magazine-worthy six-pack.
7. Flutter Kick
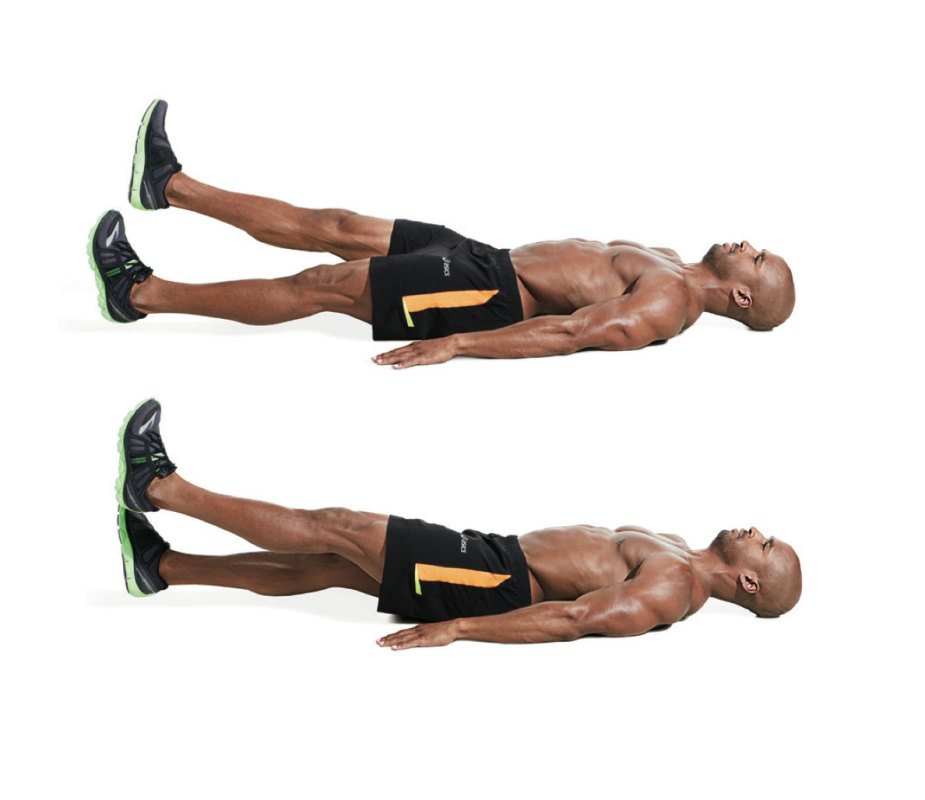
How to do it
- Lie on your back with legs straight and arms extend out at your sides.
- Lift your heels about 6 inches off the floor and rapidly kick your feet up and down in a quick, scissor-like motion.
8. Getups

How to do it
- From a sitting position, raise your right hand in the air and stand using (at most) your left hand. If you have sufficient core strength, get up without the use of your arms.
- Do the prescribed number of reps on one side and switch sides.
- Work to the point where you get up without the use of your arms.
9. Horizontal Cable Woodchop

How to do it
View the original article to see embedded media.
- Set an adjustable cable pulley to shoulder level (or attach a band to a sturdy object) and grasp the handle with both hands.
- Stand with feet shoulder width apart, perpendicular to the anchor point, and arms extended, far enough away from the machine so there’s tension on the cable.
- Twist away from the machine as if you were chopping into a tree.
- Keep your feet stationary.
Get the gear: Body-Solid Adjustable Nylon Stirrup Handle; Marcy Olympic Multi-purpose Strength Training Cage
10. Leg Raise
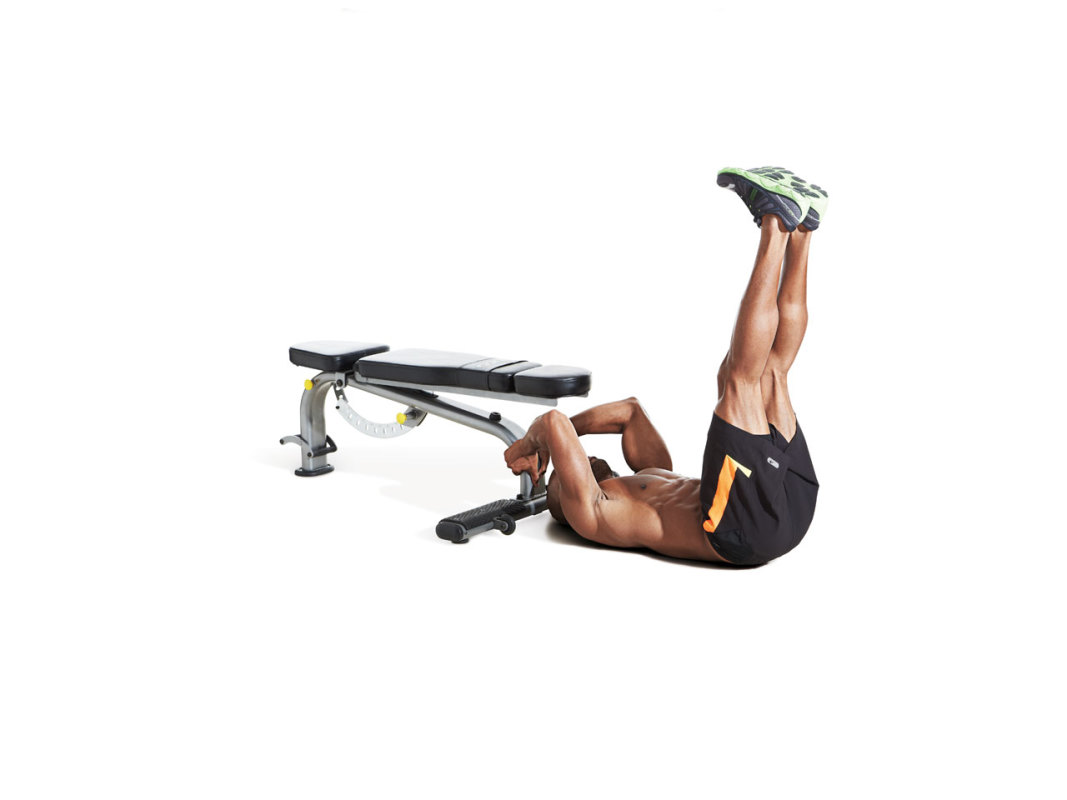
How to do it
View the original article to see embedded media.
- Lie on the floor and hold onto a bench or the legs of a heavy chair for support.
- Keep your legs straight and raise them up until they’re vertical.
- Lower back down, but stop just short of the floor to keep tension on your abs before the next rep.
Get the gear: Marcy Flat Utility Weight Bench
11. Medicine Ball Russian Twist
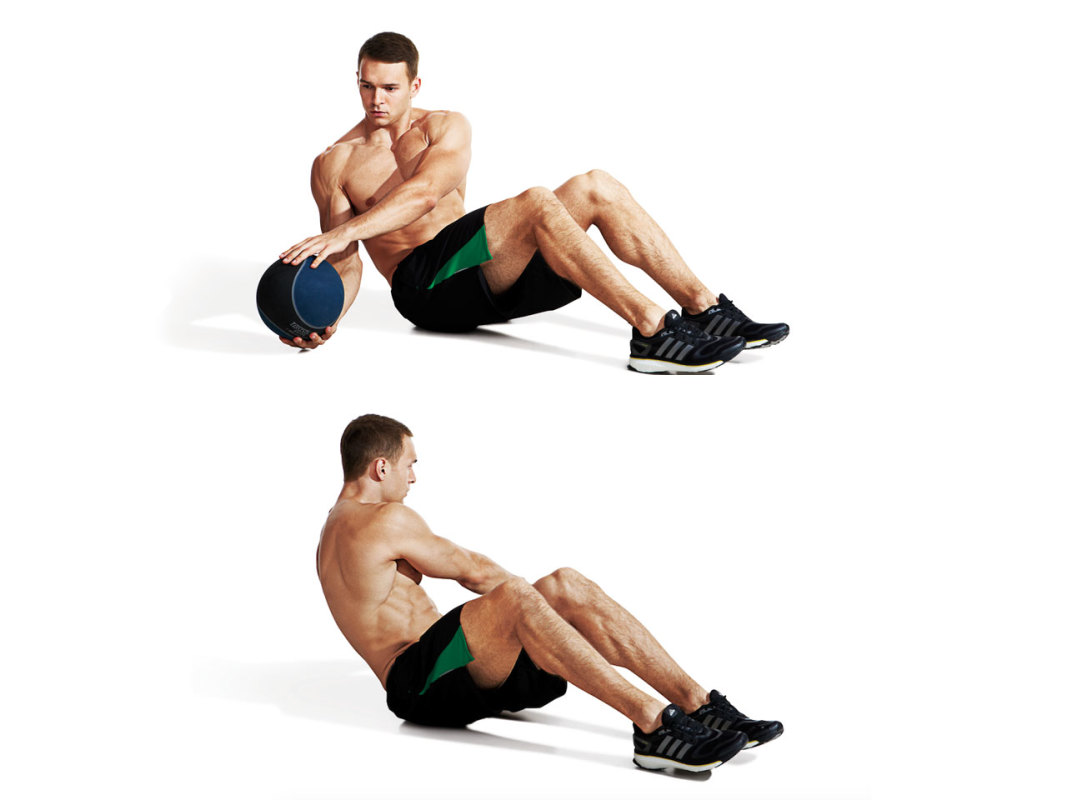
How to do it
View the original article to see embedded media.
- Sit on the floor in the top position of a situp and, holding a medicine ball with both hands, extend your arms in front of you.
- Explosively twist your body to one side and then twist back.
- Alternate sides.
View the original article to see embedded media.
Get the gear: AmazonBasics Medicine Ball
12. Medicine Ball Mountain Climber
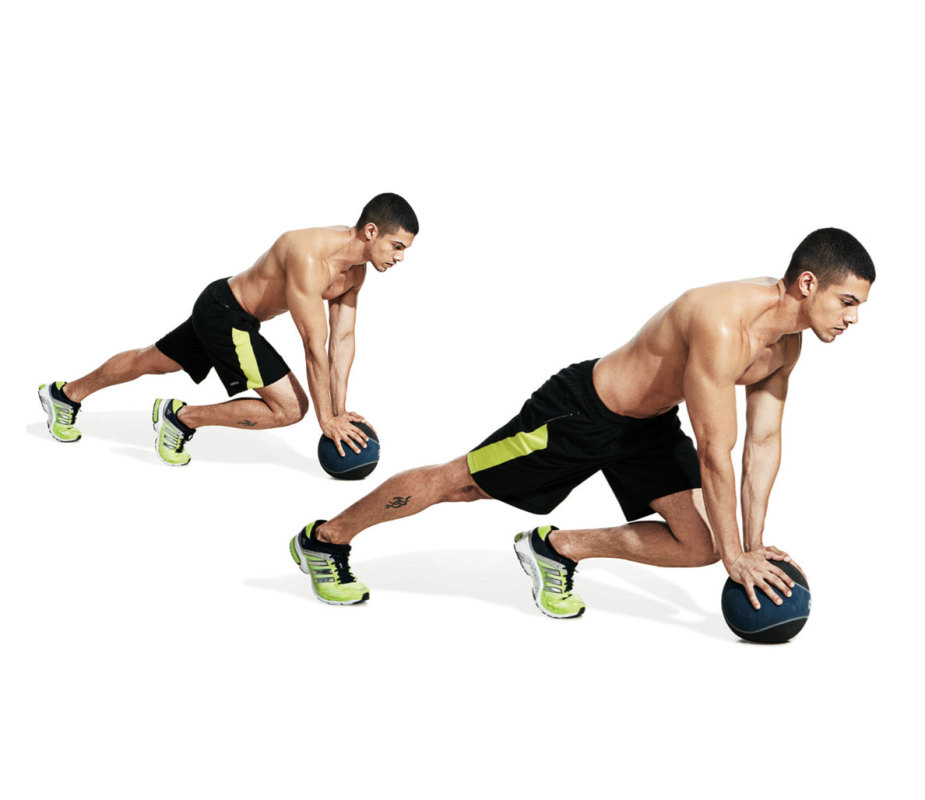
How to do it
View the original article to see embedded media.
- Hold the med ball with both hands and get into pushup position on the floor.
- Drive one knee up to your chest, then quickly drive it back while you raise the opposite knee.
Get the gear: AmazonBasics Medicine Ball
13. Pike to Superman
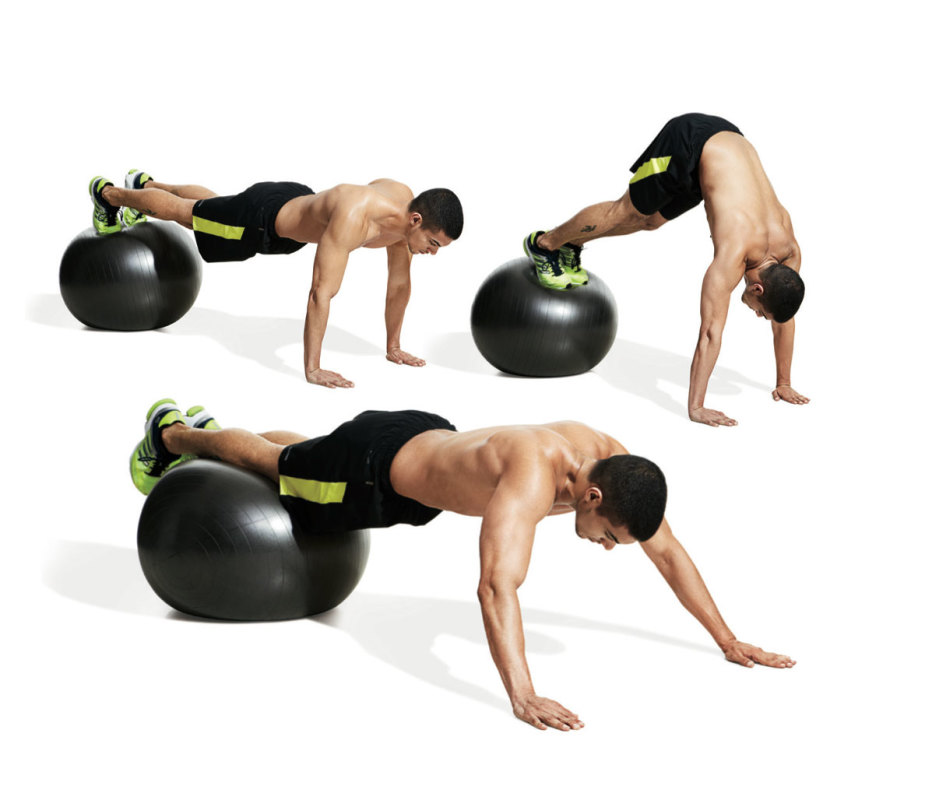
How to do it
View the original article to see embedded media.
- Get into pushup position with your toes on the stability ball.
- Bend your hips and roll the ball toward you so your torso becomes vertical.
- Roll back so your body is straight again and extend your spine, then roll the ball up your legs so your body forms a straight line with arms extended overhead but hands still on the floor. You should look like Superman flying downward. That’s one rep.
- Pull with your lats to return to the pushup position and begin the next rep.
Here are even more ab moves that use a stability ball.
Get the gear: URBNfit Exercise Ball
14. Plank
Beth Bischoff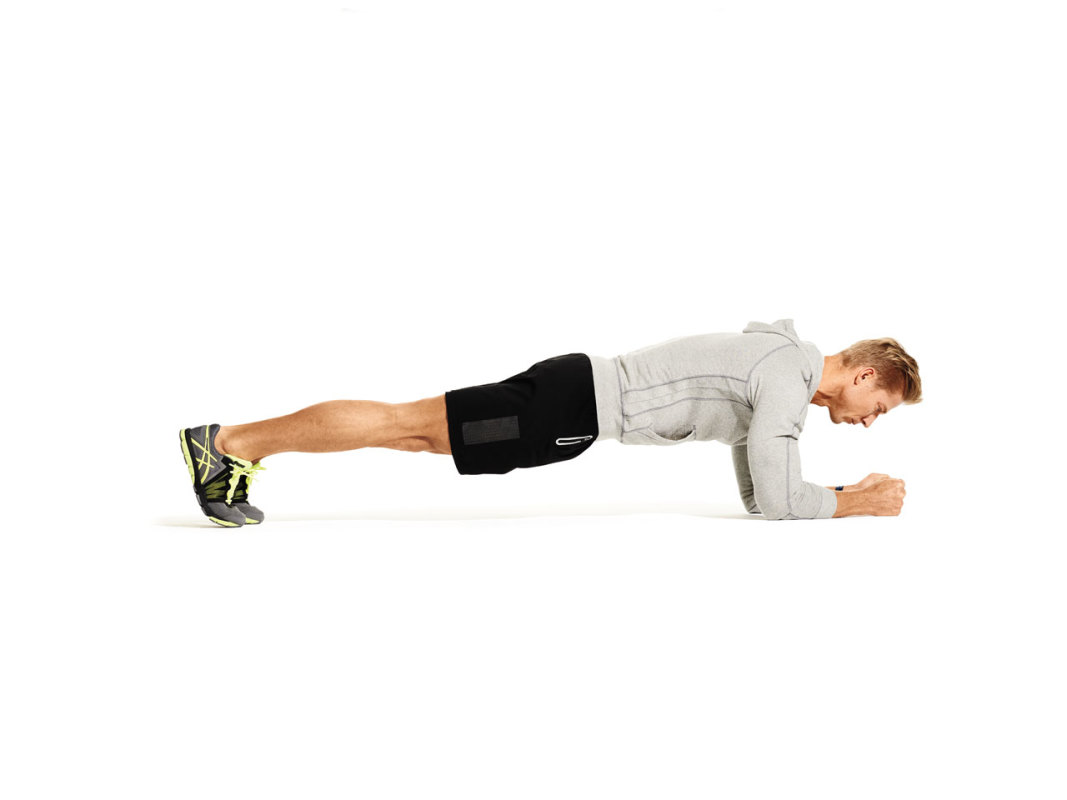
How to do it
- Get into pushup position and bend your elbows to lower your forearms to the floor.
- Hold the position with abs braced.
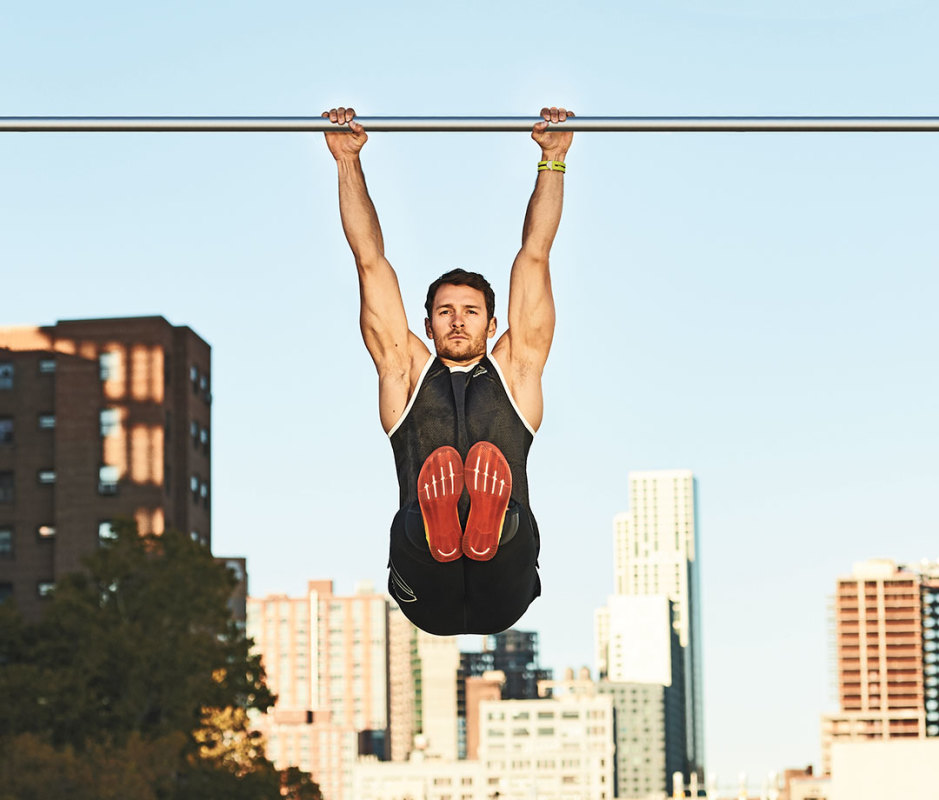
15. Pullup to Knee Raise
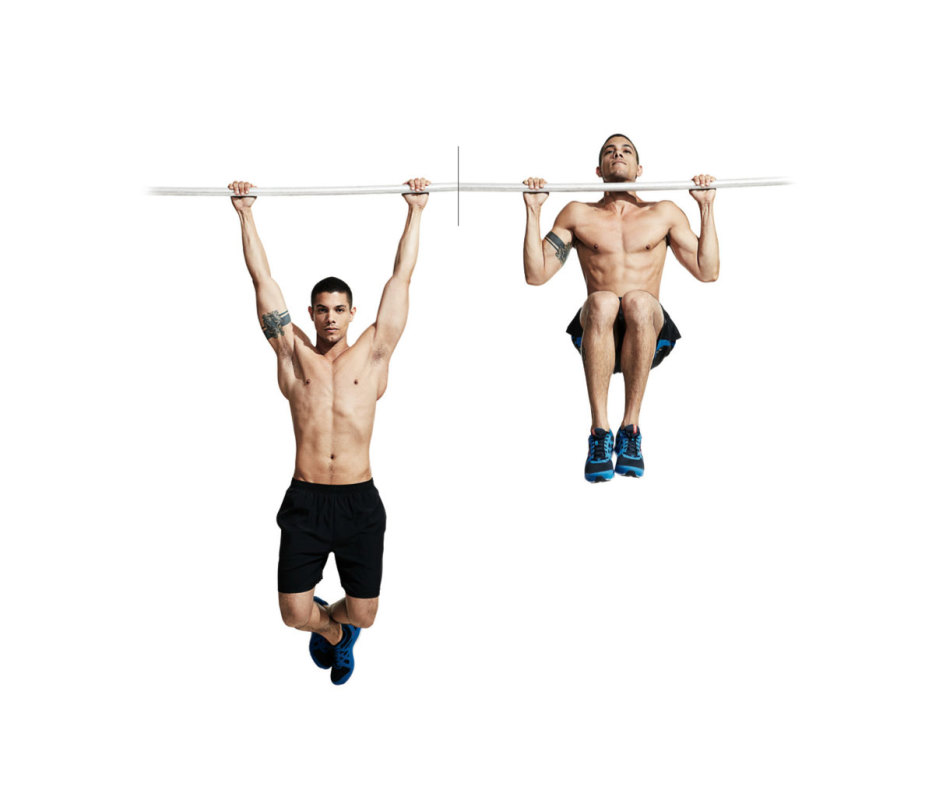
How to do it
View the original article to see embedded media.
- Hang from a pull-up bar with hands outside shoulder width and palms facing away from you.
- Pull yourself up until your chin is over the bar and then raise your knees to your chest in the top position.
Get the gear: Iron Gym Total Upper Body Workout Bar
16. Pushup Rocket
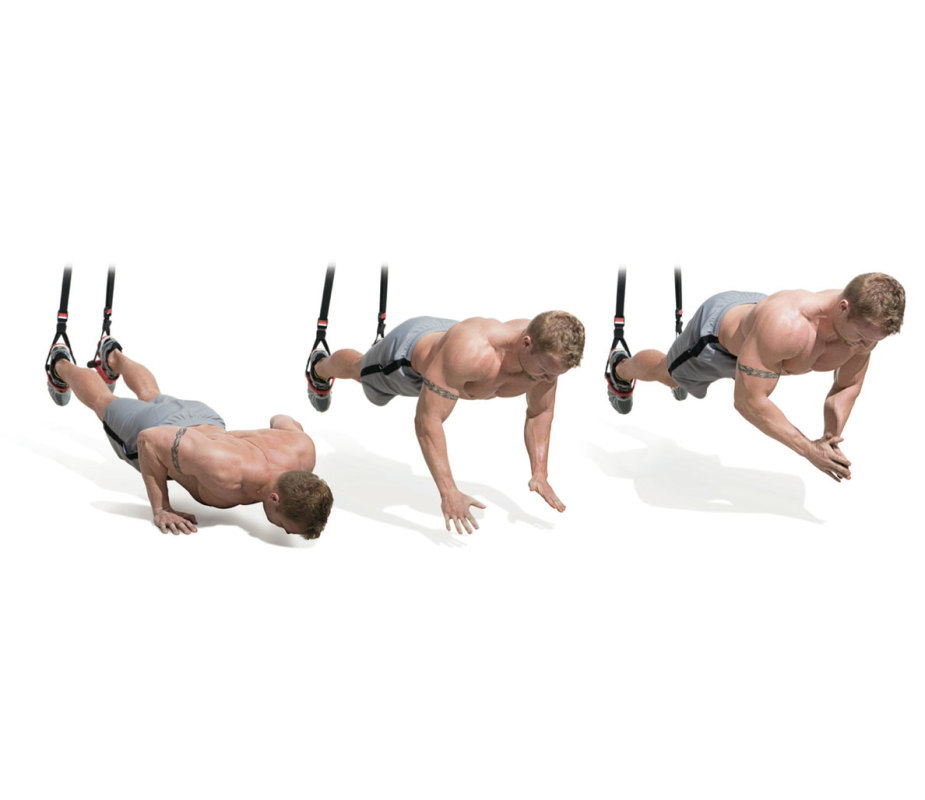
How to do it
View the original article to see embedded media.
- Get into pushup position with your feet in the cradles of a suspension trainer.
- Perform explosive push-ups so that your hands leave the floor and you can clap in midair.
Get the gear: TRX Suspension Trainer Kit
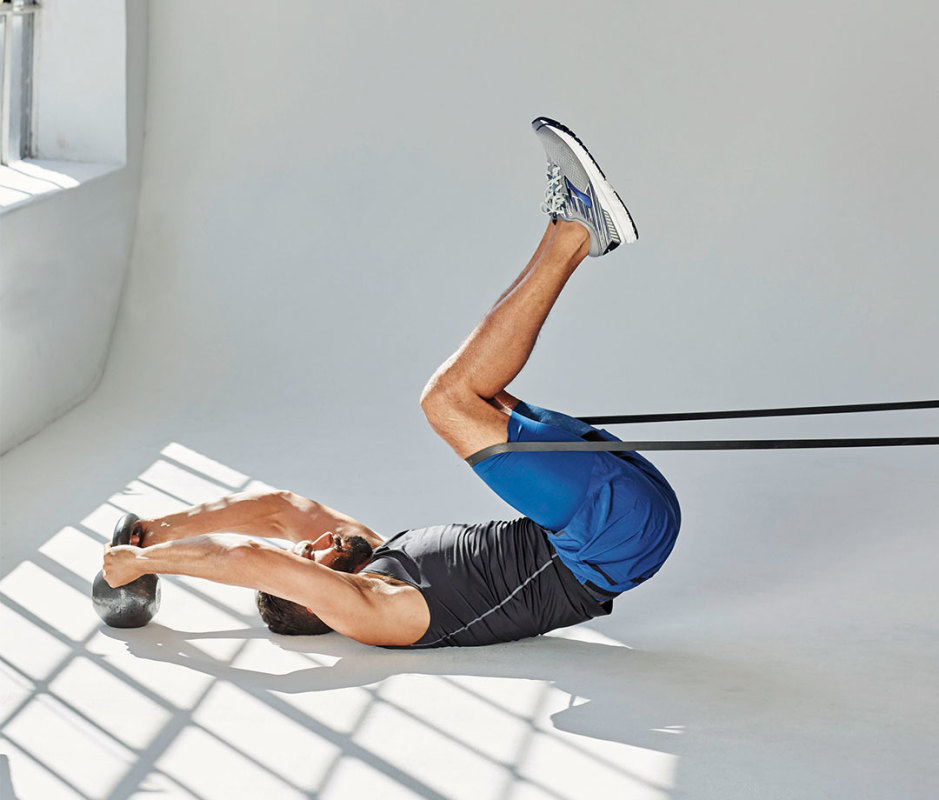
17. Resisted Reverse Crunch
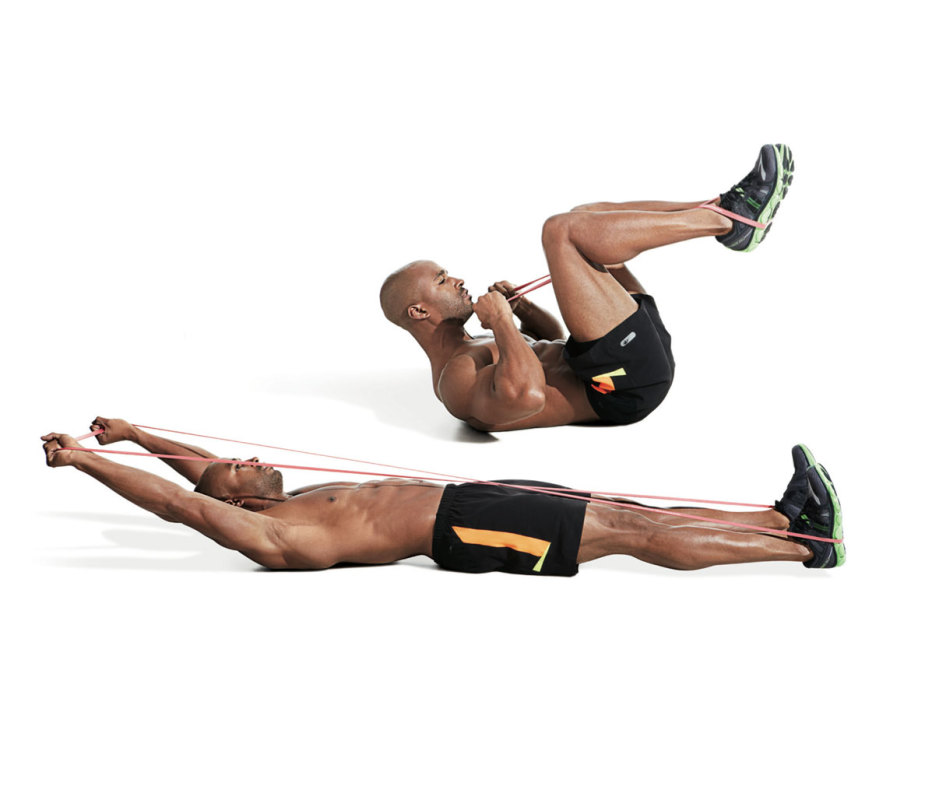
How to do it
View the original article to see embedded media.
- Lie on your back on the floor and wrap the resistance band around the arches of your feet.
- Cross the ends of the band over each other to make an “X” and grasp the ends with opposite hands.
- Bend your hips and knees so that your knees are near your chest and then crunch your torso off the floor.
- Extend your legs while you raise your arms overhead—keep your shoulder blades off the floor. That’s one rep.
Get the gear: Fit Simplify Resistance Loop Exercise Bands
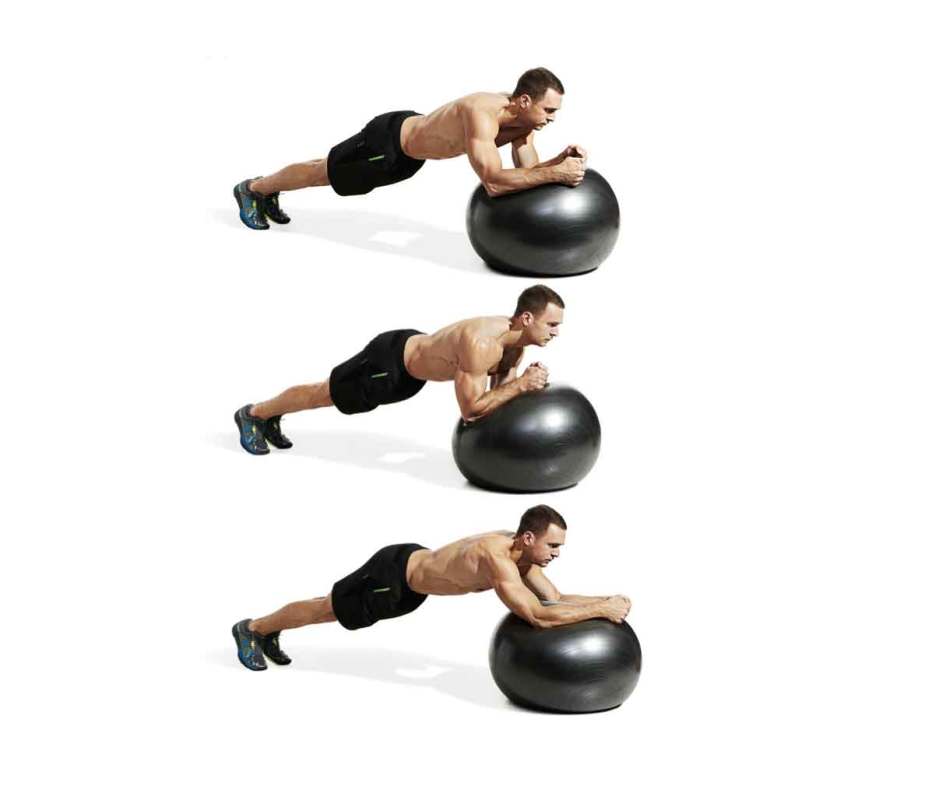
18. Swiss Ball Rollout

How to do it
View the original article to see embedded media.
- Rest your forearms on the Swiss ball and extend your legs behind you.
- Brace your abs and roll the ball forward as you extend your arms and hips.
- When you feel you’re about to lose tension in your abs, roll yourself back.
Get the gear: LuxFit Exercise Ball
19. Medicinal Ball Seated Knee Tuck
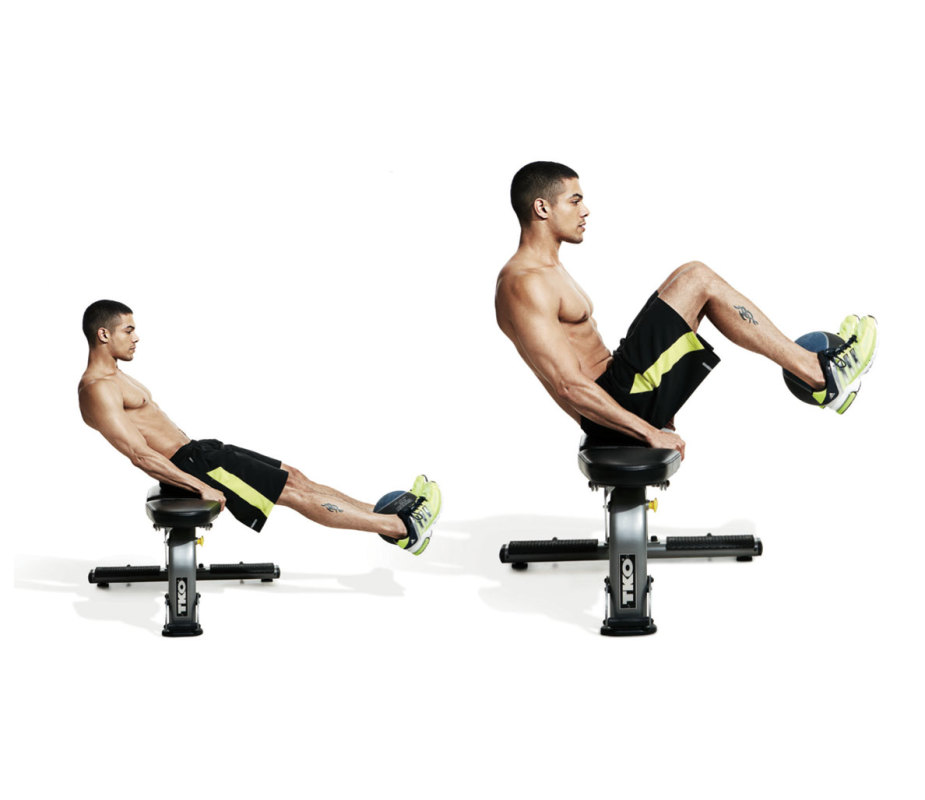
How to do it
View the original article to see embedded media.
- Sit on a bench and squeeze the medicine ball between your feet.
- Extend and elevate your legs out in front of you and extend your torso so that your body forms a straight line.
- Hold on to the bench for support.
- Crunch your torso forward and bring your knees to your chest.
Get the gear: AmazonBasics Medicine Ball; Marcy Flat Utility Weight Bench
20. Side Plank
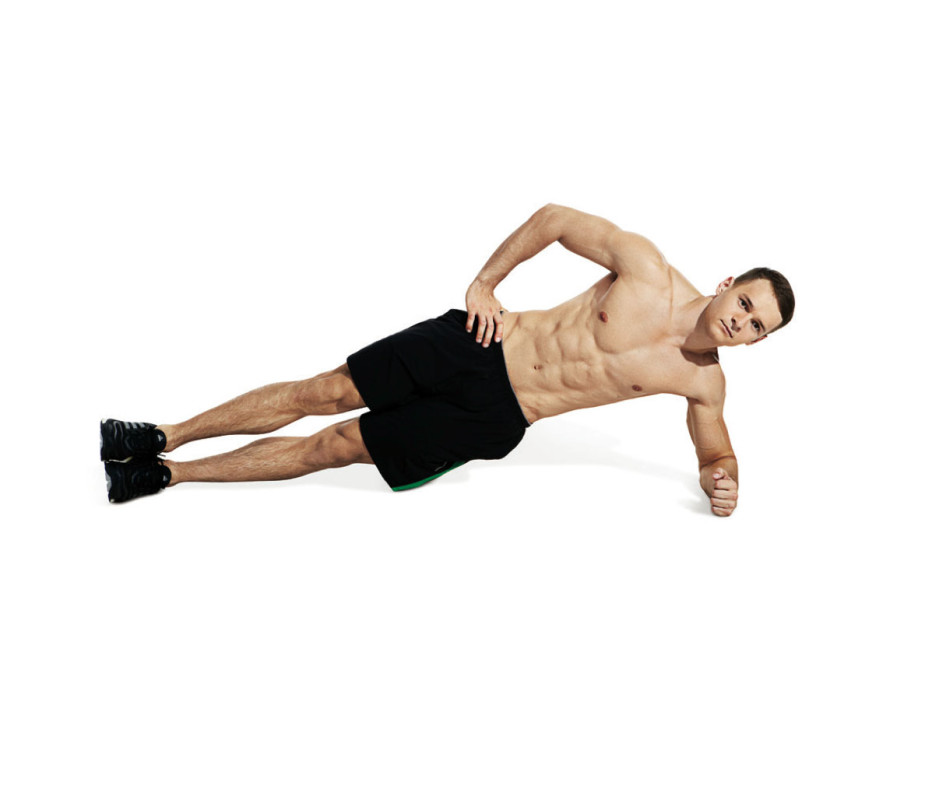
How to do it
- Lie on your left side resting your left forearm on the floor for support.
- Raise your hips up so your body forms a straight line and brace your abs—your weight should be on your left forearm and the edge of your left foot.
- Hold the position with abs braced.
21. Sprinter
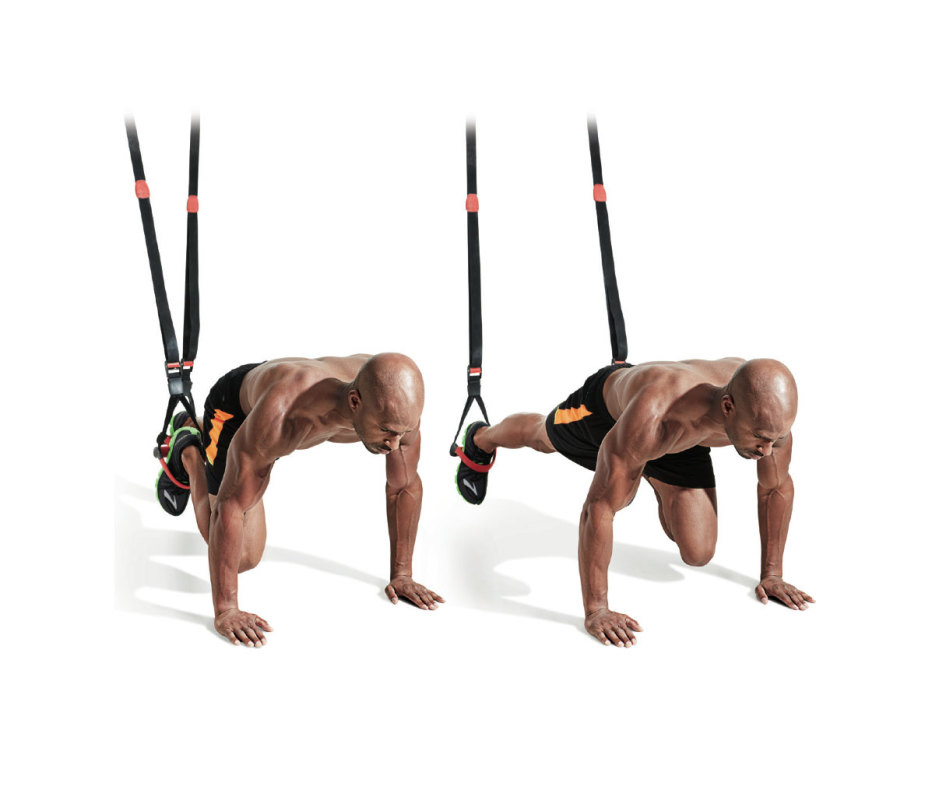
How to do it
View the original article to see embedded media.
- Place your feet in the foot cradles of the suspension trainer and get into pushup position with your hands on the floor.
- Drive one knee to your chest while the other leg remains extended.
- Now drive the opposite leg to your chest while you extend the other back.
- Continue so it looks like you’re running in place.
Get the gear: TRX Suspension Trainer Kit
22. Situp and throw
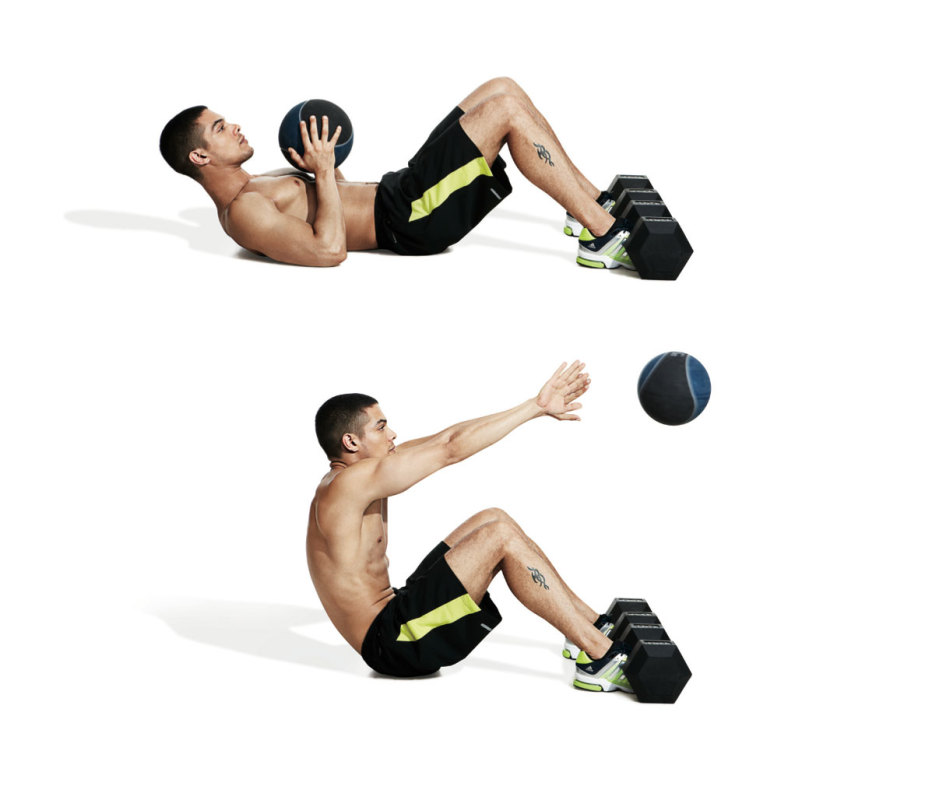
How to do it
View the original article to see embedded media.
- Hold a medicine ball with both hands in front of your chest and sit on the floor.
- Anchor your feet under something sturdy for support, and lie back on the floor a few feet away from a brick or concrete wall.
- Explosively sit up and throw the ball into the wall and then catch it on the rebound.
- If you have a partner, you can throw the ball to him/her instead.
Get the gear: AmazonBasics Medicine Ball
23. Star Plank
How to do it
- Get into pushup position.
- Move your arms and feet apart as wide as possible—your body will make a star shape.
- Hold the position with your torso straight and abs braced for 30 seconds.
24. Straight-Leg Barbell Situp
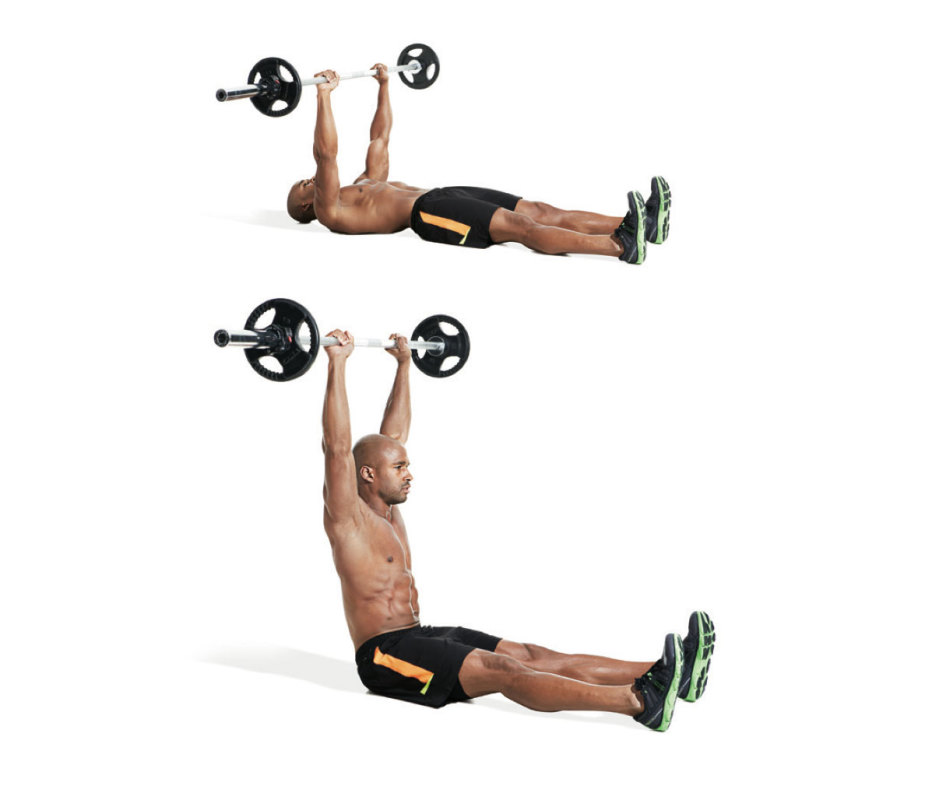
How to do it
View the original article to see embedded media.
- Lie on the floor holding an empty or lightly loaded barbell over your chest as in the top of a bench press.
- Your legs should be extended on the floor in front of you.
- Perform a sit-up, raising your torso until it’s vertical.
- Keep the bar over your head, so it drifts back to an overhead press position at the top of the sit-up.
Get the gear: Sunny Threaded Chrome Barbell
25. Suitcase Deadlift
How to do it
View the original article to see embedded media.
- Load the barbell on the floor and stand to the left of it with feet hip-width apart.
- Bend your hips back and lower your body until you can grasp the barbell in its center with your right hand.
- Brace your core and, keeping your lower back in its natural arch, push through your heels to stand up and lock out your hips.
- Squeeze the bar hard to keep it from teetering.
- Focus on keeping your spine straight the entire set—do not bend laterally toward the barbell.
Get the gear: Sunny Threaded Chrome Barbell
26. Swiss Ball Plank Circle
How to do it
View the original article to see embedded media.
- Place a Swiss ball on the floor and get into pushup position with your hands on it.
- Now lower your forearms to rest on the ball, keeping your entire body in a straight line with abs braced.
- Use your elbows to roll the ball in a circular motion, clockwise and then counterclockwise, as if you were stirring a pot.
Get the gear: URBNfit Exercise Ball
27. Swiss Ball V-Up and Pass
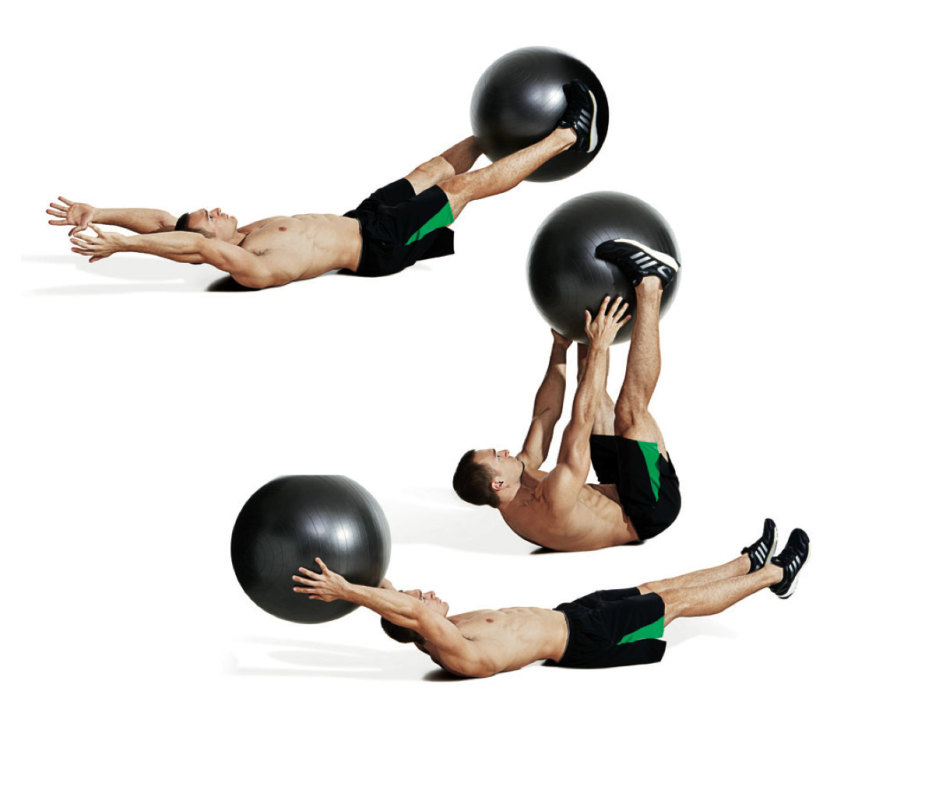
How to do it
View the original article to see embedded media.
- Lie on your back on the floor and hold the Swiss ball between your ankles.
- Extend your arms behind your head.
- Sit up while raising your legs simultaneously and pass the ball from your legs to your hands.
- Go back down to the floor and repeat, passing the ball from your hands to your legs. Each pass is one rep.
Get the gear: URBNfit Exercise Ball
28. Medicine Ball V-Up
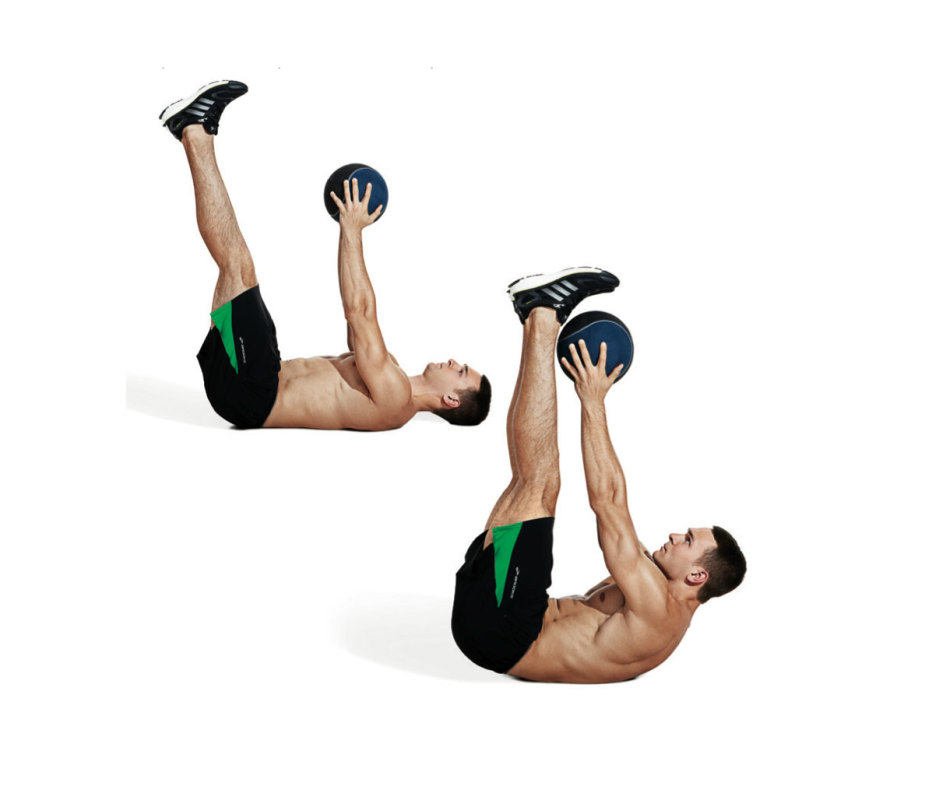
How to do it
View the original article to see embedded media.
- Lie on your back on the floor holding the medicine ball with both hands behind your head.
- Extend your legs.
- Brace your abs and sit all the way up.
- Raise your legs simultaneously and reach for your toes with the ball.
- Your body should form a V shape at the top.
Get the gear: AmazonBasics Medicine Ball
29. Seated Sprinter
How to do it
- Sit, legs extended, heels lightly touching floor.
- Keeping your torso tall and shoulders back, lean back until core engages, making sure your lower back doesn’t slump.
- Bend elbows at 90 degrees, and lift left knee toward ceiling, allowing left hand to come up and right hand to go back, like a runner, to start.
- Switch arm and leg positions back and forth continuously and fast, as if sprinting.
- Perform 40-sec. reps.
30. Half Kneeling Chop
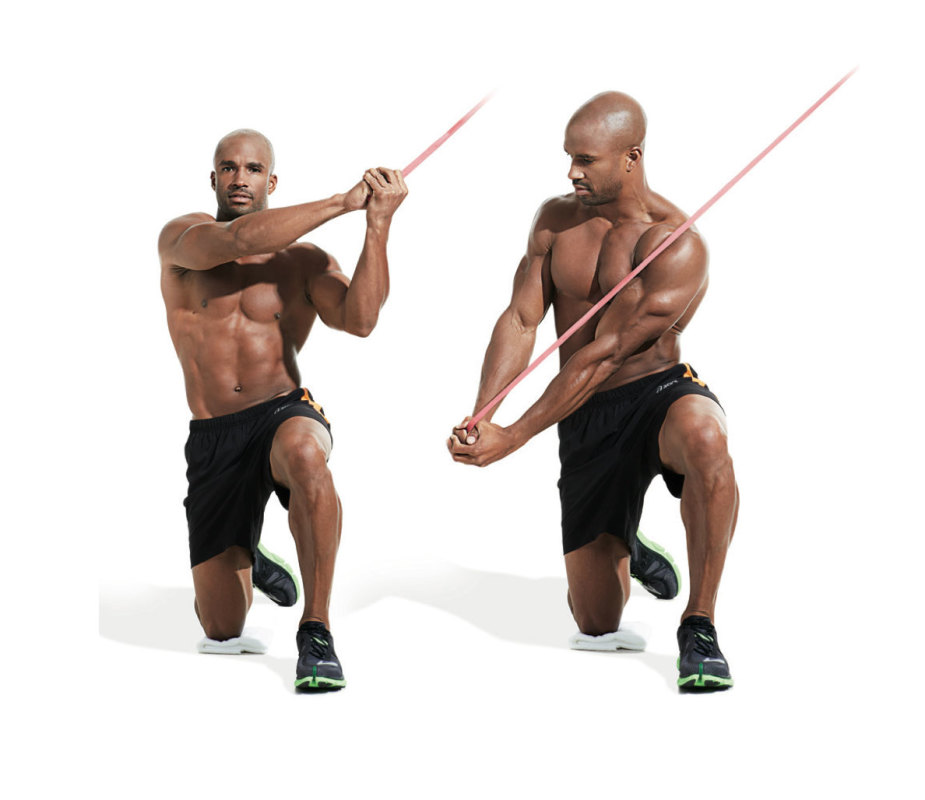
How to do it
- Get into the bottom of a lunge position with your left leg forward and reach up over your left shoulder to grasp the resistance band.
- Pull it diagonally downward across your body to the outside of your right hip.
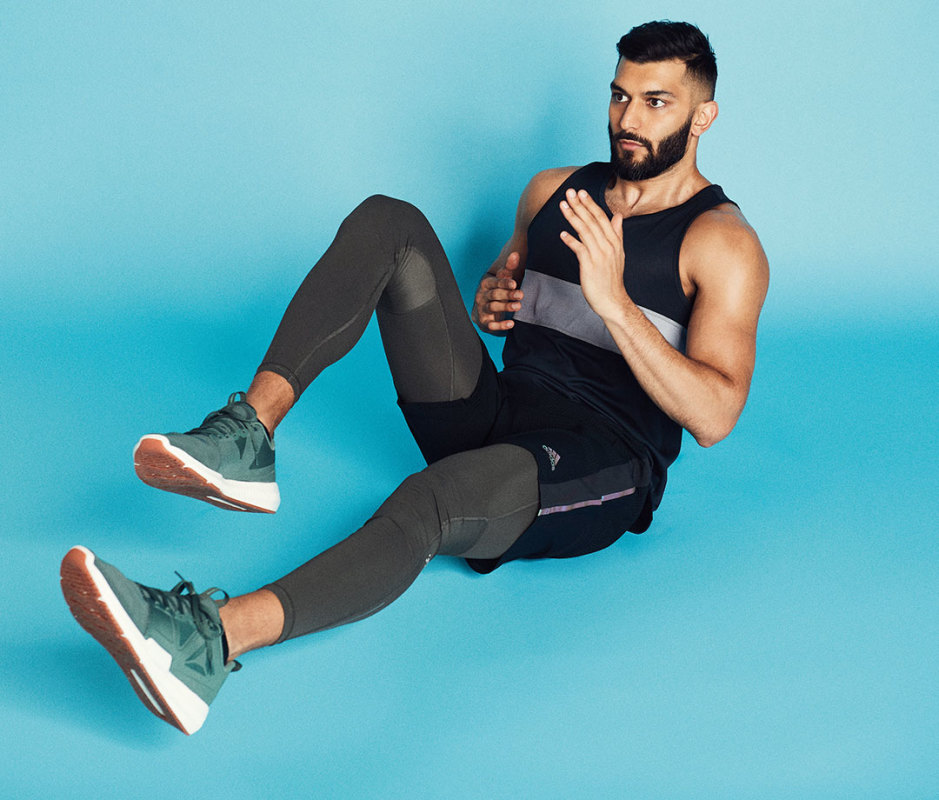
31. Boat Pose
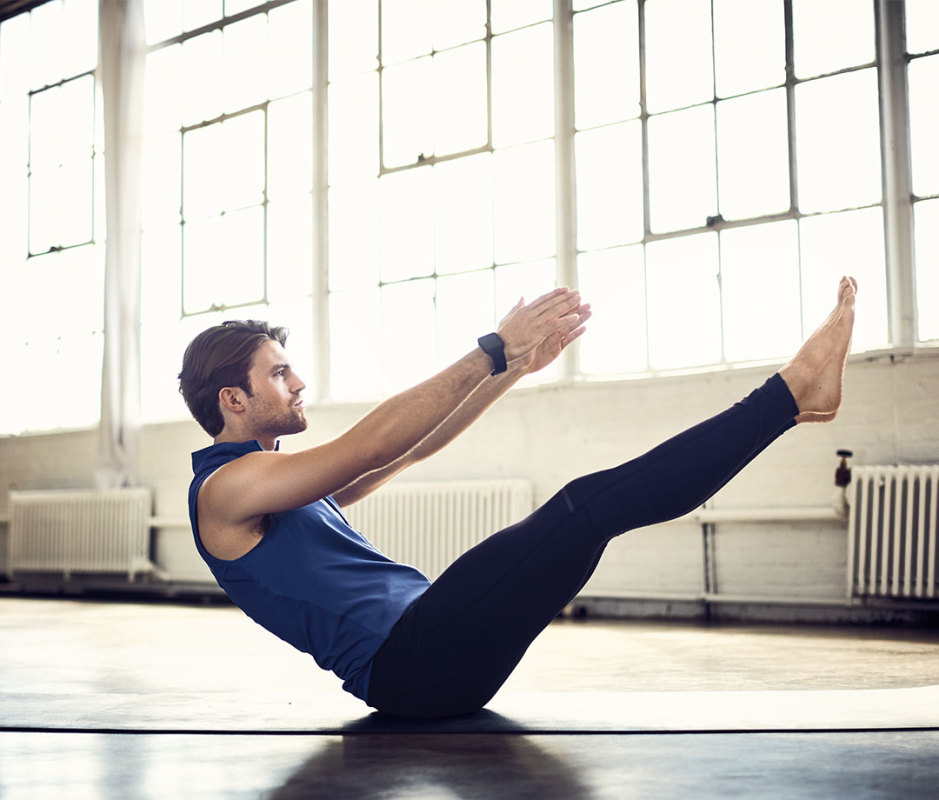
How to do it
- From a sitting position, extend your arms out, palms facing each other.
- Extend and lift both legs.
- If keeping your legs straight is too tough at first, bend at the knees, with the insides of your feet touching to do half boat.
- Keep your arms extended on either side of your legs.
- Use your abs to keep your back straight.
- Stay in this position for five deep breaths, roughly 10 seconds.
32. Oblique Mountain Climbers
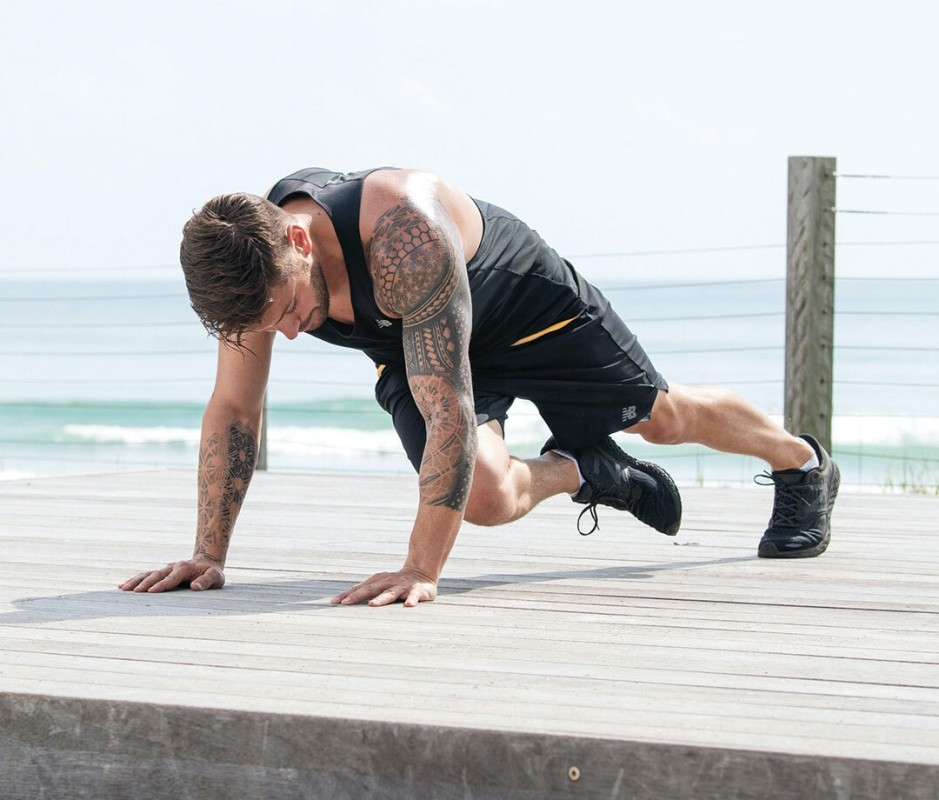
How to do it
- Start in pushup position, with the balls of your feet on the ground.
- Alternate driving your knees toward the opposite arm, twisting your body to that side, for 30 seconds.
- Keep your hips down for the entire motion.
33. Hanging Windshield Wiper
How to do it
- While hanging from a bar, pull your toes toward the bar.
- Keeping control with your obliques and toes together, rotate your legs side to side.
- If this is too challenging at first, you can do a hanging leg lift.
34. Banded Reverse Crunch
How to do it
- Attach a light resistance band to a pole at shin height.
- Sit on the floor facing the anchor, knees bent, the free end of the band across thighs.
- Scooch back until the band is taut, then lie back and grasp a heavy kettlebell behind your head to anchor the upper body.
- Draw belly in, lift lower back off the floor, and roll hips and knees toward shoulders, then reverse.
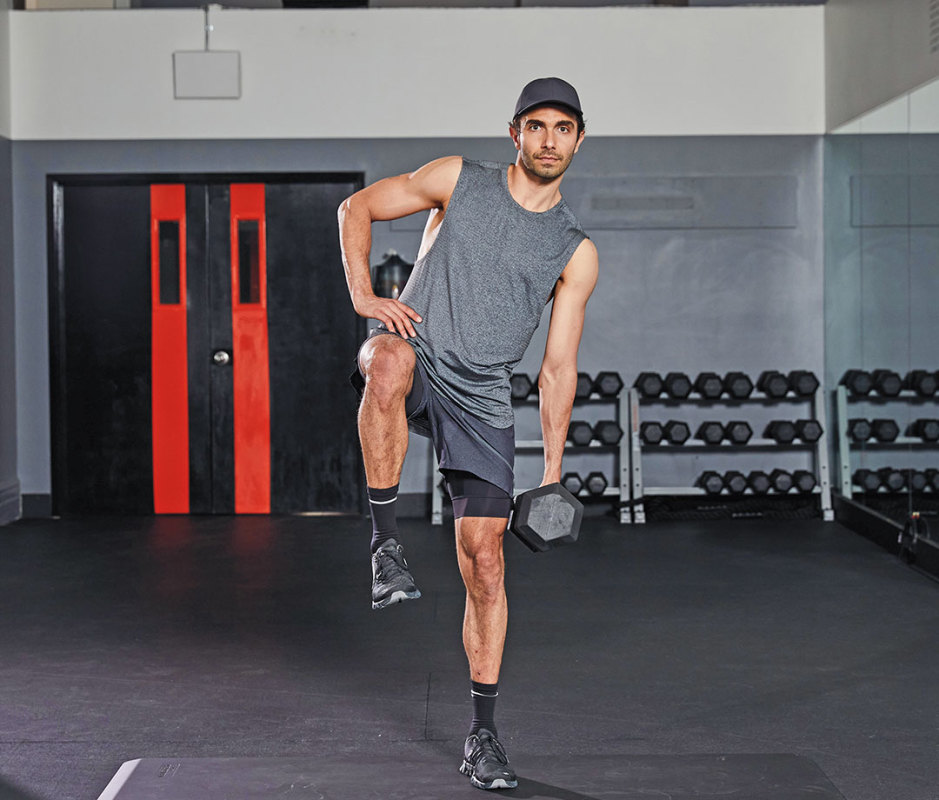
35. Waiter’s Walk
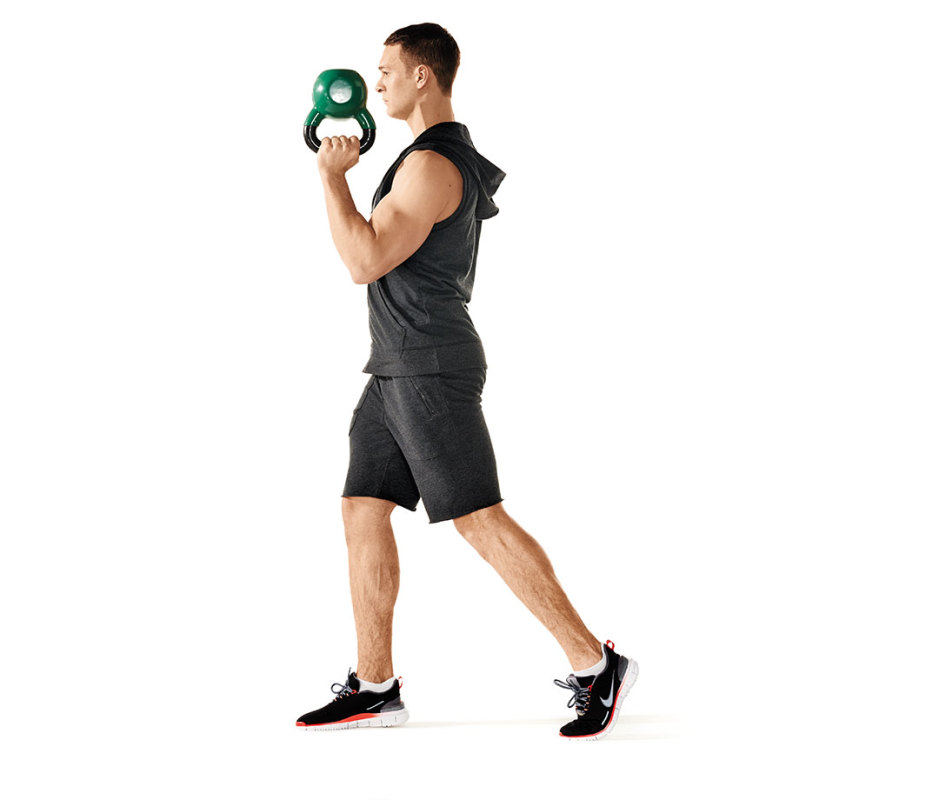
How to do it
- Grab a dumbbell or kettlebell in one hand and hold it either overhead or with your elbow bent so it’s near your face.
- Keep your shoulder blades pulled back and down and fire your glutes as you walk.
- Keep your wrists straight, as if you were waiting tables and holding a tray.
- Walk 10 yards out and 10 yards back.
- Switch hands and repeat.
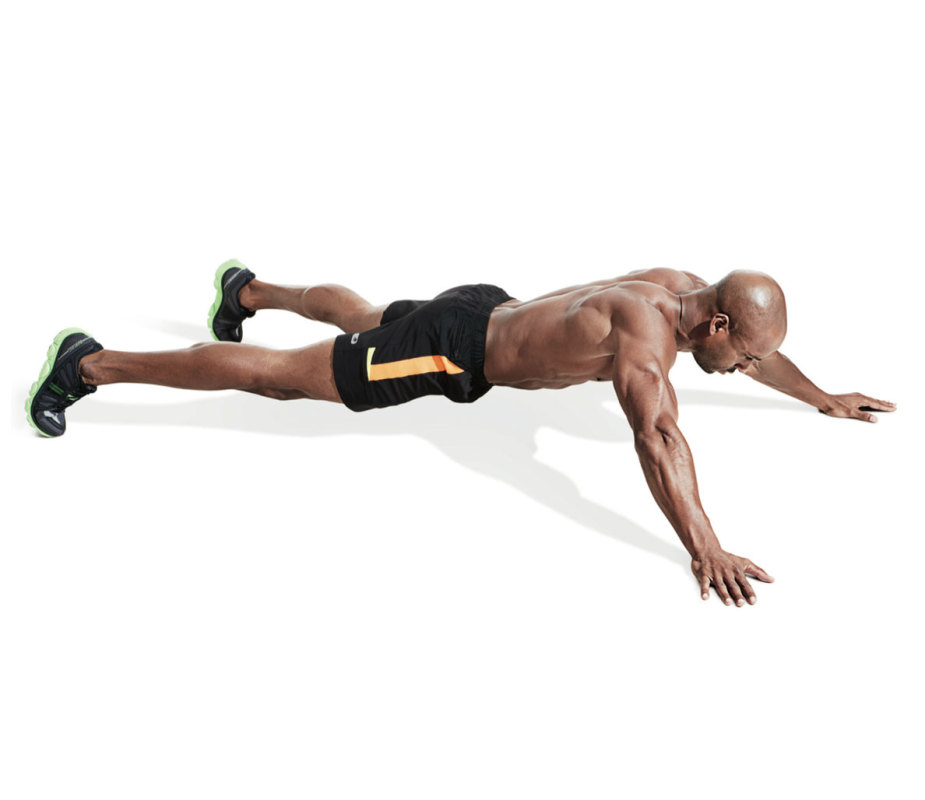
36. T Pushup

How to do it
- Start in pushup position, arms straight, with hands on light dumbbells (or start without weights, as shown).
- Lower yourself and as you push back up, lift your left arm and rotate to the left until your left arm is straight up and your right side faces the floor.
- Your body should look like a “T” on its side.
- Return to starting position and repeat on the other side.
37. Bird Dog Crunch
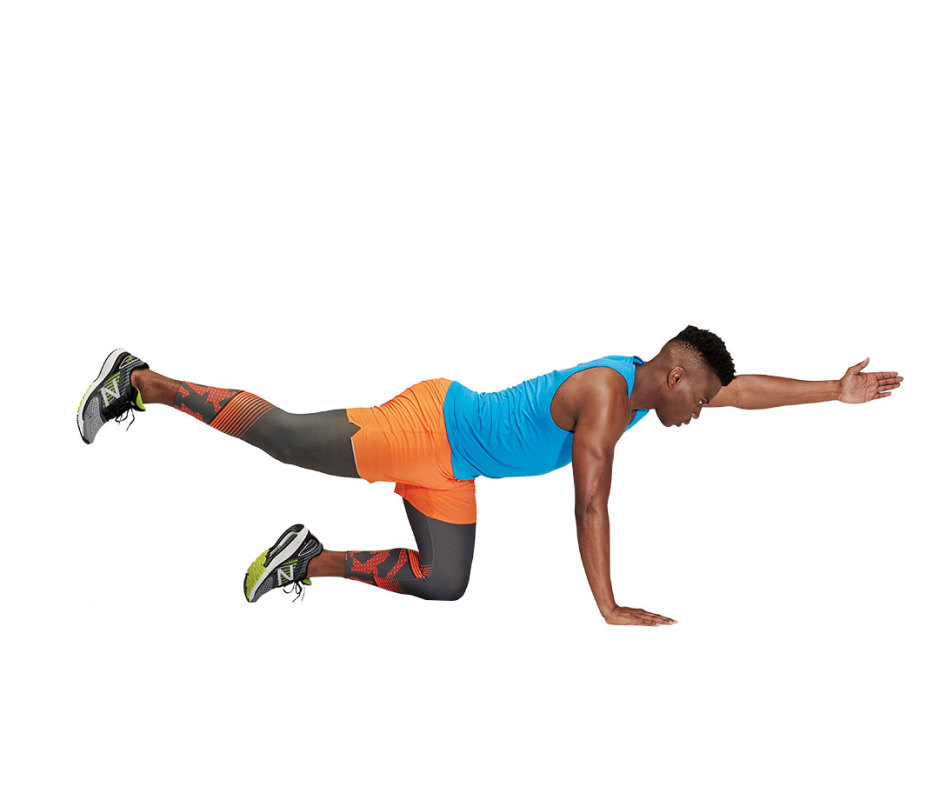
How to do it
- Kneel on all fours.
- Reach one arm as far as possible forward and the opposite foot as far as possible behind.
- Bring your elbow and knee together to crunch, drawing in the abs.
38. One-Arm Farmer’s Carry
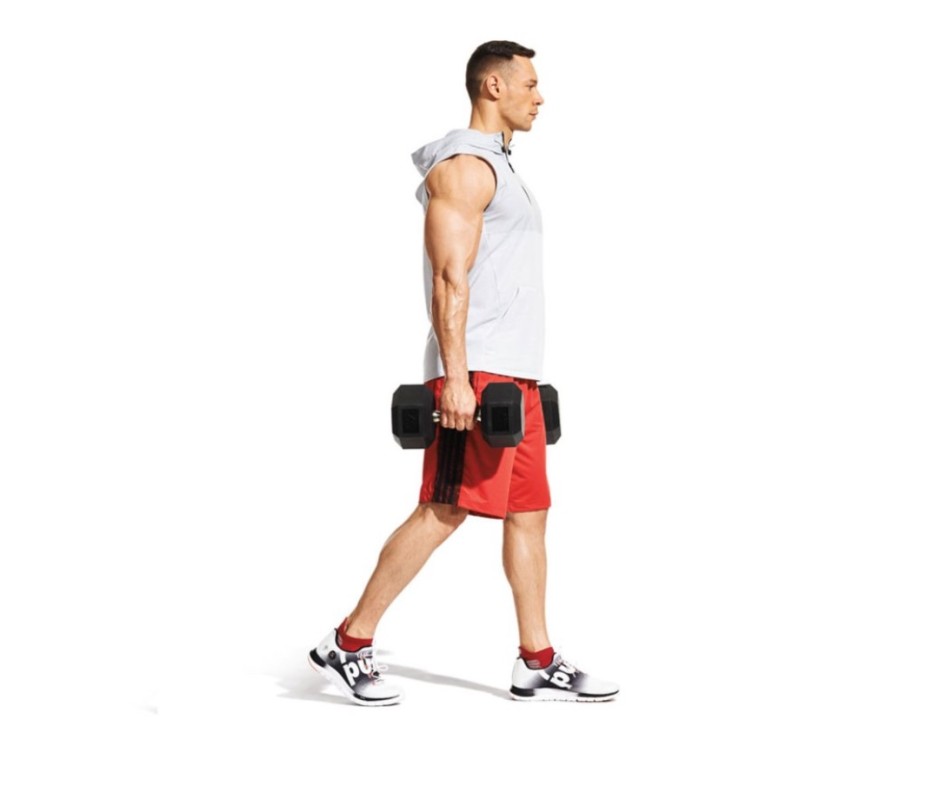
How to do it
- Carrying just one dumbbell forces the abs to work overtime to keep you stabilized.
- While carrying a dumbbell in one hand, walk 10 yards out and 10 yards back. Don’t hunch over.
- Keep your shoulder blades pulled down and back, and fire your glutes as you walk.
- Switch hands and repeat.
39. Burpee
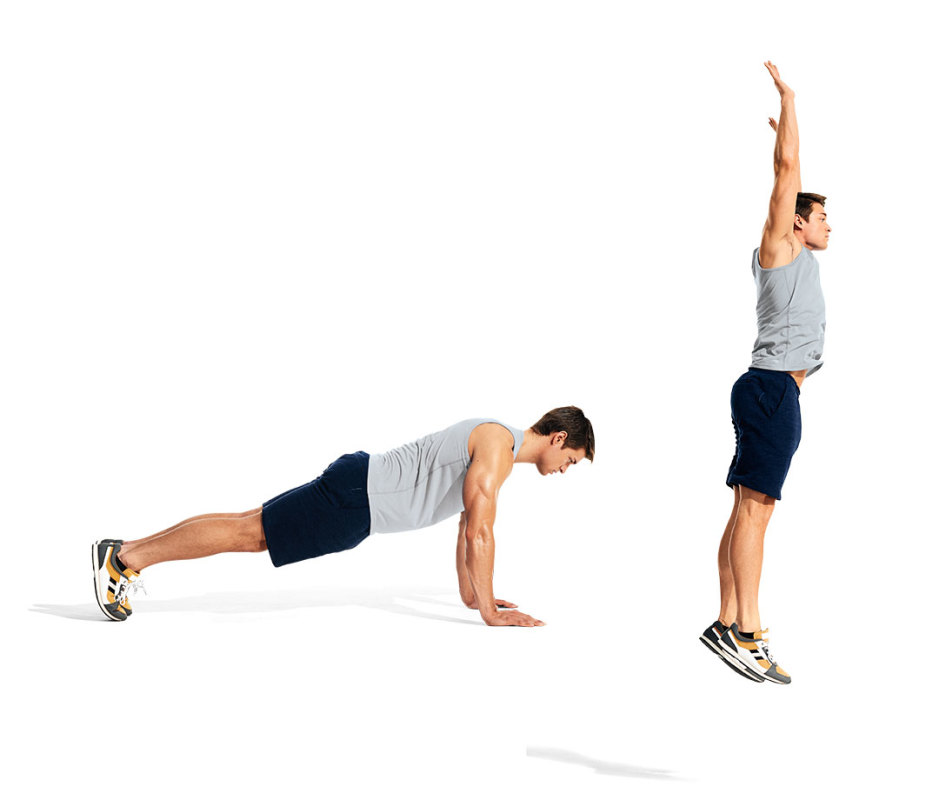
How to do it
- This is a full-body move that’s an underrated abs exercise.
- From a standing position, squat, place your hands on the ground, and “jump” your feet out into a pushup position.
- Perform a pushup, then jump your feet to your hands.
- Explosively jump as high as you can, throwing your hands over your head.
40. Swiss Ball Plate Crunch
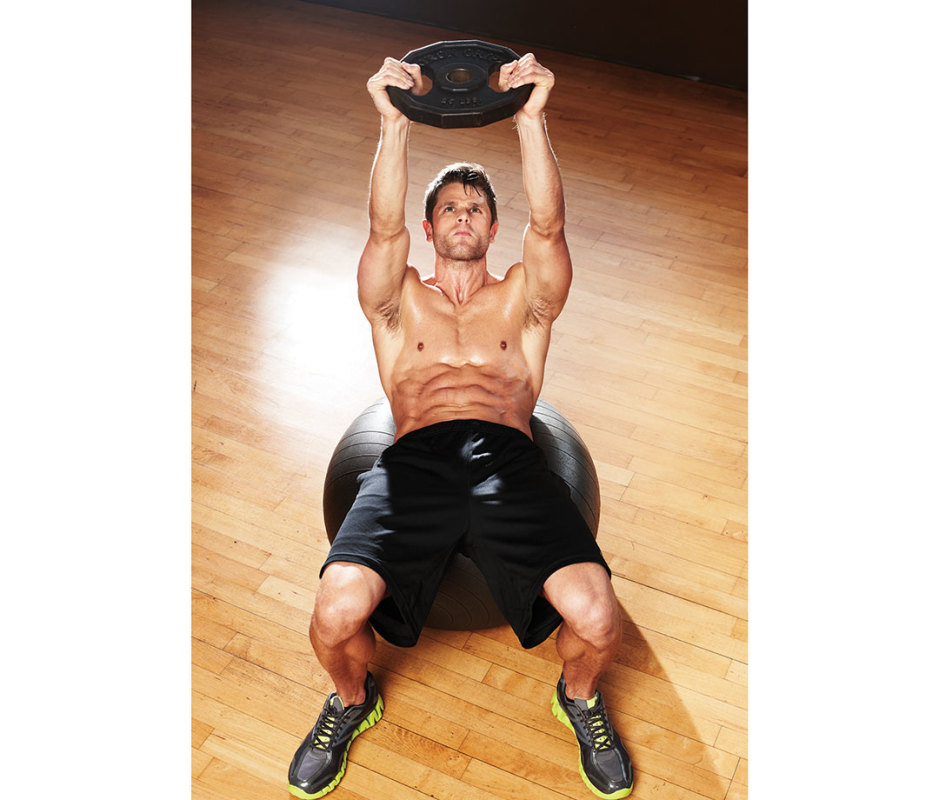
How to do it
- Lie supine on a Swiss ball with your torso arched over the ball.
- Touch your shoulders, back, and glutes to the ball so your abs are stretched.
- Hold a weight plate over your head.
- Roll your hips and chest up, crunching from the top of your torso.
- Lower your hips and chest to the starting position.
41. Medicine Ball Rotational Throw
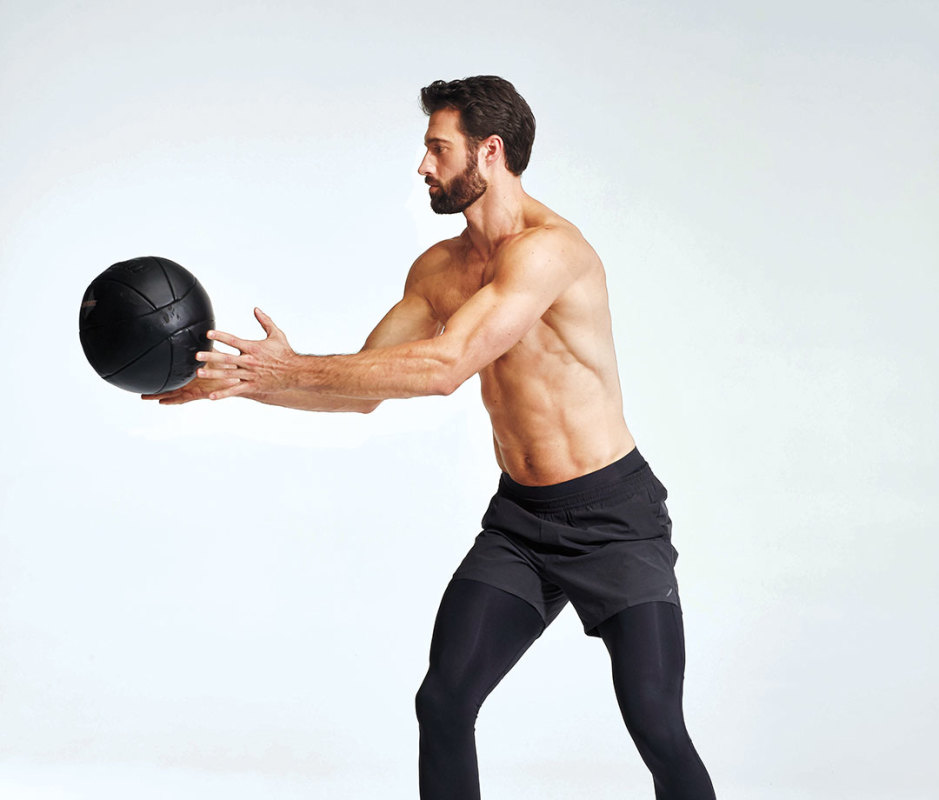
How to do it
- Stand facing a wall with feet shoulder-width apart, holding a medicine ball in both hands.
- Rotate your shoulders, hips, and torso away from the wall, taking the ball behind your hip.
- Turn your hip back to the wall and rotate the rest of your body, throwing the ball to the wall.
- Switch sides.
42. Medicine Ball Slam
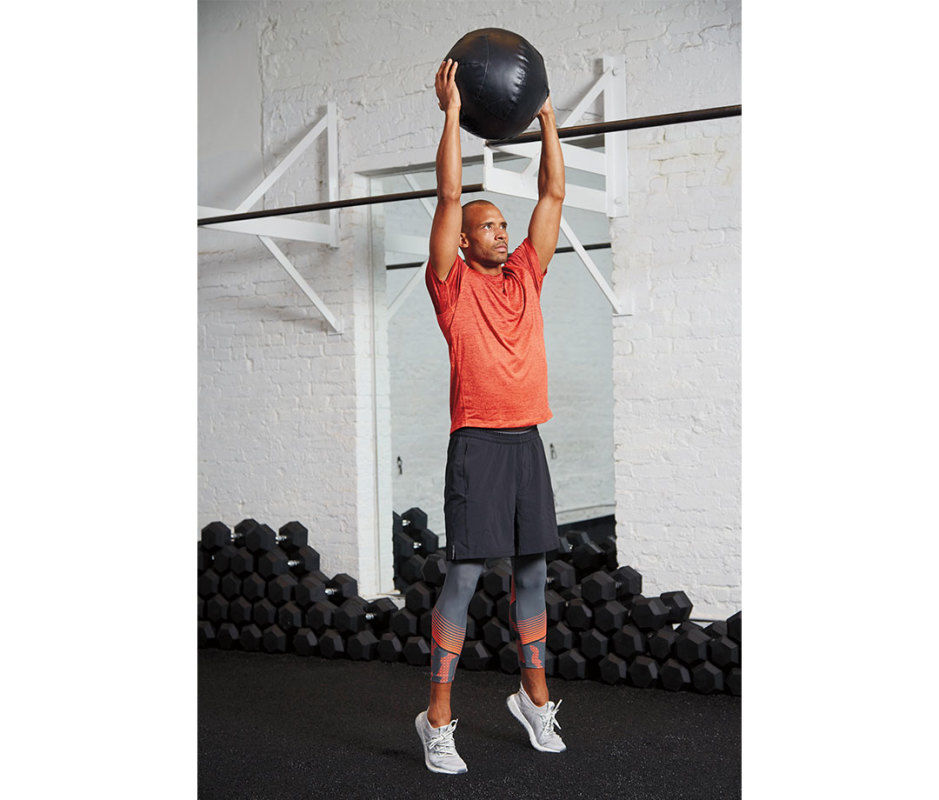
How to do it
- With knees slightly bent, raise the medicine ball with two hands overhead with arms extended.
- Rise on the balls of your feet and bend at the waist to slam the ball to the ground.
43. Corkscrew
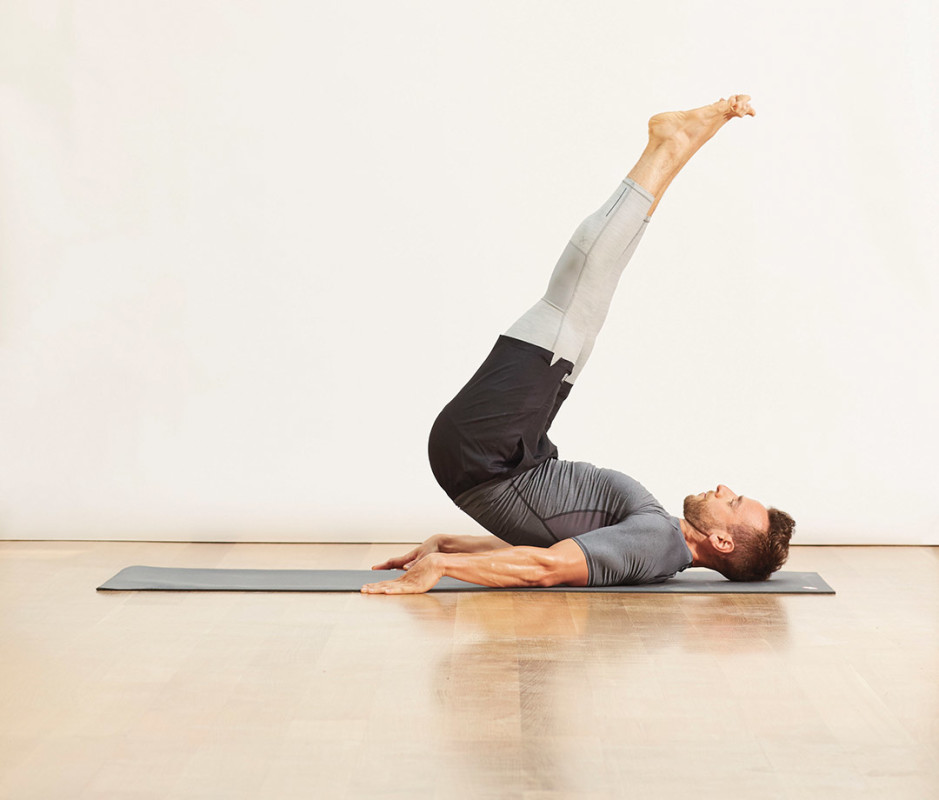
How to do it
- Lie on your back, arms along sides, legs straight at a 45-degree angle to floor to start.
- Inhale, bring legs toward torso and roll spine off mat into a hover position—hips are off the ground and tipped back, feet are overhead.
- Exhale, press through hands and tilt legs to left as you roll down the spine through the center at a 45-degree angle.
- Tilt legs to right and roll back up to hover to complete a circle.
44. Cable Crunch
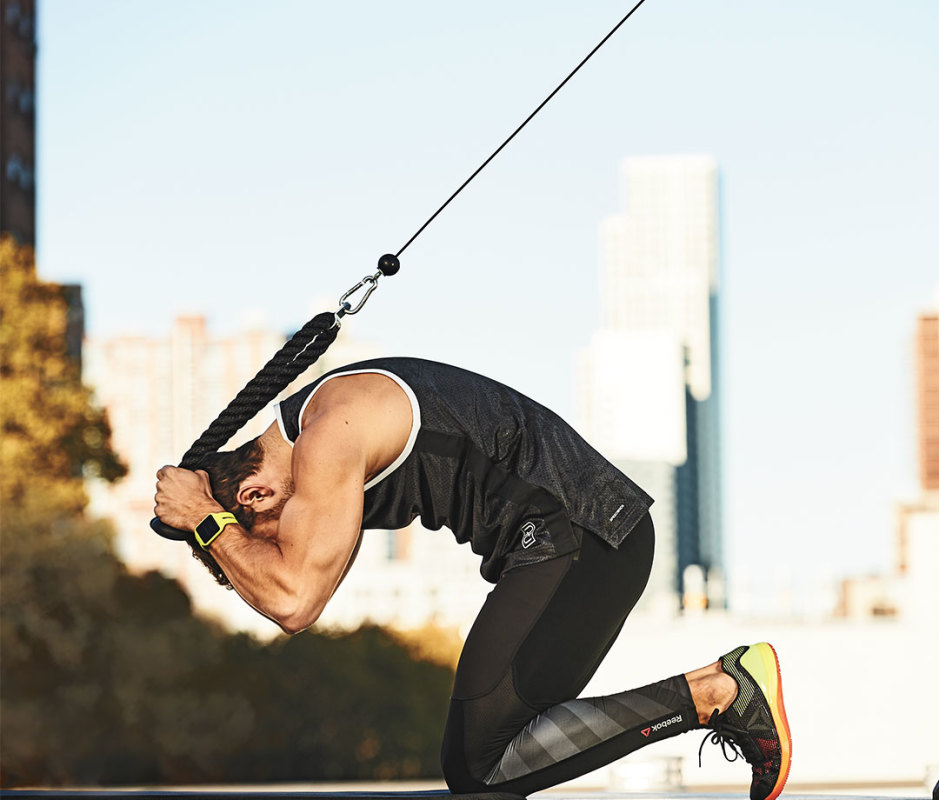
How to do it
- Attach a rope to a high pulley.
- Kneel in front of it, grabbing the rope handles on either side of your neck.
- Contract your abs to bring your elbows to your thighs.
- Pause briefly and return to starting position.
45. Side Plank Row
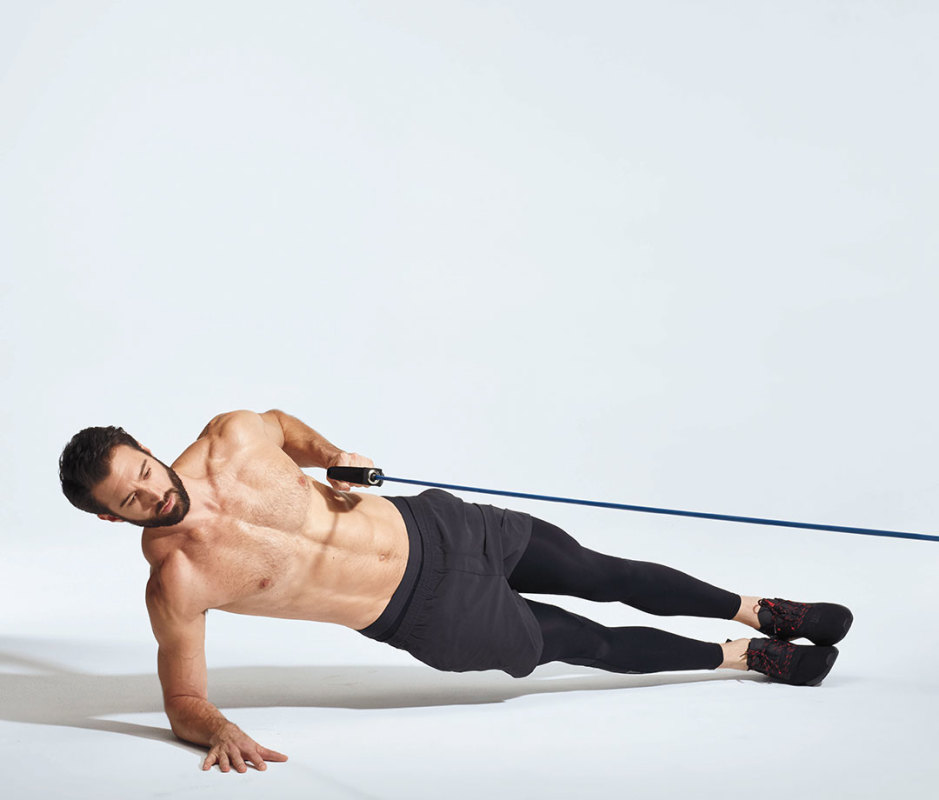
How to do it
- Start in a right forearm-down side plank, feet stacked, left hand holding a resistance band anchored in front of body.
- Pull left elbow back, then release for one rep.
- Do all reps on the left side, then switch sides.
46. Single-leg Oblique Dip
How to do it
- Stand on left leg with right leg bent at 90 degrees, foot flexed, holding a heavy dumbbell in left hand.
- Don’t rush: Keep obliques and glutes engaged as you dip toward the left.
47. Plyo Plank Shuffle
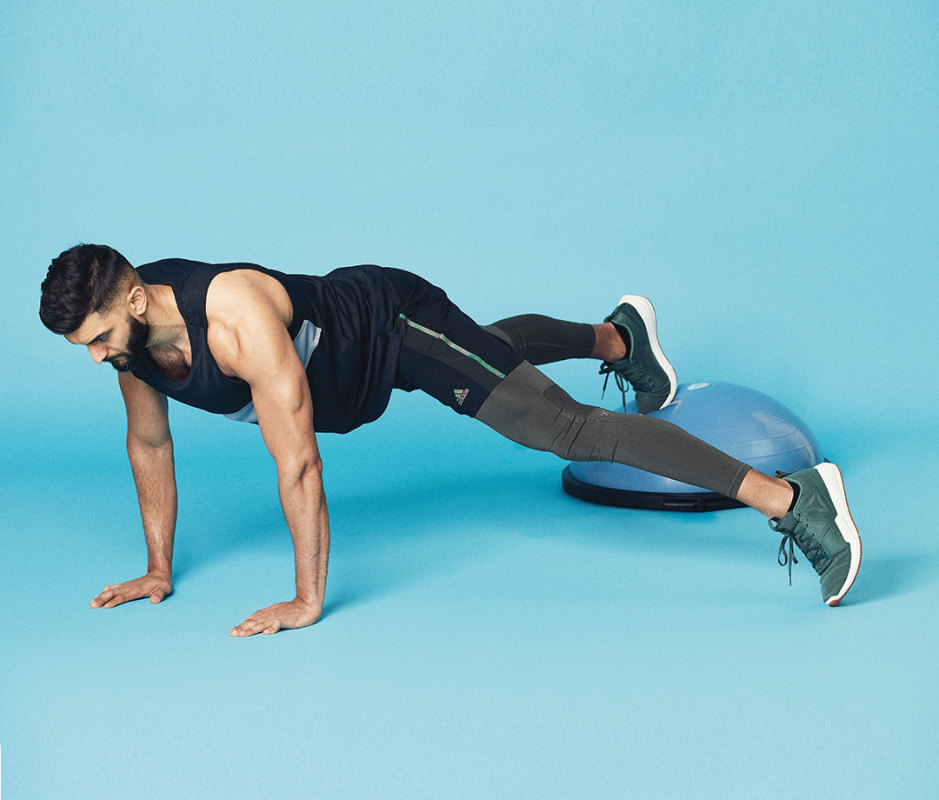
How to do it
- Start in a high plank, hands under shoulders, toes on a BOSU.
- Keeping your upper body still, and arms and legs straight, step left foot to the side, a foot away from the BOSU, then return foot to the ball.
- Repeat on the right side for 1 rep.
- For a challenge, move legs in unison.
- Start with the left leg a foot away from the BOSU, then engage hips and push off with both feet, so the left foot lands on the ball and right foot on the floor.
- Continue alternating sides.
- Perform 40-sec. reps.
48. Front Squat
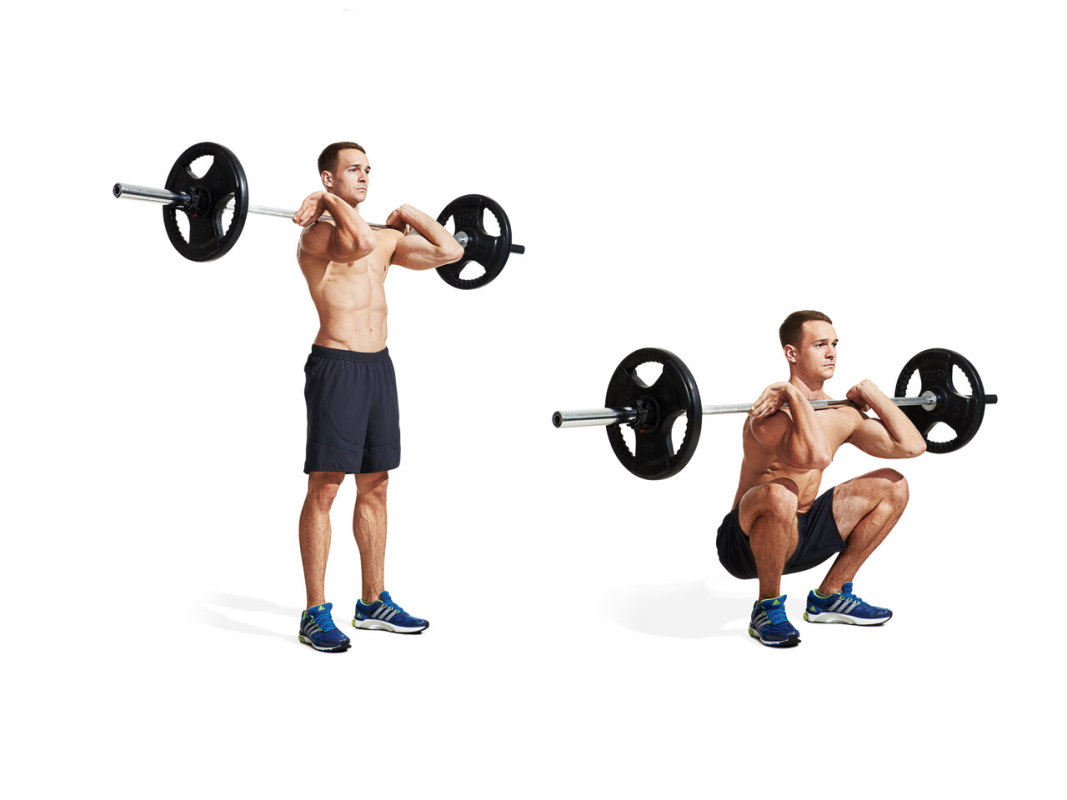
How to do it
View the original article to see embedded media.
- Set a barbell on a power rack at about shoulder height (if you don’t have a rack, clean it to your shoulders).
- Grasp the bar with hands at shoulder width and raise your elbows until your upper arms are parallel to the floor.
- Take the bar out of the rack and let it rest on your fingertips—as long as your elbows stay up, you’ll be able to balance the bar.
- Step back and set your feet at shoulder width with toes turned out slightly.
- Squat as low as you can without losing the arch in your lower back.
Get the gear: Sunny Threaded Chrome Barbell;Fitness Reality Power Cage
49. Weighted Situp
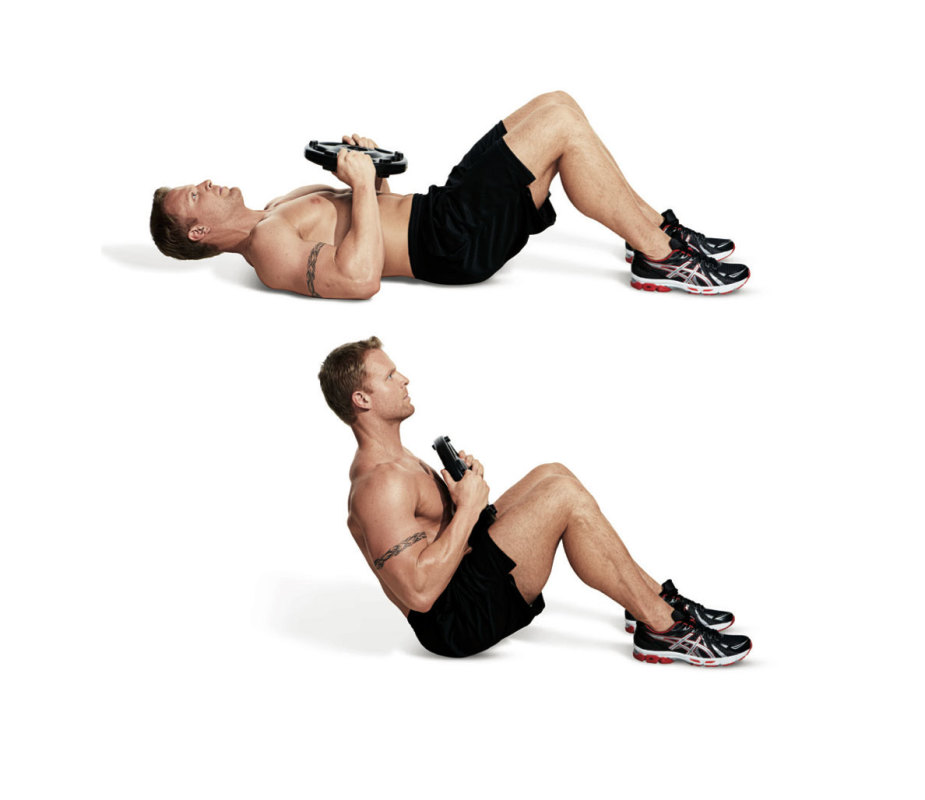
How to do it
View the original article to see embedded media.
- Lie on the floor holding a weight plate at your chest.
- Bend your knees 90 degrees with feet on the floor.
- Tuck your chin to your chest and sit up all the way.
Get the gear: CAP Standard Barbell Grip Plate
50. Kettlebell Plank Sweeps
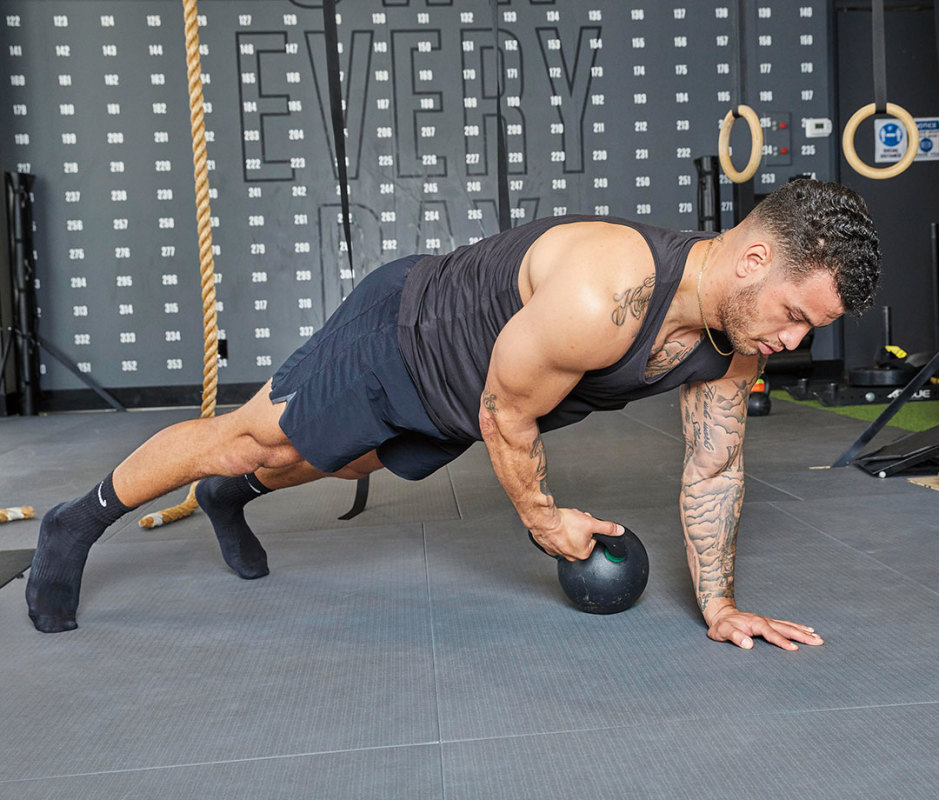
How to do it
- Hold a high plank with a kettlebell just outside your left hand.
- Reach under your torso to grab the kettlebell with your right hand and “sweep” or drag the KB back and forth with a full range of motion.
- Keep your core tight, glutes engaged, and hips level.
- Your obliques should power this exercise.
- Perform 60-sec. reps.
Tips for Maximizing Your Abs Workouts
Whether you’re a pro athlete or just want to get ripped abs—a comprehensive core workout should comprise three planes of motion: frontal, sagittal, and transverse to hit your rectus abdominis, external and internal obliques, and transversus abdominis.
An endless number of total-body exercises light up your core muscles, but targeted ab workouts can really make a difference in strengthening your core from every angle. And doing core exercises in a circuit keeps the intensity high and will likely lead to more fat loss.
But we need to acknowledge a hard truth: Not all six-packs are created equal. Some guys need to work their belly to exhaustion before they can carve out abs, while other dudes seem to get a six-pack to pop without a single sit-up or side plank. Yes, genetics play a significant role here, too.
Your meals are also crucial. The visibility of your six-pack “really comes down to the amount of body fat that covers them,” says strength coach Lee Boyce. “This will mainly be affected by diet, though proper core training is still beneficial for the health and function of your abdominal region.”
Once you’ve cleaned up your diet, be patient with progress, and stay consistent. Of course, ab exercises aren’t just hitting your upper abs, rectus abdominis, and deep core muscles. Some of these exercises also hit the upper body, lower body, or total body to help prevent injury by bolstering muscles like erector spinae (muscles along the spine) and hip flexors.


