World Fitness Blog : Leading Global Bloggers

December 5, 2023

Chest-Supported Row vs. Bent-Over Row: Which Variation is Best for Building a Bigger Back?

Filed under: Fitness — Tags: — admin @ 7:23 pm

It’s no secret that building a well-developed back entails plenty of pulling exercises and enough protein to support your strength- and muscle-building efforts. While there are different routes you can take to achieve that sculpted look, the best back workouts revolve around a classic pull-day staple: the row. 

The number of row variations to choose from may feel overwhelming, but you can’t go wrong with two of the most effective options: the chest-supported row and the bent-over row. But what reigns supreme in the battle between a bench-based back builder and a freestanding barbell movement?

Man performing chest-supported row using dumbbells.
Credit: MDV Edwards / Shutterstock

We’ll dive deeper into their differences and similarities, break down how to perform each one safely, and discuss the benefits and drawbacks of both so you can get the most bang for your buck during your next pull-day session. 

Table of Contents

Key Differences 

  • The bent-over row involves the entire posterior chain and requires significant core activation. On the other hand, the chest-supported row recruits your upper-back muscles while mostly removing your lower half from the equation.
  • The chest-supported row is generally safer for both beginners and advanced lifters since the weight bench provides stability and protection for your spine. Meanwhile, the lack of assistance with a bent-over row can limit the user’s ability to properly engage the back since they’re directing effort to stabilize their body in a bent-over position.
  • Unlike the chest-supported row, the bent-over version directly carries over to other movements like the deadlift and good mornings, as it teaches you how to hip-hinge correctly. 

[Related: Lat Pulldown vs. Pull-Up: The Battle for a Bigger Back]

Key Similarities

  • Both row variations primarily work the latissimus dorsi (lats), making either movement a fantastic choice for your back or pull-day workout. 
  • Your grip strength will be put to the test with each exercise. Rowing will help you develop a stronger grip (and forearms), which can pay off when performing exercises like cleans, snatches, and shrugs.  (If you’re trying to target your back muscles and your grip strength is a limiting factor, check out our list of the best lifting straps.)
  • The bent-over row and the chest-supported row can help add thickness and overall size to your upper- and mid-back, especially if you vary your grip to target specific areas. 

Muscles Worked 

Like the bent-over row, the chest-supported row involves multiple upper-back muscles — primarily the latissimus dorsi (lats), trapezius (traps), and rhomboids. Your lats, which are the largest back muscles, are the main mover during any row variation. Meanwhile, your traps help stabilize your scapula, and the rhomboids play an important role in shoulder stabilization. 

Bodybuilder flexes his back muscles while posing in the gym.
Credit: ThomsonD / Shutterstock

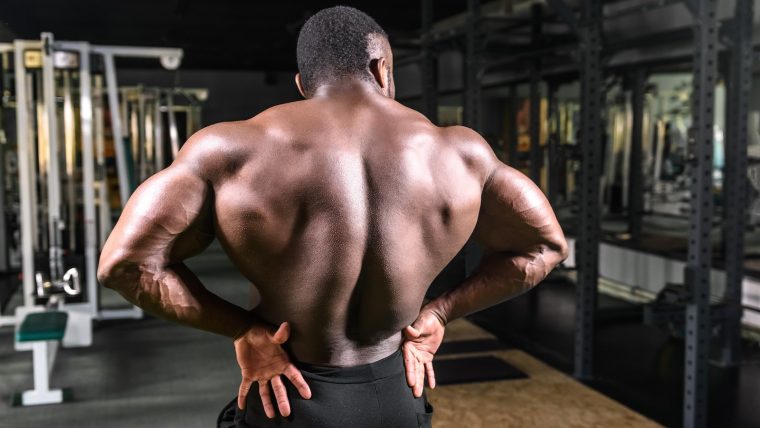
In addition to your lats, traps, and rhomboids, your posterior deltoids — the back shoulder muscles that attach to your shoulder blades — also act as prime movers during the bent-over row and the chest-supported row. Plus, both row variations involve ample biceps activation, as this two-headed muscle assists with flexing your forearm and elbow. As you retract your shoulder blades during a row, your biceps help your arm bend at the top of the movement. You can also increase the stimulus by using a supinated (palms-up) grip. 

However, the bent-over row involves several muscle groups and joint structures that the chest-supported version doesn’t. Most notably, this multi-joint movement recruits your hamstrings, glutes, and spinal erectors to prevent any rounding as you pull the barbell toward your body from a hip-hinge position. Overall, your legs and core have to put in an equal amount of effort as your upper body to perform this exercise safely and effectively.

[Related: What Muscles Do Push-Ups Work? Get More Out of This Timeless Exercise]

When to Do the Chest-Supported Row 

Sometimes, choosing a chest-supported row simply makes more sense. Whether you’re new to lifting, healing from an injury, or looking to target specific parts of your back, here are a few scenarios where a chest-supported row works best:

You’re a Beginner

Just started strength training? Rather than risk getting hurt performing a more technical movement, stick with the version better suited for beginners. The chest-supported row teaches you how to engage your core and perfect your pulling technique from a seated position that keeps your spine stable. 

While you may have to start with lighter dumbbells, you can quickly increase the load if you remain consistent with your approach. Plus, the chest-supported row gives you a chance to learn how changing variables such as your grip, the angle of the weight bench, and time under tension can affect your results. For example, an overhand (pronated) grip will lead to more rear delt and upper-back activation since your elbows come out from your body. An underhand (supinated) grip keeps the elbows closer, forcing your traps and biceps to step up their game.

Woman performs a chest-supported row with dumbbells.
Credit: MDV Edwards / Shutterstock

You’re Working Your Way Back From Injury

If you’ve been sidelined by a back injury and are ready to resume training, the chest-supported row is a smart choice. Using a bench for support decreases the pressure on your spine and core, allowing you to focus on performing the movement using precise technique. 

Start with lighter weights to set yourself up for long-term success by rebuilding your strength, stamina, and confidence one rep at a time. 

You’re Chasing Bodybuilding or Physique Goals

If you want to develop a more defined, muscular back, the chest-supported row lets you target your lats, rhomboids, and traps without your lower back and core being a limiting factor. After all, sustaining a hinged position while rowing a heavy load is very tiring.

From there, you can tailor the exercise to support your physique goals by going heavier, altering the tempo, changing the incline angle, or experimenting with different set and rep ranges. Either way, the chest-supported row stands out as an obvious choice if you want to isolate certain muscles on back day.

When to Do the Bent-Over Row

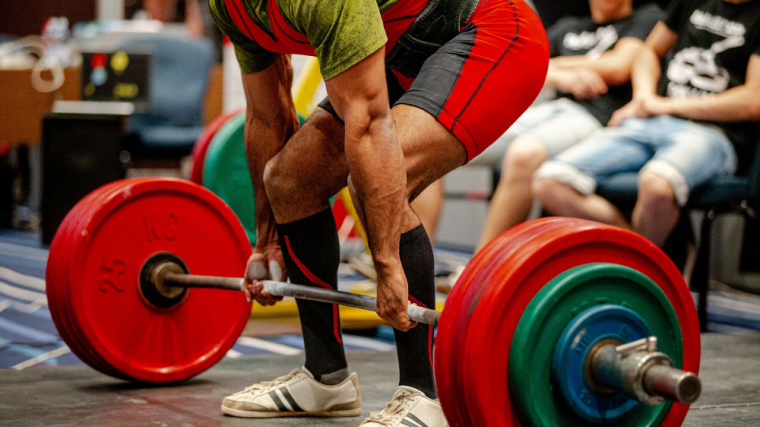
There’s a reason the bent-over row is near the top of every best back exercise list: it produces results. From athletes aiming to get more explosive to people who need to develop stronger posterior chains to lifters looking for a way to grow a bigger back, here are situations where you can make the bent-over row the star of the show.

You’re Training for Olympic Weightlifting or Powerlifting

All strength and power athletes should include a bent-over row variation in their routine. Olympic weightlifters can benefit from this exercise by using it as a primer for the clean and jerk, which requires explosive movement and a strong upper back. 

Plus, powerlifters who want to increase their deadlift PR can also utilize the bent-over row to help reach that goal. Getting comfortable with hinging at the hips, mastering how to brace your core, and learning how to fully engage your lats and other back muscles will only help you perform even better when it’s time to step up to the barbell. 

Male powerlifter prepares to perform a conventional barbell deadlift.
Credit: Nomad_Soul / Shutterstock

Additionally, bent-over rows can give you a leg up on the squat and the bench press. Developing your traps will create a stronger shelf for the bar to rest on — a major advantage when squatting heavy loads. When it’s time to bench, having a strong upper back will allow you to maintain a better arch and remain stable as you lower the bar toward your chest.       

You Want to Strengthen Your Posterior Chain

A weak posterior chain can contribute to low back pain and poor posture. Although it’s a bit of a double-edged sword, the bent-over row can help you in that area by strengthening key muscles like your spinal erectors and hamstrings — both of which are recruited heavily to remain in a strong hip-hinge position. 

According to a 2021 review on treatment for chronic low back pain, 12-16 weeks of posterior chain resistance training had a significantly greater effect than general exercise on pain, level of disability, and muscular strength. (1) So, while you shouldn’t try to max out on the bent-over row if you’re trying to build a healthy posterior chain, you can certainly incorporate it into a program that includes fundamental core exercises like dead bugs, bird dogs, and planks. 

You Want to Add Overall Size and Strength

If growing a thick, dense wall of muscle along your back matters most, make the bent-over row the main lift on your pull day. A 2009 study comparing three row variations found that this exercise produced large activation symmetrically from the upper to lower back, supporting the idea of the bent-over row as a go-to movement for adding size and strength. (2) Overall, a compound movement will involve more muscle engagement than an isolation exercise like the chest-supported row. 

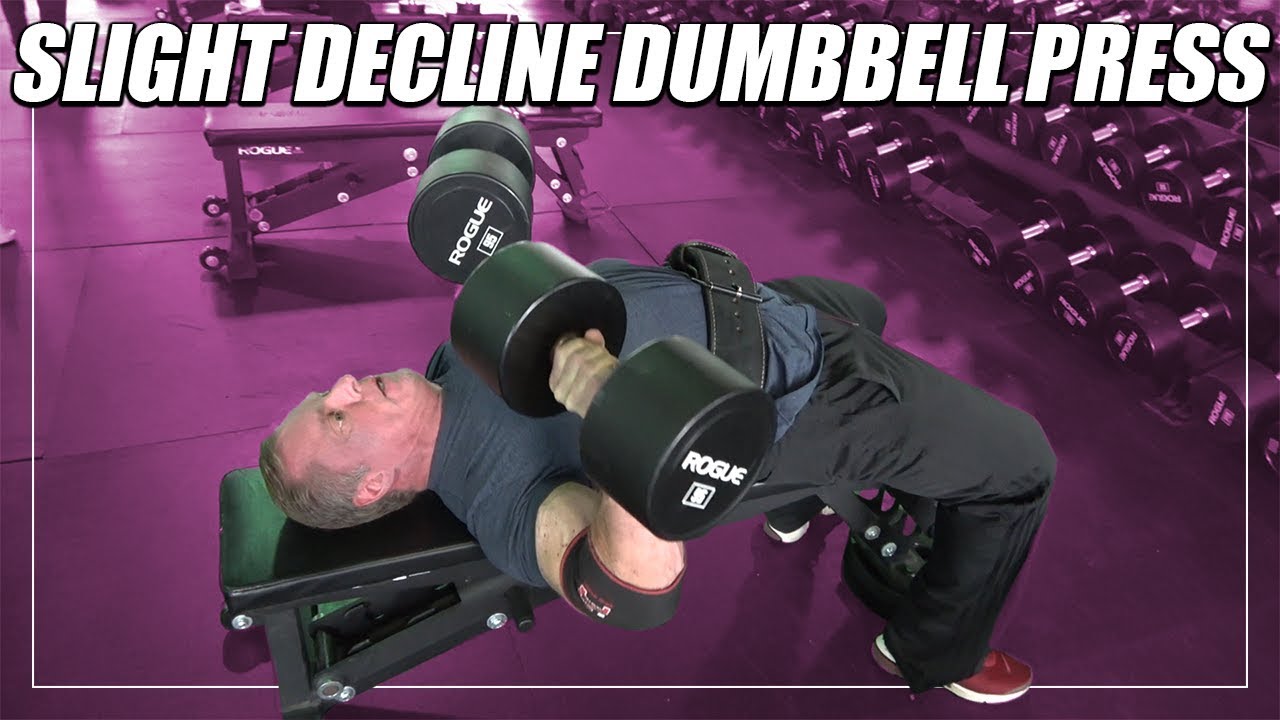
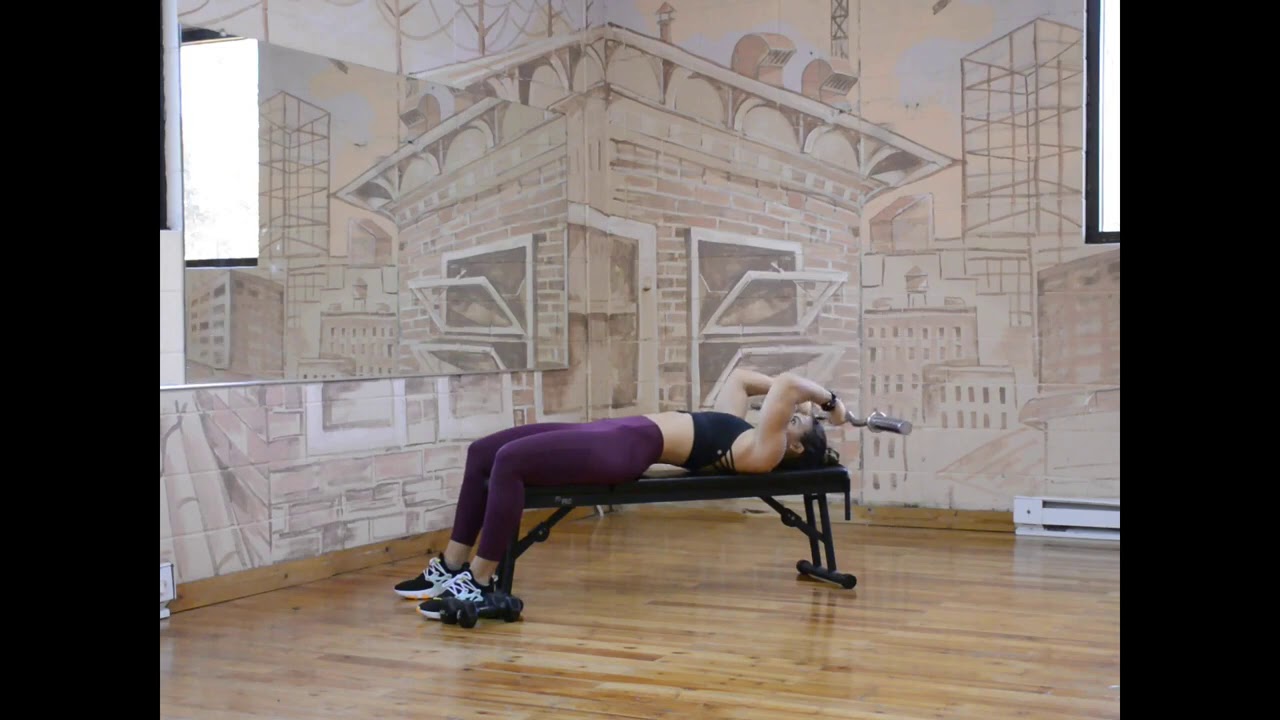
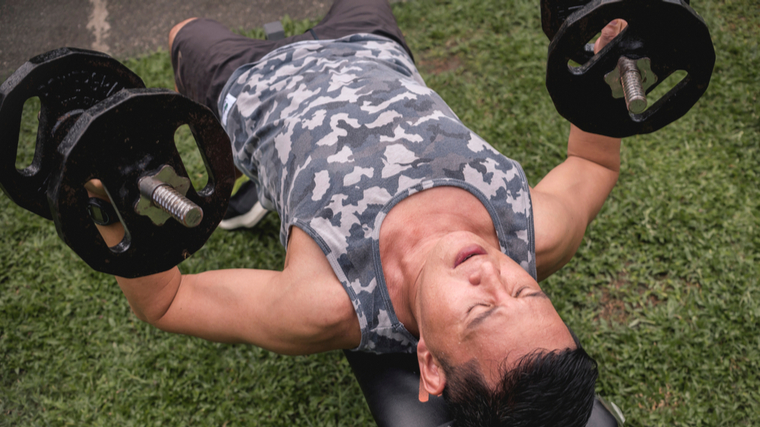
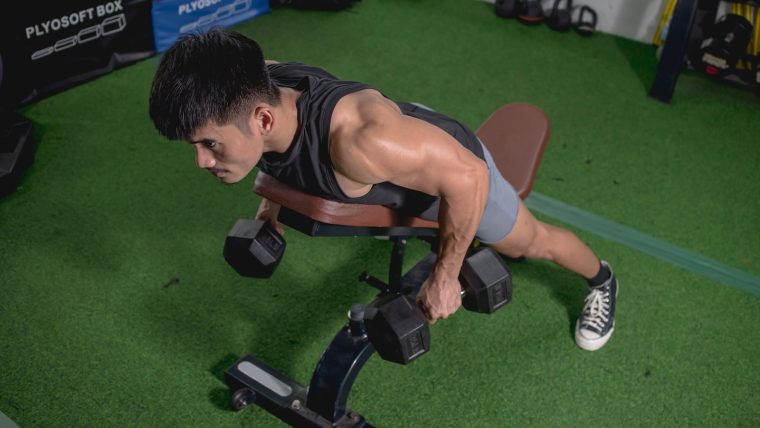
How to Do the Chest-Supported Row

YouTube Video

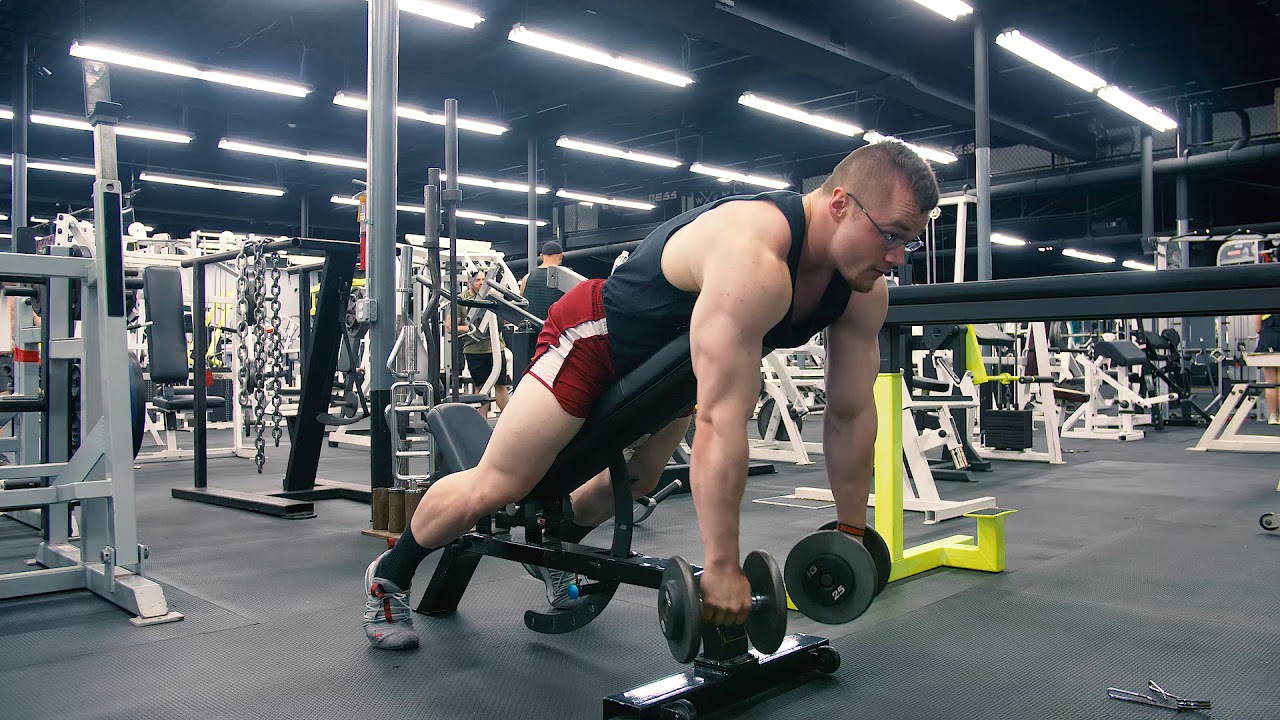
To perform a chest-supported row, you will need a pair of dumbbells and an adjustable weight bench. Changing the incline level (as well as your grip) can alter how you attack your back workout by stimulating specific muscles. 

Here’s a step-by-step guide to executing the chest-supported row with the correct technique.

  1. Set your bench to a 45-degree angle. Grab your dumbbells and lie chest-down on the bench with the weights by your sides and your palms facing inward. 
  2. Press your feet into the floor, engage your glutes, and brace your core to create tension throughout your torso.
  3. While maintaining a neutral spine and head angle, retract your shoulder blades and pull your elbows toward the ceiling until they form a 90-degree angle.
  4. Squeeze your upper-back muscles at the top of the movement for one to two seconds, then carefully lower the weights back to the starting position. Keep consistent tension in your abs to protect your lower back as you complete your set.

[Related: How to Do the Pendlay Row]

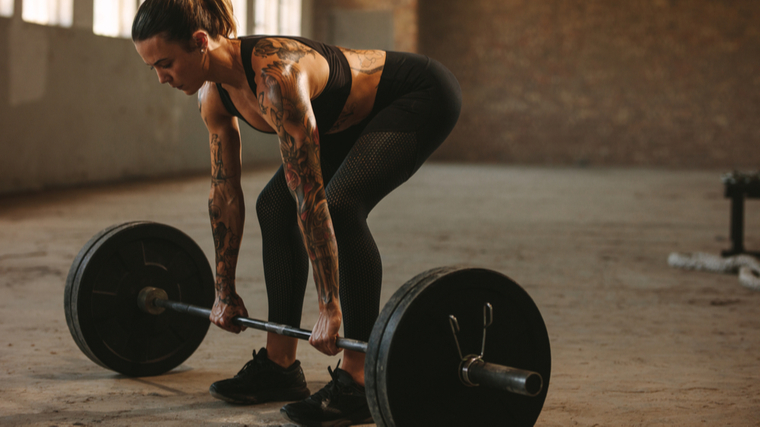
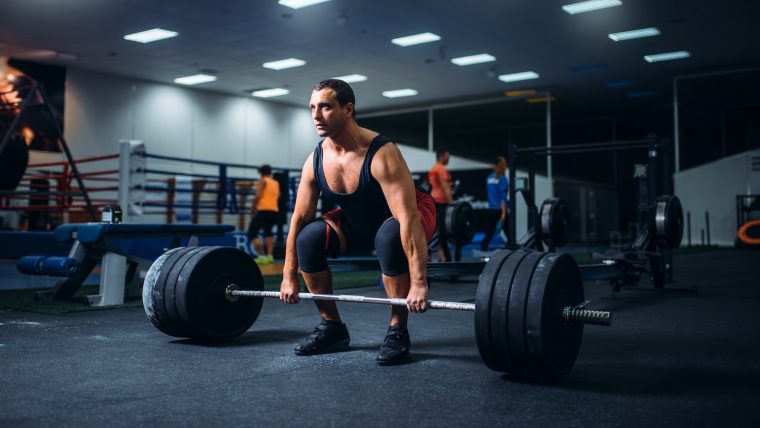
How to Do the Bent-Over Row

YouTube Video

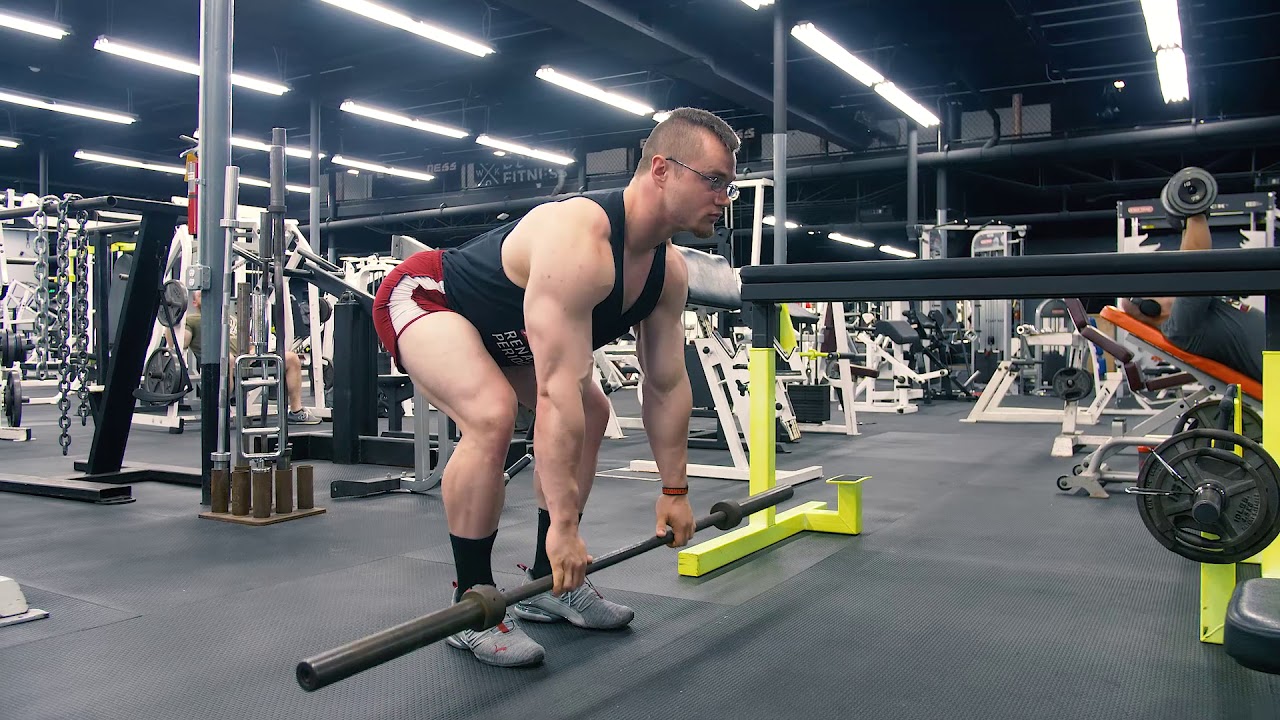
The bent-over row requires just two pieces of equipment: a barbell and weight plates. If possible, use high-quality bumper plates so you don’t have to worry about noise issues. While you can also perform this exercise with a pair of dumbbells, this breakdown covers how to do the traditional barbell bent-over row. 

Here’s a step-by-step guide that will help you master the nuances of this compound movement:

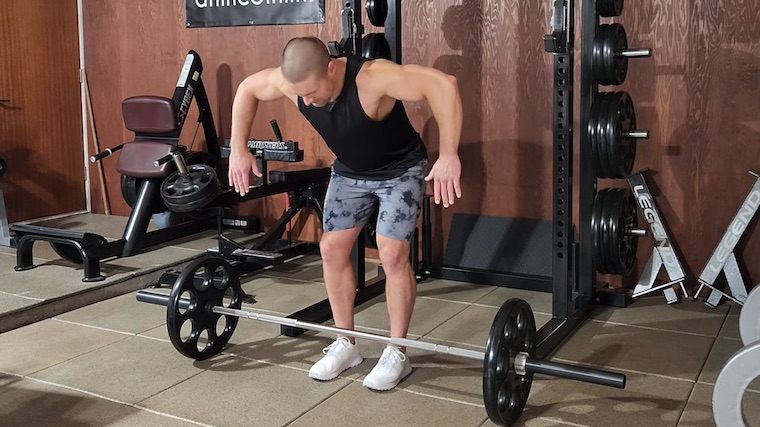
  1. Stand behind a barbell with your feet shoulder-width apart. 
  2. Hinge at the hips by keeping your back straight and bending your knees slightly.
  3. Grab the bar with your hands slightly wider than your shoulders using a pronated (palms-down) grip. 
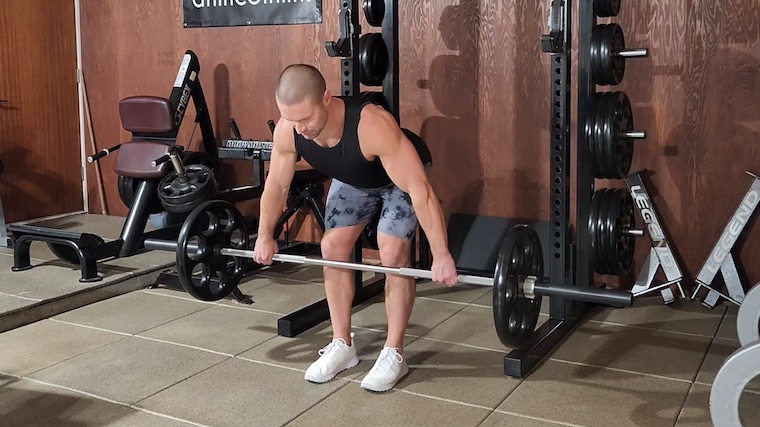
  4. Engage your glutes and core, deadlift the bar off the floor, and lean forward to form a 45-degree angle.
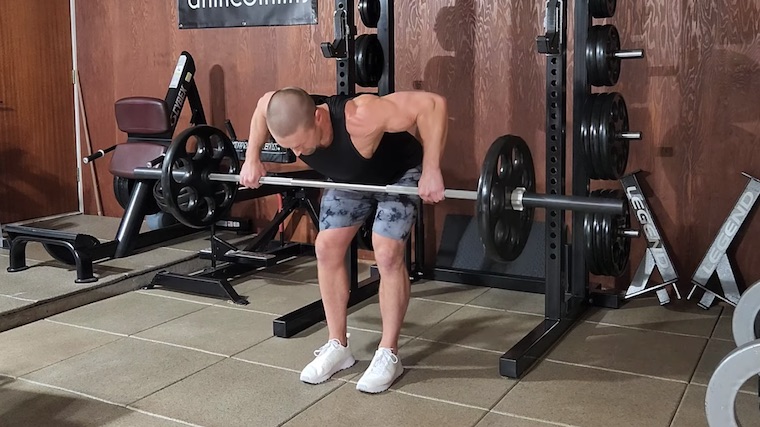
  5. While keeping a neutral spine, pull your elbows back until the bar touches your midsection. 
  6. Hold the contraction for one second before slowly lowering the barbell until your arms are extended and the weight plates are just above the ground. 

Benefits of the Chest-Supported Row

The chest-supported row offers plenty of intriguing potential for lifters looking to build a strong, defined back. Let’s examine a few key benefits of performing this exercise.

Added Stability

The biggest benefit of the chest-supported row is undoubtedly having the ability to train your back with the built-in stability of a bench. This is great for both beginners and advanced lifters who want to reach their strength and hypertrophy goals without having to learn a complicated technique or worry nearly as much about core or lower-back limitations.

Takes Advantage of Unilateral Training

As opposed to bilateral exercises like the barbell bench press or the back squat, the chest-supported row lets you attack each side independently. Unilateral training is beneficial in that it allows you to address any imbalances and removes the possibility of one side shouldering more of the load. Supersetting the chest-supported row with another unilateral exercise like single-arm lat pulldowns can take your back workout to another level. 

Easier Recovery

The less-taxing nature of the chest-supported row makes it easier to recover during and after your workout. This movement doesn’t demand nearly the same intensity or overall muscle recruitment as a compound exercise like the bent-over row.

Man sitting on a weight bench with a pair of dumbbells near his feet.
Credit: Reshetnikov_art / Shutterstock

You should be able to catch your breath, reset, and be ready to go for at least a few sets before moving on to the next exercise.

Cons of the Chest-Supported Row

Although added stability and easier recovery stand out as positives, there are some drawbacks to the chest-supported row, including:

Requires More Equipment

Unfortunately, if you don’t have an adjustable weight bench, you won’t be able to perform the chest-supported row. Plus, you need a pair of dumbbells (or kettlebells) that provide enough of a challenge. Without the requisite tools, you will have to turn to other back exercises that don’t require a bench (such as the inverted row) or can be performed without equipment (like Superman holds). 

Less Overall Muscle Engagement

There’s a tradeoff for more stability: less muscle engagement. Because you’re seated with your chest against the bench, your core and legs get a bit of a break. So even though the chest-supported row works well for hitting your lats, rhomboids, traps, and biceps, it falls short of the bent-over row in how many muscle groups it recruits.

Can’t Go as Heavy

The awkward body position of the chest-supported row can make it more difficult to jump up in weight. Working at the standard 45-degree angle gives you enough range of motion to pull and squeeze, but only to a certain degree. Even if you’re an experienced lifter with a solid strength base, you’ll quickly realize it can be difficult to control heavier dumbbells and squeeze out clean reps. 

Benefits of the Bent-Over Row

Whether you’re a bodybuilder, strength athlete, or general gym goer, the bent-over row presents a wealth of potential muscle- and strength-building benefits. 

Carryover to Other Pulling Exercises

Whether it’s pull-ups, deadlifts, or the cable seated row, you can put yourself in a better position to perform well at other pulling exercises via the bent-over row. Building strength and endurance in your lats and traps will carry over to muscle-building exercises like dumbbell pullovers, lat pulldowns, and face pulls.

Man performing cable lat pulldowns.
Credit: Nikolas_jkd / Shutterstock

Plus, training your glutes, hamstrings, and core to handle a rowing motion from a bent-over position will give you a stronger trunk to handle whatever deadlift variation you prefer. 

Compound Movement

According to a 2017 study on resistance training modalities, multi-joint exercises are more effective for improving muscle strength and maximal oxygen consumption than single-joint ones. (3) That makes something like the barbell bent-over row a great bang-for-your-buck choice for your training protocol. Not only does it build upper-body strength, but it also stimulates your abdominal and leg muscles from start to finish. 

Improved Posture

A sedentary lifestyle can lead to slouched shoulders, weak spinal erectors, and disengaged glutes. The bent-over row can help counteract that by allowing you to strengthen your posterior chain. As you progress, you shouldn’t be surprised to see an improvement in your posture and a reduction in lower back issues.

[Related: 6 Deadlift Benefits Everyone Should Know About]

Cons of the Bent-Over Row

Is the bent-over row the right pull-day movement for you? Before you pencil it into your program, here are some cons to consider. 

Injury Risk

Although it can be great for developing explosive power and upper-back strength, the bent-over row can be dangerous if done incorrectly. Maintaining proper form can be a major challenge, as you must cohesively coordinate multiple muscle groups and joint complexes to allow you to hold a loaded hip-hinge position for the duration of your set.

Just a slight slippage in form — such as rounding your lower back or slightly shifting your hips to one side — can lead to a strained muscle, ligament, or more severe injury. Whether you repeatedly perform the bent-over row incorrectly or you just lose focus for one rep, you run the risk of experiencing a setback that could derail your training plans. 

Grip Strength Limitations

If you’re taking the glass-half-empty view, one of the drawbacks to the bent-over row is that your grip strength is a limiting factor. If your forearms and hands can’t handle holding, lifting, and lowering a loaded barbell repeatedly, you will struggle to execute the movement effectively or efficiently. This can also be the case with the chest-supported row if you use heavy dumbbells.

Close-up shot of a person's hand grabbing a barbell.
Credit: Robert Avgustin / Shutterstock

You can overcome this problem by consistently working on grip strength exercises or using lifting straps for support. While the former will help you get better at bent-over rows and other lifts that require good grip strength, the latter will let you work with heavier loads by keeping your hands securely fastened to the barbell. 

Demanding on Lower Back and Core

Compound exercises like the bent-over row essentially put your entire body to the test. While there are certainly benefits to recruiting multiple muscle groups in one movement, your training session can quickly go south if you don’t have a well-developed core. 

Hinging at the hips and remaining in that near-horizontal position while pulling the weight vertically places significant stress on your lower back and abdominal muscles. Once fatigue sets in, you may struggle to keep the correct form or have to put down the barbell entirely. 

Using Momentum

While the chest-supported row forces you to use proper form by keeping your chest against the bench, the freestanding position of the bent-over row opens the door to using momentum to lift the weight. If you go too heavy, get fatigued, or lose focus, it’s easy to cheat the ensuing reps by swinging or jerking the barbell rather than maintaining tension and executing strict, controlled reps. Not only will this limit the effectiveness of the exercise, but it could also lead to an injury. 

Row Till You Grow

The battle between the chest-supported row vs. the bent-over row doesn’t necessarily have a winner or a loser. Both exercises offer unique benefits that can assist with sculpting the back of your dreams. At the same time, there are notable differences between the two rowing variations that can make one or the other a more logical choice based on your individual goals. 

Ultimately, your best bet is to include both the chest-supported and bent-over versions in your workout plan. That way you can pack serious size on your frame, develop better posterior chain and grip strength, and reap all the rewards of rowing — one pull at a time.

FAQs

Is a bent-over row better than a chest-supported row?

Because each variation brings unique benefits, it’s tough to say one is inherently better. However, if you’re focused on gaining the most size and strength, the bent-over row is the superior choice. That said, the chest-supported row is still useful for training your upper- and mid-back and is generally easier to perform, making it a solid option for beginners. 

Is the chest-supported row the same as the incline row?

Despite their name differences, both describe the same exercise. Whether you call it a chest-supported row or an incline row, you will need an adjustable weight bench and a pair of dumbbells to support your back-building efforts. 

What is the best angle for bent-over rows?

The ideal body position for a bent-over row calls for a forward lean of about 45 degrees. Although you can go a little further (around 60 degrees is my preference), hinging your hips to 90 degrees will put more stress on your posterior chain and may make the exercise more difficult to perform repeatedly.


References

  1. Tataryn, N., Simas, V., Catterall, T., Furness, J., & L. Keogh, J. W. (2021). Posterior-Chain Resistance Training Compared to General Exercise and Walking Programmes for the Treatment of Chronic Low Back Pain in the General Population: A Systematic Review and Meta-Analysis. Sports Medicine – Open, 7. https://doi.org/10.1186/s40798-021-00306-w
  2. Fenwick CM, Brown SH, McGill SM. Comparison of different rowing exercises: trunk muscle activation and lumbar spine motion, load, and stiffness. J Strength Cond Res. 2009 Mar;23(2):350-8. doi: 10.1519/JSC.0b013e3181942019. PMID: 19197209.
  3. Paoli, A., Gentil, P., Moro, T., Marcolin, G., & Bianco, A. (2017). Resistance Training with Single vs. Multi-joint Exercises at Equal Total Load Volume: Effects on Body Composition, Cardiorespiratory Fitness, and Muscle Strength. Frontiers in Physiology, 8. https://doi.org/10.3389/fphys.2017.01105

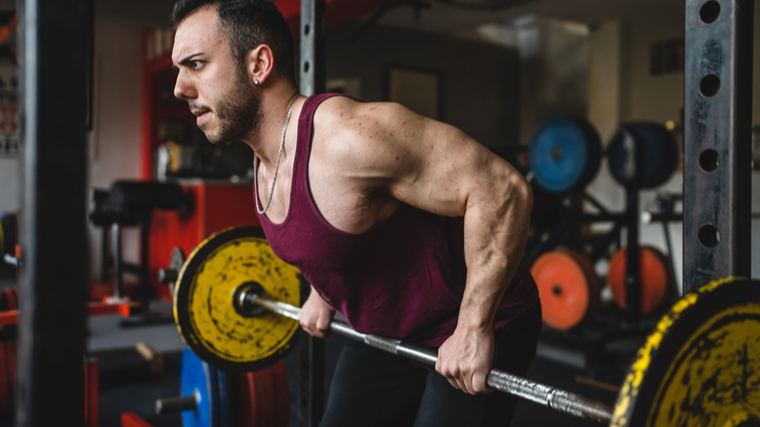
Featured Image: Jasminko Ibrakovic / Shutterstock

The post Chest-Supported Row vs. Bent-Over Row: Which Variation is Best for Building a Bigger Back? appeared first on Breaking Muscle.

Source

October 20, 2023

Walking for Weight Loss: A Guide to Drop the Pounds

Filed under: Fitness,Training — Tags: , — admin @ 5:21 am

Don’t be mistaken — it’s essential that you push yourself in the gym. However, just because high-intensity interval training (HIIT) has become incredibly popular doesn’t mean it’s the only option for people who want to burn fat and lose weight.

In fact, you can trim inches off your waistline without coming close to hitting your VO2 max or feeling like you’re about to pass out on the rowing machine. While following a strength training program will allow you to build muscle, incorporating a walking protocol into your workout routine can help get rid of some extra pounds.

People in gym on treadmills
Credit: PR Image Factory / Shutterstock

But just how many steps should you aim for if you want to see the number on the scale drop? This comprehensive guide covers everything from the benefits of walking to general weight loss tips to support your efforts to a step-by-step plan you can follow so you can reap the physical and mental benefits of the simplest form of cardio.

Walking for Weight Loss

Benefits of Walking 

Although walking isn’t necessarily the most efficient form of exercise for hitting a weight loss goal, it can certainly be effective. Because you need to be in a calorie deficit to lose body fat, walking is one way you can ensure you’re burning enough calories to support your efforts to slim down. (1)

Of course, there’s a difference between going for a casual stroll around the neighborhood and moving at a brisk pace at an incline on a treadmill. However, the point is that you can put yourself in a better position to hit your target body weight by engaging in an activity that requires zero home gym equipment or technical expertise. 

Choosing walking over rowing intervals or a weight training session may seem sacrilegious in some circles, but there are actually several reasons you may want to go in this direction (at least some of the time). Let’s take a closer look at a few of the advantages going for a walk offers.

Lower Chance of Injury

As rewarding as it may be to hit a new max on the back squat or complete a WOD in record time, high-intensity activities like weightlifting and CrossFit undoubtedly come with a level of risk.

Those forms of exercise can place tremendous stress on your tendons, ligaments, joints, and other structures. And if you don’t utilize proper form, you can quickly go from feeling ready to crush your set to suffering a setback that could keep you sidelined for a while. On the other hand, walking doesn’t come with nearly the same risk of injury.

Two people walking outdoors in park
Credit: grandbrothers / Shutterstock

Sure, you need to be careful about selecting a properly sized pair of shoes that provides sufficient arch support. However, you don’t have to worry about getting hurt from a complicated movement or high-intensity lift that could put you in a compromising position. 

Allows You to Train for Longer Periods of Time

The short-but-sweet style of high-intensity training makes it an optimal choice for those in a time crunch. However, because these type of workouts are so anaerobically demanding, they typically only last between 20-30 minutes. 

On the other hand, you can perform steady-state cardio for significantly longer and still obtain results. While it would be extremely challenging to sustain a high level of performance during a 60-minute HIIT session, you can make it through a one-hour walk without dragging at the end.  

Ideal for Active Recovery  

You won’t be able to achieve your weight loss goal if you don’t invest time in active recovery. After all, incorporating rest days into your routine is essential to maintaining balance and providing your muscles and joints with some short-term relief. 

Walking serves a dual purpose in that it can be utilized as a form of active recovery and calorie burning. Completing a 45-minute walk on your day off from lifting will not only promote blood flow, but also provide a fat-burning and muscle-sparing stimulus. (2)

10,000 Steps Per Day: Myth or Fact?

If you have a smartphone, chances are you’ve received at least a few notifications urging you to hit your step goal before it’s too late. For some people, satisfying that 10,000-step requirement has become a staple part of their daily routine. For others, though, hitting that number represents a daunting task that seems excessive, and perhaps unnecessary. 

So, who’s correct? 

Ironically, the entire premise of the 10,000 steps per day idea originated in 1965 when a Japanese company developed a pedometer called the “Manpo-kei,” which translates to “10,000 steps meter.” Rooted in marketing rather than science, the idea clearly caught on big in the fitness community and has only become more prevalent as step-tracking technology in phones and watches has improved.

Two people walking outside while talking
Credit: PeopleImages.com – Yuri A / Shutterstock

While taking more steps per day has been associated with lower mortality rates, there isn’t any direct evidence to support that 10,000-step mark. (3) Moreover, that goal may not be sustainable for certain groups, including the elderly and those with chronic health conditions. (4)

That being said, movement is still a major component of an effective weight-loss plan. Research shows that 225-420 minutes per week of physical activity promotes clinically significant weight loss. (5) Incorporating walking into your exercise mix will help you reach that target, and shooting for somewhere in the range of 7,500-9,000 is likely attainable for most individuals.

Overall, there’s nothing wrong with setting the bar high, but don’t feel discouraged if you fall a little shy of 10,000 steps. 

Weight Loss Tips

Losing weight is both an art and a science. On one hand, there’s no one-size-fits-all approach that’s guaranteed to work for everyone. On the other hand, adhering to scientific principles like eating in a caloric deficit, consuming adequate protein, and exercising regularly will put you on the right path. 

So, if your primary goal is to lose weight, here are some strategies you can start implementing immediately.

Meal Prep

Failing to prepare is preparing to fail. No phrase encapsulates losing weight quite like that one — and for good reason. Taking the guesswork out of “what’s for dinner?” will undoubtedly make life easier, especially if you have a hectic schedule. Meal prepping is easily one of the most effective ways to support your weight-loss efforts.

Depending on your caloric and macronutrient needs, you can put together a menu of breakfast, lunch, and dinner options for the week, purchase the necessary ingredients, and get your cooking done all at once so you can devote the rest of your energy to training and taking care of other responsibilities.

person taking packed lunch from refrigerator
Credit: Monkey Business Images / Shutterstock

However, taking the day-by-day approach can cause you to stray off your dietary plan, make poor food choices, and slow down your progress.

Avoid Liquid Calories

A common mistake many people make is consuming too many calories from liquid sources. That includes drinking sugar-laden sodas and juices, or even adding unnecessary calories to your morning coffee in the form of sweeteners, syrups, and other ingredients that aren’t friendly for your waistline.

To stay on track to hit your weight-loss goal, avoid “drinking” your calories, and instead stick to calorie-free beverages like water, sparkling water, black coffee, or green tea.

That will give you more room in your caloric budget for far more satiating and nutritious options like steak, chicken, eggs, and other protein sources. 

Keep a Food Journal

Holding yourself accountable is arguably the biggest key to sustained success in any endeavor. That’s no different when it comes to weight loss, where you will be rewarded for maintaining a consistent approach to your nutrition and training. 

Especially when you are starting out in your weight loss plan, be diligent about documenting exactly what’s going into your body by keeping a food journal where you log everything you eat in a day. Try doing this for at least a week, so you can get a complete picture of not just what you are eating but how much you consume on a daily basis. 

Lift Weights (Consistently) 

Don’t fall into the trap of believing hours on the StairMaster or treadmill is the best way to lose weight. Actually, you will achieve the best results by combining cardio with strength training. That doesn’t mean you have to become a powerlifter or train like a bodybuilder, but it does mean you should incorporate weightlifting into your workout routine at least two to three days per week.

Long-haired person in gym doing close-grip pulldown
Credit: pnarongkul / Shutterstock

You can start with a classic push/pull/legs workout split that targets every major muscle group over the course of three training sessions. Or, you can go with an upper/lower approach where you alternate between training your quads, glutes, hamstrings, and calves on one day and your chest, back, biceps, and triceps on another day. 

Sample Walking Plan 

If you’re ready to stretch your legs, break a sweat, and burn some calories, this sample walking plan should serve as an excellent starting point. Keep in mind that you don’t necessarily have to stick to the treadmill to get your steps in, either. Going outside to soak up some vitamin D and breathe fresh air can make walking more enjoyable and beneficial from a health perspective. 

With weight loss as the primary goal, here’s a schedule you can follow that’ll allow you to make serious strides in your journey.

  • Day 1: Walk for 30 minutes at a brisk pace on a flat surface.
  • Day 2: Set a treadmill to an incline level between 3 and 5 percent and walk at a brisk pace for 15 minutes. Increase the incline level by another 2 to 3 percent and walk at a slightly slower pace for another 15 minutes.
  • Day 3: Rest
  • Day 4: Start your day with a casual 20-minute walk on an empty stomach. End your day with another 20-minute walk after you’ve consumed your final meal.
  • Day 5: Walk for 40 minutes at a brisk pace on a flat surface — level ground outdoors or a zero-incline treadmill.
  • Day 6: Set a treadmill to an incline level between 5 and 7 percent and walk at a brisk pace for 10 minutes. Increase the incline level by another 2 to 3 percent and walk at a slightly slower pace for 10 minutes. Then, lower the treadmill to zero or one incline and finish with 10 minutes of a brisk walk.
  • Day 7: Rest

FAQs

Can I overtrain walking?

Like any form of exercise, it’s possible to overtrain with walking. Be mindful of your posture and your choice of footwear, as both are necessary for avoiding injuries. Also be aware of any joint pain or soreness, which could be indications of overtraining.
That said, walking can be a safe, relatively low-impact physical activity that you can (and probably should) do on a daily basis.

Should I walk on an empty stomach? 

Although plenty of people swear by fasted cardio, research indicates that partaking in aerobic exercise with or without food does not have a significant impact on body composition outcomes. (6)
Whether you walk on an empty stomach or eat something light beforehand, it simply comes down to personal preference. 

Should I stretch before or after walking? 

Static stretches are best performed post-activity. However, you can engage in a dynamic warm-up routine before going for a walk to increase your core body temperature, promote blood flow, and prime your muscles and ligaments for movement.  

How often should I replace my walking shoes? 

According to the American Academy of Podiatric Sports Medicine, you should replace your walking or running shoes every 300-500 miles. (7) At a rate of 30 minutes a day, five days a week, that equates to a new pair of shoes every six to 12 months. 

What can I do to prevent shin splints? 

Shin splints are one of the most common overuse injuries, especially in runners and athletes. To help prevent that painful inflammation around your tibia and shins, make sure to wear supportive shoes, incorporate rest days when needed, and slowly increase your activity level over time.

References 

  1. Strasser, B., Spreitzer, A., & Haber, P. (2007). Fat loss depends on energy deficit only, independently of the method for weight loss. Annals of nutrition & metabolism51(5), 428–432. https://doi.org/10.1159/000111162
  2. Chomentowski, P. J., Dubé, J. J., Amati, F., Stefanović-Račić, M., Zhu, S., Toledo, F. G., & Goodpaster, B. H. (2009). Moderate exercise attenuates the loss of skeletal muscle mass that occurs with intentional caloric Restriction-Induced weight loss in older, overweight to obese adults. The Journals of Gerontology, 64A(5), 575–580. https://doi.org/10.1093/gerona/glp007
  3. Lee, I., Shiroma, E. J., Kamada, M., Bassett, D. R., Matthews, C. E., & Buring, J. E. (2019). Association of step volume and intensity with All-Cause mortality in older women. JAMA Internal Medicine, 179(8), 1105. https://doi.org/10.1001/jamainternmed.2019.0899
  4. Tudor‐Locke, C., & Bassett, D. R. (2004). How many Steps/Day are enough? Sports Medicine, 34(1), 1–8. https://doi.org/10.2165/00007256-200434010-00001
  5. Swift, D. L., Johannsen, N. M., Lavie, C. J., Earnest, C. P., & Church, T. S. (2014). The role of exercise and physical activity in weight loss and maintenance. Progress in Cardiovascular Diseases, 56(4), 441–447. https://doi.org/10.1016/j.pcad.2013.09.012
  6. Schöenfeld, B. J., Aragon, A. A., Wilborn, C., Krieger, J., & Sönmez, G. T. (2014). Body composition changes associated with fasted versus non-fasted aerobic exercise. Journal of the International Society of Sports Nutrition, 11(1). https://doi.org/10.1186/s12970-014-0054-7
  7. How Do I Know When It Is Time To Replace My Athletic Shoes. (n.d.). https://www.aapsm.org/replace_shoes.html

Featured Image: Day of Victory Studio / Shutterstock

The post Walking for Weight Loss: A Guide to Drop the Pounds appeared first on Breaking Muscle.

Source

October 15, 2023

A Chest and Triceps Workout for Classic Size and Strength

Filed under: Fitness,Training — Tags: , — admin @ 10:22 pm

Among experienced lifters, heading into the gym for a focused chest and triceps workout stands as a testament to serious commitment. From powerlifters aiming for their next bench press PR to bodybuilders striving for a near-perfect physique, these sessions are fundamental in the lifting world. It’s not just about the aesthetics; it’s about strength, resilience, and dedication.

Training your chest and triceps together offers a balanced approach, maximizing both push mechanics and muscle engagement. Whether you’re a seasoned athlete or someone just starting out, there’s always room to refine technique, push boundaries, and see genuine progress.

Person in gym doing chest exercise on machine
Credit: Prostock-studio / Shutterstock

This workout uses an approach inspired by the “Mountain Dog” — legendary bodybuilding coach John Meadows. This method consists in a specific sequencing of exercises thought out to maximize the mind-muscle connection, build the muscular pump, and preserve longevity in the gym. Time to dive in and elevate your chest and triceps game to the next level.

Chest and Triceps Workout

How to Warm-up for a Better Chest and Triceps Workout

Warming up before diving into an intense chest and triceps workout isn’t just a suggestion — it’s an essential step. A proper warm-up primes the body, gradually increasing the heart rate, enhancing blood flow to the muscles, and lubricating the joints. This ensures not only optimal muscle engagement and flexibility but also significantly reduces the risk of injuries. (1)

This is especially true for sessions involving the shoulder joint (chest, shoulders, or “pushing” workouts) as it is the most flexible, but also relatively fragile, in the body. Without this preparatory phase, muscles remain stiff, making them more susceptible to strains or pulls, and joints can be caught off guard, leading to unnecessary stress or even long-term damage.

Warming up has mental benefits, as well. It provides a transition period, allowing you to mentally prepare and focus on the upcoming workout. This mental shift from rest to activity is crucial for optimal performance, ensuring that both the body and mind are in sync. Thus, skipping the warm-up not only jeopardizes physical health but also diminishes the overall quality and effectiveness of the workout. (2)

YouTube Video
  1. Band Over-and-Back: Hold a light resistance band at shoulder-height with an overhand grip and your elbows straight. Slightly hinge forward so that you don’t “cheat” the exercise by arching your back. Remain in that position, squeeze your shoulder blades together, and extend your arms out to the sides to provide tension. Keep your arms straight the whole time and move the band from in front of you, up and overhead, and behind your back as far as comfort and mobility allow. Then bring the band back to the initial position. Perform 10 repetitions before moving on the next exercise.
  2. Band Pull-Apart: Stand fully upright and begin with your hands together in front of you at chest-height. Stretch the band by pulling the band apart and squeezing your shoulder blades together until your arms are extended to form a T-shape out to the sides. Repeat for 12 to 15 repetitions and move on to the last exercise.
  3. Band Triceps Extension: Loop the band around a stable overhead support like a power rack so that it is above head-height. Grab the band with both hands, brace your core, and bend slightly forward. While keeping your elbows glued to your ribs, extend your forearms down, then flex your upper arms to stretch your triceps before extending them again. Repeat for 30 to 50 reps. Repeat this entire circuit one or two more times for a thorough warm-up.

The Tried and True Chest and Triceps Workout

This workout consists of six exercises — four chest exercises and two triceps exercises —  organized in a specific manner to reap the most benefits. You can perform it once or twice per week, depending on whether you find these body parts to be a “weak point” or not.

The chest and triceps workout can be include in either a traditional body part-focused workout split or as a “pushing workout” in a push/pull/leg plan, with a second push day focusing on the shoulders instead of the chest.

Chest and Triceps Workout Summary

  • Slight Decline Dumbbell Bench Press — 4 x 8
  • Slight Incline Barbell Bench Press — 3 x 6-8
  • Machine Chest Press — 1 x 15 with triple rest-pause
  • Pec-Deck — 2 x 12-15 with iso-holds
  • Rope Pushdown — 2 x 12-15
  • Lying Triceps Extension — 3 x 8-12

Slight Decline Dumbbell Bench Press

First, we launch with the decline dumbbell bench press. It’s all about activation — think of the exercise as coffee for your chest. Discard the typical “barbell exercise first” approach many lifters use and, instead, take a more for a joint-friendly approach. The decline position, as well as using dumbbells, will help you feel and activate your chest muscles better. (3)(4) This way, you’ll reduce the risk of injury and you’ll be able to recruit your chest better in the next exercises.

YouTube Video

The devil’s in the detail and, for a better chest recruitment and comfort, we want to use slight angles or we risk shifting the load away from the pecs and onto the shoulders or triceps. So don’t get crazy with the decline and use a roughly 10-degree angle — or place a single 25 or 45-pound weight plate under the foot-end of a flat bench. Always perform a few warm-up sets beforehand, as it is the first exercise of the session and your shoulder joints still need gradual preparation. 

  • How to do it: Lay down on the decline bench with a pair of dumbbells in your hands. Depending on your individual set-up, secure your feet under the pad, on a step, or on the plate you put under the bench for elevation. Slightly arch your upper back, squeeze your shoulder blades, and press the weight up while exhaling, making sure you keep your elbows and wrists aligned without flaring them or tilting them backward. Lower the weight with your palms facing forward, using control until the sides of the dumbbells are almost touching your chest. Press back to the starting position.
  • Sets and Reps: 4 x 8
  • Rest Time: Rest 90 to 120 seconds between sets.

Benefits of the Slight Decline Dumbbell Bench Press

  • The dumbbells allow for a more natural and joint-friendly motion, making it an ideal exercise to start a session.
  • The slight decline increases the recruitment of the chest compared to the triceps and shoulders, improving your mind-muscle connection and muscle growth.
  • The slight decline focuses on the sternal portion of the pectoralis (lower chest) which can be a benefit if your physique is lagging in this area.

Slight Incline Barbell Bench Press

Next up is the incline barbell bench press for those craving power and oomph. After the “activation” exercise, it’s time for the “explosive” phase with a big barbell movement. This will let you use a ton of weight to promote hypertrophy through mechanical tension. It’s still early in the session, so you should have a good deal of strength left.

This is called the “explosive” exercise because we want to move the barbell as fast as possible during the concentric phase (when you push the weight up) in order to improve strength and recruit as many type II fibers as possible — these are the biggest muscle fibers, the ones we’re after to optimize growth.

YouTube Video

The slight incline bench press is an excellent pièce de résistance, as the incline will focus on the upper chest, a body part many lifters are deficient in. Once again, aim for a slight angle instead of a steep incline. Something like 15 to 30-degrees will better recruit the chest instead of the anterior deltoids. (5) Aim for heavy sets of six the first week, then try to do 7, then 8 reps with the same weight the following weeks before increasing it.

  • How to do it: Set up an adjustable bench to a 15 to 30-degree angle and lay on it. Squeeze your shoulder blades together so they lay flat on the bench. Unrack the barbell, using a grip around 1.5-times your shoulder-width. Squeeze the bar hard and lower it with control toward your clavicles or upper chest. Stop a couple inches before touching it, if your shoulders are problematic, and press the weight up as hard and fast as you can while exhaling.
  • Sets and Reps: 3 x 6-8
  • Rest Time: Rest two to three minutes between sets.

Benefits of the Slight Incline Barbell Bench Press

  • An incline angle, even a slight one, activates the clavicular head (upper part) of the pectoralis major more than a flat bench. This makes it particularly useful for those looking to enhance the definition and size of their upper chest.
  • The slight incline position may reduce the amount of stress on the anterior deltoid and the rotator cuff, as compared to a flat bench press. This potentially minimizes the risk of shoulder injuries, especially for those with pre-existing shoulder conditions.
  • The slight incline angle might have more carryover to everyday activities and sports that require pushing or throwing at an upward angle. This functional strength is useful not just for athletes but also in daily life scenarios.

Machine Chest Press

Now we use a chest press machine to chase that coveted pump. Ever been so pumped you felt like you could bounce coins off your chest? If not, you soon might be. We’re aiming for that in the “pump” phase by driving a lot of nutrients, metabolites, and blood into the muscles to stimulate sarcoplasmic hypertrophy. This can increase the volume of the muscle cells and potentially trigger even more growth. For a great pump effect, you want an exercise which will be relatively safe to go to failure so you can really push yourself, while also targeting your chest as much as possible.

YouTube Video

The machine chest press is a perfect fit as it develops the chest as a whole, rounding out the previous angle-focused pummeling. A quality machine doesn’t necessitate balance or high-level technique, so the movement is more secure. End with the high-intensity rest-pause technique to push yourself out of your comfort zone and stimulate maximum muscle growth. (6) Aim for a very hard set of 15 repetitions, then wait for 20 seconds, and do as many reps as you can with the same weight. Then do it again twice! It will mostly likely be only a few reps the last time.

  • How to do it: Find your favorite chest press machine and get in securely. Set the bench height so your hands are around mid-chest level in the starting position. Load the machine, puff your chest and squeeze your shoulder blades, and extend your arms by pushing through the handles until they are straight. Reverse the motion with control, while still remaining braced.
  • Sets and Reps: 1 x 15 with triple rest-pause — perform 15 reps to muscular failure, rest briefly, reduce the weight and perform more reps to failure. Rest briefly, reduce the weight and continue. Rest briefly again, and repeat one final time.
  • Rest Time: Rest 20 to 30 seconds for each rest-pause.

Benefits of the Machine Chest Press

  • One of the main advantages of using machines is safety. For those lifting heavy or working up to (or beyond) muscle fatigue, machines reduce the risk of dropping weights or failing mid-rep.
  • The machine chest press can provide targeted stimulation without the interference of stabilizing muscles, allowing you to fully feel and focus on your chest.
  • The rest-pause method effectively increases time under tension and metabolic stress, both of which are critical factors for muscle growth.

Pec-Deck Machine

Rounding off the chest, the pec-deck (or machine chest flye) offers the stretch you didn’t know you needed but won’t forget anytime soon. Now that our muscles are really warmed up, we can safely use exercises emphasizing the stretch without injury. The stretch is not only great to improve mobility, but also is linked to more muscle growth. (7)

YouTube Video

You could use cable crossovers instead, but the pec-deck machine has the benefit of nullifying the balance and bracing needed so that you can only focus on your muscles. It’s a superb exercise to isolate your chest and deep dive into the stretch with a minimal set-up time and effort. Do hard sets of 15 repetitions and, after the final rep, pause in the stretch position for 15 seconds to keep stimulating the muscle beyond failure.

  • How to do it: Sit on the machine and set the seat height so that your arms are at shoulder-level or slightly lower. Squeeze your shoulder blades together and brace your core. Bring your arms together in front of you and flex your chest as hard as possible on each repetition. Reverse the motion with control as far as possible while still being able to keep tension in your chest and repeat for the desired amount of repetitions. On the last repetition, hold the stretch position for 15 seconds.
  • Sets and Reps: 2 x 12-15 using a 15-second iso-hold at the end of each set.
  • Rest Time: Rest 90 seconds between sets.

Benefits of the Pec-Deck Machine

  • The pec-deck isolates the pectoral muscles effectively, allowing for a concentrated workout on the chest without assistance from the shoulders or triceps.
  • The pec-deck allows for a deep stretch at the beginning phase of the movement, which can gradually increase range of motion in the shoulder joint and potentially promote muscle hypertrophy. 
  • The fixed path of the machine ensures a consistent range of motion, ensuring that the muscles are worked through a specific and consistent arc. This can be particularly beneficial for reinforcing proper movement patterns and ensuring balanced development on both sides of the body.

Rope Pushdown

Now it’s time to hammer your triceps. Doing them last ensures you can lift the most weight during your chest exercises, and that your sensitive elbow joints are completely ready for the pummeling ahead. In the same spirit, we’re going to use the classic triceps pushdown with a rope attachment, a very joint-friendly exercise. Stick to isolation exercises to simply finish off your triceps because they were already stimulated a lot during the chest-focused part of the session. 

YouTube Video

This exercise is a perfect fit to start the triceps segment as the rope allows for a smooth and natural motion, enhancing mind-muscle connection without putting excessive stress on the elbows. 

  • How to do it: Stand in front of a pulley station and set it as high as possible. Attach a rope to it. If you’re a long-limbed lifter, you could even attach two ropes for an increased range of motion, grabbing one with each hand. Slightly bend your knees and hinge forward so that you don’t accidentally hit yourself below the belt while performing the exercise. Brace your core and extend your arms down while making sure that only your forearms are moving. In the bottom position, squeeze your triceps as hard as you can for a second. Slowly flex back your arms to stretch your triceps and repeat for the desired amount of reps.
  • Sets and Reps: 2 x 12-15
  • Rest Time: Rest 60 to 90 seconds between sets.

Benefits of the Rope Pushdown

  • Using a rope attachment allows for greater range of motion than a straight bar, ensuring optimal triceps engagement compared to other triceps exercises.
  • The controlled movement of the pushdown, especially when done using cables and a rope, places less stress on the elbow joint compared to free-weight triceps exercises. This can be advantageous for those with elbow issues or looking to prevent strain.
  • The rope allows users to spread the ends apart at the bottom of the movement, providing an additional contraction or “squeeze” in the triceps. This can further enhance muscle activation and hypertrophy potential.

Lying Triceps Extension

We’re saving the best for last, as the lying triceps extension is a meat and potatoes movement in triceps training. You can use a ton of weight, thus promoting incredible strength and hypertrophy. But this exercise can be hard on the joints and we want to keep egos in check to avoid any injury. This exercise is also called the “skull crusher,” so doing it at the end of a session means that your joints will better tolerate the stress, and you won’t be able to use as much weight because of the cumulative fatigue.

YouTube Video

In any case, this exercise remains the king of triceps isolation exercises, so don’t think for a minute that it won’t make your arms stretch your sleeves. If you have bad wrists, feel free to use the EZ bar, as this squiggly thing can be easier on the joints.

  • How to do it: Grab a barbell with a pronated (palm down) grip, shoulder-width or slightly closer, and lay down on a flat bench. Extend your arms toward the ceiling and brace your core. From there, bend your arms and have the barbell stop an inch before it touches your forehead — move only your forearms, not your upper arms or shoulders — then press the weight up forcefully.
  • Sets and Reps: 3 x 8-12
  • Rest Time: Rest 60 to 90 seconds between sets.

Benefits of the Lying Triceps Extension

  • One of the primary benefits of this exercise is the ability to use relatively heavy weights compared to some other triceps isolation exercises. Heavier loads can produce greater mechanical tension on the muscle fibers, a critical factor for muscle growth.
  • The lying triceps extension is particularly effective at targeting the long head of the triceps, which is the largest of the three triceps heads.
  • This exercise has a pronounced eccentric (muscle-lengthening or lowering) phase. Eccentric actions have been associated with greater muscle damage, which can be a stimulus for muscle repair and growth.

Muscles Trained During the Workout

When you’re performing a chest and triceps workout, you’ll use various exercises to target these muscles, ensuring comprehensive development. Compound movements like bench presses engage multiple muscle groups, while isolation exercises like triceps pushdowns or chest flies focus more specifically on one group.

Pectoralis Major

This is the largest muscle in the chest, well, the one we simply call “the chest.” The clavicular head (upper chest) originates from the clavicle and helps in flexing the humerus (as in lifting the arm in front of you). The sternal head (lower/mid-chest) originates from the sternum and aids in adducting and rotating the humerus (as in flapping the arm down and inward).

Exercises done on an horizontal plane work the pectoralis as whole, while incline variations target the upper chest, and decline exercises work more the lower chest.

Triceps Brachii

Located on the back of the upper arm, it has three heads. The long head is the largest and runs along the back of the arm. It plays a role in extending the arm and adducting it (moving it toward the body). The lateral head is located on the outer side of the arm, giving the triceps its horseshoe shape. Finally, the medial head is deeper and runs beneath the long and lateral heads. It assists in extending the forearm.

Deltoids

While the pectorals and triceps are the primary focus, the anterior deltoid (front shoulder) is unavoidably activated and worked to a significant degree. This overlap is one reason why many training programs often pair chest with shoulders or allow adequate rest between chest and shoulder workouts to ensure the anterior deltoids recover properly. The middle and posterior deltoids are also recruited to an extent especially on incline movements or as stabilizer. 

Unlocking Upper Body Excellence

There’s an art and science to effective training and this workout beautifully melds both. By prioritizing joint health and muscle activation, we’re not just lifting weights; we’re sculpting an upper body masterpiece. The thoughtful arrangement of exercises, combined with techniques like iso-holds and rest-pauses, ensures each muscle fiber is recruited for maximum gain. 

So as you power through each rep, remember that it’s more than just motion — it’s purposeful progress. Whether you’re a seasoned gym-goer or stepping onto the workout floor for the first time, this chest and triceps routine promises results that speak for themselves. Give it your all and watch as strength, definition, and confidence become your workout rewards.

References

  1. Fradkin AJ, Gabbe BJ, Cameron PA. Does warming up prevent injury in sport? The evidence from randomised controlled trials? J Sci Med Sport. 2006 Jun;9(3):214-20. doi: 10.1016/j.jsams.2006.03.026. Epub 2006 May 6. PMID: 16679062.
  2. McCrary JM, Ackermann BJ, Halaki M. A systematic review of the effects of upper body warm-up on performance and injury. British Journal of Sports Medicine 2015;49:935-942.
  3. Farias DA, Willardson JM, Paz GA, Bezerra ES, Miranda H. Maximal Strength Performance and Muscle Activation for the Bench Press and Triceps Extension Exercises Adopting Dumbbell, Barbell, and Machine Modalities Over Multiple Sets. J Strength Cond Res. 2017 Jul;31(7):1879-1887. doi: 10.1519/JSC.0000000000001651. PMID: 27669189.
  4. Saeterbakken AH, Mo DA, Scott S, Andersen V. The Effects of Bench Press Variations in Competitive Athletes on Muscle Activity and Performance. J Hum Kinet. 2017 Jun 22;57:61-71. doi: 10.1515/hukin-2017-0047. PMID: 28713459; PMCID: PMC5504579.
  5. Rodríguez-Ridao, D.; Antequera-Vique, J.A.; Martín-Fuentes, I.; Muyor, J.M. Effect of Five Bench Inclinations on the Electromyographic Activity of the Pectoralis Major, Anterior Deltoid, and Triceps Brachii during the Bench Press Exercise. Int. J. Environ. Res. Public Health 2020, 17, 7339. https://doi.org/10.3390/ijerph17197339 
  6. Krzysztofik M, Wilk M, Wojdała G, Gołaś A. Maximizing Muscle Hypertrophy: A Systematic Review of Advanced Resistance Training Techniques and Methods. Int J Environ Res Public Health. 2019 Dec 4;16(24):4897. doi: 10.3390/ijerph16244897. PMID: 31817252; PMCID: PMC6950543.
  7. Warneke K, Brinkmann A, Hillebrecht M, Schiemann S. Influence of Long-Lasting Static Stretching on Maximal Strength, Muscle Thickness and Flexibility. Front Physiol. 2022 May 25;13:878955. doi: 10.3389/fphys.2022.878955. PMID: 35694390; PMCID: PMC9174468.

Featured Image: MDV Edwards / Shutterstock

The post A Chest and Triceps Workout for Classic Size and Strength appeared first on Breaking Muscle.

Source

October 12, 2023

HIIT Rowing Workouts for Fat Loss, Conditioning, and Beginners

Filed under: Fitness,Training — Tags: , — admin @ 9:52 pm

Steady-state cardio — plodding along at a consistent pace for the duration of a session — can have its place in a training program. However, high-intensity interval training (HIIT) can actually be a more efficient means to reach your fitness goals. And just like there are a variety of ways to build the ultimate physique, there are different machines you can rely upon  to help get you there. 

Although a treadmill offers the unique advantage of being able to train on an incline, it doesn’t give you a true full-body workout. Meanwhile, an elliptical machine may be a low-impact option for your joints, but that also comes at the expense of any muscle-building upside. 

Luckily, there’s a piece of home gym equipment that provides the best of both worlds: the rower, sometimes called an erg or rowerg. In fact, you’ll be hard-pressed to find a machine that tests your muscular strength and endurance (and mental fortitude) quite like the erg.

Muscular person in gym using rowing machine
Credit: Prostock-studio / Shutterstock

Whether your primary goal is to burn body fat or boost your conditioning, these HIIT rowing workouts will get the job done. And if you’re just getting your feet wet with this type of training, there’s a beginner-friendly plan that will put you on the path to becoming more proficient and confident on the rowing machine

HIIT Rowing Workouts 

HIIT Rowing Workout for Fat Loss 

A successful fat loss plan focuses on two factors: how you fuel up and how you put those resources to work. If your primary goal is to trim a few extra pounds off your frame, pairing interval training with a nutritional protocol that prioritizes protein and limits processed foods will provide the perfect stimulus to help accomplish that feat. Although this rowing workout may seem easy on the surface, you’ll quickly learn how challenging (and effective) time-specific training can be.

Tabata Intervals  

There’s a reason the Tabata protocol remains one of the most popular styles of high-intensity interval training: It works. Designed in an easy-to-follow format, a workout consists of clearly defined intervals of max-effort exercise and complete rest. Typically, the high-intensity interval lasts for 20 seconds, forcing you to go all out for what sounds like a fairly reasonable amount of time.

However, the difficult part about Tabata-style training is that you only get a rest period of 10 seconds, or half the amount of the high-intensity interval. That back-and-forth battle usually wages on for eight cycles, adding up to a four-minute round. Most workouts run around 20 minutes, which includes a brief rest period of 1-2 minutes between each completed round.

Person in gym using rowing machine
Credit: Drazen Zigic / Shutterstock

Despite its short working intervals, Tabata delivers impressive results. It has been shown to be effective for improving both body fat composition and some cardiometabolic health outcomes in university female students. (1) Additionally, a 2020 study on the impact of Tabata training showed it was also effective in reducing body fat percentage and waist-to-hip ratio in overweight individuals. (2)

Ultimately, there’s no reason to make things complicated when it comes to your fat loss journey. This rowing workout relies upon a tried-and-true setup that should leave you feeling gassed by the end. It’s best to leave this for the end of a strength training session as a high-impact finisher, or perform it on a non-lifting day to reap the rewards of aerobic and anaerobic exercise. 

Tabata Rowing Circuit 

  • How to Do it: Sit on the rowing machine seat and strap your feet in. Set the drag level between three and five. Grab the handle, maintain an upright posture, and simultaneously push with your legs while pulling with your upper body. Warm up at a comfortable pace for one minute before increasing to max effort for your first high-intensity interval. 
  • Programming: Perform 8-10 sets (one round) of 20 seconds of max-effort rowing followed by 10 seconds of rest. Repeat for three to five rounds, depending on your fitness level. 
  • Rest Time: Rest one to two minutes after each round.  

HIIT Rowing Workout for Conditioning 

Metabolic conditioning can have some crossover with fat loss training, but it also brings muscle-building benefits. And out of all the home gym equipment you should consider investing in, a rowing machine is a fantastic choice since it is capable of helping you achieve your dream physique in multiple ways.

This all-inclusive workout combines sprint intervals on the erg with various strength exercises for the ultimate conditioning session. 

On/Off Circuit

Prepare to move around with this workout. At the same time, prepare to enjoy the conditioning rewards of mixing max-effort speed intervals on the rower with muscle-building exercises that will test your strength and stamina.

Grey-haired person in gym using rowing machine
Credit: Kostiantyn Voitenko / Shutterstock

Rather than rowing for a specific time interval, your goal is to complete 250 meters as fast as possible. Then, you will go through a type of superset using resistance training exercises that target your chest, shoulders, triceps, quads, and glutes. Working hard on the rower will target your back muscles, so doubling up by targeting them with a strength-training exercise could cause excessive fatigue without added benefit.

This workout can serve as the baseline for your creative efforts. You can vary the routine in a variety of ways by increasing your target distance on the erg, increasing the time or load for the supplementary movements, or by choosing specific exercises based on your personal physique goals. Ultimately, the point is to push yourself through each phase, take a few minutes to recover, and find a way to keep going. 

Rowing Speed Interval

  • How to Do it: Sit on the rowing machine seat and strap your feet in. Set the drag level between five and seven for added resistance. Grab the handle, maintain an upright posture, and simultaneously push with your legs while pulling with your upper body. Warm up at a comfortable pace for one minute before increasing to max effort for your first high-intensity interval.
  • Programming: Complete a 250-meter row as quickly as possible.
  • Rest Time: No rest before moving to the next exercise.

Paused Push-Up

  • How to Do it: Begin in the top of a traditional push-up position with your hands directly under your shoulders, your arms locked out, hips and legs straight, and toes on the ground. Lower yourself down until your chest is one to two inches from the floor and hold for two seconds. Engage your triceps and extend your arms to return to the starting point. 
  • Sets and Reps: Perform as many reps as possible in 30 seconds.
  • Rest Time: No rest before moving to the next exercise.

Goblet Squat

  • How to Do it: Stand with your feet shoulder-width apart and your toes slightly pointed out. Hold a kettlebell or dumbbell with both hands at chest-level (the “goblet” position), engaging your front deltoids (shoulders) to support the weight. While keeping your torso upright, push your hips back, bend your knees, and sit into a deep squat position. Drive through your heels and return to the starting position.  
  • Sets and Reps: Perform as many reps as possible in 30 seconds. Use a weight that allows at least 10 to 12 repetitions in the first round.
  • Rest Time: No rest before moving to the next exercise.

Dumbbell Overhead Press

  • How to Do it: Stand with your feet hip-width apart with a dumbbell in each hand at shoulder-level. Keep your wrists in a neutral position (palms facing each other) and push the weights toward the ceiling, fully extending your arms and locking out your triceps. Slowly lower the dumbbells back down to the starting position, maintaining full control on the eccentric (lowering) portion of the lift.  
  • Sets and Reps: Perform as many reps as possible in 30 seconds. Use a weight that allows at least 10 to 12 repetitions in the first round.
  • Rest Time: Rest two to three minutes before repeating the first exercise.

HIIT Rowing Workout for Beginners

If you’re new to cardio training, or just new to the rowing machine, don’t be intimidated by the idea of an intense session on the erg. Instead, embrace the concept of pushing yourself for short spurts so you can earn some well-deserved rest. Plus, you can look forward to improving your technique with each and every stroke. 

1:2 Work-to-Rest Intervals

A key difference between the previous fat-burning and conditioning workouts and this beginner-friendly plan is the amount of time you’ll spend working at a lower intensity. Instead of following a 1:1 work-to-rest ratio, beginners should opt for a 1:2 work-to-rest rate. 

This structure is essentially the opposite of Tabata, which requires you to recover in half the amount of time as your high-intensity interval. Using a specific work/rest approach will give you the benefits of improving your VO2 max while also allowing a sufficient period for recuperation. (3)

Long-haired person using rowing machine outdoors
Credit: Microgen / Shutterstock

You’ll be starting out with 20 seconds of work, followed by 40 seconds of rest. However, don’t be afraid to switch up that 1:2 ratio as you get more comfortable on the rower. Once you have completed this workout a few times, you can ramp up the difficulty by cutting the rest interval to 30 seconds. Then, trim it down another 5-10 seconds as you improve. 

20 On/40 Off Rowing Circuit

  • How to Do it: Sit on the rowing machine seat and strap your feet in. Set the drag level between three and five. Grab the handle, maintain an upright posture, and simultaneously push with your legs while pulling with your upper body. Warm up at a comfortable pace for one minute before increasing to near-max effort for your first high-intensity interval. Make sure to rest for double the amount of work-time for each cycle.
  • Programming: Two sets of 8 rounds — each round requires 20 seconds of hard rowing, followed by 40 seconds of easy rowing.
  • Rest Time: Rest for three minutes after completing the first round.

How to Warm-Up for a HIIT Rowing Workout

A structured warm-up isn’t just a means to break a sweat or get your head in the game prior to a workout. Besides being beneficial for performance, it’s also a proactive measure that can help prevent injuries. (4)

Because the erg requires you to recruit essentially every major muscle group, you need to prepare accordingly. Diving straight into any of the three HIIT workouts isn’t a sound strategy — especially if you’re hitting the gym after sitting at a desk for hours.

YouTube Video

Set yourself up for success by completing this four-part warm-up which focuses on getting your shoulders, back, quads, and hamstrings ready for a rowing session that will leave you feeling accomplished from head to toe. 

HIIT Rowing Workout Warm-Up

  1. Arm Circle: Stand with your feet about shoulder-width apart and your arms fully extended out to your sides so they are parallel with the floor. Keep your arms straight and begin making small circular motions in a forward direction. Progress to bigger circles for a wider range of motion. for 20 to 30 seconds. Then, perform the same movement in the opposite direction for another 20 to 30 seconds.  
  2. Inch Worm: Stand tall with your feet about hip-width apart and your hands by your sides. Look down at the floor and start reaching your hands out in front of your feet as you allow your knees to bend slightly. Carefully walk your hands forward until they are directly under your shoulders and your body is parallel to the floor. From that full plank position, keep your legs straight and walk your hands back toward your feet. Brace your core and raise your upper body to return to the starting position. Perform 10 repetitions before moving to the next exercise. 
  3. Paused Bodyweight Squat: Stand with your feet at a shoulder-width distance and your toes pointed slightly out. Brace your core, push your hips back, and slowly lower yourself down until your thighs are parallel to the floor. Hold for two seconds, then push through your heels and drive upward until you reach the starting position. Complete 15 to 20 full-depth squats before finishing up with the final part of the warm-up. 
  4. Rowing Machine: Get on a rowing machine and set the damper to a low level (between one and four). Maintain a steady but comfortable pace for three to five minutes to prime your muscles and get in the flow for the high-intensity workout to follow. 

Full-Body Benefits in Far Less Time

While you will most certainly work harder, you’ll also be working smarter with these HIIT rowing workouts. Ramping up the intensity means you won’t have to spend nearly as much time repeating the same motion until you’ve reached a state of boredom. Instead, efficient interval-style training will let you reap the full-body rewards of centering your next workout around the simple but incredibly effective rowing machine. 

References

  1. Lu, Y., Wiltshire, H., Baker, J. S., Wang, Q., & Ying, S. (2023). The effect of Tabata-style functional high-intensity interval training on cardiometabolic health and physical activity in female university students. Frontiers in Physiology, 14. https://doi.org/10.3389/fphys.2023.1095315
  2. Domaradzki, J., Cichy, I., Rokita, A., & Popowczak, M. (2020). Effects of Tabata training during physical education classes on body composition, aerobic capacity, and anaerobic performance of under-, normal- and overweight adolescents. International Journal of Environmental Research and Public Health, 17(3), 876. https://doi.org/10.3390/ijerph17030876
  3. Helgerud, J., Høydal, K. L., Wang, E., Karlsen, T., Berg, P. R., Bjerkaas, M., Simonsen, T., Helgesen, C. S., Hjorth, N. L., Bach, R., & Hoff, J. (2007). Aerobic High-Intensity intervals improve VO2max more than moderate training. Medicine and Science in Sports and Exercise, 39(4), 665–671. https://doi.org/10.1249/mss.0b013e3180304570
  4. Ding, L., Luo, J., Smith, D. M., Mackey, M. J., Fu, H., Davis, M. M., & Hu, Y. (2022). Effectiveness of Warm-Up Intervention Programs to Prevent Sports Injuries among Children and Adolescents: A Systematic Review and Meta-Analysis. International Journal of Environmental Research and Public Health, 19(10), 6336. https://doi.org/10.3390/ijerph19106336

Featured Image: Microgen / Shutterstock

The post HIIT Rowing Workouts for Fat Loss, Conditioning, and Beginners appeared first on Breaking Muscle.

Source

September 5, 2023

Free Weights vs. Resistance Bands: Challenge Your Muscles the Right Way

Filed under: Fitness,Training — Tags: , — admin @ 5:31 pm

Whether you’re aiming to sculpt your physique, enhance athletic performance, or simply get through daily challenges a little bit easier, resistance training has been shown to be the key to a more fit life. (1) “Resistance training”, however, is a broad term for many different ways to strengthen your muscles.

Most people gravitate toward lifting free weights — barbells or dumbbells. However, there are other forms of resistance training that can elicit similar, sometimes even more beneficial, results. One of the most common alternatives, found both in commercial gyms and as a convenient addition to home workouts, is training with resistance bands

In the big picture, free weights (which includes barbells and dumbbells) offer a straightforward load — a 100-pound barbell offers 100 pounds of resistance. Resistance bands provide dynamic tension and present a more significant challenge as the band is stretched into a longer position.

Person using exercise band at home

Credit: DC Studio / Shutterstock

Understanding how and when to choose the right tool for the right job is vital for creating an optimal workout that will get you closer to your goals. Free weights and resistance bands might seem to be worlds apart, but once you acknowledge their similarities and differences, you will have a better idea about how to implement them into your workout to take your fitness to the next level.

In this article, we will elaborate on the debate of “free weights versus resistance bands,” explore their differences and similarities, and figure out the best times to use these modes of resistance training for better results.

Free Weights vs. Resistance Bands

Differences Between Free Weights and Resistance Bands

The differences between free weights and resistance bands seem noticeable at first glance. However, there are some less obvious differences to be aware of before incorporating free weights or resistance bands into your workout routine. Each modality has its unique advantages, and knowing how to leverage them effectively can help you achieve a well-rounded fitness regimen.

Source of Resistance

One of the biggest differences between free weights and resistance bands is the source of resistance. Free weights rely on moving against the force of gravity to challenge a lifter’s raw strength. The actual weight of the equipment itself is what is used to provide resistance for each exercise.

This also means resistance remains consistent throughout the movement, and only your position of leverage and the direction of the weight will significantly alter the feel of resistance. It’s one reason why squats feel more difficult in the bottom and relatively easier as you approach a standing position.

person in gym performing deep barbell squat

Credit: SOK Studio / Shutterstock

When using resistance bands, the source of resistance comes through the use of a pliable band, commonly made from latex or rubber. The elasticity of the band means that, as you increase the band’s length, tension is increased which provides a more challenging and “heavier” stimulus.

This varied resistance — with more challenge at the end range of motion and relatively less challenge in shorter positions — can be very useful for lifters who may have an injury or those want to train a specific aspect of the exercise. The resistance profile can allow you to recruit or emphasize muscles during certain ranges of motion within a specific exercise.

Stabilization Requirement

Working with free weights requires a higher degree of stabilization, as the weights are not connected to a fixed point. This relative freedom of movement engages additional muscles to maintain balance and control throughout the exercise. This would be an advantage for those who are looking to recruit more muscle groups and want to also improve their functional strength, such an athlete that requires total-body stability. 

Resistance bands provide built-in stabilization due to their attachment points — bands are typically anchored to a fixed object which allows you to pull or push the bands’ handles. This can be advantageous for individuals looking to isolate specific muscle groups without focusing as much on stability.

In certain situations, a high degree of stabilization is not desired, as an athlete might want to perform an easier exercise variation to focus on the target muscle without worrying about other variables such as the muscular coordination needed to control a barbell or dumbbell.

Joint Stress

Depending on the exercise, free weights can exert more stress on joints due to the constant pull of gravity on the levers of the body. Stress doesn’t have to be bad, though. You want to achieve a level of stress on the joints of the body to create fatigue for growing muscle. You can perform variations of exercises, such as pressing on a flat, incline, or decline angle to adjust this stress.

In other instances, some populations might not be able to handle higher levels of stress during a particular movement. Resistance bands provide a smoother resistance curve that can reduce joint stress at the start of the movement and gradually increase stress as the band stretches. This can potentially make an exercise more joint-friendly for certain individuals who might be recovering from an injury or have limited mobility.

Portability and Convenience

When discussing portability, free weights (especially barbells) are known to be heavier and space-consuming pieces of equipment. Free weights can be bulky and require dedicated storage space. They are less portable, making them more suitable for gym environments or home setups with designated workout areas.

Muscular person training outdoors with resistance band

Credit: SOK Studio / Shutterstock

Resistance bands are highly portable and take up minimal space, making them ideal for home workouts with limited space, travel, and on-the-go training. They offer a versatile training option that can be easily adapted to different environments. Bands are also great for trainers who work with larger groups or “boot camps.”

Similarities Between Free Weights and Resistance Bands

For all of their significant differences, there are plenty of similarities between bands and free weights. Knowing where their benefits overlap can allow you to understand which form of resistance training would be compatible for your goals and needs.

Principle of Overloading Strength

Whether you use free weights or resistance bands, both forms of resistance training provide an opportunity to overload your body for building both size and strength. Free weights and resistance bands create tension in different ways, however, they both still provide muscular tension. This tension is what challenges your various muscle groups to create movement through exercise.

The more resistance you add, the more size and strength will grow. You can progressively increase this resistance with both methods, whether it’s adding a 10-pound plate onto each side of a barbell or advancing from a “moderate” resistance band to a thicker, heavy-duty resistance band.

Muscle Engagement

Both free weights and resistance bands engage muscle groups to meet the demands of the exercise — performing a movement under tension. To provide context, consider a biceps curl. Whether you do a biceps curl with a band or with pair of dumbbells, both exercises build tension within your biceps muscle to build size and strength.

muscular person at home performing biceps curl with resistance band

Credit: BLACKDAY / Shutterstock

Even though free weights and resistance bands might recruit and target your biceps muscle slightly differently, your biceps is fully engaged and will benefit from the training stimulus.

Versatility in Exercise Options

Both free weights and resistance bands offer the opportunity to mimic similar exercises through different types of resistance. As mentioned earlier, you can do a biceps curl with resistance bands or dumbbells. Both exercises are a variation of the biceps curl and will fully recruit your biceps muscles.

This idea proves that whether you have a dumbbell, a barbell or a resistance band, you should be able to mimic a wide range of exercise options that can target various muscle groups. This versatility allows you to design comprehensive workout routines that cater to your fitness goals without being necessarily limited by your equipment.

The Most Effective Times to Use Free Weights

Throughout this article, we have discussed the general similarities and differences of using free weights and bands for resistance training. Now it’s time to discuss when to choose one training implement over the other.

Building Raw Strength

Free weights are particularly effective for building raw strength and muscle mass due to the constant force of gravity. They offer a greater potential for overloading the muscle, making them an ideal source of strength training.

Powerlifter performing deadlift in contest

Credit: Real Sports Photos / Shutterstock

This is especially true as free weights allow the lifter to perform compound movements like squats, deadlifts, and bench presses that challenge multiple muscle groups simultaneously. While similar exercise can be performed with resistance bands, the maximum potential overload is superior with free weights. Few, if any, resistance bands will safely provide several hundred pounds of resistance, while a barbell can tolerate that load with plenty of room to spare.

Functional Stabilization

Free weight exercises require greater stabilization efforts from muscles and the core due to their lack of fixed attachment points. This makes them excellent for improving overall stability and coordination, which is essential for activities that demand functional strength.

This idea of building total-body stability could be beneficial to traditional athletes and for those who need to improve their fitness for daily living, such as older individuals or those who are recovering from injury. (2)

Mimicking Real-World Activities

Free weights can allow you to closely mimic real-world movements where you lift, carry, and manipulate objects with varying weights. For example, dumbbells allow you to perform farmer’s walks and other loaded carries. If your goal is to enhance performance in sports or everyday tasks, free weights can help translate your strength gains more directly.

Maximizing Muscle Activation

Some exercises, like the bench press and overhead press, allow for a longer range of motion and muscle activation when using free weights compared to bands. The ability to control the weights in all planes of movement can lead to more complete muscle development compared to resistance bands, which might be limited to certain ranges of motion due to relatively lower resistance found in certain parts of the movement.

The Most Effective Times to Use Resistance Bands

It’s true that many people who perform resistance training typically gravitate toward free weights. However, the use of resistance bands can provide a unique approach that could be very accommodating for specific populations. Bands are a versatile choice for those who need to train under unique conditions, which may require getting creative.

Joint-Friendly Workouts

Resistance bands provide a lower impact on joints compared to free weights. If you’re recovering from an injury, dealing with joint discomfort, or focusing on joint mobility, resistance bands offer a relatively gentler form of resistance that minimizes stress on your joints without compromising muscular stress.

Variable Tension Within Range of Motion

Resistance bands offer variable resistance that changes based on the stretch of the band. Arguably, this matches the natural strength curve of muscles, providing greater tension where your muscles are strongest and less tension where they’re weakest. This can lead to a safer approach on movement if that specific stimulus is provided. 

Isolation for Rehabilitation

Resistance bands are excellent for isolating and activating specific muscle groups. This is due to the fact that the resistance bands start off lighter, and build in tension with the stretch of the band.

When using a resistance band for rehab exercises, you can anchor and perform movement strategically to help activate targeted muscle groups in specific positions that might be more beneficial for someone with an injury.

An example of this could be doing internal and external shoulder rotations. The more you rotate the shoulder joint, the harder it becomes. This means the band is light at the beginning of rotation, which would be the shoulder’s weakest position, and resistance increases as the shoulder moves through the range of motion.

Travel-Friendly and Versatile

If you’re often on the go or don’t have access to a full gym, resistance bands are an efficient way to stick to a training routine. They are highly portable and take up minimal space. Bands can provide a challenging workout anywhere, making them a convenient option for maintaining your fitness routine while traveling or in limited spaces.

Which Source of Resistance is for You?

Choosing between free weights and resistance bands depends on your fitness goals and overall circumstances. Free weights are excellent for building sheer strength through heavy loading, making them ideal for compound movements like squats and bench presses.

On the other hand, resistance bands are joint-friendly and provide variable tension that matches natural strength curves, aiding in balanced muscle activation and isolation exercises for smaller stabilizing muscles. They are great for rehabilitation, “prehabilitation,” and on-the-go workouts due to their portability and versatility.

Learning the pros and cons of each of these forms of resistance training will help you integrate one, or both, into your routine. This can create a comprehensive approach that addresses your strength and adaptability by offering a well-rounded fitness regimen tailored to your needs.

References

  1. Westcott W. L. (2012). Resistance training is medicine: effects of strength training on health. Current sports medicine reports, 11(4), 209–216. https://doi.org/10.1249/JSR.0b013e31825dabb8
  2. Mayer, F., Scharhag-Rosenberger, F., Carlsohn, A., Cassel, M., Müller, S., & Scharhag, J. (2011). The intensity and effects of strength training in the elderly. Deutsches Arzteblatt international, 108(21), 359–364. https://doi.org/10.3238/arztebl.2011.0359

Featured Image: InnerVisionPRO/ Shutterstock

Source

September 1, 2023

Squat Stand vs. Power Rack: How to Choose Your Gym’s Command Center

Filed under: Fitness,Training — Tags: , — admin @ 8:13 am

Whether you’re setting up your own home gym or simply trying to figure out where to settle in for your next exercise at the neighborhood fitness center, you’ll likely be confronted with the choice between a squat stand and a power rack.

Squat stands consist of two simple metal uprights to support a barbell — they are more compact and significantly lighter than power racks. A power rack, sometimes referred to as a squat rack, will typically have four to six metal uprights and offer more exercise options and accessories than a pair of squat stands.

Long-haired person in gym performing barbell squats near mirror

Credit: hurricanehank / Shutterstock

While these two pieces of equipment are often used interchangeably, differences in their characteristics and intended usages are worth consideration. This article will help you make the most out of your home gym budget or your commercial gym workout by guiding you to the most appropriate and safest piece of equipment for your specific needs.

Squat Stand vs. Power Rack

Differences Between Squat Stands and Power Racks

At first glance, squat stands and power racks differ substantially in physical size — squat stands are smaller and power racks are bigger. Comparison done and dusted, right? Nope, not so fast. Differences in safety features, mobility, stability,potential exercises, and accessories are worthy of consideration.

Safety Features

A spotter is a trained and capable individual whose primary task is to ensure the safety of the lifter by assisting when necessary. One or more spotters are recommended for traditional strength training exercises when a barbell is held on the back or front of the body, when weight is lifted overhead, or when a weight travels over the face. (1) Under these guidelines, many common barbell exercises require the presence of a spotter — back squat, front squat, overhead press, bench press, incline press, and more. 

No one wants to get pinned under a barbell, asphyxiate with a bar atop their windpipe, or catch a barbell to the face. Albeit unlikely, serious injuries or even death could occur if you train without appropriate safety precautions. But if you train alone or at home, you might not always have a trained spotter available. Now what?

person in gym lower barbell in bench press

Credit: Hryshchyshen Serhii / Shutterstock

Fortunately, a power rack, when properly set up and appropriately used, provides safety pins/pipes, arms, or straps that “catch” the barbell in the event of a failed lift. (2) Traditional squat stands, on the other hand, do not offer safety arms — even among squat stands that offer safety arms, the stability of the stands varies widely across designs and manufacturers.

Some heavy-duty squat stands with safety arms are appropriate to handle the failed lifts of all but the strongest lifters, while lighter and smaller squat stands with safety arms might not be trusted. Altogether, lifters who train alone might benefit from the safety features of a power rack. 

Mobility

A key feature of squat stands is their mobility, or ability to be relocated from place to place. Traditionally, squat stands were used by Olympic weightlifters. Relatively lightweight squat stands could be carried or wheeled onto the platform for use then pushed back against a wall or into a corner when no longer needed.

To further improve mobility, some squat stands have two-piece designs. Each upright has its own base, allowing it to be moved and positioned independently of the other. One piece squat stands commonly include or have the option of adding wheel kits, which allow the stand to be rolled around the gym with relative ease. 

For individuals with a garage gym, the mobility of a squat stand may allow it to be stowed away when not in use, possibly allowing the garage to serve its original purpose — vehicle storage. Better yet, on a nice day, a squat stand might be moved outdoors. Sun’s out, guns out, right?

Stability

Power racks are typically more difficult to move around than squat stands. They tend to be big and heavy, with lighter power racks typically designed to be bolted to the floor.

Most importantly, power racks tend to have a longer base of support, or footprint. This allows the lifter to perform squats, bench presses, and other exercises within the rack. Lifters tend to feel more “secure” when performing barbell exercises within a power rack — and for a good reason.

Muscular person in gym performing barbell squat

Credit: Miljan Zivkovic / Shutterstock

All exercise in the power rack is performed over the rack’s base of support, which allows effective use of the safety features. A missed lift is almost assuredly “caught” by the safeties and the rack won’t tip over. Moreover, the larger base of support, paired with the larger mass of the power rack, makes it less prone to tipping or moving while in use. 

Note: The half rack is a design variant of the power rack. Half racks consist of two uprights in front, to support the barbell, and two additional uprights in back, which enhance the stability of the rack above and beyond the two-post squat stand design. While performing common barbell exercises in a half rack, the lifter remains over the rack’s base of support owing to the elongated base of the rack.

Accessories and Exercise Options

More space and more stability offer the ability to deck out power racks with accessories. In addition to safety equipment such as spotter arms, pins/pipes, or straps, power rack can offer attachments for additional exercises and equipment storage. 

While taller squat stand designs may offer the option of a pull-up bar, multi-grip pull-up bars are routinely mounted on power racks. Multi-grip pull-up bars allow for traditional pull-ups, chin-ups, neutral-grip pull-ups, and more. Many power racks are compatible with rack-mounted dip bars and medicine ball targets. Attachments may also be affixed to the bases or uprights of power racks to perform a variety of landmine exercises.

Heavier power racks or those bolted to the floor may accommodate band pegs, which allow for band-resisted or band-assisted barbell movements. Plates may be stored on posts, which are bolted or welded to the rearmost uprights of a six-post power rack or a half rack. Simple storage solutions, such as hooks, bands, chains, belts, and barbells, mounted to the sides of power racks or half racks. If you value customization and exercise variety, a power rack is a strong choice.

Similarities Between Squat Stands and Power Racks

Although certainly not interchangeable, squat stands and power racks provide similar benefits and uses.

Support for the Barbell

Many common exercises, including squats and presses, benefit from an elevated starting position for the barbell. Before squat stands and power racks, squatters had to clean the barbell to their shoulders or perform an outlandish maneuver of tipping the barbell on end in an attempt to get under it.

Person in gym performing barbell squat

Credit: Photology1971 / Shutterstock

Think about how much energy was expended prior to starting the actual set. Squat stands and power racks allow the lifter to conveniently retrieve the barbell when setting up and finishing various lifts.

Accommodate Lifters of Various Sizes

Squat stands range in height from just over four feet to well over nine feet, while power racks tend to range from six feet to 10 feet. The start position of the barbell is adjustable in increments to allow fine-tuned position of the J-hooks (the specialized attachment used to support the barbell on the rack).

This adaptive setup allows trainees to customize starting positions to their height for more efficient training, which can be necessary for taller lifters as well as lifters of shorter stature.

Allow a Variety of Exercises

Squat stands and power racks are versatile. Both pieces allow lifters to perform barbell squat variations, including, but not limited to back squats, front squats, Zercher squats, and safety squat bar squats. Additionally, power racks and very sturdy squat stands can be used to support the barbell in an elevated position to avoid having to deadlift from the floor (i.e. rack pull deadlifts) or avoid having to lift the bar from the floor to the start position of exercises such as bent-over rows, wide rows, and Romanian deadlifts.

Many other exercise options may be possible with other accessories. For example, add an adjustable weight bench and lifters can perform the bench press, incline press, and seated overhead press. Exercise options for squat stands and power racks are discussed at length later in the article.

How to Use Squat Stands

  • Ensure your squat stands are appropriately placed. Squat stands should sit on level ground. Independent or two-piece squat stands must be placed an appropriate distance apart — stands should be set narrower than the distance between the sleeves of the barbell. Placing the stands four to six inches narrower than the inside distance between the sleeves reduces the likelihood of bumping or knocking over the stands when re-racking the barbell. 
  • Set the height of the stand or J-hooks. The J-hooks should be placed one setting below or one to three inches below the anticipated start height of the exercise. Appropriately placed J-hooks allow the lifter to remove the barbell from the rack with minimal vertical displacement and minimal disruption to body position. For example, the height of the J-hooks should require the lifter to slightly flex their knees and hips to place the bar on the upper back when setting up for a back squat. (3)
  • Load the barbell, recruit a spotter if necessary, and perform your set. Recall, at least one spotter is recommended for traditional strength exercises when a barbell is on the back or front of the body, when lifted overhead, or lifted over the face. (1)
  • Re-rack with care. Depending on the stability of the squat stand, a degree of caution is indicated when replacing the barbell on the squat stands. Aggressively driving the barbell into the J-hooks or carelessly bumping the stands may cause undesirable movement of your equipment at the worst possible time — when you’re fatigued at the end of the set.

How to Use Power Racks

  • Set the height of the J-hooks. Hooks should be placed one setting below or one to three inches below the anticipated start height of the exercise. Once again, appropriately placed J-hooks allow the lifter to remove the barbell from the rack with minimal vertical displacement and minimal disruption to body position. For example, the height of the J-hooks should allow a lifter performing a bench press to slide the barbell forward out of J-hooks with their elbows straight, but without losing upper back tension or requiring forward movement of their shoulder blades. 
  • Set the height of the spotter arms, pipes, or straps. The safety arms should be placed one setting below, or two to four inches below, the anticipated lowest depth of the exercise. (2)
  • Load the barbell, take note of hand placement, and perform your set. Take note of your hand placement on the bar during setup. Those who squat or press with excessively wide hand placement may be at risk of pinching their hands or fingers between the barbell and the power rack. If your mobility does not allow you to take a narrower grip, be aware that quick movement of your hands may be required to prevent pinching during re-racking or in the event of a failed lift. (2)
  • Return the barbell to the rack. Return the barbell to the power rack by first pushing the bar against the vertical back surface of the J-hook. Once you feel, hear, and see the barbell make contact with both J-hooks, control the bar until it comes to rest. 

When to Use Squat Stands or a Power Rack

As indicated by their long history of use in Olympic Weightlifting, squat stands can be appropriate for certain types of exercise and convenient for exercise in novel locations. However, beefy power racks are a mainstay in strength training facilities across professional and Olympic sports. They’re a key piece of equipment for a wide variety of exercises.

For Power-Focused Exercises

“Power exercises” refer to lifts performed with ballistic intent — not to be confused with powerlifting exercises (i.e, the squat, bench press, and deadlift). Power exercises include Olympic weightlifting movements (i.e., clean & jerk, snatch), weightlifting derivatives, and loaded jumps. A spotter is typically not recommended for power exercises, as the individual may get in the way of the fast lift or worse yet, become injured by the rapidly moving barbell.

Certain barbell-based power exercises benefit from the convenience of a squat stand but might be inappropriate to be performed in a power rack. Exercises like jerks, push presses, and squat jumps are more appropriately performed outside of the power rack or several feet away from a squat stand. 

Long-haired person in gym preparing to do barbell exercise

Credit: hurricanehank / Shutterstock

Using a squat stand allows the lifter to efficiently load the barbell and set up jerks, push presses, and squat jumps, then step away from the rack. In the event failure occurs during power-based exercises, the lifter must know how to safely “bail,” or get out from underneath the barbell. (2) Bailing may entail either pushing the barbell forward and simultaneously jumping back or throwing the barbell backward and leaping forward out of its path. (2)

It’s best not to be “trapped” in a power rack if bailing is necessary. In the event a lifter is forced to bail during a power exercise, clear surroundings are essential with no other persons, and minimal equipment, in the immediate area. Loading the bar with bumper plates is preferred to promote equipment longevity. (4)

For Technique Work

While squat stands do not tend to be as stable or offer the safety features of power racks, they should be sufficient for handling relatively lighter sets of traditional barbell exercises and sets ended far from muscular failure. Essentially, these sets can be classified as “technique work.”

Technique work is appreciated as an opportunity to stimulate improvements in coordination and foster long-term athletic development. Squat stands allow you to efficiently set up barbell exercises and put in the reps while maintaining total control over the bar, even at the end of a set.

For Outdoor Workouts

“Suns out, guns out,” remember? Few things are better than training outside on a beautiful day. Mobile squat stands allow traditional barbell exercise to be performed in non-traditional environments. Simply haul or roll your squat stand to level and firm ground, set up, and train while simultaneously topping up your vitamin D levels.

For Heavy, High-Effort Lifting

Heavy lifting is performed with high loads (i.e., 85% or more of one’s maximum), while high level of effort lifting describes sets approaching failure. Although neither heavy lifting nor high-effort lifting are inherently dangerous, both present an elevated risk of failure.

In the event that failure is reached during a barbell squat or press, you’re going to want the secure frame of a steel power rack to protect you. Appropriately placed safety pins/pipes, arms, or straps on a power rack should provide the confidence to push through the hardest sets.

For Accessory Exercises

While commercial gym etiquette may declare “no curling in the squat rack,” power racks do allow for a wide variety of accessory exercises. Most power racks come equipped with a pull-up bar, which allows for a variety of pull-up variations.

Muscular person performing pull-ups in gym

Credit: CrispyPork / Shutterstock

Unlike taller squat stands, which might also offer a pull-up bar, the stability of an appropriately installed power rack may allow for kipping exercises, such as toes-to-bar or muscle-ups. Power racks can be used to set up rack pull deadlifts and barbell shrugs.

For Pin Pressing and Pin Squatting

Pin presses and pin squats begin with the barbell setting on the safety pins/pipes of a power rack in the lowest position of the exercise. Each repetition begins and ends with the barbell coming to a dead stop on the pins/pipes. Pin presses and pin squats eliminate the stretch reflex at the bottom of traditional pressing and squatting exercises.

Ultimately, pin presses and pin squats tend to require less weight to achieve a stimulating training effect, and may help to improve “starting strength,” or the ability to overcome the inertia of a load at rest.

The Centerpiece of the Gym

Squat stands and power racks are key pieces of gym equipment for athletes, bodybuilders, and fitness enthusiasts alike. But just as you wouldn’t use a hammer to drive a screw, selecting the right tool for the job is essential for safe and effective training.

References

  1. Haff, G. G., & Triplett, N. T. (Eds.). (2015). Essentials of Strength Training and Conditioning 4th ed. Human Kinetics. Champagne, IL, USA. 351-408. 
  2. Garhammer, J. (1991). Weightroom safety: Using a power rack for squatting. Strength & Conditioning Journal13(5), 74-82.
  3. Ronai, P., & Gendron, K. (2023). The barbell back squat exercise. ACSM’s Health & Fitness Journal27(4), 65-73.
  4. Waller, M., & Townsend, R. (2007). The front squat and its variations. Strength & Conditioning Journal29(6), 14-19.

Featured Image: MDV Edwards / Shutterstock

Source

August 28, 2023

10 Benefits of Cardio: Build Your Physique, Health, Performance, and More

Filed under: Fitness,Training — Tags: , — admin @ 7:28 am

Many people who exercise tend to label themselves “lifters” because, well, they lift weights in the gym. However, what some people (conveniently?) overlook is that there’s a whole other world of exercise available to them — cardio training.

While the thought of treadmills, ellipticals, recumbent bikes, and assorted machinery might trigger waves of muscle-burning trepidation, cardio workouts can be as simple as going for a walk outside. Yep, something people learned to do before they could talk can still be considered exercise if it’s programmed properly.

People walking outdoors

Credit: Bignai / Shutterstock

Here’s a closer look at some research-based reasons why you should consider being more than just “a lifter.”

Benefits of Cardio

Aerobic Cardio vs. Anaerobic Cardio

Cardiovascular exercise, in general, can be performed one of two ways: aerobically or anaerobically. Their benefits overlap in some respects while also delivering distinct advantages from each other. (1) The key difference is their inherent training intensities, or speed of movement, and the stimuli they trigger in the body. For clarity throughout this article, aerobic training will be the primary cardio method discussed in each subsequent point.

Aerobic cardio is likely what most people imagine when they hear the phrase “cardio training.” Aerobic training is performed at a low to moderate intensity, such as walking or jogging. The relatively low intensity allows the body to continue the exercise for a relatively long duration.

For example, Olympic race walking (yes, that’s a thing) has had races up to 50 kilometers (31 miles) with athletes moving non-stop for more than four hours. This potential for longer sessions is why aerobic work is often synonymous with “endurance training.”

Anaerobic training is most notable for being relatively high intensity and short duration. The body cannot perform anaerobic training for an extended time because the heart rate is extremely elevated and the metabolic processes needed to fuel muscle contractions are short-lived. It’s like asking a car to drive 100 miles per hour while the low fuel light is on — neither smart nor safe.

Long-haired person sweating in gym holding barbell

Credit: Jacob Lund / Shutterstock

Anaerobic exercise is typified by high-intensity interval training (HIIT), sprinting, many “metcon” (metabolic conditioning) workouts, and any fast-paced movements that cannot be maintained for more than a few minutes, or even several seconds, without rest. A heavy set of three deadlifts or a set of 50 kettlebell swings, for example, are also cases of anaerobic exercise.

Boost Your Health with Cardio

Cardio exercise can be for more than just burning some extra calories or warming up before grabbing a barbell. As a reminder, “cardio” is actually short for cardiovascular, as in, your cardiovascular system which pumps blood throughout your entire body. Cardio training can have several significant health benefits, regardless of your goals in the gym.

Cardiovascular Health

This may seem like a statement that should go without saying, but cardiovascular training can improve your cardiovascular health. Just like biceps training can improve your biceps or lower body training can improve your leg strength, training your cardiovascular system can strengthen and improve your cardiovascular function.

A stronger heart and better total-body circulation can improve cholesterol levels and blood pressure while decreasing the risk of potentially deadly cardiac events like stroke or heart attack. (2) Cardiovascular exercise is also associated with decreased total-body inflammation, which can further decrease the risk of cardiovascular disease. (3)

While not directly related to cardiovascular health, performing low to moderate intensity cardio exercise after eating, especially after your largest meal of the day, has been associated with decreased blood sugar levels. (4) This can be an effective approach for people living with diabetes or prediabetes.

Reduced Joint Pain

For those dealing with joint pain, whether it’s from overuse in the gym or the onset of diagnosed arthritis, aerobic training has been shown to decrease pain and improve functional use of affected joints, particularly in the lower body (hips, knees, and ankles). (5)(6)

gray-haired person using treadmill in gym

Credit: YAKOBCHUK VIACHESLAV / Shutterstock

Walking with knee pain may sound counterproductive, but a structured plan that carefully monitors intensity, duration, and frequency may improve symptoms and joint function. You certainly wouldn’t want to log miles while hobbling in agony, but a gradual approach performed with a deliberate and cautious approach could be incorporated into your general training plan.

Similarly, moderate cardio training has been shown to stimulate bone density and potentially slow down the effects of osteoporosis. (7) This can be an ideal complement (or alternative) to weight training, which can also provide bone-strengthening similar results.

Improved Immune System

If you’ve ever been told to “go out and get some fresh air” after complaining about feeling poorly, it turns out you received some practical and science-based advice. Aerobic exercise, though not specifically outdoor exercise, has been shown to support a healthy immune system. (8)

Exercising while sick is an often debated point, but regular exercise (including cardio training) performed consistently may help improve your overall immune function. This could give you a headstart in fighting common colds or even certain viral infections. (9)

While exercise certainly can’t create a full-on immunity to any particular sickness, cardio exercise may stimulate an antibody response that supports your body’s natural immune system. Over the long-term, this type of “cellular reinforcement” may have a cumulative effect to put you in the most advantageous position to fend off common illnesses, especially when supported by a nutritious diet.

Cardio for Better Gains

For better or worse, some lifters are primarily interested in using cardio as a tool to support their efforts in the gym. Whether your priority is lifting heavier weights, building more muscle, or burning more fat, cardio workouts can be used in a performance-boosting context. Here’s why a bit of cardio can help, not hinder, your lifting.

Increased Fat Loss

Arguably the most common reason a lifter would decide to hop on a piece of cardio equipment — to burn some extra calories — cardio can be a highly effective part of a fat loss routine.

While a goal-focused diet plan is necessary for fat loss, and a proper weight training program is necessary to build and preserve muscle mass, cardio exercise can be a game changer for reshaping your physique and getting lean. (10)

Interestingly, and perhaps counterintuitively, some research has actually shown a degree of fat loss from only performing aerobic exercise, without a coordinated diet or weight training plan. (11) While this approach may not be ideal in terms of overall body composition and lean muscle mass, it raises an interesting potential as a “starting point” for anyone looking to lose body fat without necessarily being able to follow a comprehensive diet and weight training program.

If you’re looking for fat loss, you could make some strides toward progress if you did nothing other than following a basic cardio training plan. Adding a tailored nutrition plan and structured weight training routine will support those efforts even further.

Improved Recovery

If there’s one secret weapon any lifter can deploy to boost recovery between sessions and enter each workout at maximum capacity, it would be turning some of your weekly rest days into active recovery days.

“Passive recovery” is the technical term for carrying on your standard, non-exercise activities on days you’re not training — your typical rest day. Performing low intensity exercise is considered to be active recovery because you’re actively/deliberately moving your body, encouraging blood flow, and decreasing residual muscle soreness. (12)(13)

Person walking dog on sidewalk outdoors

Credit: Monkey Business Images / Shutterstock

Although you could perform any type of relatively low intensity exercise as an active recovery workout — low volume/low intensity weight training, group fitness class, pickup basketball game, etc. — those forms of activity can require a bit more forethought and planning to ensure they provide the intended recovery benefits without creating excessive fatigue.

Instead, an effective “no-brainer” active recovery workout can be as simple and practical as taking a relatively long, easy-paced walk or bike ride. For an active recovery workout to provide the most benefit, it shouldn’t feel like a workout when you’re doing it.

Increased Endurance and Conditioning

Second to fat loss goals, long duration endurance-type training is what many people in the gym associate with cardio sessions. Logging mile after mile on the treadmill or bike is one way to spend your time in the gym, and it might actually pay off if that’s what you’re after.

Not only can this type of “sport-specific” endurance training help if your goal is to eventually tackle a 26.1-mile marathon, but overall aerobic fitness can improve your overall conditioning. This can help to bounce back between weight lifting sessions, and even potentially recover quicker between sets of intense weight training. (14)(15)

Maybe you’re a competitive powerlifter who attends a meet where your first squat attempt is at 11 a.m. and your last deadlift ends up being at 7 p.m. Or maybe you’re a bodybuilder taking the stage to pose for callout after callout. Or it could just be that your typical back workout leaves you so winded, you end up resting on a comfy incline bench waiting to catch your breath enough to make it into the locker room.

In any of those cases, boosting your general conditioning with some strategic cardio training could raise your base level of general fitness to the point where it’s not holding back your overall performance.

Muscle Growth

Many people believe that lifting is good for muscle growth and cardio is good for almost everything except muscle growth. That’s generally true. However, some research has shown a modest muscle-building stimulus from relatively lower intensity aerobic exercise, particularly in the legs. (16)(17)

This can be especially useful for people who may not be able to perform resistance training due to an existing injury. It’s also a potential solution for people with limited energy levels, or mobility restrictions, which can limit their overall exercise options.

Higher intensity anaerobic training has also been shown to trigger muscle growth in the involved muscle groups. However, higher intensity training requires more finely tuned programming to avoid interfering with a concurrent weight training routine. The higher intensity would not be an efficient or practical choice for people recovering from injury or dealing with low energy issues (for example, elderly people unaccustomed to regular exercise).

Surprising Cardio Benefits 

Beyond the direct physical benefits, there are some unanticipated but equally significant reasons to make cardio exercise a regular part of your training week.

Improved Mental Health

“Clearing your head” with a good workout doesn’t have to mean loading up the bench press and repping out or putting on some boxing gloves and hitting a heavy bag. Grabbing a cardio workout can be just as effective for improving mental clarity, decreasing symptoms of depression, reducing anxiety, and improving mood. (18)(19)(20)

Long-haired person in gym using treadmill

Credit: antoniodiaz / Shutterstock

Next time you feel like taking a break from the stress of a tough day, head out for a quick walk and listen to five of your favorite songs or an entire Ramones album, whichever is shorter. When the music’s done, turn around and repeat it on the walk back.

Many experienced lifters have relied on “iron therapy” in the gym, lifting weights for a mental boost that matches the physical. Experienced cardio practitioners have also found their own parallel, often described as a “runner’s high.”

In both cases, physical activity was seen to have a distinct and noticeable effect on their overall mental health. It’s not often the reason a person begins exercising, but this benefit can sometimes become a welcomed and necessary reason to continue training.

Better Sleep Quality

Exercise and sleep have a symbiotic relationship. When you get a good night’s sleep, you wake with more energy and you can tackle a tough workout. Whenever you have a good, productive workout, you’re typically able to get a good night’s sleep (from fatigue or a simple sense of accomplishment).

Cardio exercise has been directly associated with improved sleep quality (the level of restoration a given night’s sleep actually provides). (21)(22) A high degree of sleep quality is associated with healthy hormone levels, improved immune system function, increased muscle mass, and improved overall athletic performance.

However, some lifters may inadvertently sabotage their sleep schedule by taking highly caffeinated pre-workouts late in the day. Paying attention to your supplement ingredients and timing, and avoiding stimulants within several hours of going to sleep, can put you in a better position to actually sleep well.

Exercise timing hasn’t shown a variety of influences, with training sessions either in the morning or 90 minutes before bed both helping to improve sleep quality. The key is to get the exercise done when your schedule allows. Your individual preference and response are certainly a factor, as well. You’ll know whether a treadmill run will amp you up and re-energize you or if it helps to drain your battery as you slide into slumberland.

Accessible to Everyone

There aren’t too many forms of exercise that can be simultaneously performed by a mother pushing a set of twins in a jogging stroller, her husband the competitive weightlifter, and her mother the 75-year old retiree with a bad hip — but basic cardio exercise is one.

Going for a walk can be a simple, barebones, effective workout that doesn’t require any specialized equipment or gym membership. Cardio is accessible to everyone: experienced gym-goers and beginners, young athletes and older adults.

While you don’t need a gym membership to perform basic body weight resistance exercises like push-ups or lunges, you also don’t need a gym membership to walk, run, or perform body weight cardio exercises like burpees (which have a love ’em or hate ’em reputation). Cardio can be done virtually anywhere, almost anytime, by almost anyone.

FAQs

Can’t most of these benefits also be found with weight training?

Yes and no. “Exercise” is an all-encompassing term that could cover anything from walking a 20-minute mile to taking a yoga class to lifting a 300-pound front squat.
It’s absolutely true that exercise, in general, can provide some of the benefits discussed above. For example, using a combination of both weight training and cardio training has been shown in some research to promote better cardiovascular health than using only one method or the other. (23)
However, weight training programs can require more specific attention to programming and progression than cardio. Manipulating weights, sets, and reps can be more challenging and can involve more planning than going for a walk or taking a bike ride.
There are also some physical capacities that cannot be built without longer duration cardio exercise. Just ask any pro fighter who’s ever gassed out in round four or any strength athlete who’s needed an oxygen mask between lifting attempts.
For the best overall improvements in your health, physique, and overall performance, find ways to follow a well-designed, goal-focused plan that incorporates resistance training and cardio exercise on a regular basis.

How should I get started adding cardio to my training plan?

The details will largely depend on your specific workout split (how many days you’re currently training), as well as your specific goal.
In general, adding two or three cardio sessions per week can be a good place to start. Begin with 15 to 20 minutes of low to moderate intensity work, either on a non-training day or performed immediately after your weight training.
Avoid performing significant cardio training before a lifting session, which may negatively affect strength output for the resistance training to follow. (24) A brief warm-up is fine, but don’t let five to 10 minutes on the bike turn into a full-blown 45-minute cardio workout.

Hop Aboard the Cardio Train

Regardless of your specific training goal, cardiovascular exercise can deliver a slew of benefits for relatively little time investment. Relatively low intensity cardio can require minimal adjustment to your current training plan. As training intensity increases, so does the need to more carefully balance the big picture program. Don’t buy the hype that’s sometimes peddled: “Cardio burns muscle. All you need is lifting.” That’s a short-sighted outlook that will only prevent you from maximizing your health, physique, and performance.

References

  1. Patel, H., Alkhawam, H., Madanieh, R., Shah, N., Kosmas, C. E., & Vittorio, T. J. (2017). Aerobic vs anaerobic exercise training effects on the cardiovascular system. World journal of cardiology, 9(2), 134–138. https://doi.org/10.4330/wjc.v9.i2.134
  2. Pinckard, K., Baskin, K. K., & Stanford, K. I. (2019). Effects of Exercise to Improve Cardiovascular Health. Frontiers in cardiovascular medicine, 6, 69. https://doi.org/10.3389/fcvm.2019.00069
  3. Zheng, G., Qiu, P., Xia, R., Lin, H., Ye, B., Tao, J., & Chen, L. (2019). Effect of Aerobic Exercise on Inflammatory Markers in Healthy Middle-Aged and Older Adults: A Systematic Review and Meta-Analysis of Randomized Controlled Trials. Frontiers in aging neuroscience, 11, 98. https://doi.org/10.3389/fnagi.2019.00098
  4. Borror, A., Zieff, G., Battaglini, C., & Stoner, L. (2018). The Effects of Postprandial Exercise on Glucose Control in Individuals with Type 2 Diabetes: A Systematic Review. Sports medicine (Auckland, N.Z.), 48(6), 1479–1491. https://doi.org/10.1007/s40279-018-0864-x
  5. Roddy E, Zhang W, Doherty MAerobic walking or strengthening exercise for osteoarthritis of the knee? A systematic reviewAnnals of the Rheumatic Diseases 2005;64:544-548.
  6. Rahnama, N., & Mazloum, V. (2012). Effects of strengthening and aerobic exercises on pain severity and function in patients with knee rheumatoid arthritis. International journal of preventive medicine, 3(7), 493–498.
  7. Alghadir, A. H., Aly, F. A., & Gabr, S. A. (2014). Effect of Moderate Aerobic Training on Bone Metabolism Indices among Adult Humans. Pakistan journal of medical sciences, 30(4), 840–844. https://doi.org/10.12669/pjms.304.4624
  8. Gonçalves CAM, Dantas PMS, dos Santos IK, Dantas M, da Silva DCP, Cabral BGdAT, Guerra RO and Júnior GBC (2020) Effect of Acute and Chronic Aerobic Exercise on Immunological Markers: A Systematic Review. Front. Physiol. 10:1602. doi: 10.3389/fphys.2019.01602
  9. da Silveira, M. P., da Silva Fagundes, K. K., Bizuti, M. R., Starck, É., Rossi, R. C., & de Resende E Silva, D. T. (2021). Physical exercise as a tool to help the immune system against COVID-19: an integrative review of the current literature. Clinical and experimental medicine, 21(1), 15–28. https://doi.org/10.1007/s10238-020-00650-3
  10. Willis, L. H., Slentz, C. A., Bateman, L. A., Shields, A. T., Piner, L. W., Bales, C. W., Houmard, J. A., & Kraus, W. E. (2012). Effects of aerobic and/or resistance training on body mass and fat mass in overweight or obese adults. Journal of applied physiology (Bethesda, Md. : 1985), 113(12), 1831–1837. https://doi.org/10.1152/japplphysiol.01370.2011
  11. Donnelly, J. E., Honas, J. J., Smith, B. K., Mayo, M. S., Gibson, C. A., Sullivan, D. K., Lee, J., Herrmann, S. D., Lambourne, K., & Washburn, R. A. (2013). Aerobic exercise alone results in clinically significant weight loss for men and women: midwest exercise trial 2. Obesity (Silver Spring, Md.), 21(3), E219–E228. https://doi.org/10.1002/oby.20145
  12. Ortiz, R. O., Jr, Sinclair Elder, A. J., Elder, C. L., & Dawes, J. J. (2019). A Systematic Review on the Effectiveness of Active Recovery Interventions on Athletic Performance of Professional-, Collegiate-, and Competitive-Level Adult Athletes. Journal of strength and conditioning research, 33(8), 2275–2287. https://doi.org/10.1519/JSC.0000000000002589
  13. Tomlin, D. L., & Wenger, H. A. (2001). The relationship between aerobic fitness and recovery from high intensity intermittent exercise. Sports medicine (Auckland, N.Z.), 31(1), 1–11. https://doi.org/10.2165/00007256-200131010-00001
  14. Tomlin, D. L., & Wenger, H. A. (2001). The relationship between aerobic fitness and recovery from high intensity intermittent exercise. Sports medicine (Auckland, N.Z.), 31(1), 1–11. https://doi.org/10.2165/00007256-200131010-00001
  15. Rankovic, G., Mutavdzic, V., Toskic, D., Preljevic, A., Kocic, M., Nedin Rankovic, G., & Damjanovic, N. (2010). Aerobic capacity as an indicator in different kinds of sports. Bosnian journal of basic medical sciences, 10(1), 44–48. https://doi.org/10.17305/bjbms.2010.2734
  16. Konopka, A. R., & Harber, M. P. (2014). Skeletal muscle hypertrophy after aerobic exercise training. Exercise and sport sciences reviews, 42(2), 53–61. https://doi.org/10.1249/JES.0000000000000007
  17. Naruse, M., Vincenty, C. S., Konopka, A. R., Trappe, S. W., Harber, M. P., & Trappe, T. A. (2023). Cycle exercise training and muscle mass: A preliminary investigation of 17 lower limb muscles in older men. Physiological reports, 11(16), e15781. https://doi.org/10.14814/phy2.15781
  18. Falkai, P., Schmitt, A., Rosenbeiger, C. P., Maurus, I., Hattenkofer, L., Hasan, A., Malchow, B., Heim-Ohmayer, P., Halle, M., & Heitkamp, M. (2022). Aerobic exercise in severe mental illness: requirements from the perspective of sports medicine. European archives of psychiatry and clinical neuroscience, 272(4), 643–677. https://doi.org/10.1007/s00406-021-01360-x
  19. Herbert, C., Meixner, F., Wiebking, C., & Gilg, V. (2020). Regular Physical Activity, Short-Term Exercise, Mental Health, and Well-Being Among University Students: The Results of an Online and a Laboratory Study. Frontiers in psychology, 11, 509. https://doi.org/10.3389/fpsyg.2020.00509
  20. Zhao, J. L., Jiang, W. T., Wang, X., Cai, Z. D., Liu, Z. H., & Liu, G. R. (2020). Exercise, brain plasticity, and depression. CNS neuroscience & therapeutics, 26(9), 885–895. https://doi.org/10.1111/cns.13385
  21. Ezati, M., Keshavarz, M., Barandouzi, Z.A. et al. The effect of regular aerobic exercise on sleep quality and fatigue among female student dormitory residents. BMC Sports Sci Med Rehabil 12, 44 (2020). https://doi.org/10.1186/s13102-020-00190-z
  22. Dolezal, B. A., Neufeld, E. V., Boland, D. M., Martin, J. L., & Cooper, C. B. (2017). Interrelationship between Sleep and Exercise: A Systematic Review. Advances in preventive medicine, 2017, 1364387. https://doi.org/10.1155/2017/1364387
  23.  Schroeder, E. C., Franke, W. D., Sharp, R. L., & Lee, D. C. (2019). Comparative effectiveness of aerobic, resistance, and combined training on cardiovascular disease risk factors: A randomized controlled trial. PloS one, 14(1), e0210292. https://doi.org/10.1371/journal.pone.0210292
  24. Markov, A., Chaabene, H., Hauser, L., Behm, S., Bloch, W., Puta, C., & Granacher, U. (2022). Acute Effects of Aerobic Exercise on Muscle Strength and Power in Trained Male Individuals: A Systematic Review with Meta-analysis. Sports medicine (Auckland, N.Z.), 52(6), 1385–1398. https://doi.org/10.1007/s40279-021-01615-6

Featured Image: bluedog studio / Shutterstock

Source

August 23, 2023

How to Do the Barbell High Row for a Powerful, Muscular Upper Back

Filed under: Fitness,Training — Tags: , — admin @ 4:22 pm

In a quest for upper back size and strength, and the muscular silhouette that comes with it, lifters are increasingly finding room for a unique rowing exercise in their back-building routines. The barbell high row, sometimes called the wide row, is a bent-over barbell row performed with a distinctive setup and arm path that hammers the entire upper half of your back, especially your mid-back and shoulders.

While bent-over rows and reverse flyes are traditional choices to target these regions, the barbell high row offers distinct mechanical advantages that promote targeted loading and honest form.

Long-haired person in gym preparing to lift barbell off ground

Credit: Jacob Lund / Shutterstock

The barbell high row is an old school exercise enjoying widespread recognition. Whether you use it to round out an intense back workout or to round out the backsides of your shoulders, the barbell high row is a solid addition to any lifting routine.

Barbell High Row

Barbell High Row Video Guide

Dr. Merrick Lincoln, the article’s author, provides an instruction video explaining the barbell high row. Watch the demonstration, then check out the step-by-step analysis with more form tips.

How to Do the Barbell High Row Step By Step

To get the benefits of the barbell high row, you’ll need to focus on crisp, strict form. Execute pristine barbell high rows with these four steps.

Step 1 — Take a Wide Grip

Dr. Merrick Lincoln in gym demonstrating barbell row

Credit: Merrick Lincoln, DPT, CSCS / YouTube

The barbell high row uses a significantly wide overhand grip — specifically, a “snatch grip” similar to the Olympic weightlifting exercise. Your hands should grab the bar substantially beyond your shoulders and approximately the distance between the points of your elbows when your arms are outstretched at shoulder-height.

Form Tip: Rather than getting the measuring tape, a simple technique to determine an appropriate grip width is to grab the bar in the “scarecrow position:” bend forward, flare your elbows to shoulder-height, and allow your forearms to hang with your elbows at an approximately 90-degree angle. Grab the bar at this width. 

Step 2 — Stand Up, Then Hinge Down

Dr. Merrick Lincoln in gym demonstrating barbell row

Credit: Merrick Lincoln, DPT, CSCS / YouTube

Grip the bar firmly and stand up straight, allowing your elbows to straighten with the barbell resting near your hips. Hinge forward at your hips, letting your hips flex as your buttock travels backward to keep you balanced. The position of your spine should remain virtually unchanged — no rounding. Keep a slight bend in your knees throughout the movement.

Form Tip: Lower until you feel a stretch in your hamstrings (behind your thighs) or when the plates are hovering just above the ground, whichever comes first. 

Step 3 — Pull High and Wide

Dr. Merrick Lincoln in gym demonstrating barbell row

Credit: Merrick Lincoln, DPT, CSCS / YouTube

Hold the bent position and pull the barbell toward your upper chest, or just below your collarbone, by simultaneously driving your elbows out to your sides while drawing your shoulder blades together. Not all lifters will be able to touch the barbell to the upper chest, and that is okay.

Form Tip: Think about “stretching” the bar or making it longer as you pull. This cue reinforces proper arm path. Ensure your elbows remain flared to the sides and not alongside your ribs.

Step 4 — Lower With Control

Dr. Merrick Lincoln demonstrating barbell row

Credit: Merrick Lincoln, DPT, CSCS / YouTube

Lower the barbell toward the floor by allowing your elbows to straighten and your shoulder blades to be pulled apart, moving forward around your ribcage. Maintain the hinged forward position and repeat the pull for additional rowing repetitions

Form Tip: Don’t miss out on the stretch across your mid-back at the bottom. Ensure your trunk angle or hip hinge depth allows you to get a full range of motion without the barbell plates touching the ground. If you’re flexible and the weight plates hit the floor before you feel the stretch, reset your trunk angle by extending your hips or load the bar with smaller diameter plates.

Barbell High Row Mistakes to Avoid

The barbell high row involves stability and a degree of coordination between your upper and lower body. Keep exercise quality high by avoiding these recurring errors.

Using Too Much Biceps

Training your biceps is nice, but hitting the target muscles of your shoulders and back is nicer. It has been suggested that rowing with greater than 90-degrees of elbow flexion increases contribution of the biceps brachii. (1)

Muscular man performing barbell row exercise

Credit: Miljan Zivkovic / Shutterstock

Moreover, rowing with excessive elbow flexion reduces the resistance arm, or perpendicular distance between the barbell and the shoulder joint, which ultimately reduces demand on the shoulder musculature. 

Avoid it: Avoid letting your biceps steal the row by using appropriate grip placement, setup, and technique. First, ensure your grip is overhand and spaced approximately the distance between your elbows when your arms are at shoulder-height. Second, when you hinge forward to set up, ensure the bar is hanging underneath your upper chest. Finally, pull toward your upper chest, not your stomach.

Poor “Scapulohumeral Rhythm”

As you pull your arms back, or horizontally abduct your shoulder joint, your shoulder blades ought to come together, or retract. The coupling of shoulder joint motions with appropriate shoulder blade motions is called scapulohumeral rhythm. If your blades aren’t working with your shoulder joints, well, you’ve got no rhythm.

Muscular person in gym performing barbell row

Credit: Jasminko Ibrakovic / Shutterstock

Avoid it: Draw your shoulder blades back as you perform the upward movement phase of the row. A useful cue is to create progressively more space between the front of your shoulder and the floor as you row. (2) Then, allow this space to shrink as you perform the downward movement phase.

Momentum from Your Hips or Trunk

While the upward movement phase of the repetition should be performed with powerful intent, form should not be compromised. If the angle between your trunk and the floor dramatically changes during each repetition, with your torso dipping up and down, you’re cheating and likely sacrificing tension on the target muscles.

Bald person in gym doing barbell deadlift

Credit: UfaBiaPhoto / Shutterstock

Avoid it: If you cannot fix this error by stiffening your midsection and consciously keeping a tight core, it may be time to reduce the weight and put in some more practice sets.

How to Progress the Barbell High Row

Once the barbell high row begins to feel relatively easy, you need progression to ensure ongoing gains. Based on your goals and preferences, consider the following strategies.

Add Repetition Volume

Unlike the bench press, no one will ever ask how much weight you can barbell high row, because no one really cares. So, rather than adding weight when your sets of barbell high rows start to feel “easy,” simply add another repetition or two per set.

Provided your sets have not become miniature endurance events limited by other energy systems, gradually progressing into higher repetition ranges can be effective for building muscle. (3)

If you’re a physique-focused lifter who enjoys moderate-to-high volume sets, and your sets are still under 25 or 30 repetitions, continue to add repetitions until your sets become challenging again.

Increase the Weight

Adding more repetitions may stimulate ongoing muscle growth, but it may not be the best option for building strength in your back and shoulders. Strength, defined as the ability to exert force in a measurable and meaningful way, is logically best developed using progressively heavier loads.

If you are a strength-focused athlete who is consistently hitting six or more repetitions per set with some in the tank, it may be time to add some change plates to the bar. For your working sets, start by adding increments of 2 to 5% of the total weight.

Consider an Eccentric Tempo

Popular wisdom in the gym suggests using a relatively slow tempo during the downward movement (eccentric phase) can improve your gains. However, this topic is more controversial than it seems. Research on intentionally slow eccentric training is mixed when it comes to hypertrophy and appears decidedly unwise for strength goals. (4)

Tattooed woman preparing to lift barbell

Credit: Jacob Lund / Shutterstock

However, if you find yourself unable or unwilling to progress barbell high rows via the traditional methods discussed above (e.g., injury, lack of additional weights, or good old-fashioned stubbornness), applying an eccentric tempo may be worth consideration. 

If using an intentionally slow tempo during the eccentric requires you to decrease the weight or reduce the repetitions performed, it likely does not represent a progression. (4) To be clear, using an eccentric tempo is only a progression if you impose it upon the repetitions and load your body is accustomed to. If you choose to experiment with eccentric tempo work, a lowering phase that lasts for a full three-to-four count is a reasonable target.

Finally, intentionally slowing the upward movement (concentric phase) of a lift has little to no physiological benefit. (5) So you will still want to strike the balance between intent for bar speed and control during the concentric.

Benefits of the Barbell High Row

Why are more and more lifters choosing the barbell high row to build their shoulders and backs? Because this rediscovered exercise has advantages that other common options cannot match.

Robust Shoulder Complex Training

The shoulder complex includes the shoulder joint proper (i.e., glenohumeral joint), the shoulder girdle (i.e., shoulder blade and collar bone), along with all associated muscles. While other types of rows may hit your latissimus dorsi harder, arguably no common row variation trains the back of the shoulder complex as robustly as the barbell high row. 

Although we tend to classify all rowing exercises as “horizontal pulling,” the uniqueness of the high row is all about differences in angles and arm paths. Most row variations bias your shoulder extensors due to relatively narrow and low arm paths. These muscles are also trained in neutral-grip lat pulldowns, neutral-grip pull-ups, chin-ups, and other similar exercises.

However, the barbell high row trains your shoulder horizontal abductors due to the high and wide arm path. These muscles include the rear deltoid, part of the middle deltoid, and even several muscles of the rotator cuff.

Muscular person in gym preparing to lift barbell

Credit: Paul Aiken / Shutterstock

High rows may better target your mid-back, namely the middle trapezius, compared to row variations with lower arm paths (6) This finding makes sense, because the high and wide resistance applied through your arms maximizes resistance to the scapula retractor muscles.

If you are already hitting pulldowns or bent-over rows, the barbell high row might be a great addition to round out your training for the back of the shoulder complex. It can also serve as a substitute for reverse flyes, as discussed below.

Hard to Cheat

Compared to reverse flyes, a dumbbell exercise for your rear deltoids and mid-back, the barbell high row promotes strict form. It is a little too easy to generate momentum at the bottom part of a reverse flye, and that momentum helps to carry the dumbbells to the top position without significant muscular activation.

The barbell high row, on the other hand, leaves little room for generating arm swing because tension never really comes off the working muscles. What’s true for both exercises, however, is that you must still remain vigilant to avoid momentum from your hips. This can be accomplished by carefully maintaining the same trunk angle, or distance between your trunk and the floor, throughout the exercise. 

Low Back Health

If you could collect a dollar every time you see an exercise purported to “bulletproof” the low back, you could quickly buy a barbell and build strength and endurance with hip hinge or forward-bent exercises.

Barbell exercises that load the hip hinge include deadlifts, good mornings, bent-over rows, and high rows. They’re all effective for training the spinal erector muscles. For this reason, among others, these exercises may be useful for combating low back problems. For example, the Pendlay row has been used as a part of an effective resistance training protocol for individuals with low back pain. (7)

The barbell high row is an effective exercise for building low back strength and endurance. Will the exercise “bulletproof” your low back? Not in the literal sense, but it may be worth a shot for potentially preventing back problems or treating appropriate types of low back pain.

Disclaimer: All brands of low back pain are different. If you are suffering from low back pain or injury, you should get checked out by a sports medicine physician or physical therapist.

Muscles Worked by Barbell High Row

While traditional bent-over rows and reverse grip bent-over rows are great for building lats due to their narrower grip and lower bar path, the barbell high row biases different muscles of your back. It’s also a phenomenal shoulder-builder.

Middle Trapezius and Rhomboids

Your mid-back muscles include the rhomboids major, rhomboids minor, and the middle part of the trapezius. Rhomboids retract your scapulae, or pull the shoulder blades together, and assist with downward rotation and elevation.

Muscular person flexing back and shoulder muscles

Credit: PeopleImages.com – Yuri A / Shutterstock

The muscle fibers of the middle part of the trapezius, sometimes called “middle traps,” are oriented horizontally, so they exclusively perform scapula retraction. Since retraction is the predominant resisted movement of the shoulder blades during the barbell high row, it hits middle trapezius and rhomboids.

Rear and Middle Deltoids

Your deltoids are the round muscles that sit atop and envelop your shoulder joints. Well-built deltoids have a “capped” or rounded appearance, which requires training the front, middle, and rear portions of the muscle. The barbell high row hammers the rear deltoids and also hits some of the middle fibers.

Rotator Cuff

The rotator cuff consists of four deep muscles and tendons that surround the ball and socket joint of the shoulder. They are typically considered stabilizing muscles, working to counteract or modify forces imposed on the joint by much larger superficial muscles. During rows, the subscapularis, or anterior rotator cuff, has been shown to be most active. (8)

In addition, anatomical analysis of the posterior rotator cuff (infraspinatus and teres minor) suggests these muscles may also be trained along with the posterior deltoid during the barbell high row. Both muscles pass behind the shoulder joint and are mechanically suited to act as horizontal abductors.

How to Program the Barbell High Row

The barbell high row can be programmed in a full-body workout or in a variety of workout splits. As a multi-joint pulling exercise, the barbell high row can be used to build functional strength or as an efficient way to pack on mid-back and shoulder muscle.

As a Moderate Weight Back-Builder

Lifters with hypertrophy or muscle-building goals should focus on moderate weight sets of barbell high rows. As a rule of thumb, you will use 30-50% less weight for the barbell high row than you do for standard bent-over barbell rows.

For those reaching for calculators or scrolling for calculator apps, relax. There is no need to overthink the weight and repetition range. As long as your sets are high effort, or carried out close to muscular failure, they will be effective at virtually any weight. (3)(9) To put on muscle, perform three or four sets of eight or more repetitions, taking each working set to within two or three repetitions of failure. Rest two or three minutes between sets.

As a Strength Staple

Load barbell high rows with relatively heavy weight, and you’ve got a potent exercise for building upper back and shoulder strength. As the weight increases, stay disciplined with your form. Extending your hips to initiate the row shifts emphasis from your upper body to your lower body.

To build pulling strength, perform three or four sets of four to six repetitions using a challenging weight. Rest two to four minutes between sets.

As Part of a Superset

Using supersets refers to two different exercises performed back-to-back without a rest interval in between. It’s a time-efficient training method, if you’re tough enough to handle it. In the strictest sense, the two exercises comprising a superset should target antagonistic or opposite muscle groups.

Man outdoors on flat bench lifting dumbbells

Credit: MDV Edwards / Shutterstock

Since the barbell high row is a horizontal pulling exercise primarily targeting the back and rear deltoids, its superset counterpart should be a horizontal pushing exercise that hits the chest and front of the shoulders. Appropriate “pushing” exercise options for this push-pull superset include the time-honored bench press, the dumbbell hex press, or the dumbbell bench press

Supersets save time, and research indicates lifters experience similar hypertrophy gains compared to straight sets. (10) While supersets are known to result in greater perceived exertion and discomfort, most lifters prefer them over traditional straight sets. (11) For an efficient workout, perform a pressing exercise immediately followed by the barbell high row with no rest in between.

Barbell High Row Variations

Looking for other effective exercises to build your mid-back and shoulders? The row variations below use barbells, dumbbells, resistance bands, and machines to spice up your workout. 

Meadows Row

Another increasingly popular type of exercise uses a barbell as a lever. They’re called landmine exercises. (2) The Meadows row is a single-arm high row landmine exercise. It was popularized by the late coach John Meadows, MS, CSCS.

Aside from the ability to perform the movement unilaterally, a feature making the Meadows row unique is the resistance curve of the exercise. The barbell lever makes the row “heavier” at the bottom position. (2) Keep in mind, you’re stronger at the bottom of the rowing motion than you are at the top. (2)

Also, the target muscles of the mid back and shoulders are stretched at the bottom position while they are exposed to greater loads. These features can make the Meadows row incredibly effective for building pulling capacity and stimulating stretch-mediated hypertrophy.

Resistance Band High Row

Resistance band exercises are great for warm-ups, accessory exercises, pump-work, and travel. The resistance band high row allows for quick setup and performance of the high row movement in an upright position.

To perform resistance band high rows, simply anchor a resistance band securely at the level of your upper chest and take an overhand grip on the band — slightly wider than shoulder-width if using a loop-style resistance band. With your arms at shoulder height, back up into tension. Pull the handles high and wide, leading with your elbows, to bring the band to your upper chest before returning to the starting position. Be sure not to turn the movement into a face pull by pulling the band to eye-level.

Three-Point Dumbbell Wide Row

The dumbbell wide row is the single-arm version of the barbell high row. (1) Using a three-point stance on a bench provides the support you may need to zero-in on target muscles.

Set up by placing the non-working side knee and palm on the bench, with your working-side foot on the floor, and the dumbbell in the working-side hand. Drive your elbow out the side as you pull toward the upper chest. Return to the starting position while allowing your shoulder blade to “wrap forward” around your ribcage.

Machine Wide Row

Support and guidance offered by a well-built machine can help to ensure your rear deltoids and mid-back receive the intended training stimulus from wide rows. The machine can also minimize demands on your low back, which can be useful when managing fatigue throughout a grueling workout.

Find a row machine with wide-set horizontal handles. Adjust the seat to allow a high arm path toward your upper chest. Take overhand grips on the handles and draw the machine’s movement arms back. Like the barbell version, drive your elbows out to your sides and retract your shoulder blades as you pull. Reverse the movement to return to the start position.

FAQs

What’s the difference between the barbell high row and the bent-over barbell row?

While both exercises are performed from the hip hinge position with overhand grips, the barbell high row uses a significantly wider grip. Due to the wider grip, the natural bar path for the high row is “higher” as the bar is pulled toward the upper chest, while the bent-over row is pulled toward the lower chest or upper stomach.

What’s the difference between the barbell high row and the Pendlay row?

The barbell high row uses a grip significantly wider than the shoulders and begins with the barbell suspended in the air while maintaining a hip hinge position. The Pendlay row uses an overhand grip that’s slightly wider than the shoulders and each repetition begins from a dead-stop on the floor.
Once again, the difference in grip width results in different natural bar paths. While the barbell high row bar path leads toward the upper chest, the Pendlay row is directed toward the lower chest. (7)

“Should I squeeze my shoulder blades together before I row?”

Some coaches encourage lifters to retract or set their shoulder blades prior to initiating the row. While this could be useful as a very early teaching drill, training using this technique is misguided. 
During functional movements like a row, the shoulder joints and shoulder blades should work together to accomplish the task. While retraction is the appropriate movement of the scapulae, performing it prior to the row limits the tension the mid-back is exposed to during the row. The dynamic retraction work is already complete before movement of the upper arm bone amplifies the resistance arm.
We know muscles are stronger isometrically than concentrically, so simply holding the retracted position during the most challenging portions of the row will fail to stimulate as much mid-back growth as performing rows the correct way — retract as you row.

Barbell high rows for low back health? Why not deadlift instead?

That’s an option. Both exercises train your spinal erector muscles. Deadlifts were part of the low back pain protocol study discussed above, and additional evidence suggests deadlifts may be useful for individuals suffering from low back pain. (7)(12)(13)
However, there are a few reasons the barbell high row might be favored over deadlifts. The barbell high row uses substantially less weight than deadlifts, which may result in less compressive loading through the spine. But the bar path of the high row is farther from the lumbar spine than it is in the deadlift, meaning the barbell has a larger resistance moment arm. The longer resistance arm applies proportionately larger torque or demand on the low back, which is ultimately counteracted by the spinal erectors.
Finally, during the row, the lifter remains hinged forward at the hips throughout the entire set, which may lead to the development of greater muscular endurance in the low back. Both are great exercises. Again, if you are suffering from back issues, consult a sports medicine physician or physical therapist for individualized advice.

Build a Top-Level Physique with the Barbell High Row

The barbell high row is an effective exercise for adding muscular thickness behind the shoulders and between the shoulder blades. Over time, this new muscle will fill out the top half of your physique. Better yet, to help keep you in the gym long enough to realize those gains, the barbell high row also promotes shoulder and low back stability.

References

  1. Hedrick, A., & Herl, M. (2021). Technique of the unilateral dumbbell wide row. Strength & Conditioning Journal43(4), 121-123.
  2. Lincoln, M. A., et al. (2023). Exercise Technique: The Landmine Row. Strength & Conditioning Journal45(3), 371-378.
  3. Schoenfeld, B., et al. (2021). Resistance training recommendations to maximize muscle hypertrophy in an athletic population: Position stand of the IUSCA. International Journal of Strength and Conditioning1(1), 1-30.
  4. Suchomel, T. J., et al. (2019). Implementing eccentric resistance training—part 1: a brief review of existing methods. Journal of Functional Morphology and Kinesiology4(2), 38.
  5. Hermes, M. J., & Fry, A. C. (2023). Intentionally Slow Concentric Velocity Resistance Exercise and Strength Adaptations: A Meta-Analysis. Journal of Strength and Conditioning Research37(8), e470-e484.
  6. Lim, J. Y., et al. (2015). A comparison of trapezius muscle activities of different shoulder abduction angles and rotation conditions during prone horizontal abduction. Journal of Physical Therapy Science27(1), 97-100.
  7. Tjøsvoll, S. O., et al. (2020). Periodized resistance training for persistent non-specific low back pain: a mixed methods feasibility study. BMC Sports Science, Medicine and Rehabilitation12, 1-12.
  8. Wattanaprakornkul, D., et al. (2011). Direction-specific recruitment of rotator cuff muscles during bench press and row. Journal of Electromyography and Kinesiology21(6), 1041-1049.
  9. Weakley, J., et al. (2023). Physiological Responses and Adaptations to Lower Load Resistance Training: Implications for Health and Performance. Sports Medicine-Open9(1), 1-10.
  10. Fink, J., et al. (2021). Physiological Responses to Agonist–Antagonist Superset Resistance Training. Journal of Science in Sport and Exercise3, 355-363.
  11. Andersen, V., et al. (2022). A comparison of affective responses between time efficient and traditional resistance training. Frontiers in Psychology13, 912368.
  12. Aasa, B., et al. (2015). Individualized low-load motor control exercises and education versus a high-load lifting exercise and education to improve activity, pain intensity, and physical performance in patients with low back pain: a randomized controlled trial. Journal of Orthopaedic & Sports Physical Therapy45(2), 77-85.
  13. Welch, N., et al. (2015). The effects of a free-weight-based resistance training intervention on pain, squat biomechanics and MRI-defined lumbar fat infiltration and functional cross-sectional area in those with chronic low back. BMJ Open Sport & Exercise Medicine1(1), e000050.

Featured Image: Paul Aiken / Shutterstock

Source

August 21, 2023

Your Beginner Barbell Workout: A Starter Plan for Strength and Muscle

Filed under: Fitness,Training — Tags: , — admin @ 12:03 am

Something magical happens near the beginning of every dedicated lifter’s love affair with resistance training. There’s a period of unprecedented gains in strength and size. Some refer to the muscular adaptations realized during this stage as “newbie gains.” 

Don’t let the derogatory connotation fool you. Newbie gains are awesome. You’ll hit frequent personal bests, stack on pounds of lean muscle mass, and dial-in natural lifting technique. 

Long-haired person in gym holding barbell for front squat

Credit: Ground Picture / Shutterstock

What’s the best way for a new lifter to take advantage of this honeymoon period of gains? Easy. Get your hands on a weight set and train consistently with the basic barbell lifts. Built around barbell basics, this program provides everything you need for serious muscle.

Beginner’s Barbell Workout

How to Warm-up for Your Barbell Workout

Starting a workout cold may lead to reduced performance, so learn good habits from the start. Don’t skip your warm-up. Warm-ups typically begin with a four-to-six-minute session of cardio to increase body temperature and circulation, ultimately improving oxygen delivery to your muscles and improving metabolite clearance. Common options for the cardio warm-up include skipping rope, riding a stationary bike, or taking a quick jog

Next, mobilize and activate the joints and muscles of the body involved in the upcoming workout. Since you’re warming up for a full-body workout, you could burn a lot of gym time here, so it’s best to focus on a few key areas such as your hips, shoulders, and spine. Below is a two-movement mobility and activation sequence for these regions. Perform three rounds of following movements:

  • Plank to Pike with Alternating Reach: Assume a “high plank” position — the top position of a push-up — then use your upper body to push your hips back over your heels until you feel a hamstring stretch. This “upside down V” is called the pike position. Maintain the pike position and reach your right hand toward your left foot, return your hand to center, then reach your left hand toward your right foot. Return to a high plank by lowering your hips. That’s one repetition. Perform 8 repetitions.
  • Plank to Deep Lunge with Rotations: Begin in the high plank position and drive your left leg forward and plant your foot as close to the outside of your hand as your mobility allows. Then, lift your left hand and reach out and up toward the ceiling as you rotate your trunk to the left as far as you can. Rotate back and return your hand to the floor, then step back to high plank. Repeat on the right side. That’s one repetition. Perform 8 repetitions. 

Once you finally get your hands on the barbell, remember to perform several “work-up sets” of each exercise using lighter weights. Work-up sets allow you to dial-in technique and help you to identify appropriate weights for the sets that count.

Barbell Basics for Size and Strength

A barbell with plates is possibly the most versatile tool for resistance training. In addition to being the requisite piece of equipment for common exercises, it’s loadable, allowing you to scale the intensity of your training to your current level of strength. Paired with an adjustable bench and sturdy rack, a barbell set gives you the means to train your entire body. 

Fortunately, beginner lifters don’t need to live at the gym to experience newbie gains. A large meta-analysis compared the effects of less than five weekly sets per muscle group, five to nine weekly sets, and ten or more. (1) For hypertrophy and strength results, this analysis concluded beginners and novice lifters should target five to nine sets per week per major muscle group. (1)

Of course, this recommendation does not imply all sets should be performed in the same workout. Full-body workouts help to maximize training frequency, or the number of times each muscle group is trained per week. Higher frequency training allows for greater weekly sets while avoiding marathon-length workouts. 

The workout below consists of 15 sets of barbell exercises. If repeated two or three times per week, this workout puts beginner and novice lifters squarely into the target range for weekly sets. (1) It might be the only resistance training program you need to take your physique from entry-level to next-level.

Barbell Basics Workout Plan

  • Front Squat — 3 x 6-10
  • Bench-Supported Barbell Row — 3 x 8-12
  • Romanian Deadlift — 2 x 8-12
  • Incline Bench Press — 3 x 6-10
  • Barbell Rollout — 2 x 12-16
  • Barbell Curl — 2 x 8-12

Front Squat

Set the tone of your workout by hitting squats first. Specifically, front squats, which hammer your thighs and glutes. The front squat differs from the back squat in several ways. First, as the name implies, the front squat requires carriage of the bar in front of the body, while back squats are performed with the bar across the upper back.

The front carriage or “front rack” position may be more forgiving for those with shoulder instability, and it tends to promote a more upright trunk position. Compared to back squat, the front squat also tends to require relatively less weight to elicit a similar training effect. (2

Why favor an exercise that uses less weight? This is a full-body workout, and we are just getting started. Less load spares the body from excessive fatigue accumulation, which might interfere with subsequent exercises. Front squats will toast your quads without burning through all your matches. 

  • How to Do it: Set up for the front squat by placing the bar at chest height in the rack. For safety, set the spotter arms to approximately one increment below the lowest point you anticipate the bar reaching during the movement. Place your fingers over the bar, slightly outside shoulder-width and dip under the bar as you point your elbows straight ahead. Step back a half step from the rack, place your feet approximately shoulder width, and squat down, keeping your elbows high and chest up. Descend as far as possible while remaining upright with heels on the floor, then return to standing. 
  • Sets and Repetitions: 3 x 6-10
  • Rest time: Rest three minutes between sets .

Benefits of the Front Squat

  • The “front rack” bar position promotes an upright trunk, which may be beneficial for lifters who tend to fold excessively forward during squats.
  • Front squats build big, strong quadriceps. Quadriceps can be further biased by placing wedges or small plates under the heels.
  • The exercise promotes athleticism. Front squats have direct carryover to Olympic weightlifting movements (i.e., clean & jerk) and are shown to improve vertical jump performance more effectively than heavy hip thrusts. (3)

Bench-Supported Barbell Row

The next exercise is an upper body pulling movement. Barbell rows are known to build wide lats. This bench-supported variation spares your spinal erectors (the lower back muscles that support your back) for the next exercise. (4) Spoiler alert: deadlifts are next, so you’ll need a fresh set of erectors. In addition to your latissimus dorsi, barbell rows hit your rear deltoids and trapezius. (4)

The bench support also allows you to dial-in natural rowing technique because you do not have to worry about maintaining trunk or hip positions as in the bent over row. Rows should involve the entire shoulder complex, not just the ball and socket joint of the shoulder. Meaning when you pull, your shoulder blades out to retract, or squeeze together. To re-enforce proper shoulder blade movement, focus on creating more space between the front of your shoulders and floor as you row the barbell. (5)

  • How to Do it: Set an adjustable bench to a roughly 35-to-45-degree angle. Lie on your stomach with your chest supported by the top several inches of the bench. Grasp the barbell with an overhand grip slightly beyond shoulder-width. Draw the bar toward the underside of the bench, then return to the bottom position, ensuring motion comes from the shoulder joint and shoulder blades.
  • Sets and Repetitions: 3 x 8-12
  • Rest time: Rest two minutes between sets.

Benefits of the Bench-Supported Barbell Row

  • The bench support prevents unnecessary fatigue and allows for greater focus and emphasis on the target muscles — lats, mid-back, and rear delts.
  • Using a moderate-width, overhand grip promotes balanced development of mid-back and lat muscles for back thickness and width.
  • The bench-supported row is great for shoulder health. In addition to building your back, rows train the rotator cuff, namely the subscapularis, as a dynamic stabilizer. (6)

Romanian Deadlift

When programmed earnestly, conventional deadlifts tend to be unforgiving. They place heavy demands on your grip, trunk, and legs. The Romanian deadlift (RDL) is a deadlift variation beginning at the top position of the lift and executed with minimal bend at the knees. It’s a smarter barbell lift for targeting hamstrings at this stage of the workout.

Following the same rationale as programming front squats rather than back squats to reduce systemic demand and ensuing fatigue, the RDL is favored for this full-body workout. At 70% of one-repetition maximum, conventional deadlifts and RDLs place similar mechanical demands on the hips and show similar hamstring muscle activity. (7)

However, the RDL one-repetition maximum is substantially lower than the conventional deadlift. Sure, conventional deadlifts are shown to hit the quadriceps harder than RDLs, but you’ve already toasted your quads with the front squat. (7) Savor the stretch of RDLs as you build an impressive set of “hanging hamstrings.”

  • How to Do it: Stand with either an overhand or mixed (“over/under”) grip on the barbell. Maintain a slight bend in your knees as you lower the bar by bending at the hips. Lower the weight until you feel a strong stretch behind your thighs in the bottom position, then return to standing. Keep your torso stiff as you bend at the hips and avoid curving your back forward.
  • Sets and Repetitions: 2 x 8-12
  • Rest time: Rest three minutes between sets.

Benefits of the Romanian Deadlift

  • The RDL builds “strength at length.” By keeping your knees relatively straight while you bend forward at the hips, you stretch the hamstrings under load, which promotes simultaneous gains in hypertrophy and flexibility. (8)(9)
  • Romanian deadlifts activate the hamstrings to similar levels as conventional deadlift. (7) RDLs likely exposes the hamstrings to greater tension due the increases stretch across three of the four hamstring muscles — semitendinosus, semimembranosus, and biceps femoris long head.

Incline Bench Press

No full-body barbell workout is complete without a press. Rather than default to the ever popular bench press or classic military press, we’re striking middle ground by programming the incline bench. The incline bench press not only hits the middle and lower fibers of your pectoralis major — the largest and most prominent chest muscles — but it also hammers the upper (clavicular) fibers. (10) Since your shoulders are trained through a larger range of motion, the incline bench press is also an effective choice for building your deltoids, specifically the front portion. 

Still not convinced the incline bench is the right press for you? Results of an eight-week training study showed similar gains in muscle thickness in the middle and lower regions of pectoralis between a group training exclusively traditional bench press and a group training exclusively incline bench press. (11) However, the thickness gains were significantly greater in the upper pectoral region for the incline bench group. (11)

Most surprisingly, improvements in a lab-based test of horizontal pressing strength at the end of the study were similar between groups. (11) As a disclaimer, those looking to compete in the sport of powerlifting should still program traditional bench press, as the principle of training specificity still applies.

  • How to Do it: Set an adjustable bench to the 45-degree incline position. Retract your shoulder blades so they lie flat when you lean against the pad with an arched back. Ensure the spotter arms are positioned one notch lower than your anticipated range of motion. Take a closed overhand grip on the bar, ensuring the bar rests on the heels of your hands. Keep your forearms vertical and bend at the elbows to lower the bar to your mid or upper chest. Avoid bouncing the bar off your chest before driving it back up to the lockout position. 
  • Sets and Repetitions: 3 x 6-10
  • Rest time: Rest two minutes between sets.

Benefits of the Incline Bench Press

  • The incline bench press delivers robust chest training by hitting all parts of your pectoralis major, as well as your front deltoids and triceps. (10)
  • Incline pressing builds mid and lower pec size (sternocostal head) while also building strength similarly to the traditional flat bench press, with the added benefit of stacking on more upper pec muscle (clavicular head). (11)
  • Working on an incline delivered efficient results while requiring about 20% lower weights than traditional bench press. (12)

Barbell Rollout

The front squat and RDL have already trained your spinal erectors (the core muscles on the back of the trunk), but no exercise so far has directly targeted the anterior core, or abdominals. Enter the barbell rollout exercise. Essentially, it’s an ab wheel rollout performed with a barbell and plates. Sure, you could use the cheap plastic, purpose-built device, but wouldn’t you rather chisel your abs with steel rather than something that looks like it was lifted from a toddler’s tricycle?

Exercise biomechanics of the barbell rollout are virtually identical to the classic ab wheel rollout. The ab wheel rollout is known to produce higher upper abdominal, lower abdominal, and external oblique muscle activity that crunches and reverse crunches. (13) In addition to training your anterior core, the rollout also hits your shoulder extensors. (13)

Since these shoulder muscles are trained through a relatively long range of motion, the rollout may provide added benefits of shoulder mobility and latissimus dorsi flexibility. (9) Ultimately, if you are not accustomed to this style of core training, get ready for serious delayed onset abdominal soreness.

  • How to Do it: Load a plate and a collar on each side of the barbell. Kneel in front of the barbell and take a shoulder-width overhand grip. Use your abdominals to draw your rib cage slightly downward and tilt your pelvis slightly back — “tuck your tail.” Keeping your hips extended and without allowing your spine to arch, roll the bar forward as far as you can comfortably control. Use your shoulders to pull yourself back to an upright position.
  • Sets and Repetitions: 2 x 12-16
  • Rest time: Rest 30 to 60 seconds between sets.

Benefits of the Barbell Rollout

  • The rollout is an anti-extension abdominal exercise that also builds shoulder strength and mobility.
  • Barbell rollouts tend to be more challenging than other common core exercises, such as crunches and reverse crunches.
  • Rather than adjusting the weight, the barbell rollout can be made less difficult by limiting your range of motion forward.

Barbell Curl

No weight training workout is complete without “pump work” for the glamor muscles. Everyone’s favorite showcase muscle, the biceps brachii, will have received some training stimulus during the row, but you cannot earnestly count those as three sets of biceps training. (14

As old school as it may feel, the straight barbell is an effective choice for building big strong arms. During the downward movement phase of the exercise, the barbell curl elicits more biceps brachii activity than the dumbbell curl. (15) During the upward movement phase, the barbell curl is more effective than the dumbbell curl for stimulating muscle activity in the brachioradialis muscle, the thumb-side muscle that crosses in front of your elbow. (15)

Finally, from a practical standpoint, the straight barbell always stays in front of your body during curls, which keeps tension on the target muscles. Compared to dumbbell curls, it is much more difficult to “cheat” on barbell biceps curls by swinging the weight. 

  • How to Do it: Stand upright with an underhand shoulder-width grip on the barbell. Keeping your arms at your sides or slightly in front of your ribs, curl the barbell by flexing your elbow. Maintain a vertical torso and don’t use your hips to swing the weight. Return to the bottom position with control.
  • Sets and Repetitions: 2 x 8-12
  • Rest time: Rest 30 to 60 seconds between sets.

Benefits of the Barbell Curl

  • Barbell curls are equally effective to EZ-bar curls for activating the biceps brachii. (15) However, barbell curls require full forearm supination throughout the movement, which may further emphasize your biceps brachii. (16)
  • For those interested in forearm training, barbell curls appear better suited for training brachioradialis than the dumbbell curl. (15)

Maximizing Your Iron Investment

This 15-set, barbell-only workout hits all major muscle groups. For best results, perform it two or three times per week with at least one full day of recovery between sessions. 

As your strength and muscularity steadily increase, you might come to realize your weight set (or gym membership) was the best investment you’ve ever made. But there’s no such thing as passive return on this investment.  Even “newbie gains” require regular deposits of sweat and effort.

References

  1. Ralston, G. W., et al. (2017). The effect of weekly set volume on strength gain: a meta-analysis. Sports Medicine, 47, 2585-2601.
  2. Bird, S. P., & Casey, S. (2012). Exploring the front squat. Strength & Conditioning Journal, 34(2), 27-33.
  3. Contreras, B., et al. (2017). Effects of a six-week hip thrust vs. front squat resistance training program on performance in adolescent males: a randomized controlled trial. Journal of Strength and Conditioning Research, 31(4), 999-1008.
  4. García-Jaén, M., et al. (2021). Electromyographical responses of the lumbar, dorsal and shoulder musculature during the bent-over row exercise: a comparison between standing and bench postures (a preliminary study). Journal of Physical Education and Sport, 21(4), 1871-1877.
  5. Lincoln, M. A., et al. (2023). Exercise technique: The landmine row. Strength & Conditioning Journal, 45(3), 371-378.
  6. Wattanaprakornkul, D., et al. (2011). Direction-specific recruitment of rotator cuff muscles during bench press and row. Journal of Electromyography and Kinesiology, 21(6), 1041-1049.
  7. Lee, S., Schultz, J., Timgren, J., Staelgraeve, K., Miller, M., & Liu, Y. (2018). An electromyographic and kinetic comparison of conventional and Romanian deadlifts. Journal of Exercise Science & Fitness, 16(3), 87-93.
  8. Wolf, M., Androulakis-Korakakis, P., Fisher, J., Schoenfeld, B., & Steele, J. (2023). Partial vs full range of motion resistance training: A systematic review and meta-analysis. International Journal of Strength and Conditioning, 3(1).
  9. Afonso, J., et al. (2021). Strength training versus stretching for improving range of motion: a systematic review and meta-analysis. Healthcare 9(4), 427.
  10. dos Santos Albarello, et al. (2022). Non-uniform excitation of pectoralis major induced by changes in bench press inclination leads to uneven variations in the cross-sectional area measured by panoramic ultrasonography. Journal of Electromyography and Kinesiology67, 102722.
  11. Chaves, S. F., et al. (2020). Effects of horizontal and incline bench press on neuromuscular adaptations in untrained young men. International Journal of Exercise Science, 13(6), 859-872.
  12. Saeterbakken, A. H., et al. (2017). The effects of bench press variations in competitive athletes on muscle activity and performance. Journal of Human Kinetics, 57(1), 61-71.
  13. Escamilla, R. F., et al. (2006). Electromyographic analysis of traditional and nontraditional abdominal exercises: implications for rehabilitation and training. Physical Therapy, 86(5), 656-671.
  14. Schoenfeld, B. J., Grgic, J., Haun, C., Itagaki, T., & Helms, E. R. (2019). Calculating set-volume for the limb muscles with the performance of multi-joint exercises: implications for resistance training prescription. Sports, 7(7), 177.
  15. Marcolin, G., et al. (2018). Differences in electromyographic activity of biceps brachii and brachioradialis while performing three variants of curl. PeerJ, 6, e5165.
  16. Murray, W. M., Delp, S. L., & Buchanan, T. S. (1995). Variation of muscle moment arms with elbow and forearm position. Journal of Biomechanics, 28(5), 513-525.

Featured Image: Benoit Daoust / Shutterstock

Source

August 11, 2023

Is CrossFit Bad for You? 4 Points to Consider Before Stepping into a Box

Filed under: Fitness,Training — Tags: , — admin @ 2:54 am

In the realm of fitness, few training methodologies have ignited as much debate, and enthusiasm, as CrossFit. CrossFit is characterized by its emphasis on constantly varied functional movements performed at a high intensity.

CrossFit workouts typically blend elements from Olympic weightlifting, endurance sports, and gymnastics. Yet, despite drawing from largely niche sports that require relatively high levels of skill, CrossFit has infiltrated mainstream fitness and promotes itself as an accessible form of training that anyone can do.

Two people in gym doing barbell exercises
Credit: Jacob Lund / Shutterstock

With its surge in popularity, CrossFit has also faced criticism about the foundational principles upon which it was formulated, along with outright skepticism about its ability to be implemented in an effective, safe, and sustainable fashion. Critics raise concerns about the potential injury risk of performing complex movements while under fatigue, the efficacy of trying to improve all aspects of fitness simultaneously, and the seemingly random nature of the workouts.

However, those who regularly participate in CrossFit do see impressive physical benefits in multiple areas. And the feats accomplished at the CrossFit Games each year continue to be astonishing. So, does a training style that produces these results really deserve such a bad rap?

Let’s review some of the strengths and weaknesses of CrossFit as a training regimen for developing overall fitness. While doing so, we might be able to answer the question of whether or not CrossFit is “bad” or if it holds up to the claims of accessibility and appropriateness for everyone.

A Review of CrossFit Training

Strengths of CrossFit Training

Having been an established force in the fitness world for more than two decades, and still steadily growing in popularity, CrossFit brings several clear benefits to the table. While these same benefits could sometimes be found with other training methodologies, they are inherently “built-in” to CrossFit training, delivering greater overall results.

Building Cardiovascular Fitness

Let’s face it, most people in the gym probably need to do more aerobic work, aka “cardio.” Even if you are primarily interested in building strength or muscle, it would likely benefit you to not only add cardiovascular training, but to do it via different methods, modalities, and intensities. (1) CrossFit excels at this.

More often than not, a CrossFit workout will require you to row, bike, run, or jump rope. Even workouts that don’t have these specific elements will develop some aspect of aerobic fitness or endurance due to their structure, often by incorporating circuit-style training.

But if your primary goals are developing strength and increasing muscle, won’t this hurt your progress or even cause you to lose your gains? Probably not. In fact, there’s a good chance it will help your long-term progress.

Man and woman performing air bike sprints
Flamingo images/Shutterstock

The common fear that aerobic exercise will hurt strength, power, and muscle gain is rooted in what’s known as the interference effect. This is the notion that, if multiple physical qualities are developed simultaneously, none of them are developed very well because they interfere with each other on a physiological level. It’s a “jack of all trades, master of none” situation.

The effect is most pronounced if the qualities require vastly different physiological adaptations, which is the case with strength/power and aerobic adaptations. However, if there is one thing CrossFit has shown us, it’s that the interference effect is not an issue for most trainees. Even fairly advanced trainees can experience significant gains in strength, power, and muscle while simultaneously improving aerobic fitness. (2)

So if aerobic work isn’t hurting these gains, how is it helping them? Improving aerobic fitness will help you recover faster between sets, which can allow you to do more overall work (i.e. volume) in your sessions. This will have benefits regardless of your training style or specific goal. It can allow you to get more reps if your goal is hypertrophy and decrease the amount of rest needed between heavy sets if your goal is strength. The outcome in both scenarios is more high-quality work which can result in a novel stimulus for new gains.

Sure, if you are already at a high level and want to be elite in a specific strength sport such as bodybuilding, powerlifting, or Olympic weightlifting, your training should be specific toward those goals most of the time. But if you’re training for general fitness or to be bigger, stronger, or leaner than most people, improving your aerobic fitness is going to be beneficial.

Emphasis on Bodyweight Movements

Another area that tends to get neglected in many peoples’ training is the use of bodyweight exercises. Now, it’s not like you’re going to build the same levels of muscle or one-rep max strength using bodyweight movements compared to utilizing external load. But your skill and ability in movements using external loads, like free weights, have little carryover to bodyweight-only movements and methods.

Not convinced? Try getting through the bodyweight exercise portion of the popular CrossFit workout “Murph” — complete a total of 100 pull-ups, 200 push-ups, and 300 unweighted squats. The full workout bookends those 600 reps with a one-mile run before and after, and it’s typically performed wearing a weighted vest. But, for an eye-opener, try the exercises on their own.

shirtless person performing push-ups outdoors
Credit: oleksboiko / Shutterstock

Murph doesn’t care how much you bench or what your muscular endurance is like with heavy, high-rep squats. It will become apparent, very quickly, that those things don’t help you much. If you truly want to develop holistic fitness that helps you look good, feel good, and perform well under a variety of circumstances, you should regularly include some bodyweight exercises in your regimen. (3)

Again, this is one area where CrossFit excels. It’s all but guaranteed that you will be doing some form of unweighted squat, push-up, or pull-up every week. But it’s not just the fitness and work capacity aspect of this that’s beneficial. Many of the bodyweight movements require a degree of skill and total-body control that are unique to them, and this is part of the reason why barbell-based movements don’t transfer well.

This is particularly true of gymnastic-type movements like handstand work and many pull-up variations including chest-to-bar pull-ups, muscle-ups, and even kipping pull-ups. Yep, you read that right: kipping, or incorporating lower body momentum and total-body involvement into a pull-up, is an overall positive attribute. Most often, people’s disdain or outright hate for kipping is simply based on a misunderstanding of what it is.

Many people think that kipping is basically a type of poor technique or a form of “cheating,” and that CrossFitters are just flopping around on the pull-up bar. To be fair, that may sometimes be the case, but it’s not the rule. In reality, kipping is borrowed straight from the gymnastics world. If you’ve ever watched a gymnast perform on the uneven bars, you’ve seen kipping. It’s how they get themselves onto the bars and pick up speed for various movements in their routine.

CrossFit has taken this and applied it to pull-up variations as well as other movements. When done correctly, these movements involve skill, coordination, and body control. And when incorporated as part of a workout, they require aspects of cardiovascular and muscular endurance that’s hard to replicate with other movements.

Weaknesses of CrossFit Training

For as many benefits as Crossfit training can deliver, it is also lacking in some arenas. No single training methodology can really be all-encompassing and general CrossFit training, like many other types of training, has a few holes in its game. Here are some gaps to be aware of before stepping into a Crossfit box.

Only One Gear

CrossFit workouts have two primary formats. One is “As Many Rounds as Possible” (AMRAP), where you attempt to complete a series of exercises for as many rounds as possible in a given amount of time. The other is “rounds for time” where you aim to complete a set amount of rounds as fast as possible.

In each of these formats, training density is the goal — how much work you can accomplish per unit of time. This isn’t necessarily bad. In fact, in many training programs, density is often an overlooked area for progression. But just like any training variable, always chasing the same quality or outcome is a recipe for stagnation or, potentially, mental and physical burnout.

Person in gym straining to lift barbell
Credit: Jacob Lund / Shutterstock

To be clear, this is not necessarily specific to CrossFit. This would be analogous to powerlifters always maxing out or bodybuilders always taking sets to failure. You can get away with doing those things for a relatively short time, but you eventually have to back off or switch gears to make maximum progress.

While there are certainly cases of trainees in those disciplines overdoing it, it’s generally accepted that a well-designed training system rotates through periods of relatively higher, more moderate, and lower workout intensities.

Not only that, but there are endless training methods and formats to accomplish those fluctuations in intensity. You simply can’t train at the highest gear all the time. AMRAPs and rounds for time are very intense, high-gear formats. Even the “easy” days aren’t all that easy when you’re racing the clock to hit a PR performance.

CrossFit, as a general system, hasn’t gotten to the point where more moderate or low-intensity formats are part of the WOD (workout of the day) repertoire. This may seemingly violate the “high-intensity” aspect of the core CrossFit philosophy, but incorporating the lower intensity work can help elevate and improve the high-intensity work without compromising results, while also allowing better overall recovery. (4)

Lack of Movement Variety

One of the key tenets of CrossFit is that it is “constantly varied.” Of course, part of this is in reference to the fact that workouts are constantly changing. But it’s also intended to reference movement variety.

From the outside looking in, CrossFit does appear to incorporate a wide variety of exercises, particularly if you’re relatively new to strength training. The majority of people have likely not considered performing Olympic lifts and their variations on a regular basis, for example. So that could be a whole new library of movements. But if you train CrossFit consistently for a while, you’ll soon find that the movement menu is actually relatively small.

Two people in gym performing ring pull-ups
Credit: blissblue_11 / Shutterstock

When you take a look at the exercises and the movement patterns that are repeatedly performed, there are a lot of effective exercises, movement patterns, and pieces of equipment that go unutilized. Incorporation these missing elements would not only add much more variety, but would also make the training more in line with another CrossFit tenet: functionality. 

Now, to be clear, a high degree of exercise variety does not necessarily mean that a training program is beneficial or highly effective. Frequently changing exercises can present drawbacks of their own, particularly for beginners. And there are countless examples of programs with relatively little movement variety that are very effective at attaining results, whether that be for strength, muscle gain, or fat loss.

However, those programs or training styles don’t hang their hat on being the gold standard of functional training. For CrossFit to be truly functional and constantly varied, there are some missing elements that would be beneficial to include.

Missing Element 1: Lateral and Rotational Movements

Almost every movement in CrossFit is performed in what’s called the sagittal plane. These are movements that are done forward or backward, and/or primarily require flexion and extension (bending and straightening) of the joints involved. This includes CrossFit staples like front squats, deadlifts, cleans, kettlebell swings, box jumps, push-ups, burpees, wall balls… the list goes on.

Our body is designed to do a lot more than just flex and extend. If we don’t do those things, we will gradually lose our ability to do them safely and efficiently. Nevermind the fact that life is multidirectional. We need the ability to rotate, move side to side, and move diagonally, and we need to do all those things while also moving up and down or forward and backward. If we cannot move in those ways (i.e., if we don’t train it), we become less functional.

Missing Element 2: Unilateral Movements

Most of the movements utilized in CrossFit are bilateral, meaning they involve using both legs or both arms at the same time in a symmetrical fashion. But just as life is multidirectional, it’s also predominantly unilateral, especially when it comes to the lower body.

Again, if we want our training to be truly functional, it should regularly incorporate unilateral lower body and upper body movements such as split squats, step-ups, single-leg squats, single-leg deadlift variations, single-arm pressing, and other single-arm and single-leg movements. 

Missing Element 3: Horizontal Pulling

When you look at the general movement patterns utilized in CrossFit, one of the biggest omissions is horizontal pulling, or rowing movements. Yes, the rowing machine is often utilized for metabolic conditioning, but that does not provide enough resistance to truly strengthen the muscles of your upper back.

Person with long hair performing barbell row
Credit: MilanMarkovic78 / Shutterstock

And even though pull-ups are performed on a regular basis, one disadvantage of the kip is that it decreases the involvement of your upper back muscles, particularly the rhomboids, traps, and rear delts. The result is that muscle groups which can be important for posture, shoulder health, overall performance, and having a well-rounded physique go understimulated.

Missing Element 4: More Equipment

On one hand, the fact that a CrossFit box can exist with minimal equipment is a benefit, and this is part of the reason for its growth as a training style. Any sport that requires very specialized equipment has very limited growth potential. It’s one reason why there are more soccer players around the world than there are golfers.

On the other hand, there are a lot of great pieces of exercise equipment that go underutilized or completely unutilized. These are items that would not only add variety and functionality, but would allow necessary movement progressions for people who need them, improve their performance, and potentially reduce the risk of injury.

The medicine ball is a great example. The fact that every CrossFit box has dozens of them, but almost exclusively uses them for wall balls is a bit of a travesty. Medicine balls are meant to be thrown and slammed to develop whole-body power. There are also endless variations through which to incorporate lateral, rotational, and unilateral movements that can be easy to work into metcons.

Other equipment such as trap bars, safety squat bars, physioballs, landmines, and suspension trainers could all easily have their place in CrossFit. They would not only add to the functionality aspect, but provide movement variations that might be more appropriate for some people (e.g., trap bar deadlift vs. conventional barbell deadlift, landmine squat vs front squat, etc.).

However, these items are nowhere to be seen in typical CrossFit programming or WODs and there’s no valid reason as to why. Maybe there would be logistical issues to every CrossFit affiliate having all, or most, of these items which would make affiliate programming difficult. It could also make the style of “CrossFit Training” less recognizable, which isn’t beneficial for branding.

However, it seems as though these items aren’t even considered as options, which may not be beneficial for the majority of trainees on a broad scale.  

How to Make the Most of CrossFit Training

If you want to try CrossFit, or use it as your primary form of training, here are some suggestions. Note that these could apply to any training style.

Don’t Be Afraid to Back Off Some Days

It’s OK not to go all out in every WOD. It can be tempting to always try to beat your old PRs or challenge one of your peers, but if you’re feeling run down, it’s much more effective to listen to what your body is telling you and let off the gas from time to time.

Don’t Sacrifice Technique for Rounds or Time

If you’re not a competitor, it’s just not worth it. The antithesis of functional training is consistently doing something that will harm your functionality down the road, such as using improper technique. Slow down in the WODs, or pace yourself appropriately, and take a beat to do movements correctly.

Switch Gears Periodically

Every once in a while, use a completely different training style or have only one specific training goal for a month or two. Maybe it’s just building size or strength via bodybuilding or powerlifting-style training. Or maybe you’re going to mess around using only kettlebells for a month. Or do yoga, or pilates, or hiking the nature trails in your area. These brief periods of drastic variation can be great mental and physical resets.

In Supplemental Training, Do the Opposite

If you decide to do some supplemental workouts along with your CrossFit training, do the opposite of what you typically do in a WOD. This means taking longer rest times, doing lower intensity aerobic work, and performing different movements or utilizing different pieces of equipment like mentioned earlier. Fit in some medicine ball slams, single-arm dumbbell rows, landmine presses, Russian twists, and other pieces that are missing from the classic CrossFit puzzle.

Is CrossFit a Good Fit for You?

The bottomline is that you can and will simultaneously develop multiple qualities to a relatively high level through CrossFit training. And if your goal is well-rounded fitness — becoming stronger, leaner, and generally more “in shape” than the average person — CrossFit can be a fantastic and effective way to achieve that. (5)

However, the consistent high-intensity and competitive aspects do make it unique from other training styles and they warrant consideration for how they’re approached long-term. Consider the strengths and weaknesses laid out above, consider them relative to your individual needs and goals, and then decide if it’s the right training solution for you.

References

  1. Patel, H., Alkhawam, H., Madanieh, R., Shah, N., Kosmas, C. E., & Vittorio, T. J. (2017). Aerobic vs anaerobic exercise training effects on the cardiovascular system. World journal of cardiology, 9(2), 134–138. https://doi.org/10.4330/wjc.v9.i2.134
  2. Schumann, M., Feuerbacher, J. F., Sünkeler, M., Freitag, N., Rønnestad, B. R., Doma, K., & Lundberg, T. R. (2022). Compatibility of Concurrent Aerobic and Strength Training for Skeletal Muscle Size and Function: An Updated Systematic Review and Meta-Analysis. Sports medicine (Auckland, N.Z.), 52(3), 601–612. https://doi.org/10.1007/s40279-021-01587-7
  3. Harrison, Jeffrey S CSCS, NSCA-CPT. Bodyweight Training: A Return To Basics. Strength and Conditioning Journal 32(2):p 52-55, April 2010. | DOI: 10.1519/SSC.0b013e3181d5575c
  4. Sousa, A. C., Marinho, D. A., Gil, M. H., Izquierdo, M., Rodríguez-Rosell, D., Neiva, H. P., & Marques, M. C. (2018). Concurrent Training Followed by Detraining: Does the Resistance Training Intensity Matter?. Journal of strength and conditioning research, 32(3), 632–642. https://doi.org/10.1519/JSC.0000000000002237
  5. Claudino, J.G., Gabbett, T.J., Bourgeois, F. et al. CrossFit Overview: Systematic Review and Meta-analysis. Sports Med – Open 4, 11 (2018). https://doi.org/10.1186/s40798-018-0124-5

Featured Image: Jacob Lund / Shutterstock

Source

Older Posts »

Powered by WordPress