Ready for an efficient workout to build your upper body by creating a more sculpted chest and a more muscular back? Rethink your training week and step away from the usual workout split.
Training chest and back in the same session lets you use agonist-antagonist supersets — a high-dollar term for exercise pairings that hit opposite sides of your body with zero rest in-between.
By deleting the rest interval, these supersets allow you to get lots of training accomplished in less time. Better yet, they’re less likely to impair exercise performance compared to supersets targeting the same muscle groups. (1)
So buckle up, grab the plan, and get to work hitting just about everything above your hips using a handful of high intensity, highly focused movements.
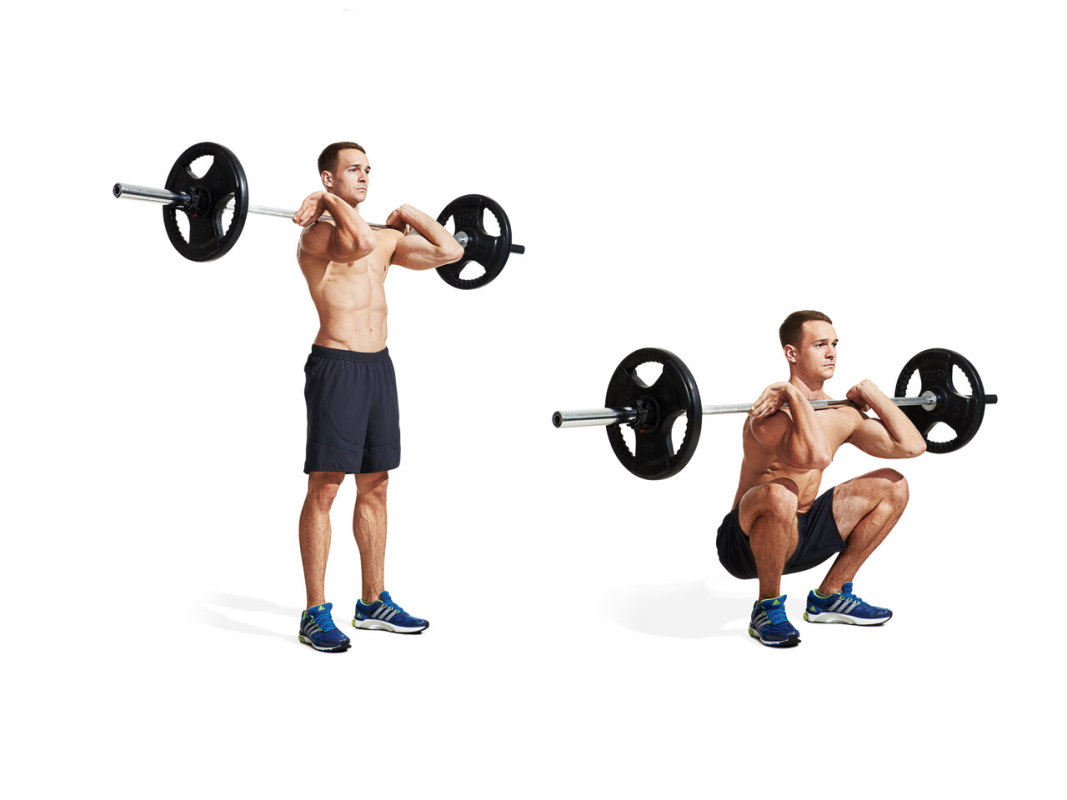
Chest and Back Workout
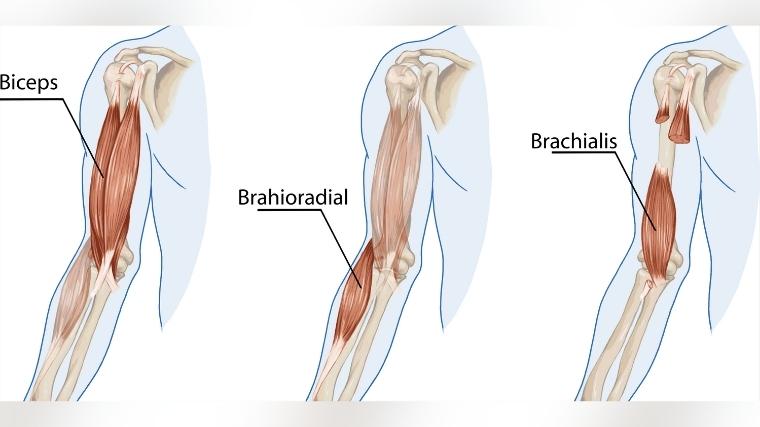
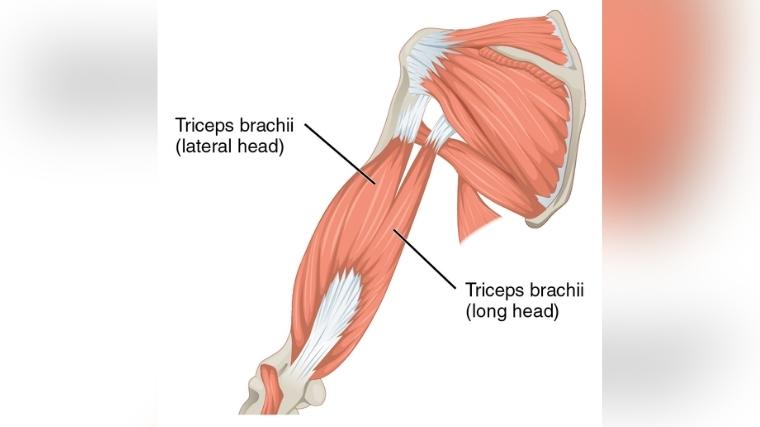
Meet Your Chest and Back Muscles
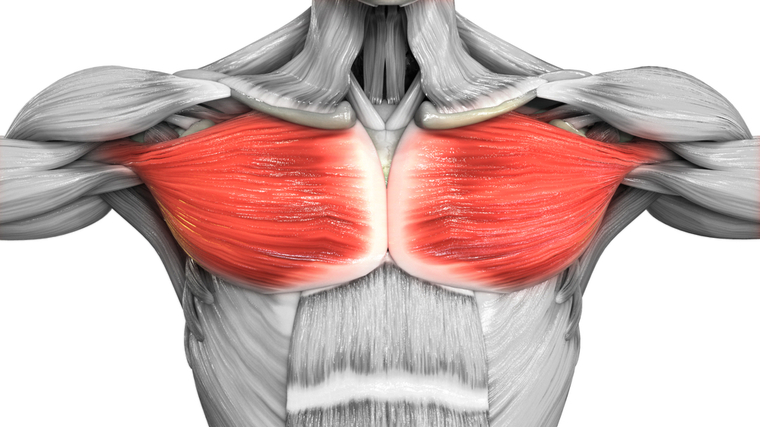
In his prime, massive and full pectoral muscles were among Arnold Schwarzenegger’s most impressive attributes. Arnold’s chest had size and symmetry — attributes which are key to a well-developed chest. Not only will lifters with bodybuilding goals need to perform chest exercises with sufficient intensity, but they will also need to ensure all areas of the chest are adequately targeted.
Pectoralis major, the most prominent chest muscle, has two or three functional “subregions.” The sternocostal head is the largest portion and it is effectively trained during horizontal adduction exercises such as horizontal chest presses and flyes. (2)(3)(4) The upper-most part of the pec major, termed the clavicular head, is emphasized with shoulder flexion exercises and incline presses. (2)(3)(4)(5)
Less often discussed, but relevant to any lifter training for a top physique, is the inferior-most portion of the pecs — the lower costal fibers and abdominal fibers. These fibers pull your arms down from the overhead position, as in pulldowns and pullovers. (2)
An impressive back has three key qualities: breadth or width, thickness, and definition. While the latter can only be achieved by reaching sufficiently low levels of body fat, developing all qualities depends on robust muscle growth, or “hypertrophy,” of the back muscles. Major aesthetic back muscles include the latissimus dorsi, middle- and lower trapezius, and rhomboids.
In bodybuilding, the muscles of the back are trained during vertical and horizontal pulling movements, along with a slew of single-joint accessory exercises. Perhaps counterintuitively, narrow-grip pulldowns and rows tend to promote back width, while wide-grip horizontal pulling tends to promote back thickness. (2) This workout builds both.
The Ultimate Chest and Back Workout
This double-duty routine incorporates free weights and machines, programs supersets and traditional sets, and leans into tension and “the pump” to build the ultimate upper body. It fits perfectly into either a chest and back/legs/shoulders and arms split or an upper/lower workout split. It might also be useful in a more classic “one body part per day” split when a missed workout necessitates doubling up.
Neutral-Grip Lat Pulldown
The neutral-grip lat pulldown is a joint-friendly back-builder. It principally trains your latissimus dorsi — the muscle responsible for back width. The rhomboids of your mid-back, the muscles behind the shoulders (such your posterior deltoids and teres major), and even the lower portion of your pectoralis major (“costal fibers”) will also contribute to the movement. (2)
From the deep stretch when your arms are overhead to the peak contraction when your upper arms are pinned against the sides of your ribcage, the neutral-grip lat pulldown trains the target muscles through a range of motion unmatched by most other back exercises. Since your lower body is locked into the machine, the exercise can also be loaded heavily. Starting the workout with a heavy, full range of motion exercise sets the tone for the workout.
- How to Do it: Sit at a lat pulldown station using a grip attachment with parallel handles. Secure your thighs under the roller pads and slightly lean back at your hips. Initiate the pulldown by drawing your shoulder blades downward as you bring your elbows toward the sides of your ribcage. Return to the starting position with arms outstretched overhead.
- Sets and Reps: 3 x 8-12
- Rest Time: No rest before moving to the next exercise.
Benefits of the Neutral-Grip Lat Pulldown
- The exercise trains the back through large arcs of motion at the shoulder joint proper (glenohumeral joint) and shoulder girdle (scapulothoracic joint). Importantly, pulldowns train the latissimus dorsi at long muscle lengths, which may enhance muscle gain. (6)
- The neutral grip tends to be well-tolerated by lifters with banged-up shoulders or elbows.
- This multi-joint back exercise largely spares the muscles that will be trained in the chest press, the second exercise of this superset.
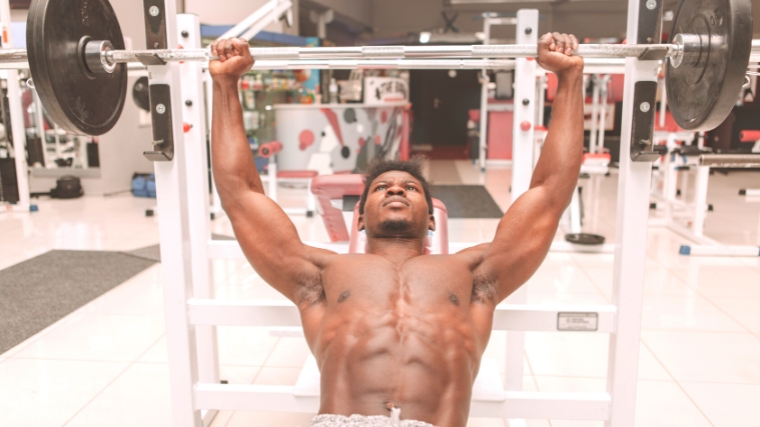
Machine Chest Press
Provided your gym is not too busy and the lat pulldown station and chest press machines aren’t on opposite sides of the facility, plan to superset pulldowns with machine chest presses. If you’re training in a public gym and are concerned about occupying two machines at once, give the machine you are departing a quick wipe down and carry your things with you instead of leaving them to “claim” he equipment. This will give a non-verbal cue to anyone waiting to “work in.”
Sure, if someone does work in, it’ll slow your workout, but it’s the decent thing to do in a shared public space. Nine times out of ten, the machine will be empty when you return.
Machine chest presses come in many designs — seated, lying, plate-loaded, cable stack-loaded, etc. Ideally, locate one that feels comfortable and provides a stretch across your shoulders in the bottom position. Although it may be acceptable to substitute the barbell bench press for the machine movement, you’ll need a trained spotter for the free weight version. Moreover, most lifters are more comfortable pushing high-effort sets — sets that approach or even reach failure — on a “self-spotting” chest press machine.
- How to Do it: Adjust the seat and starting handle position so that your elbows and hands naturally track at approximately nipple-height at the bottom position. If the seat is too high (or if you are positioned too high up the bench on a lying chest press machine), it will feel like a decline press. If the seat is too low (or you are positioned too far down the bench on a lying version), your elbows will be flared out at or near shoulder-height. Even though you’re not performing a competition-style barbell bench press, you should still establish an arched mid-back position to facilitate greater chest tension. Lift your sternum and pull your shoulder blades together and toward your glutes. Press the handles until your elbows reach lockout. Lower with control to a tolerable stretch across your chest and the fronts of your shoulders.
- Sets and Reps: 3 x 8-12
- Rest Time: Rest two to three minutes before repeating the previous exercise.
Benefits of the Machine Chest Press
- Machine chest press may offer more targeted chest training compared to free-weight variations. This is likely due to the stability offered by the equipment, as the machine bench press has shown reduced lateral deltoid and triceps muscle activity and equivalent pectoralis major activity compared to the barbell bench press. (4) However, these findings were not replicated in a recent similar study. (7)
- It’s a machine-based exercise, which enables relatively heavy loading and high-effort sets without requiring a spotter. (7)
Machine Wide Row
Wide rows, traditionally performed with an overhand grip spaced wider than the shoulders, target the mid-back and back of the shoulders. As such, wide rows are a great exercise for back “thickness.”
Chest-supported machines, in particular, allow for greater focus on the target muscles and reduced systemic demand (i.e. less fatigue), because the lifter is not required to maintain an unsupported forward-bent posture. (8) Wide rows may also be performed on a chest-supported T-bar row machine or using free weights with your trunk supported on an incline bench.
- How to Do it: Set the seat height so the support pad makes contact with your lower chest and the handles are just below shoulder-height. Lean into the pad to ensure your hips are slightly behind your chest. Grab the handles with an overhand grip. You should have to stretch to reach the handles — if not, adjust the chest support or start position of the handles. Initiate the row by drawing your shoulder blades together and driving your elbows to the sides. Your elbows should track slightly below shoulder height, not tuck toward your body or flare above shoulder-height. Return to the starting position, allowing the machine to pull your arms forward and stretch your mid back.
- Sets and Reps: 3 x 12-16
- Rest Time: No rest before moving to the next exercise.
Benefits of the Machine Wide Row
- This rowing variation has a favorable stimulus-to-fatigue, meaning support from the machine reduces the need for activity in non-target musculature. (8)
- When appropriately set up, the machine wide row applies a profound stretch to the mid-back and shoulders, increasing range of motion of the exercise and potentially enhancing hypertrophy.
Machine Kelso Shrug
Not all muscle groups targeted by multi-joint (compound) exercises are trained equally. Some muscles are hammered, while others are left relatively unscathed. For example, when using rows to target your mid-back, your shoulder muscles (e.g. posterior deltoid) may fatigue during wide rows, while muscles of the mid-back (e.g. middle trapezius and rhomboids) may not be trained to their potential.
Advanced training techniques such as pre- and post- exhaustion may be useful to address inequitable training stimuli among agonist muscles during multi-joint exercise. Pre-exhaustion places an isolation exercise immediately before a compound exercise with no rest. Although bodybuilding pioneers like Arthur Jones tended to promote pre-exhaustion methods, the research on this strategy is somewhat lackluster. (9) At best, lifters accomplish equivalent training volume and experience similar strength gain compared to performing the isolation exercise and compound exercise as traditional straight sets. (10) At worst, trainees may lose repetitions during the compound exercise due to fatigue. (11)
Fortunately, a related technique called post-exhaustion avoids the major downside of pre-exhaustion. Post-exhaustion uses compound supersets in a specific way. A multi-joint exercise is immediately followed by an isolation exercise for the same target muscle(s).
Paul Kelso, an author and powerlifting analyst, promoted post-exhaustion training for thickening the upper back by using a sequence of rows and Kelso shrugs, his namesake exercise. Kelso shrugs may also be performed on a chest-supported T-bar row machine or using free-weights with trunk supported on an incline bench.
- How to Do it: Kelso shrugs involve isolated retracting (“drawing together”) the shoulder blades. While they may be performed with free weights while bent over or supported on an incline bench, performing Kelso Shrugs on a row machine with chest support allows you to better isolate the target muscles — your middle trapezius and rhomboids. Using a wide, overhand grips on the row machine, begin with your arms outstretched in front of you. You should feel a profound stretch as the machine draws your arms and shoulder blades forward. With little to no elbow bend and absolutely no rowing, squeeze your shoulder blades together, drawing the handles slightly closer to your body. Although your mid-back may arch or extend slightly as you draw your shoulder blades together, do not drive this motion by pushing your chest into the pad. Focus on using your middle trapezius and rhomboids. Pause momentarily, then allow the machine to slowly draw your shoulder blades apart.
- Sets and Reps: 3 x 8-12
- Rest Time: Rest two to two and a half minutes before repeating the previous exercise.
Benefits of the Machine Kelso Shrug
- This unique shrug variation hits the mid-back in relative isolation, allowing for additional training volume, especially when performed as a post-exhaustion technique following a rowing exercise.
- Kelso shrugs have a relatively easy exercise setup and minimal systemic fatigue.
- The exercise builds strength and control of the shoulder blades, which may promote overall shoulder health. (12)
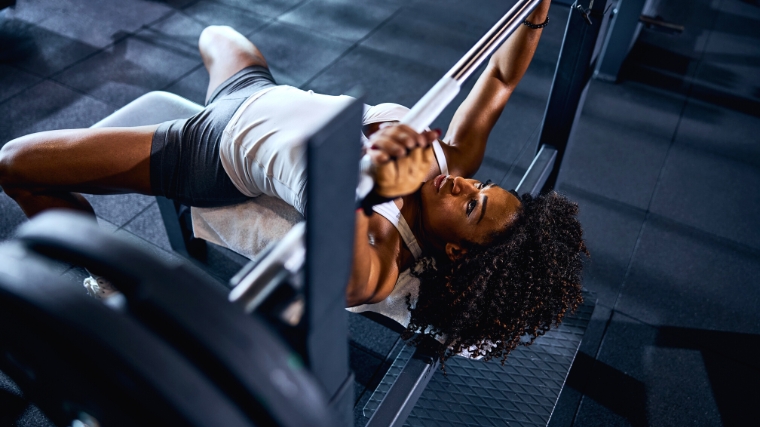
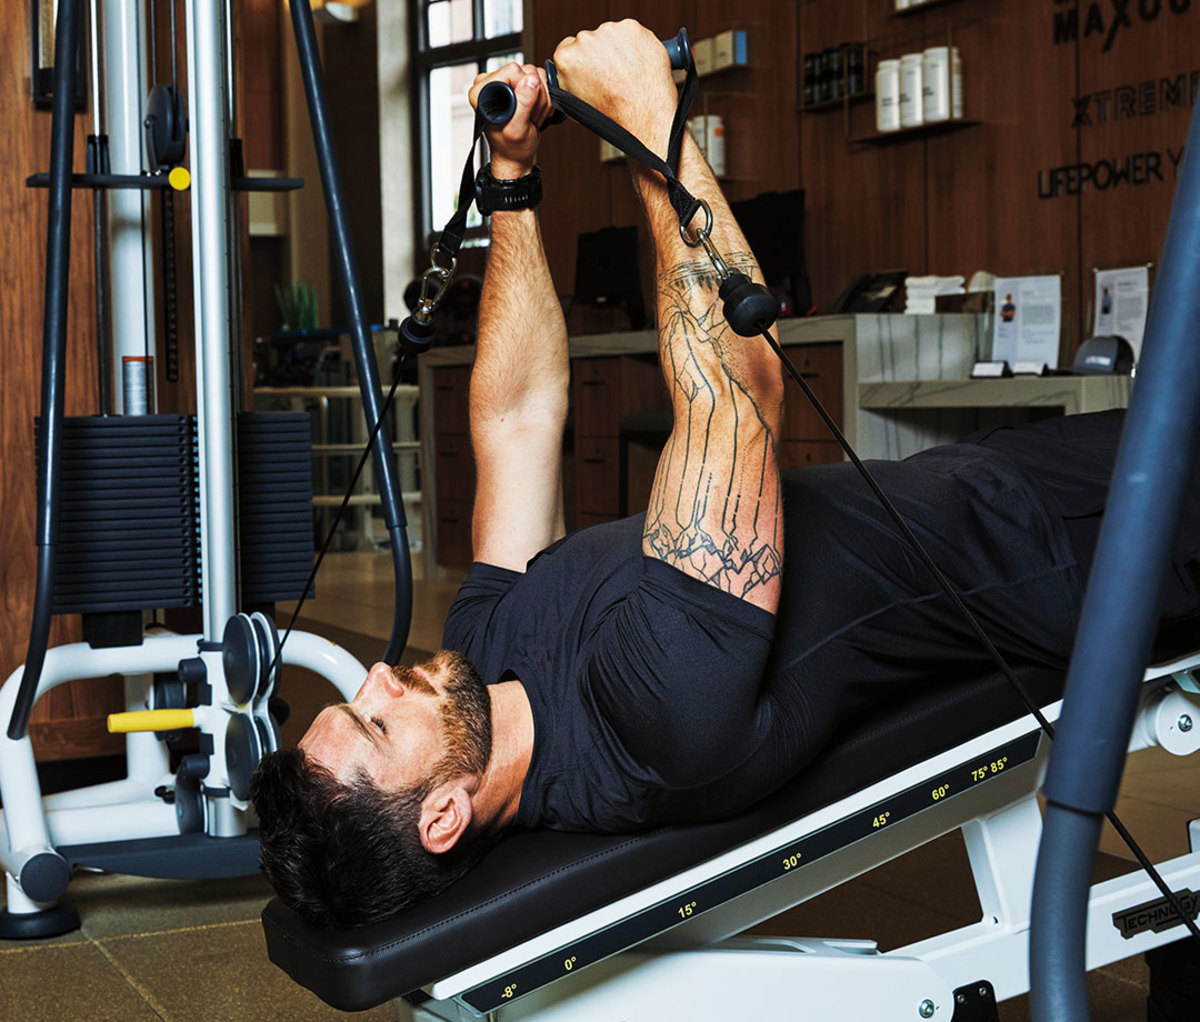
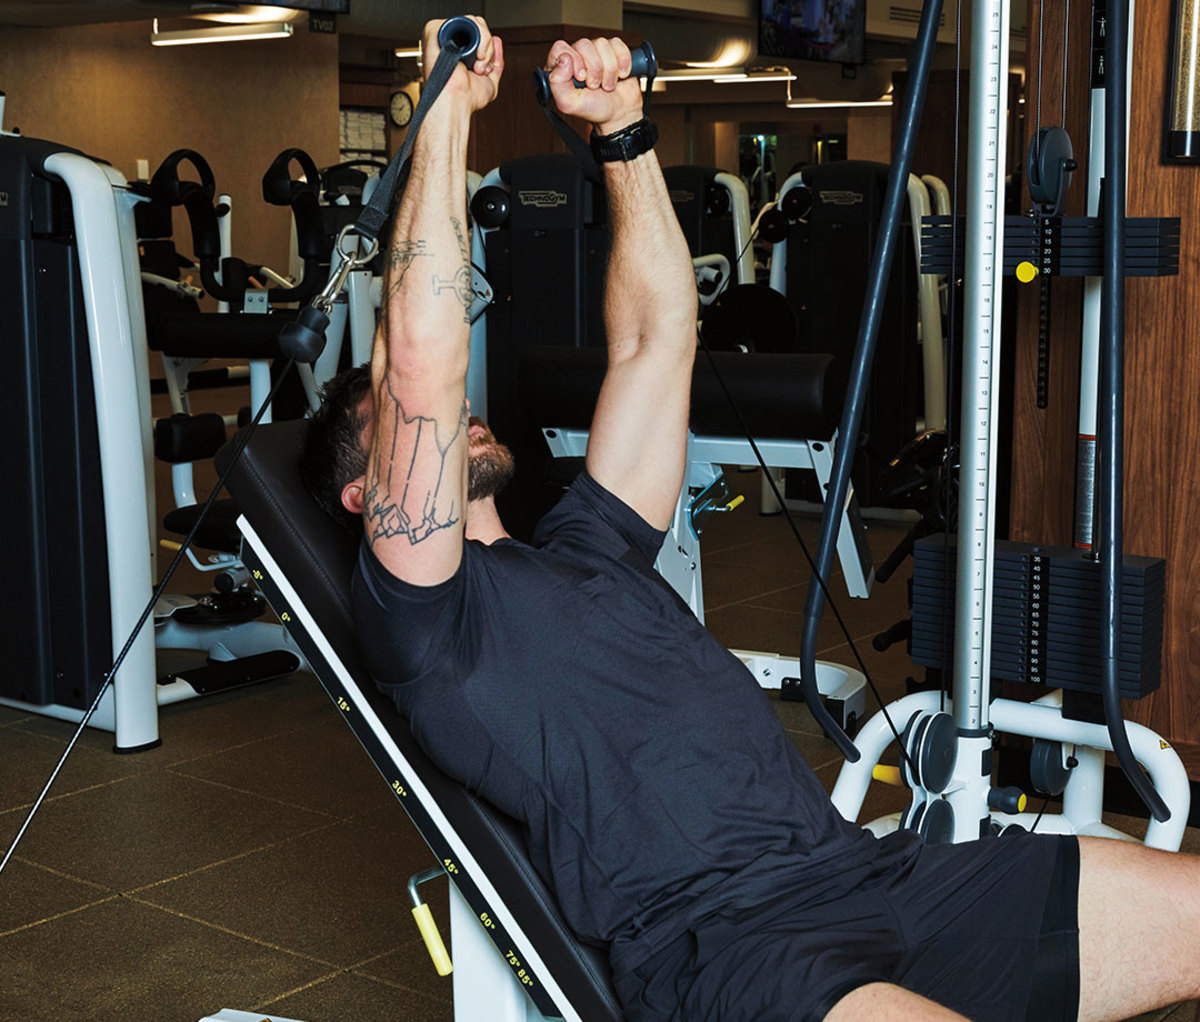
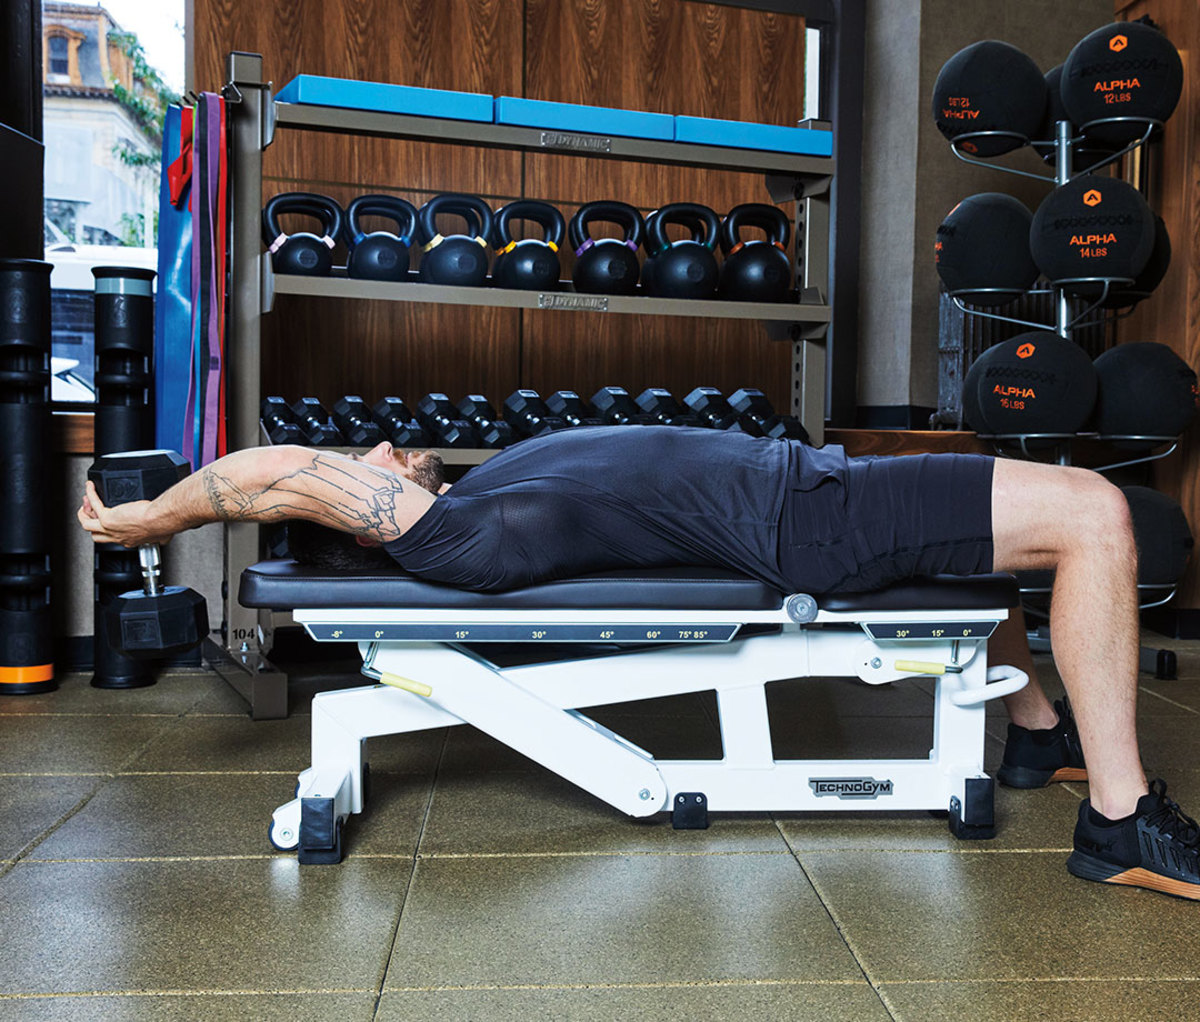
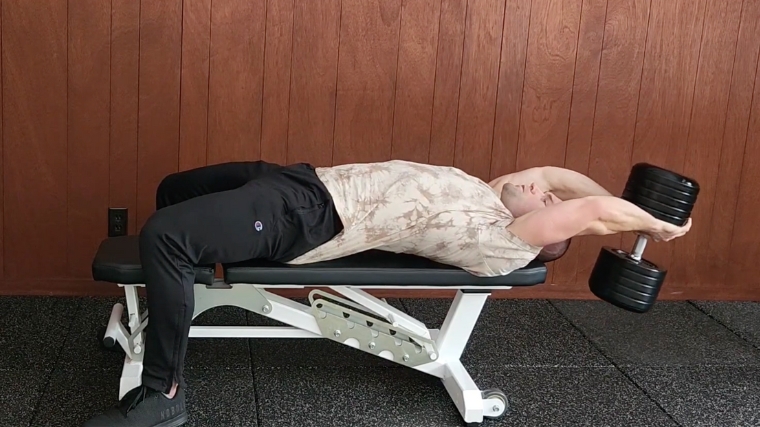
Incline Dumbbell Flye Press
Muscles are stronger during eccentric contractions, which typically occur during the lowering phase of an exercise. One technique that exploits this phenomenon by increasing the intensity of the exercise during the eccentric phase is called eccentric accentuated training. (13) The flye press is a straightforward eccentric accentuated exercise, easily set up using an adjustable bench and a pair of dumbbells.
While any incline press biases the upper chest, the incline dumbbell flye press packs an extra punch by accentuating the eccentric contraction of the clavicular head of pectoralis major. (3)(4)(5)(13) Therefore, this exercise serves to complement other chest exercises found in this workout, which tend to bias the lower muscle fibers of the chest.
- How to Do it: Set an adjustable bench to the 45-degree incline position. Lay on the bench and set your shoulder blades together so they lie flat against the pad. Begin with the dumbbells just outside the front of your chest and press them vertically until your elbows are nearly straight. Keeping slight elbow flexion, allow the dumbbells to drift apart. Continue to lower the dumbbells until you feel a strong stretch across the front of your chest. Bend your elbows to return the dumbbells to the start position before pressing to the top to repeat the sequence for additional repetitions.
- Sets and Reps: 3 x 8 to 12
- Rest Time: Rest one and a half to two minutes between sets.
Benefits of the Incline Dumbbell Flye Press
- The exercise is eccentric accentuated, meaning demand on chest is greater during the lowering phase, which may enhance strength development and hypertrophy. (13)(14)
- Using an incline bench promotes upper chest — pectoralis major clavicular head — activity and development. (3)(4)(5)
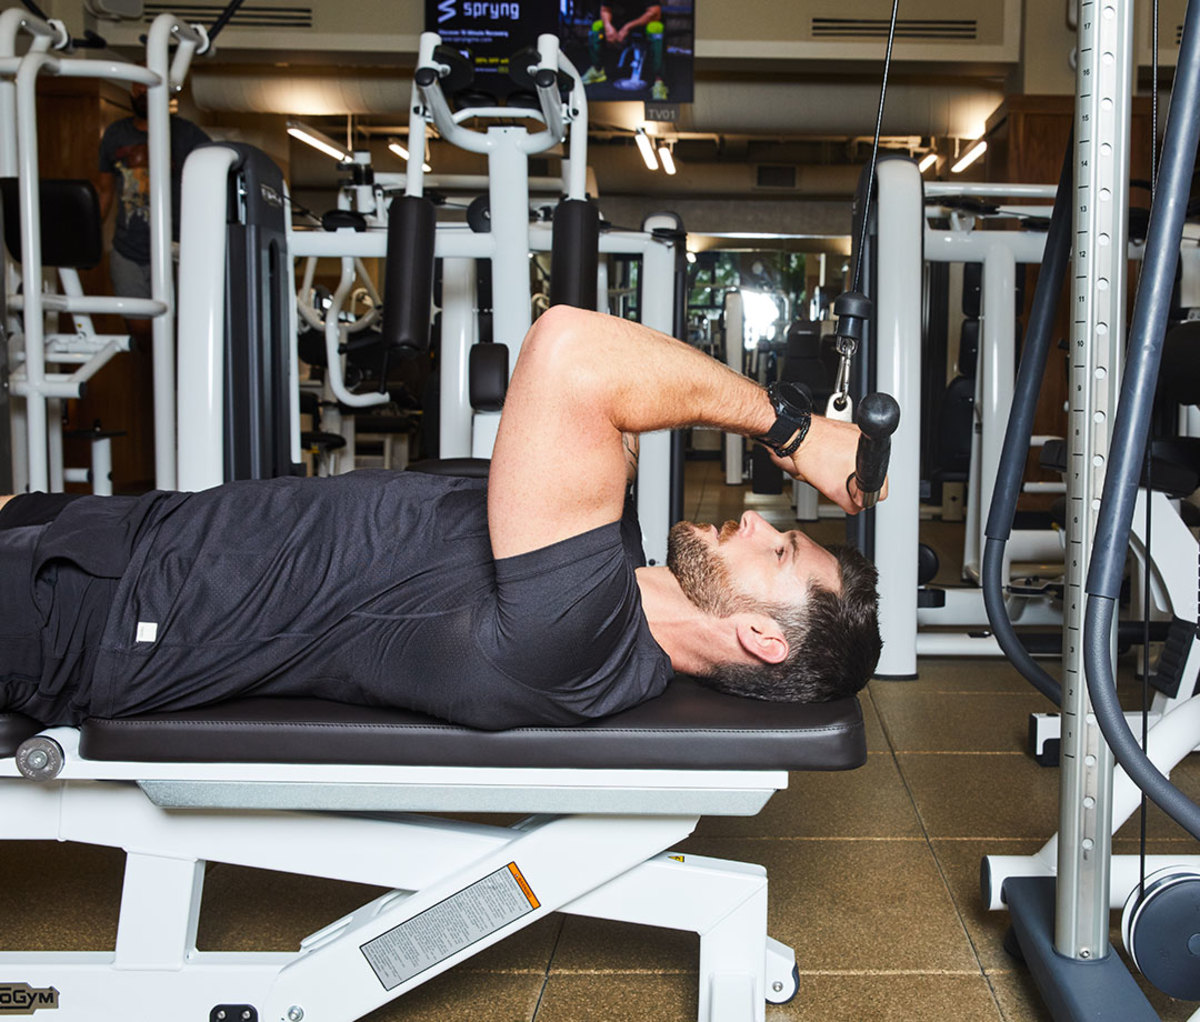
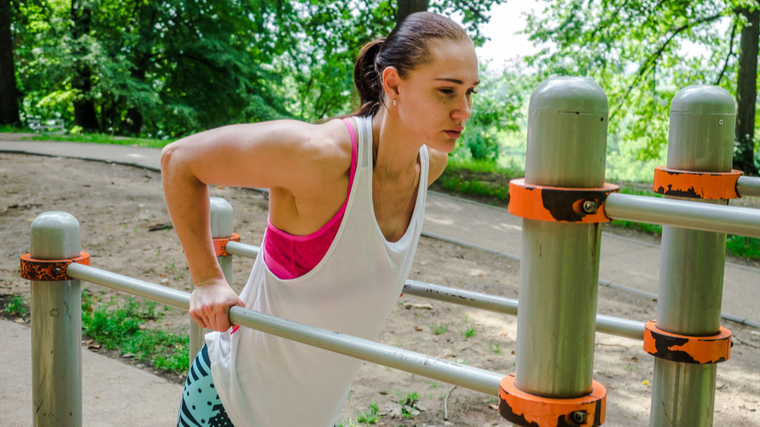
Bar Dip
Dips are typically performed using a dedicated dip station or a sturdy dip attachment on a power rack. The handles of the dip station or dip attachment are often parallel or diverge slightly from parallel — a feature that results in different training stimulus and exercise technique compared to traditional bodyweight bench dips. (15)
Compared to triceps-focused bench dips, which are performed with the heels of hands supported by the long edge of a bench, bar dips show greater pectoralis major muscle activity. (15) Also compared to bench dips, bar dips require less shoulder hyperextension. (15) Since loaded shoulder hyperextension can be hard on the shoulders, dips may be better tolerated by lifters with known shoulder issues. (15)(16)
Bar dips are easy adapt to beginner strength-levels via the use of the lower body or an elastic band for assistance. They can be made more challenging by adding weight to a dip belt. Effective and versatile, the bar dip is a great exercise for building the mid- and lower chest.
- How to Do it: If your dip station or attachment has diverging handles, select a grip width comfortable for your shoulders. Begin in the top position with your elbows locked out and your hands on the bars under your shoulders supporting your weight. Your hips should drift slightly backward as you lower your body, allowing your elbows to flex and your upper arms to extend slightly behind you. In the bottom position, achieve a stretch across the front of your chest. Pause momentarily before pushing back to the top.
- Sets and Reps: 2 x 8-12
- Rest Time: No rest before moving to the next exercise.
Benefits of the Bar Dip
- The dip trains your pectoralis major, pectoralis minor, triceps brachii, and lower trapezius. Your latissimus dorsi, serratus anterior, and the posterior rotator cuff may also be active, serving as stabilizing roles. (15)
- Your chest experiences a “loaded stretch” in the bottom of the bar dip, which may promote accelerated muscle growth. (14)
- High-effort sets of dips may further bias your pectoralis major, as increased muscle activity has been shown when sets are taken toward failure. (17)
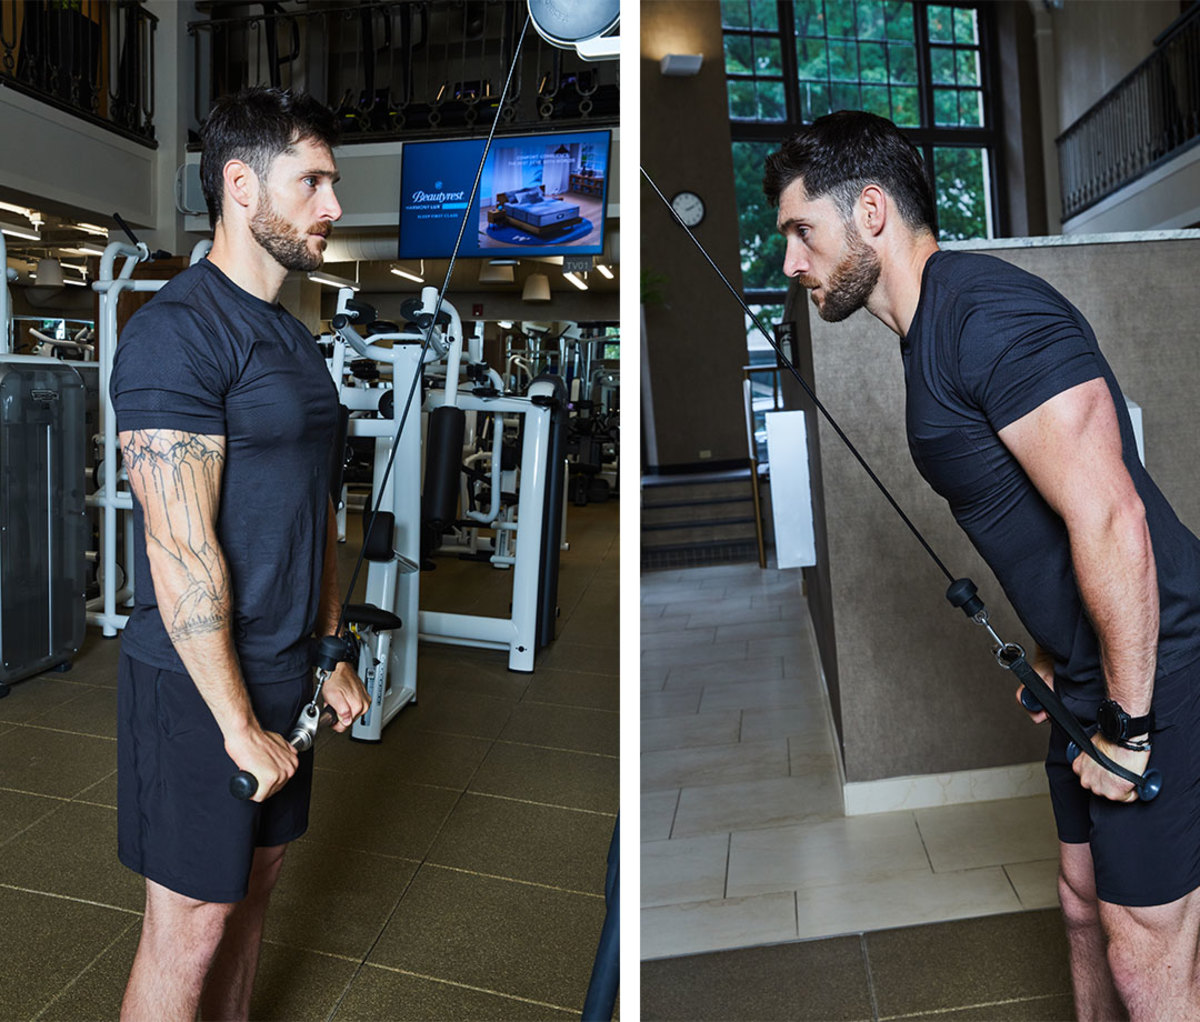
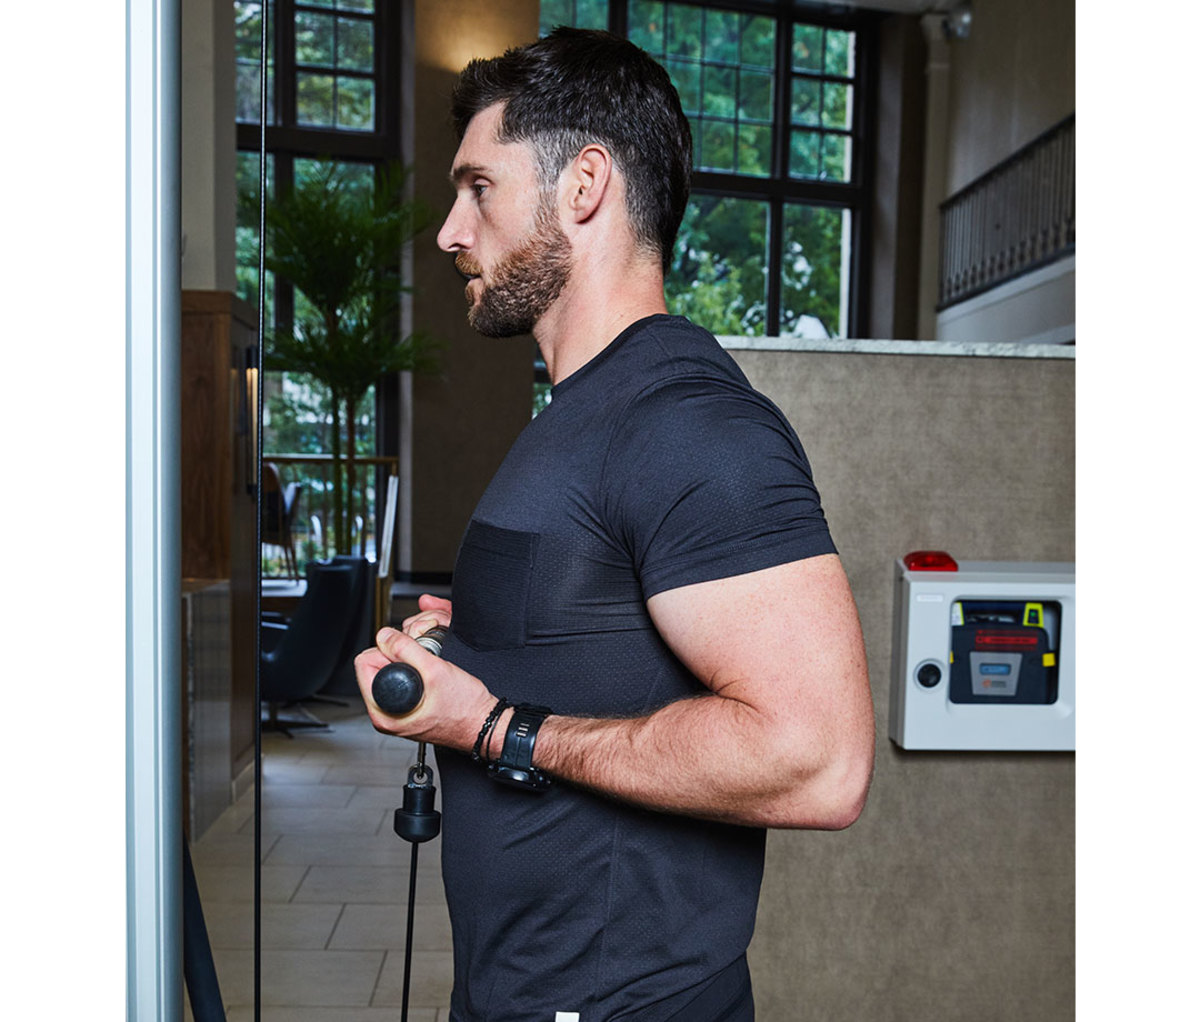
Standing Cable Pullover
As the name implies, pullovers involve drawing a resistance over the body from high-to-low. Although typically thought of as back exercises, pullover variations such as the dumbbell pullover and cable pullover train your back and chest. (2)(18)
The cable pullover has a slightly different resistance curve than free weight versions, as the lifter experiences maximum resistance when their arms are perpendicular to the cable rather than perpendicular to the vertical line of gravity. (19) This feature makes the cable pullover more conducive to high repetition, “pump work” style sets.
Cable resistance also enables the exercise to be performed standing, a variation sometimes called a straight-arm pushdown or pulldown. If you’re looking for a high-tension solution to polish off your upper body workout, don’t skip the standing cable pullover.
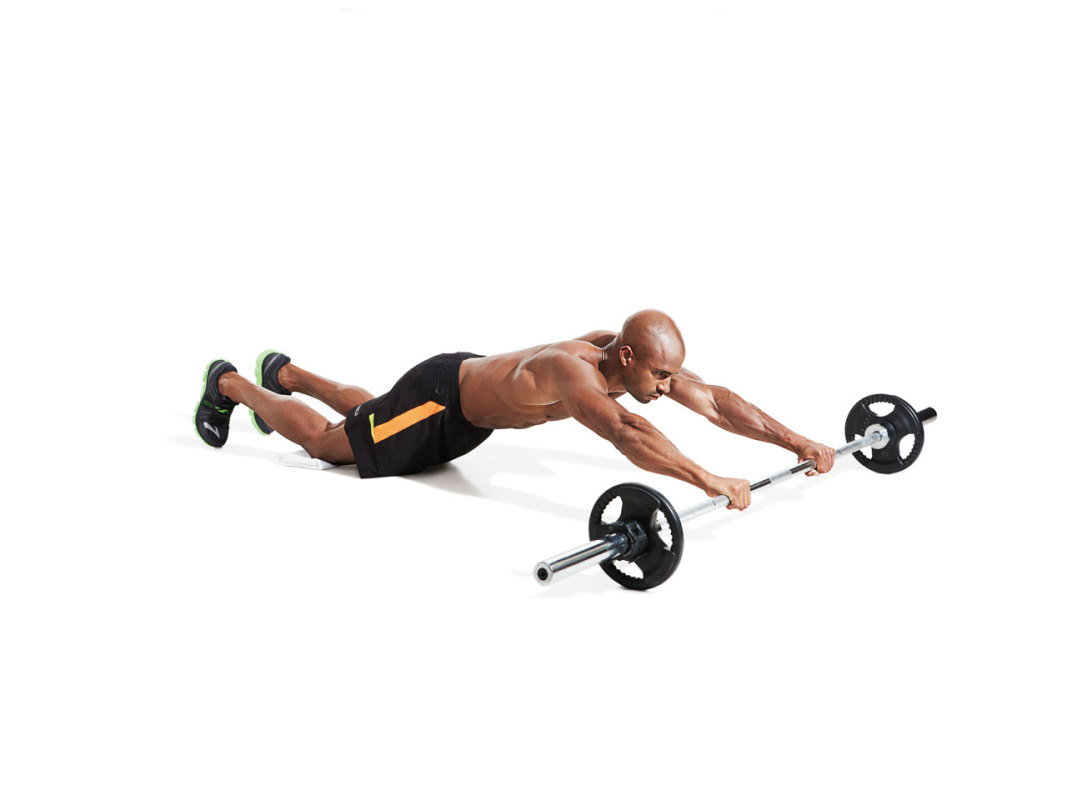
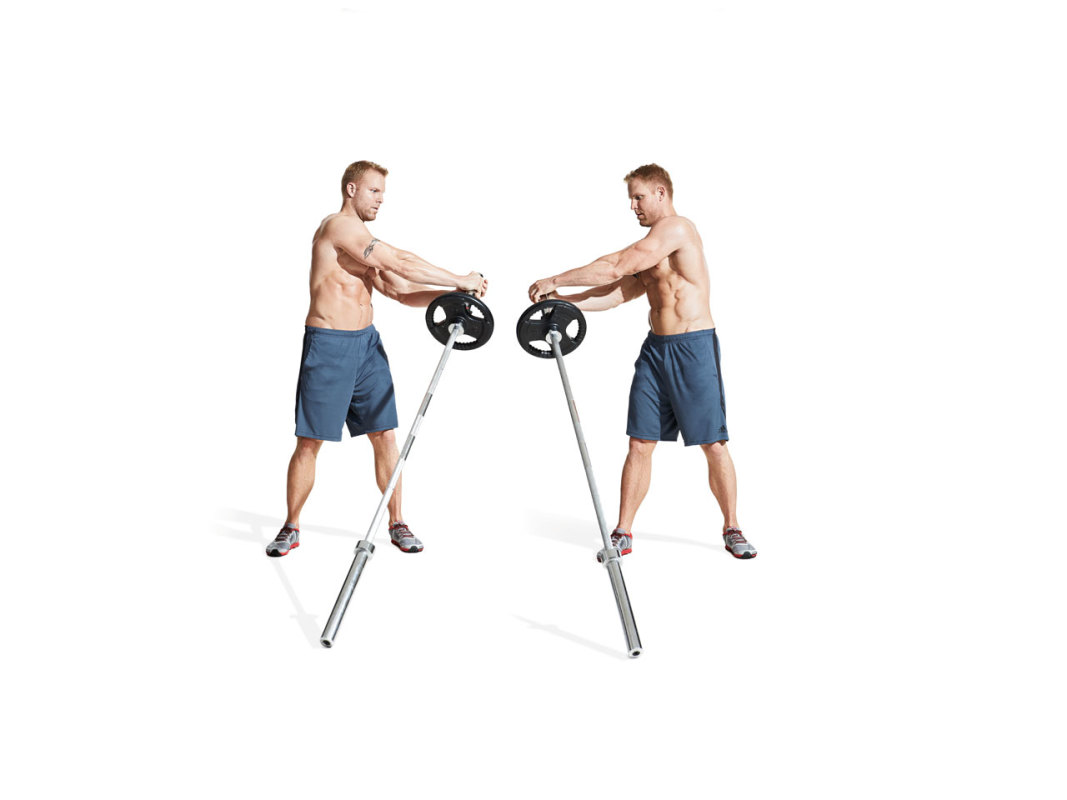
- How to Do it: Grab a straight bar cable attachment with a double-overhand grip, with hands placed wider than your shoulders. Hinge slightly forward at the hips and lift your chest. With your arms outstretched overhead, pull the bar toward your thighs. Once the bar contacts your thighs, control the movement back to the start position. Keep your elbows straight but not locked throughout the movement.
- Sets and Reps: 2 x 16-20
- Rest Time: Rest two to three minutes before repeating the previous exercise.
Benefits of the Standing Cable Pullover
- Pullovers train the back and chest together. (18)
- The resistance profile of the cable pullover applies substantial resistance when the latissimus dorsi is stretched, which may enhance muscle gain. (6)(19)
- The focused tension of the exercise tends to promote a great lat pump sensation.
How to Warm-up for Your Chest and Back Workout
Traditional warm-ups begin with a short bout of cardiovascular activity to raise body temperature, increase breathing rate, and improve overall circulation, followed by more specific movements and mobilizations to prepare the body for the workout ahead. With a substantial chest and back workout ahead of you, cardio followed by a multi-exercise specific warm-up may feel daunting.
Rather than skip the warm-up altogether, try a high-volume warm-up instead. High-volume warm-ups include long sets of high repetition, light resistance and/or bodyweight exercises performed in circuit fashion.
The benefits of high-volume warm-ups are similar to traditional warm-ups. They physiologically and mentally prepare your body for the workout, but they have the added benefit of extra reps for muscle groups that will be targeted in the upcoming workout and for muscle groups that could benefit from additional training volume (including specific weaknesses you may need to address).
Perform 20 to 30 repetitions of each of the following exercises as a circuit — take no rest between each exercise set. Rest 30 seconds between circuits. Repeat the entire circuit two or three times.
- Band Face Pull: Stand facing a light resistance loop anchored at chin-height. With arms outstretched in front of your body, grasp the loop leaving a length of resistance band slightly wider than your neck between your hands. Keeping your chest up and your body stationary, draw the resistance band toward your forehead by simultaneously performing a high row with shoulder external rotation — Your elbows should track at or above shoulder-height, and your wrists should travel higher than your elbows. When the band reaches or nearly reaches your forehead, reverse the movement and return to the starting position.
- Elevated Push-up: Begin with your hands elevated on a bench or Roman chair/back extension and your feet on the floor. Perform a push-up by pressing your body up and away from the support surface until your elbows are straight. Your push-up should resemble a “moving plank,” with your trunk and legs moving together as a unit. Lower until your chest touches or nearly touches the support surface.
- Dynamic 45-Degree Back Extension: Set up a 45-degree Roman chair so the top of the pad is just below your beltline. Lay with your thighs supported by the pad and your feet on the footplate of the machine. As you lower your torso toward the floor, intentionally allow your spine to round. As you raise your torso toward the ceiling, intentionally extend (“arch”) your spine throughout the movement. This movement requires minimal movement from the hip joints.
Here’s the deal: Some lifters train their back extensor muscles (the “fins” of muscle that lie on either side of the spine) on leg day with exercises like deadlifts, good mornings, and hyperextensions. Other lifters place these exercises with their back training. The jury is out on which practice is “best,” but one thing is clear — most lifters will benefit from more low back training.
Outside of powerlifters who’ve adopted the reverse hyper machine, and those who still use old school back extension machines, few lifters intentionally perform dynamic back extensor training — exercises that intentionally train the back extensors through an appreciable range of motion. If you are new to flexion- and extension-based low back exercises, the dynamic 45-degree back extension is a good place to start, but you may need to reduce the repetition target until you’re accustomed to the direct work.
Jacked from Front to Back
Nineteen sets in total, this formidable workout hits all major parts of your chest and back. Remember to take two or three “work-up sets” per exercise to groove your technique and identify a challenging weight for the target repetition range (“work-up sets” do not count toward set total). Altogether, plan to be in the gym a little over an hour accomplishing more than most do in two separate workouts.
References
- Weakley, J. J., et al. (2020). The effects of superset configuration on kinetic, kinematic, and perceived exertion in the barbell bench press. The Journal of Strength & Conditioning Research, 34(1), 65-72.
- Ackland, D. C., Pak, P., Richardson, M., & Pandy, M. G. (2008). Moment arms of the muscles crossing the anatomical shoulder. Journal of Anatomy, 213(4), 383-390.
- dos Santos Albarello, et al. (2022). Non-uniform excitation of pectoralis major induced by changes in bench press inclination leads to uneven variations in the cross-sectional area measured by panoramic ultrasonography. Journal of Electromyography and Kinesiology, 67, 102722.
- Coratella, G., et al. (2020). Specific prime movers’ excitation during free-weight bench press variations and chest press machine in competitive bodybuilders. European Journal of Sport Science, 20(5), 571-579.
- Lee, H. M. (2019). Force direction and arm position affect contribution of clavicular and sternal parts of pectoralis major muscle during muscle strength testing. Journal of Hand Therapy, 32(1), 71-79.
- Ottinger, C. R., et al. (2022). Muscle hypertrophy response to range of motion in strength training: a novel approach to understanding the findings. Strength & Conditioning Journal, 10-1519.
- Muyor, J. M., Rodríguez-Ridao, D., & Oliva-Lozano, J. M. (2023). Comparison of Muscle Activity between the Horizontal Bench Press and the Seated Chest Press Exercises Using Several Grips. Journal of Human Kinetics, 87, 23.
- García-Jaén, M., et al. (2021). Electromyographical responses of the lumbar, dorsal and shoulder musculature during the bent-over row exercise: a comparison between standing and bench postures (a preliminary study). Journal of Physical Education and Sport, 21(4), 1871-1877.
- Trindade, T. B., et al. (2022). Pre-exhaustion training, a narrative review of the acute responses and chronic adaptations. International Journal of Exercise Science, 15(3), 507.
- Fisher, J. P., et al. (2014). The effects of pre-exhaustion, exercise order, and rest intervals in a full-body resistance training intervention. Applied Physiology, Nutrition, and Metabolism, 39(11), 1265-1270.
- Vilaça-Alves, et al. (2014). Effects of pre-exhausting the biceps brachii muscle on the performance of the front lat pull-down exercise using different handgrip positions. Journal of Human Kinetics, 42(1), 157-163.
- Sciascia, A., & Kibler, W. B. (2022). Current views of scapular dyskinesis and its possible clinical relevance. International Journal of Sports Physical Therapy, 17(2), 117.
- Walker, S., et al. (2016). Greater strength gains after training with accentuated eccentric than traditional isoinertial loads in already strength-trained men. Frontiers in Physiology, 7, 149.
- Wackerhage, H., et al. (2019). Stimuli and sensors that initiate skeletal muscle hypertrophy following resistance exercise. Journal of Applied Physiology, 136, 30-43.
- McKenzie, A., et al. (2022). Bench, Bar, and Ring Dips: Do Kinematics and Muscle Activity Differ?. International Journal of Environmental Research and Public Health, 19(20), 13211.
- McKenzie, A. K., et al. (2021). Glenohumeral Extension and the Dip: Considerations for the Strength and Conditioning Professional. Strength & Conditioning Journal, 43(1), 93-100.
- McKenzie, A., et al. (2022). Fatigue increases muscle activations but does not change maximal joint angles during the bar dip. International Journal of Environmental Research and Public Health, 19(21), 14390.
- Muyor, J. M., López-Miñarro, P. A., & Alacid, F. (2022). Comparison of electromyographic activity during barbell pullover and straight arm pulldown exercises. Applied Sciences, 12(21), 11138.
- Schütz, P., et al. (2022). Chest exercises: movement and loading of shoulder, elbow and wrist joints. Sports, 10(2), 19.
Featured Image: Ground Picture / Shutterstock