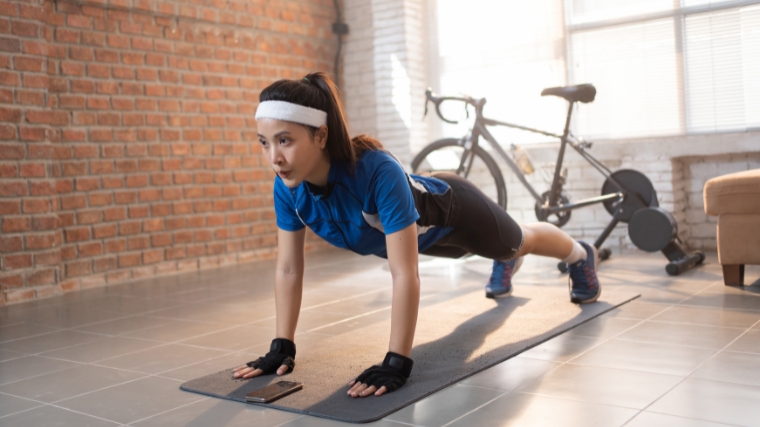
Many champions don’t just want to win titles — they want to help others become their best as well. One example of a champion that does as such is six-time Figure Olympia winner Cydney Gillon.
Outside of her competitive career, the former “Survivor” contestant trains and coaches other athletes. She also shares training tips for her social media followers, such as the ab workout she posted to her Instagram on May 8, 2023.
Gillon told her 139,000 followers that she includes these three exercises regularly into her training routines, performing an ab workout in every training session. Besides the video demonstrations, she also included tips in the caption of the post to help execute the exercises.
Foam Roller Crunches
Gillon can be seen lying on the floor with a foam roller under her mid-back area. She lowers herself down so her upper back rounds around the foam roller before performing a standard crunch.
Her hands are behind her head with the elbows coming forward as she rises and flaring out as she goes back. She didn’t offer a specific rep goal, but performed eight reps on the video.
“There should be zero strain in your neck. Make sure your hand is properly supported and you aren’t bending your neck versus using your abs.”
Plank Knee Taps
Next, Gillon takes a push-up position before lowering her knees to the floor. Once they touch the ground, she immediately brings them back up to the starting position. She maintained a consistent cadence with each rep. Gillon showed herself doing 15 reps on this exercise.
Replying to a question in the comment section, she clarified the goal of the exercise by saying it works the entire ab muscle with an emphasis on the lower abs.
“Great if done efficiently. The core should be tight the entire time and the knees should not collapse to the floor. Plank first, drive knees down and right back up for each rep. This variation is good if your hip flexors are zapped from leg lifts or leg day.”
Planks
Gillon placed her elbows on the floor for the final exercise of the sequence. She performed a traditional plank with her elbows and forearms on the ground, while keeping her glutes slightly higher than her shoulders.
This stationary exercise is most effective when the abs remain strongly contracted instead of allowing them to relax. Gillon is shown holding the position for roughly 10 seconds before the clip ends.
“Make sure your core remains engaged and try to make sure you don’t rock forward to your shoulders when the abs begin to fatigue. Start with a short count then work your way up.”
More from Breaking Muscle:
Gillon will be making her next title defense when she steps on stage at the 2023 Figure Olympia contest as a part of the 2023 Olympia Weekend, scheduled for Nov. 2-5 in Orlando, FL. With six consecutive titles, she’s already the winningest champion in her division’s history.
The next-closest uninterrupted string of title wins was inaugural Figure Olympia champ Davana Medina’s three-year run (2003-2005). Nicole Wilkins amassed four total wins across six years (2009, 2011, 2013, 2014), still not approaching Gillon’s six-and-counting victories.
Not to discount her fellow Figure competitors, but Gillon appears to have no doubts about retaining her title indefinitely. In November, her streak could be expected to extend even further.
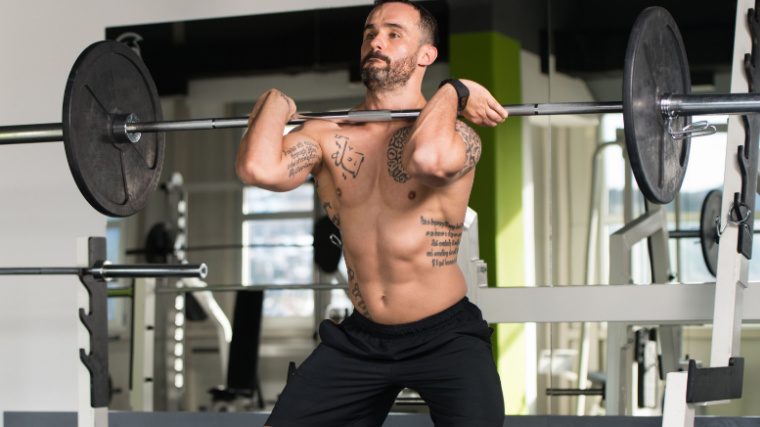
Some lifters will only consider training their abs with high-repetition bodyweight exercises. If they do add resistance, it’s often with exercises performed on highly stabilized machines, excessively heavy movements with compromised technique, or basic cable crunch variations that don’t allow the abs to perform as efficiently as possible. That’s when it’s time to head into the cable station and hit your core with something new.
Credit: Balance In Motion / YouTube
The half-kneeling Pallof press is a challenging, progressive core exercise derived from the basic standing Pallof press. The unique ground-based position challenges different musculature on both sides of your body while coordinating your torso, core, and legs with different tasks.
Here’s a review of all the elements you need to know about building total-body stability and core strength with the half-kneeling Pallof press.
Half-Kneeling Pallof Press
Half-Kneeling Pallof Press Video Demonstration
Author James Shapiro explains the half-kneeling Pallof press and offers in-depth guidance for exercise technique, common mistakes, as well as several simple and effective ways to adjust the exercise.
How to Do the Half-Kneeling Pallof Press Step By Step
Following these detailed instructions to position yourself up for the half-kneeling Pallof Press will optimize your results. You will need a cable pulley system or a long resistance band with an anchor point that will not move, such as a squat rack.
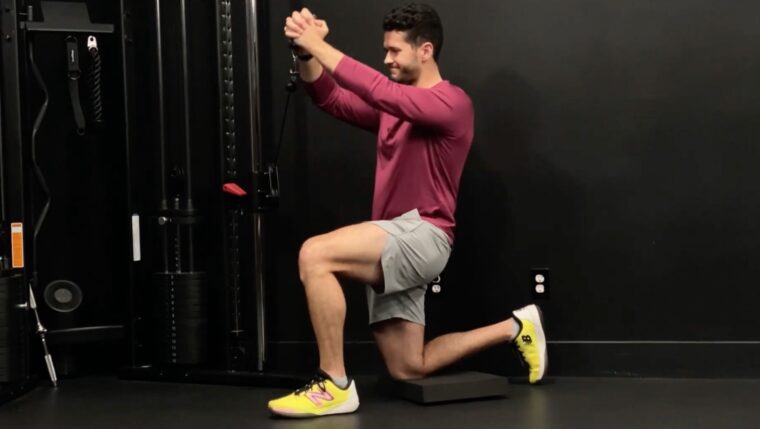
Step 1 — Set Up Your Equipment and Position
Credit: James Shapiro Performance / YouTube
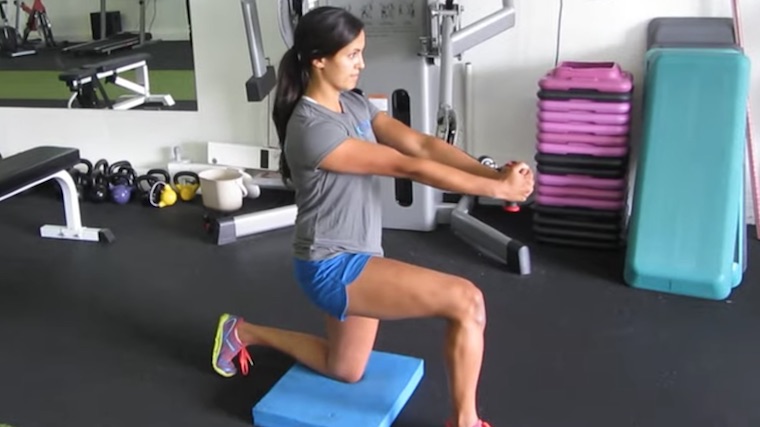
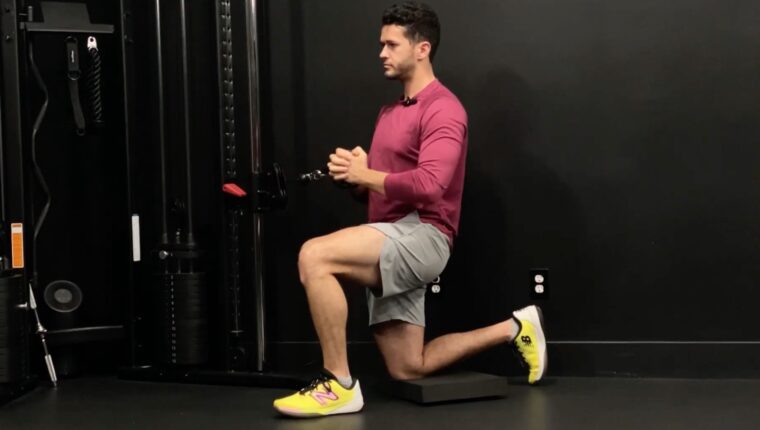
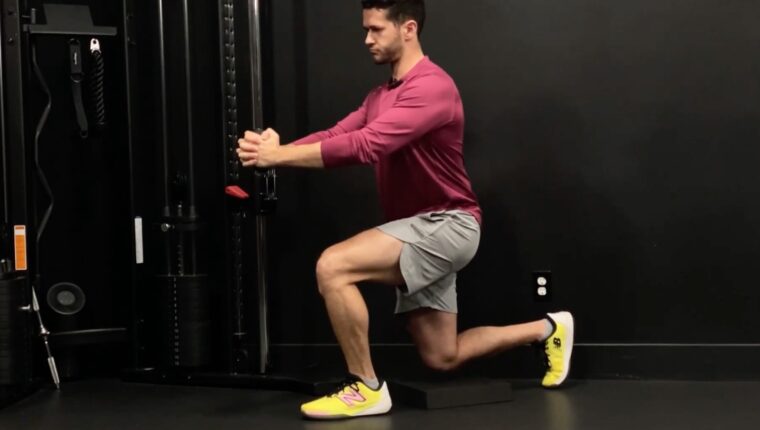
Being relatively comfortable is a priority since you’re in a half-kneeling (one-knee down) position Use a pad to cushion your knee if you don’t like the surface you are kneeling on. Set the pulley or band height so that the resistance runs in-line with your sternum — above your hips and under your chest — when you’re in the kneeling position.
Stand sideways to the cable and assume a half-kneeling position with the foot of your outside leg flat on the ground and the knee, shin, and toes of your inside leg on the ground. Your outside leg should have a roughly 90-degree angle relative to your hip and knee. Set the heel of your outside leg directly underneath the same side knee and set the knee of your inside leg underneath your hip.
Form Tip: Tucking the toes of your inside leg down (aiming your shoelaces to the ground) will add an extra level of lower-body bracing and activation. If you keep that foot pointed up on its toes, you might experience less hip stabilization and glute activation.
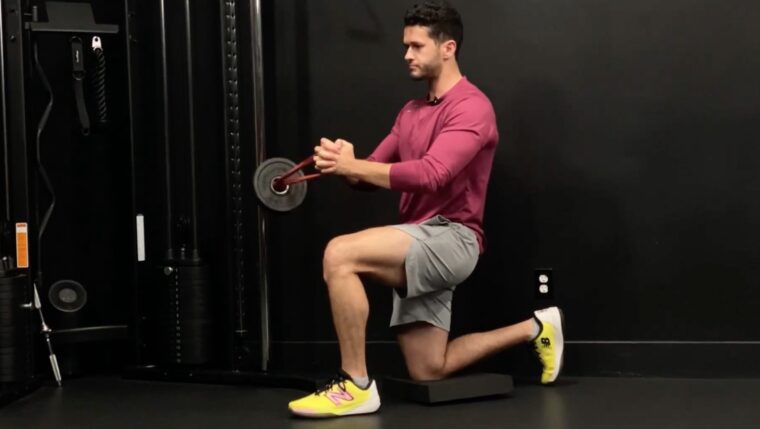
Step 2 — Brace with the Weight
Credit: James Shapiro Performance / YouTube
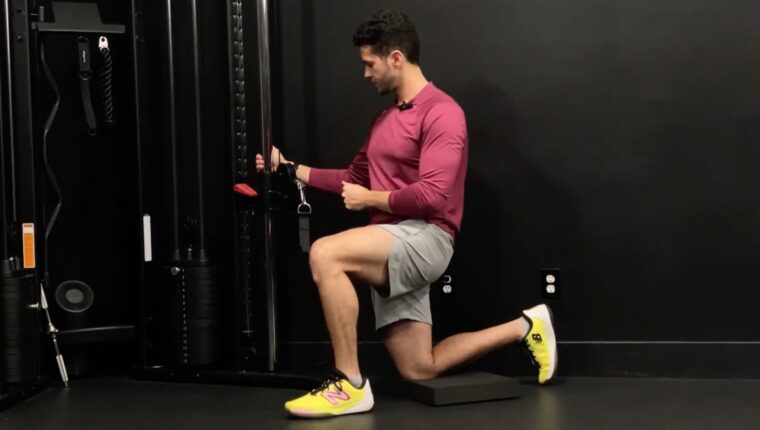
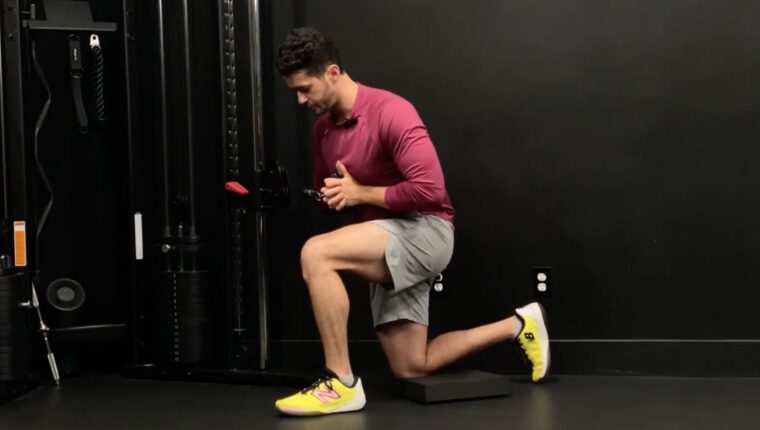
Grab the cable or band with both hands and interlock your fingers. Slowly pull the handle to the center of your sternum. With your lower body in position, drive your shoulders down pull your elbows to your sides to brace your total-body position before initiating the movement.
Keep your outside leg strong by engaging your glutes and activating your shoulders prior to the press. You should be able to maintain these key positions throughout the entire exercise.
Form Tip: The half-kneeling Pallof press is not an evenly distributed movement toward the body. The rotational forces being applied by the resistance are biased more toward the side closest to the band’s anchor point. This means you need to work even harder with the side farthest from the anchor point (the outside half of your body) to stay in line and balanced. This is also why it’s essential to perform reps equally on both the left and right sides.
Step 3 — Press and Pause
Credit: James Shapiro Performance / YouTube
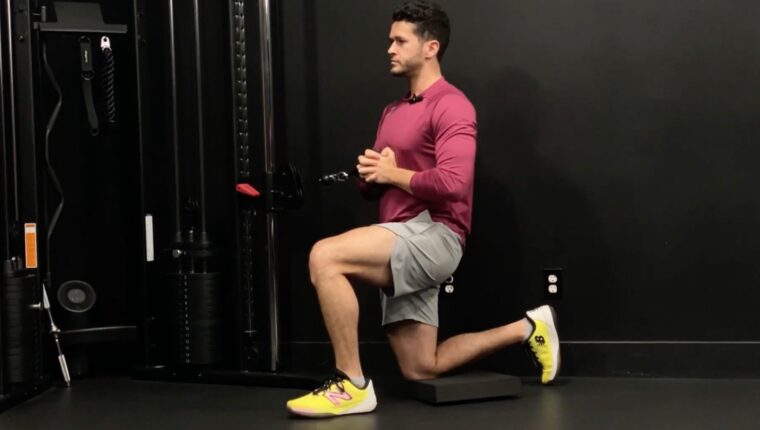
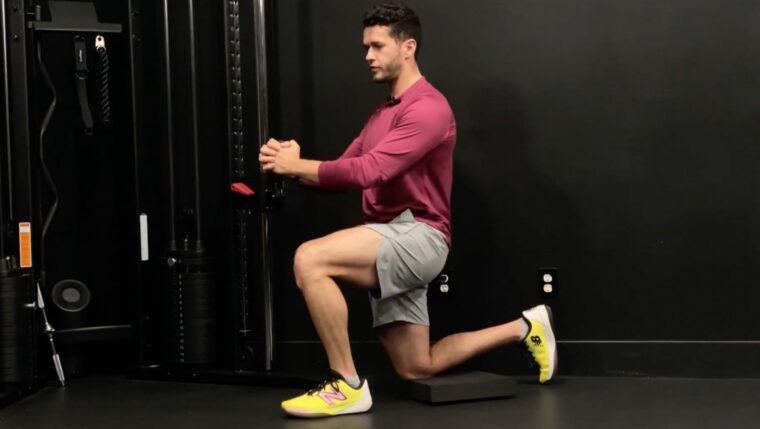
Keep your lower body stable as you press your hands in a straight line, from the center of your sternum, away from your body until your arms are locked out. Pause briefly in the locked out position.
This is the hardest point of the movement — when your arms are farthest away from your body. The greatest amount of anti-rotation occurs when the arms are extended and the hands are the furthest point away from the sternum. Pausing in the arms-locked position will maximize tension through your core.
Form Tip: Do not try to exceed the muscular stress your body can maintain. If you start to feel that you’re shifting away from pressing in a straight line as your arms extend, do not go further just to get “more” out of the exercise. At that point, it’s likely you’ve lost some of your initial brace and need to return to the starting position. If necessary, stop before lockout to maintain position.
Step 4 — Return to the Starting Position
Credit: James Shapiro Performance / YouTube
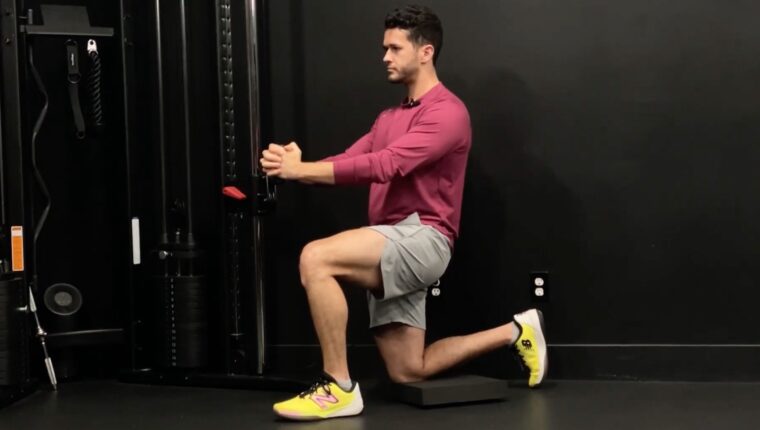
Bring your hands back to your sternum in a controlled manner. Repeat steps two through four — brace, press and pause, return — for your intended repetition scheme before carefully returning the weight back to the anchor point.
Form Tip: There is no need to speed through the half-kneeling Pallof press. With a reduced and lowered base of support, plus a greater emphasis on core control, you need to be careful and deliberate with each individual repetition. Focus on quality movements instead of piling up a quantity of repetitions.
Half-Kneeling Pallof Press Mistakes to Avoid
A successful half-kneeling Pallof press requires a lot of moving parts and internal communication. Steer clear of these common mistakes to maximize your performance and results.
Leaning Too Far Forward or Backward
One common issue with half-kneeling positions is that people sometimes have a hard time understanding what a “neutral hip position” actually is. Either their torso leans too far forward because their lower body is positioned wrong or they lean back too much “for balance” and create too much extension through their low back.
Credit: James Shapiro Performance / YouTube
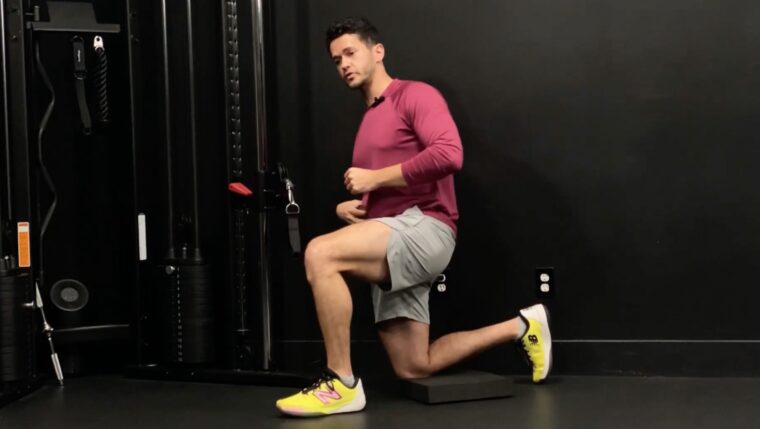
Avoid it: Think about keeping your upper body as tall as possible when entering the half-kneeling Pallof press. When you look down, you should see your hips are under your shoulders and above the knee of your lower leg. If you start to see an angle form between your torso and front thigh, you’re likely pushing your hips back.
Allowing Your Outside Knee To Collapse
Your outside knee might experience some movement during the pressing motion as your core is activated and your body fights against the resistance, however your knee can actually be the last place a lot of people focus on.
Credit: James Shapiro Performance / YouTube
If your outside knee collapses inward toward the weight, it is demonstrating a lack of coordination from your glutes and obliques. Loss of coordination and strength from the internal obliques on the outside portion of your body can lead to more torso rotation toward the inside leg.
Avoid it: Be attentive to not push your knee out excessively. Having your inside-leg toes tucked under and engaging your glutes will help your outside leg maintain stability. An additional cue is to focus on how much ground pressure you are developing — feel power coming up from your outside foot. Pushing through the big toe of your outside leg can keep your hips and ankle in more efficient alignment.
Having Your Arms Fall “Off-Center”
Finding an imaginary line on the floor or focusing on a spot on the wall may initially be hard, but it’s possible when you don’t have any tangible landmarks to aim for while pressing away from your chest.
Credit: James Shapiro Performance / YouTube
Once you’ve picked a target, your arms should not be moving excessively “off-center”. If they do, it indicates you have either lost the brace position or you’re using too much resistance. Being in a half-kneeling position only amplifies either of these two common faults because your stability is challenged that much more.
Avoid it: You can either reduce the resistance, which should allow you more overall control, or you can slightly reduce the range of motion to a stay in a more easily controlled position. The half-kneeling position is a very demanding variation for any movement let alone an anti-rotation core movement.
Hips Falling To The Side
Poor oblique control paired with a lack of adductor (inner thigh) activation from your outside leg will lead you to have your hips falling to the side. Some of the functions of your obliques (side abs) include rotation, flexion, and lateral flexion — performing those movements as well as resisting them.
Credit: James Shapiro Performance / YouTube
As you press forward, you may notice your hips potentially falling to the inside if you’re not strongly stabilizing the adductors of your outside leg.
Avoid it: Imagine you’re slightly crunching your obliques prior to your brace and press — just imagine, don’t actively crunch sideways. With your obliques and core fully engaged prior to pressing, you can expect little-to-no movement at your hips.
How to Progress the Half-Kneeling Pallof Press
Progressing through the half-kneeling Pallof press comes in a variety of ways. Using a band or cable pulley system can be a preference or a factor of accessibility depending on your available equipment. When the basic half-kneeling Pallof press becomes mundane or “easy,” challenge yourself with these small adjustments.
Pause Repetitions
Changing your tempo (speed of movement) is one of the best initial ways to progress a standard half-kneeling Pallof press, outside of changing your sets and reps. You can challenge your core with a longer pause in the lockout position before returning your hands to your sternum. You can also add multiple pauses for a second or less at specific points throughout the range of motion to make each repetition longer, creating more time under tension.
Increasing Repetitions Performed
Performing any anti-rotation exercise depends on the strength and endurance of your entire core musculature working together. Increasing the number of repetitions performed puts a strain on your core and challenges your local and overall muscular endurance. Making small incremental jumps in repetitions will also increase the amount of time worked and is a form of linear progression.
Benefits of the Half-Kneeling Pallof Press
The list of benefits the half-kneeling Pallof press holds may persuade you to add it into your workouts even if it may not look like the most interesting exercise. The research and evidence demonstrate the effectiveness of this exercise for relieving pain, supporting strength development, and improving sport performance. (8)
Reducing Lower Back Pain
One of the primary sources of work absence and disability is lower back pain (LBP). (1) With sedentary lifestyles, bad ergonomics, and poor posture, it shocking to see that more than 50% of people in the United States are affected by lower back pain that can lead to physical therapy or disability. (12)
By using the half-kneeling Pallof press to train the muscles responsible for improving the stability and endurance of your lumbar spine and hips, you can either reduce, eliminate, or prevent pain and discomfort in your lower back.
Increasing Your Strength
Performing compound (multi-joint) exercises like squats, lunges, deadlifts, overhead pressing, and bench press requires minimal movement where there should be stiffness. Many hear the word “stiffness” in a gym setting and attach a negative connotation. However, in places where there should be stiffness — such as your low back and spine — stiffness can simply mean wanting to be as stable as possible.
Credit: Jasminko Ibrakovic / Shutterstock
The effects of abdominal bracing have been shown to increase the strength and power of trunk and hip extension. (10) A core program that includes the half-kneeling Pallof press can stimulate intra-abdominal pressure, which helps to create that much-needed stability, and results in improved force output.
Sport Performance Improvements
Athletes who play sports are going to be rotating through their spine to generate force when they change direction, move sideways, jump, throw, or swing. Having the ability to generate core stiffness in certain athletic positions can also lead to great force application and prevent “energy leaks” (losses of strength and power) from occurring when attempting athletic movements. (5)(9)
Athletes who engage in core training with exercises like the half-kneeling Pallof press may see improvements in their athletic skill, agility, and power while maintaining a healthy spine. (2)(4)
Muscles Worked by the Half-Kneeling Pallof Press
Even though it has the word “press” in the exercise name, the half-kneeling Pallof press does not fall under traditional pressing exercises which would train your chest or shoulders. The press portion of the exercise is used to increase the lever arm and more strongly challenge your core stabilizers. You’re not actively lifting the weight during the pressing movement, so your chest and shoulders are not significantly recruited.
This means the muscles in your hips, core, and a few intrinsic muscles of your back get utilized a lot more than muscles of the shoulders, pecs, and triceps.
Obliques and Transverse Abdominis
Your internal and external obliques — found on each side of your abdominal wall — maintain abdominal tension, increase intra-abdominal pressure, and coordinate to rotate your trunk.
Credit: MDV Edwards / Shutterstock
This buildup of intra-abdominal pressure reinforces the transverse abdominis (your “primary” abdominal muscle) to stabilize your spine and pelvis. (6) Coordination between all of these muscles help to keep your spine and trunk stable and relatively stationary during he half-kneeling Pallof press as you press with your hands away from your body. (11)
Hip Musculature
In the half-kneeling position, your hips work isometrically to activate and integrate your core muscles. Your hamstrings and glutes are firing to maintain hip extension on your inside leg while holding a neutral hip position. Your outside leg has the TFL (tensor fasciae latae, a hip muscle) to assist the leg in hip flexion. Your inside leg is relying on a neutral position that counteracts the hip flexion of the outside leg. These muscles work in concert to prevent your hips from tilting sideways, forward, or backward during the exercise.
Intrinsic Back Muscles
People often misinterpret “core muscles” to mean only those located where we can see them — on the front of our body. However there are smaller intrinsic muscles located on our back, near our spine, or with attachment to our ribs.
The erector spinae, semispinalis, quadratus lumborum, and multifidi are a few that play a part during the half-kneeling Pallof press. These muscles are designed to extend the spine, laterally flex the spine when contracted unilaterally, maintain posture, and stabilize the low back. (7)
How to Program the Half-Kneeling Pallof Press
The half-kneeling Pallof press is considered a “supplemental” or accessory exercise and doesn’t necessarily need to be the primary movement for your workout. Understanding where the half-kneeling Pallof press can be programmed will determine its effectiveness in your program. Also note, if you’re familiar with performing the standing Pallof press, use less resistance with the half-kneeling exercise due to the change of position.
Supplementing Your Main Compound Lift
Performing the half-kneeling Pallof press at relatively lower intensities can be beneficial to those who lack proper core bracing during heavier sets of their squats, deadlifts, bench pressing, or overhead pressing. (3)
Fatiguing your core is not a smart or effective approach before performing compound movements. However, performing the half-kneeling Pallof press with lower intensities (staying away from muscular failure) and lower volume (such as two sets of 10 to 12 reps) can reinforce and maintain core tension for your primary training movements.
Low Intensity Recovery Days
Adding the half-kneeling Pallof press to recovery workouts or low intensity days can be an effective way to prepare your body, and your central nervous system, for the more intense workouts during your training week. Performed at low to moderate volume — such as two to four sets of eight to 12 reps — can help prime your body for the next day. It can also help with small “power leaks” with your strength-based movements.
Positioned in a Core Circuit
Many experienced lifters have found that training multiple core movements together as a form of circuit training amplifies the intensity of each exercise, compared to performing separate exercises by themselves. Pairing up other core exercises such as suitcase carries, hollow body holds, or deadbugs can amplify the intensity of the half-kneeling Pallof press.
Half-Kneeling Pallof Press Variations
Challenging yourself with the half-kneeling position can be difficult, but definiely not impossible. Below are a few variations of the half-kneeling Pallof press that increase with difficulty and should be progressed slowly. Demonstrations can be reviewed in the technique video at the beginning of the article.
Pallof Press and Lift
Moving your arms away from your center-mass is the driving force behind the anti-rotational benefits of the Pallof press. The farther the leverage moves from your center, the more difficult it will be.
Credit: James Shapiro Performance / YouTube
Adding a lift above your sternum, to eye-level or higher, further challenges your whole body to remain stable while engaging your serratus and shoulder stabilizers even more. Start small, as even a little movement will yield exponential difficulty to the exercise.
Pallof Perturbation Press and Hold
When your goal is to brace and maintain position, your body will work even harder when forces are trying to move you, rather than forces being manipulated more passively. This advanced exercise variation is performed with a small weight plate and a resistance band attached to an anchor point, rather than with a cable pulley.
Credit: James Shapiro Performance / YouTube
Attach a relatively light resistance band to the anchor point and slide a five-pound weight plate halfway down the band. Step out farther from the anchor position than normal and assume a half-kneeling position.
Focus on a rapid, almost explosive, press and hold the locked out position. The momentum of the movement should sling the plate forward and back. This forward and backward disturbance will try to push your body out of position. Work hard to maintain full-body tension, with core stiffness and a strong position, as the weight plate slowly comes to rest.
Isometric Split Squat Pallof Press
This variation increases lower body involvement while decreasing your base of support, which further increases the stability requirement. Start off in the half-kneeling position, brace, and press your arms in front of your chest. Then the hard part begins.
Credit: James Shapiro Performance / YouTube
Hold the locked out position, and push from the ground with both legs until your back knee is slightly off the ground. Briefly hold this isometric split squat position before gently returning the knee back to ground. Keep your arms locked and repeat the split squat position for repetitions.
FAQs
Why is the half-kneeling Pallof press harder than the standing version?
By taking the half-kneeling position, you create an uneven environment when your outside leg enters hip flexion and your inside hip remains neutral. This position affects the oblique core musculature demands when comparing the half-kneeling position and the more evenly stabilized standing position.
How can this exercise increase my strength for heavy compound lifts?
It takes a lot of experience to build full-body tension and equally express force through both sides of your body. Naturally, people will have a bias from one side of their body, either due to overall posture or from favoring the dominant side of the body. If you’ve ever felt a small turn or tilt to one side of your body when performing a lift, it’s a sign that you are losing tension during the movement. The half-kneeling variation can help address the oblique muscles on your relatively weaker side, so that your body can express force more efficiently.
What resistance level should I start with?
Begin with relatively light weight or low resistance. If you’re using a looped resistance band, use a thinner band, as band tension exponentially increases as you stretch it farther from the anchor point. If you have access to a cable pulley station, I would initially use 50% of the resistance you use if you’re familiar with performing the standing Pallof presses. If it’s your first time performing any Pallof press, use less than 10 pounds and master the technique before progressing gradually in weight.
References
Chang, Wen-Dien et al. “Core strength training for patients with chronic low back pain.” Journal of physical therapy science vol. 27,3 (2015): 619-22. doi:10.1589/jpts.27.619
Hibbs, Angela E et al. “Optimizing performance by improving core stability and core strength.” Sports medicine (Auckland, N.Z.) vol. 38,12 (2008): 995-1008. doi:10.2165/00007256-200838120-00004
Huxel Bliven, Kellie C, and Barton E Anderson. “Core stability training for injury prevention.” Sports health vol. 5,6 (2013): 514-22. doi:10.1177/1941738113481200
Kibler, W Ben et al. “The role of core stability in athletic function.” Sports medicine (Auckland, N.Z.) vol. 36,3 (2006): 189-98. doi:10.2165/00007256-200636030-00001
Luo, Shengyao et al. “Effect of Core Training on Skill Performance Among Athletes: A Systematic Review.” Frontiers in physiology vol. 13 915259. 6 Jun. 2022, doi:10.3389/fphys.2022.915259
Lynders, Christine. “The Critical Role of Development of the Transversus Abdominis in the Prevention and Treatment of Low Back Pain.” HSS journal : the musculoskeletal journal of Hospital for Special Surgery vol. 15,3 (2019): 214-220. doi:10.1007/s11420-019-09717-8
Malátová, Renata, Jitka Rokytová, and Jan Stumbauer. “The use of muscle dynamometer for correction of muscle imbalances in the area of deep stabilising spine system.” Proceedings of the Institution of Mechanical Engineers, Part H: Journal of Engineering in Medicine 227.8 (2013): 896-903.
McGill, Stuart M.. “Core Training: Evidence Translating to Better Performance and Injury Prevention.” Strength and Conditioning Journal 32 (2010): 33-46.
Samson, Kim M. et al. “A Core Stabilization Training Program for Tennis Athletes.” Athletic Therapy Today 12 (2007): 41-46.
Tayashiki, Kota et al. “Effect of abdominal bracing training on strength and power of trunk and lower limb muscles.” European journal of applied physiology vol. 116,9 (2016): 1703-13. doi:10.1007/s00421-016-3424-9
Willson, John D., et al. “Core stability and its relationship to lower extremity function and injury.” JAAOS-Journal of the American Academy of Orthopaedic Surgeons 13.5 (2005): 316-325.
Wu, Aimin et al. “Global low back pain prevalence and years lived with disability from 1990 to 2017: estimates from the Global Burden of Disease Study 2017.” Annals of translational medicine vol. 8,6 (2020): 299. doi:10.21037/atm.2020.02.175
Featured Image: James Shapiro Performance / YouTube
Physical therapist John Pallof shared a simple exercise with a few influential strength coaches in the early 2000s. It offered an effective way to challenge core stability in an upright, athletic position. Due to the exercise’s relative starting and ending point, he called it the belly press.
Fast-forward two decades. Pallof’s “belly press” was renamed by way of common usage, and what’s become known as the Pallof press is a mainstay exercise in settings from rehabilitation clinics to the strength and conditioning facilities of elite athletes. (1)(2)(3)(4)
This relatively new spin on the classic plank challenges core strength at a new angle, literally. The direction of force requires anti-rotation, as opposed to dynamic rotation. “Anti” movements are a generally overlooked and undertrained aspect of core health and strength.
Credit: RomarioIen / Shutterstock
How can a single exercise be effective across such a wide range of populations? Well, it’s scalable for difficulty, making it effective and accessible to beginners and experienced athletes alike. It also trains the body to resist rotation, which is useful across human movement patterns from athletics to daily life. Here’s a detailed look at the Pallof press and how to incorporate into your training plan.
Pallof Press
Classic Pallof Press Video Tutorial
Author Dr. Merrick Lincoln demonstrates the Pallof press in the video below. Read on for step-by-step instructions.
How to Do the Pallof Press
Follow these detailed instructions to dial-in proper Pallof press form for maximum benefit and efficiency. You’ll need a cable system with an adjustable pulley or a resistance band and a stable, chest-high anchor point.
Step 1 — Set Your Equipment and Step Out
Credit: Merrick Lincoln, DPT, CSCS / YouTube
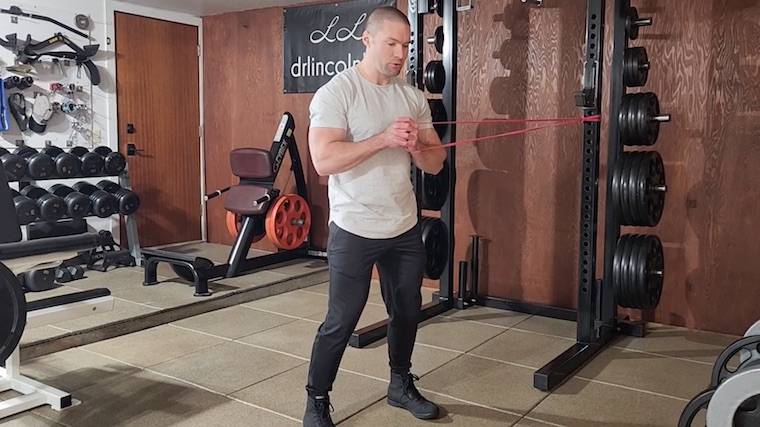
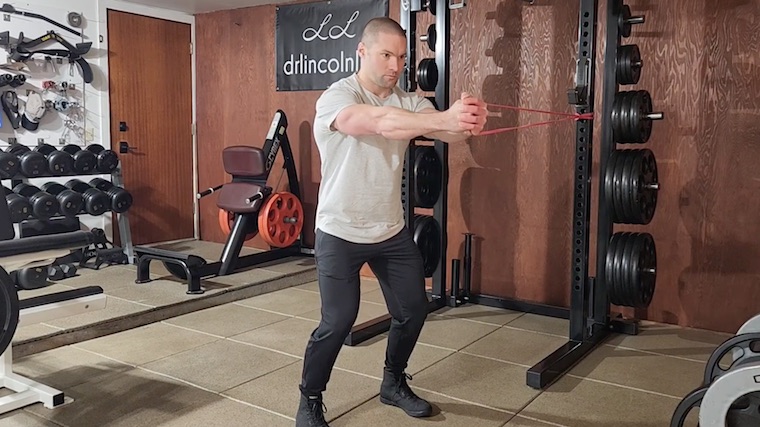
Set a resistance band or cable pulley (with a single handle attached) at approximately chest-height. Grasp the band or handle with both hands and hold it in front of your sternum with bent arms.
Pull your shoulders back and brace your core. Sidestep away from the anchor-point until you feel moderate tension on the band, or until the weight plates lift several inches from the cable stack.
Form Tip: Although this is just the “setup” of the exercise, your core is already experiencing resistance from the band or cable. Before the walkout, not after, is the best time to set your brace and tense your abs, as this avoids having to establish proper alignment while under greater resistance.
Step 2 — Quarter-Squat and Press
Credit: Merrick Lincoln, DPT, CSCS / YouTube
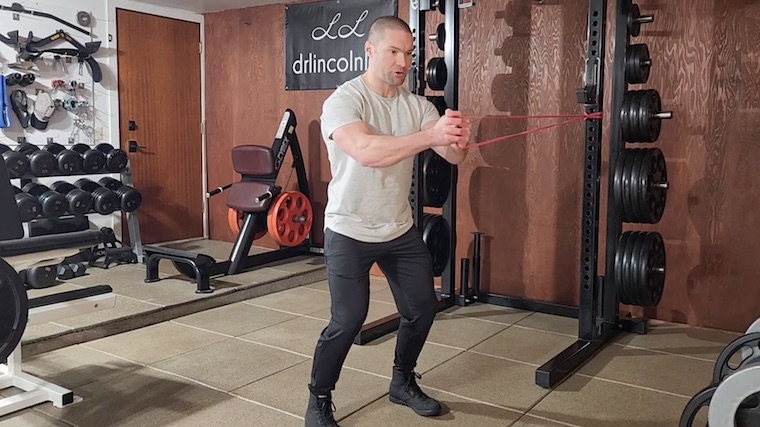
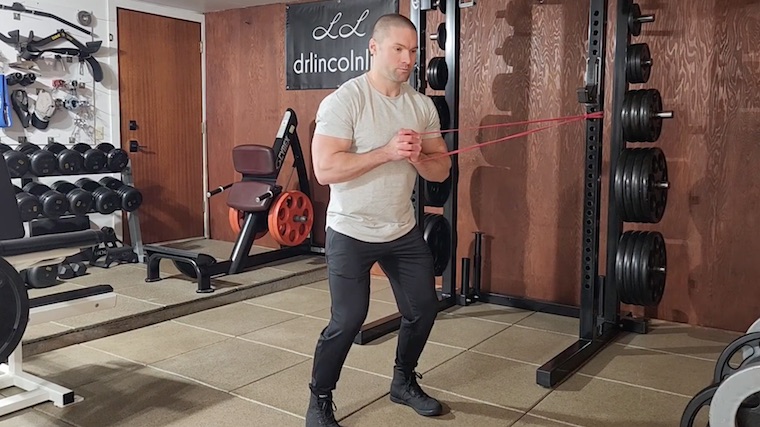
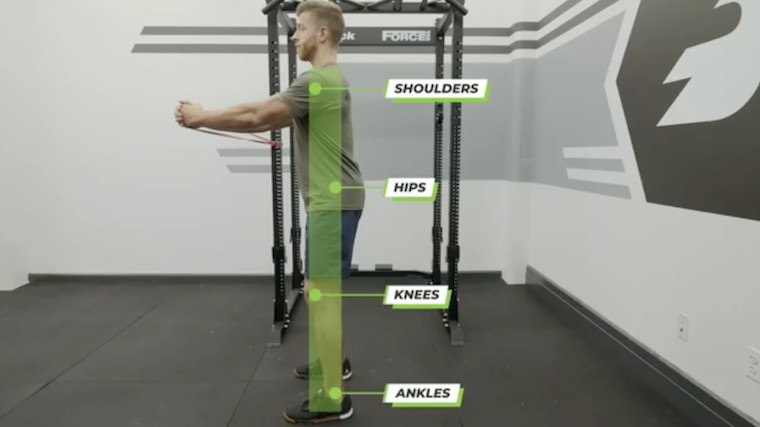
With your shoulders squarely over your pelvis and your feet just beyond shoulder-width, perform a shallow squat. Maintain this stable position throughout the remainder of the exercise. Slowly press the band or cable directly away from your sternum until your elbows are straight.
Form Tip: The turning force from the band or cable doesn’t stop at your core. You will need to establish a firm connection with the floor during the Pallof press. Accomplish this by attempting to “grip” or “spread” the floor with your feet.
Step 3 — Pause at Peak Tension
Credit: Merrick Lincoln, DPT, CSCS / YouTube
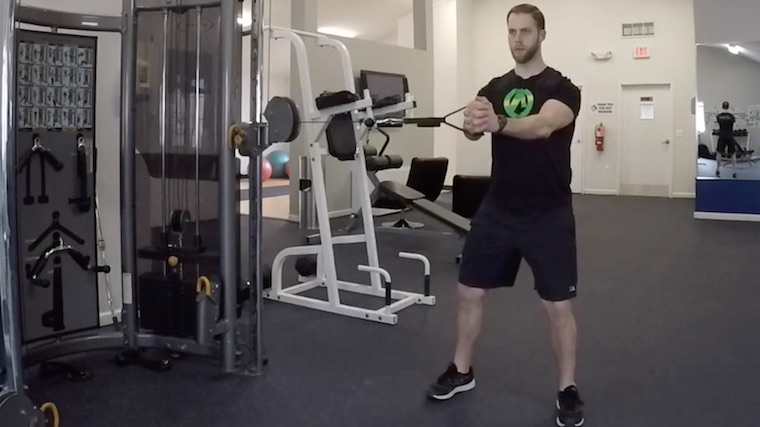
This portion of the exercise is responsible for a relatively large amount of the training stimulus, so give it plenty of attention. The end position of the press is the most challenging part of the exercise — Savor it by pausing for a moment or longer.
Form Tip: You’ve (likely) inhaled to set your brace before initiating the repetition, and you’ve exhaled throughout the pressing motion. Now, fill the pause at peak tension with another full breath cycle (breathe in, breathe out) without losing your brace. This is a good way to make sure you hold the pause for a sufficient duration.
Step 4 — Return to Start Position
Credit: Merrick Lincoln, DPT, CSCS / YouTube
Pull the band or cable handle back to your sternum with a smooth, controlled movement. Repeat steps two through four (press, pause, pull back) for the desired number of repetitions before sidestepping toward the anchor point or pulley and switching sides.
Form Tip: Although the exercise becomes progressively easier as you bring the band or handle back toward the start position, do not lose your brace. Strive for no movement below the shoulders.
Pallof Press Mistakes to Avoid
Don’t be lulled into thinking this simple-looking exercise doesn’t require focus. Avoiding these Pallof press pitfalls ensures exercise effectiveness.
Setting Up at an Angle
One common error in the Pallof press occurs before the exercise really begins. After you step out with band or cable, your torso must be perpendicular to the line of pull of the resistance. Don’t bend at your waist and don’t stand in front of, or behind, the anchor point or cable.
Credit: BarBend / YouTube
Any substantial deviation from perpendicular will reduce the effectiveness of the exercise by decreasing the turning force (“torque”) applied to your trunk. An oblique angle reduces demand on your obliques.
Avoid it: No need to track down a protractor or angle finder. Just imagine a straight line running between your shoulder joints and another straight line running through your hip joints. These two imaginary lines should be parallel to each other and run at a right angle to the actual line of the band or cable.
Midsection Motion
Poor trunk control during the Pallof press is indicative of a misunderstanding of the exercise or the use of too much resistance. Assuming you’re not simply overpowered by the band or cable, you can improve your Pallof press form by focusing on a “braced” midsection.
Credit: Breaking Muscle / YouTube
Avoid it: Treat the Pallof press like a “standing plank.” Make your trunk rigid by bracing or co-contracting the muscles on the front, back, and sides of your midsection.
Retreating Quickly From Peak Tension
The Pallof press should be most challenging after the press, when your arms are outstretched in front of the body. This is informed by Newtonian physics (i.e. “law of the lever”) and it’s supported by the obvious sensation of effort you should feel at the end-range.
Credit: BarBend / YouTube
Avoid it: Make Sir Isaac Newton proud by pausing and demonstrating control when the resistance force has the most leverage. When your elbows are straight and your hands are at approximately chest-height, take a moment to verify your shoulders and hips are square. As you breathe during the pause, make sure your midsection is tight and braced before returning to the start position.
How to Progress the Pallof Press
When progressing the Pallof press, use a combination of traditional exercise variables (e.g. adding resistance or volume) and non-traditional variables (e.g. devising modifications that increase the technique-demands or complexity of the exercise. (5) When the traditional Pallof press gets too easy, lean into one or more of the progression strategies below.
Change the Base of Support
The basic version of the Pallof press is performed with both feet slightly outside shoulder-width. Your “base of support” is always going to be the area outlined by your feet and all the space between the feet. The exercise becomes drastically more difficult with a smaller base of support. Achieve this progression by standing with a narrower stance. Once you’re able to perform Pallof presses with your feet together, try the lunge variation or even the single-leg variation, described below.
Increase the Number of Repetitions
For performance training, the Pallof press is considered an “accessory exercise,” generally performed for moderate to higher repetitions. It isn’t the type of exercise conducive to high resistance/low repetition programming. No one cares about your Pallof press one-repetition maximum. Rather than push for more resistance, push for higher-repetition sets. Work up to sets of 20 or more smooth, controlled repetitions before worrying about adding resistance.
Increase the Movement Speed
Your primary task during the Pallof press is to keep your trunk motionless. Or, if there is any motion or loss of the initial trunk position, your task is to regain control and re-achieve the initial position as soon as possible. In fact, the latter scenario most closely describes the biomechanics definition of stability. (6) Rapid movement speed during the Pallof press exposes the body to a greater stability challenge.
As long as any movement below your shoulders is minimal and well-controlled, increasing the speed of the pressing motion can be an effective progression. However, even when performing faster repetitions, you should still pause at peak tension when arms are fully outstretched.
Benefits of the Pallof Press
Isometric core exercises like the Pallof press are recommended to improve core muscle endurance. (7) But the benefits of the Pallof press don’t stop there. Emerging research points to its potential role in improved sports performance and injury-risk reduction.
Enhances Force Transfer and Performance
From a movement development perspective, we know the ability to control the trunk and demonstrate stability is a prerequisite for effective limb movement. This is evidenced by babies sitting unsupported before they walk or before launching their toys across the room. This same phenomenon is seen in athletes, albeit during much higher-level activities. Trunk stability enhances the ability to generate forceful, rapid, and precise limb movement. (8) The good news is, this appears to be trainable.
For example, a core training program including Pallof press variations was shown to improve striking force among Muay Thai athletes. (9) Whether you’re a fighter, thrower, field- or court sport player, swimmer, or just about any other type of athlete, progressive training with the Pallof press might up your game.
Teaches You To ‘Breathe and Brace’
Many sports and athletic endeavors require the skill of simultaneous breathing and bracing — sprinting, kayaking, swimming, and pretty much any CrossFit-style workout, just to name a few. The peak tension position of the Pallof press is a great opportunity to practice this skill.
As noted in the step-by-step instructions, you should pause when your arms are fully pressed away from your sternum. If you fill this pause with one or more breath cycles while also preventing any motion between your shoulders and hips, you are training “breathing and bracing.” Since the Pallof press is typically programmed as a fairly-high repetition, moderate-to-low load exercise, it gives plenty of opportunities to practice.
Potentially Reduces Injury Risk
Poor core stability is thought to predispose athletes to injury. (10) And although we know not all injuries can be prevented, there is a strong case for the inclusion of core exercises like the Pallof press in workout programs designed to reduce injury risk. Improving core stability is thought to improve control or coordination of the body and limbs. (10)(11) And improved coordination may translate into reduced risk for injury.
For example, across 13 studies, core training was shown to improve balance, which may ultimately decrease the risk of injurious falls. (12) Altogether, exercises intended to improve stability and coordination (i.e. “neuromuscular training”), along with strength training, are among the most well-supported types of training to reduce risk of injury. (13)
Muscles Worked by Pallof Press
Although the term “press” may seem to imply the shoulders are targeted, the Pallof press is decidedly core work. The pressing motion is minimally-resisted due to the body’s orientation to the line of pull of the band or cable stack. The press isn’t “lifting” the weight. Instead, the exercise hammers your core, particularly the muscles that prevent trunk rotation.
Abdominals
The primary muscle task during the Pallof press is to resist trunk rotation, which is why the movement pattern is termed “anti-rotation.” Muscles that act to rotate the trunk contract isometrically and create tension without creating appreciable movement.
Credit: MDV Edwards / Shutterstock
Key muscles include the external obliques and internal obliques. Your rectus abdominis (i.e. the six-pack abs) and transversus abdominis (the deepest abdominal muscle) may also contribute to the Pallof press by increasing intra-abdominal pressure to increase the rigidity of your trunk.
Tiny Back Muscles
Often forgotten, many small muscles on the backside of the trunk contribute to trunk rotation and anti-rotation. These muscles are arranged between the bones of the spine (vertebrae), run between the ribcage and vertebrae, or span the pelvis and sacrum to vertebrae.
Among them, erector spinae may be the most notable, but semispinalis, multifidi, and rotatores deserve honorable mention. Multifidi and rotatores, in particular, are thought to produce“fine-tuning” muscle contractions needed for effective stabilization of the spine. (14)
How to Program the Pallof Press
For most, the Pallof press is an accessory exercise, meaning it plays a supplementary role in the training program. Accessory exercises can be programmed in a variety of ways, provided they support, or at least do not interfere with, the primary objectives of the workout.
As a Warm-up or Primer
The warm-up is a time dedicated to increasing body temperature and rehearsing movements that support the upcoming training session. It’s also a great time to incorporate core work. As a fairly low-intensity exercise, the Pallof press is well-suited for inclusion during any general warm-up.
As Dedicated Core Training
By setting aside time specifically for core training, as you likely do for your shoulders, arms, chest, back, or quadriceps, you help to ensure the work gets done. The Pallof press primarily works the rotators of the trunk. Therefore, to create a robust core workout, you may also wish to add exercises targeting the flexors, extensors, and lateral flexors of the core, such as crunches or planks, Roman chair back extensions, and farmer’s walks, respectively.
Although the Pallof press is a wonderfully effective year-around core exercise for most individuals, high-level athletes may wish to incorporate more dynamic trunk rotation training, such as medicine ball twists and tosses, during the pre-season and in-season for more sport-specific training. (7)
As Rest Interval “Filler”
The amount of exercise completed in a defined period of time determines the density of a workout. Increasing the density of your workouts makes them more efficient, as long as the additional work (or reduced rest) does not adversely affect exercise performance. The Pallof press does not create excessive fatigue in muscles commonly targeted by traditional resistance training.
Therefore, it may be a great “filler” exercise. Take some of the two or three minutes you’d typically rest passively between sets of bench presses, rows, or any other exercise, and hit a set of Pallof presses. By supersetting the Pallof press with another exercise, you’ll increase the efficiency of your workout and keep your mind (and body) engaged throughout your entire training session.
Pallof Press Variations
The Pallof press can be modifiable in countless ways. Below, find a beginner-friendly version of the Pallof press, followed by three relatively more advanced modifications.
Half-Kneeling Pallof Press
To reduce the difficulty of the Pallof press, try the “half-kneeling” position. Place your inside knee (the leg closest to the band or cable stack) on the floor and bend your outside leg 90-degrees at the knee and hip. Place your front foot flat on the floor. (1)
From this position, brace your midsection and perform the Pallof press with typical pressing technique. When you switch sides, be sure to switch leg positions — the leg closest to the resistance is on the ground and your opposite foot is flat on the floor.
Lunge-Position Pallof Press
Performing the Pallof press in a lunge stance increases the difficulty by narrowing your base of support. (1) With your outside leg in front, drop into a narrow lunge position, brace, then perform the Pallof press with standard “press and pause” form.
Be sure to keep your outside knee pointing straight ahead, as tension from the band or cable will try to “unravel” your body. Don’t allow your knee to collapse inward. When you switch sides, switch lead legs and repeat the lunge position.
Single-Leg Pallof Press
The single-leg Pallof press is performed standing on the outside leg — The leg farthest from the anchor point of the band or the cable stack. By performing the exercise on one leg, the single-leg Pallof press increases training demand on the lateral hip muscles, namely the gluteus medius. (4)
You will also need to prevent your foot and ankle from caving inward (“pronating”) under the pull of the band. To get the greatest training effect from the foot and ankle complex, perform in minimalist shoes or even barefoot.
Chaos Pallof Press
To further progress the Pallof press, increase the reactive demand of the exercise by adding a light weight to the center of the resistance band setup (demonstrated in the video). Be sure the weight is secured in place, so it can’t slide up and down the length of the band.
Performing the “press” portion rapidly will create oscillating movements of the weight plate. Your core muscles will be forced to contend with the added, and somewhat unpredictable, challenge of the bouncing plate. Hold the paused position to regain core control before continuing repetitions.
FAQs
Why are there so many Pallof press variations?
Core stability can be conceptualized as a function of capacity (i.e. strength, power, endurance) and control (i.e. coordination). Increasing resistance or adding extra sets and repetitions to core stability exercises primarily improves the core’s capacity. To improve control, modifications that increase the technical difficulty of the exercise are indicated. That is, we need to progress the complexity of the exercise. (5) We can increase the complexity of the Pallof press in many ways. These include, but are not limited to, decreasing the footprint or “base of support” (as in the lunge-position and single-leg variations), increasing the movement speed, adding instability by standing on a balance pad, or incorporating a reactive challenge (as in the chaos Pallof press). As long as you adhere to the basic movement principles and technique guidelines, you are only limited by your creativity when developing variations of the Pallof press.
Should I use a cable stack or a resistance band for the Pallof press?
Equipment availability and personal preference should be the key determinants of whether to use a cable stack or a resistance band. Assuming both are available, consider the pros and cons of each. Compared to bands, the cable stack allows for more consistent external resistance and provides the ability to adjust loading in smaller, more quantifiable increments. But low-quality or poorly maintained cable stacks can feel rough and friction in the machine can negatively affect the resistance during the exercise. Elastic bands are inexpensive and convenient. They are better than cables for training at high speeds due to minimal inertial forces. Like cable stacks, elastic bands allow for modification of the resistance, but you will need to either change out resistance bands to accommodate you desired resistance level or set up closer or farther from the anchor point to adjust the band’s stretch. Due to the elastic nature of the resistance band, it will apply more resistance when your arms are fully outstretched than when your arms are pulled in. That is, expect a more dramatic resistance curve with resistance bands — At the hardest part of the movement, the demand is on your trunk is even greater. This feature may introduce a bottleneck effect: It could limit the resistance used ,as well as your ability to progress to thicker resistance bands.
How often should I perform the Pallof press?
When programmed for injury prevention or athletic performance enhancement, core training is commonly performed at moderate to high frequencies with at least two sessions per week and as many as seven days per week. (9)(12) To accomplish this, complete a couple of sets during the warm-up for your daily workout, or designate two or three core-focused sessions per week to complete three to six sets of the Pallof Press per session.
Make Room for Anti-Rotation in Your Exercise Rotation
Since its introduction, the Pallof press has become a contemporary classic exercise. It builds rotational strength and enhances trunk stability. And it might even boost athletic performance and reduce injury risk. Remember, to achieve meaningful benefits, consistency and progression are key.
References
Mullane, M., Turner, A. N., & Bishop, C. (2021). The Pallof Press. Strength & Conditioning Journal, 43(2), 121-128.
Wilson, K. W., et al. (2019). Rehabilitation and return to sport after hip arthroscopy. Operative Techniques in Orthopaedics, 29(4), 100739.
Cotter, A. (2022). Return to Sport Following Anterior Cruciate Ligament Reconstruction: Women’s Field Hockey. Journal of Women’s Sports Medicine, 2(2), 57-69.
Holling, M. J., Miller, S. T., & Geeslin, A. G. (2022). Rehabilitation and Return to Sport After Arthroscopic Treatment of Femoroacetabular Impingement: A Review of the Recent Literature and Discussion of Advanced Rehabilitation Techniques for Athletes. Arthroscopy, Sports Medicine, and Rehabilitation, 4(1), e125-e132.
La Scala Teixeira, C. V., et al. (2019). Complexity: a novel load progression strategy in strength training. Frontiers in Physiology, 10, 839.
Reeves, N. P., Narendra, K. S., & Cholewicki, J. (2007). Spine stability: the six blind men and the elephant. Clinical Biomechanics, 22(3), 266-274.
Willardson, J. M. (2007). Core stability training: applications to sports conditioning programs. The Journal of Strength & Conditioning Research, 21(3), 979-985.
Kibler, W. B., Press, J., & Sciascia, A. (2006). The role of core stability in athletic function. Sports Medicine, 36, 189-198.
Lee, B., & McGill, S. (2017). The effect of core training on distal limb performance during ballistic strike manoeuvres. Journal of Sports Sciences, 35(18), 1768-1780.
Willson, J. D., et al. (2005). Core stability and its relationship to lower extremity function and injury. JAAOS-Journal of the American Academy of Orthopaedic Surgeons, 13(5), 316-325.
Huxel Bliven, K. C., & Anderson, B. E. (2013). Core stability training for injury prevention. Sports Health, 5(6), 514-522.
Barrio, E. D., et al. (2022). Effects of core training on dynamic balance stability: A systematic review and meta-analysis. Journal of Sports Sciences, 40(16), 1815-1823.
Lauersen, J. B., Bertelsen, D. M., & Andersen, L. B. (2014). The effectiveness of exercise interventions to prevent sports injuries: a systematic review and meta-analysis of randomised controlled trials. British Journal of Sports Medicine, 48(11), 871-877.
Kavcic, N., Grenier, S., & McGill, S. M. (2004). Determining the stabilizing role of individual torso muscles during rehabilitation exercises. Spine, 29(11), 1254-1265.
Featured Image: Merrick Lincoln, DPT, CSCS / YouTube
Everyone in the gym has their own ideas about ab training. And the majority of people seem to hate it. It’s the one thing most lifters leave to the end of their workout in favor of movements for other body parts, if they bother to train their core at all.
People often neglect core training because it can be grueling, boring, or just plain difficult. But it doesn’t have to be any of that. Simple and effective core training starts with the basics. When it comes to simple core training, it’s hard to beat what’s arguably the most ubiquitous of all core exercises in the gym, the classic plank. But when it comes to being both simple and effective, take the plank to the next level.
Credit: Human Form Fitness / YouTube
Enter, the bear plank. This upgraded plank position is both easier to learn than the classic and it hits your core harder. Here’s how to get a win-win for your core workout.
Bear Plank
How to Do the Bear Plank
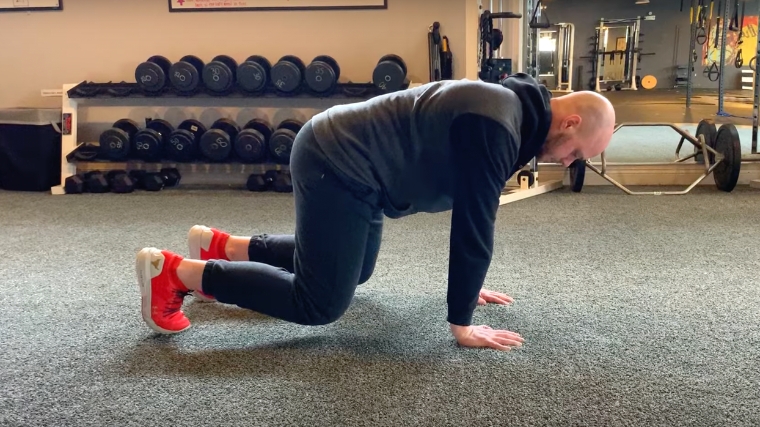
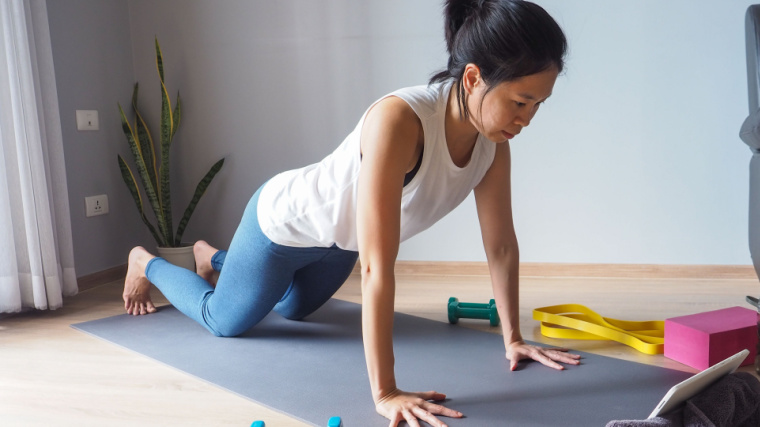
The bear plank, or bear-stance plank, refers to holding a ground-based position using straight arms and bent legs, rather than straight arms and straight legs (like a standard plank position). Your weight is supported on your hands and toes, with no other bases of support, but your legs are bent and your knees are very slightly above ground-level.
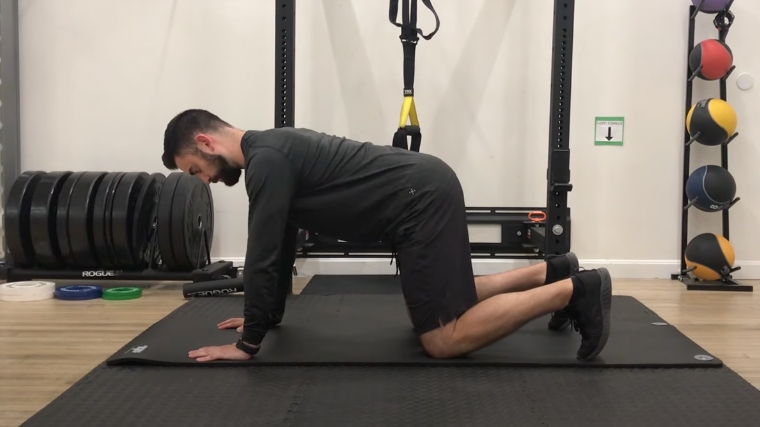
Step 1 — Hands, Knees, and Toes
Credit: Christian Fabrizio / YouTube
Get on the ground and support your body with your hands, knees, and feet. Set your hands directly under your shoulders, not in front or behind them. Place your feet hip-width apart.
Get an approximate 90-degree joint angle at your knees. If your legs are too bent, the movement won’t be challenging enough and you’ll risk resting your knees on the ground. If your legs are too straight with your knees behind your hips, you’ll end up looking like a poorly performed standard plank, which defeats the purpose of the exercise.
Form Tip: Your overall position should be comfortable, square, and balanced. Take the time to check the position of your hands, shoulders, knees, hips, and feet. Look directed down to the ground or slightly in front of your hands. Cranking your head to look forward will only stress your neck.
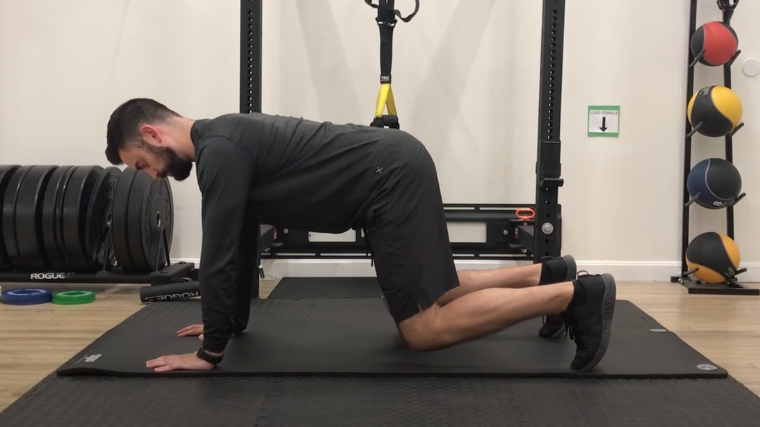
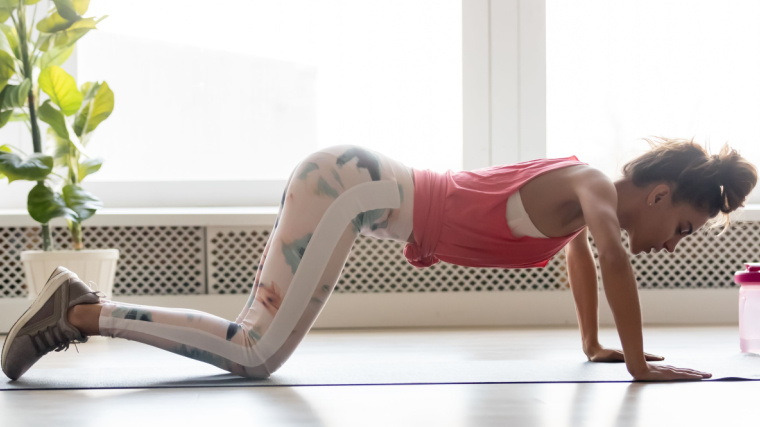
Step 2 — Lift Your Knees and Brace
Credit: Christian Fabrizio / YouTube
Bring your knees just a few inches off the ground and keep them in line with your feet. Don’t let your shins or knees wobble in or out of alignment. Flex every muscle from your toes to your wrists. Although this is a core-focused exercise, the more muscles surrounding the core you can also contract to promote stability, the better. (1)
Squeeze your quads, glutes, and hips. Think about driving your hands and feet into the floor as hard as possible without actually raising your body. Keep your knees off the ground and maintain complete tension for the duration of each set.
Form Tip: Don’t only focus on flexing your abs. Achieving full-body tension will contribute to a better quality bear stance which will make the movement harder and require more effort, which can yield better results.
Bear Plank Mistakes to Avoid
Even though the bear plank is a static exercise with no “moving parts,” there are still some common technique errors that will prevent maximum tension or limit progress.
Poor Knee Position
When your knees are touching the ground, your body has very little need to stabilize, so you’re not actually performing the exercise. Keeping your knees elevated also helps to maintain a strong hip position and prevent back rounding. This can also help maintain tension through your hamstrings, glutes, core, and trunk.
Credit: Benjavisa Ruangvaree Art / Shutterstock
Avoid it: Set your knees directly under your hips or tailbone, not far back in a nearly straight position. When you begin the exercise, imagine having a tray of wet paint appear under your knees. Stay tight, stay focused, and keep your legs clean. If your knees dip down into the “paint,” end the set, rest briefly, and try again.
Bending Your Arms
The fully supported bear plank position uses your fully straightened arms to support your upper body while your lower body is supported by bent legs. Bending your upper arms changes the overall angle of your torso and alters your center of gravity.
Credit: fizkes / Shutterstock
This makes the exercise less effective overall and emphasizes the relatively smaller muscles of your arms and shoulders to support the majority of your body’s weight, compared to dispersing the tension throughout your entire body.
Avoid it: Keep your arms locked straight during the exercise. If your shoulders or triceps fatigue excessively, end the set. Over time, your muscles will adapt by building strength and endurance to support the position.
How to Progress the Bear Plank
The bear plank is a relatively a simple movement, so the natural inclination of a lifter would be to seek ways to make it more difficult once they’ve “graduated” from the basic execution.
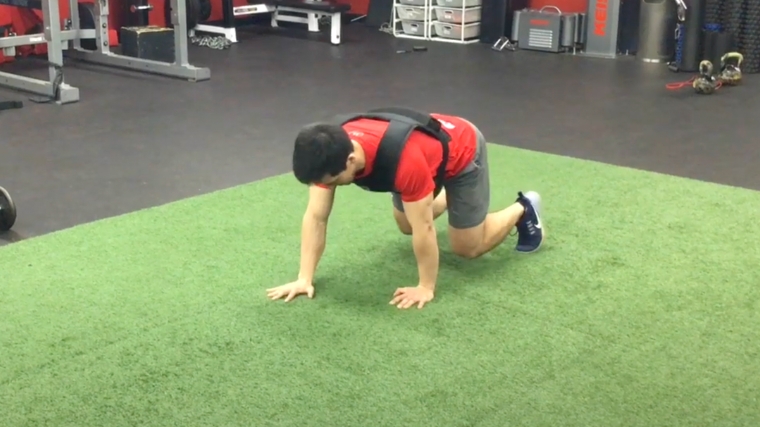
Add a Weight Vest
Adding a weight vest creates a heavier load to bear when in position, requiring even more from the trunk for stability and positioning. However, the typical weight distribution of a standard weight vest (with the weighted inserts often placed around the midsection) creates even greater temptation for the spine to slip into an arched or extended position. That means more reliance on your abs to negate this repositioning and keep your spine flat.
Credit: Depth Training and Physiotherapy Waterloo / Youtube
Keep in mind that using a weight vest usually goes hand-in-hand with reducing the amount of time spent in the plank position. Focus on high-quality performance rather than just achieving long durations.
Shoulder Taps
In the typical bear-stance plank, there are four points of contact with the floor — two hands and two feet. That means forces are distributed evenly among all those points. As soon as one of those points of contact leaves the floor, there are added demands on the body to resist changing position to compensate for reduced stability. In the bear plank, these are rotational forces and resisting them would be termed “anti-rotation.”
`
Since a massive function of your core is to brace and work against unwanted outside forces, the simple shoulder tap is a great way to train anti-rotation from a bear stance. Work hard to stay square and keep your back and trunk parallel to the floor without twisting or shifting. Try sets of 12-20 shoulder taps, alternating hands as you go along. Remember to move slowly with control.
Bear Dogs
Assuming a bear-stance starting position allows you to maintain a much more neutral spine when in starting position, as previously discussed. The basic bird dog exercise is a core stability movement that many lifters can master, but taking things to the next level involves some strategy. Bear dogs are a smart modification that provide all of the benefits in blasting contralateral stability (coordinating left and right limb movements).
Keep sets very low-rep, such as three or four reps per side. Instead of progressing with higher reps, opt for more total sets. This ensures you can focus on high-quality repetitions while avoiding too much fatigue which would prevent good performance.
Benefits of the Bear Plank
The bear plank, like all types of plank exercises, can be a top-level core strengthening drill. The total-body tension and abdominal activation can carry over to provide stability in other strength-focused exercises.
Better Ab Recruitment
The bear plank works well as a modification or alternative to basic planks, while being much more effective in targeting the abs due to simple changes in positioning. The abs are much more difficult to fully engage in a classic plank due to the long-legged position. Everyone naturally has a slight arch (lordotic curve) in their lower backs, and it’s especially present when standing up straight. The same issue applies when we get into a typical plank position.
However, when sitting down, it’s a lot harder to maintain the same degree of back arch. When you’re bending your knees to sit down, your pelvis tends to rotate “under” your body into more of a posterior tilt, making the spine exit extension and edge toward neutral or even a flexed position — that’s part of what makes you “slouch” when you sit.
Using that to our advantage can go a long way in its efficacy for core training. While it can be tough to keep a flat spine using a classic plank, opting for the bear plank almost ends up mimicking a seated position while kneeling. This change in knee angle also affects your pelvic position and brings your lumbar spine into a much more neutral state, which is great news for targeting and activating your abdominals. (2)
Simplified Technique
The bear plank is both a more challenging plank modification because it hits the abs harder than most other plank variations will. Fortunately, it’s also a less challenging modification because it’s relatively easier to perform for most lifters.
A lifter looking to take their core training game to the next level of quality and effectiveness can’t go wrong with the bear plank. Doubling down on the exercise by applying the advanced methods listed later in this article will be gold for keeping your training interesting while providing a continued challenge to trunk strength and stability.
Muscles Worked by the Bear Plank
Any exercise in the plank family will first and foremost target your core muscles. The bear plank, specifically, recruits these crucial stabilizing muscles better than many other exercises due to your overall body position.
Rectus Abdominis
When all four limbs are on the ground, the bear plank primarily focuses on the rectus abdominis muscles — the body part that most people reference when they say “six-pack”. The goal of the exercise is to keep the strength of the muscular contraction consistent and high-intensity.
Transverse Abdominis
The transverse abdominis is the “inner layer” of the abdominal wall. During the bear plank, or any high-effort core bracing, your transverse abs will be firing at maximum capacity to provide stability to your entire trunk, like beams of a house giving stability to the outer framework.
Obliques
Your obliques, on the sides of your abdominals, are responsible for rotating your trunk and thoracic spine, as well as resisting rotation. During the bear plank, your obliques are activated to help prevent tipping over sideways.
Credit: ThomsonD / Shutterstock
Anytime you lift a hand or foot during any anti-rotational bear plank variations, your obliques take on significantly more work. They will be asked to isometrically contract to keep the core from twisting out of position.
How to Program the Bear Plank
The bear plank can be plugged into any number of workout programs, either as a warm-up and activation drill, a focused core training exercise, or as part of a conditioning workout.
High Intensity for Time
The bear plank, and all plank variations, are somewhat unique to other exercises you can perform because they’re typically not done for multiple repetitions. Instead, focus on achieving maximum tension from head-to-toe and holding that tension for a specific time — using your phone’s timer feature comes in real handy for this. Aim for anywhere from five to 30 seconds of fully flexed tension for two to five sets.
Just like you “shouldn’t” use poor form to squeeze out a few extra reps of squats, you shouldn’t allow yourself to gradually apply less and less tension as a set goes on just to hit a pre-set time limit. When you feel the focused tension falling less than 100%, stop the set, rest, and do another.
Variations of the Bear Plank
Once you’ve mastered applying full-body tension with the bear plank, you can adapt that skill and conditioning to other exercises for a variety of results.
Classic Plank
As popular and common as the plank exercise is, the interesting truth is the fact that many people perform it poorly. Positioning the body on your elbows and toes has proven to be a slightly more demanding task than meets the eye, especially with form cues to ensure your abs are working their hardest. For starters, it’s important to remember that the abdominals posteriorly tilt the pelvis.
Credit: TORWAISTUDIO / Shutterstock
That means keeping your back flat with your butt squeezed and “tucked in” is far superior to keeping your back slightly (or generously) arched. Doing the latter will negate the purpose of the exercise.
Actively “pull inward” with your elbows in an attempt to move your ribcage down toward the hips. This keeps your core braced while contracting as hard as it can. This is an important cue, as it’s really easy to “hang out and chill” when performing a plank, enabling someone to stay in position for minutes on end. It’s much more effective to hold an intense contraction for 30 seconds or less, than to hold a poor quality position for three, five, or 45 minutes.
Bear-Stance Renegade Row
Doing renegade rows from a bear-stance position isn’t only harder and more intense for the abs, it’s also an easier way for you to assume the right lumbar (lower back) posture. Your pelvis enters anterior (forward) tilt and your body has to find a way to keep your glutes and lower abs engaged enough to overcome this. This isn’t easy in the presence of fatigue.
Making the switch to bent knees with tilt your pelvis posteriorly (backward) just enough to enforce a neutral spine, potentiating more lower ab involvement while leaving the glutes less involved. If the goal is core training, this is an ideal “gym hack.” The inclusion of the row pattern (which shouldn’t use a very weight) will also train your upper back to address posture, strength, and development.
FAQs
Should I begin with the bear plank or the classic plank?
Because the bear-stance plank puts your hips in a more efficient position, it can be a better starting point for many lifters. It’s also relatively harder to “cheat” during the bear plank, unless you rest your knees on the ground or stand up too high. With the standard plank, it’s common to see lifters dropping their hips and creating a U-shape with their body, losing tension throughout their core. Either movement can be effective when done properly, but it can be redundant and inefficient to perform them both in the same workout.
When should I add weight?
Apply the same principles as any bodyweight exercise — when your current programming (sets and duration) are no longer challenging, you can add a small load to increase the difficulty. With the bear plank, that could mean adding a very light weight vest when you can perform multiple sets of 20 to 30 seconds while maintaining high tension for the duration. Just like you might go from a set of 12 bodyweight pull-ups to a set of three weighted pull-ups, don’t be surprised if you drop from 30 seconds of unweighted bear planks to sets of five seconds with a weighted bear plank.
Get Down, Knees Up
There are hundreds of abdominal and oblique-focused exercises that might help a lifter get stronger and more conditioned, but it doesn’t have to get too fancy. Taking a basic plank and turning it into a bear-stance can be all that’s needed to step your training up a notch or two. Exercise doesn’t need to be complicated for good things to happen — quality is king. The bear plank is a great example of emphasize simple and effective training being the path to better results.
References
Gontijo, L. B., Pereira, P. D., Neves, C. D., Santos, A. P., Machado, D.deC., & Bastos, V. H. (2012). Evaluation of strength and irradiated movement pattern resulting from trunk motions of the proprioceptive neuromuscular facilitation. Rehabilitation research and practice, 2012, 281937. https://doi.org/10.1155/2012/281937
Workman, Chad & Docherty, David & Parfrey, Kevin & Behm, David. (2008). Influence of Pelvis Position on the Activation of Abdominal and Hip Flexor Muscles. Journal of strength and conditioning research / National Strength & Conditioning Association. 22. 1563-9. 10.1519/JSC.0b013e3181739981.
Featured Image: Susan Niebergall Fitness / Youtube