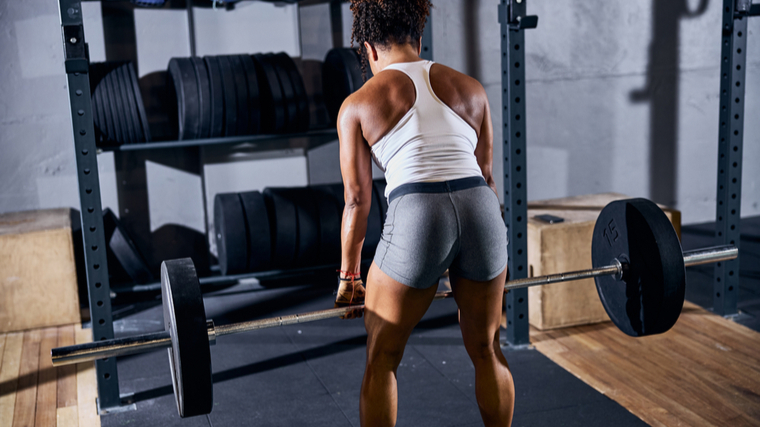
The deadlift is considered by many lifters to be the king of exercises. It could be considered the ultimate display of full-body strength, and it’s likely an exercise that recruits the most muscles in the human body. Deadlifts are also a very natural and instinctive movement — useful in everyday life as well as being transferable to many sports. It is the quintessential “hinge” exercise, one of the five basic human movement patterns popularized by coaches in recent years, along with “squat,” “push,”, “pull,” and “carry.”
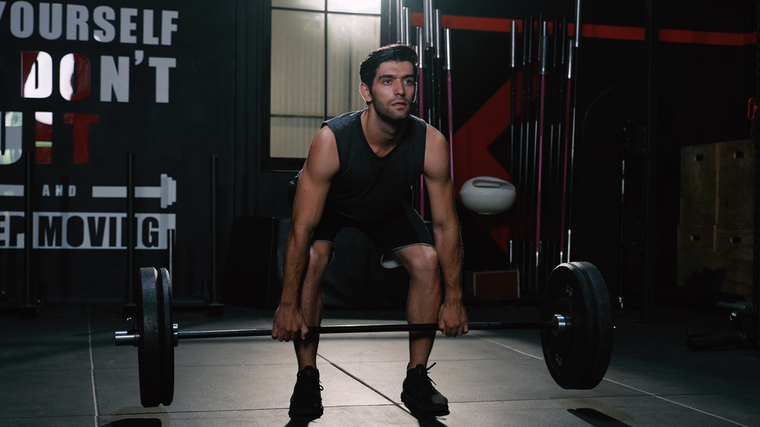
As such, this primordial lift is so versatile, it can be used for a multitude of goals — strength, muscle growth, speed and power, grip strength, core stability, and more — as long as you can perform it properly. But human ingenuity, and necessity, also helped to create countless variations, each focusing more on one or more of these aspects.
Whether you want to target a precise muscle group, improve your deadlift technique, a specific weak point, or improve your athletic abilities, there’s a variation for you. The traditional deadlift will build total body size and strength, but we can take things even further. Here’s a list of 15 deadlift variations to include in your training regimen and tailor your sessions to your specific needs.
Best Deadlift Variations
Deficit Deadlift
Standing on a plate or elevated platform will make the lift more difficult. The increased range of motion requires you to reach and crouch down further, placing you in a less-than-optimal position.
That’s usually not something you want to do on purpose, but the poor leverage improves your strength at the start of the lift, making it useful for lifters who are “weak off the floor,” or have trouble with the initial phase of the deadlift.
When to Do It
This variation is often used by lifters interested in strength sports (specifically powerlifting or strongman/strongwoman) or those looking for maximal deadlift strength. It is a perfect fix if you fail at the start of the lift, at floor-level or just above it. Being elevated means that the range of motion is increased and you’ll have to use more knee flexion, which will increase your quadriceps strength and power off the floor.
Deficit deadlifts are also a great teaching tool if you have trouble getting deadlift technique right, as it forces you to use less weight and focus on perfect form. Finally, you can also use it as a variation to increase quadriceps recruitment, either for strength or size.
How to Do It
Stand securely on a small platform or a weight plate. Grab a barbell and perform a regular deadlift. Because your feet are elevated, your hips will have to get lower in the starting position because the bar will be further down. Do not make the mistake of turning it into a stiff-leg deadlift — be sure to bend your knees and use your quads.
Don’t get crazy with an extremely high deficit or it won’t have much transfer to your basic deadlift. Elevating yourself just a few inches will be right for most lifters When in doubt, start with the lowest height and increase gradually.
Rack Pull
Working the opposite spectrum from the deficit deadlift, the rack pull provides a reduced range of motion. Sometimes called a partial deadlift, the rack pull starts with the bar in a power rack and skips the starting phase near the floor.
By starting with the barbell in a higher position, you can use more weight and stimulate more growth. You can also focus on the “end range” (lockout portion) of the movement if locking out deadlifts is your specific weakness.
When to Do It
The rack pull is ideal for emphasizing your glutes and back. It is also a relatively less technical lift because of the shortened range of motion. Rack pulls are suitable for many people because the movement requires less mobility and can put less strain on your lower back because you can begin in a more stable position.
Use this version to focus on hypertrophy (muscle growth), as a powerlifting tool to improve your lockout strength, or in lieu of the conventional deadlift if it’s not suited to your body type or injury history.
How to Do It
Set the safety pins in a rack so the barbell starts at your mid-shins, or higher if needed. Grab the barbell, flex your abs as hard as you can and perform the upper portion of a deadlift — pull your shoulders back and drive your hips forward.
Remember that overconfidence is a slow and insidious way to kill your results, so don’t set the barbell too high just to lift more weight. The higher the bar, the more weight lifted, but the less carryover to the actual movement. A shorter range of motion may also be less effective for growth, so choose an appropriate height.
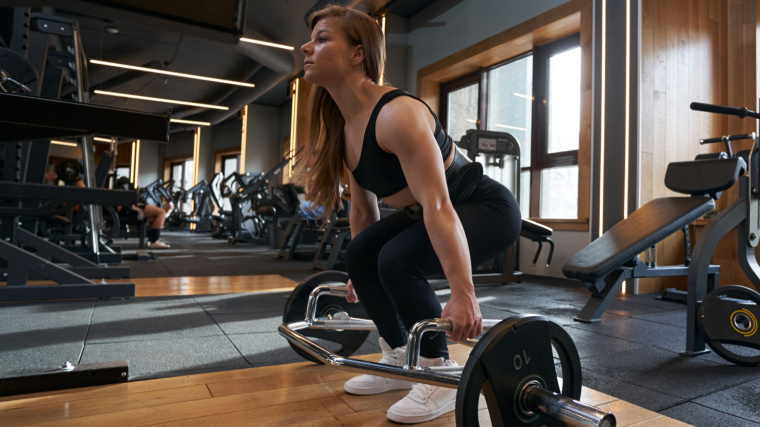
Trap Bar Deadlift
With this variation, we’re using a trap bar instead of a straight barbell. This hexagon- or diamond-shaped specialty bar is now a common occurrence in many gyms around the world, and for good reason: this is an amazing lift that delivers size and strength with less joint strain.
This relatively easy to learn exercise is a hybrid between a squat and a standard deadlift because of the adjusted body position. This combination of benefits makes it excellent for developing size and strength.
When to Do It
If you’re a beginner who can’t make the regular deadlift work for you, give this variation a go. It will help you master overall positioning, hip hinging, and core bracing, while increasing total-body size and strength.
It is also a favorite for developing lower body strength and athleticism. Because you can keep your torso more upright, and put less strain on your lower back, it can be less risky than the conventional deadlift. It’s a great fit for people who only use weightlifting to get better at their sport. If you’re playing football, rugby, hockey, or combat sports, the trap bar deadlift can become your primary lower-body builder.
How to Do It
Step into the trap bar and grab it by the handles. Brace your whole body, push through your legs and pull with your back to lift the weight up. You can use either the low or high handles if you flip the trap bar. Using the high handles is the basic and most common configuration which is recommended for most, and especially taller lifters whose leverages make barbell deadlifts too uncomfortable.
Using the low handles can be great to stimulate more quadriceps growth by forcing knee flexion, similar to performing a deficit deadlift. You can also perform the trap bar deadlift more like a squat, keeping your hips low and driving as much as you can through your legs to trigger quadriceps growth. This technique used by some bodybuilders so focus on leg growth more than strength and power.
Sumo Deadlift
This “controversial” lift has gotten a bad rap and is even seen as cheating by some lifters, because you can greatly reduce the range of motion compared to a conventional (close-stance) deadlift.
But the sumo deadlift also has a number of unique benefits: It puts less pressure on the lower back, it’s better suited to some morphologies (body types with varying limb lengths), and it will improve size and strength in the quadriceps, glutes, and adductors.
When to Do It
For some people, the sumo deadlift simply feels more natural. If that’s the case, then make it your default deadlift of choice. If you’re a competitive powerlifter and are stronger with this technique, do not hesitate to make it your competition lift. Some coaches argue that a good lifter should be efficient with both styles, for they both have their strengths and weaknesses and teach you different key positions and techniques.
Studies have shown that the sumo deadlift puts less stress on your spine than a conventional deadlift, so if you’re a veteran lifter with an achy back, consider this lift as your deadlift of choice. (1) You can also simply rotate the sumo deadlift with the conventional deadlift to periodically rest your spine, for instance during a deload.
How to Do It
Take a stance that it is wider than shoulder-width. The specific foot position will depend upon your morphology, mobility, and preferences. Let your arms hang straight down to grab the barbell near the center of the bar, and sink your hips down. Your hips should be as close to in-line with the barbell as possible, rather than remaining in a high position.
Take a deep breath and brace your core. Contract your lats while keeping your upper body close to vertical. Push through the ground with your feet. Imagine trying to split the ground in half with your feet as you drive up. Pull the weight until your hips are locked out.
Stiff-Leg Deadlift
This strength-focused variation is all about your lower back. By extending your legs and keeping them almost straight in the starting position, you change your body’s leverage and muscle recruitment.
The stiff-leg position decreases involvement from your quadriceps and make it a pure posterior chain exercise — emphasizing your spinal erectors (lower back) and hamstrings.
When to Do It
This variation is mostly done by strength enthusiasts to strengthen their posterior chain, especially their lower back. (2) Compared to the traditional deadlift, the stiff-leg deadlift is more difficult because fewer muscles are involved in moving the weight, but that doesn’t prevent it from being used as a main exercise. Use it if your posterior chain is a weak point, strength-wise, or if you want to build a more muscular set of spinal erectors.
How to Do It
Set yourself like you would for a conventional deadlift — stand in front of a bar with your feet roughly hip-width, grabbing the barbell slightly outside your legs — but keep your hips higher and your legs only slightly bent. Your torso should be roughly parallel to the ground. The farther the barbell is from your shins, the more strain will be put on your lower back and core. As long as you’re conservative with the weight, this adjustment can be used deliberately to focus even more on these muscles.
Create tension in your whole body and hinge at your hips. This is a pure hip hinge exercise with little-to-no leg drive. Extend your body completely to stand up and squeeze your glutes at the top. Reverse the motion with control until the barbell is back on the ground.
Romanian Deadlift
The Romanian deadlift, or RDL, is all about triggering hypertrophy by providing a great stretch, constant muscular tension, and a long time under tension — all drivers for muscle growth. (3)
It was popularized by Romanian Olympic weightlifter Nicu Vlad when he arrived in the United States. Vlad supposedly complemented his Olympic lifting with this variation instead of rounded-back stiff-leg deadlifts which were common at the time.
When to Use It
This classic exercise is one of the most efficient exercises for developing your hamstrings and glutes. Use it for moderate repetitions (eight to 12 per set) as your posterior chain exercise of choice during a bodybuilding-focused session or as an assistance exercise in your strength programming for sets of five to eight repetitions per set. Beginner lifters and elite athletes alike can rotate this lift into their training plan.
How to Do It
The Romanian deadlift is often confused with the stiff-leg deadlift, but technique for each movement is slightly different. The RDL starts from the top position, and not with the bar on the floor like the stiff-leg deadlift. Grab the barbell from a power rack, take a step backwards, and bend at the hips while keeping your back flat and your knees barely bent. Think about pushing your hips backward as far as you can.
Descend until you cannot push your hips back anymore, or until you feel your back starting to round, and reverse the motion by flexing your glutes and driving your hips forward. You should feel a deep stretch in your hamstrings. Your mobility will determine how low you can go — don’t necessarily try to reach the bar to the ground. Keep in mind, when done consistently the Romanian deadlift may improve your flexibility and mobility. Consider using a pair of lifting straps to ensure your grip doesn’t fail or distract you from feeling your leg muscles working.
Single-Leg Deadlift
The single-leg deadlift requires some coordination, but it can challenge your core, balance, glutes, and hamstrings like no other. It may seem simple in appearance: “deadlift while standing on only one leg.” But sometimes, the simplest things are the best.
The unilateral (single-leg) exercise focuses on more core stability while also shifting the work load to each individual leg. This single-sided focus can help to correct potential strength and size imbalances. (4)
When to Do It
This exercise can improve mobility, coordination, and balance, while also training your hamstrings, glutes, and lower back. Your core also development, especially the obliques through anti-rotation.
Whether you’re an athlete, a bodybuilder, a strength athlete, or simply someone who wants to be more functional, you can find a place for this exercise in your training. It’s also a great warm-up exercise that will lubricate your joints, teach correct mechanics, and prime your body for the heavier lifts.
How to Do It
Hold a barbell, a pair of kettlebells, or a pair of dumbbells and extend one leg behind you so that only the toes of that foot are touching the ground. Keep your front leg slightly bent and shift the majority of your body weight onto your front leg. Pitch your torso forward and lift your extended leg behind you until your body forms a T-shape. Reverse the motion by squeezing your hamstrings and glutes. Keep the weights relatively light, the repetitions moderate, and your form impeccable. Moving at a slightly slower pace can help to keep your technique and balance in order.
Snatch-Grip Deadlift
No, the snatch-grip deadlift is not only reserved for Olympic lifters. It does initially come from the world of weightlifting, and the snatch exercise itself, but it’s essentially a deadlift performed with a very wide grip.
This posterior chain exercise will recruit your whole back, with emphasis on your upper back muscles. It can also improve your drive off the floor because it requires you to start in a lower position.
When to Do It
If you’re an Olympic weightlifter, it’s a no-brainer as you can overload the snatch movement pattern, target the related muscles, and improve the starting position. If you’re a powerlifter who’s weak off the floor in the conventional deadlift, rotate the snatch-grip deadlift into your training to focus on your weak point. And if you’re only interested in aesthetics, the snatch-grip will overload your lats and upper back even more than the traditional deadlift.
How to Do It
Use a slightly wider stance than a conventional deadlift, lower your hips a bit more, and grab the barbell with a wide grip. Exactly how wide will depend upon what you want to achieve. If you’re a weightlifter, use the same grip as your normal snatch — which can be collar to collar for taller lifters. If you’re a powerlifter, you should employ a grip slightly outside your shoulder-width to have maximal carryover to your conventional pull. Consider using lifter straps for this variation, as your grip will be extremely challenged and you cannot use a mixed grip (one overhand grip and one underhand grip).
The wider your grip, the lower your hips will have to be to achieve a strong starting position. This means more work for your glutes, quads, and lats. Brace your core and drive through your legs while keeping a flat spine until you’re standing tall. Descend with control to the ground.
Zercher Deadlift
This one’s for the most unconventional lifters. Ed Zercher was a strongman who would perform lifts with the barbell in the crooks of his elbows. It led to the Zercher squat, Zercher carry, Zercher deadlift, Zercher good morning, and so on.
Holding a barbell in this awkward style will tremendously increase the stress on your core, upper back, and biceps, leading to more growth and strength.
When to Do It
Most people in the gym seeing you perform this unique lift may think you’re a little crazy or misinformed, but the Zercher deadlift will challenge your core like almost no other movement. It is performed with a slightly rounded back, and as such, should be reserved for experienced lifters who’ve mastered bracing and core stability. It’s also a great exercise for competitive strongmen and strongwomen to train for the Atlas stone event, as it replicates the motion. If you want to build your back and core, try the Zercher deadlift.
How to Do It
Use a wider-than-usual stance to accommodate your arms, and squat deep to place the barbell in the crook of your elbows. Flex your abs as much as you can and lift the bar off the ground. If it’s too painful for your elbows, use a bar pad or try to use a thicker axle bar. The Zercher deadlift requires a lot of mobility, and might prove too stressful for your lower back. In that case, elevate the bar in a rack or on blocks and perform a partial motion.
Chain Deadlift
This powerlifting favorite is not available for most people, but if you can have access to chains, adding them to your standard deadlift will spice up your training and unlock new gains.
Using this accommodating resistance in conjunction with regular weights will change the curve of resistance: the weight will be lighter at the bottom, and heavier at the top. This can provide new training paradigms. This can also be performed for a similar effect using resistance bands on each side of the bar.
When to Do It
Because the weight is heavier at the top, chain deadlifts are perfect if you want to emphasize this portion of the lift and target the specific muscles responsible for the top-end motion, namely your back and glutes.
If the top-end is already your forte, you can also use the chain deadlift for overload, using a heavier weight than you could normally lift, which can unlock new growth. (5) It’s also invaluable if you want to do speed work — a specialized kind of strength training moving light-to-moderate weights as fast as you can. Bands and chains allow you to accelerate and be even more powerful through the phenomenon of compensatory acceleration, making you even stronger. (6)
How to Do It
Attach chains to the barbell so that they hang from it as the bar elevates, but not so high as they completely come off the floor. Some links should remain on the floor for to keep the bar balanced and stable.
A good weight is to aim for around 25% of your one-rep maximum in chains, and at least as much regular weight in plates. For example, if your max deadlift is 405 pounds, use around 100 pounds of chains. Then, perform a normal deadlift.
Sweeping Deadlift
If you have trouble with keeping your upper body tight and braced, coach Christian Thibaudeau popularized the sweeping deadlift. It’s the perfect fix for learning how to engage your lats and improve your posture during the deadlift.
Fighting the band’s pull will force you to constantly engage your lats and maintain total-body tension during a deadlift.
When to Do It
The deadlift can be hard to master, as it is a total body lift that requires lots of coordination and technique. A common flaw is having the barbell “moving away” from you during the ascent. This results in a strength leak and puts more stress on the lower back. To fix this, integrate the sweeping deadlift, either as a warm-up movement or a supplemental exercise. It will teach you to engage your lats and keep the bar close to your body at all times, which is the optimal pulling position.
How to Do It
Loop one end of a band around the center of your barbell and the other end to a sturdy object like a rack. Step in front of the barbell, facing the rack, so that the band is pulling the barbell away from you. Perform controlled deadlift repetitions while keeping tension in your lats and on the band. Keep the bar close to you at all times and don’t allow it to drift forward.
Kettlebell Deadlift
This beginner-friendly variation is a great introduction to the hip hinge pattern, but can also serve as an effective glute and hamstring builder. The kettlebell deadlift allow you to really push yourself without risking form breakdown or causing too much fatigue.
The kettlebell deadlift is a simple and efficient way to drill the deadlift movement. You can reinforce general technique while building strength and targeting all of the involved muscles, from your legs to your upper body and grip.
When to Do It
If you’re new to the gym, the kettlebell deadlift is the perfect tool to teach you proper hip hinge mechanics. Because the weight is closer to your centerline and not in front of you like a barbell, it is an easier and more natural-feeling exercise. You can start with lighter weight, which is great for inexperienced lifters. But if you have access to heavy kettlebells, it can also become a great lower body exercise for more advanced lifters, as it will put less strain on your back than a barbell.
How to Do It
Depending on the size of the kettlebell and your mobility, you might want to elevate it for a higher starting position. Step in front of the kettlebell and assume a shoulder-width stance. Hinge forward and grab the kettlebell. Brace your core, flex your lats by squeezing an imaginary ball under your armpits, and spread the floor apart with your feet. Drive your hips forward to full extension and exhale. Lower the weight with control to the ground.
If you want to make the exercise a bit harder, drive as hard as you can and squeeze your glutes at the top, so the weight rises up in a slight arc, similar to the beginning of a kettlebell swing.
Landmine Deadlift
The landmine is a little piece of equipment designed to hold one end of a barbell and allow for a myriad of exercises using it as a fixed anchor. Among these exercises, we can find the deadlift.
The landmine variation of the deadlift is simpler and safer than a barbell, making it a perfect variation for beginners. The bar follows a somewhat fixed path with the landmine, so this movement necessitates less coordination and technique than a barbell
When to Do It
The landmine deadlift is a great way to learn the hip hinge pattern and to develop the confidence for lifting heavier weights. It also puts less strain and shear forces on the spine because you can keep your upper body more upright — a perfect variation for battered-up lifters dealing with aches and pains.
Because the exercise doesn’t require as much coordination and balance as a barbell deadlift, you can focus more on the desired muscles and improve mind-muscle connection, which makes it a perfect variation to improve size.
How to Do It
Place a barbell in a landmine, and load plates on the free end. Take a shoulder-width stance and grab the collar. Keep your back flat, your chest puffed, and your abs flexed. Drive your hips forward until you’re standing tall. If you’re more interested in hypertrophy, consider performing a landmine Romanian deadlift and stop the descent before the weight reaches the ground, to maximize time under tension.
Suitcase Deadlift
Who knew holding luggage could host so much benefits? This deadlift variation mimics lifting a heavy suitcase off the ground and delivers massive core and grip strength.
Using a barbell will challenge your grip to the extreme, as you’ll have to keep the long bar level and engage some rarely used grip and forearm muscles.
When to Do It
What’s interesting with this exercise is that it provides unilateral benefits for your upper body. It can improve core and bracing strength, most notably in your obliques via anti-lateral flexion, but also your upper back and lat posture and strength. If you feel you lack core strength or have upper-back imbalances, include this variation as supplemental exercise or as your core movement of choice.
How to Do It
Stand next to a heavy dumbbell or a barbell. Grab it and, if using a barbell, take extra care to hold it right in the middle for stability. Brace your whole body and perform a standard deadlift. It may seem simple, but you can’t just rip it off the floor if you want to reap the benefits. Remain level and don’t allow your body to bend toward one side or the other. This will demand a great deal of bracing and core strength. Do not rush your reps, and do not use heavier weight until you’re sure you can maintain perfect posture.
Using a barbell will also require lots of grip and wrist stability to balance the barbell. If you tend to fail deadlifts because of a weak grip, consider this variation. Having stronger grip and forearms will also improve elbow and shoulder health at the same time.
Reeves Deadlift
Also called a “pinch-grip deadlift,” this variation gets its name from bodybuilder and actor Steve Reeves. He was known to deadlift while holding a barbell by the plates, to exacerbate upper back and forearm strength.
If you’re up for an unconventional yet highly effective lift, try it. Think of the Reeves deadlift as a more intense variation of the snatch-grip deadlift, with a major grip strength challenge added to the mix.
When to Do It
This tough exercise is even more difficult than the snatch-grip deadlift, and amplifies its benefits and weaknesses. Forget all hope of lifting really heavy with this one. But if you want to vastly improve your grip and forearm strength, as well as your lats, rhomboids, and middle traps, this is the right choice.
How to Do It
Load a barbell and grab it by the holes in the plates, which would be a very wide grip. If the weight plates don’t have cutout holes, grab the lip of the plate. If you want to increase the load, use one 45-pound plate to grip, followed by smaller plates afterwards.
Pack your scapulas (shoulder blades) back and down and hold a neutral posture for the whole lift. If you don’t have extra-long arms, consider using a trap bar as they are shorter than a standard barbell.
Muscles Worked by the Deadlift
This total-body lift is one of the few movements that recruits most of the muscles throughout your body. Even though these variations emphasize some muscles more than others, all of the following muscles will actively participate in any deadlift exercise.
Legs
Your quadriceps, hamstrings, and even your calves will be recruited during the deadlift. The hamstrings are a series of posterior muscles that flex or bend your knees. They also help extend the hips in conjunction with the glutes. In the deadlift, your hamstrings assist the glutes in driving the weight up from the bottom position by extending the hips.
The quadriceps are among the biggest and strongest muscles in the body. This group of four muscles goes from the tibia on top of the knee and ends up on the top of the femur (thigh bone) or the hip. They extend your knee, and as such, the more flexed your knees will be during any variation, the more your quadriceps will be trained. The calves, the muscles on the back of the lower leg, also assist the upper legs by extending the ankles.
Glutes
Like any hip hinge, the glutes will be heavily involved in the deadlift. The gluteus maximus, medius, and minimus are a group of three large muscles that govern hip movement. In the deadlift, their main role is to extend the hips — bringing the body from a bent-over position to an upright posture.
Back
Even though you’re not pulling with your upper body or arms, several back muscles contribute to the deadlift. The latissimus dorsi (lats), the biggest back muscle, are engaged to provide spinal stability and maintain a strong arm position. Your trapezius, rhomboids, and rear deltoids across your upper back all work in conjunction to protect your shoulder joints and guide the barbell along its path. The wider your grip will be, the more these muscles will contribute to the exercise.
Erector Spinae
Sometimes called the spinal erectors, this is considered the “lower back,” when it’s actually a length of muscle that goes from the pelvis up to the base of the skull. This postural muscle helps keep the spine in place and also contributes to hip extension. It will work primarily to stabilize your upper body in the deadlift.
If your back rounds over during the deadlift, you put the erector spinae into a more active role and increase the risk of injury. You don’t want to use them as the prime mover during a deadlift.
Abdominals
Your abdominals work together with the erector spinae to form your “core” and provide a stable upper body. The abs control torso rotation and flexion (bending forward), as well as resisting extension (leaning backward). During the deadlift, your abs are highly active to maintain a neutral spine position.
Forearms
Your forearm muscles (wrist flexors and wrist extensors) are responsible for your grip strength, which is a big part of the deadlift. Some of these variations will challenge it even more, through thick handles or a wider grip.
Deadlift Form Tips
The deadlift can seem like a daunting task, but as long as you’re following these cues, you can get bigger and stronger, safely and efficiently. A very common flaw is to try to “squat” the deadlift, meaning lifting with your hips very low as if you were performing a squat. This will result in an inefficient bar path and strength leakage, making the exercise less effective.
You have to move around the bar, not the other way around. If you deadlift with low hips, you will either push the barbell away from you to avoid your knees or you’ll shoot your hips up first and perform a pure hip hinge afterwards.
If you want to be optimal and efficient, remember that the starting position of the deadlift is not the same as the squat. Your hips have to be higher, your knees only slightly bent, and your shoulders directly over or slightly in front of the bar. If your hips and your shoulders raise at the same time, and the bar follows a straight path, then you know you’re doing right.
Another dreadful and potentially dangerous form issue is to round the back. Experienced lifters can sometimes use this technique in very specific and deliberate contexts, but in general, you should deadlift with a stiff and neutral back if you want to minimize the risk of injuries.
To help you engage your lats and keep a flat back, think about bending the bar like a horseshoe or think of squeezing imaginary balls under your armpits. Keep your chest puffed and your shoulder blades packed. Hold a big breath of air in your belly and brace your core as much as you can during the lift.
Deadlift Yourself Up
Now you have no excuses not to fit some form of this quintessential exercise into your training plan. The deadlift is a fundamental movement that should be done by every lifter. Whether you’re a beginner, a gym veteran, an athlete, or someone that just wants to pack on some more muscle, now you can find a variation that will benefit your goals and situation.
References
- Cholewicki J, McGill SM, Norman RW. Lumbar spine loads during the lifting of extremely heavy weights. Med Sci Sports Exerc. 1991 Oct;23(10):1179-86. PMID: 1758295.
- Martín-Fuentes I, Oliva-Lozano JM, Muyor JM. Electromyographic activity in deadlift exercise and its variants. A systematic review. PLoS One. 2020 Feb 27;15(2):e0229507. doi: 10.1371/journal.pone.0229507. PMID: 32107499; PMCID: PMC7046193.
- Krzysztofik M, Wilk M, Wojdała G, Gołaś A. Maximizing Muscle Hypertrophy: A Systematic Review of Advanced Resistance Training Techniques and Methods. Int J Environ Res Public Health. 2019 Dec 4;16(24):4897. doi: 10.3390/ijerph16244897. PMID: 31817252; PMCID: PMC6950543.
- Manca A, Dragone D, Dvir Z, Deriu F. Cross-education of muscular strength following unilateral resistance training: a meta-analysis. Eur J Appl Physiol. 2017 Nov;117(11):2335-2354. doi: 10.1007/s00421-017-3720-z. Epub 2017 Sep 21. PMID: 28936703.
- Peterson MD, Pistilli E, Haff GG, Hoffman EP, Gordon PM. Progression of volume load and muscular adaptation during resistance exercise. Eur J Appl Physiol. 2011 Jun;111(6):1063-71. doi: 10.1007/s00421-010-1735-9. Epub 2010 Nov 27. PMID: 21113614; PMCID: PMC4215195.
- Swinton PA, Stewart AD, Keogh JW, Agouris I, Lloyd R. Kinematic and kinetic analysis of maximal velocity deadlifts performed with and without the inclusion of chain resistance. J Strength Cond Res. 2011 Nov;25(11):3163-74. doi: 10.1519/JSC.0b013e318212e389. PMID: 21993040.
Featured Image: BAZA Production
