The best kettlebell workouts also happen to be among the best at-home workouts. Why? Kettlebells have the advantage of being an extremely versatile piece of home gym equipment—even more so than dumbbells. The uneven weight distribution challenges stabilization and control as you swing, press, and pull. Plus, kettlebells ramp up the need for core and grip strength.
We asked Luke Pelton, C.S.C.S., NSCA-C.P.T., a competitive powerlifting coach and weight training instructor, to put together 10 of the best kettlebell workouts with—you guessed it—the best kettlebell exercises.
You’ll need kettlebells in varying weights and a Swiss/stability ball. In the market for the best kettlebells? There are a variety of brands that suit every budget, in addition to adjustable kettlebells for those who want to minimize space. Just like adjustable dumbbells, these sets are a great bang for your buck.
Directions
When determining the right kettlebell weight, you need to know what your goals are, so you work in the appropriate rep range. According to Pelton:
- A lighter kettlebell used for a few sets of higher reps (15+) will promote muscular endurance.
- A heavier kettlebell used for multiple sets of a few reps (5-8) will promote muscle growth (aka hypertrophy) and strength.
In both cases, choose a kettlebell heavy enough so you’re nearing muscle failure by the end of the set. Each workout will consist of a lower-body movement, an upper-body movement, and a core/grip movement. These movements will challenge your stability flexors in a way you’ve never experienced before.
Use the following rest-rep-set scheme depending on your goal:
- For endurance: Perform 3 sets of 15+ reps (on both sides, when required), with 45 seconds of rest.
- For strength/hypertrophy: perform 4-5 sets of 5-8 reps (on both sides, when required) with 90-120 seconds of rest.
Kettlebell Workout 1
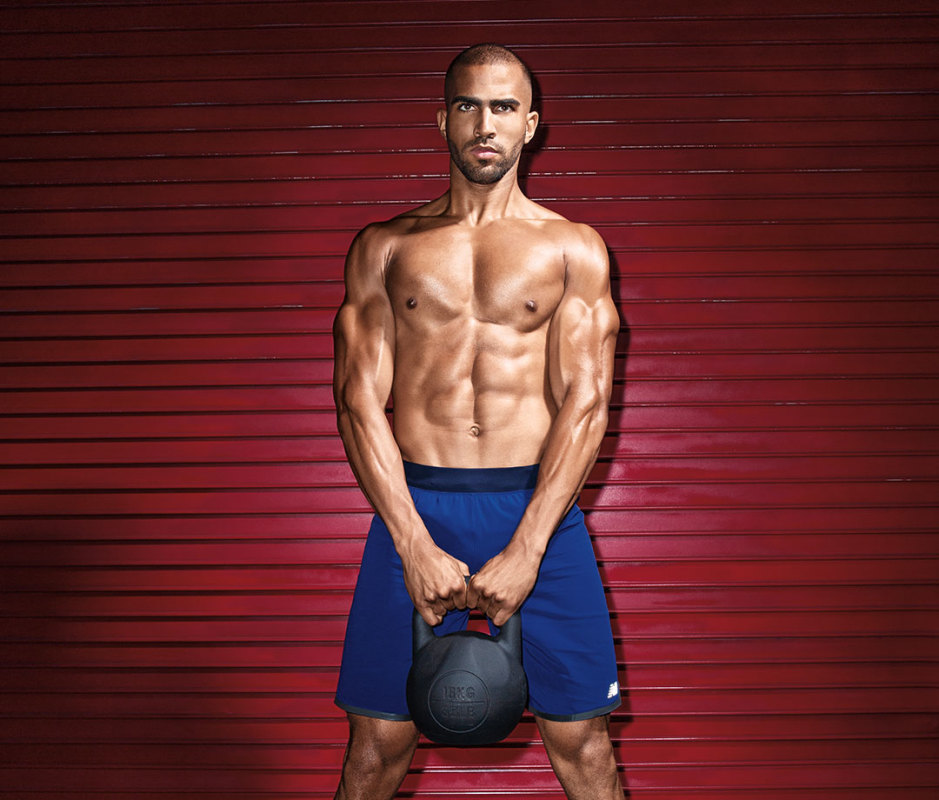
1. Kettlebell Goblet Squat
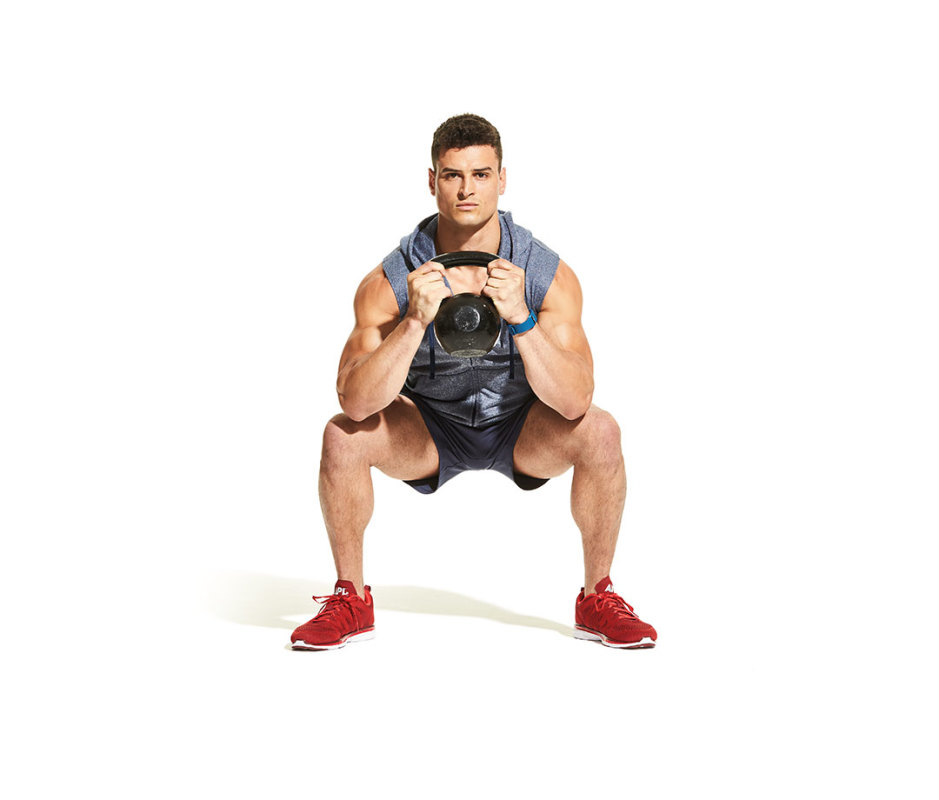
James Michelfelder
How to Do It
- Hold a kettlebell upside-down by the bell or by the horns with feet shoulder-width apart, to start.
- Keeping the kettlebell close to your chest and elbows pointing down, lower your body into a squat for a count of three.
- Push your knees out and allow your elbows to brush against the inside of your knees to reach the full range of motion.
- Explosively drive through heels to stand.
- That’s 1 rep.
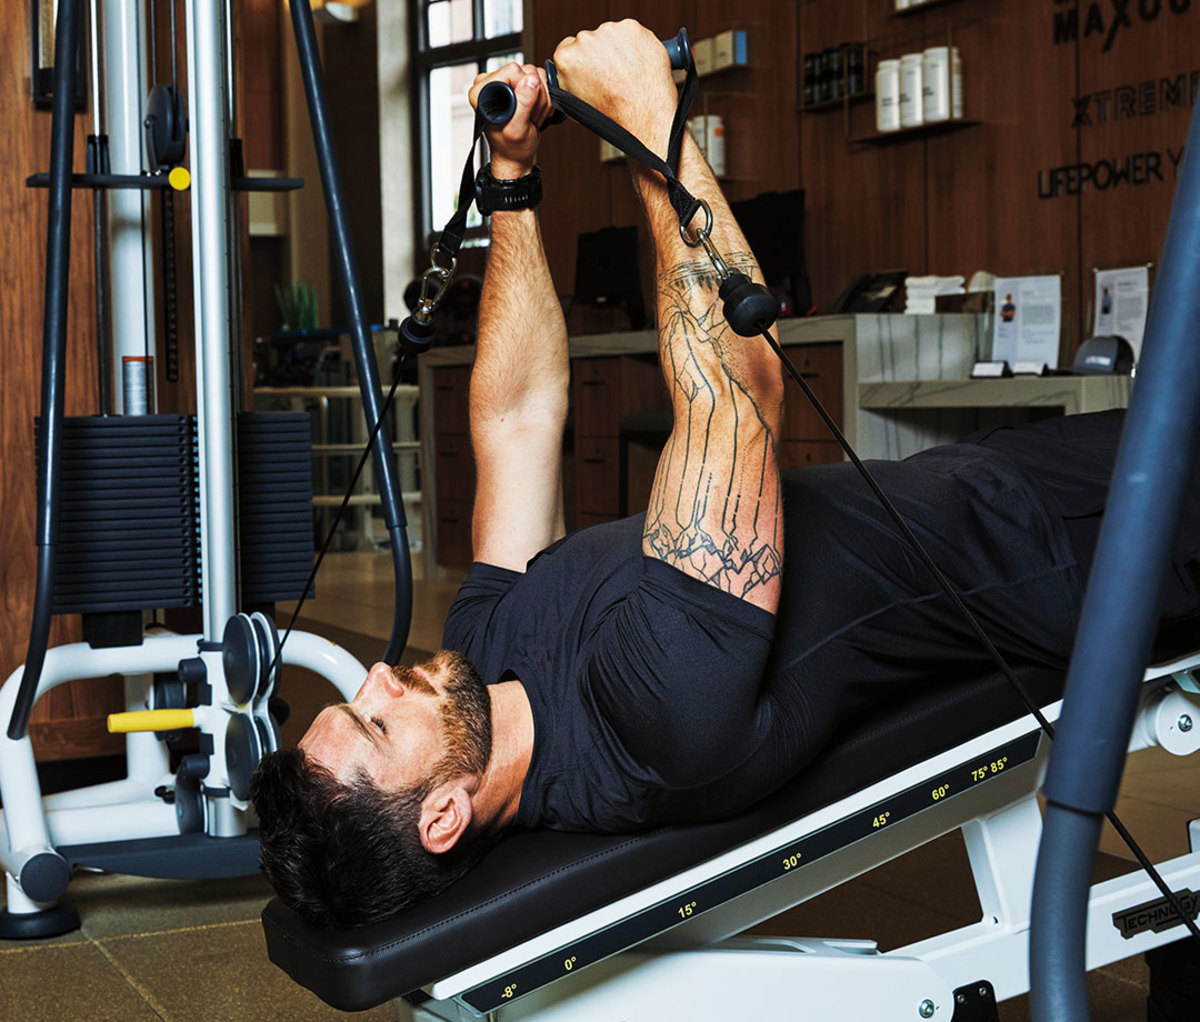
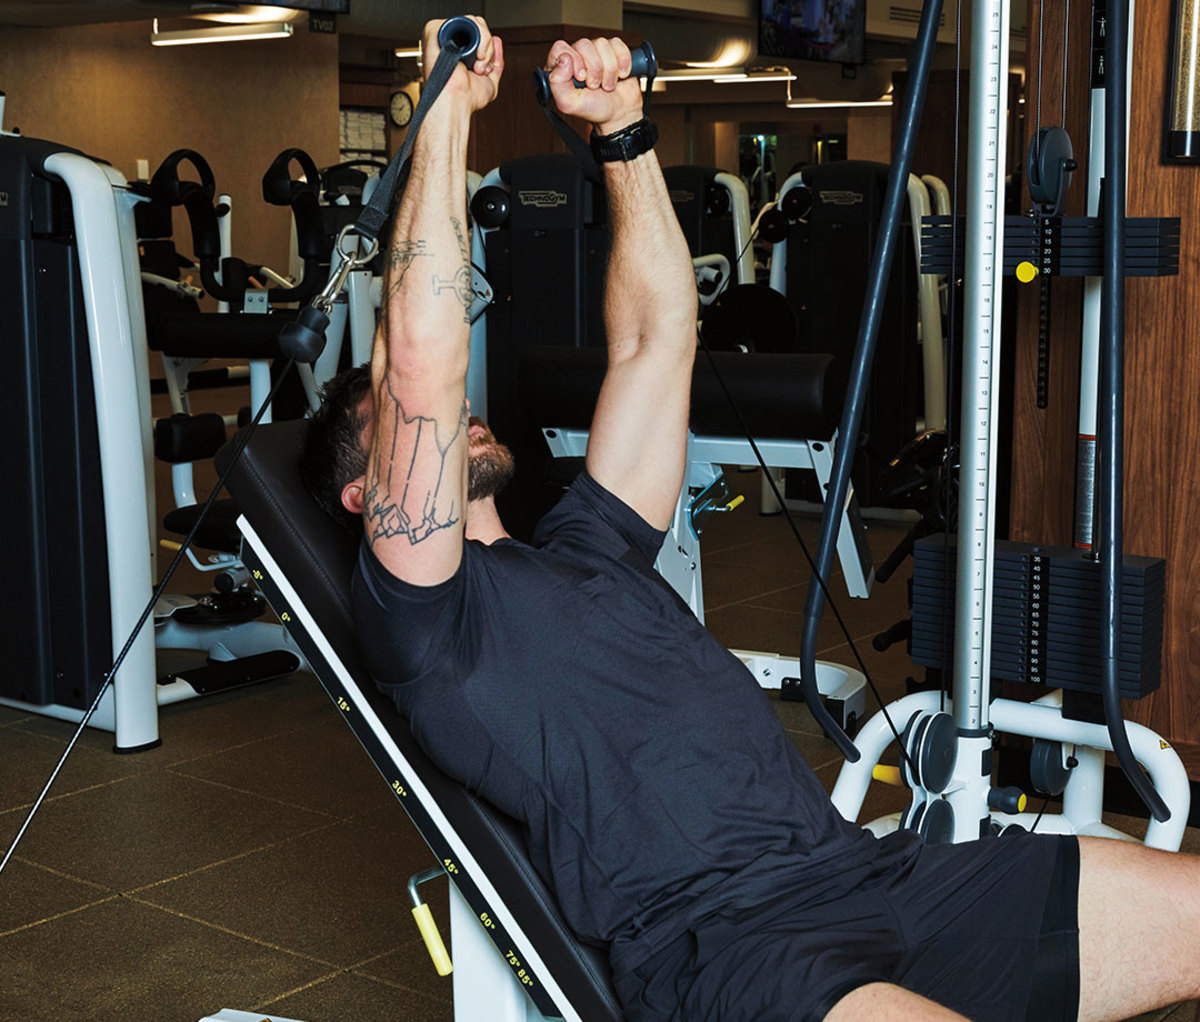
2. Stability Ball Kettlebell Press
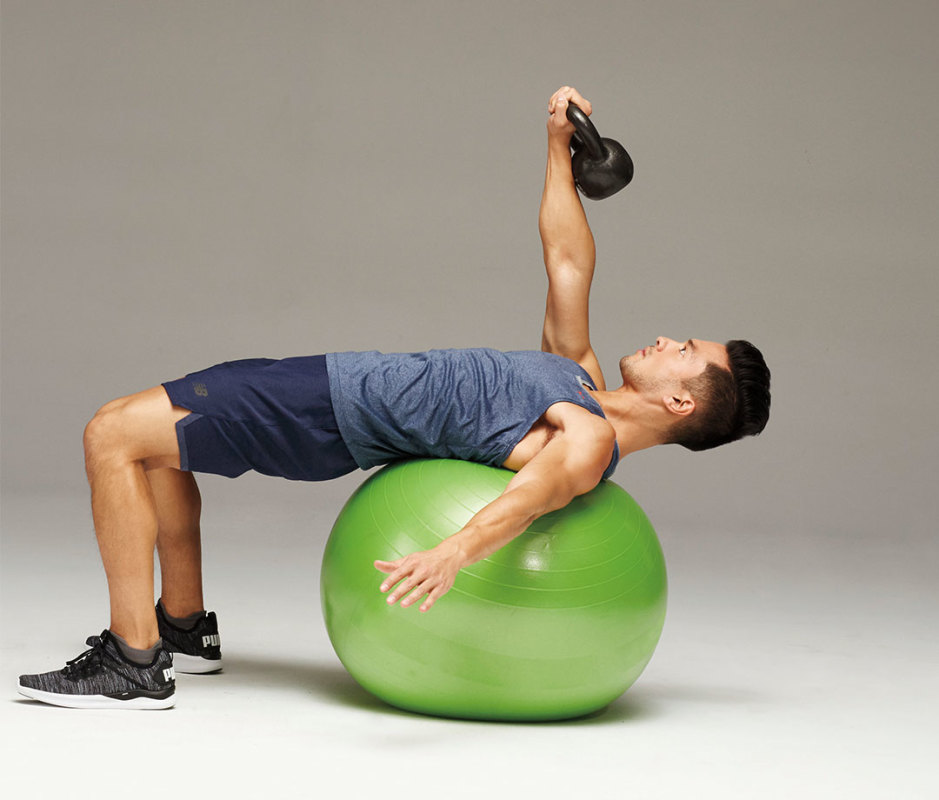
Justin Steele
How to Do It
- Hold a kettlebell by the handle in your right hand so it hangs on the outside of your hand, then lie down on a stability/Swiss ball positioned under your shoulder blades, to start.
- Adjust your positioning so feet are planted wide, your neck is engaged, hips are high, and back is flat.
- Engage your core and extend your opposite arm out, making a fist for counterbalance.
- Press the bell overhead, then lower with control.
- That’s 1 rep. Perform all reps on one side, then switch.
3. Bottoms-Up Shoulder Press
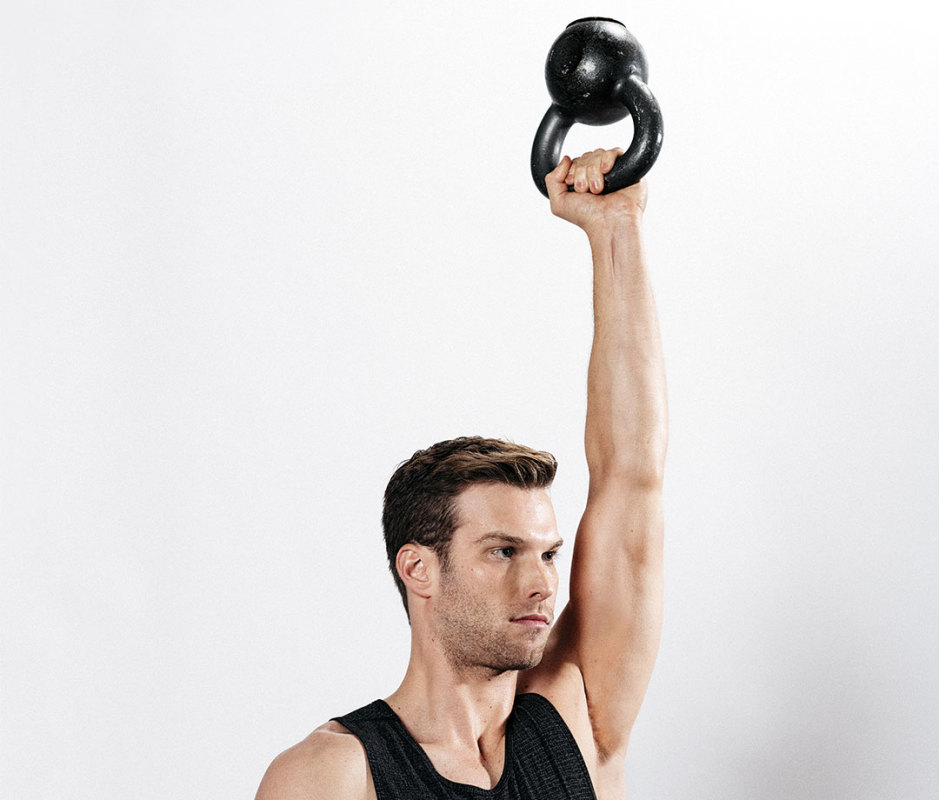
José Mandojana
How to Do It
- Stand tall with feet shoulder-width apart, gripping a kettlebell by the handle bottoms-up in one hand, to start.
- Hold the bell at shoulder height, then engage your core and working shoulder to stabilize the weight.
- Keeping your wrist perfectly straight and kettlebell steady, press your arm straight up, extending your elbow.
- Carefully bend your elbow and lower the kettlebell back to shoulder height.
- That’s 1 rep. Perform all reps on one side, then switch.
Kettlebell Workout 2
1. Kettlebell Deadlift
Ian Maddox
How to Do It
- Stand with feet shoulder-width apart and a heavy kettlebell between your feet, to start.
- Hinge at your hips to grab the horns with both hands using an overhand grip.
- Pull your shoulder blades down your back and imagine you’re ripping the bar of the bell apart with your hands as you press through the floor to stand, extending through hips.
- Lower with control, then immediately begin the next rep.
- That’s 1 rep.
2. Stability Ball Kettlebell Press
Justin Steele
How to Do It
- Hold a kettlebell by the handle in your right hand so it hangs on the outside of your hand, then lie down on a stability/Swiss ball positioned under your shoulder blades, to start.
- Adjust your positioning so feet are planted wide, your neck is engaged, hips are high, and back is flat.
- Engage your core and extend your opposite arm out, making a fist for counterbalance.
- Press the bell overhead, then lower with control.
- That’s 1 rep. Perform all reps on one side, then switch.
3. Farmer’s Carry
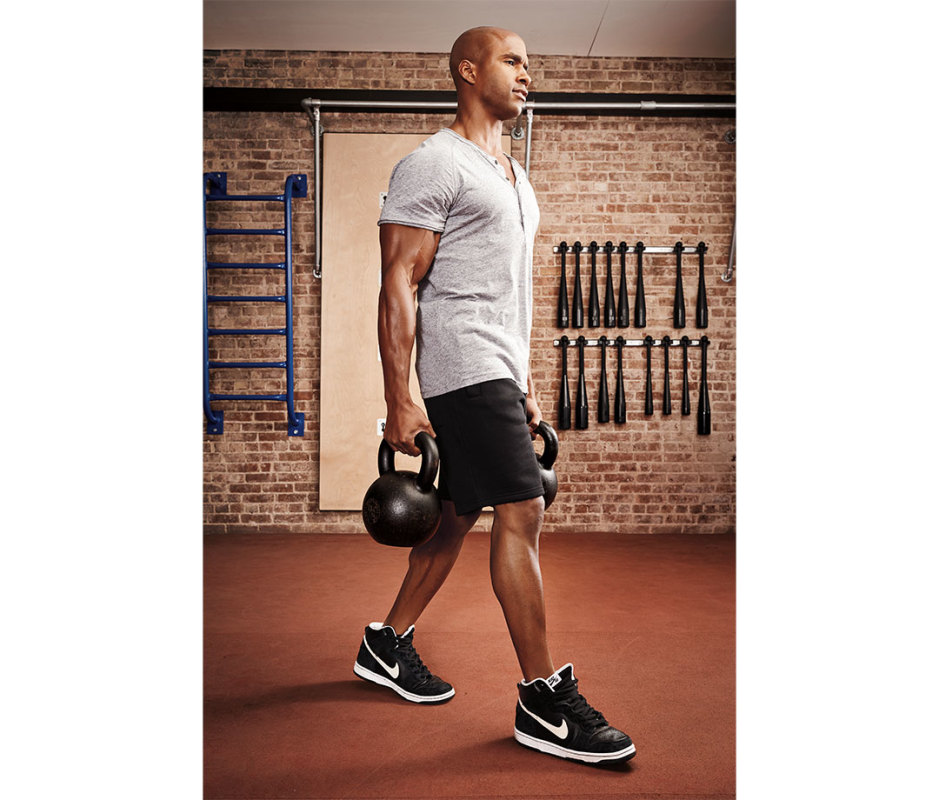
James Michelfelder
How to Do It
- Focus on maintaining proper core bracing and stability of the kettlebell.
- Stand tall with a weight in each hand. Maintain a tall chest, retract shoulder blades, and keep weights from resting on thighs.
- Walk forward, using choppy, heel-to-toe steps. Look straight ahead and keep your posture rigid.
- Perform 1-minute rounds.
Kettlebell Workout 3
1. Bulgarian Split Squat
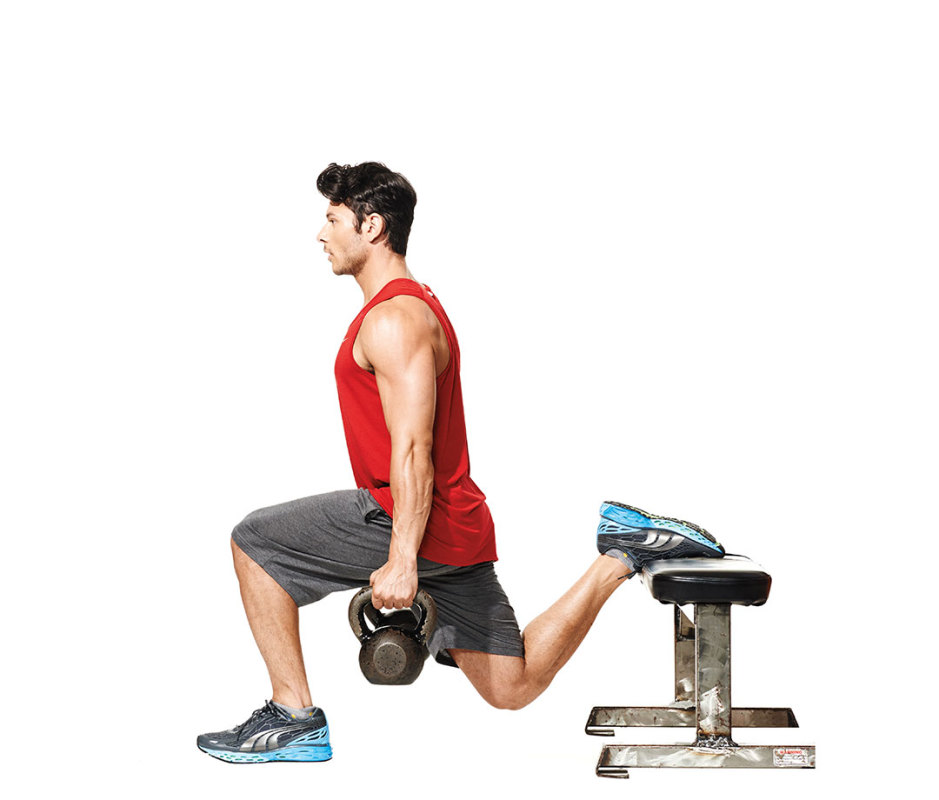
James Michelfelder and Therese Sommerseth
How to Do It
- Hold light to moderate kettlebells in either hand or one heavy kettlebell in both hands while standing in front of a flat bench, to start.
- Assume a split-squat position by placing your right foot back with the top of the foot on the bench, left leg forward with a slight bend in the knee.
- Keeping your chest high, drop right knee toward the ground, then drive through your left foot to stand.
- That’s 1 rep. Do all reps with right foot on bench, then switch sides.
2. Kettlebell Renegade Row
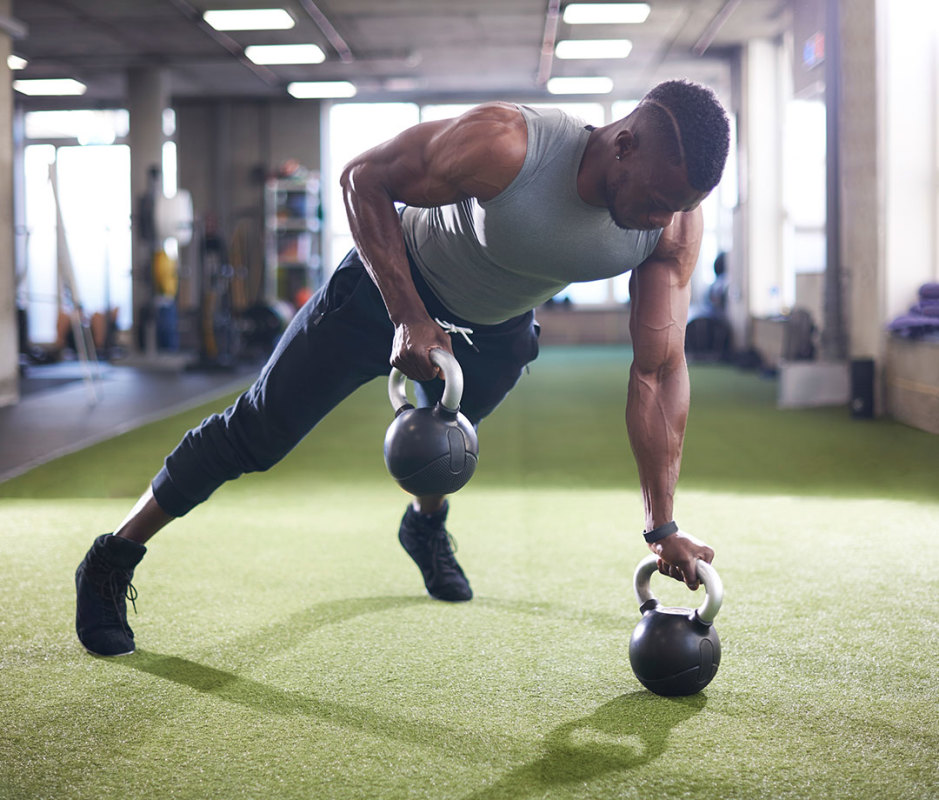
How to Do It
- Place two kettlebells directly under shoulders with handles parallel to one another, to start.
- Get into a tall pushup position with hands on top of the kettlebell handles, weight evenly distributed among your arms and tops of feet.
- Row one kettlebell toward your ribs, then lower with control back down, squeezing your glutes and engaging your core for counterbalance. Keep your hips as still as possible—don’t rock back and forth.
- Repeat on the other side.
- That’s 1 rep. Alternate sides on each rep.
3. Overhead Carry
Ian Maddox
How to Do It
- Stand with feet hip-width apart with a kettlebell between your feet, to start.
- Clean the kettlebell with your right hand to shoulder height, then press the bell overhead, locking your arm out.
- Pack your shoulder down and brace your core to stabilize the kettlebell as you walk for time.
- Switch sides after 1 min.
Kettlebell Workout 4
1. Single-Arm Deadlift
How to Do It
- Stand with feet shoulder-width apart with a kettlebell in between, to start.
- Hinge your hips back to grab the handle with one hand, palm facing you.
- Drive through feet to stand, keeping the kettlebell close to your body, squeezing glutes at the top of the movement.
- Brace your core to slowly lower the weight to the floor.
- That’s 1 rep. Complete all reps on one side, then switch.
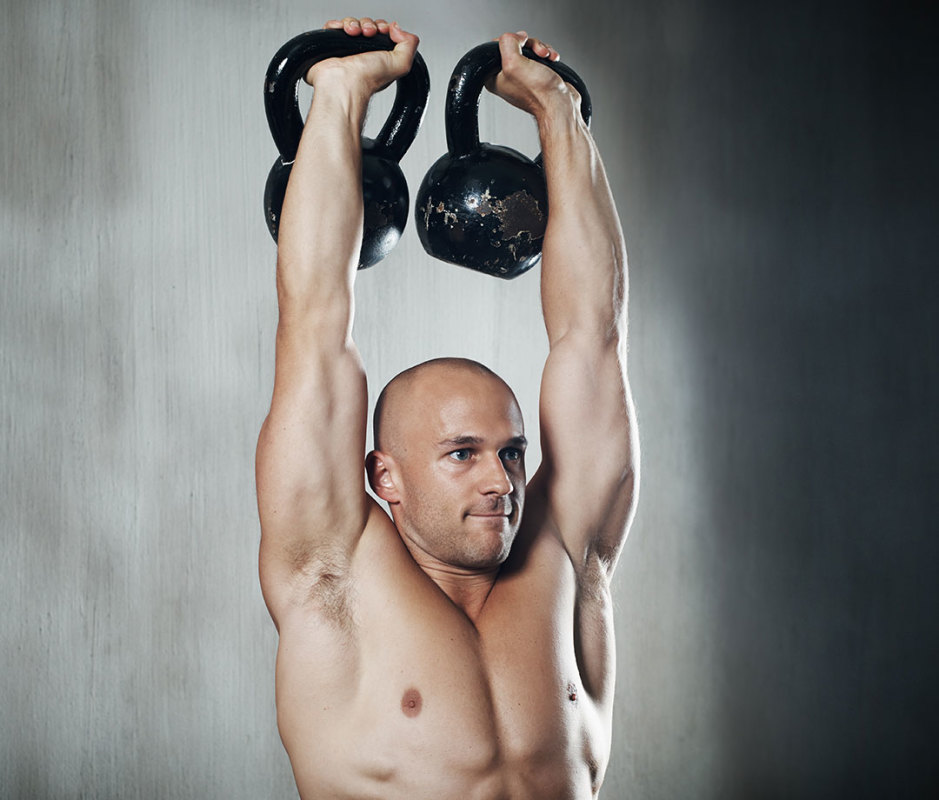
2. Double Kettlebell Press
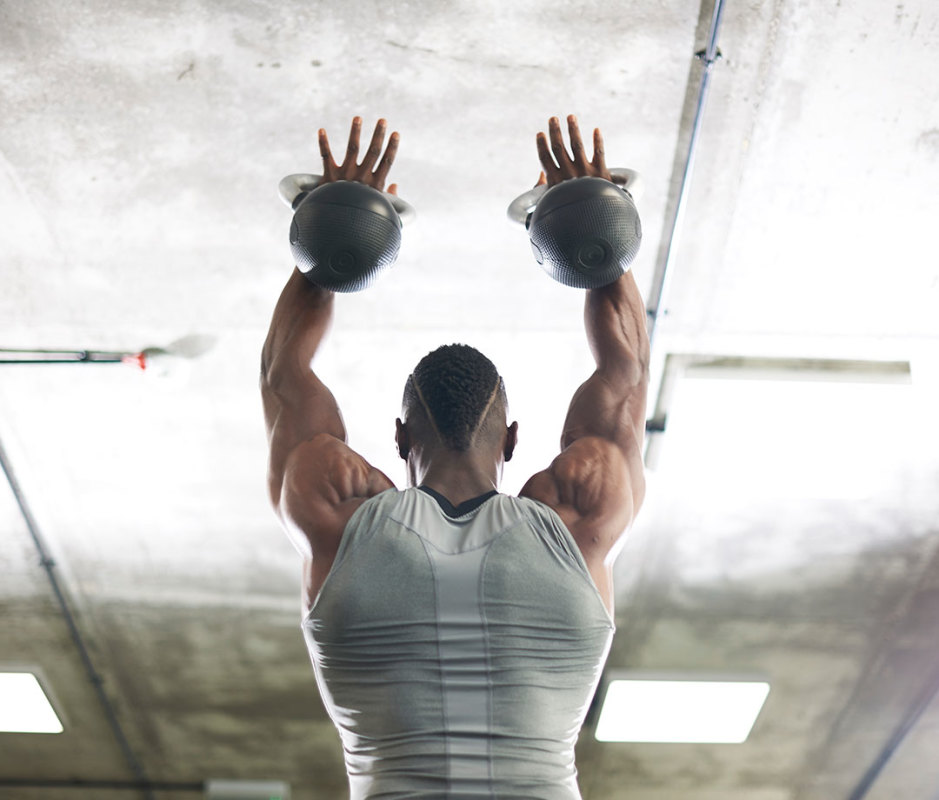
Peter Muller/Getty Images
How to Do It
- Stand with feet shoulder-width apart with two kettlebells between your feet, to start.
- Clean the kettlebells to shoulder height, knuckles pointing toward the ceiling, palms facing in.
- Press the bells overhead, locking your arms out. Bend your knees and use them to help drive the weight overhead, if needed.
- Return kettlebells to the rack position with control.
- That’s 1 rep.
3. Alphabets
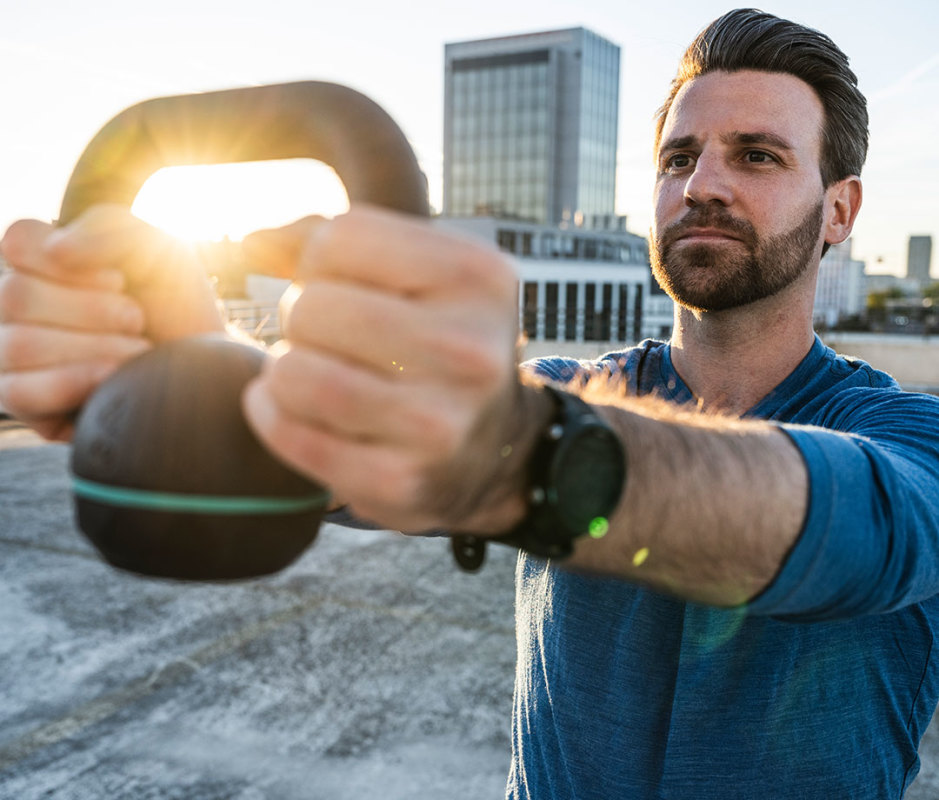
How to Do It
- Stand holding a light kettlebell by the horns in front of your body, with elbows slightly bent and forearms out straight, to start.
- Moving at the wrists only—this is a forearm exercise—spell out each letter of the alphabet.
- Work your way up to the full alphabet, taking breaks as needed.
Kettlebell Workout 5
1. Kettlebell Squat to Floor
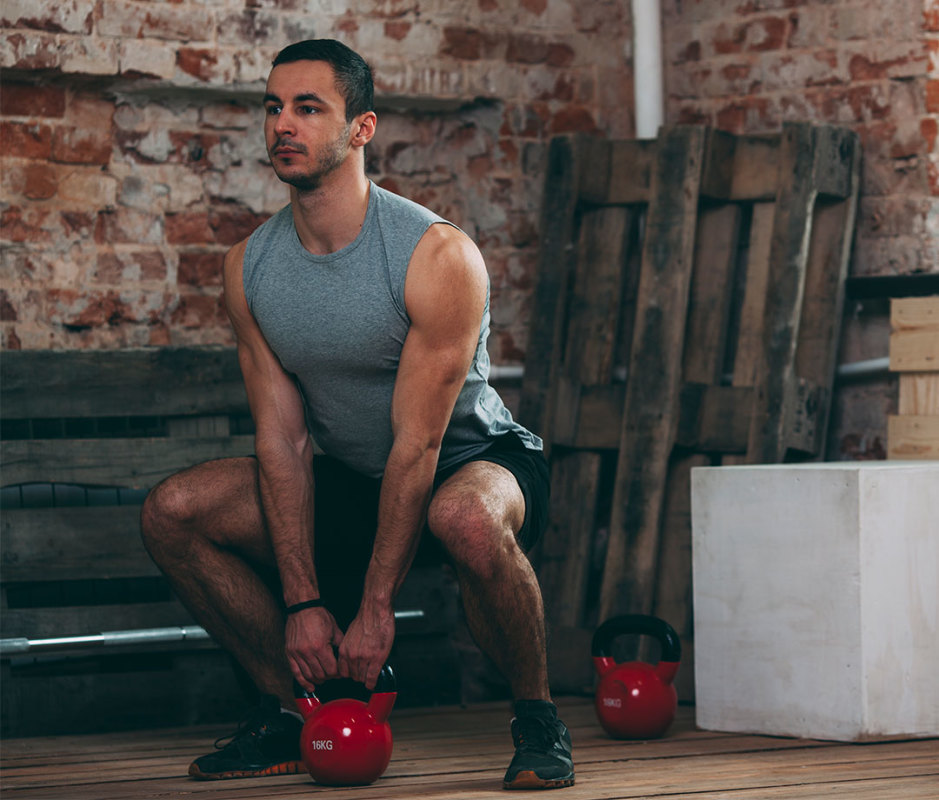
Vasily Pindyurin/Getty Images
How to Do It
- Stand with feet shoulder-width apart between a kettlebell, toes pointed slightly out, to start.
- Hinge hips and bend knees to grab the kettlebell’s handle with both hands.
- Drive through heels to stand. Keeping arms extended, lower into a squat, letting the kettlebell tap the ground before driving through heels to stand.
- That’s 1 rep.
2. Kettlebell Pushup
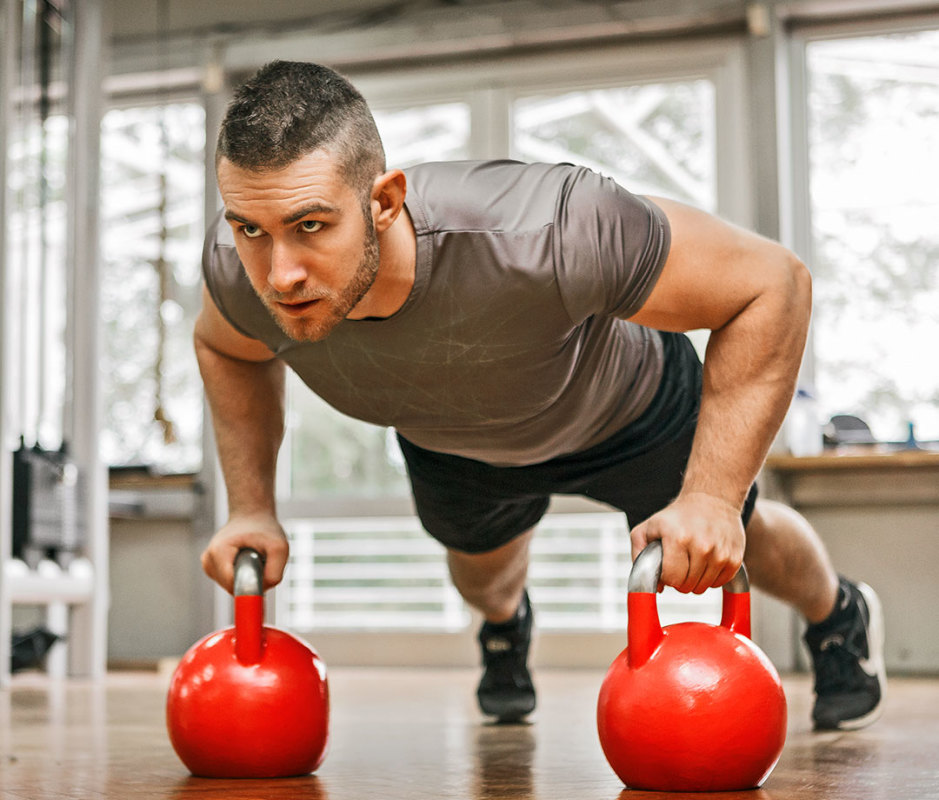
How to Do It
- Place two kettlebells shoulder-width apart (or a bit wider) on the ground, angled toward one another, to start.
- Grasp the handles and extend legs out into a tall pushup position, feet flexed.
- Bend arms to lower into a pushup, pausing at the bottom, then pushing through kettlebells to return to the start position.
- That’s 1 rep.
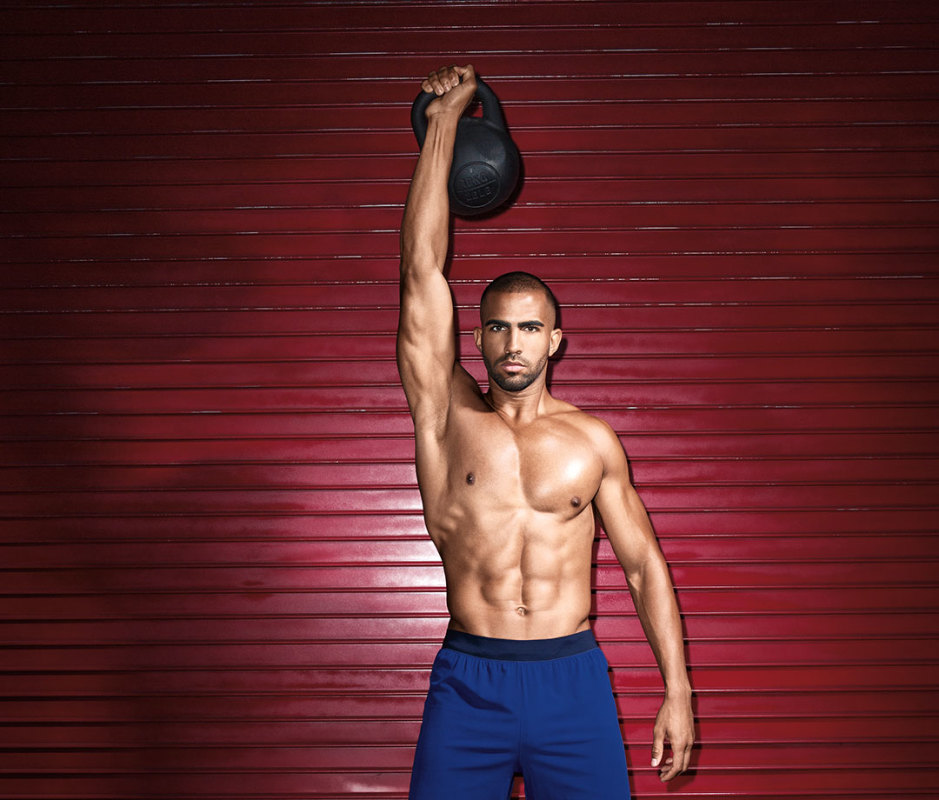
3. Standing Single-Arm Overhead Press
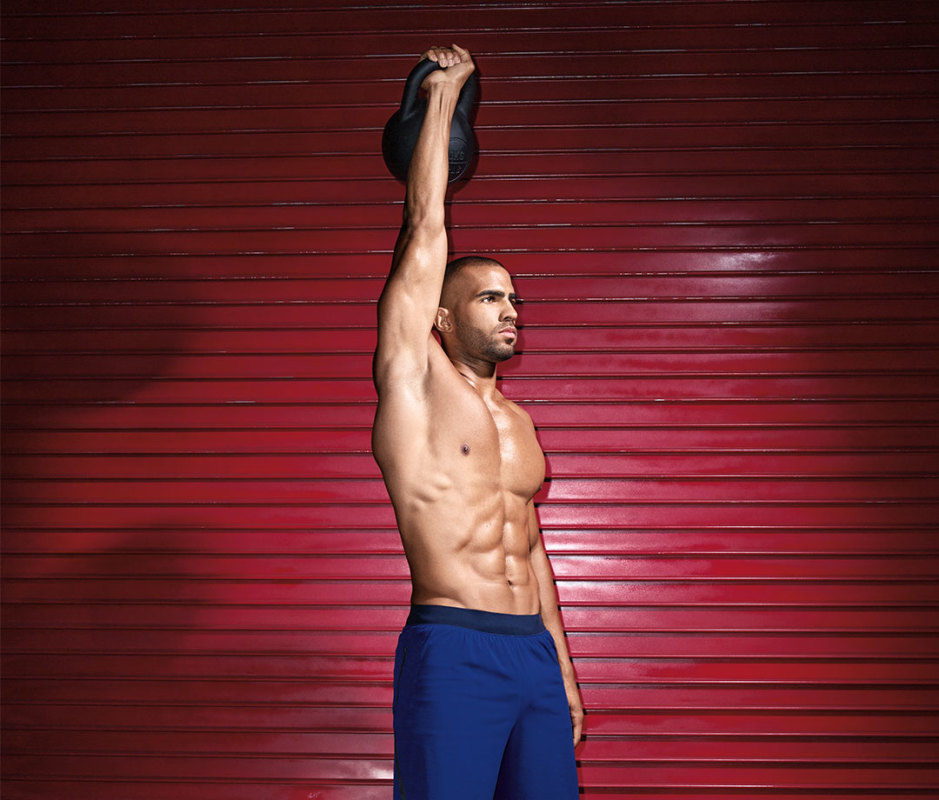
Ian Maddox
How to Do It
- Stand with feet hip-width apart with a kettlebell between your feet, to start.
- Clean the kettlebell with your right hand to shoulder height, knuckles pointing toward the ceiling, palm facing in.
- Without using your legs, press the bell overhead, locking your arm out.
- Return kettlebell to the rack position with control.
- That’s 1 rep. Perform all reps on one side, then switch.
Kettlebell Workout 6
1. Kettlebell Romanian Deadlift
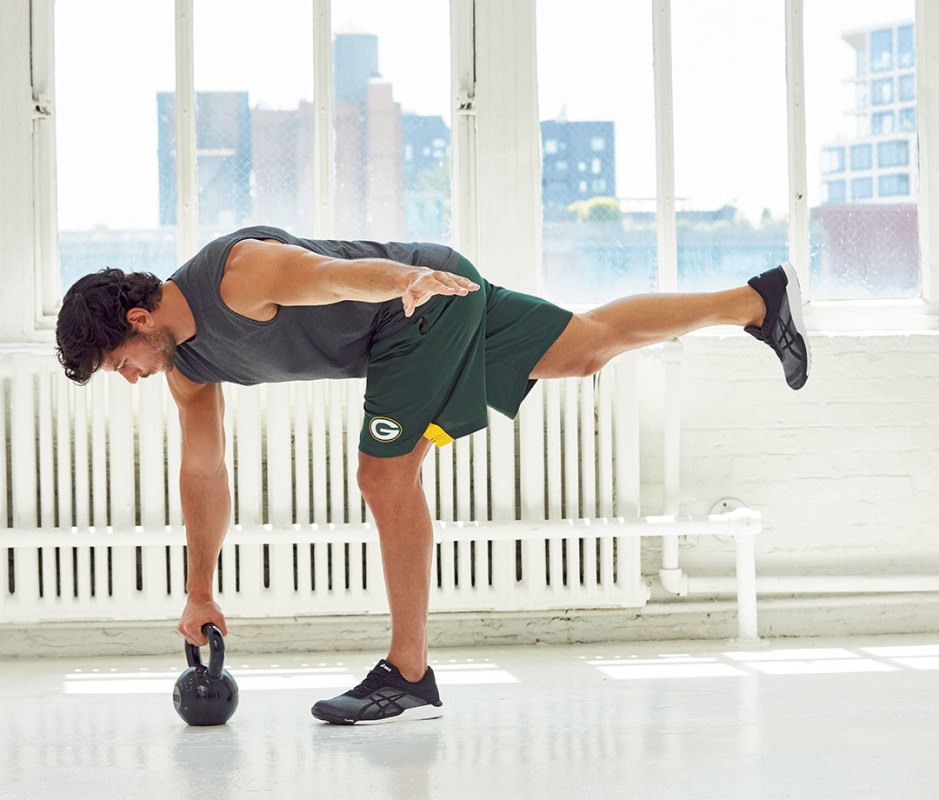
Jay Sullivan
How to Do It
- Hold a kettlebell in your right hand, standing with a slight bend in your knees, to start.
- Shift your hips back to perform a hip hinge as you lower the weight over your left midfoot and simultaneously extend your right leg, foot flexed. Go only as low as you can while maintaining an extended spine.
- When you feel a stretch in the hamstrings, contract your glutes to return to the starting position.
- That’s 1 rep. Perform all reps on one side, then switch.
2. Bottoms-Up Shoulder Press
José Mandojana
How to Do It
- Stand tall with feet shoulder-width apart, gripping a kettlebell by the handle, bottoms-up, in one hand, to start.
- Hold the bell at shoulder height, then engage your core and working shoulder to stabilize the weight.
- Keeping your wrist perfectly straight and kettlebell steady, press your arm straight up, extending your elbow.
- Carefully bend your elbow and lower the kettlebell back to shoulder height.
- That’s 1 rep. Perform all reps on one side, then switch.
3. Farmer’s Carry
James Michelfelder
How to Do It
- Stand tall with a kettlebell in each hand, to start.
- Maintain a tall chest, retract shoulder blades, and keep weights from resting on thighs.
- Walk forward, using choppy, heel-to-toe steps. Look straight ahead and keep your posture rigid.
- Perform 1-minute rounds.
Kettlebell Workout 7
1. Single-Arm Overhead Kettlebell Squat
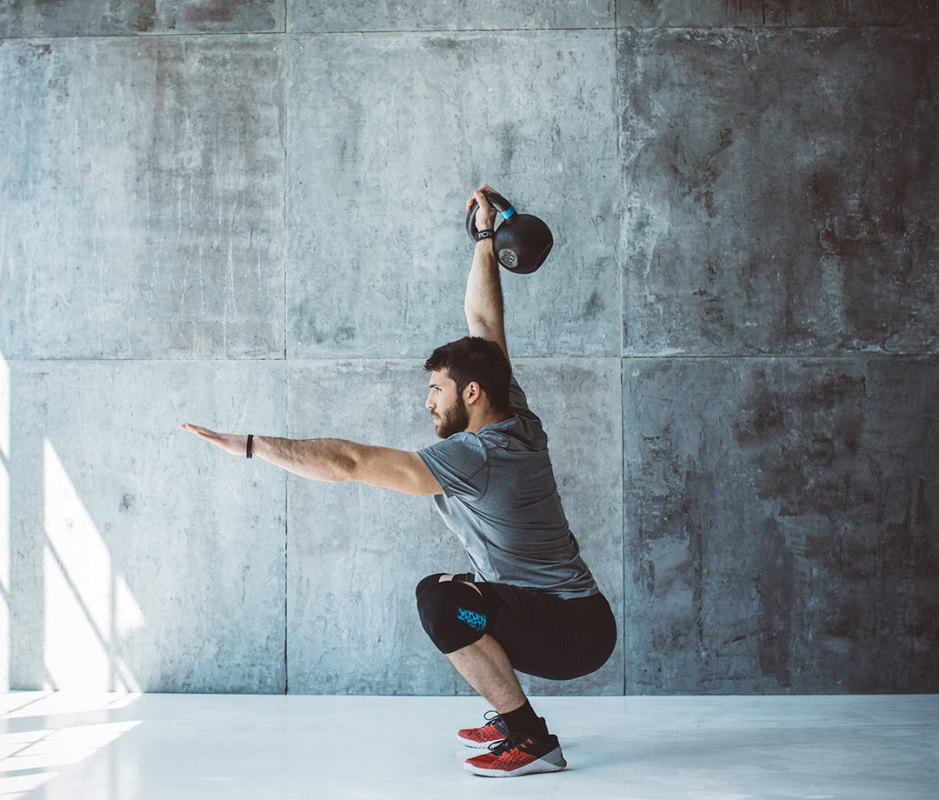
Svetikd/Getty Images
How to Do It
- Stand with feet hip-width apart with a light kettlebell between your feet, to start.
- Clean the kettlebell with your right hand to shoulder height.
- Press the kettlebell overhead, then extend your other arm for counterbalance.
- Lower into a squat, keeping your bicep by your ear so the weight is directly overhead throughout.
- Drive through your heels to stand.
- That’s 1 rep. Complete all reps on one side, then switch.
2. Kettlebell Renegade Row
How to Do It
- Place two kettlebells directly under shoulders with handles parallel to one another, to start.
- Get into a tall pushup position with hands on top of the kettlebell handles, weight evenly distributed among your arms and tops of feet.
- Row one kettlebell toward your ribs, then lower with control back down, squeezing your glutes and engaging your core for counterbalance. Keep your hips as still as possible—don’t rock back and forth.
- Repeat on the other side.
- That’s 1 rep. Alternate sides on each rep.
3. Overhead Carry
PeopleImages/Getty Images
How to Do It
- Stand with feet hip-width apart with two kettlebells between your feet, to start.
- Clean the kettlebells to shoulder height, knuckles pointing toward the ceiling, palms facing in.
- Press the bells overhead, locking your arms out.
- Pack your shoulders and brace your core to stabilize the kettlebells as you walk for time.
- Perform 1-min. rounds.
Kettlebell Workout 8
1. Kettlebell Deadlift
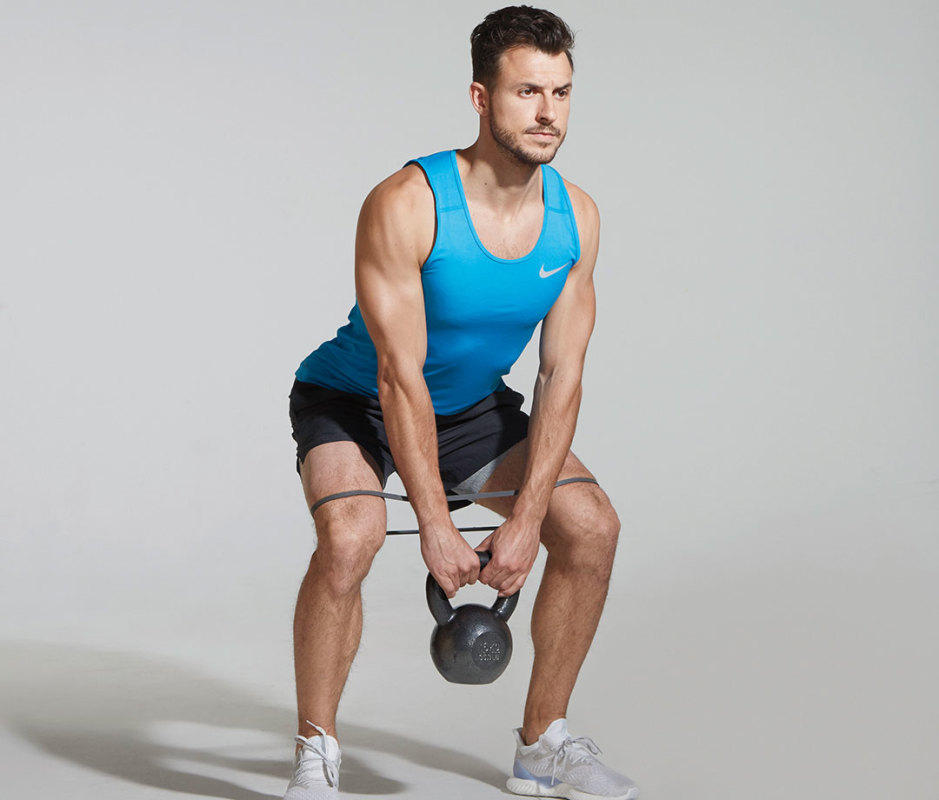
Justin Steele
How to Do It
- Stand feet shoulder-width apart with a kettlebell between your feet, to start.
- Optional: Place a resistance band above your knees to help activate your glutes. It forces the muscles to work extra hard to keep the knees wide and tracking over the feet.
- Hinge at hips to grab the kettlebell with an overhand grip. Drive through feet to stand.
- Push against band to drive knees out, if using, as you bend knees to lower kettlebell toward the ground. Tap the bell, then drive through heels to stand.
- That’s 1 rep.
2. Standing Single-Arm Overhead Press
Ian Maddox
How to Do It
- Stand with feet hip-width apart with a kettlebell between your feet, to start.
- Clean the kettlebell with your right hand to shoulder height, knuckles pointing toward the ceiling, palm facing in.
- Without using your legs, press the bell overhead, locking your arm out.
- Return kettlebell to the rack position with control.
- That’s 1 rep. Perform all reps on one side, then switch.
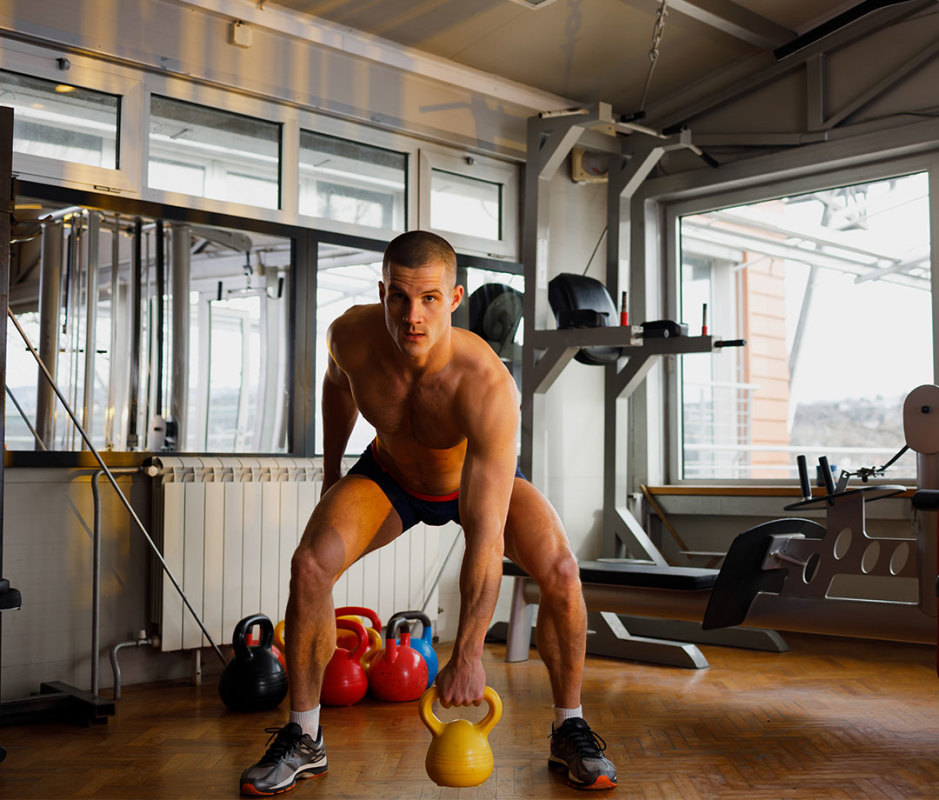
3. Kettlebell Swing
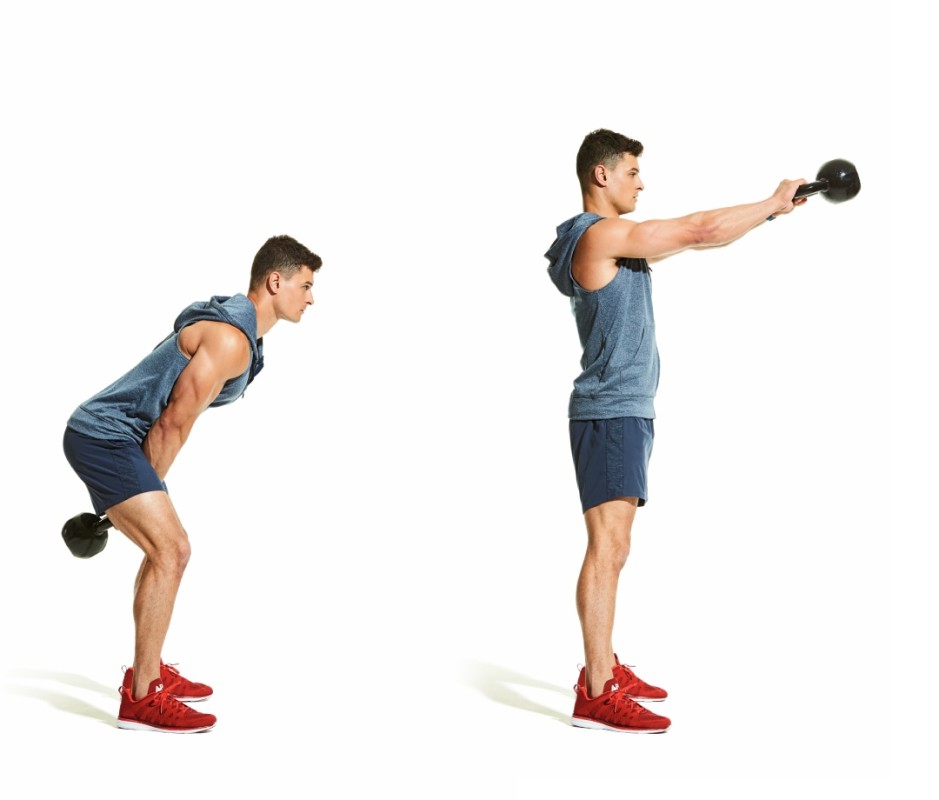
James Michelfelder
How to Do It
- Stand with feet shoulder-width apart a foot behind a kettlebell, to start.
- Hinge at hips and grab the handle of the kettlebell, tipping it toward you so it’s resting on its side.
- Forcefully, swing the bell back through your legs while keeping your low back flat. Bend your knees as necessary.
- Explosively extend through hips to swing the weight up to shoulder level.
- Let momentum bring the kettlebell back through your legs.
- That’s 1 rep.
Kettlebell Workout 9
1. Kettlebell Goblet Squat
James Michelfelder
How to Do It
- Hold a kettlebell upside-down by the bell or by the horns with feet shoulder-width apart, to start.
- Keeping the kettlebell close to your chest and elbows pointing down, lower your body into a squat for a count of three.
- Push your knees out and allow your elbows to brush against the inside of your knees to reach the full range of motion.
- Explosively drive through heels to stand.
- That’s 1 rep.
2. Standing Single-Arm Overhead Press
Ian Maddox
How to Do It
- Stand with feet hip-width apart with a kettlebell between your feet, to start.
- Clean the kettlebell with your right hand to shoulder height, knuckles pointing toward the ceiling, palm facing in.
- Without using your legs, press the bell overhead, locking your arm out.
- Return kettlebell to the rack position with control.
- That’s 1 rep. Perform all reps on one side, then switch.
3. Farmer’s Carry
James Michelfelder
How to Do It
- Stand tall with a kettlebell in each hand, to start.
- Maintain a tall chest, retract shoulder blades, and keep weights from resting on thighs.
- Walk forward, using choppy, heel-to-toe steps. Look straight ahead and keep your posture rigid.
- Perform 1-minute rounds.
Kettlebell Workout 10
1. Kettlebell Goblet Squat
James Michelfelder
How to Do It
- Hold a light kettlebell upside-down by the bell or by the horns with feet shoulder-width apart, to start.
- Keeping the kettlebell close to your chest and elbows pointing down, lower your body into a squat for a count of three.
- Push your knees out and allow your elbows to brush against the inside of your knees to reach the full range of motion.
- Explosively drive through heels to stand.
- That’s 1 rep.
2. Bulgarian Split Squat
James Michelfelder and Therese Sommerseth
How to Do It
- Hold light to moderate kettlebells in either hand or one heavy kettlebell in both hands while standing in front of a flat bench, to start.
- Assume a split-squat position by placing your right foot back with the top of the foot on the bench, left leg forward with a slight bend in the knee.
- Keeping your chest high, drop right knee toward the ground, then drive through your left foot to stand.
- That’s 1 rep. Do all reps with right foot on bench, then switch sides.
3. Romanian Deadlift
Jay Sullivan
How to Do It
- Hold a kettlebell in your right hand, standing with a slight bend in your knees, to start.
- Shift your hips back to perform a hip hinge as you lower the weight over your left midfoot and simultaneously extend your right leg, foot flexed. Go only as low as you can while maintaining an extended spine.
- When you feel a stretch in the hamstrings, contract your glutes to return to the starting position.
- That’s 1 rep. Perform all reps on one side, then switch.
4. Bottoms-Up Shoulder Press
José Mandojana
How to Do It
- Stand tall with feet shoulder-width apart, gripping a kettlebell by the handle, bottoms-up, in one hand, to start.
- Hold the bell at shoulder height, then engage your core and working shoulder to stabilize the weight.
- Keeping your wrist perfectly straight and kettlebell steady, press your arm straight up, extending your elbow.
- Carefully bend your elbow and lower the kettlebell back to shoulder height.
- That’s 1 rep. Perform all reps on one side, then switch.
5. Kettlebell Pushup to Renegade Row
How to Do It
- Place two kettlebells shoulder-width apart (or a bit wider) on the ground, angled toward one another, to start.
- Grasp the handles and extend legs out into a tall pushup position, feet flexed.
- Row one kettlebell toward your ribs, then lower with control back down, squeezing your glutes and engaging your core for counterbalance. Keep your hips as still as possible—don’t rock back and forth. Repeat on the other side.
- Next, bend arms to lower into a pushup, pausing at the bottom, then pushing through kettlebells to return to the start position.
- That’s 1 rep.