World Fitness Blog : Leading Global Bloggers

June 10, 2023

Lat Pulldown vs. Pull-Up: The Battle for a Bigger Back

Filed under: Fitness,Training — Tags: , , , , , — admin @ 2:22 am

The lat pulldown and the pull-up are staples across many training programs — sometimes even coexisting within the same workout. Both exercises train the “vertical pulling” movement pattern and can be highly effective for targeting your back muscles, which is why some lifters regard them as nearly interchangeable. Despite how visually similar the movements may seem, they can actually offer pretty significant and distinct benefits.

long-haired person in gym doing pull-ups

Credit: Microgen / Shutterstock

Whether you should focus on pulldowns or pull-ups can depend on a few factors, including your experience and your goals. From technique, programming, and step-by-step execution, here is everything you need to know about these foundational back-building exercises.

Lat Pulldown and Pull-Up

Exercise Differences

Recognising the differences between the lat pulldown and the pull-up can put you on the fast track for better results. Some key differences involve the equipment used, or lack thereof. Some relatively subtle, but significant, differences in programming can also be found.

Human Body vs. Machine

The major visual difference between the lat pulldown and pull-up is the fact that one is a bodyweight exercise and the other requires a full cable station. This brings with it two major considerations.

The lat pulldown uses a specialized cable stack pulley system to anchor your body in place while you move an adjustable weight stack, whereas the pull-up simply requires a fixed overhead bar that can support your body weight.

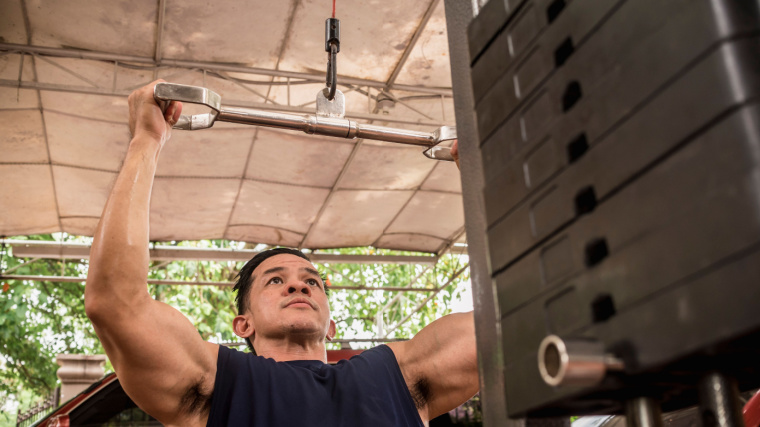
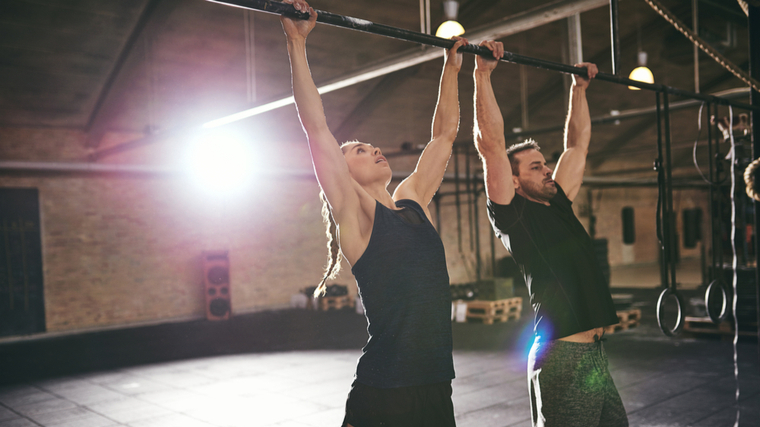
Two people in gym doing pull-ups on an overhead bar

Credit: Ground Picture / Shutterstock

This can affect the relative ease of implementing each exercise into your program based upon availability of equipment, as well as your own capabilities — body weight pull-ups may be too challenging for beginners, while pulldowns can accommodate lifters of any experience or strength level.

As a calisthenics exercise, the pull-up places a greater stabilization challenge on your entire body, from your back and shoulders through your core to your lower body. The stable machine and fixed anchor points provided by the pads on a lat pulldown machine make it tremendously easier to take a seat and get to work. The machine itself provides stabilization, so you can focus targeting your back muscles.

Loading

One of the largest differences between the lat pulldown and pull-up is the range of resistance you can use. The lat pulldown is a highly adjustable machine that simply requires you to add more plates or lower the pin on the weight stack further and further — sometimes exceeding a comparable pull-up load.

The lat pulldown is more scalable than a pull-up — the resistance can be quickly and easily reduced to allow relatively weaker lifters to perform the exercise. Aside from getting creative using resistance bands to assist a pull-up or having access to a dedicated assisted pull-up machine, it can be quite challenging to overcome the baseline level (your body weight) needed to perform a pull-up. This is especially true if you want to perform multiple repetitions per set.

Sets and Repetitions

Similar to the differences in loading, the lat pulldown and pull-up are often paired with distinct set and repetition schemes. For many people, the pull-up is an upper body strength movement that lives in a lower repetition range. Whereas, the lat pulldown typically exists as an effective muscle-building tool that thrives with more moderate repetitions.

You’ll often see pull-ups performed for two to three sets of anywhere from one to 10 repetitions. While the pulldown could be performed with much heavier weights for low-rep sets, it’s nearly impossible to maintain strict form with such programming due to poor leverage. Having your lower body and core locked into position becomes a limiting factor.

In contrast, a lat pulldown is typically done for two to four sets of eight to 12 repetitions. Reaching that type of volume with pull-ups is typically reserved for experienced lifters of a significant strength level, either performed with added weight or with body weight alone.

Exercise Similarities

While there can be several key differences, the lat pulldown and pull-up do share some significant overlaps to consider, as well. They will hit many of the same primary muscle groups, both require some degree of overhead mobility, and the exercises share many basic variations.

Muscles Worked

The lat pulldown and pull-up primarily target your latissimus dorsi — a large swath of muscle located on either lateral side of your back. While the latissimus dorsi (lats) are the prime mover, both exercises will also heavily involve your upper back, biceps, and varying degrees of core musculature to stay in an efficient pulling position.

Mobility Requirements

The vertical pulling pattern used in both exercises requires you to be able to successfully, comfortably, and safely get your arms fully extended overhead. While that may sound simple enough, shoulder mobility and joint health is a very important component of avoiding training-related aches or pains in the long-term.

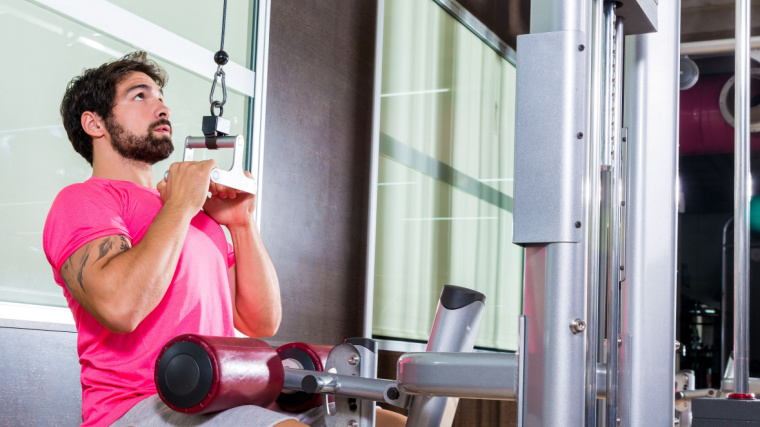
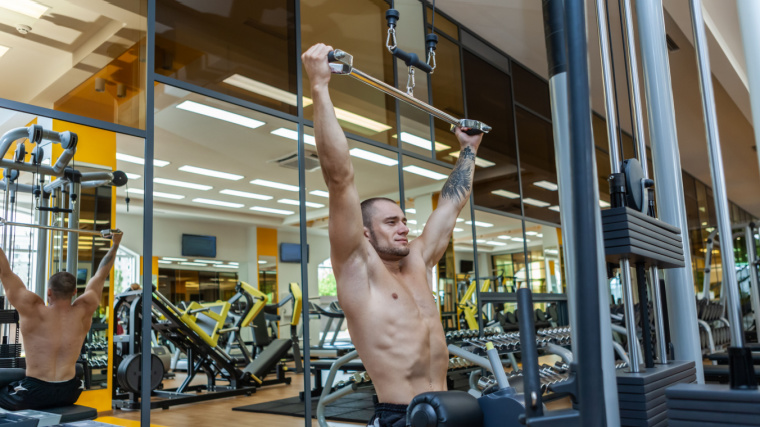
Muscular man performing lat pulldown in gym

Credit: martvisionlk / Shutterstock

If you can achieve the overhead position effectively, both the lat pulldown and pull-up can be effective at maintaining your overhead mobility, especially when you focus on working through a full range of motion in the stretched (overhead) position.

Grip Variations

When it’s time to introduce exercise variety, the lat pulldown and pull-up can both allow narrow or wide hand positions, which can alter the muscle emphasis from your lats to your upper back or even your biceps. (1)

Both exercises can also be performed using unique grip orientations, from neutral-grip to overhand or even freely rotating (using individual handles or straps to allow your wrists to rotate during each repetition). Like grip width, changing the orientation of your hands and forearms is an effective way of altering muscle recruitment by making slight adjustments. (2)

Technique Differences

The lat pulldown and pull-up have some definitive technique differences. Because one is a calisthenics exercise and the other is performed while seated on a machine, your overall body position will affect exercise technique.

Hollow Body

The hollow body is a full-body bracing technique that helps to create a rigid body posture. The high level of total body tension it creates allows you to better control your movement through space. This technique is especially important during the pull-up, where you will be freely moving without any anchor points aside from your grip.

In order to successfully perform a pull-up, establishing a strong hollow body technique is essential to maintain stability. The lat pulldown, on the other hand, provides this stability on your behalf by offering leg pads to hold you in place.

Torso Angle

Your torso angle during each repetition is a major difference between the pull-up and lat pulldown. Because your lower body is secured under the knee pads, the lat pulldown allows you to manipulate your torso angle to target subtly different muscles. A greater degree of backward lean could emphasize more of your upper back, whereas a more vertical torso angle puts your upper back into a less advantageous position and emphasizes lat activation.

On the other hand, fairly consistent technique and upper body position is required for a proper pull-up. From a dead-hang position (gripping the bar with your arms fully straightened), you must set your shoulder blades by first “shrugging” yourself up. In doing so, you will be able to better leverage your latissimus dorsi to complete the rep and actually pull you up.

When you get this technical cue right, you will have a slightly backward-leaning torso angle while performing each repetition, but nowhere near the freedom of motion provided by the lat pulldown machine.

Lower Body Position

Your lower body positioning will certainly be a notable difference in each exercise. Similar to the stability requirements during the hollow body technique in the pull-up, your leg position will be affected by the need to stay rigid. Fully lock your legs out, leaving them either hanging straight down or angled slightly ahead of your body. You cannot achieve a strong, stable hollow body position with bent legs.

With a lat pulldown, you will be in a completely seated position with your feet flat on the ground driving your knees up against the pad. While some lifters disregard the knee pad and let their heels leave the ground during pulldowns, this poor form doesn’t add any benefit and only reduces your stability and upper body pulling power.

How to Do the Lat Pulldown

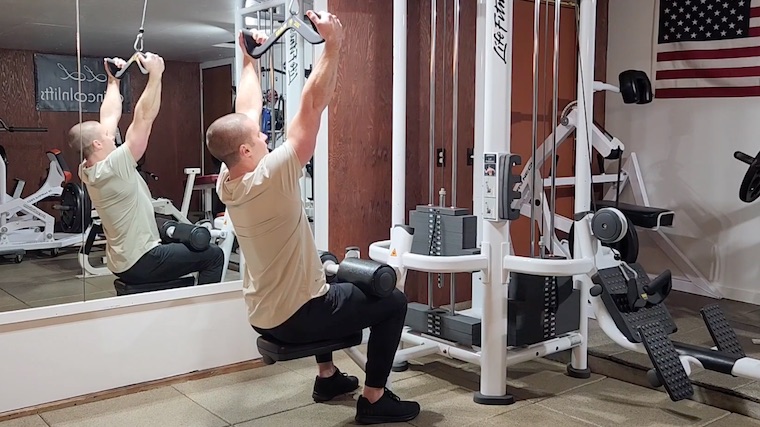
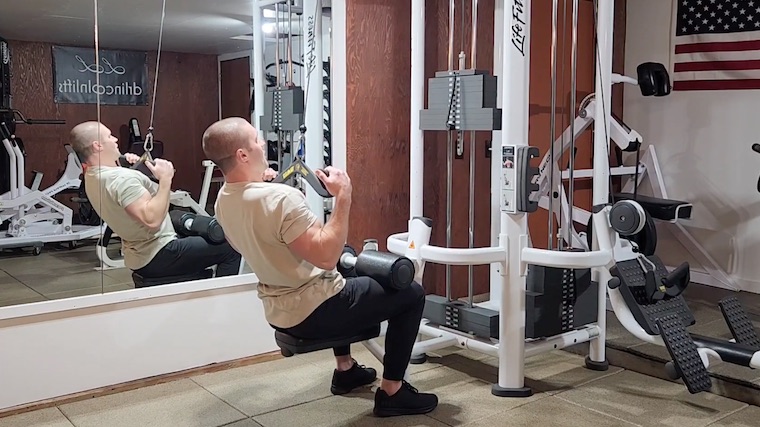
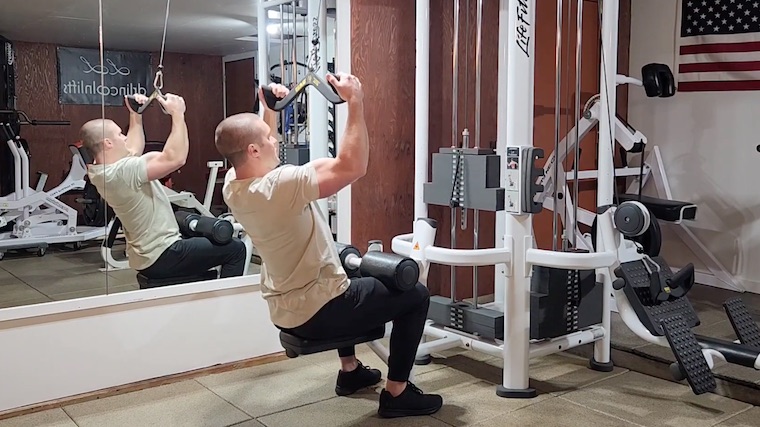
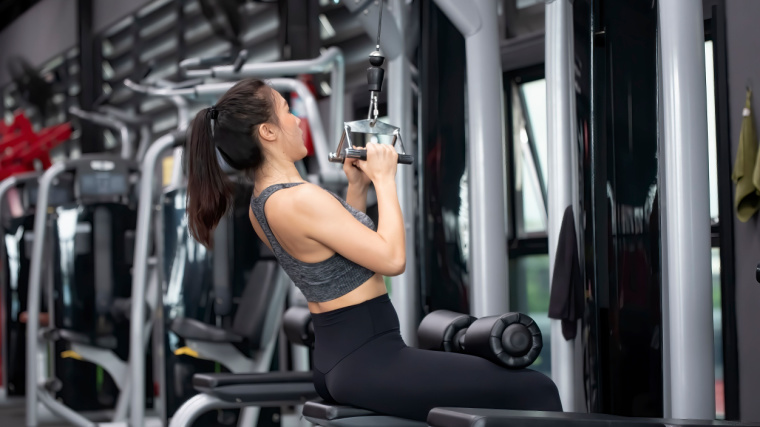
Sit on the lat pulldown machine and adjust the knee pads to snuggly anchor your legs in place with your feet flat on the ground. Stand back up and grab the lat pulldown bar evenly, about shoulder-width apart, with an overhand grip.

Brace your full body and sit down, securing your legs under the knee pads. Squeeze the bar tight, brace your core, drive your legs into the knee pads by performing a static calf raise.

Lean back slightly and pull the bar toward your chest. Focus on feeling your back squeeze in the bottom position before straightening your arms to return to the starting position.

Form Tip: Be diligent to avoid momentum. Secure your body in the machine and brace hard – only move the bar by squeezing your back and pulling with your arms. Do not excessively sway your torso backwards. 

Benefits of the Lat Pulldown

  • The lat pulldown has a high degree of stability, making it a more effective way to focus on the back muscles.
  • The pulldown machine offers highly scalable loading, making it easy to perform for lifters of all experience levels.
  • Multiple handle attachments allow many variations for different benefits.
  • It’s relatively safe to take this exercise close to muscle failure.

Lat Pulldown Variations

The majority of effective lat pulldown variations will capitalize on different handle attachments to slightly change your technique and alter muscle recruitment.

Close-Grip Pulldown

Close-grip pulldowns draw your hands slightly closer together than the standard, shoulder-width grip. This increases the amount of leverage your lats have and slightly increases the range of motion — both of which can lead to a stronger training stimulus.

The close-grip pulldown can make the exercise more effective when you’re just learning general technique by delivering a strong training stimulus without needing heavy weight.

Wide-Grip Pulldown

Wide-grip lat pulldowns place your hands slightly farther apart than the standard issue grip placement. This will put your lats at a greater disadvantage, making some of the supporting musculature in your upper back, shoulders, and arms contribute more. This will also reduce the load you’ll be able to lift.

This is a great exercise to fill gaps in your physique or in your strength development. By strengthening relatively weaker links, wide-grip pulldowns can also prolong the amount of time you can make progress before adding weight.

Dead-Hang Pulldown

The dead-hang style of lat pulldown will have you fully “relax” your shoulder blades and assume a completely upright torso between each repetition. Your teres minor (a small shoulder muscle) will get some added work helping to stabilize your shoulder for each repetition.

This is a great way to gain, and maintain, shoulder stability. The increased muscle recruitment will also help upper back development.

Single-Arm Pulldown

The single-arm lat pulldown turn the exercise into a unilateral (single-sided) version. This forces each side of your body to work independently of the other, which will greatly help to accommodate any body size or shape while addressing any natural asymmetries.

The single-arm pulldown is also a tremendously effective way to add more progression time to your lat pulldown exercise by essentially doubling the amount of load each side will have access to.

How To Do The Pull-Up

Perform the pull-up by grabbing a straight bar that is high enough for your legs to dangle freely without touching the ground. Use a small box or (safely) jump to grab the bar with an overhand grip approximately shoulder-width apart.

Perform a hollow body technique by flexing your core, depressing your shoulder blades, engaging your glutes, and locking your quads.

Engage your lats and flex your arms to pull your chest toward the bar. Once you have reached the highest point that you can pull yourself to, slowly lower back to the starting position using control. Maintain your brace and perform for your target repetitions.

Form Tip: Be diligent about maintaining hollow body tension and eliminating any lower body sway. Performing a pull-up gets exponentially more difficult when you have to counter any unneeded movement. Stay braced and aim to start each repetition from a motionless position. Swinging your hips and legs may help you perform more reps, but it reduces muscular stress on your back.

Benefits of the Pull-Up

  • The pull-up requires little-to-no equipment.
  • Bodyweight exercises can improve coordination and proprioception (body awareness) which can carryover to general athleticism.
  • Scalable to suit either strength or hypertrophy goals when appropriate programming and loading is used.

Pull-Up Variations

Pull-ups can be modified to attack a few different goals. Similar to pull-ups, changing your grip position can deliver some unique benefits.

Wide-Grip Pull-up

Wide-grip pull-ups place your upper back (teres minor) on blast. A wider grip will make it harder on your lats, but also put a bigger emphasis on your ability to maintain the right shoulder positioning for each repetition.

When you’re looking to train nearly your entire upper body, while also seriously roasting your shoulder stability, use the wide-grip pull-up.

Neutral-Grip Pull-up

On the opposite side of things, a neutral-grip pull-up places you in a much more inherently stable position. The relatively closer grip and neutral (palms facing in) hand placement will make it easier to harness your back muscles to pull you up, but also take some of the shoulder stability challenge away.

When you’re looking to go for moderate or higher reps, or build a foundation of strength and muscle, neutral-grip pull-ups are a great option.

Towel Pull-up

Towel pull-ups are a huge boost to your grip strength. This low-tech modification, draping a simple (but sturdy) towel over a bar, will seriously challenge your ability to simply hang on.

If you’re in the market for a stronger grip and bigger arms — and if you can already perform more than a handful of pull-ups — challenge yourself with towel pull-ups.

When to Program the Best Pulling Movement for Your Goal

There are several instances where either the lat pulldown or pull-up might be the better option. Your specific goals and training experience are unique factors to consider.

Beginner

When you’re a beginner, you’ll be looking to build a base of muscle and strength before eventually launching into a more structured and challenging program. With that in mind, you may struggle with pull-ups because they can be very unforgiving.

While there are ways to make pull-ups more accessible for beginner lifters, such as using resistance bands for assistance, oftentimes a pull-up is a bit of a tall order. Instead, spending some time building a super-strong lat pulldown can be a relatively lower barrier to entry. Once you’ve accomplished this, either option is freely available and effective.

Muscle Gain

Both the lat pulldown and pull-up can be very effective muscle-building tools, but there are some subtle differences that likely edge the lat pulldown ahead. The lat pulldown is a more stable training tool. This means that there will be less “moving parts” in your way while you chase highly stimulating sets that accumulate volume needed to build your back. (3)

The lat pulldown also allows for a slow, controlled, and incremental increase in loading which once again provides a boost to long-term muscle growth. The pull-up is great in its own right, but it’s hard to beat the lat pulldown for pure muscle gain.

Strength Gain

Gaining strength can be accomplished with both the lat pulldown and pull-up. However, the lat pulldown can more easily be loaded and trained for strength-focused results. With that in mind, it’s going to offer you more lat-specific strength.

On the other hand, the pull-up, as a bodyweight exercise, is more of a full-body exercise. In this instance, the pull-up will help build greater full-body strength. If you want better overall strength potential, emphasizing the pull-up will likely be the better option.

Limited Equipment

When you don’t have access to a gym, the choice is a simpler one. The lat pulldown literally requires a machine, which likely is only accessible through a commercial or home gym equivalent.

While a pull-up bar may seem mandatory for doing pull-ups, it is not actually required. A pull-up can, technically, be performed anywhere you have access to a strong, stable anchor point to safely grab. The pull-up wins when you have limited equipment. 

Advanced Athlete

If you’re an advanced athlete in nearly any sport, it’s a toss up. Once you’ve developed a strong base of muscle, strength, and coordination, both the pull-up and lat pulldown can be tailored to your needs.

Both can be loaded and progressed, both have unique variations to prolong your progress, and both are relatively easy to master after a short amount of focused time. Depending on your goals or needs, either the pull-up or lat pulldown (or even both) can be effectively programmed for athletic goals.

Prioritize Your Pulls

The lat pulldown and pull-up are both iconic staples of weight training. The exercises have unique benefits, times of superiority, and some clear drawbacks. Depending on your training age, goals, and available equipment, one option may jump out as the obvious choice. Review the information and make the best decision for your goals. Prioritize your pulls for some big gains and, one day, both classic movements may find their way into your program.

References

  1. Andersen, V., Fimland, M. S., Wiik, E., Skoglund, A., & Saeterbakken, A. H. (2014). Effects of grip width on muscle strength and activation in the lat pull-down. Journal of strength and conditioning research, 28(4), 1135–1142. https://doi.org/10.1097/JSC.0000000000000232
  2. Signorile, J. F., Zink, A. J., & Szwed, S. P. (2002). A comparative electromyographical investigation of muscle utilization patterns using various hand positions during the lat pull-down. Journal of strength and conditioning research, 16(4), 539–546.
  3. Schoenfeld, B. J., Contreras, B., Krieger, J., Grgic, J., Delcastillo, K., Belliard, R., & Alto, A. (2019). Resistance Training Volume Enhances Muscle Hypertrophy but Not Strength in Trained Men. Medicine and science in sports and exercise51(1), 94–103. https://doi.org/10.1249/MSS.0000000000001764

Featured Image: Tom Wang / Shutterstock

Source

May 9, 2023

How to Do the Reverse-Grip Bent-Over Row to Build a Strong, Muscular Back

Filed under: Fitness,Training — Tags: , , , , , — admin @ 10:15 pm

How do you develop killer lats? First, you need to do lat pulldowns. Then you need to do pull-ups. After you’re done with that, try some rows, and then finish off with some pullovers. Or… you could just perform the reverse-grip bent-over row and get nearly the same results as combining a series of back-focused exercises.

long-haired person in gym doing barbell row

Credit: lunamarina / Shutterstock

Efficient programming and exercise choice can drastically improve the quality of your back workouts. Follow these steps to learn how to perform the reverse-grip bent-over row, and how you should incorporate it into your routine to make the most out of your back day.

How to Do the Reverse-Grip Bent-Over Row Step By Step

Approaching the reverse-grip bent-over row for the first time doesn’t need to be an intimidating experience. Follow these steps for a picture-perfect lift. 

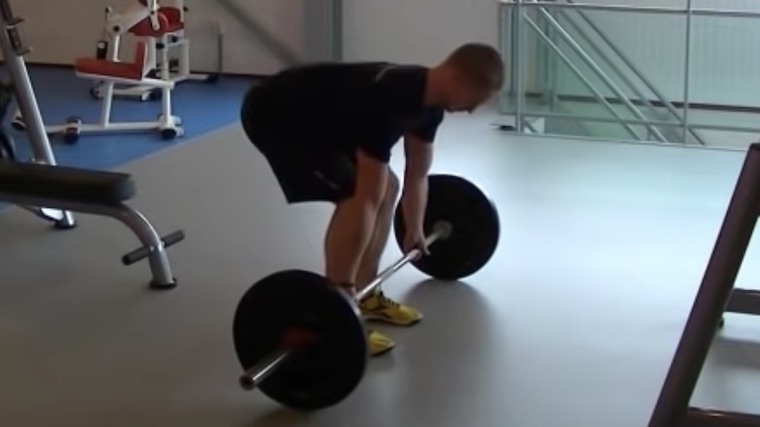
Step 1 — Setting Up

person in gym doing barbell row

Credit: Rocher Möllenkamp / YouTube

When you initially approach the bar, setting up for the reverse-grip bent-over row feels a bit like setting up for a deadlift. With the barbell over your midfoot, grab the bar slightly outside shoulder-width, using a double-underhand (supinated) grip — this is the “reverse grip” compared to the double-overhand (pronated) grip of the standard barbell row.

Brace your core, keep your spine neutral (not rounded or excessively arched), and drive through your feet to lift the weight off the floor. 

Form Tip: Experiment with your grip width to see what results in feeling the highest degree of lat (back) activation. Most likely, setting up with your grip just past shoulder width apart will yield the best results. But depending on your limb and torso length, you may feel more comfortable slightly closer or wider.

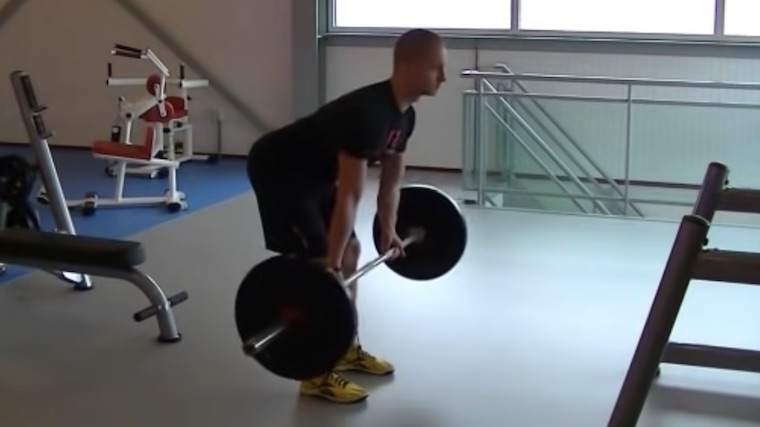
Step 2 — Find Your Trunk Angle and Brace Your Core

person in gym doing barbell row

Credit: Rocher Möllenkamp / YouTube

Hinge forward at your hips and stop when your trunk is pitched at roughly a 45-degree angle. Bend your knees slightly and maintain that angle throughout the movement. Keep your arms straight and allow the barbell to shift slightly forward. Take a deep breath and brace your core as you prepare to perform the row.

Form Tip: Consistency is key. Keep your arms at a dead-hang while you set up. This will reinforce the position you want to hold at the beginning and end of each rep.

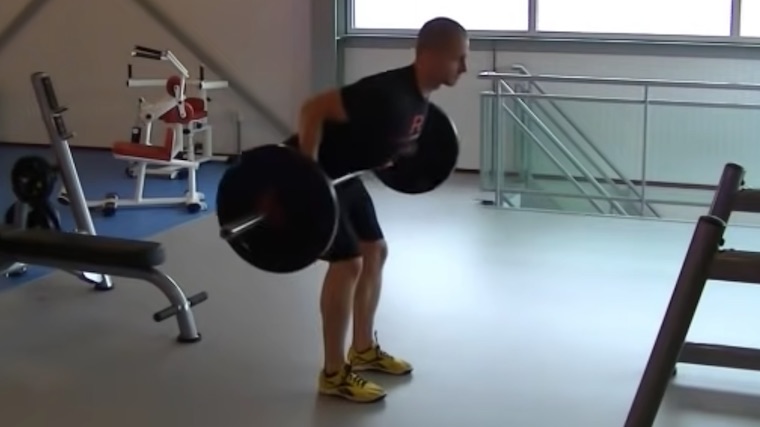
Step 3 — Pull From Your Elbows

person in gym doing barbell row

Credit: Rocher Möllenkamp / YouTube

Squeeze and depress your scapula (pull your shoulder blades together and “down” toward your tailbone), then pull your elbows back. As you lift the weight, consciously engage your back muscles before you contract your biceps.

Continue pulling the weight toward your trunk until the barbell makes contact with your torso. To specifically target your lats rather than your upper back muscles, make the bar contact closer to your belly button than your sternum.

Form Tip: Don’t be concerned if your bar path isn’t a perfectly straight line. Pulling towards your belly button may feel awkward at first, but you should quickly notice increased lat activation when lifting this way.

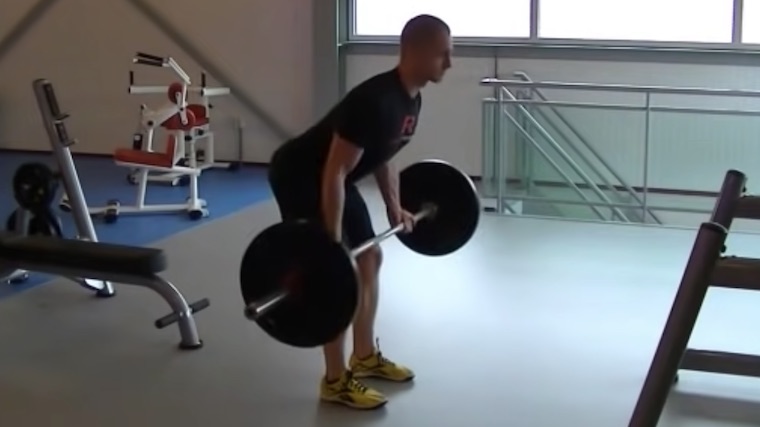
Step 4 — Lower the Weight

person in gym doing barbell row

Credit: Rocher Möllenkamp / YouTube

Squeeze your back muscles at the top of the lift and consider holding the weight there for a moment. Keeping your back flat and your core tight, lower the weight back to the stretched position until your arms are fully extended.

Maintain the forward hinge position throughout the entire set. To perform the next repetition, pull the barbell toward your belly button again.

Form Tip: Keep the movement relatively slow and controlled. This helps to avoid using momentum from one repetition to another to lift the weight.

Reverse-Grip Bent-Over Row Mistakes to Avoid

If you have a passing familiarity with the traditional bent-over row, or hinge movements as a whole, you could probably jump right into using the reverse-grip bent-over row to build your back and biceps without thinking too hard about form. Nevertheless, slipshod technique could mean you’re leaving gains on the table, or even putting yourself at an increased risk of injury.

Setting Up With a High Torso Angle

Either tight hips and hamstrings, a weak core, or a combination of the two could make it difficult for you to hold your trunk at a 45-degree angle across an entire set of rows. As a result, you could end up performing more of an upright row than you intend.

muscular person in gym rowing barbell

Credit: SOK Studio / Shutterstock

Setting up with a higher torso angle can result in increased muscular activation in your trapezius and your rhomboids, which means less isolation for your lats

Avoid it: When you setup to perform the row, be sure to hinge forward and shoot your hips back to create a strong pulling position. Add hinge movements like the deadlift, Romanian deadlift, and the good morning into your training plan to develop greater levels of strength, balance, and mobility. This will help you build the strength needed to maintain the angle in your torso for your entire set. 

Lower Back Rounding

For your spinal health and your longevity in the gym, for goodness sake, keep a flat back whenever you perform hinge movements like the row. While lower back rounding may be the result of a lack of mobility, you could also experience this just by going too heavy.

reverse-grip row back posture

Credit: Gabriel Sey / YouTube

Avoid it: If you find your lower back rounding while you perform the reverse-grip bent-over row, set your ego aside. Either practice hinge movements until you’re capable of maintaining an isometric hinge or reduce the weights significantly and start over.

Engaging Your Biceps First

Since your biceps are a wrist supinator — responsible for turning your hand into a palm-up position — they engage the moment you “reverse” your grip on a bent-over row. In addition to being a secondary mover to perform the exercise, they also stabilize your elbow.

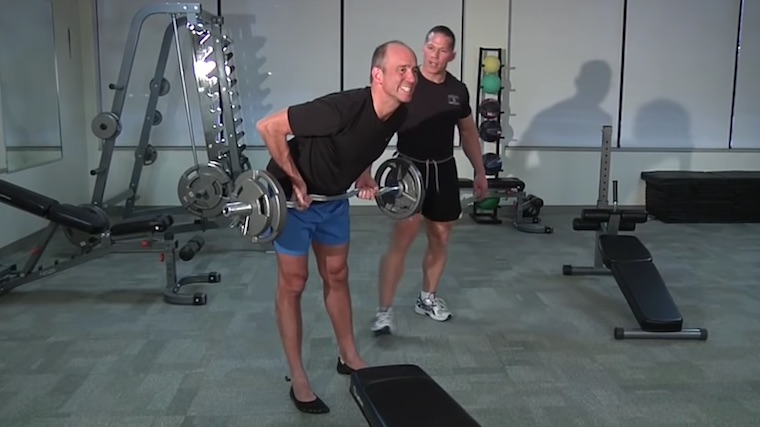
person in gym doing barbell row with personal trainer

Credit: MercolaPeakFitness / YouTube

But your biceps should not be the primary mover in the reverse-grip bent-over row. That job falls to your lats, and trying to use your biceps to lift heavy loads meant for your lats might not end well for the much smaller biceps muscle.

Avoid it: Consciously think about pulling your shoulders back to engage your back muscles before pulling with your elbows. Don’t try to curl the bar to move the weight.

Utilizing Momentum From Rep to Rep

If you fail to maintain a consistent angle in your torso across each repetition, you might be generating momentum with your hips that decreases the load on your lats and biceps. This can be a sign of going too heavy, but you might also be doing this for ego lifting or simply because you’re not paying attention.

Muscular person in gym doing barbell row

Credit: Maui Athletics / YouTube

Avoid it: If the weight is too heavy for you to keep under control, lower it. Otherwise, consider focusing on the eccentric (lowering) portion of the lift to guarantee you keep the weight moving in a slow and controlled fashion to prevent momentum from building.

How to Progress the Reverse-Grip Bent-Over Row

If you have trouble performing the reverse-grip bent-over row right off the bat, here’s how you can approach it as a beginner and how to increase the difficulty as you continue to get stronger and progress in the gym.

Yates Row

The Yates row is the cousin of the reverse-grip bent-over row, the difference between the two being the angle of your torso. While you perform a reverse-grip bent-over row with your torso at roughly a 45-degree angle, the Yates row is performed from a more upright position.

The resulting lift targets your rhomboids and your traps in addition to your lats and biceps. It may not be as good of a lat builder, but it makes up for it by hitting your entire back. What was a “mistake” for the reverse-grip row can be used deliberately for a strategic purpose.

As you develop strength performing the Yates Row, you can slowly transition towards the reverse-grip bent-over row by experimenting with your torso angle. Sinking deeper into the hinge position will let you feel your lats working harder as you get closer to the 45-degree angle. 

Add Isometric Holds or Timed Eccentrics

At a certain point, implementing basic linear progression — adding more repetitions or more weight — stops being as useful for lifts like the reverse-grip bent-over row. Rather than continuously increasing the load on the bar, which can eventually create a higher risk than reward and may decrease stress on the target muscle, you can add isometric holds or timed eccentrics.

With isometrics, squeeze your back and shoulders at the top of each repetition for one, two, or even three seconds while the bar is in contact with your abdomen. For timed eccentrics, focus on making the negative (lowering) phase of each rep take two, three, or four full seconds. This can help to maximize your gains and develop your mind-muscle connection. 

Reverse-Grip Pendlay Row

If you’re looking to add an extra level of difficulty, swap out the reverse-grip bent-over row for a reverse-grip pendlay row. Since each rep starts and finishes on the ground, there’s no way for you to build momentum from rep to rep, which makes it a great lift to isolate your muscles and focus on pure pulling strength.

The reverse-grip pendlay row requires more hamstring flexibility than the reverse-grip bent-over row, because you’re in a steep forward-leaning position. However, it’s relatively easier on your core and lower back since you don’t have to hold an isometric hinge for the duration of your set.

Benefits of the Reverse-Grip Bent-Over Row

When you step into the gym, you come face-to-face with a wide range of tools and movements that you can use to sculpt your biceps and your lats. Here are some of the unique benefits of the reverse-grip bent-over row that make it worth adding to your routine.

Increased Lat Activation

Switching from a pronated grip to a supinated grip puts your arms and shoulders into a different position and changes the pulling angle, which is why it’s easier to draw the weight closer to your belly button than your sternum. This results in increased lat activation when compared to the traditional bent-over row.

Additionally, your rhomboids and traps play much less of a role in the reverse-grip bent-over row than they do when you perform the lift with an overhand grip. 

Improved Balance and Core Strength

Holding an isometric hinge isn’t easy. Your core muscles work overtime to maintain a consistent angle under heavy loads. Simultaneously, your hamstrings stay active and engaged at a lengthened position, which can help build strength in your posterior chain while also improving your overall mobility. 

Unparalleled Rowing Strength

The reverse-grip bent-over row cuts down on a number of variables and limiting factors posed by many other row variations. Generally speaking, you can lift heavier loads with a barbell than you can with a dumbbell.

Flipping your grip from overhand to underhand means your grip strength won’t hold you back as you increase loads over time because your wrists and forearms are in a stronger position. Finally, range of motion tends to be more efficient than with a traditional bent-over row, since you have improved leverage when tracking the bar closer to your center of gravity.

When you put all these factors together, what you get is a lift that lets you lift heavy weights with your lats, without so many of the variables that get in the way when performing other types of rows.

Muscles Worked by the Reverse-Grip Bent-Over Row

As a compound exercise, the reverse-grip bent-over row targets muscles across numerous joints. Here’s a list of the largest muscle groups worked by the lift. 

Latissimus Dorsi

With some back exercises, you feel “your back” working. That’s not the case with the reverse-grip bent-over row. When performed correctly, you should be able to feel and, later specifically target, your lats in particular.

Your lats are the biggest muscle group in your upper body — running along each side of the back half of your torso. Your lats are also the primary muscle group working in the reverse-grip bent-over row. A rock-solid pair of lats make your upper body and shoulders appear broader and your waist look more narrow in comparison, which makes them an important part of developing an aesthetic physique.

Biceps

As secondary movers — muscles which assist the primary target muscles during a given exercise — your biceps and your brachialis muscles play two separate roles during the reverse-grip bent-over row. Since your biceps are a wrist supinator, they get direct stimulation to maintain the palm-up position during the lift. More importantly, they’re responsible for stabilizing your elbow during flexion to support the joint as the muscle contracts. 

Abdominals

With a barbell held out in front of you and your torso held in an isometric hinge, your abs provide the strength and stability necessary to keep you from buckling over while performing the reverse-grip bent-over row. Especially as you get to heavier loads, you’ll find that your core plays a crucial role — keeping your torso held at the desired angle and stabilizing your spine to prevent rounding.

Hamstrings

As with any hinge movement, the reverse-grip bent-over row provides stimulus to your hamstrings. By developing strength in the fully lengthened (stretched) position, the exercise promotes muscular balance and flexibility in your hamstrings.

How to Program the Reverse-Grip Bent-Over Row

Building an effective training routine can be challenging. When you’re in the gym, you want to make the most of your time and energy to maximize your gains. If you’re not sure how to incorporate the reverse-grip bent-over row into your workout plan, here are a few options that you might consider. 

As an Accessory for the Deadlift

For powerlifters, who specialize in performing the squat, bench press, and deadlift, finding efficient compound (multi-joint) exercises that complement your primary lifts can be a bit of a chore or simply confusing. The reverse-grip bent-over row builds strong lats while performing an isometric hinge, which can improve both strength and mobility across your posterior chain.

Following the deadlift, consider incorporating three to five sets of six reps, using a weight that lets you keep your torso angle solid across the length of the set.

As a Main Movement For Bodybuilders

In the interest of both exercise economy, and the hormonal response that compound movements provide, many bodybuilders prefer to start their workouts with heavy compound exercises before they get to their isolation movements. (1)(2) When you’re carving a statue from stone, use the dynamite before you get started with the hammer and chisel. 

If your training split has a back and biceps day, the reverse-grip bent-over row lets you isolate your lats and warm-up your biceps, while also stimulating a hormonal response which may support muscle growth. Early in your workout, hit at least three sets of eight, focusing on the eccentric portion of the lift to maximize your hypertrophy gains. (3)

As a High Volume Accessory Lift

If you spend a significant amount of time in a squat rack or on a weight platform, adding the reverse-grip bent-over row as an accessory after the classic bent-over row can be as much about convenience as anything else. All you have to do is flip your wrists around and you have a lift that lets you engage and isolate your lats while also dialing in your rowing technique after the related muscles are thoroughly warmed up and pre-trained.

If you want to implement the reverse-grip bent-over row as a high volume accessory movement, consider performing three sets of 15 following other row variations. 

Reverse-Grip Bent-Over Row Variations

Maybe you don’t have access to a barbell. Maybe you’re dealing with nagging shoulder or back pain. Maybe you just want to mix things up. Regardless of your reasons, here are a few different lifts that let you target your back like the reverse-grip bent-over row.

Seal Row

As with all chest-supported rows, the seal row provides unique stimulus by preventing you from developing momentum or engaging your hips. Unlike other chest-supported rows, you perform the seal row by lying face down on a flat bench.

The resulting lift can target your lats and your rhomboids without having to concern yourself with keeping a flat back. The full bench support also removes strain from the lower back and makes it virtually impossible to move the weight using momentum.

Single-Arm Dumbbell Row

Single-arm dumbbell rows are a relatively easy-to-learn introductory lift that keeps paying dividends as you grow in the gym. To get started, just kneel on a bench and row.

The single-arm row provides some advantages over barbell rows. Kneeling on a bench limits the amount of stress on your spine. Since the lift is performed one side at a time, you can isolate your lats and correct any muscular imbalances that may develop if you tend to exclusively use barbell row variations.

Inverted Row

Advanced pull-ups aren’t the only way to utilize your body weight for back-building. Inverted rows can be performed in a number of different ways — whether that be with suspension straps, on a Smith machine, a barbell set in a power rack, or any other stable surface that lets you get under it, and keeping your body in a straight line, pulling upwards.

To modulate the level of difficulty, simply increase or decrease the angle of your body relative to the floor. Either elevate your feet (for increased difficulty) or create a steep angle with an elevated upper body (to decrease the challenge).

FAQs

Should I perform the reverse-grip bent-over row instead of the bent-over row?

If you’re specifically interested in targeting your lats, the reverse-grip bent-over row would be a good addition to your routine. It isn’t necessarily a replacement for the bent-over row which, in addition to targeting your lats, also hits your rhomboids and helps develop grip strength.

Why am I feeling my biceps more than my back while performing the reverse-grip bent-over row?

If you feel your biceps more than your back during the reverse-grip bent-over row, you’re probably leading with your arms. Think about squeezing your back and shoulder muscles before pulling with your elbows.

What should I do if my mobility keeps me from performing the reverse-grip bent-over row?

No lift is strictly necessary to get a good workout, but improving your mobility can be a crucial part of joint health and longevity in the gym. Consider incorporating movements that both strengthen your posterior chain and improve your mobility into your routine. Some examples of these include Romanian deadlifts and good mornings.

References

Vingren JL, Kraemer WJ, Ratamess NA, Anderson JM, Volek JS, Maresh CM. Testosterone physiology in resistance exercise and training: the up-stream regulatory elements. Sports Med. 2010 Dec 1;40(12):1037-53. doi: 10.2165/11536910-000000000-00000. PMID: 21058750.

Shaner AA, Vingren JL, Hatfield DL, Budnar RG Jr, Duplanty AA, Hill DW. The acute hormonal response to free weight and machine weight resistance exercise. J Strength Cond Res. 2014 Apr;28(4):1032-40. doi: 10.1519/JSC.0000000000000317. PMID: 24276305.

Hody S, Croisier JL, Bury T, Rogister B, Leprince P. Eccentric Muscle Contractions: Risks and Benefits. Front Physiol. 2019 May 3;10:536. doi: 10.3389/fphys.2019.00536. PMID: 31130877; PMCID: PMC6510035.

Featured Image: mountaira / Shutterstock

Source

March 15, 2023

How to Do the Neutral-Grip Lat Pulldown for a Bigger Back

Filed under: Fitness,Training — Tags: , , , , , , — admin @ 7:02 pm

Due to their prominence, well-developed back muscles have been described as wings. Want wing-like back muscles? On the short list of things that allegedly “give you wings” are energy drinks, good deeds, and upper body vertical pulling.

After consuming energy drinks throughout my younger years, I can dispatch the first claim. Alertness and insomnia? Yes. Back muscles? No. As for good deeds, this is a fitness article so it shall be kept secular. That leaves vertical pulling — pull-ups and pulldowns.

Person in gym doing close-grip pulldown on cable machine.

Credit: lunamarina / Shutterstock

Although pull-ups can be modified for nearly everyone, nothing beats the adjustability and convenience of cable-stack pulldowns. But the traditional overhand grip isn’t for everyone, especially those with shoulder issues. (1)(2)(3)

The neutral-grip lat pulldown is a shoulder- and elbow-friendly alternative to standard lat pulldowns. Find out how to perform, program, and modify this big back builder.

Neutral-Grip Lat Pulldown

Neutral-Grip Lat Pulldown Technique Breakdown

Dr. Merrick Lincoln demonstrates how to do a neutral-grip pulldown and talks you through a complete repetition. Check to see what form looks like before reading on for the details.

How to Do the Neutral-Grip Lat Pulldown Step By Step

As opposed to using a straight or cambered “lat bar,” the neutral-grip pulldown requires use of a bar with grips running perpendicular to the length of the bar. This allows you to keep your forearms in a “neutral” rotation, with your palms facing each other, halfway between full supination (palms facing toward you) and full pronation (palms facing away from you).

Step 1 — Establish Points of Contact

Dr. Merrick Lincoln preparing to do lat pulldown

Credit: Merrick Lincoln, DPT, CSCS / YouTube

Face a cable machine with your glutes on the seat, both feet flat on the floor, and your upper legs under the thigh pad. If necessary, adjust the height of the thigh pad or seat for secure fit.  

Form Tip: When setting the height of the thigh pad or seat, ensure your feet are flat on the floor with your heels slightly behind your knees. This enables you to easily slide your feet back to stand when it’s time to retrieve or return the pulldown bar.

Step 2 — Grab the Bar and Set Your Trunk Angle

Dr. Merrick Lincoln doing lat pulldown

Credit: Merrick Lincoln, DPT, CSCS / YouTube

Grab the handles with a shoulder-width, or slightly narrower, position. If the bar has traditional cylinder-shaped grips, use a fully closed grip with your fingers and thumb wrapped around the bar. If the bar has more modern paddle-style or angled grips, ensure the palms of your hands make maximum contact with the paddles. With this handle, the knuckles of your fingers should be flexed over the top of the handle. 

Once your grip is secure, lift your chest, lean back slightly (e.g. 10 to 30-degrees from vertical), and brace your core. Maintain this trunk position throughout the exercise. In the stretched position, your elbows should be locked completely straight.

Form Tip: If you have range of motion limitations in the overhead position, you may benefit from leaning back slightly further (e.g. approximately 30-degrees from vertical). This changes the pulling angle and reduces stress on your shoulder joints.

Step 3 — Pull Down to Peak Contraction

Dr. Merrick Lincoln doing lat pulldown

Credit: Merrick Lincoln, DPT, CSCS / YouTube

Initiate the movement by drawing your shoulder blades together and down, and “pull your shoulder blades into your back pockets.”

Immediately after beginning to move your shoulder blades, begin pulling your elbows toward the sides of your ribcage. Peak contraction is achieved when your shoulder blades are squeezed together and down, and your upper arms are pinned to your sides. 

Form Tip: Don’t worry about getting the bar to your chest, below your chin, or to some other arbitrary position. Focus on achieving a strong contraction in your back muscles when you reach the bottom position. 

Step 4 — Return and Seek Stretch

Dr. Merrick Lincoln doing lat pulldown

Credit: Merrick Lincoln, DPT, CSCS / YouTube

Lower the weight and allow your arms to be drawn upward, slowly letting your elbows extend. At the same time, allow your shoulder blades to be elevated. The upward movement phase ends when elbows are completely straight and a strong sensation of stretch is felt across the outside of your armpits — that feeling is your lat muscles being properly stretched.

Form Tip: As your arms are drawn overhead and your latissimus dorsi are stretched, your low back might tend to arch. Avoid this by keeping your abdominal muscles engaged to maintain a neutral torso.

Neutral-Grip Lat Pulldown Mistakes to Avoid

Common errors in the neutral-grip pulldown occur when range of motion goes unchecked, when compensations are permitted, and when your arms “out-muscle” your back. 

Excessive Range of Motion

The uninitiated often assume the pulldown is not complete until the bar touches their chest. This is erroneous. Hyperextension of your shoulder places additional stress on the front of the shoulder. (4)(5) This is not typically good for folks with anterior shoulder instability, a prevalent issue among lifters. (4) Also, consider the physics of hyperextending the shoulders at the bottom of the pulldown — Demand on the shoulder muscles actually decreases due to a shortened resistance lever.

Long-haired person in gym grimacing while doing pulldown exercise.

Credit: Kitreel / Shutterstock

Still convinced touching the bar to your chest is “necessary?” Watch a handful of folks with barndoor backs perform neutral-grip pulldowns. They don’t touch the bar to their chest — Albeit, they likely couldn’t if they wanted to due to the size of their latissimus dorsi and teres major muscles. 

Avoid it: A good rule of thumb for pulldown range of motion is to pull down and back until your triceps squeeze against your lats. Achieve a strong contraction, then begin the upward movement. 

Slouching Into the Repetition

The sticking point, or most challenging part of the repetition, occurs near the bottom of the downward pulling phase. Novice lifters often work through this portion of the lift by rounding their shoulders forward and flexing their mid-back. This gives the appearance of “crunching” or slouching at the bottom of the repetition.

Long-haired person in gym doing close-grip pulldown

Credit: pnarongkul / Shutterstock

Avoid it: As you pull, keep focus on your back muscles by reminding yourself to create space between the front of your shoulder and the cable pulley.

“Curling” the Weight Down

While it’s true the neutral-grip pulldown can be a great biceps-builder, it is not intended to be an arms-focused exercise. Lifters who initiate the pulldown with elbow flexion and “muscle” the bar down with their elbow flexors are missing out on back gains.

Long-haired person in gym doing lat pulldown

Credit: Vladimir Sukhachev / Shutterstock

Avoid it: Performed properly, upper body vertical pulling exercises (i.e. pull-ups and pulldowns) are initiated by back muscles, specifically your lower trapezius and latissimus dorsi. (8) These muscles should activate a split-second before your biceps. Ensure this sequence by downwardly rotating and depressing your shoulder blades to begin each rep or “pull your shoulder blades into your back pockets.”

How to Progress the Neutral-Grip Lat Pulldown

To learn the neutral-grip pulldown, start with light weight. Over time, progress the exercise by adding weight and/or repetitions. Incorporating strategic pauses may also be useful for dialing-in proper form and building strength

Start Light, Add Weight and Reps

Once proper form is dialed in, progress the pulldown by adding weight. The amount of weight you add should be related to your primary training goal. A weight that allows four to six good repetitions is an effective target when you’re prioritizing strength. A wide range of weights can be effective for hypertrophy, so pick a weight that allows a repetition target you prefer (e.g. eight to 12 repetitions, 12 to 16 repetitions, or 16 to 20 repetitions). 

Once you’ve established your working weight, you will need to add weight or repetitions over time to ensure you are progressively overloading your muscles. A simple strategy is to add repetitions, then add weight once you’ve exceeded the top end of your target repetition range. For example, if you/re aiming for eight to 12 repetitions per set, start by identifying a weight that allows you to perform approximately eight repetitions.

In a week or two, you’ll likely be hitting nine or 10 repetitions with the same weight. Eventually, you’ll reach 13 repetitions, which is the signal to add weight. Note: If you have a bit more training experience, gains sometimes come more slowly and you might consider the occasional deload to ensure ongoing progress. 

Add “Iso-Holds”

Near the bottom position of a pulldown, when your elbows are bent and just in front of your chest, the resistance at the shoulder is amplified by the length of the humerus (upper arm bone). This is the sticking point, or portion of the exercise where muscular failure or form breakdown is most likely to occur. It’s also the perfect position for adding an isometric hold or “iso-holds.” This is an intensification technique used to prolong time under tension and improve strength at targeted positions.

Muscular person in gym doing lat pulldown exercise

Credit: Vladimir Sukhachev / Shutterstock

To add an iso-hold, simply stop at the most challenging portion of the pulldown. Hold for four to six seconds, and then complete the repetition. Iso-holds can be performed on the final repetition to maximize set performance or incorporated on every repetition. Keep in mind, you will likely need to lower the weight or repetition target if you intend to use iso-holds on every rep. 

Benefits of the Neutral-Grip Lat Pulldown

Sure, there are a lot of back exercises you could do at the gym, so why focus on this pulldown variations? With good effort and decent programming, lifters can build respectable size and strength with the neutral-grip pulldown due to the setup, range of motion, and user-friendliness.

Works Back Muscles Through a Full Range of Motion

During pulldowns, shoulders reach the overhead position at the top of every repetition. This exposes the target muscles to substantial stretch and load. This mechanical tension is a key driver of muscle growth. (6) Unlike rows, for example, which only train the muscles through a relatively partial range of motion, pulldowns reach maximum or near-maximum stretch on the target muscles.

Full range of motion training may result in more muscle gain over time. (7) As a bonus, full range of motion training is likely to improve flexibility as effectively, or even more effectively, than stretching. (9)  

An Alternative for Banged Up Shoulders and Elbows

Although traumatic injuries among resistance trainees are somewhat uncommon, a large percentage of lifters complain of painful shoulders and elbows. (4)(10) The lion’s share of these issues can often be attributed to overuse or training errors. 

Forearm position during exercise affects the stress and strain experienced by joint structures, connective tissues, and muscles around the elbow. (11) Structures around the shoulders experience different patterns of stress based on your arm path. For example, the “high five” position of abduction and external rotation passed through during traditional lat pulldowns is associated with increased stress the front of the shoulder. (4)(1)(3) Temporarily avoiding this position may be indicated in the presence of certain shoulder injuries.

Muscular person in gym lifting weight with lat pulldown exercise

Credit: MDV Edwards / Shutterstock

It may be prudent for lifters to incorporate neutral-grip variations to reduce the risk of overuse. Periodically switching out pull-ups or traditional lat pulldowns for a slightly different vertical pulling exercises, such as neutral-grip pulldowns may help to ward off overuse-type injuries. 

Lifters already contending with overuse injuries related to upper body pulling may wish to experiment with variations such as the neutral-grip pullover to determine whether it’s better tolerated than previous exercises. 

Allows Easy Use of Advanced Training Techniques

Advanced training techniques can include methods used to take sets past failure (e.g. forced reps, drop sets, rest-pause), delay failure (e.g. cluster sets), or increase time under tension by imposing a tempo (e.g. lowering the weight very slowly with six-second eccentrics). (12) The neutral-grip pulldown is typically performed on a stable and safe machine that allows for efficient use of these techniques.

The pulldown machine enables quick manipulation of weight — Just move the pin or slide plates on or off. This allows for efficient performance of drop sets. The machine is also self-contained and “self-spotting.” If muscular failure is reached, there is very little chance of getting pinned under weight. Just stand up and control the pulldown bar back to the top position. 

Similarly, if the lifter wishes to take rest within a given set (i.e. cluster set training), the machine allows for quick stops and starts. Finally, the seated position on the machine allows for a training partner to safely and efficiently assist the lifter to perform additional reps. Advanced training techniques are far from easy, but the pulldown setup makes them about as efficient as they can be.

Muscles Worked by Neutral-Grip Lat Pulldown

The neutral-grip pulldown hammers muscles of the back, shoulders, and arms. (3)(13)(14) The pulldown is a relatively fundamental movement because it recruits a number of upper body muscles and works them through a significant range of motion.

Shoulder Extensors — Lats, Upper Back, Deltoids

The neutral-grip pulldown targets the muscles that extend the shoulders or draw the arms from in front of the body toward the back of the body. They primarily include the latissimus dorsi, teres major, rear deltoids, and the long head (or innermost portion) of the triceps brachii. Interestingly, the lower part of the pectoralis major (“costal fibers” of the chest) contribute to the pulldown as well. (14)

Shirtless muscular person in gym doing cable pulldown exercise

Credit: Vladimir Sukhachev / Shutterstock

Collectively, the shoulder extensors have the potential to be highly aesthetic muscles. Well-developed latissimus dorsi gives the back breadth, while teres major and rear deltoid enhance shoulder dimensions. And if any gap remains between the arms and upper sweep of the lats, building the long head of triceps brachii will appear to fill it in. “Wings” achieved.

Mid-Back

Sometimes called “scapular muscles,” the muscles of the mid-back act on your shoulder blades. No big back is complete without the visual interest and depth of well-developed scapular muscles.

While these muscles may not be the primary target of the pulldown, they will receive a training effect. During the pulldown, the rhomboids, lower trapezius, and middle trapezius rotate the shoulder blades downward, pull them together, and draw them toward the small of your back. 

Elbow Flexors

Curls aren’t the only way to build big biceps. Drawing resistance toward the body trains the muscles of elbow flexion (bending your arms) — Specifically, your biceps brachii, brachioradialis, and brachialis. Functional importance notwithstanding, these muscles give your arms a more muscular, anaconda-like appearance. 

How to Program the Neutral-Grip Lat Pulldown

Neutral-grip pulldowns can fit nicely into most lifters’ programs in a full body workout, back day, or pulling session. Whether your major training goal is strength or muscle gain, an overarching recommendation is to perform neutral-grip pulldowns earlier in the workout to maximize adaptations.

As a Primary Exercise for Strength

The neutral-grip lat pulldown is long range-of-motion, multi-joint exercise that allows incremental loading. These features make it ideal for use as a primary exercise in your “back day” or “pull day” routine. Primary exercises, sometimes termed “core exercises” in some circles, are typically placed earlier in the workout before any “accessory exercises,” which are typically single-joint exercises or rehab/prehab work.

This exercise order is preferred, because multi-joint exercise performance tends to suffer when performed after isolation exercise. (15) Moreover, exercises performed earlier in the workout tend to stimulate greater improvement in strength. (16)

To prioritize back strength, hit two to five sets of four to six repetitions using 85% or greater of your one-repetition maximum (1RM), ideally early in your workout. (17)

As High-Volume Hypertrophy Work

If your training focus is building a big back, address neutral-grip pulldowns toward the beginning of your workout. Due to heavy involvement of the biceps brachii and other elbow flexors, it is best practice to perform pulldowns before curls or other direct biceps exercises

Some research has shown that as few as three sets of barbell curls performed before pulldowns can decrease back-training performance by three to five repetitions. (13) Lost repetitions does not bode well for optimal muscle gain, as hypertrophy is positively related to exercise volume (i.e. total weekly sets x reps). (18) Maximize pulldown volume by performing this exercise early in the workout.

For building bigger back and biceps, perform three to six sets of eight to 20 repetitions using a weight that brings each set within three or fewer repetitions of failure.

Neutral-Grip Lat Pulldown Variations

On your back-building quest, there are many variations of the neutral-grip pulldown to help move you forward. Select the most appropriate variation based on personal preference, equipment availability, and goals. 

Neutral-Grip Pull-Up 

No pulldown machine? Prefer pull-ups over pulldowns?— Swap neutral-grip pulldowns for pull-ups. If multiple neutral-grip widths are available, start with the ones closest to shoulder-width or slightly narrower.

Despite the fact your bodyweight provides the resistance, the mechanics of the neutral-grip pul-up are similar to the neutral-grip pulldown. Start from a dead-hang, initiate from your shoulder blades, and pull your elbows down to your sides.

V-Bar Lat Pulldown

Using a narrow v-bar or “chinning triangle” attachment results in a tighter arm path and hits your back and arms differently. Neutral-grip pulldowns with the v-bar appear to rely more heavily on the biceps brachii than shoulder-width and wide neutral-grip variations. (13) So the v-bar pulldown is a great option for those prioritizing strong, thick arms.

httpv://www.youtube.com/watch?v=bdH\u002d\u002dh42K5w

The v-bar pulldown is performed much like the neutral-grip pulldown except the lifter should focus on squeezing the elbows and forearms together throughout the exercise. Elbows should graze your ribcage below your pecs as you approach the bottom position of the exercise. 

Half-Kneeling Single-Arm Lat Pulldown

Single-arm lat pulldowns are wonderful for feeling the stretch and contraction of your latissimus dorsi and other shoulder extensor muscles through a large arc and long range of motion. Because each arm is worked individually, they can also help to address any possible side-to-side strength asymmetries.

The half-kneeling single-arm lat pulldown is the next level of single-arm pulling. The “half-kneeling” position (i.e. one knee down) provides a large, stable footprint for the addition of subtle trunk movements. These trunk movements allow more stretch at the top followed by a stronger peak contraction at the bottom of each rep. The former may enhance “stretch-mediated” muscle growth, while the squeeze at the bottom promotes mind-muscle connection and increased latissimus dorsi activity. (6)(19)

Face the cable stack and kneel with the working side knee down. Allow your shoulder blade to be pulled up for a full stretch through your lat. Side-bend your trunk slightly away from your working arm. Pull by drawing your shoulder blade and elbow down and in. Achieve peak contraction by aggressively pulling your arm to your ribcage and side-bending slightly toward the working side. Focus on feeling your lats “cramp” at the bottom of each rep.

Swiss Bar Pullover

The pullover is a phenomenal exercise for the shoulder extensor muscles — Latissimus dorsi, posterior deltoid, part of your pectoralis major, etc. Although commonly done with a both hands on a single dumbbell, the pullover may also be performed using a neutral-grip implement such as a Swiss bar, a multi-grip barbell, or triceps bar.

The Swiss bar may enable those with less-than-ideal range of motion (i.e. limited forearm pronation or shoulder external rotation) to reap the benefits of pullovers – Namely, heavy loading overhead when the target muscles are at their longest lengths, which may enhance growth.(6)(20)(21) Just be sure to have an attentive spotter due to free weights passing over your head and face during the movement.

FAQs

Should I use lifting straps for neutral-grip lat pulldowns?

It is common to use lifting straps during pulling exercises such as deadlifts and barbell rows. Lifting straps may increase the amount of weight a lifter can handle, prolong the set by minimizing grip fatigue, and spare your grip for subsequent exercises.
While it is possible to use straps for neutral-grip pulldowns, it is typically not necessary. The neutral-grip position tends to stronger than a pronated (overhand) grip, though not as strong as supinated (underhand) grip. (22) Moreover, trained lifters have demonstrated no beneficial effects of lifting straps on pulldown one-repetition maximum, repetitions to failure, or total repetitions across three sets to failure. (23) That being said, if you train deadlifts during a back workout, there might be benefits to using straps to preserve your grip if you’re performing heavier pulls later in the workout. 

Can different pulldown variations be used to target different portions of the lats or back?

Compared to other pulldown variations, the neutral-grip pulldown may bias certain shoulder muscles and even certain parts of the lats. 
While some neuromuscular strategies may differ due to grip orientation, more notable differences can be attributed to differences in grip width. The lat pulldown traditionally uses a relatively wide grip, which results in resisted shoulder adduction (i.e. pulling your arms down and into the sides of your body). (24) neutral-grip pulldown typically uses a shoulder-width or slightly narrower grip. This grip width results in resisted shoulder extension (i.e. pulling your arms toward the back of your body). 
The most reliable method of determining a muscle’s action is to analyze its moment arm (how a muscle crosses the joint and how much leverage it has over the joint). For example, muscles crossing behind the shoulder will extend the shoulder when they shorten. Shoulder extensors with a larger moment arm extend the shoulder more efficiently.
Since the posterior deltoids and teres major have the greatest moment arms for shoulder extension through much of the pulldown’s range motion, it could be inferred that the neutral-grip pulldown will emphasize these muscles. (14)
The latissimus dorsi is a broad, multi-part muscle with fibers originating on the pelvis (“iliac part”), lumbar region (“lumbar part”), and lower thoracic spine (“thoracic part”). Certain parts are mechanically better suited to adduct the shoulder (i.e. iliac- and lumbar parts), whereas the upper portion of latissimus dorsi (i.e. thoracic part) is a strong shoulder extensor. (14)
Putting that all together, from a mechanical standpoint, traditional lat pulldowns may best target the iliac and lumbar parts of the latissimus dorsi (“lower lats”), while neutral-grip pulldowns may better target the thoracic part of latissimus dorsi (“upper lats”), teres major, and posterior deltoid.
Ultimately, more research is needed. To cover your bases for complete back development, incorporate both pulldown variations into your training plan.

Is there any benefit to using rotating handles?

First, let’s examine how these rotating handles are often used. The handles are commonly held in the pronated (“overhand grip”) position at the top of the pulldown then gradually twisted into the supinated (“underhand grip”) position at the bottom of the repetition.
Another option is to maintain the same grip and forearm position throughout the pulldown. You could hold the rotating handles in a neutral position (or any other position) throughout the repetition; however, this option introduces an additional degree of freedom (read: “instability”) and may result in reduced maximum weight or repetition performance.
The rotating method feels very natural for some lifters. Anecdotally, twisting the handle throughout the repetition promotes shoulder external rotation during the pulldown. This might be useful for keeping tension on primary muscles like latissimus dorsi and teres major.
Objective research on rotating handles is sparse, however. Some research has reported pull-ups performed with rotating handles increased latissimus dorsi muscle electromyography (EMG) activity, albeit not to a level reaching statistical significance. (8) But interpret these findings with caution. It must be stated that muscle activity via surface EMG is not an indicator of the quality of an exercise and it does not necessarily mean rotating handles promote better lat growth or strength. (25)(26)
Ultimately, if rotating handles feel more natural or more comfortable to you, go ahead and use them instead of a rigid pulldown bar.

Earn Your Wings

The neutral-grip lat pulldown builds a wide back and thick arms to boot. When performed with a shoulder-width or slightly narrower grip, it tends to be a joint-friendly exercise for your lats, upper back, mid-back, and biceps. Altogether, neutral-grip lat pulldowns may be among the best options for building a set of wings when your shoulders have other plans.

References

  1. Escalante, G. (2017). Exercise modification strategies to prevent and train around shoulder pain. Strength & Conditioning Journal39(3), 74-86.
  2. Ribeiro, A. S., Nunes, J. P., & Schoenfeld, B. J. (2020). Selection of resistance exercises for older individuals: the forgotten variable. Sports Medicine50, 1051-1057.
  3. Fees, M., et al. (1998). Upper extremity weight-training modifications for the injured athlete. The American journal of sports medicine26(5), 732-742.
  4. Kolber, M. J., Corrao, M., & Hanney, W. J. (2013). Characteristics of anterior shoulder instability and hyperlaxity in the weight-training population. The Journal of Strength & Conditioning Research27(5), 1333-1339.
  5. Watson L, et al. (2016). The treatment of multidirectional instability of the shoulder with a rehabilitation program: Part 1. Shoulder & Elbow. 8(4):271-278
  6. Wackerhage, H., et al. (2019). Stimuli and sensors that initiate skeletal muscle hypertrophy following resistance exercise. Journal of Applied Physiology, 126(1):30-43.
  7. Kassiano, W., et al. (2022). Which ROMs Lead to Rome? A Systematic Review of the Effects of Range of Motion on Muscle Hypertrophy. The Journal of Strength & Conditioning Research, 10-1519.
  8. Youdas, J. W., et al. (2010). Surface electromyographic activation patterns and elbow joint motion during a pull-up, chin-up, or perfect-pullup™ rotational exercise. The Journal of Strength & Conditioning Research24(12), 3404-3414.
  9. Morton, S. K., et al. (2011). Resistance training vs. static stretching: effects on flexibility and strength. The Journal of Strength & Conditioning Research25(12), 3391-3398.
  10. Siewe, J., et al. (2014). Injuries and overuse syndromes in competitive and elite bodybuilding. International Journal of Sports Medicine35(11), 943-948.
  11. Bryce, C. D., & Armstrong, A. D. (2008). Anatomy and biomechanics of the elbow. Orthopedic Clinics of North America39(2), 141-154.
  12. Krzysztofik, M., Wilk, M., Wojdała, G., & Gołaś, A. (2019). Maximizing muscle hypertrophy: a systematic review of advanced resistance training techniques and methods. International journal of environmental research and public health16(24), 4897.
  13. Vilaça-Alves, J., et al. (2014). Effects of pre-exhausting the biceps brachii muscle on the performance of the front lat pull-down exercise using different handgrip positions. Journal of Human Kinetics42(1), 157-163.
  14. Ackland, D. C., Pak, P., Richardson, M., & Pandy, M. G. (2008). Moment arms of the muscles crossing the anatomical shoulder. Journal of Anatomy213(4), 383-390.
  15. Figueiredo, T., et al. (2016). Influence of Exercise Order on One and Ten Repetition Maximum Loads Determination. Journal of Exercise Physiology Online19(2).
  16. Nunes, J. P., et al. (2021). What influence does resistance exercise order have on muscular strength gains and muscle hypertrophy? A systematic review and meta-analysis. European Journal of Sport Science21(2), 149-157.
  17. Peterson, M. D., Rhea, M. R., & Alvar, B. A. (2004). Maximizing strength development in athletes: a meta-analysis to determine the dose-response relationship. The Journal of Strength & Conditioning Research18(2), 377-382.
  18. Figueiredo, V. C., de Salles, B. F., & Trajano, G. S. (2018). Volume for muscle hypertrophy and health outcomes: the most effective variable in resistance training. Sports Medicine48, 499-505.
  19. Snyder, B. J., & Leech, J. R. (2009). Voluntary increase in latissimus dorsi muscle activity during the lat pull-down following expert instruction. The Journal of Strength & Conditioning Research23(8), 2204-2209.
  20. Maeo, S., et al. (2022). Triceps brachii hypertrophy is substantially greater after elbow extension training performed in the overhead versus neutral arm position. European Journal of Sport Science, 1-11.
  21. Pedrosa, G. F., et al. (2021). Partial range of motion training elicits favorable improvements in muscular adaptations when carried out at long muscle lengths. European Journal of Sport Science, 1-11.
  22. Murugan, S., et al. (2013). Grip strength changes in relation to different body postures, elbow and forearm positions. Int J Physiother Res1(4), 116-121.
  23. Valério, D. F., etal. (2021). The effects of lifting straps in maximum strength, number of repetitions and muscle activation during lat pull-down. Sports Biomechanics20(7), 858-865.
  24. Snarr, R., Eckert, R. M., & Abbott, P. (2015). A comparative analysis and technique of the Lat Pull-down. Strength & Conditioning Journal37(5), 21-25.
  25. Vigotsky, A. D., et al. (2018). Interpreting signal amplitudes in surface electromyography studies in sport and rehabilitation sciences. Frontiers in Physiology, 985.
  26. Vigotsky, A. D., et al. (2017). Greater electromyographic responses do not imply greater motor unit recruitment and ‘hypertrophic potential’ cannot be inferred. The Journal of Strength & Conditioning Research31(1), e1-e4.

Featured Image: MDV Edwards / Shutterstock

Source

November 16, 2022

The 12 Best Lat Pulldown Alternatives for Back Size

Filed under: Fitness,Training — Tags: , , , , — admin @ 10:45 am

There aren’t many muscle-building or strength-focused training programs that leave out  the traditional lat pulldown. Many effective workouts include this classic, and for good reason.

Pulling in a vertical pattern strengthens your back, shoulders, and arms, while also building the muscles that support and stabilize your shoulder blades. This maintains healthy joint function which, in turn, keeps your entire upper body strong. 

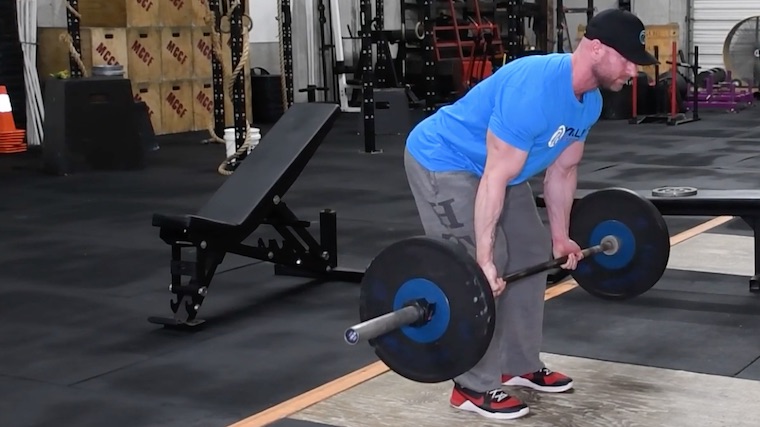
person in blue shirt performing pulldown back exercise

Credit: Tom Wang / Shutterstock

However, the lat pulldown isn’t enough to build thickness in your entire back and it’s not the only way to keep everything strong, healthy, and balanced.  Eventually, you need to make some adjustments. Over-focusing on classic straight bar lat pulldowns without any change in angles, grip, or technique won’t be enough to for complete development.

If you know which muscles and attributes you’re looking to address, you can wisely choose the right exercises for better results. Here are 12 of the best alternatives to build a bigger, stronger, more complete back. 

Best Lat Pulldown Alternatives

Behind-the-Neck Pulldown

“Scapular control is as cool as a really wide back,” said no person ever. Maybe you don’t do standard pulldowns to target the muscles that control your shoulder blades, but the basic movement does train muscles that control and rotate them. Pulling the bar behind your neck creates an even more efficient path.  

Why Use the Behind-the-Neck Pulldown

By slightly altering the mechanics and path of this vertical pull, you train the supporting muscles of the shoulders and shoulder blades through a more complete range of motion. If you have suitable shoulder mobility and can perform the motion without pain, pulling behind your head allows you to target the muscles that rotate and lower the shoulder blades. 

The kicker here is that when your shoulders and scapulae (shoulder blades) are well-positioned, with the behind-neck movement, your body can create higher levels of strength and develop more noticeable upper-back muscle.

How to Do the Behind-the-Neck Pulldown

Set up on a lat pulldown machine as you normally would. Use a long bar attachment and grab it with an overhand grip beyond shoulder-width. Sit with your arms straight overhead and shoulders “shrugged” up. Keep your forehead, chin, and sternum in line as you lean slightly forward. Let your arms be pulled slightly back, in line with your hips. Keep your body forward as you pull the handle down. Ideally, aim to touch the bar to the base of your traps, near your neck, but pull to a comfortable depth based on your overall mobility.

Think about trying to shrug your shoulders “down” as you bend your arms and drive your elbows down. In the bottom position, squeeze your shoulder blades down before straightening your arms and controlling the weight up. Let your shoulders rise as the cable pulls you into a controlled overhead lat stretch. Start with light weight and a full range of motion, and increase slowly without sacrificing form. 

Rhomboid Pulldown

This movement may feel a little funky at first, but it’s a simple and effective way to shift focus from your big lat muscles to the smaller muscles of your upper and mid-back. To do these, you’ll use close or neutral-grip attachment and a very specific body angle. 

Why Do the Rhomboid Pulldown

The rhomboids are deep muscles between the shoulder blades that pull your upper back together. If these supportive muscles don’t function well, there’s a good chance you will eventually deal with some shoulder dysfunction, pain, or injury. The rhomboid pulldown targets these muscles while also building muscle in the center of your mid-back, which for many, is lacking thickness and development.  

How to Do the Rhomboid Pulldown

Grab the a close-grip attachment with your palms facing each other. Lock your legs under the pads, but lean your torso back to create a roughly 45-degree angle between your upper body and the floor. Pull your hands to your sternum and allow your elbows to flare out at a 90-degree angle to your shoulders. Keep your trunk braced and stable as throughout the exercise.

In the bottom position, think of pulling your shoulder blades together and your shoulders down to the ground. Control the weight on the way up, but keep your torso angled backward for the entire set.

Stiff-Arm Pulldown

This single-joint (isolation) exercise is arguably better at building lat thickness than traditional pulldowns because the work it done only by the lats with minimal assistance from the shoulders and arms.

Why Do the Stiff-Arm Pulldown

The stiff-arm pulldown, also known as a straight-arm pushdown, is great at building lat size and general mobility because the muscle has to overcome resistance through a long range of movement. You need to control the resistance through a long arc that puts your lats in a significant stretch toward the top. This is one of the few exercises that actually strengthens shoulder extension (raising the arm) along with training your shoulder blades to slide downward into a stable position.  

How to Do the Stiff-Arm Pulldown

Attach a straight bar or rope to a cable near the top of your head. Stand tall, grab the bar or rope with your elbows slightly bent and your palms facing down (on a bar) or facing each other (with a rope). Maintain a bent-arm position as you “sweep” the attachment toward the top of your legs.

At the bottom, imagine pulling your shoulders behind your torso before you let the weight pull your arms back up. Control the weight and let your arms come all the way up for an active stretch at the top. 

Lying Cable Pullover

Dumbbell or kettlebell pullovers are sometimes used as an alternative to pulldowns or, more specifically, an alternative to stiff-arm pulldowns, but expecting people to do those free weight exercises light enough to limit the contribution of the chest, arms, and shoulders is like asking them not to look at themselves in the mirror after a good arm pump. Lying cable pullovers are a more effective way to emphasize the contraction of the lats and other back muscles with relatively light weight and high tension.

Why Do the Lying Cable Pullover

This exercise gives you all the same benefits of stiff arm pulldowns — increased lat recruitment with limited additional muscles — while also increasing the duration that the muscle held under tension. And the longer the muscle is contracting under tension the more muscle and strength can be built. (1)

How to Do the Lying Cable Pullover

Lie on a flat bench with a cable set slightly above head-level. Use a rope attachment to allow for more range of motion. Grab the rope with your hands facing each other. Maintain a slight bend in your elbows and pull the rope toward your legs while keeping your lower back flat against the bench.

Keep your hands facing one another and try to touch your pinky fingers to the floor. In the bottom position, squeeze your shoulders together and think of pushing your triceps through the floor before controlling the resistance all the way back. Let the resistance pull your arms as far back as you can tolerate, above and behind your head.

Crossed Band Pulldown 

This movement is perfect for using resistance bands rather than a cable machine because the tension of the bands combines with the long range of motion to target the smaller muscles of the back. The crossed band pulldown can also be called a “banded rhomboid pulldown” because it works those smaller upper back muscles similar to a rhomboid pulldown.

Why Do the Crossed Band Pulldown

By pulling the bands in a cross-body motion, you are training the muscles that move and support the scapulae with a specialized effort you wouldn’t be able work with cables. These supportive muscles not only keep your shoulders functioning properly, but they provide the stability needed to build high-level pressing and pulling strength, and they contribute to unique thickness of the back musculature.

The resistance bands allows for more tension at the end range (peak contraction), which is where most people need to build more scapular control. As you pull the band, it becomes more challenging and the muscles have to create more tension, compared to steady resistance with cable pulleys. 

How to Do the Crossed Band Pulldown

Anchor two resistance bands to the top of a squat rack, pull-up bar, or other high and stable structure. Space the bands to be just outside the width of your shoulders. Grab the left band with your right hand and vice versa, and sit on the floor between them.

Keep a neutral spine, not arched or rounded, and pull the bands across the front of your body. Try to drive your elbows toward the floor behind you. Hold and squeeze the contacted position for one second before controlling the bands into a stretched position with straight arms. 

Supinated-Grip Pulldown

To keep your shoulders healthy and your upper back strength balanced, you need to do vertical pulls with your palms both facing away (pronated grip) and facing toward you (supinated grip). The supinated-grip pulldown, or “chin-down” (as opposed to a bodyweight chin-up), is a great option to build this supinated-position strength whether you can do chin-ups or not. 

Why Do the Supinated-Grip Pulldown

This hand position doesn’t magically make it a biceps-only exercise. This grip variation trains the connections between the biceps, delts, and upper-back muscles differently from a pull-up or pulldown. (2) It also builds more balanced upper back stability and more shoulder mobility.

How to Do the Supinated-Grip Pulldown

Use a straight bar attachment and set up just as you would for a standard pulldown. Grab the bar with palms facing you and hands placed right at or a little wider than shoulder width apart.

Pull the attachment down by driving your elbows to the ground and try to touch it right below your collarbone. Squeeze the elbows down before controlling the cable back up. 

Weighted Pull-Up

Most don’t think that pulling exercises that target the upper back should ever really be loaded heavy, but that line of thinking is a big mistake.

If you’re looking to build your back as big as you can, you need to combine high-rep sets with heavy weights. The weighted pull-up is an extremely effective, if slightly advanced, way to get the job done.  

Why Do the Weighted Pull-Up

Pull-ups are typically done to build muscle size using only your body weight for as many reps as possible. But they can and should sometimes be loaded as heavy as possible and performed in rep ranges as low as three to five per set. This will expose you to new types of muscular stress that leads to muscle growth

How to Do the Weighted Pull-Up

Take an overhand grip with your arms at, or just a little wider than, shoulder-width. Pull from a straight-arm hang to your chin or neck reaching bar-level. Warm-up with bodyweight-only sets and then add a weight using either a dip belt or a weighted vest. Start with a weight that you know you can do at least five reps with.

Perform multiple sets of three to five reps, adding just a little weight after each set. When you reach a very challenging weight and feel like you can only grind two or three reps, stick with this weight and try to do two to four more sets.

Mechanical Drop-Set Pull-Up

It’s important to do vertical pulling exercises with a variety of hand positions – overhand, underhand, and neutral-grip. Each grip is mechanically different in terms of difficulty and muscle recruitment, and this can be exploited to do more quality volume, which results in greater strength and muscle growth. (3)

Why Do the Mechanical Drop Set Pull-Up

A pronated (palms away) hand position is most challenging and prioritizes the lat muscle and upper back. A supinated (palms toward you) hand position is slightly easier and emphasizes the biceps and shoulders, and a neutral position (palms facing each other) offers the greatest leverage and is least challenging, recruiting the brachialis and shoulders. (4)

A “mechanical drop set” is a specialized technique that allows you to do as many reps as you can with the most difficult hand position. This causes the emphasized muscles to work hardest. You then continue to add more tension to the same muscle groups with a supinated grip, and finally using neutral-grip hand position. In total, you are able to do more volume than you could normally achieve using exclusively any one grip.

How to Do the Mechanical Drop Set Pull-Up

Take a shoulder-width overhand grip on a pull-up bar and lift yourself from a straight-arm hang to your chin near bar-level. As you reach muscular fatigue, let go and reset your grip to take a shoulder-width underhand grip. Continue performing additional repetitions until you reach fatigue again. Let go and finally take a neutral (palms facing) grip. Continue the last phase of the set with more reps.

One effective approach with this method is to pick a pre-determined rep count for each hand position. For example, if you can do five standard (overhand) pull-ups, you may choose to do two or three reps of each grip. This increases your pull-up volume significantly because you end up doing a total of six to nine repetitions instead of only five.

Inverted Row

The inverted row is often done with your body parallel to the floor, with your feet elevated to make it a true horizontal rowing motion. While this is a great variation to build the entire mid-back and lats, doing these at a 45-degree angle with your feet on the ground may be an even more efficient way to strengthen your back muscles similar to a lat pulldown. 

Why Do the Inverted Row

This is a great option to replace or add more bodyweight movements. Strong or experienced lifters tend to neglect bodyweight training, maybe throwing in a few push-ups here or there, but that’s short-sighted. Bodyweight pulling movements, in particular, demand trunk stabilization and good scapular control which carry over to strength and stability in nearly all exercises.

If you can’t do bodyweight pull-ups, you need to find other ways to train your pulling muscles. The 45-degree inverted row uses your bodyweight to build strength and muscular coordination. This moderate angle makes it a different and effective way to strengthen the scapular muscles and still build the lats, comparable to a traditional pull-up or pulldown.

How to Do the Inverted Row

Set a barbell on a rack somewhere around ab-height. You can also use a Smith machine. You may have to adjust this higher or lower once in position depending on your arm length. Grab the bar with an overhand grip, with your arms a little wider than shoulder-width. Slide your feet out until your body is at roughly a 45-degree angle with the floor.

Keep your legs straight and pull yourself toward the bar. Aim to touch your chest to the bar before lowering under control and repeating for the set number of reps. 

Ultra-Wide Grip Bent Over Barbell Row 

The wide-grip barbell row might be one of the best exercises to increase thickness in your lats and traps while building strength that carries over to other big lifts. If you see someone who does this exercise often, heavy, and well, you can count on them having a big and powerful back. 

Why Do the Ultra-Wide Grip Bent-Over Barbell Row

The ultra-wide grip row not only makes your lats wider, but it builds thickness in the mid-back better than many other exercises. The challenging wide grip also taxes your forearm muscles, making them bigger while building a stronger grip. The bent-over position requires your hips, trunk, and hamstrings to stabilize you body and create tension to support the weight. This total-body recruitment makes you stronger for pretty much anything else in the gym or on the field. 

How to Do the Ultra-Wide Grip Bent-Over Barbell Row 

Stand over a barbell with your feet hip-width apart. Hinge forward at the hips, squat down, and grab the bar with a palms-down grip as far wide as your grip will allow. The bar should be difficult to hold, but be sure you can keep it in your hands for the entire set. Stand straight up with the bar in your hands and your arms straight. Slightly bend your knees as you hinge from your hips.

Keep your knees slightly bent and bend forward until your back is close to parallel with the ground. Hold this position with your elbows locked and keep your back flat and your abs braced. Row the bar toward the bottom of your sternum. Control the weight back down to a straight-arm position, and repeat for repetitions.

Landmine Row

The landmine row can train the lats more without causing, or worsening, any potential shoulder problems because it places a unique demand on the body compared to other barbell or dumbbell exercises. The angle and leverage of the landmine create a different stress on the muscles and joints. It allows the lifter to adjust their body position and change the pull of the weight.

Why Do the Landmine Row

This exercise is done using a “v-bar” attachment, which requires a neutral-grip. This helps you contract your lats through a full range of motion while allowing the shoulder blades to move into a natural position. This not only helps to reduce shoulder pain but also reinforces and builds the shoulder-stabilizing muscles.

Because landmine row moves though an arc range of motion rather than a straight line, it creates different leverages for your muscles. For that reason, the weight typically feels heavier at the bottom and lighter at the top, which is the opposite of most exercises. This “reversed” strength curve means that the landmine row can train the lats differently by placing them under greater tension at the bottom position. 

How to Do the Landmine Row

Put one end of a barbell in a landmine unit, or in the stable corners of a squat rack. Attach a neutral-grip v-bar handle around the free end of the barbell just below the collar. Straddle the bar, squat down to grab the handle, and stand up supporting the bar with straight arms. Make sure your back is almost completely parallel with the floor and your legs are slightly bent.

Row the bar up and try to touch your wrists somewhere between the bottom of your sternum and your abs. Lower the weight by straightening your arms under control. Try not to “hitch” or bounce as you lift the weight. The more strict the movement, the better it is for building muscle and strength. 

Single-Arm Face Pull 

Standard lat pulldowns are usually done in hopes of building wider backs, but it’s not really just about building back width. You need to build muscle on your upper back and across the backs of your shoulders, as well. There are more focused ways to develop these key areas than just using the simple pulldown.

Why Do the Single-Arm Face Pull

The single-arm face pull targets the rear delts (back of the shoulder) and the upper and inner parts of your back. These muscle groups not only need to be strong for optimal shoulder health and stability, but they need to be well-developed if you want your back to look as thick as possible.

Training one are at a time helps you narrowly focus on properly moving your shoulder and shoulder blade. Single-arm exercises like this also train your trunk to resist rotation so, as an added benefit, you’re also training core stability.

How to Do the Single-Arm Face Pull

Attach a single handle to a cable pulley at forehead-height. Grab the handle palm-down with one hand. Straighten your arm and step back until the cable slightly pulls on the weight stack to lift it up. Stand tall with your knees slightly bent and your feet about hip-width apart.

Keep your palm facing down as you pull the handle toward your ear. Think “chicken wing” to keep your elbow high and pointed out. Focus on pulling your shoulder blade in toward your spine. Hold and squeeze at this end position for one second. Don’t let your shoulder shrug upward. Control the weight back without letting it pull your shoulder too far forward as your arm straightens. 

Benefits of Lat Pulldown Variations

There are three basic reasons to include this vertical pulling motion in your training: muscle size, muscular strength, and musculoskeletal health. Whichever reasons are on your goal list, there are plenty of effective movements to get the job done.

Increased Muscle Recruitment

Many people want to build their lats thicker and wider. Bigger lats give an athletic look many people want. Whether it’s on a bodybuilding stage, at the beach, or just for your own personal physique goal, a well-developed back includes wide lats as well as a solid upper and mid-back.

The lat pulldown, on its own, isn’t sufficient for targeting the multiple muscles involved in building complete back size.

Improved Strength Development

The more overall back strength you have, the more weight you can lift. Back strength is essential for a strong, stable upper body. This strength and stability carries over to big lifts like the deadlift, when maintaining proper position for efficient technique.

Man in white sleeveless t-shit squatting with a loaded barbell across his back

Ivan Kochergin / Shutterstoc

A stronger back even carries over to lower body exercises like the squat, to help your upper body transfer power from your legs through your core and upper body.

Joint Health

Healthy, well-functioning shoulders and shoulder blades (scapulae) are essential for any lifter. If you press weights overhead (up), you need to pull weights down. Basic muscular symmetry helps to reduce the risk of shoulder and upper body injuries. (5) Vertical pulling trains coordination and control between your shoulders and the scapulae, and it reinforces the postural muscles surrounding your scapulae and the entire middle back.

Get Down with All the Pulldowns

The lat pulldown is one of the most popular vertical pulling exercises for building muscle and strength. It’s an effective and time-tested exercise, but you still need to stress the upper and mid-back muscles with different angles and demands to create a maximum training effect. You can’t haphazardly add variations and hope for the best, because that can be a counterproductive waste of time. Review the exercises above, figure out which suit your specific needs, and plug them into your training plan. Soon enough, you’ll have all the variety you need for a well-rounded, and well-widened, back.

References

  1. Burd, N. A., Andrews, R. J., West, D. W., Little, J. P., Cochran, A. J., Hector, A. J., Cashaback, J. G., Gibala, M. J., Potvin, J. R., Baker, S. K., & Phillips, S. M. (2012). Muscle time under tension during resistance exercise stimulates differential muscle protein sub-fractional synthetic responses in men. The Journal of physiology590(2), 351–362. https://doi.org/10.1113/jphysiol.2011.221200
  2. Lusk, S. J., Hale, B. D., & Russell, D. M. (2010). Grip width and forearm orientation effects on muscle activity during the lat pull-down. Journal of strength and conditioning research24(7), 1895–1900. https://doi.org/10.1519/JSC.0b013e3181ddb0ab
  3. Leslie, Kelly & Comfort, Paul. (2013). The Effect of Grip Width and Hand Orientation on Muscle Activity During Pull-ups and the Lat Pull-down. Strength and Conditioning Journal. 35. 75-78. 10.1519/SSC.0b013e318282120e.
  4. Plantz MA, Bordoni B. Anatomy, Shoulder and Upper Limb, Brachialis Muscle. [Updated 2022 Feb 22]. In: StatPearls [Internet]. Treasure Island (FL): StatPearls Publishing; 2022 Jan-. Available from: https://www.ncbi.nlm.nih.gov/books/NBK551630/
  5. Drigny, J., Gauthier, A., Reboursière, E., Guermont, H., Gremeaux, V., & Edouard, P. (2020). Shoulder Muscle Imbalance as a Risk for Shoulder Injury in Elite Adolescent Swimmers: A Prospective Study. Journal of human kinetics75, 103–113. https://doi.org/10.2478/hukin-2020-0041

Featured Image: Wood Water Wall / Shutterstock
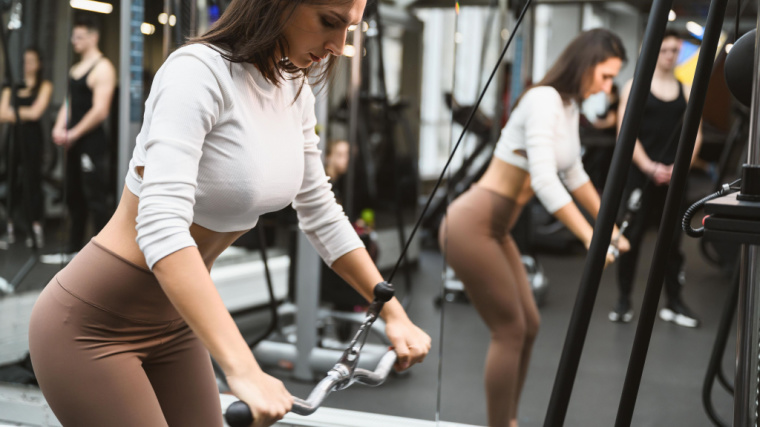
Source

November 11, 2022

How to Do the Straight-Arm Pushdown for a Wider Back

Exercises like the chin-up and the deadlift are seen as the kings of back-builders by many lifters, but they are only the meat and potatoes. You have to add some seasoning if you want the best final product, and the extra flavor (and extra results) will come from your exercise choices.

The problem is that compound (multi-joint or “polyarticular”) exercises like chins, deadlifts, and rows not only train the large lat muscle of your back, but also many other muscles in your whole body. The lats are a notoriously hard to target body part, and these big lifts have the risk of shifting the work to other supporting muscles.

muscular person doing chin-ups outdoors

Credit: Iryna Inshyna / Shutterstock

The straight-arm pushdown, sometimes called a stiff-arm pushdown or pulldown, is one the most effective movements to work just the lats because it is an isolation (single-joint) exercise. This allows you to really focus on the target body part with minimal assistance from other muscles.

Adding this exercise might just be the key to unlock new growth and a better mind-muscle connection. Here’s why and how to add it to your training plan.

How to Do the Straight-Arm Pushdown

As a single-joint exercise, the straight-arm pushdown is a fairly straightforward to perform. These types of movements typically require less coordination and technique than multi-joint exercises, but you still need to use proper form if you want the best results.

Step 1 — Set up at the Cable Station

Person in gym doing cable machine exercise.

Credit: ANRproduction / Shutterstock

Set a cable pulley at the maximum height so that you can enjoy a full range of motion, and attach a straight or EZ-curl bar. 

Grab the bar using a palms-down, shoulder-width grip, and fully extend your arms toward the pulley. Step back until the weight starts floating off the stack and you feel tension pulling you toward it. Lean forward at the waist and slightly bend your knees to adopt a stable position from which to pull. Your hands should be slightly above shoulder-height.

Form tip: Keep your shoulders down and your chest puffed up. This will diminish the stress on your shoulders and reduce interference from non-target muscles like your shoulders or traps.

Step 2 — Pull the Weight Down

Person in gym doing cable back exercise.

Credit: ANRproduction / Shutterstock

Exhale and squeeze your lats as much as you can while driving the bar down towards your thighs. Keep your arms straight or slightly-bent for the duration of the lift. Nothing should move but your arms. Keep your wrists neutral, don’t allow them to curl down or bend back.

Form tip: Imagine you have an orange under each of your armpits and you’re squeezing them for their juice. This will help you recruit your back more and shift focus away from your arms.

Step 3 — Control the Stretch

Person in gym doing back exercise with cable machine.

Credit: ANRproduction / Shutterstock
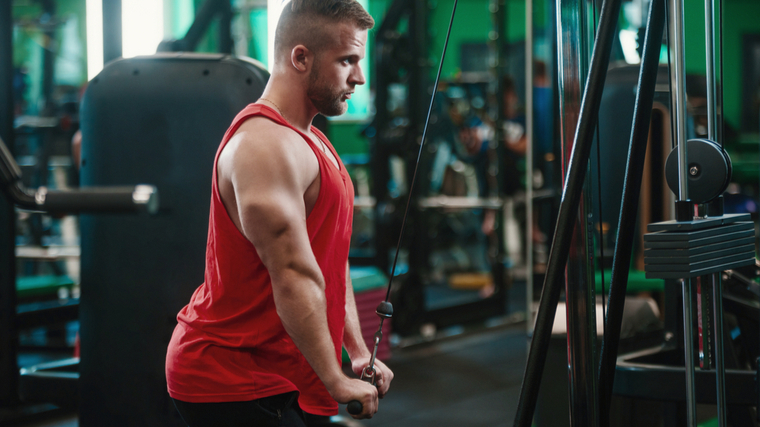
When the bar is nearly touching your legs, slowly reverse the motion and let your arms come up. Keep your torso still and don’t stand up straight at the weight comes up. Once you’re at the top of the range of motion and your back is fully stretched, repeat for the desired amount of reps. 

Form tip: If you feel your arms overpowering your lats, and your triceps or shoulders fatigue before your back muscles, use a “false grip” by placing your thumb on top of the bar next to your fingers. This will reduce arm involvement.

Straight-Arm Pushdown Mistakes to Avoid

The straight-arm pushdown requires focus to reap all the benefits. You have to nail the technique if you want to progress safely, and that means avoiding these common mistakes.

Swinging the Weight

Ego should never have a place in the gym, especially not when doing an isolation movement. If you start using body English to move more weight, you’ll end up working your hips, abs, and arms more than your back. If you want to move more weight and use as many muscles as possible, then skip the straight-arm pushdowns and do some barbell rows.

muscular person in gym doing cable exercise

Credit: martvisionlk / Shutterstock
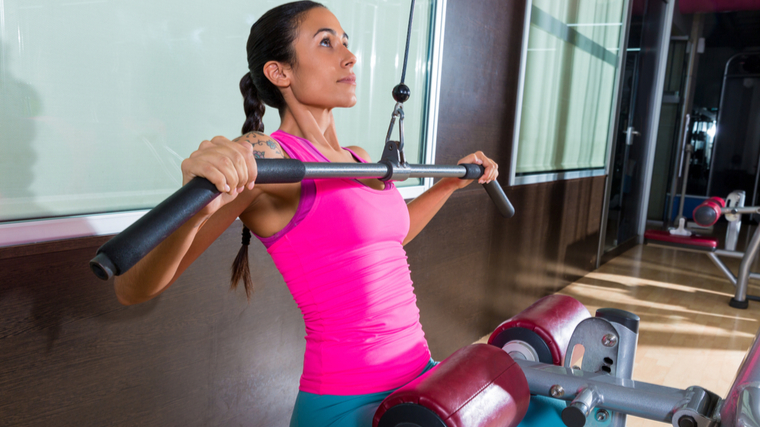
Moreover, using momentum will put more stress on your connective tissue and joints, possibly causing injuries. (1)

Avoid it: Only your arms should move during the exercise, and they should only move at the shoulder, not the elbow. If you have to move anything else, it’s either because you used too much weight or that your initial set up (stance and body position) wasn’t stable enough. Reduce the weight, bend your knees a bit more, and widen your stance to lower your center of gravity and increase stability.

Using Your Arms

You might not expect it, but the long head of your triceps (posterior muscle of the arm) will assist your back during this exercise because it’s partially responsible for moving your arm at the shoulder joint. However, it should remain a lat-focused exercise.

person in gym bent forward holding handle attached to cable

Credit: Vladimir Sukhachev / Shutterstock
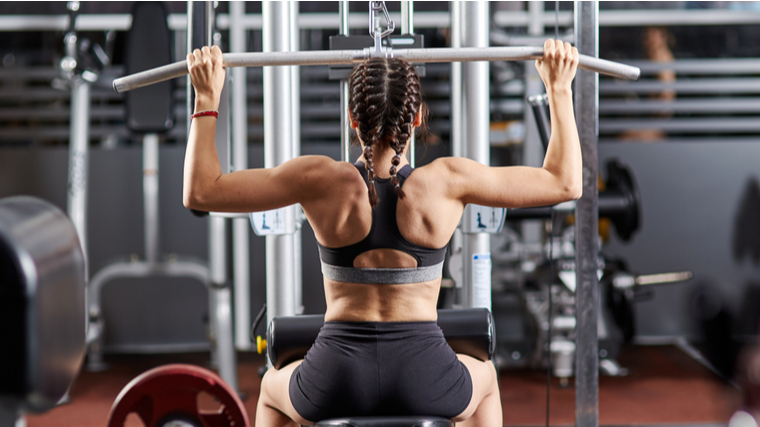
If you bend and extend your arms during the exercise, you’ll turn the exercise from a straight-arm pushdown into a wrongly-performed triceps pushdown, resulting in less muscle gains for each body part.

Avoid it: Don’t let your arms bend. Remember that it’s called a “straight-arm” movement and maintain the same elbow angle during the duration of the lift. To further reduce arm involvement, use a false grip by moving your thumbs on top of the bar near your fingers.

Going Too Heavy

Yes, there’s a recurring theme in this mistake session: do not chase weight. Keep the heavy weights and maximal efforts for the big compound exercises. If you use too much weight, you can end up compensating with other muscles and you’ll stop feeling the intended muscles, leading to less muscle growth. (2)

person wearing red tank top performing cable triceps exercise

Credit: vladee / Shutterstock
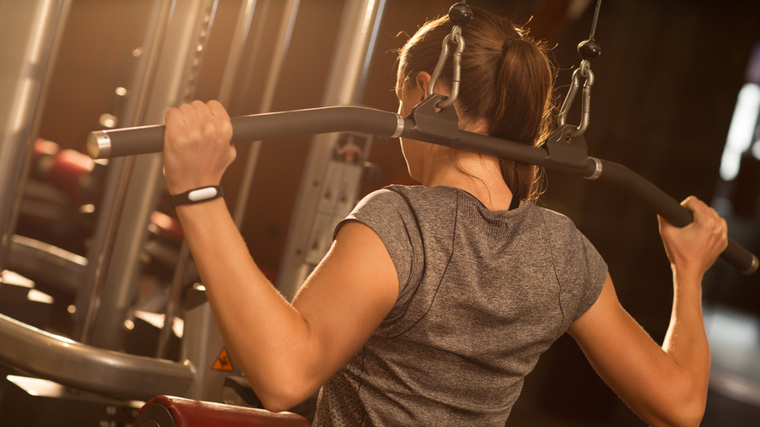
Avoid it: When you perform the exercise, if you stop feeling tension in your lats, it’s likely because other muscles have taken over. Reduce the weight immediately and double-check your stance, torso position, and arm angle.

How to Progress the Straight-Arm Pushdown

The cable station used for straight-arm pushdowns usually allows you to use very light or heavy weights, but that’s not always the case. Some pulleys have limited weights or other issues that affect your performance. In those cases, you can use progressions to either make the exercise easier or harder.

Resistance Band Straight-Arm Pushdown

Bands are versatile and easy to use. Strap a resistance band to a sturdy object at roughly head-height and perform the exercise as you would with a cable pulley. The band resistance starts very low and can be adjusted by standing closer or farther from the anchor point, which is perfect if you don’t yet feel confident enough to tackle more challenging resistance. 

One benefit of bands is that the resistance curve increases during the range of motion — as the band is stretched, it becomes more challenging — which can be beneficial for you to feel your lats working. This is also a great variation if you don’t have access to a cable station.

Slow Tempo Straight-Arm Pulldown

Whether you can’t put more weight on the station or you just have trouble feeling the correct muscles working during this exercise, you can use a slower tempo (lifting and lower speed) to make to movement more challenging with lighter weights.

One great way to do this is by taking three to five seconds on the concentric phase (when you lift the weight) and three to five seconds for the eccentric (when you reverse the motion). This will make the exercise tremendously harder, increase the time under tension, and improve your mind-muscle connection as well. 

Banded Dumbbell Pullover

If you’re an experienced lifter who already mastered the dumbbell pullover, which is itself a free-weight variation of the straight-arm pushdown, then you can take things to the next level. This is one of the most intense lat isolation exercises.

The problem with the basic dumbbell pullover is that there is little-to-no resistance at the top of the movement due to gravity’s limited effect on the weight. Strapping a band around the dumbbell, with an anchor point far behind your head, results in a continuous curve of resistance with a deep stretch and a hard peak contraction, resulting in a greater stimulus for muscle growth. (3)

Benefits of the Straight-Arm Pushdown

The straight-arm pulldown is very unique among back exercises because it allows you to zero-in on your lats without much fatigue or involvement from other back muscles.

Muscle Growth

Single-joint exercises are ideal for hypertrophy (muscle growth) because their purpose is to isolate a target muscle as much as possible. Isolation movement aren’t as effective for building strength because they weight used is limited, but if when it comes to talking strictly about muscle growth, they can be just as efficient as multi-joint exercises. (4)

Isolate Your Lats

If you’re a physique enthusiast and your lats are a weak point, the straight-arm pushdown is a perfect fix to bring them up to par. The fact that the straight-arm pushdown isolates the lats means you can really focus on them and correct any imbalances. You don’t have the risk of having your biceps, shoulders, or other back muscles taking over the movement.

The exercise also generates relatively less fatigue and is easier to perform than a multi-joint back exercise, meaning you could train it more often than other movements. The high-tension exercise is also better at increasing mind-muscle connection in your lats, something many lifters struggle with, but it can result in more muscle growth.

Muscles Worked by the Straight-Arm Pushdown

The straight-arm pushdown might be an isolation exercise, but the truth is that you can never isolate a single muscle. Let’s see what it trains.

Latissimus Dorsi

The lats are the biggest back muscle, giving it all its width. It goes from your hip bone to your humerus (arm bone) and attaches to your spine. This muscle has many functions including extending or flexing your torso, and moving or rotating the shoulder.

During the straight-arm pushdown, the lats are recruited when bringing your arms down toward your body’s midline. The straight-arm pushdown is one of the few back exercises that can perform this movement with limited involvement from the biceps.

Teres Major

This upper-back muscle goes from the humerus to the scapula, and it assists the lats in almost every function. The teres is heavily recruited during the straight-arm pushdown to stabilize your shoulder blades as your shoulders rotate and move through the range of motion..

Triceps Brachii

Even though the straight-arm pushdown primarily targets the back muscles, you’ll most likely feel your triceps burn during the exercise because they’re being worked statically, to maintain the straight-arm position. This posterior arm muscle consists of three heads (the long, lateral, and medial heads).

The long head, in particular, goes from the elbow to the scapula (shoulder blade) and it assists in moving your in toward your body’s midline, similar to the lats. 

How to Program the Straight-Arm Pushdown

The straight-arm pushdown is ideally used for hypertrophy. In that regard, you should use repetition schemes conducive to muscle growth. 

Moderate Weight, Moderate Repetition

This time-tested approach is the go-to for most bodybuilders. Three to four sets of eight to 12 repetitions will provide ample muscle tension and stimulus for optimal growth. This is a staple approach for a well-rounded back workout.

Low Weight, High Repetition

You can also use longer duration sets as a “finisher” for a serious burn and to practice technique. Two to three sets of 15 to 20 repetitions at the end of a session will encourage muscle growth as well, but will provide a different feeling from relatively heavier and lower rep training. Be sure to keep good posture and avoid swinging the weights as the reps get higher.

Straight-Arm Pushdown Variations

Once you’ve mastered the standard movement, you can try these variations to provide the same benefits to your body while creating a different stimulus. While these exercises are similar, the technique and movement differences will allow you to progress even further. (5)

Kneeling Straight-Arm Pushdown

This variation can be an excellent addition if you’re a taller lifter because it lets you use a full range of motion without worrying about the weight stack hitting the top of the pulley.

The kneeling position also provides more core and stability work because it’s harder to maintain and stabilize your balance. This increased core activation can be transferable to other exercises like the pull-up or general sports activities.

Dumbbell Pullover

This old school exercise is a favorite among classic bodybuilders. You only need a dumbbell and a bench, which is invaluable when you train during peak hours in a busy gym. You can either lie fully flat on a bench, or across it resting only your upper back on the bench which will increase the difficulty, thoracic (upper back) stretching, and core recruitment of the exercise.

The dumbbell pullover is also interesting because it changes the curve of resistance of the exercise — it emphasizes the lengthened contraction and the stretch of the muscle, but there’s almost no tension at the top. This can provide a completely novel stimulus which may trigger more growth.

Bent-Arm Barbell Pullover

This exercise is as old school as its dumbbell cousin and it follows the same general principles but this time, you’re using a barbell which changes your hand position and grip width.

The other key difference is that you’re not keeping your arms straight, but bent at around 90-degrees. The angle is maintained for the entire lift. This helps to put the lats into a nice, deep stretch. A few sets of practice and you’ll be able to appreciate the unique feeling of this classic movement.

Frequently Asked Questions

How wide should my grip be to target the lats?

The standard grip with a straight-arm pushdown is around shoulder-width, but it’s more a question of comfort. Some lifters feel more natural pulling with a much wider grip, holding a lat pulldown bar attachment well-beyond shoulder-width. Other lifters use a rope handle and keep their hands almost touching each other during the exercise.
Use the grip width that allows you to feel the target muscles contract and stretch without causing any shoulder discomfort and without interference from other body parts. The most important part of the movement is maintaining a straight-arm position, not bending your arms throughout the lift.

When should I do the straight-arm pushdown in a workout?

Isolation exercises are often best performed later in a workout, especially when there is a significant stretch involved in the exercise, like the top position of the straight-arm pushdown. This helps to make sure your joints and muscles are fully warmed up to safely utilize the full range of motion.
You should do your heavier compound exercises, like rows or pull-ups, earliest in the workout when you’re fresh and can move the most weight, then finish the target muscle with the straight-arms pushdown at the end of the session.
However, you could sometimes use the this movement earlier in the session if you have trouble feeling your lats. Isolation exercises are great for “pre-exhausting” individual muscles and developing the mind-muscle connection.

Push Yourself to the Next Level

The straight-arm pushdown can help you define and reinforce your back whether you’re a beginner or an experienced lifter. If you’re looking to step up your back game, fill your shirts, and get stronger, it’s time to appreciate this rare isolation exercise.

References

  1. Faigenbaum AD, Myer GD. Resistance training among young athletes: safety, efficacy and injury prevention effects. Br J Sports Med. 2010 Jan;44(1):56-63. doi: 10.1136/bjsm.2009.068098. Epub 2009 Nov 27. PMID: 19945973; PMCID: PMC3483033.
  2. Calatayud J, Vinstrup J, Jakobsen MD, Sundstrup E, Brandt M, Jay K, Colado JC, Andersen LL. Importance of mind-muscle connection during progressive resistance training. Eur J Appl Physiol. 2016 Mar;116(3):527-33. doi: 10.1007/s00421-015-3305-7. Epub 2015 Dec 23. PMID: 26700744.
  3. Schoenfeld, Brad J. The Mechanisms of Muscle Hypertrophy and Their Application to Resistance Training. Journal of Strength and Conditioning Research: October 2010 – Volume 24 – Issue 10 – p 2857-2872 doi: 10.1519/JSC.0b013e3181e840f3
  4. Gentil P, Soares S, Bottaro M. Single vs. Multi-Joint Resistance Exercises: Effects on Muscle Strength and Hypertrophy. Asian J Sports Med. 2015 Jun;6(2):e24057. doi: 10.5812/asjsm.24057. Epub 2015 Jun 22. PMID: 26446291; PMCID: PMC4592763.
  5. Baz-Valle E, Schoenfeld BJ, Torres-Unda J, Santos-Concejero J, Balsalobre-Fernández C. The effects of exercise variation in muscle thickness, maximal strength and motivation in resistance trained men. PLoS One. 2019 Dec 27;14(12):e0226989. doi: 10.1371/journal.pone.0226989. PMID: 31881066; PMCID: PMC6934277.

Featured Image: ANRproduction / Shutterstock

Source

May 12, 2022

Build Back Muscle and Work Up to a Pull-Up With the Lat Pulldown

Filed under: Fitness,Training — Tags: , , , , , — admin @ 2:47 pm

Many gym-goers are well aware of the pull-up, but struggle to perform their first rep. While it may be fairly easy for some, for others, it is a much longer journey that can be shortened by spending time building the strength of the back musculature.

This is where the lat pulldown, sometimes called the front pulldown, comes in. It’s equally effective for beginners, intermediates, and advanced lifters because it can be performed with a variety of attachments and requires minimal equipment to execute. Here’s how to get the most out of this fundamental back-building exercise.

How to Do the Lat Pulldown

Because the lat pulldown uses a cable machine, it provides a great opportunity for muscle development. Master the basic movement, and then you can manipulate your body position and bar attachments to target your back muscles in a variety of ways.

Step 1 — Grab the Bar and Sit Down

Muscular man performing lat pulldown in gym

Credit: martvisionlk / Shutterstock
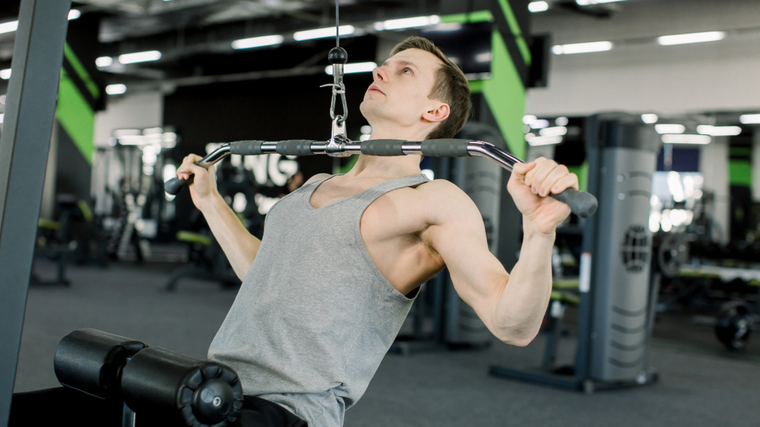
Attach a wide bar to the pulldown cable attachment. Take a seat and adjust the kneepads to keep your lower body locked into place. Stand up and take hold of the bar wider than shoulder-width using a pronated grip (palms facing away from you).

Keep hold of the bar with slightly bent arms and use your bodyweight to descend into the seat. Shift your thighs under the pads and firmly plant your feet on the floor.

Form Tip: Stand with your thighs as close to the pads as possible before descending to help you better get into position smoothly. Locking your legs beneath the pads helps to provide stability and can reinforce a strict upper body position.

Step 2 — Pull the Weight to Your Chest

Woman performing pulldown exercise in gym

Credit: lunamarina / Shutterstock

Remain in an upright position and create a very slight arch in your lower back, opening your chest towards the ceiling. Pull your shoulder blades together and down. Engage your core and pull the bar until it is underneath your chin or touches your chest without using any momentum.

Your torso should remain mostly stationary throughout the entire rep. Rather than just thinking “pull using every muscle available,” a great cue is to think about pulling your elbows out to the sides and down into the floor.

Form Tip: Imagine you are wearing pants that have back pockets and think about pulling your shoulder blades back and down towards those pockets. This scapular retraction and depression helps to engage more upper back muscles.

Step 3 — Raise Your Arms, Lower the Weight

Woman in gym performing pulldown exercise

Credit: Slatan / Shutterstock

Once you have reached the bottom, raise your arms under control, remaining seated. When your arms are fully stretched, release your shoulder blades from the pulled back position. Don’t shift or swing your upper body while your arms move.

Form Tip: When ascending back to the top of the movement, it is common to see people moving too fast. By not controlling the weight, you decrease stress on the back muscles and allow arms to take over. Take the time to feel your back muscles as they slowly stretch and fully lengthen. This body awareness creates a sense of mindfulness and helps you to use your back muscles more effectively in this and other exercises.

Lat Pulldown Mistakes to Avoid

While your lower body is set in place, your upper body is unsupported and simple mistakes in technique can reduce muscle activation and overall effectiveness.

Pulling the Bar Behind Your Neck

While behind the neck pulldowns are technically an exercise variation and not necessarily a “mistake,” it’s important to know that the movement can put you at risk of shoulder injury.

Woman in gym performing behind the neck pulldown

Credit: Zoriana Zaitseva / Shutterstock
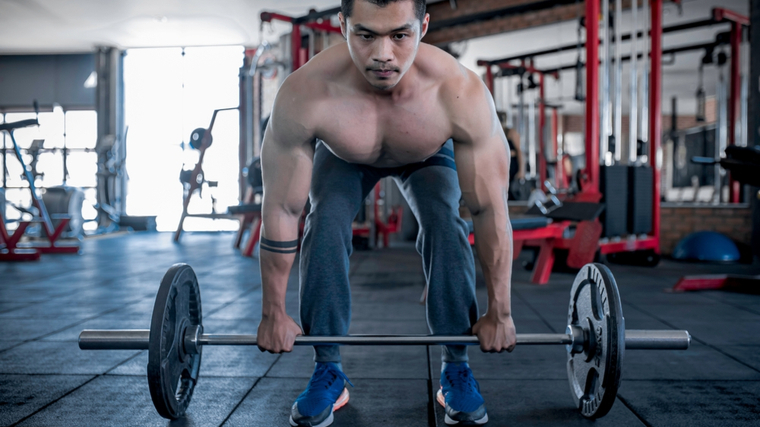
Due to the positioning of the shoulder joint, you may find yourself with some discomfort and irritation of the shoulders. (1)(2) Avoid this movement altogether and keep the bar in front.

Avoid It: Lifters often use the behind the neck pulldown thinking that it targets the back muscles differently. However, research has shown that this variation is no more effective at training the lats than your standard lat pulldown, yet has a higher potential for injury. (3)
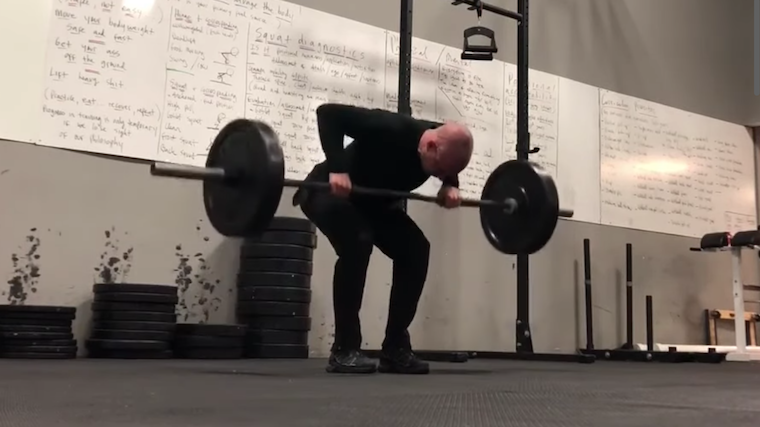
Gripping the Bar Too Wide

Some lifters use an extremely wide grip, often at the extreme ends of the bar, in the hopes that it will help to build wider lats. Unfortunately, “wide grip = wide lats” doesn’t pan out.

Muscular man in gym performing wide grip pulldown

Credit: NDAB Creativity / Shutterstock

Research has shown that the wide-grip variation is not more effective than the standard lat pulldown for training your lats. (4)

Avoid It: Maintain a standard grip, slightly wider than your shoulders. To build a wider back, focus on performing the exercise properly, contracting the muscles, and achieving a complete stretch.

Swinging Your Torso

Some lifters perform the lat pulldown like a fish out of water, with their whole upper body swaying back and forth. In some cases, you will even see their lower body come up off the seat. This is not the way to get results.

Man in gym performing back exercise with cable machine

Credit: SofikoS / Shutterstock

Avoid using any weight that causes you to sway excessively. This instability of your torso will displace stress from the muscles you want to target, which will take away from the effectiveness of the exercise.

Avoid it: Engage your core musculature and flex your abs while imagining being “stuck in the mud.” You want to be so stable that if someone tried to shove you from any angle, you remain in position.

Benefits of the Lat Pulldown

The benefits of the lat pulldown begin with its simplicity in set up and potential to be progressed (made more challenging) or regressed (made easier) beyond simply increasing or reducing weight.

Older woman performing pulldown exercise

Credit: YAKOBCHUK VIACHESLAV / Shutterstock

Pulldowns can help to improve a range of qualities in the upper body such as muscular strength, muscle hypertrophy, muscular endurance, and performance.

Constant Tension

The use of the cable places a significant amount of stress on the muscles due to the constant tension being placed throughout the entire range of motion. This makes it an invaluable exercise for lifters working to build size, because a greater amount of time under tension has been shown to stimulate more muscle growth. (5)

Beginner-Friendly

The pull-up and chin-up will always reign as kings for upper body vertical pulling exercises, but the lat pulldown can still be a great exercise for lifters new to training. You may not be strong enough to perform a pull-up, but the lat pulldown will assist in developing your back musculature as you become stronger over time.

The lat pulldown places relatively less demand on your body, which means you can train with a considerable amount of volume by increasing your sets and reps each week, making it a great exercise to build muscle and strength in your back.

Muscles Worked by the Lat Pulldown

The lat pulldown works a host of muscles on your back, including the large lat muscles and the entire upper back.

Muscular man performing back exercise on pulldown machine

Credit: Nikolas_jkd / Shutterstock

This pulling movement, like most back exercises, also provides some stimulation to the forearms and biceps.

Latissimus Dorsi

The lats are the wide muscles on either side of your back. They have two functions — to bring the arm in closer to your body when it is out to the side and to bring the arm closer to the body when it is out in front. The path of your elbow and upper arm follows both of these movements, which is why pulldowns hit target the lats efficiently.

Upper Back

The trapezius, rhomboids, teres, infraspinatus, and posterior deltoid work together to form the upper back musculature. They control a variety of movements at the scapulae (shoulder blades), including raising and lowering, pinching together, extending, and pulling downwards.

Biceps Brachii

The biceps are recruited during nearly all back exercises, particularly pulldowns as the weight is lifted and your arm bends and straightens at the elbow. “Lifting with the arms” can occur when your elbows are bent too quickly and the biceps move the weight, rather than lifting with your back muscles by focusing on moving your upper arm at the shoulder.

Forearms

The forearm muscles, specifically the wrist flexors on the palm-side of the arm, are heavily activated to secure your grip to the bar while lifting and lowering the weight. Some lifters may have their grip strength become a limiting factor when pulldown weights get excessively heavy. Progressing gradually, or considering lifting straps, should help to avoid the problem.

Who Should Do the Lat Pulldown

A number of lifters can make use of the lat pulldown within their programming due to its versatility, simplicity in its set up, and ability to provide a significant amount of tension on the majority of the back muscles.

Training for Muscle

You would think by the name of the exercise that it would specifically target the lats, yet, most people are surprised that research has shown it actually trains the majority of your back muscles very effectively. (6)

Not only can you use relatively heavy weights, since this exercise recruits almost every major muscle group in your back, but you also don’t need to use multiple exercises within your workout which makes the lat pulldown an ideal, time-efficient choice.

How to Program the Lat Pulldown

To maximize muscle development and strength, a variety of rep ranges can be used on the lat pulldown. However, you should never use a weight so heavy that it takes away from executing the exercise properly.

Too many lifters pile on the weight and swing their torso to get it moving, thinking they’re overloading their back when all they’re doing is stressing their joints, not their muscles.

Moderate Weight, Moderate Repetition

To maximize muscular hypertrophy, training within a close proximity to muscular failure in the six to 12 rep range for three or four sets is the most effective way to program this exercise.

Light Weight, High Repetition

The use of the cable machine creates constant tension, increasing the muscle-building stimulus. This can be further exploited at the end of a workout to fully exhaust all muscle fibers. Using two to three sets of 12 to 20 reps will serve you best.

Lat Pulldown Variations

The lat pulldown is a highly adaptable exercise that can be used in a variety of ways by simply attaching a different handle or attachment.

V-Bar (Neutral-Grip) Pulldown

The neutral-grip variation uses a V-bar attachment to allow your palms to face each other. This adjusted grip position provides you with a mechanical advantage which allows you to lift more weight.

This is a great variation to use for working the surrounding muscles of the scapulae through a full range of motion while strengthening your back in the process.

Supinated-Grip Pulldown

The supinated variation uses a standard long bar with your palms facing you. The key difference with the supinated lat pulldown is that it trains the biceps more than the standard pulldown, with the lats being trained more in the standard movement. (7)

This can be seen as a similar relationship between the pull-up and chin-up, with the chin-up emphasizing the biceps and the pull-up emphasizing the lats

Single-Arm Pulldown

Attaching one single handle to the pulley and training each arm individually allows you to identify any muscular imbalances between sides of the body. By focusing on each side independently, you can strengthen and correct any differences.

The free movement of a single handle also allows you to use a variety of hand positions, either neutral (palm facing you), supinated, pronated, or rotating during the movement. Each hand position will slightly alter muscle recruitment and can reduce stress on elbow or shoulder joints.

Lat Pulldown Alternatives

Once you have built a solid foundation of strength on the lat pulldown, your back will be better developed to progress into more advanced exercise alternatives. It is important to note that the lat pulldown can still be used within your workouts, but the order of priority may change.

For example, you may perform more challenging exercises earlier in your back workout when your strength, focus, and energy is higher and train pulldowns later in the workout.

Pull-Up

The goal of successfully performing a pull-up (or chin-up) should be on every lifter’s mind since it works the entire back, can be done nearly anywhere, and is so easy to progressively overload.

Mastering this fundamental bodyweight exercise can benefit any lifter or athlete.

Assisted Pull-Up

The assisted pull-up, either with a machine or using resistance bands, is a great exercise to transition from pulldowns to full pull-ups This exercise allows you to practice the correct positioning of the upper body and reinforce technique that will be required when performing a pull-up.

Use this exercise to focus on feeling the back musculature throughout the eccentric (lowering)and concentric (lifting) portions of the lift while also practicing your ability to engage your core and keep your torso stable.

FAQs

Is there a “best” pulldown attachment to use?

All of the variations of the lat pulldown are very effective exercises that should be used across multiple phases of training. To maximize overall back development, it would be a good idea to rotate one or two of these variations into each phase of your programming.

This will help decrease any muscular imbalances that may occur when solely focusing on one exercise, but can also help you identify any weak points that you may have when using certain variations.

How long until I will be able to perform a bodyweight pull-up?

Every person will progress at their own ability based on a number of individual factors, so there is no set timeline to achieving your first bodyweight pull-up. However, if you are incorporating a combination of the above pulldown variations into your workouts, this will give you the best opportunity at finally achieving that bodyweight pull-up or chin-up faster.

While the pull-up may be considered as the ultimate goal, once you feel that your back is strong enough, starting with the chin-up alternative will allow you to practice the same general technique involved in the pull-up, but it is relatively easier to perform due to the slight mechanical advantage using a supinated grip.

Perfect the Pulldown

The lat pulldown is a reliable back-builder, perfect for beginners and advanced lifters. It should be a staple in any back routine, whether you’re on the way to your first pull-up or can knock them out by the dozen.

References

  1. Pagnani, M. J., & Warren, R. F. (1994). Stabilizers of the glenohumeral joint. Journal of shoulder and elbow surgery, 3(3), 173–190. https://doi.org/10.1016/S1058-2746(09)80098-0
  2. Durall, Chris & Manske, Robert & Davies, George. (2001). Avoiding Shoulder Injury From Resistance Training. Strength & Conditioning Journal. 23. 10. 10.1519/00126548-200110000-00002.
  3. Sperandei, S., Barros, M. A., Silveira-Júnior, P. C., & Oliveira, C. G. (2009). Electromyographic analysis of three different types of lat pull-down. Journal of strength and conditioning research, 23(7), 2033–2038. https://doi.org/10.1519/JSC.0b013e3181b8d30a
  4. Andersen, V., Fimland, M. S., Wiik, E., Skoglund, A., & Saeterbakken, A. H. (2014). Effects of grip width on muscle strength and activation in the lat pull-down. Journal of strength and conditioning research, 28(4), 1135–1142. https://doi.org/10.1097/JSC.0000000000000232
  5. Burd NA, Andrews RJ, West DW, et al. Muscle time under tension during resistance exercise stimulates differential muscle protein sub-fractional synthetic responses in men. J Physiol. 2012;590(2):351-362. doi:10.1113/jphysiol.2011.221200
  6. Ronai, Peter. (2019). The Lat Pulldown. ACSMʼs Health & Fitness Journal. 23. 24-30. 10.1249/FIT.0000000000000469.
  7. Lehman, G. J., Buchan, D. D., Lundy, A., Myers, N., & Nalborczyk, A. (2004). Variations in muscle activation levels during traditional latissimus dorsi weight training exercises: An experimental study. Dynamic medicine : DM, 3(1), 4. https://doi.org/10.1186/1476-5918-3-4

Featured Image: lunamarina / Shutterstock

Source

May 5, 2022

Build Explosive Pulling Power With the Pendlay Row

Glenn Pendlay was one of the leading coaches in American weightlifting — he held a Level 5 accreditation from USA Weightlifting (the highest available) and coached many high-level athletes to medals in national and international competitions.

In addition to his lifters’ success on the platform, he’s known for popularizing a strength-building exercise known as the Pendlay row — a barbell row performed from the floor to the stomach each rep. The movement has been used to build back strength and size in strength athletes and lifters of all levels. Here’s how to perform this highly effective movement.

Pendlay Row Technique Video

Coach Greg Walsh demonstrates a textbook Pendlay Row. Note the nearly horizontal torso, stationary upper body, and full stop at the bottom.

How to Do the Pendlay Row

The barbell row has been a long-running staple for building size and strength in the back, shoulders, and arms. The Pendlay row enforces specific technique to increase power output and make the target muscles work even harder.

Step 1 — Get Into the Starting Position

Muscular man in gym bending down to grab barbell

Credit: kittirat roekburi / Shutterstock

Begin with a loaded barbell on the floor directly above your toes. Stand with your feet slightly wider than shoulder-width. With a slight bend in your knees, push your hips back and bend at the waist until your upper body is parallel to the ground.

Arch your lower back and grab the bar with an overhand grip. Your grip width will be determined by your arm length. The priority is maintaining a parallel torso, so grabbing the bar wider than shoulder-width should be necessary.

Form Tip: You should feel tightness, not discomfort, in your hamstrings from holding the correct upper body position. If you feel pain, thoroughly warm-up your hips, hamstrings, glutes, and lower back to achieve the position more comfortably.

Step 2 — Perform an Explosive Pull

Man in gym performing barbell row

Credit: Breaking Muscle / Youtube

Flex your abs and squeeze the bar to create tension and stability. Pinch your shoulder blades together and quickly drive your elbows up while pulling the bar to your lower chest. Your torso should not lift from the parallel position.

The bar should physically touch your lower chest or upper abdomen before you allow it to return quickly to the ground. Don’t try to deliberately slow the barbell on the descent. Let the bar come to a complete rest on the ground before beginning the next rep.

Form Tip: If your torso moves significantly, reduce the weight on the bar and focus on maintaining a tight posture. Keeping a strict upper body position while lifting explosively is more important than swinging heavy weights.

Pendlay Row Mistakes to Avoid

The Pendlay row is specifically used to avoid technique issues more common with traditional barbell rows. Make sure you’re performing it correctly by avoiding these problems.

Moving Your Upper Body

One of the most noticeable differences with a Pendlay row is the significantly bent-over position, keeping the upper body parallel to the ground throughout the exercise. This allows maximum stress to be placed on the upper back and lat muscles, without using the lower back, glutes, and hamstrings to move the weight.

Muscular man performing barbell row exercise

Credit: Miljan Zivkovic / Shutterstock

If your torso shifts to get the weight moving, you’re dissipating stress from the target muscles and reducing the strength and size benefit of the exercise.

Avoid It: Remember that the body position is deliberately bent forward in order to get optimal results. Be conscious of maintaining a strict parallel position. Never trade technique for more weight on the bar.

Bouncing Off the Floor

Each rep of a Pendlay row should be performed with the bar starting from a rested position on the floor. This requires your body to produce maximum force for each individual rep, instead of relying on the stretch-shortening cycle (a muscular phenomenon which uses a stretched position to increase strength). (1) This technique is sometimes referred to as “dead-stop training.”

Man in gym performing barbell exercise

Credit: Qilin’s prance Filmmaker / Shutterstock

Eliminating this full rest at the bottom allows momentum to build, which decreases the body’s force production and reduces the exercise’s effectiveness.

Avoid it: Allow the bar to come to a complete stop on the ground after each rep. Releasing the bar and resetting your grip between each rep can also help to ensure a full stop. Approach any given set as a series of individual reps, not one group of several reps. For example, instead of “a set of five reps,” think of performing “five single reps” with one second between each.

Benefits of the Pendlay Row

The Pendlay row was initially used to support good old-fashioned strength gains. Like all barbell rows, it also delivers plenty of muscular growth as well. Here are all the reasons to train with this big, basic lift.

Muscular athletes holding barbell

Credit: Yupa Watchanakit / Shutterstock

Back Strength

A strong back is essential for maximal strength production during pressing exercises and for reducing the risk of shoulder injuries. (2) The Pendlay row directly trains all the muscles of the back to directly increase pulling strength, as well as to carryover to bench and overhead pressing.

Explosive Power

Because the Pendlay row is performed from a dead-stop, an explosive lift is required to move the weight. This helps to increase muscle recruitment and has been shown to increase overall power and strength gains. (3)

Back Size

Directly training the lats and upper back with heavy weights is an ideal way to trigger muscle growth. The Pendlay row applies muscular stress to these body parts, along with the biceps and forearms, making it an excellent cornerstone for any back-building workout.

Muscles Worked by Pendlay Row

The Pendlay row is a compound (multi-joint) exercise coordinating a number of muscles to complete the lift. This intense exercise hits nearly every muscle on the back half of the body, and then some.

black and white phot of bodybuilder preparing to lift a barbell from the ground

Credit: SOK Studio / Shutterstock

Upper Back

The upper back — consisting of the trapezius, rear deltoids (shoulders), rhomboids, and other smaller muscles — works primarily to control the shoulder blades (scapulae). The Pendlay row activates the upper back on each repetition, helping to lift the bar from the ground and pull the bar into the top position.

Lats

The latissimus dorsi (lats) are the largest muscles on the back, running near your ribs and from under your arms to your lower back. They work to bring your arm in towards your body from an extended position, making them the primary mover during any rowing exercise.

Spinal Erectors

The spinal erectors are a pair of muscular columns running the length of your spine. They work to control your torso position at the waist (bending forwards or sideways, and rotating). During the Pendlay row, the spinal erectors work to maintain a static upper body position.

Biceps

The biceps brachii (biceps) control flexion at the elbow, bending your arm into a closed position. While they don’t undergo a complete contraction during a Pendlay row (a wider grip on the bar prevents a full biceps contraction), the biceps help to pull the weight towards your body and complete the lift in the top position.

Forearms

The forearms are technically composed of two separate muscles — the flexors on the bottom side of the forearm and the extensors on the top side. Maintaining a secure grip on the barbell during Pendlay rows heavily activates the flexors, while controlling the bar during the upwards lift recruits the extensors.

Who Should Do the Pendlay Row

Like many compound exercises, lifters with a variety of goals can benefit from incorporating the Pendlay row into their workouts.

Strength and Power Athletes

Lifters focused on moving serious weights in competition (or, really, for recreation too) can benefit from the strength and power built from Pendlay rows. Coach Pendlay initially used the exercise to assist the powerlifts and eventually used it as a staple for his Olympic weightlifting champions.

Training for Muscle

Heavy rowing exercises have consistently built large, muscular backs. The Pendlay row develops thicker, wider lats and an upper back to match.

How to Program the Pendlay Row

To efficiently train for size and strength without excessive fatigue in the support muscles of the lower back, which would compromise technique, the Pendlay row is best trained with relatively lower reps. Here are some effective guidelines

Moderate Weight, Low Repetition

Focusing on the Pendlay row’s explosive performance can sometimes mean applying more force to less weight. Training for two to six sets of two to four reps can prioritize maximum force production, which leads to more power development.

Heavy Weight, Low Repetition

Three to five sets of three to five reps is a time-tested way to move heavy weights on big compound lifts, delivering size and strength gains. When you begin lifting heavier weights while keeping strict form, you open a very big door to very big results. Remember that you may not be able to lift as much with the Pendlay row as you can with a traditional bent-over row.

Pendlay Row Variations

The Pendlay row delivers plenty of benefits, but not all lifters may be ready to dive into this big lift. Here are the best ways to work up to Pendlay rows.

Chest-Supported Row

The chest-supported row allows the back to be trained without requiring any lower body stabilization. This makes it ideal for lifters working around a lower back issue or lifters who may have mobility restrictions preventing them from reaching the parallel torso position needed for Pendlay rows.

Another benefit of many chest-supported row machines is a variety of gripping handles, which can slightly alter recruitment by emphasizing different muscles of the back.

Neutral-Grip Two Dumbbell Row

While the single-arm dumbbell row is common, performing the movement with two dumbbells at once is an excellent “gateway” to barbell rowing. By requiring both sides of the body to carry their share of the load (no weightlifting pun intended), strength discrepancies in muscles on either side can be more easily noticed and addressed.

Using a neutral-grip also reduces strain on the shoulder joint and allows increased muscular stress on the biceps and upper back.

Reverse-Grip Barbell Row

The reverse-grip barbell row involves a supinated (palms up) grip which significantly increases biceps activation and changes the exercise’s range of motion, which affects the back muscles.

The trapezius is more significantly activated due to a more upright torso angle and the lats are kept under constant tension with a significant stretch in the bottom position.

Pendlay Row Alternatives

There are a handful of exercises which can build size, strength, and power like the Pendlay row. Here are some of the top choices.

Barbell Row

While the Pendlay row involves a strict, parallel torso position and pulling each repetition from the ground, “breaking” those rules turns the barbell row into a different back-building beast.

The same muscle groups are activated to varying degrees. A slightly angled torso position reduces the hip and hamstring mobility requirement or Pendlay rows, while the muscles are kept under constant tension without resting the barbell. This makes the exercise more suitable for moderate to higher repetitions without fatiguing the supportive muscles.

Kroc Row

If a Pendlay row is considered a “strict barbell row,” a Kroc row could be considered a “controlled chaos dumbbell row.” It’s typically performed using heavy weights for high-rep sets and is often mistaken for standard single-arm rows being done with poor form.

Kroc rows can be very effective for building upper back strength and size even though they involve leg drive and body English rather than super-strict upper body pulling.

Power Clean

The power clean is arguably one of the most beneficial exercises that an athlete can perform in the gym. (4) It’s a classic staple in strength and conditioning programs for contact sports and is a variation of the clean and jerk from competitive Olympic weightlifting.

The power clean builds explosive total-body strength while packing size onto the upper back and traps, specifically. Note: When performing power cleans (or any Olympic lift variation), the bar should only be dropped from the top position if you’re using bumper plates and a specific lifting platform.

FAQs

My grip fatigues before the end of my set. Should I use lifting straps?

With many rowing exercises, and back exercises in general, muscular fatigue setting into the smaller muscles of your grip and forearms before the larger back muscles is a common issue. While grip strength often improves relatively quickly, it shouldn’t affect the primary goal of any exercise.

Supporting your grip with lifting straps during the heaviest and most challenging sets can improve performance overall. Over-relying on lifting straps, however, such as wearing them when lifting less-challenging weights, can prevent the development of grip strength.

Why does my lower back hurt during the exercise?

Keeping your torso in a parallel position is essential in the Pendlay row. However, some lifters may find that this position aggravates lower back pain or they may be unable to achieve sufficient depth in the first place.

The solution is to address flexibility and mobility in the lower back, hamstrings, glutes, and hips. Depending on your specific needs, it could be as simple as performing light weight single-leg deadlifts at the start of each workout or as thorough as consistently practicing a complete hip mobility series.

Pendlay Rows for Power

The Pendlay row has supported strength and power development for nearly three decades and has been used by top lifters around the world. With a simple barbell, and more than a few weight plates, you can add it to your own workouts and build world-class strength and size.

References

  1. Seiberl, Wolfgang et al. “Editorial: The Stretch-Shortening Cycle of Active Muscle and Muscle-Tendon Complex: What, Why and How It Increases Muscle Performance?.” Frontiers in physiology vol. 12 693141. 20 May. 2021, doi:10.3389/fphys.2021.693141
  2. Escalante, Guillermo DSc, MBA, ATC, CSCS, CISSN1; Fine, Daniel SPT, CSCS2; Ashworth, Kyle SPT, CSCS2; Kolber, Morey J. PT, PhD, CSCS2 Progressive Exercise Strategies to Mitigate Shoulder Injuries Among Weight-Training Participants, Strength and Conditioning Journal: February 2021 – Volume 43 – Issue 1 – p 72-85 doi: 10.1519/SSC.0000000000000547
  3. Aagaard P, Simonsen EB, Andersen JL, Magnusson P, Dyhre-Poulsen P. Increased rate of force development and neural drive of human skeletal muscle following resistance training. J Appl Physiol (1985). 2002 Oct;93(4):1318-26. doi: 10.1152/japplphysiol.00283.2002. PMID: 12235031.
  4. Huyghe, Thomas & Goriss, Brent & DeLosAngeles, Ernest & Bird, Stephen. (2021). Exploring The Power Clean. International Journal of Strength and Conditioning. 1. 10.47206/ijsc.v1i1.95.

Featured Image: kittirat roekburi / Shutterstock

Source

April 22, 2022

Everything You Need to Know to Master the Pull-Up

The pull-up is the meat and potatoes of any back workout. It’s one of the few exercises that nearly every experienced lifter agrees is essential for building a foundation of size and strength. You’ll find it performed and praised by bodybuilders, strength athletes, and traditional sports athletes due to its wide benefits. 

This battle-tested exercise is unique since it delivers a stronger back and abs for huge carryover to almost every other major lift. Plus, bigger muscles in the back, shoulders, and arms will improve any physique. All while using only your bodyweight. You don’t need a gym to find plenty of gains.

How to Do the Pull-Up

Pull-ups are a great addition to any strength program. The simple movement of lifting yourself up to a bar will provide a great range of benefits that assist in general strength, posture, and core stability. 

Step 1 — Hang From a Bar

Man and woman hanging from pull-up bar

Credit: Flamingo Images / Shutterstock

Start hanging from a straight bar with your core stabilized to prevent your body from swaying. Set your hands so they’re a smidge wider than shoulder-width using a pronated (overhand or palms down) grip. To maintain balance and coordination, you can cross one foot over the other at your ankles.

Form Tip: When stabilizing your core, imagine someone is about to punch you in the stomach. The initial flinch of tightening your stomach will place you in an effective bracing position.

Step 2 — Pull Your Chest Towards the Bar

Man and woman performing pull-ups

Credit: Flamingo Images / Shutterstock

Take a breath before beginning to pull yourself towards the bar. Pull your shoulder blades together to recruit your upper back muscles. Maintain that squeeze while bending your elbows to raise your body. Exhale throughout the movement. Lean back very slightly on the way up.

When your neck is near the bar, you’ve completed the concentric (pulling) portion of the rep. In the top position, your torso should be angled slightly backwards with your elbows near your ribs.

Form Tip: To improve muscle coordination and muscle fiber recruitment, pause at the top for one or two seconds.

Step 3 — Lower Under Control

Muscular man performing pull-ups outdoors

Credit: oOhyperblaster / Shutterstock

Start the eccentric (lowering) portion of the rep by extending your elbows to lower your body. Breathe in and keep your core engaged. Do not swing to create momentum between each rep. Keep your legs hanging directly down.

Form Tip:To improve the quality of each rep and prevent any swaying, lower yourself over two seconds and pause at the bottom before beginning the next rep.

Pull-Up Mistakes to Avoid

The pull-up is a basic bodyweight exercise, but there are several common technique errors to avoid in order to build strength and muscle while reducing joint strain.

Not Using a Full Range of Motion

The half-rep pull-up is an all too common issue seen in many gyms. Some lifters smash out rep after rep while only descending halfway down before rushing straight back to the top. When it comes to maximizing strength and muscle gains, these half-reps are counterproductive.

Man performing pull-ups outside

Credit: Syda Productions / Shutterstock

The shortened range of motion reduces the muscle’s time under tension, which can reduce muscle growth and strength development.

Avoid it: Leave your ego at the door and focus on quality reps over quantity. Lower yourself into a fully stretched position before re-engaging your muscles to lift yourself back up.

Excessive Swinging

Stabilizing the body is crucial for minimizing stress on the shoulder joint. If you are trying to build strength and muscle, using an excessive amount of swinging is not going to help and may make things worse in the long run.

Man swinging from pull-up bar

Credit: baranq / Shutterstock

CrossFit training has popularized “kipping pull-ups”, a specific exercise variation which has the trainee deliberately swing the lower body back and forth throughout each rep. This generates momentum which helps to perform high-rep sets and turns the back-building pull-up into a full-body exercise. Kipping is a specific technique used for a specific purpose. It’s also a deliberately learned skill, it’s not meant to be an accidental way to perform basic pull-ups.

Avoid it: Focus on the core-engaging cue explained in step one of the setup. While hanging and before pulling, flex your stomach as if you were about to be punched in the gut. Maintain this ab tension throughout each rep.

Benefits of the Pull-Up

The pull-up is a second-to-none vertical pulling exercise. When performed correctly, it can emphasize the development of strength and muscle across the entire upper body, support overall posture, and help general shoulder and upper back mobility.

Three people performing pull-ups on wall-mounted bars

Credit: UfaBizPhoto / Shutterstock

Getting Bigger and Stronger

Because so many muscles are involved in the exercise, the pull-up delivers a serious bang for your buck. This one movement builds muscle through the entire back, shoulders, and arms. Even the abs get a solid workout. It is also a very easy exercise to progressively overload (make more challenging, often with added weight), which makes the exercise ideal for building strength. 

Carries Over to Multiple Exercises

The pull-up recruits and builds muscles which play key roles in many other lifts. Strengthening these support muscles translates to improvement in other exercises. For example, strengthening the lats, upper back, and middle back can carryover to the bench press where you need to retract your shoulder blades into the bench to create stability and control when pressing a heavy weight.

Better Grip Strength

While there are specific exercises to build a stronger grip, simply performing the pull-up strengthens your forearms and grip without additional wear and tear that may occur from more grip-focused exercises like the deadlift. Because you’re hanging from the bar supporting your bodyweight during each set, your grip strength is being consistently trained from the first rep to the last.

Muscles Worked by Pull-Up

The pull-up is a compound movement, meaning it involves multiple joints and recruits multiple muscle groups at once. Here’s a breakdown of the muscles worked by the pull-up.

Bodybuilder performing pull-ups in gym

Credit: Satyrenko / Shutterstock

Latissimus Dorsi

The lats are the largest back muscle, attaching at the upper arm and along the spine near the lower back. They serve two primary functions. First, they bring the arm closer to the body from out to the side. Second, they bring the arm closer to the body from out in front. This is why the lats are heavily activated when your arms begin overhead and pull down and in to raise your body during a pull-up.

Upper Back

The upper back (generally including the rear deltoid of the shoulder, the trapezius, and the rhomboids) functions to control movement of the scapulae (shoulder blades) and to support the shoulder joints under muscular stress, particularly in the bottom portion of the pull-up.

Trapezius

While sections of the traps fall into the “upper back” category, the trapezius is a large muscle on its own and serves a big role during pull-ups. The middle portion of the traps help to pull your shoulders back while extending your elbows behind you while also stabilizing your shoulders when you move your arms.Your lower traps are crucial to many other lifts and are highly activated during pull-ups. (1)

Biceps Brachii

The biceps are composed of two heads: a long head commonly referred to as the “outer” and a short head referred to as the “inner.” Both muscle heads originate at the scapulae and insert on the radius bone of the forearm. The biceps play a relatively smaller, but important, role during pull-ups to complete the top part of the movement. They are more significantly activated and play a larger role in the chin-up variation.

Lower Back

The muscles of the lower back, or lumbar spine, have been shown to be recruited during pull-ups even though they aren’t moved through a significant range of motion. Because these muscles control your torso bending at the hips, they work during the exercise to maintain a stable core position and keep a straight line from your shoulders to your knees or feet.

Rectus Abdominis

The abs are surprisingly worked to a very significant degree during pull-ups. While most lifters are more familiar with the abs’ role in flexing your torso in a curled position, they’re highly activated to maintain a stiff, solid torso. Similar to the lower back, the abs work to prevent bending at the hips.

Who Should Do the Pull-Up

Training for Bodyweight Strength

Many bodyweight training-focused lifters consider the pull-up to be an essential test of strength. Because strength is a skill, if you want to improve your pull-up numbers, you need to get better at the exercise itself. This skill comes from repeated efforts, rep after rep.

Training for Muscle

To increase muscularity, the pull-up should be a recurring movement in your workouts. The activation of multiple muscles combined with a long range of motion provide a muscle-building stimulus that very few upper body exercises can match. 

How to Program the Pull-Up

The pull-up can be programmed with a variety of sets, reps, and tempo schemes. The exercise is ideally performed at the beginning of your workout. This will make sure your body has the energy required to perform this comprehensive movement without sacrificing your technique or increasing injury risk.

Weighted, Low Repetition

To maximize basic strength in the pull-up, completing four to six sets in the three to six rep range is the place to start. Use a weight that leaves you with at least two reps left “in the tank” to avoid reaching muscular failure. A rest period of three to five minutes between each set will ensure you lift with maximum effort.

However, to ensure proper technique, you should only add weight once you can comfortably handle moderate to high-rep sets using your bodyweight. 

Unweighted, Moderate Repetition

To ensure growth in the working muscles, three to four sets in the six to 12 rep range will increase overall training volume, which is beneficial for building muscle. (2) The multiple sets and reps also allow you to improve your pull-up technique.

Modified Cluster Sets

Some lifters, especially beginners, may not be able to perform pull-ups for multiple sets of multiple reps. Even performing one or two reps may be challenging. This is where cluster sets are beneficial. Cluster sets allow a lifter to perform multiple low-rep “mini-sets” (or clusters) with a heavy weight while avoiding excessive muscular fatigue. You can apply the same technique to bodyweight pull-ups.

This modified cluster set method will have three sets of three reps in one cluster (if you can currently perform four or five reps with good form). Perform three reps, rest for 15 to 30 seconds, perform another three reps, rest for 15 to 30 seconds, and perform a final group of three reps. That entire series is one set. Take two minutes rest before repeating two more sets.

Because three sets of three cluster reps is comparable to performing nine reps in a single set. This will allow you to get stronger, maximize the recruitment of high-threshold muscle fibers (specialized muscle fibers which improve power output), and increase total working volume which can lead to more muscle.

Note: If you cannot perform three reps with good technique, you can use the cluster set method while performing one or two reps per cluster. 

Pull-Up Variations

The basic pull-up is staple in many experienced lifters’ routines, but simple variations can be used for specific goals. Even after you’ve mastered the pull-up, you can implement some of these variations into your training.

Negative Pull-Ups

To perform negative pull-ups, you will need to stand on a box or bench under a pull-up bar. Take hold of the bar with a basic shoulder-width grip and jump up to get your chin above the bar.

Take at least five seconds to lower yourself into the stretched position. Once fully stretched, put your feet on the box again, return to the top position, and repeat until you hit your target rep range.

Chin-Up

One of the most basic pull-up variations is simply reversing your grip. By grabbing the bar with a supinated (underhand or palm-up) grip, you more directly recruit the biceps.

This makes the exercise fit very well into a specific arm workout or it can add “extra” arm training to your back workout.

Wide-Grip Pull-Up

The wide-grip pull-up requires grabbing the bar several inches wider than shoulder-width. Pull yourself up as high as possible and lower yourself under complete control.

The different grip changes the arm position overhead, which changes the range of motion and puts the lats, upper back, and biceps under a different angle of stretch, which creates a unique training stimulus.

Pull-Up Alternatives

You might not be ready to complete a full set of pull-ups, which is no big deal because we all start somewhere. The first priority is understanding the prime movers involved in the pull-up and how to strengthen them. The muscles most activated in the pull-up are the lats, mid and lower traps, biceps, and your core. (3) The following exercises will help you build strength in these important muscle groups.

Scapula Pull-Ups

Scapula pull-ups can help strengthen your grip and lower traps which both play a large role in performing the full pull-up effectively.

Start by hanging from the bar with a shoulder-width grip. Keep your shoulders “shrugged” down away from your ears. Without bending at your elbows, pull your scapulae downwards while pulling your body up. It’s a very short but impactful range of motion. Hold for a slight pause at the top and lower yourself slowly by allowing your scapula to “open up” until you are at a full stretch.

To progress, start by increasing the amount of reps done in each set until you can handle 12 to 15. Once mastered, this exercise can be used within your general warm-up sequence before full pull-ups.

Kneeling Lat Pulldowns

The kneeling lat pulldown will help strengthen the lats, core, and biceps. Use a cable machine, kneeling on the ground while mimicking the exact same starting position as you would for the pull-up.

Keep yourself upright with your glutes flexed to provide stability and increase core activation. Every muscle must remain tight from the ground up.

To progress, you can introduce one and one-half reps — one full rep includes pulling all the way down, releasing the weight halfway up, pulling down again, and releasing to a full stretch. This is a great technique that can be used to emphasize the tension placed on the muscles from both the start of the pull-up and the end of the pull-up.

Inverted Row

The inverted row will help to strengthen the pulling strength of your lats, core, and arms while also emphasizing the mid-traps and upper back. A Smith machine is perfect for this exercise since you can easily adjust the height of the bar while also being in a stable, fixed position.

To progress, lower the height of the bar to adjust leverage and increase the challenge. Eventually you can elevate your feet to put your entire body into a more horizontal position.

Banded Pull-Ups

The banded pull-up is a great way to improve your muscle coordination from a neurological standpoint since strength is a skill built on repetition. (4) The banded pull-up is going to allow you to better prepare yourself to perform the concentric (pulling) portion of the movement since the bands will assist your strength in the bottom position.

Attach a resistance band to the top of a bar and get yourself into position with the band supporting your body, either with bent knees or keeping your legs straight.

To progress, make your way up resistance bands offering less resistance until you are ready to perform your pull-ups with full bodyweight.

FAQs

Can I get a six-pack from doing pull-ups?

No single exercise can give you a six-pack. That can only be achieved through a reduction in body fat, fat loss-focused training, and a calorie-controlled nutrition plan.

With that being said, pull-ups may help with improving the final look of your abs because they are heavily recruited during the exercise, as explained in the muscles-worked section. Pull-ups are an awesome and overlooked exercise for training your abs. You can expect a more prominent set of abs once you do get lean enough.

When can I start performing weighted pull-ups?

The exact timeframe can vary from individual to individual since some people are capable of performing pull-ups in a very short time. However, once you can accomplish three to four sets of 12 reps using your bodyweight, you’ve likely built the technique, coordination, and strength to tackle low-rep weighted pull-ups.

How many times per week should I perform pull-ups?

For building strength and muscle, and taking into consideration the recovery ability of the involved muscle groups, performing this exercise twice per week will be the best place to start. (5) Make sure to give yourself at least two or three days rest between workouts.

For the purpose of getting more technique practice and perfecting this movement, you can implement bodyweight pull-ups as a part of your general warm-up for upper body workouts or even for workouts where a back-focused exercise like the deadlift may be performed. The aim for this technique training would be not to fatigue your back muscles, but to mobilize and activate the associated muscles that are going to be used in those workouts..

References

  1. Youdas JW, Amundson CL, Cicero KS, Hahn JJ, Harezlak DT, Hollman JH. Surface electromyographic activation patterns and elbow joint motion during a pull-up, chin-up, or perfect-pullup™ rotational exercise. J Strength Cond Res. 2010 Dec;24(12):3404-14. doi: 10.1519/JSC.0b013e3181f1598c. PMID: 21068680.
  2. Schoenfeld BJ, Contreras B, Krieger J, et al. Resistance Training Volume Enhances Muscle Hypertrophy but Not Strength in Trained Men. Med Sci Sports Exerc. 2019;51(1):94-103. doi:10.1249/MSS.0000000000001764
  3. Hewit, Jennifer. (2018). A Comparison of Muscle Activation during the Pull-up and Three Alternative Pulling Exercises. Journal of Physical Fitness, Medicine & Treatment in Sports. 5. 10.19080/JPFMTS.2018.05.555669.
  4. Ochi, E., Maruo, M., Tsuchiya, Y., Ishii, N., Miura, K., & Sasaki, K. (2018). Higher Training Frequency Is Important for Gaining Muscular Strength Under Volume-Matched Training. Frontiers in physiology, 9, 744. https://doi.org/10.3389/fphys.2018.00744
  5. Schoenfeld, B. J., Ogborn, D., & Krieger, J. W. (2016). Effects of Resistance Training Frequency on Measures of Muscle Hypertrophy: A Systematic Review and Meta-Analysis. Sports medicine (Auckland, N.Z.), 46(11), 1689–1697. https://doi.org/10.1007/s40279-016-0543-8

Featured Image: UfaBizPhoto / Shutterstock

Source

April 1, 2022

How to Do the Seated Cable Row for a Bigger Back

Filed under: Fitness,Training — Tags: , , , , , , , — admin @ 3:31 pm

Back exercises come in two basic patterns: vertical, or overhead, pulls, like the classic pull-up, and horizontal rows. Many lifters are familiar with standard pull-ups, chin-ups, and pulldowns, but the wide variety of rows requires more specific attention.

The seated cable row offers distinct advantages over barbells, dumbbells, or other machines. The combination of body position, leverage, and unique resistance from cable pulleys make the exercise an excellent muscle-builder when using proper form to target the multiple back muscles.

Here’s a detailed guide to performing the highly effective seated cable row and programming tips to build a muscular, powerful back.

How to Do the Seated Cable Row 

The seated cable row may, at first, appear daunting. Typically the machine consists of a long bench with a handle attachment on one side, an imposing weight stack, and not much in the way of reliable guidance.

More so than many other exercises in the gym, the seated cable row can’t often be learned by standing non-creepily in the corner of the gym watching another lifter do their set. The variety of handle options, versatile pulling angles, and prevalence of plain old bad form make it hard to know who to replicate to get the results you’re after.

Here’s a straightforward plan to learn basic and effective technique for the seated cable row.

Step 1 — Take a Seat

Man in gym performing back exercise

Credit: Miljan Zivkovic / Shutterstock

Find a “V”-shaped attachment with vertical grips which allow your hands to face each other. Clip the bar to the cable hook and sit on the bench with your legs bent and both feet on the platform.

Grab the handles, tighten your core, straighten your back, and extend your arms until they’re nearly locked out. Press against the foot platform to very slightly raise your glutes off the bench. Straighten your legs, feeling muscular tension through your entire body. When the weight lifts off the stack and your body moves backwards slightly, lower your glutes to the bench and ensure a tense, vertical upper body.

Your legs should be stiff with a slight bend. Your straight arms should be supporting the weight through the cable attachment. If your arms are nearly straight but the weight is not yet lifted from the stack, you’re too close. Repeat the process to reposition your body slightly farther back.

Form Tip: Some lifters may take a quicker setup by simply grabbing the handle, placing one foot on the platform while standing, and then “plopping” their body down onto the bench to raise the weight.

This no-frills process increases stress on the hips, low back, and shoulder joints due to the impact of dropping from a standing position while supporting additional weight (via the cable attachment). It also doesn’t allow the torso to remain in a well-supported position, which exposes the low back to more potential stress.

Step 2 — Row Your Elbows In

Muscular man in gym performing back row exercise

Credit: Amorn Suriyan / Shutterstock

Press your feet into the platform without straightening your legs. Pull the bar into your mid-ab area until it touches slightly above your belly button. Throughout the movement, your upper arms should aim towards the ground, not towards the walls to either side.

Your shoulder blades should come together as your upper back contracts to help pull the weight. To reinforce your upper back engagement, imagine puffing your chest out. When you’ve reached peak contraction, your elbows should be slightly behind your body and your forearms should be near your ribs.

During the rep, focus on gripping the handle tightly while driving your elbows past your body. Keep your torso upright. Your upper body shouldn’t lean back to “reel in” the weight like a swordfish on a charter boat. Pulling only with your arms while keeping your upper body vertical ensures the large back muscles, not the smaller shoulders muscles or lumbar spine, are receiving the training stimulus.

Form Tip: The focus for this foundational movement is to keep the bar at roughly belly-button height to put the majority of the back under optimal muscular stress. A number of seated cable row variations manipulate the pulling angle to focus stress onto different parts of the back — pulling to the hips, above chest-level, etc. Those will be addressed below.

Step 3 — Extend Your Arms

Shirtless muscular man in gym performing back row exercise

Credit: Amorn Suriyan / Shutterstock

After completing the range of motion (with the bar touching your abs), reverse the movement by pushing your elbows and lower arms forward. Continue gripping the handles tightly to ensure control of the weight. Your shoulder blades should naturally extend as you reach the end range of motion. Do not deliberately “reach” your shoulders forward, which would expose the shoulder joint to excessive strain.

Maintaining an upright torso is even more critical during the lowering phase due to the pulling force of the weight stack and potential instability of the lower back. Resist the urge to lean forward. Keep steady pressure through your feet to engage the hamstrings and glutes for added lower back support. Once your arms are nearly locked out and your back muscles are stretched, pause briefly before pulling the next rep.

Form Tip: Your legs and upper body should make a general “L” shape during the entire rep. If your upper body moves and the angle changes to more of a “V”, your lower back is being recruited to move and lower the weight, which increases strain.

Changing your upper body angle also changes the cable angle relative to your muscles because your arms are closer to an overhead position. This alters muscle recruitment and changes the exercise’s effectiveness.

Seated Cable Row Mistakes to Avoid

Because your upper body is unsupported during each rep of the seated cable row, you may run into common mistakes that can reduce muscle activation and increase the risk of injury.

Short Range of Motion

For maximum muscle recruitment and development, perform the seated cable row by pulling the bar until it touches your abs and extending until your arms are nearly locked out (because the target muscle is the back, which can be fully stretched before your arms are extended).

Lifters often avoid the end-range of motion, on either the stretch or the contraction, in an effort to “keep tension on the muscle.” However, when using proper form, the muscle is always under tension.

Large bodybuilder in gym performing back exercise

Credit: MAD_Production / Shutterstock

Using a full range of motion not only allows optimal development, but also allows the shoulder and elbow joints to function using their full mobility. Lifting with a full range of motion can help to improve overall joint mobility and flexibility. (1)

Avoid it: Individual limb lengths may sometimes require adjusting the seated cable row range of motion. For example, a lifter with very long arms may not be able to pull far enough to touch the bar to their abs while a lifter with short arms may have trouble getting into position while raising the weight off the stack.

Unless you’re exceptionally tall or exceptionally short (which will require adapting a number of exercises to your frame), maintain the reference point of using full stretch and full contraction on each rep.

Forward Leaning Torso

Wanting to move the torso forwards and backwards during a rep may seem intuitive and may even feel like a natural movement, but it’s counterproductive and exposes the lower back to added stress without adding significant muscular benefit.

Woman in gym performing seated row exercise

Credit: Zoriana Zaitseva / Shutterstock

Leaning forward while lowering the weight may appear to increase the exercises range of motion, and a longer range of motion can sometimes lead to increased muscle recruitment. However, with the seated cable row, that added range of motion is not coming from the target muscle (the large muscles of the back).

The increased range of motion is achieved because additional muscles, particularly the shoulders and upper back, have been recruited. The target muscle isn’t receiving any added benefit. You may have seen photos or videos of massive bodybuilders nearly touching their toes with the bar in an extreme stretch. Don’t do that. It’s unnecessary, high risk, and low reward.

Avoid it: Pretend there’s a padded backstop jutting up from the seated row bench. Imagine keeping your hips and lower back against the seat when lifting and lowering the weight. Your head, shoulders, and chest should remain roughly above your hips throughout each rep.

Lifting Too Heavy

The majority of seated cable row stations are designed with the weight stack facing the lifter. This can create a mind game for anyone who over-focuses on moving the most weight possible rather than moving an appropriate weight to achieve the right training stimulus.

Shirtless muscular man in dark gym performing seated row exercise

Credit: MAD_Production / Shutterstock

Even though the entire weight stack is staring back at you during the exercise, never feel as though you’re “only” lifting a certain amount of weight. If you’re achieving muscular fatigue in the programmed rep range, you’re on the right track.

Trying to use too much weight is often an underlying cause in the two previous mistakes. When the weight is too heavy, you’ll be unable to achieve a full peak contraction, so your range of motion is shortened. An excessive load can also pull you forward out of position, and require swinging the upper body to use momentum, not muscle, to lift the weight.

Avoid it: As with most exercises, avoid letting your ego dictate your actions. The seated cable row should never be an exercise to attempt extreme weights because the body isn’t aligned for a major display of strength without risking injury. Follow the sets and reps in your routine and maintain consistent technique to target the intended body parts.

Benefits of the Seated Cable Row

The seated cable row can play a significant role in building a muscular back with minimal joint strain. It’s often one of the first exercises lifters in a home gym attempt to replicate, since its unique cable setup requires a dedicated workstation. Here’s why this exercise is a high priority movement.

Bodybuilder in gym performing back exercise

Credit: martvisionlk / Shutterstock

Back Size

Seated cable rows are a staple in nearly every back-building workout, and for very good reason. The constant resistance provided by the cable makes it a highly effective way to place your back muscles under extended time under tension, which is the catalyst for more muscle growth stimulus. (2)

Reduce Lower Back Stress

The seated cable row delivers constant tension from the cable pulley along with a stable, lower-back saving body position (assuming your form is tight). This combination makes it an ideal exercise for lifters unable to perform other row variations — like the barbell row — which may increase strain on the lower back due to a less-supported body position.

The cable’s constant tension also allows lifters to achieve a significant muscle-building stimulus while using relatively lighter weights. This reduces the cumulative stress on the joints without compromising hypertrophy (muscle size).

Muscles Worked by the Seated Cable Row

The seated cable row, and all rowing variations, will target multiple muscles in the back.

Bodybuilder flexing back and arm muscles

Credit: Dmytro Vietrov / Shutterstock

Lats

The latissimus dorsi, or lats, are what most people think of when they think of “a big, muscular back.” The muscle runs from under the shoulders down to the waist, with the developed muscle being visible under the arms near the ribs. The lats are worked during the seated cable row when your elbows pull the weight towards your body, causing a powerful contraction on both sides of the body.

Upper Back

The upper back is a collective term for the part of the back running from shoulder to shoulder between the neck and shoulder blades. It’s composed of several separate muscles including the rear deltoids, teres, rhomboids, and trapezius. These muscles are recruited during the seated cable row as the scapulae (shoulder blades) pull inwards while raising the weight.

Biceps

The biceps aren’t, and shouldn’t be, the primary muscle moving the weight in a seated cable row, but they are significantly recruited during the exercise. When your arm is bent to pull the handle towards your body, your biceps assist in the movement. The smaller forearm and gripping muscles also support the movement, as they do during any type of “pulling” exercise.

Who Should Do the Seated Cable Row

The seated cable row builds muscle size with reduced wear and tear on the lower back and shoulders. This makes the exercise valuable for a number of lifters.

Lifting for Muscle

When a lifters’ goal is to build a muscular back, the seated cable row can be invaluable. The cable provides constant tension which puts the muscle under greater overall stress compared to free weight (barbell or dumbbell) rows, which can decrease stress due to gravity affecting leverage in different positions.

Lifters with Back Pain

Because the seated cable row allows a lifter to train effectively without needing significant weight, it’s an effective option for lifters dealing with lower back pain. The cable also allows more adaptable joint positioning compared to a rowing machine, making it a better option for lifters with shoulder or elbow pain.

How to Program the Seated Cable Row

The seated cable row can be programmed with several effective methods to suit a lifter’s goal and individual needs. Due to body position and necessary technique, the exercise is not well-suited to extremely heavy, low-rep programming.

Moderate Weight, Moderate Repetition

Using a classic bodybuilding-style approach, reaching muscular failure in the 8 to 12 rep range for three or four sets, is one of the most common and most effective ways to program this exercise.

Light-to-Moderate Weight, High Repetition

The constant tension of the cables allows lifters to get a significant muscle-building effect without heavy, low-rep loading. Using two to three sets of 12 to 20 reps can be an excellent workout to “burn out” the back, particularly as the last exercise of a back workout when the muscles are fatigued from previous work.

Seated Cable Row Variations

The seated cable row is extremely versatile and a number of simple, effective variations can be implemented by simply attaching a different handle and/or pulling the bar to a different point of your body.

Long Bar Attachment

Using a straight pulldown bar, or long bar, allows either a palms-up (supinated) grip or a palms-down (pronated) grip. A supinated grip will activate the biceps to a greater degree while a pronated grip may be more comfortable on your shoulders, especially if you use a wider grip (outside shoulder-width).

A supinated grip also allows the user to pull the bar more efficiently to the lower abs or waist, which reduces upper back recruitment and can increase lat activation. A pronated grip allows you to pull the bar much higher, to chest or neck-level, which decreases lat recruitment and increases muscular stress on the entire upper back.

Rope Attachment

Attaching a rope handle, more commonly used for triceps exercises, allow the wrists to rotate during the movement. This freedom reduces joint stress. The flexible nature of the rope, compared to a solid metal handle, also allows a slightly longer range of motion at peak contraction.

Similar to the long bar, rope rows can be performed low to the hips for increased lat stress. The rope attachment is often used for pulls to neck or eye-level, appropriately called “face pulls”. This exercise prioritizes the upper back and shoulder stabilizer muscles 

Single-Arm Cable Row

Attaching a single handle and rowing with one arm at a time offers several benefits. Like all unilateral upper body exercises, the overall core activation is increased, specifically the obliques and rotational stabilizers.

A single-handle, similar to the rope attachment, also allows your wrist to freely rotate during the exercise. This can decrease stress on the joints by encouraging the elbow to more with less restriction.

The single-arm cable row can also be performed while standing, instead of braced on the bench seat. This specific variation can have more athletic carryover, due to increased total-body recruitment. It has also been shown to build significant core strength. (3)

Seated Cable Row Alternatives

The seated cable row is highly effective and offers unique benefits, but other row variations can also provide specific training effects separate from the seated cable.

Barbell Row

The barbell row is considered one of the “big basics” — fundamental exercises like the squat, deadlift, bench press, and shoulder press which help to establish a base of head-to-toe strength.

The barbell row allows lifters to potentially move significant weight, which can have great carryover to building muscle size and raw power. However, due to the body’s position, the lower back is put under much more direct stress

Dumbbell Row

The dumbbell row is most commonly performed supporting the body on a flat bench while moving one dumbbell. However, using two dumbbells from a standing position can be another effective variation.

The dumbbell row is an effective balance of lower back support while also providing a full stretch and contraction for a strong muscle-building stimulus.

Chest-Supported Row

The chest-supported row is one of the most effective back exercises to drastically reduce lower back involvement, because the torso is fully supported on a bench and movement is unavoidably strict with no swinging.

This variation can be done on a specific chest-supported row bench or using a pair of dumbbells while lying chest-down on a bench set to a high angle.

Sit, Row, and Grow

Targeting the larger back muscles without aggravating the lumbar spine requires an attention to detail, both in exercise selection and performance. The seated cable row checks all boxes and allows you to train intensely without excessive strain. Practice the form tips and add the exercise to your back routine.

FAQs

Why does my grip fail before my back muscles?

It’s not uncommon for grip to fatigue during many back exercises, because the hands and forearms are much smaller than the larger, stronger muscles of the back. Fortunately, grip strength improves relatively quickly from consistent lifting. Adding one or two grip-focused exercises (such as a farmer’s walk or pull-up hold) to your training week should yield noticeable results in a short time.

However, if grip strength continues to interrupt your back workout, use a pair of lifting straps to secure your grip to the handle. Be sure to use straps only when necessary, on the most challenging sets. Over-relying on lifting straps can end up being counterproductive by reducing grip development.

Why does my lower back hurt after a set?

Even though one benefit of the seated cable row is reduced lower back strain, some lifters may not feel totally comfortable with the exercise depending on their underlying condition.

Placing the feet in a wider stance on the platform, driving through the heels, and more actively engaging the glutes and hamstrings can all help to provide maximal support to the lower back. Ensuring a strict upright torso and tense abdomen during every rep will also reduce strain.

Should I do seated cable rows if I have a different row in my workout?

The majority of back-focused workouts will include at least one “overhead pull”, like a pulldown or pull-up, and at least one type of rowing exercise. The seated cable row provides specific benefits compared to rowing with barbells, dumbbells, or machines.

To ensure optimal progress, avoid performing exercises which are too similar to one another. However, depending on your overall workout plan, a session which includes seated cable rows for moderate reps and, for example, barbell rows for lower reps, could be an excellent approach to build size and strength. Performing seated cable rows with a long bar, followed by seated cable rows with a single-handle, would be redundant and much less effective.

References

  1. Afonso J, Ramirez-Campillo R, Moscão J, et al. Strength Training versus Stretching for Improving Range of Motion: A Systematic Review and Meta-Analysis. Healthcare (Basel). 2021;9(4):427. Published 2021 Apr 7. doi:10.3390/healthcare9040427
  2. Burd NA, Andrews RJ, West DW, et al. Muscle time under tension during resistance exercise stimulates differential muscle protein sub-fractional synthetic responses in men. J Physiol. 2012;590(2):351-362. doi:10.1113/jphysiol.2011.221200
  3. Fenwick CM, Brown SH, McGill SM. Comparison of different rowing exercises: trunk muscle activation and lumbar spine motion, load, and stiffness. J Strength Cond Res. 2009 Mar;23(2):350-8. doi: 10.1519/JSC.0b013e3181942019. PMID: 19197209.

Featured Image: Amorn Suriyan / Shutterstock 

Source

Powered by WordPress