World Fitness Blog : Leading Global Bloggers

January 9, 2023

Try These 11 Front Squat Alternatives for Powerful Legs and a Stronger Core

Filed under: Fitness,Training — Tags: , , , , , , , — admin @ 12:20 am

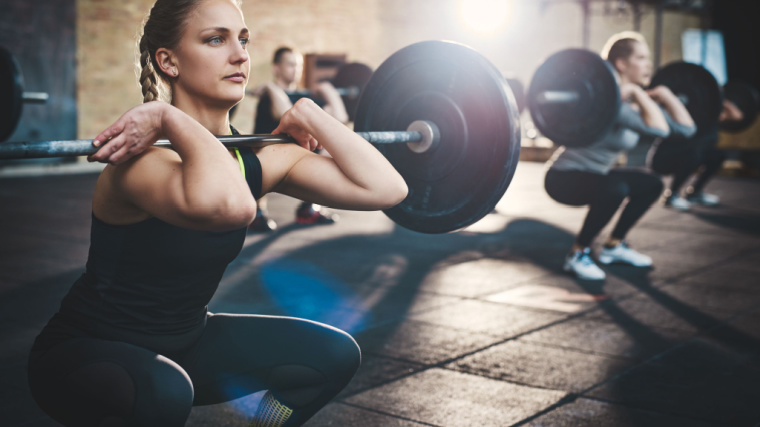
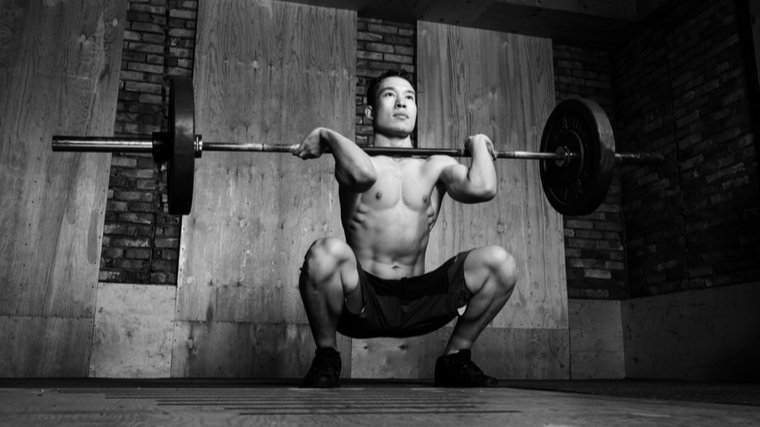
The front squat is a staple movement for Olympic weightlifters, CrossFit athletes, and countless other strength-focused lifters. However, some find the unique bar position to be a limiting factor because it requires ample shoulder and wrist mobility.

group of lifters performing barbell squats
Credit: Ground Picture / Shutterstock

Other lifters shy away from the front squat because they can move relatively more weight with other squat variations. Regardless of the reason, while the front squat has plenty of benefits to offer, there are some equally effective alternatives to consider which let you work around any restrictions and find comparable results.

Bruce Lee once talked about “the art of fighting without fighting,” so consider these exercises “how to front squat without front squatting.”

Best Front Squat Alternatives

Front Squat with Straps

One of the biggest limiting factors for many lifters, when it comes to performing the front squat, is holding the bar in the “rack position” — held across the fronts of your shoulders with your arms flexed and your fingertips under the bar.

This position requires flexibility and mobility throughout your wrists, elbows, and shoulders. While those attributes can be improved over time with dedicated work, you can reduce the mobility requirements without compromising results by attaching a pair of lifting straps to the bar. These serve as makeshift handles to offer a slightly adjusted hand and arm position.

When to Use It

The front squat with straps can be used identically to the classic front squat, or any time you need to support the bar in the rack position (across the front of your shoulders). The strapped movement can be programmed with the same sets and reps, and often with the same weights. This exercise is particularly useful for any lifters with pre-existing upper-body joint issues which may restrict their mobility.

How to Do It

Set a barbell in a rack at roughly upper chest-level. Secure a pair of lifting straps to the bar just outside shoulder-width. Grab one strap in each hand with your palms facing each other.

Step to the bar, bending your arms as you unrack the weight with your thumbs near the front of your shoulders. Keep tension on the straps without lifting the bar off your shoulders. Take a small step back and squat, keeping your elbows aimed forward and your torso upright.

Front Squat to Box

While the front squat with straps addresses upper body mobility restrictions, the front squat to box can be used to address lower body mobility restrictions. By using a box to limit your range of motion, you change the muscle recruitment and alter the stress on muscles and joints. (1)

When to Use It

Program the front squat to box if you have hip or ankle mobility issues which prevent you from achieving a deep front squat position. A box can also be used by beginners as a target to ingrain consistent squat depths and technique.

How to Do It

Set up a stable box or series of aerobic steps at a comfortable height, generally above knee-level, a few feet behind a barbell set in a rack. Setup for a standard front squat and carefully step back to position yourself above the box.

Descend under control, lowering your glutes to the box. Don’t rest your full weight on the box — pretend it’s a deck of cards that you don’t want to knock down. Pause very briefly without losing tension. Explode upwards to a powerful lockout.

Safety Bar Squat

If your gym has a safety bar, easily spotted with its thick pads and jutting handles, it can be a key player in building your lower body without straining your joints. (2) The safety bar squat allows a more upright torso and increased upper back engagement, which can reduce lower back stress. The forward-facing handles allow a more natural arm position which reduces stress on your shoulder and elbow joints.

When to Use It

The safety bar squat is an ideal alternative if you cannot maintain the elevated arm position required for front squats. This exercise is also an efficient way to increase upper back training because the thick pads offset the center of gravity and increase trapezius and upper back activation.

How to Do It

Set a safety bar in a rack at roughly shoulder-height. Duck under the bar and position the padded cradle around your trapezius, upper back, and shoulders. Grab the handles and pull your elbows toward your ribs.

Brace your core and pinch your shoulder blades together before unracking the weight. Step back and squat down. Don’t allow the weight to tip your upper body forward. Squeeze the handles and keep you elbows near your ribs as you drive upward to lockout.

Zercher Squat

The unconventional bar position of the Zercher squat, named after American weightlifter Ed Zercher, almost looks like a very poorly attempted front squat. By cradling the barbell in the crook of your arms, you can hold it very close to your body, which  improves your leverage and power output. While the Zercher squat requires little-to-no shoulder or elbow mobility, the strain of the bar on your forearms and elbows can be uncomfortable for some lifters.

When to Use It

Perform the Zercher squat in place of the front squat if you have significant upper body mobility restrictions. The Zercher squat can also be used toward the end of a workout, after first fatiguing your legs with other movements. This will let you get an efficient training stimulus with relatively lighter (and likely more comfortable) weights.

How to Do It

Set the bar in a rack near your belly button or lower chest-level. Step up to the bar and place your elbows on it, curling your arms around the barbell, with your palms up. Brace your core and stand up before taking a step back.

Squat down until either the bar or your elbows gently touch your thighs. Pause briefly before standing upright. Keep your elbows tight to your body and don’t allow the weight to pull you forward.

High-Bar Back Squat

Strangely, sometimes the best front squat alternative is a back squat variation. The high-bar back squat is a useful choice for competitive powerlifters, who must perform the back squat at meets. This exercise allows increased quadriceps recruitment and relatively less lower back strain while maintaining a sport-specific movement.(3)

When to Use It

The high-bar back squat can be used at any point in a training program to emphasize the quadriceps muscles, which can benefit leg size as well as carry over to improved squat and deadlift strength.

How to Do It

Place a bar at upper chest-level in a rack. Position the bar across your trapezius and upper back. Unrack the back and take a roughly shoulder-width stance. Brace your core, pull your shoulder blades together, and squat as low as possible.

Keep your upper body mostly vertical as you descend. Aim to reach a depth with your hips nearly in line with your knees (thighs roughly parallel to the ground) before returning upright.
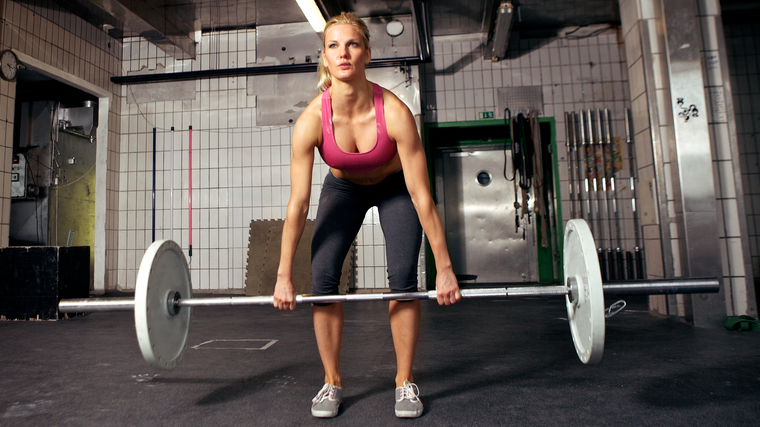
Trap Bar Squat

A trap bar can be a versatile piece of equipment, but is commonly used to perform the trap bar deadlift. The neutral hand position (palms facing your body) keeps the weight in line with your body’s center, which helps to reduce joint strain in your back and shoulders. Shifting your body position to keep a more upright torso when performing a trap bar squat will further emphasize the front of your thighs (quadriceps).

When to Use It

Use the trap bar for any type of squat or deadlift variation to decrease joint strain without reducing muscular stress. The trap bar squat can be particularly beneficial for sneaking extra upper body recruitment into your leg training, because your grip, arms, shoulders, and back help support the load during the exercise.

How to Do It

If your trap bar has two sets of handles, one “high” and one “low,” begin using the high handles and save the low handles for a more challenging progression. Stand in the center of the bar with your feet roughly shoulder-width. Squat down to grab the handles.

Be sure to bend at your knees and dip your hips down, to put your legs in an optimal pulling position. Puff your chest up and pull your shoulders back. Think about keeping your head over your tailbone as you drive upward to lockout.

Front Rack Lunge

To reap the core stability and upper back strengthening benefits of a front squat, with increased focus on each individual leg, performing a front rack lunge can be an extremely useful movement. You can build upper and lower body strength with less total load, because the movement is primarily performed unilaterally (with one leg at a time).

When to Use It

Unilateral movements like the lunge help to address strength and developmental discrepancies that can occur from exclusively bilateral (two-leg) exercises. Lunges can also build more complete athleticism and power than over-focusing on two-legged squat movements.(4)

How to Do It

Set up a barbell in a rack at shoulder-height. Grab the bar in the rack position and take a two or three steps backward. Stabilize the weight and brace your core.

Take one longer than normal step forward and plant your foot flat. Squat down until your rear knee lightly touches the floor. Keep your shoulders back and your upper body close to vertical. Drive up through your front foot with maximum force and return both feet together in a standing position. Perform all reps with one foot before switching legs. Re-rack the bar after performing the exercise with each leg.
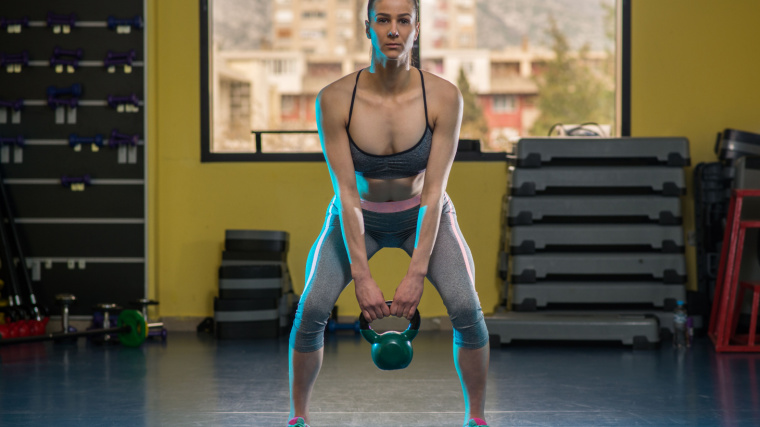
Goblet Squat

While the front squat supports the bar across your shoulders, the goblet squat is as close as you can get to an identical movement using a single dumbbell. By supporting the weight in front of your chest, you train the same type of front-loaded squat movement which builds core strength and overall mobility.

However, the goblet squat doesn’t require a large degree of shoulder mobility because your upper arms remain pointed mostly downward instead of forward.

When to Use It

The goblet squat is a much more convenient and practical exercise for many lifters, requiring only a single dumbbell instead of a barbell and power rack. It can be performed as part of a general warm-up prior to heavy front squats or it can be trained heavily on its own to deliver a shoulder-sparing squat workout.

How to Do It

Place a dumbbell vertically on its end atop a flat bench. Squat down and place your palms on the bottom side of the top weight plate, getting your chest as close to the dumbbell as possible. Brace your core and pull your shoulder blades back.

Stand upright, supporting the weight with bent arms. The dumbbell should be near your collarbones or neck. Squat as deep as possible while keeping your torso vertical. Don’t allow the weight to pull your arms down or forward during the movement.

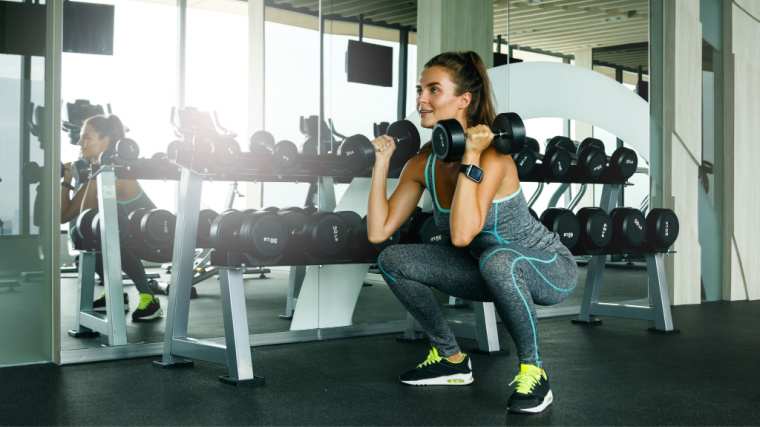
Dumbbell Front Squat

The dumbbell front squat could be seen as the next-step progression from the goblet squat. Instead of holding a single dumbbell as your chest, you’re supporting a weight in each hand. This more closely mimics a barbell from squat.

In fact, it puts you in nearly an identical hand and arm position as the front squat with straps, because your hands are in a neutral position (palms facing each other). This reduces the mobility requirements needed to perform the exercise,

When to Use It

Choose the dumbbell front squat if you’re training with limited equipment (such in a hotel gym or limited home gym) because you don’t need a barbell and rack. The dumbbell front squat is also an effective choice for lifters training around wrist or shoulder issues, since the joints are less stressed during the movement.

How to Do It

Stand with a dumbbell in each hand, resting at your sides. Bring the dumbbells up to the front of each shoulder in a hammer curl-type motion. Using some body English to control the swing of the weights is acceptable as long as it’s done with leg drive (as a quick jump), not bending at the waist or heaving with your lower back.

Hold the weights in the shoulder-supported position throughout the exercise. In a wider than shoulder-width stance, squat as deeply as possible. Aim your elbows forward and lean back to keep your upper body vertical. Don’t allow the weights to fall forward or sideways off your shoulders. 

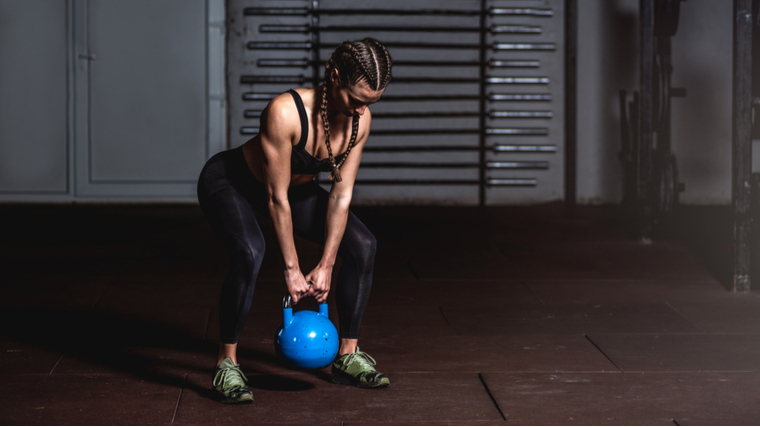
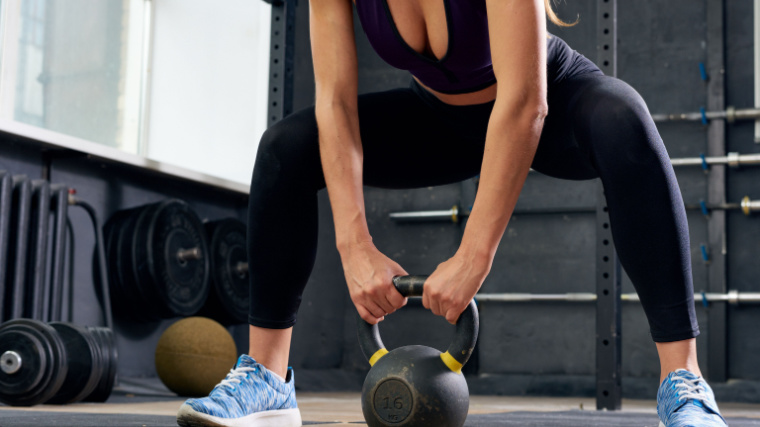
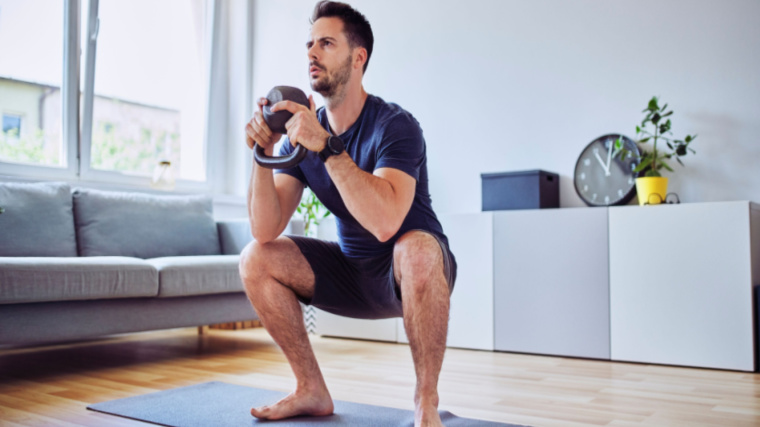
Single-Arm Kettlebell Front Squat

A classic kettlebell exercise, the single-arm kettlebell front squat emphasizes core strength just as much as (possibly more than) leg strength. The “imbalanced,” single-sided load forces your abs and lower back to fire constantly to resist the sideways pull. This builds serious core stability which can play a key role in reducing the risk of lower back injuries. (5)

When to Use It

Because your core strength will likely be the limiting factor for most lifters, it may be more beneficial to treat the single-arm kettlebell front squat primarily as a core-building exercise that delivers leg size and strength as an added benefit, rather than primarily as “a leg exercise.” Improved core strength and stability can carry over to stronger lifts.

How to Do It

Bring a kettlebell to shoulder-height, either by performing a kettlebell clean or using your free hand to get the weight into position. Your thumb should be nearly resting on the front of your shoulder with the ball of the kettlebell resting on your forearm.

Stand upright, without leaning sideways into the weight or excessively counterbalancing to the opposite side. Take a relatively wide stance, beyond shoulder-width, and descend into a deep squat. Hold the kettlebell close to your body and don’t allow it to shift your torso. Perform all reps on one side before switching hands.

Front Squat Hold

This front squat alternative doesn’t actually involve any squatting at all. By reinforcing the locked out position, you create significant tension in your core stabilizers, as well as actively stretching the muscles directly involved in holding the rack position. This cumulative effect can lead to a stronger and more stable front squat.

Because static holds put you in the strongest mechanical position, you can also “overload” your system with heavier than normal weights, which can stimulate strength gains.

When to Use It

The front squat hold should be the first exercise performed on a lifting day, after a general warm-up. Not only will it help to recruit more muscle units in the training to follow, but performing the hold with any muscle fatigue can drastically increase the risk and decrease the benefits.

How to Do It

Set up for a standard front squat, with the bar in a rack near shoulder-level. Unrack the bar and take one or two small steps back. Instead of commencing a squat, hold the top position with maximum focus.

Concentrate on fully engaging your core and upper back. Flex your glutes and legs to further reinforce the lockout position. This exercise is typically performed “for time” (often three to five seconds, up to 10 seconds) rather than for multiple repetitions.

Benefits of Front Squat Alternatives

While the front squat is an essential movement for certain strength athletes like Olympic weightlifters and CrossFit athletes, front squat alternatives can be used by many lifters to deliver key benefits when the primary movement is no longer an option.

Reduced Mobility Requirements

Some lifters have crossed the front squat off their list of potential exercises because they cannot get their arms into the rack position needed to support the weight or because their hips or knees don’t allow the type of deep front squat commonly associated with the exercise.

black and white photo of person performing front squat
Credit: xamyak / Shutterstock

Several front squat alternatives allow lifters of any mobility level to benefit from the squat squat movement by reducing the mobility and flexibility requirements. These alternatives can also address and improve restrictions over time, which can progress to a full front squat.

Decreased Lower Back Strain

One key benefit of the front squat is its reduced lower back strain compared to the back squat. Each front squat alternative preserves that back-sparing advantage, making each movement a potential exercise choice for lifters prone to lower back issues.

Quadriceps Size and Strength

Front squat alternatives continue to emphasize the quadriceps, on the front of the thighs, relatively more than the glutes or hamstrings. (6) This is a key reason why many physique-focused lifters prioritize the front squat over the back squat. These alternatives are equally effective in emphasizing the quads, while back squats and deadlift variations are more commonly used to focus on the hamstrings and glutes.

Get Back to Front Squatting

The front squat can be beneficial for strength athletes, physique-conscious lifters, and any gym-goer looking to build lower body strength and muscle, a stable core, and a stronger lower back. If you’re not yet ready to tackle the Olympic-level movement, choose the variation that best suits your individual needs and start racking up the results.

References

  1. Kubo, K., Ikebukuro, T., & Yata, H. (2019). Effects of squat training with different depths on lower limb muscle volumes. European journal of applied physiology, 119(9), 1933–1942. https://doi.org/10.1007/s00421-019-04181-y
  2. Hecker, Kara & Carlson, Lara & Lawrence, Michael. (2018). Effects of the Safety Squat Bar on Trunk and Lower-Body Mechanics During a Back Squat. Journal of Strength and Conditioning Research. 33 Suppl 1. 1. 10.1519/JSC.0000000000002912. 
  3. Glassbrook, D. J., Brown, S. R., Helms, E. R., Duncan, S., & Storey, A. G. (2019). The High-Bar and Low-Bar Back-Squats: A Biomechanical Analysis. Journal of strength and conditioning research, 33 Suppl 1, S1–S18. https://doi.org/10.1519/JSC.0000000000001836
  4. Speirs, Derrick E.1,2; Bennett, Mark A.3; Finn, Charlotte V.4; Turner, Anthony P.2. Unilateral vs. Bilateral Squat Training for Strength, Sprints, and Agility in Academy Rugby Players. Journal of Strength and Conditioning Research 30(2):p 386-392, February 2016. | DOI: 10.1519/JSC.0000000000001096
  5. Huxel Bliven, K. C., & Anderson, B. E. (2013). Core stability training for injury prevention. Sports health, 5(6), 514–522. https://doi.org/10.1177/1941738113481200
  6. Coratella, G., Tornatore, G., Caccavale, F., Longo, S., Esposito, F., & Cè, E. (2021). The Activation of Gluteal, Thigh, and Lower Back Muscles in Different Squat Variations Performed by Competitive Bodybuilders: Implications for Resistance Training. International journal of environmental research and public health, 18(2), 772. https://doi.org/10.3390/ijerph18020772

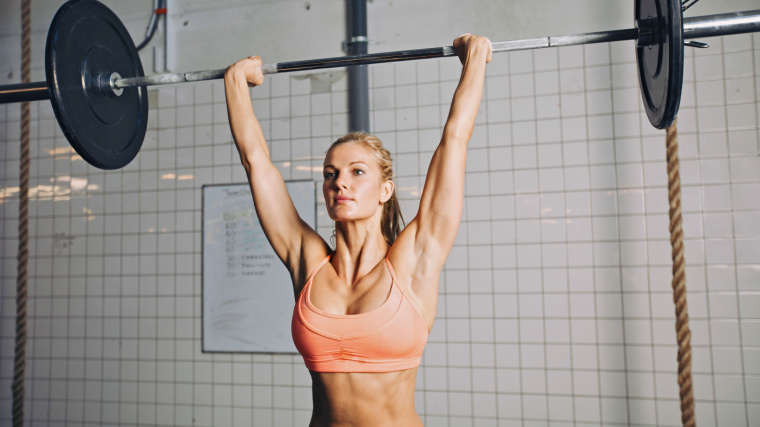
Featured Image: Berkomaster / Shutterstock

Source

January 5, 2023

How to Do the Kettlebell Deadlift for Lower Body Size and Strength

Filed under: Fitness,Training — Tags: , , , , , — admin @ 9:00 am

When a new lifter finally gets a kettlebell in their hands, the swing is typically one of the first exercises they try. But it shouldn’t be. The swing is arguably the most popular kettlebell exercise and it might actually be the movement that’s synonymous with the oddly shaped weight, but the swing isn’t exactly a simple exercise to perform.

person grimacing while doing kettlebell swing

Credit: Bojan656 / Shutterstock

Swings require a base level of muscular conditioning, coordination, and timing to reap major benefits. Beginning your kettlebell experience with the swing is like learning to cook an omelet before you can manage scrambled eggs. Instead, consider the kettlebell deadlift as your introductory kettlebell exercise.

The kettlebell deadlift will build strength, size, and conditioning in your lower body, core, back, and arms. The deadlift also teaches you how to properly hinge at your hips, which is the most efficient way to recruit your glutes and hamstrings for powerful lifts (including, you guessed it, the swing). Here are more reasons to get started with the real fundamental kettlebell movement — the kettlebell deadlift.

Kettlebell Deadlift

Kettlebell Deadlift Demonstration

Watch coach Alex McBrairty showcase picture perfect technique with a kettlebell deadlift. Even though he’s specifically demonstrating a wide-stance, or sumo-style, kettlebell deadlift, the overall form and body positioning will be the same when using a more moderate foot position.

Get a visualization of the movement and then continue learning tips, cues, and more form advice.

How to Do the Kettlebell Deadlift Step By Step

The kettlebell deadlift is a foundational movement. It teaches the hip hinge movement pattern, which coordinates force production through your hamstrings, glutes, and lower back. The kettlebell deadlift is also, quite practically, a safe and efficient way to lift any load off the ground.

Step 1 — Address the Kettlebell

Person in gym preparing to lift kettlebell from the ground

Credit: Rocksweeper / Shutterstock

No, not by tipping your hat and cheerily saying “Hello, bell.” Stand in front of the kettlebell with your feet roughly shoulder-width apart. Position the center of the weight between your toes and midfoot. The weight’s handle should be pointing toward each foot, not front and back.

Form Tip: If you have a larger frame, a long torso, or short arms, you may need to adjust the kettlebell’s starting position. If possible, perform one or two repetitions with a relatively light weight and adjust your stance to achieve a comfortable and powerful starting position.

Step 2 — Grab the Weight and Drop Your Hips

Muscular woman in gym performing kettlebell exercise

Credit: Srdjan Randjelovic / Shutterstock

Drive your glutes backward and bend at your hips to reach toward the weight. Grab the top handle with a palms-down grip using both hands, with your thumbs nearly touching each other. Keep your torso straight and bend your legs until your shoulders are in line above the weight and your hips are below your shoulders. Keep your head neutral — avoid any instinct to look straight ahead, which could strain your neck.

Feel tension in your hamstring and glute muscles. Squeeze the handle and rotate at your wrists and shoulders to point your biceps forward. This should also drive your shoulder blades down toward your hips and put tension on your lat muscles, which improves your upper body stability.

Form Tip: If the kettlebell handle is too narrow to comfortably fit both hands, leave your pinkies running along the outer edge or “horns” of the kettlebell, pointing to the ground. It may feel awkward, but it shouldn’t affect performance of the exercise or impact your grip strength to any large degree.

Step 3 — Drive Up to a Standing Position

Long-haired muscular person in gym lifting kettlebell

Credit: ildintorlak / Shutterstock

Squeeze your grip and pull your shoulders toward your hips to feel tension on your lat muscles. Drive your feet through the ground, pull your shoulders back, and push your hips forward to stand up to a locked out position. Keep your arms straight and bring the kettlebell up along your legs.

In the locked out position, the weight should be resting near the front of your thighs with your arms locked straight. Take a quick breath in, brace your core, and reverse the motion — driving your hips back and returning the weight to the ground under control.

Form Tip: Aim to stand up straight without leaning back excessively at the top. Flex your glutes, abs, and arms to ensure a mostly straight lockout. This should prevent too much backward “overcorrection,” which can strain your lower back.

Kettlebell Deadlift Mistakes to Avoid

While the kettlebell deadlift is a fundamental and relatively basic movement, there are several technique errors that can be counterproductive. Here’s what to avoid as you perform the exercise.

Pulling with a Rounded Back

This is a capital mistake for any deadlift variation, including the kettlebell deadlift. Having your back in a rounded position as you drive up in a deadlift puts the supportive muscles of your spine in a poor leverage position, which transfers stress to your vertebral discs.

Person in gym lifting kettlebell

Credit: pnarongkul / Shutterstock

A rounded back position also puts your body in an inefficient position to transfer force from your lower body to your upper body, which will affect how much power you can produce.

Avoid it: Stay stiff from your hips to your neck. Before lifting the weight off the ground, flex your core and lat muscles to create tension throughout your entire torso.

Pulling with Bent Arms

Similar to the issue regarding a rounded back, you want to avoid performing any deadlift variation with bent arms. If your arms are less than straight as you lift, you shift stress onto your elbow joints rather than your muscles. You also decrease the amount of force you can transfer from your back and shoulders into your grip, which will decrease your strength.

person in gym lifting kettlebell

Credit: SeventyFour / Shutterstock

There’s also a chance of straining your biceps muscle, which will be partially contracted when your arm is bent, compared to a more stable and supported straight-arm position.

Avoid it: Before each repetition, contract your triceps and try to “aim” your biceps forward by rotating at your wrists and shoulders. These small steps should force your arms into a straightened position, or highlight when your arms are bent.

How to Progress the Kettlebell Deadlift

Some lifters may not be able to perform a kettlebell deadlift with good technique due to their limb leverages, current strength levels, or other factors. Other lifters may consider the exercise “too fundamental” and not challenging enough. Rather than neglecting the exercise, some simple adjustments can be made to accommodate lifters of any experience level or capability.

Elevated Kettlebell Deadlift

The most efficient adjustment to the exercise is raising the kettlebell onto a sturdy step or series of weight plates. This reduces the range of motion, making the exercise more accessible for lifters whose limb lengths make the standard exercise technique uncomfortable.

The elevated kettlebell deadlift is also an excellent choice if you only have access to a limited selection of kettlebell weights and the “lightest” available is beyond your current capacity. Gradually increasing an exercise’s range of motion, rather than increasing the weight used, is an effective technique for building strength and muscle. (1)

Kettlebell Deficit Deadlift

Performing the kettlebell deadlift while standing on a slightly elevated platform is another way of manipulating the range of motion, this time making the exercise more challenging.

Placing stable weight plates or sturdy platforms (of identical heights) under each foot will increase muscle recruitment by requiring your body to move through a longer range of motion. When lifting from a deficit, a little elevation goes a long way. Don’t be too aggressive by starting with significant heights. One to two inches (such as a 25-pound weight plate) is an effective way to begin.

Benefits of the Kettlebell Deadlift

The kettlebell deadlift can serve a number of roles in your training plan. Whether it’s part of a kettlebell-only workout or incorporated into other training, this exercise can deliver a range of results.

Lower Body Strength

The kettlebell deadlift can be used to establish a base level of strength in the posterior chain — your lower back, glutes, and hamstrings. Even though the exercise isn’t often performed with very heavy weights, the applied tension will build strength and muscular conditioning in the target muscles. This strength can carry over to other deadlift variations, as well as a variety of lower body exercises.

Lower Body Size

The glutes and hamstrings, in particular, are strongly recruited during the kettlebell deadlift. (2) The quadriceps and back are also involved, and all of these activated muscles will be stimulated for muscle growth during the exercise. Any deadlift variations, including the kettlebell deadlift, can be very effectively used as part of any bodybuilding-style leg day.

Practicing the Hip Hinge Movement

Because the kettlebell deadlift requires a single piece of training equipment, it’s a convenient way to train the hip hinge movement pattern or general deadlift technique. While the kettlebell itself is unique to the movement, the overall body positioning, necessary tension, and step by step technique cues will carry over to barbell deadlifts.

person outdoors performing deadlift

Credit: Tom Yau / Shutterstock

This makes the kettlebell deadlift an efficient way to train the movement without needing to place the body under heavy loads, which can be useful for general mobility training, exercise warm-ups, or technique practice.

Muscles Worked by the Kettlebell Deadlift

The kettlebell deadlift is typically considered a lower body exercise, but like many other deadlift variations, it can only be performed by coordinating actions between your legs and upper body. Here’s a closer look at everything that’s working during a set.

Legs

Your legs are the primary targeted muscle group during the kettlebell deadlift. More specifically, your glutes and hamstrings are strongly recruited to lift the weight and extend your hips into the locked out position. Your quadriceps play a role in the lower portion of the lift, initially bringing the weight off the ground.

Upper Back

The upper back muscles (including your trapezius, rhomboids, and rear deltoids) play a role in controlling your posture during the kettlebell deadlift. Because your hands are close together while holding the weight, your shoulders are pulled slightly forward. Your upper back is activated to resist this action by pulling your shoulder blades into a more stable position. 

Core

Your abs and lower back work in unison to provide a safe, strong, and stable body position during the kettlebell deadlift. Your core is the key to transferring force from your lower body through your upper body to move the weight. Your lower back, in particular, is heavily activated to achieve a fully upright, locked out position.

Grip

Many kettlebell manufacturers design their handles to be slightly thicker than the average barbell or dumbbell. Training with thick-handled implements can increase the activation of forearm muscles, which can benefit grip strength development.

How to Program the Kettlebell Deadlift

Few lifters will have access to kettlebells heavy enough to perform extremely heavy, low repetition training. There are still effective ways to fit the kettlebell deadlift into your training plan for optimal results.

Moderate Weight, Low to Moderate Repetition

The kettlebell deadlift can be ideally trained for size and strength using a classic set and rep scheme of three to four sets of five to eight reps. A moderate load should be used to avoid muscular failure. This keeps the emphasis on crisp technique and a high rate of force production rather than cumulative fatigue from a long time under tension, which could compromise technique.

Light Weight, Moderate Repetition

The kettlebell deadlift can be performed as a type of warm-up movement using a relatively light weight for two to three sets of eight to 10 reps. With this approach, you can drill the hip hinge movement and prepare your hips, hamstrings, glutes, and involved muscles without excessive fatigue.

Kettlebell Deadlift Variations

The kettlebell deadlift can deliver a range of benefits from just a few simple modifications and variations. Here are some of the most basic and most efficient variations to trigger more results.

Kettlebell Suitcase Deadlift

Performing a single-arm kettlebell deadlift may sound like an intuitive variation, but more importantly than using only one arm is keeping the weight next to your body rather than in front of it.

Shifting the weight from in front of your body to alongside your leg creates a more intense challenge to your core. This lights up your obliques (side abs) and spinal erectors (lower back) to prevent your body from leaning toward the weight as you perform the exercise.

Kettlebell Stiff-Leg Deadlift

By keeping your legs stiff or nearly straight (not entirely locked out), you shift muscle recruitment to more strongly emphasize your hamstrings, glutes, and lower back. This technique adjustment will slightly reduce the amount of weight you can lift, but will increase the stress put on the target muscles. 

With the kettlebell stiff-leg deadlift, it’s essential that you maintain a stiff lower back and not round forward to reach the weight, which would increase strain on your vertebrae.

Kettlebell Single-Leg Single-Arm Romanian Deadlift

This might win the award for longest exercise name, but the results are also award-worthy. The “KBSLSARDL” is a performance-based movement focused on using perfect technique and full-body tension rather than lifting heavy weight or targeting one specific body part.

Holding the weight in one arm while supporting your entire body on one leg turns the exercise into a total-body test of strength and stability. Muscles from your ankle to your neck to your grip will fire nonstop as you fight to remain in control of the weight.

FAQs

Is the kettlebell deadlift very different from the dumbbell deadlift?

Both movements can either be alternatives to, or progressions toward, the standard barbell deadlift. The key difference, beyond the specific implements (one kettlebell versus two dumbbells), is that the dumbbell deadlift is typically performed with the weights held at your sides. This can reduce some strain on the lower back by shifting your center of gravity and dispersing stress.
The kettlebell deadlift is performed with the weight in front of your body, which is more similar to the conventional barbell deadlift. The exercises are otherwise very similar and can be used nearly interchangeably, as your needs require.

I only have access to one kettlebell. How should I use the kettlebell deadlift?

This is a common situation with home gym-based lifters who may have limited equipment. If you only have a single, fixed-weight kettlebell, you can incorporate the kettlebell deadlift with adjusted programming methods.
Manipulate the sets and reps depending on your current strength level relative to the weight you have available. If you can perform more than 10 repetitions, consider adding an additional set or reducing rest times to make the exercise more challenging. You can also perform the kettlebell deficit deadlift as a more challenging progression.
If you can perform fewer than five repetitions with your weight, consider using the elevated kettlebell deadlift while progressively decreasing the height. You can also perform multiple sets of one to two repetitions, to build strength while maintaining good technique.

Pick Up the Kettlebell

The kettlebell swing is highly effective and versatile exercise, but you need to walk before you run. Or, more accurately, you need to deadlift before you swing. Take the time to master this fundamental movement and it will serve you will for building a base of muscle, strength, and conditioning, as well as fine-tuning your hip hinge to boost your barbell lifts.

References

  1. Whaley, Orrin & Larson, Abigail & DeBeliso, Mark. (2020). Progressive Movement Training: An Analysis Of Its Effects On Muscular Strength And Power Development: 881 Board #7 May 27 1:30 PM – 3:00 PM. Medicine & Science in Sports & Exercise. 52. 210-211. 10.1249/01.mss.0000675840.15637.df. 
  2. Martín-Fuentes, I., Oliva-Lozano, J. M., & Muyor, J. M. (2020). Electromyographic activity in deadlift exercise and its variants. A systematic review. PloS one, 15(2), e0229507. https://doi.org/10.1371/journal.pone.0229507

Featured Image: Srdjan Randjelovic / Shutterstock

Source

January 3, 2023

8 Overhead Press Variations for Stronger Shoulders

Filed under: Fitness,Training — Tags: , , , , , — admin @ 3:25 am

Everyone talks about “International bench day,” but there’s nothing quite like pressing something heavy overhead. It’s pretty much the most innate display of strength. When little kids want to impress their parents with how strong they’re getting, they lift something overhead.  

Most lifters should be able to press something relatively heavy overhead. If you can’t, it often means you’re missing the full use of your shoulders. Maybe you can’t move your shoulder through its full range of motion or maybe the stabilizing muscles of your shoulder blades and trunk can’t create stability to safely produce force.

muscular man pressing barbell overhead

Credit: Gorodenkoff / Shutterstock

The strict standing barbell press involves the shoulders, upper back, triceps, and even upper chest. It trains the entire body to create a stable base to push from, but it can be difficult to steadily improve and progress tends to stall much sooner relative to other barbell lifts. That’s why it’s important to know and use many different variations to help continue building muscle and strength. Here are eight overhead variations that will help you impress mom, again.

Best Overhead Press Variations

Landmine Press 

Sometimes, pushing weight directly overhead can cause more harm than good. It may be because of an injury or just a lack of flexibility in the shoulder, triceps, lats, or wrists. The landmine press is unique because the pattern of movement is between a straight vertical and horizontal path.

This hybrid type of motion gives many of the benefits of direct overhead pressing while reducing the joint angle that may be putting a dangerous demand on your shoulder.  

When to Use It

The landmine press is great to use when recovering from injury and building back strength and function from time off training. It allows you to still develop strength and muscle while you work to restore full function of the shoulders to press directly overhead. 

It’s also a good variation to use when doing an intense phase of bench press training, as it won’t fatigue your shoulders excessively or affect recovery quite like straight overhead barbell pressing. 

How to Do it 

If you don’t have a landmine holder, you can wedge a regular barbell in any corner where it won’t cause damage. Load the bar and pick it up by the head (the end of the sleeve where you load the plates).

The landmine press can be performed with just one arm or both together. If you’re using two arms, cup the end of the barbell sleeve with both of your hands. Place the head of the bar near your sternum with your torso leaning slightly forward. Set your feet between hip and shoulder-width apart. Keep your elbows close and pulled in as you press. As your elbows lock with the bar almost at the crown of your head, shrug your shoulders up before returning the bar back to the starting position. 

If you’re using the one-arm variation, grab the end of the sleeve with one hand and place the bar at the front of your shoulder. Stand and press the same way, driving the bar forward and up to lockout, followed by a shoulder shrug. Make sure you keep your elbow in, so the bar stays in line with your shoulder throughout the entire movement. Flaring your elbow will alter the pressing angle, reduce power, and shift stress to the joint.

Landmine Push Press 

The push press is a great way to increase overhead stability with weights you couldn’t otherwise strict press. You use your legs to help to drive the weight up in a push press, allowing you to use heavier weights. 

But a standard barbell push press can be difficult to learn and to do efficiently. The landmine push press is easier for people to grasp because of both the path you drive the bar and the position of your shoulders relative to the bar.  

When to Use It

The landmine push press is a great exercise to add whenever your pressing progress slows or hits a plateau. The exercise can be included on either bench or overhead press days as a way to overload the pressing muscles with more volume while still moving relatively big weights. 

How to Do it 

Just like the landmine strict press, if you don’t have a holder you can wedge the bar in a corner and load it the same way. Because using heavier weights is a specific benefit of the landmine push press, it’s best performed with both hands on the bar. Cup your hands and place  the head of the bar almost directly on your sternum. Set your feet between hip and shoulder-width apart and flare your toes out very slightly. 

Brace your core and dip your knees as if you were preparing to jump as high as possible. Drive your feet into the ground and explosively extend your knees and hips as if you were trying to jump. Your heels will lift from the floor from this aggressive ankle extension, but keep the balls of your feet in contact with the ground — don’t actually jump into the air.

As your ankles extend, shrug your shoulders toward the bar. Try to make the bar fly off your chest from your leg drive and shoulder shrug. Then, push with your arms to extend your elbows. Let your heels touch back to the floor right as your elbows extend with the bar over the crown of your head. Control the bar as you bend your arms and absorb the momentum with your legs and trunk as you lower it.

Bottoms-Up Press

This is one of the best, but most challenging, pressing exercises for shoulder and scapular function and stability. It’s often used as a rehab or “prehab” drill because it engages most of the postural muscles like those of the rotator cuff that stabilize and move the shoulder blade. 

Balancing the bell upside down trains you to find the most stable path of motion and forces you to control the movement. Sometimes, the dominant muscles responsible for pressing overhead are restricted by how well your shoulders are stabilized. Improve those muscles and you can improve how much force you can create.  

When to Use It

These are great to do on deload weeks or at the very beginning of a new phase of training. You can think of them as a developmental exercise to prepare the shoulders for heavier, more intense training ahead. 

How to Do it

The bottoms-up press can be done standing or sitting, but a half-kneeling position actually puts you in a great mechanical position to do the exercise. Kneel down with the kettlebell in one hand and that side leg kneeling on the ground, with the opposite leg forward. Squeeze the handle and turn the weight upside down so the bottom of the bell is facing the ceiling. Crush your grip to maintain the weight in this vertical position.

Move your elbow toward your center so your thumb is in front of your face and your elbow is at a right angle with the floor. Slowly extend your elbow up to the ceiling and move your upper arm slightly back to put it in line (or covering) your ear as you lock out overhead. Stabilize the weight overhead briefly before slowly returning back down to your face. 

Kettlebell Z Press 

The Z press is an excellent choice for increasing the tension and demand on your shoulders and upper back without necessarily increasing the load used. Often you’ll see a lifter arch their spine or lean back during a standing overhead press because they lack the postural control and trunk or upper back strength needed to keep their spine neutral while pressing.

Sitting upright on the floor with no possible leg drive or back support helps you feel any change in your spinal position, so you can focus on preventing the problem. Pressing from the floor with the offset weight of kettlebells challenges your trunk and shoulder stabilizers in a way other exercises can’t.

When to Use It

Use the kettlebell Z press at the beginning of a workout to warm up your entire shoulder complex. One or two sets with light to moderate weight is enough to get your shoulders moving freely without causing fatigue that could affect your main training. 

Adding it to the end of a hard pressing workout is also a great way to add more volume, because you don’t need to use much weight or too many reps for the movement to be effective.  

How to Do it 

Sit on the floor with your legs straight while keeping an upright torso. Hold a pair of kettlebells with your palms facing each other at shoulder-level. Exhale hard through your mouth trying to force the air out of your torso to make it as narrow as possible. You should feel your ribcage drop down and the muscles in the front and sides of your torso, around your core, contracting.

Keep these muscles engaged to prevent your back from arching or your ribs flaring up as you press overhead. Keep your upper arms in line with your ears and rotate your hands palms-forward as you lock your elbows. Shrug your shoulders as your elbows lock before returning to the starting position. 

Earthquake Bar Overhead Press 

The earthquake bar is a bridge between training stability and increasing pressing power. The bar is designed to shake and swing, which engages the deepest and smallest shoulder stabilizers. Because it’s one straight bar, you can use relatively heavier weights than you could with dumbbells or kettlebells.

If you don’t have access to an earthquake bar, hanging resistance bands from the ends of both sleeves of a standard barbell and attaching weight plates is an effective alternative.

When to Use It

You can think of this like a secondary lift which can be done right after a heavy overhead barbell press or bench press. Though you will use much less weight, you can use a similar weekly progression of set and reps that you’d use for your main pressing lift. The instability will be the key challenging element to this exercise.

How to Do it

Set the bar on a rack just as you’d do for a standing overhead press. Start with relatively light weight and gradually slowly add more as you feel comfortable and learn to control the movement. Grab the bar with your thumbs just outside your shoulders. Angle your elbows just slightly in front of the bar. Shrug your shoulders forward and up to create a support for the bar, whether you have the mobility to rest the bar on top of your shoulders or not. 

Step back from the rack and set your feet hip-width apart with your knees just slightly unlocked. Wait until the initial swinging stops and pull your chin back (think of giving yourself a “double-chin”). Press the weight up slowly, keeping the bar as close to your face as possible. 

Once the bar passes the crown of your head, very slightly push your head and sternum forward so your elbows lock overhead as the bar is directly over the base of your neck. Shrug your shoulders upward and stabilize the bar at the top. Lower the weight by pulling your chin back and returning the bar to the starting position.  

Snatch-Grip Behind-the-Neck Press 

Usually you’d only see Olympic weightlifters use this as an accessory exercise, but it can be very beneficial to anyone looking to improve overhead strength or build their upper back and traps. 

The ultra-wide grip challenges your rear delts and upper back in a very unique way. If you start with relatively light weight and progress slowly, the snatch-grip behind-the-neck press can actually improve your shoulders’ working range of motion and strengthen the muscles and connective tissue that support good shoulder function.

When to Use It 

These can be pretty difficult, so instead of adding them as an accessory exercise after heavy standard overhead pressing, take a few weeks to prioritize the exercise by progressively working heavier instead of performing the standard barbell overhead press. Do them as the first main lift on a pressing or upper-body focused day. 

How to Do it 

Place a bar on a rack at your back squat-height (roughly upper-chest level). Walk under the bar and place it on your back as if you would for a high bar squat. Unrack the weight and step back. Slide both hands out until your index fingers are generally outside of the knurl marks on the barbell (smooth rings).

Angle your elbows directly under the bar, keep your neck straight, and brace your trunk while keeping your ribs from flaring up. Press the bar while keeping it in line with the base of your neck until your elbows lockout overhead. Don’t let the bar sway forward or behind your neckline. Shrug your shoulders at the top before returning the bar all the way back to the top of your traps.

Swiss Bar Overhead Press 

The Swiss bar is one of the best tools to use if you’ve had any shoulder or elbow pain, or pre-existing injuries. Its key benefit is multiple handles that let you place your hands close or wide while keeping a neutral-grip (palms facing each other) position.

This neutral position gives even those rotator cuff dysfunction a way to press without causing more strain in problematic areas in the shoulder or upper back.

When to Use It

The Swiss bar press is great to do when your shoulders, elbows, or wrists get cranky from other types of pressing. You can use the exercise in place of other overhead pressing options until you fully rehab an injury or recover from whatever nagging pain is causing issues.

How to Do it

Decide which grip-width feels most comfortable use and set the bar on a rack, the same you would for any overhead barbell press. Grab the handles and rotate the bar so your thumbs face toward your head. Unrack the weight and step back to your standard press foot position, roughly hip-width apart. Start with the bar about chin height.

Pull your neck in, as if you were giving yourself a double-chin, and keep the bar close to your face as you press overhead. Push your head slightly forward as you lock your elbows overhead. Shrug at the top as your elbows lock before lowering to the starting position. 

Overhead Pin Press

Part of the reason overhead pressing can be so hard to improve is because you push from a static position, particularly on the first rep. In many other lifts, like the bench press, you have the eccentric (lowering portion) of the lift which helps store force that you use to press the weight back up.

Because you don’t lower the bar first in an overhead press, you have to be able to muster a large amount of force suddenly without momentum. This is called “starting strength” and a pin press is one of the most effective ways to specifically train this quality.

When to Use It

If you can’t create a stiff and stable base of tension, you can’t suddenly create this force. And if you’re shifting your torso back and forth as you press, you definitely don’t have a good base of support. 

Consider swapping all barbell overhead pressing for pin pressing until you improve this stability. Because the bar is supported on the safeties, you can better focus on setting your trunk and keeping it stiff and fixed in place as you push hard against the bar to lift it from the starting position.

How to Do it 

Set the bar on strong safety bars at the height you would start your press from, generally around neck-height. Set your feet hip- to shoulder-width apart and grab the barbell with your standard overhead grip. Get in position under the bar and brace your entire trunk and back so your ribs won’t flare up and your spine is locked in place.

Keep this static position as you press as hard and fast as possible, brining the bar to lockout overhead. Return back to the pins and let the weight settle there before re-bracing and repeating for another repetition.

Muscles Worked by the Overhead Press

The overhead press is primarily a “shoulder exercise,” but it cannot be completed without assistance from several key body parts. Each of these body parts will be put under training stress during the exercise.

Shoulders

Your shoulders (deltoids or “delts”) are the primary movers during the overhead press. These muscles are responsible for flexing your arms overhead. The shoulder muscles consist of three heads — the front, side, and rear — which are involved in moving the arm in those respective planes of motion relative to your body.

All three muscle heads are used to press the weight overhead, but can be emphasized with various types of lateral raises.

Triceps

The triceps work to extend your arms, which is the latter portion of any shoulder press. The lockout portion of any overhead press, specifically, strongly activates your triceps. (1) The triceps are worked through a long range of motion during any overhead press variation, with the muscle recruited maximally in the top half of the movement.

Core

Your abs and lower back work together to form a strong, stabilizing core which supports overhead pressing. Any degree of sideways or backward lean is prevented through strong core stabilization. (2) It’s not unusual to feel sore abs after an intense overhead pressing session, which is one indicator of how significantly the core muscles work during the movement.

Overhead Press Form Tips

A few key technique cues can turn your basic overhead press from pain into progress. If you’re performing the lift from a power rack, set the safeties near shoulder or neck-level, not near your chest. Beginning the press from a position that’s too low leaves you with poor leverage that shifts more strain to the shoulder joint than the shoulder musculature.

long-haired person in gym pressing barbell overhead.

Credit: Jacob Lund / Shutterstock

During any press exercise, grip the bar as hard as possible. This will start a chain reaction of strength from your wrist and forearm muscles, through your upper arms, into your shoulders and upper back. (3) It’s a surprisingly effective way to stay tight while producing more power and minimizing joint strain.

Similarly, don’t stand up “passively.” Before each repetition, flex your core, glutes, legs, and calves. Imagine gripping the ground with your feet. This will help to establish total-body stability to drive a strong upward press.

Press More Over Your Head 

Bench press variations are fairly commonplace. Without giving it much thought, lifters tend to do much more horizontal pressing than vertical, but too much horizontal work and not enough vertical pressing can lead you to develop deficiencies in the muscular development and control of the entire shoulder girdle.

Learning and trying new overhead variations not only increases the potential weights you can use for your barbell overhead press, but also reduces the gap between these two pressing patterns making you much stronger and more balanced. Diversify your overhead training and reap the strength, stability, and muscle-building results.

References

  1. Kholinne, E., Zulkarnain, R. F., Sun, Y. C., Lim, S., Chun, J. M., & Jeon, I. H. (2018). The different role of each head of the triceps brachii muscle in elbow extension. Acta orthopaedica et traumatologica turcica52(3), 201–205. https://doi.org/10.1016/j.aott.2018.02.005
  2. Shinkle, J., Nesser, T. W., Demchak, T. J., & McMannus, D. M. (2012). Effect of core strength on the measure of power in the extremities. Journal of strength and conditioning research26(2), 373–380. https://doi.org/10.1519/JSC.0b013e31822600e5
  3. Gontijo, L. B., Pereira, P. D., Neves, C. D., Santos, A. P., Machado, D.deC., & Bastos, V. H. (2012). Evaluation of strength and irradiated movement pattern resulting from trunk motions of the proprioceptive neuromuscular facilitation. Rehabilitation research and practice2012, 281937. https://doi.org/10.1155/2012/281937

Featured Image: MDV Edwards / Shutterstock

Source

November 5, 2022

Workout Complexes Explained: Use Combination Lifts for Better Results

Filed under: Fitness,Training — Tags: , , , , , , — admin @ 4:38 am

Complexes, also known as combination lifts, consist of two or more exercises performed with the same free weight in a non-stop, continuous fashion. While this method may initially appear similar to low-intensity circuit training commonplace in machine-laden rec centers, true complexes are quite the opposite.

Romanian weightlifting coach Istvan Javorek popularized complexes in the 1970s to enhance athletes’ training intensity, increase workout efficiency, and eliminate the monotony of traditional “exercise, rest, exercise, rest” barbell training. (1)

person in empty gym performing barbell exercise

Credit: Jacob Lund / Shutterstock

Complexes are unique because they simultaneously train the muscular, cardiovascular, and neurological systems. They challenge your muscles, heart, lungs, and coordination. Learn classic barbell complexes along with creative complexes using dumbbells, kettlebells, and sandbags, then put them to work to ignite new gains. 

Simplifying Workout Complexes

How Workout Complexes Work

A complex strings together multiple exercises without rest. Unlike circuit training and some types of supersets, complexes must be performed with the same piece of equipment because the transition from one exercise to the next must occur smoothly and without pause.

Complexes commonly involve the Olympic weightlifting movements (i.e. clean & jerk, snatch) and their derivatives such as pulls and front squats. (2) Many coaches falsely believe complexes “must” consist of a power clean to get the barbell off the ground, followed by one or two additional exercises, such as a press and then an overhead squat. (3)

In reality, complexes can be performed using a wide variety of exercises and implements.

According to Javorek, the number of possible complexes is “unlimited, depending on a coach’s knowledge and creativity, the availability of equipment, and the goals of the coach and athletes.” (3

Classic Barbell Complexes

Performing complexes with a series of exercises using a single barbell may be the most common way to implement this training method. Here are two complexes that are relatively well-known in the weightlifting world.

Javorek Complex 1

Coach Javorek’s “Complex 1” incorporates Olympic weightlifting assistance exercises that build full-body power, coordination, and conditioning. Complex 1 includes the upright row, high pull snatch, squat push press, good morning, bent-over row, and high pull snatch (again). (1)(3) Javorek advocated ending the complex with a dynamic movement, hence the repeat performance of the high pull snatch. (3)

One cycle of Complex 1 consists of 6 repetitions per exercise. Note that Coach Javorek also promoted “Complex 2,” which consists of the same exercises performed for three repetitions each. (1)(3)

Upright Row

  • How to Do it: Stand with your feet hip-width apart. Hold the barbell at mid-thigh position with an overhand grip. Push with your legs toward the ceiling, rising onto the balls of your feet. Carry that momentum into a shrug and vertical row, drawing your elbows up and out. Control the negative. 
  • Sets and Reps: 4-5 x 6
  • Rest time: No rest before moving to the next exercise.

High Pull Snatch

  • How to Do it: Using the same stance and grip as the previous exercise, begin with the barbell on the floor above the front of your feet. Keeping your back tight, pull the bar from the floor by extending knees, ankles, and hips. As the bar passes mid-thigh, aggressively shrug your shoulders. Allow your arms to carry the momentum to the overhead position while keeping the bar close to the body. Receive the bar overhead with elbows straight. Reverse the motion and control the negative in the same bar path. On the last rep of the set, carefully “land” the bar across your upper traps instead of the floor, so you’re in position to begin the next movement.
  • Sets and Reps: 4-5 x 6
  • Rest time: No rest before moving to the next exercise.

Squat Push Press

  • How to Do it: Using a shoulder-width stance, begin with the barbell racked on your upper traps. Drop into a full back squat. Immediately drive back to standing, using the momentum to assist with an overhead press. Control the negative back to the racked position on your traps. Repeat the entire “squat and press” combination for each repetition.
  • Sets and Reps: 4-5 x 6
  • Rest time: No rest before moving to the next exercise.

Good Morning

  • How to Do it: Keep the same stance and hold the barbell behind your head on your upper traps. Allow your weight to shift to your heels as you bend forward by hinging or flexing at the hips. Maintain an arched spine and slightly bent legs throughout. Reverse the movement, driving your hips forward, and return to standing. On the last rep of the set, “squat and press” to pop the bar barely over your head and bring the bar to waist-height under control.
  • Sets and Reps: 4-5 x 6
  • Rest time: No rest before moving to the next exercise.

Bent-Over Row

  • How to Do it: Begin in a shoulder-width stance with the barbell held in front of your body in an overhand grip. Hinge forward and allow the barbell to hang below your chest. Depending on your flexibility and limb length, the bar may or may not touch the floor. Row by pulling your elbows up and out as you squeeze your shoulder blades together. Control the bar as you allow it to return to the stretched position.
  • Sets and Reps: 4-5 x 6
  • Rest time: No rest before moving to the next exercise.

High Pull Snatch

  • How to Do it: Using the same stance and grip as the previous exercise, begin with the barbell on the floor above the front of your feet. Keeping your back tight, pull the bar from the floor by extending knees, ankles, and hips. As the bar passes mid-thigh, aggressively shrug your shoulders. Allow your arms to carry the momentum to the overhead position while keeping the bar close to the body. Receive the bar overhead with elbows straight. Reverse the motion and control the negative in the same bar path.
  • Sets and Reps: 4-5 x 6
  • Rest time: Rest one to three minutes before repeating the first exercise.

Bear Complex

Popularized by CrossFit in the 2000s, the Bear complex builds full-body strength, power, and conditioning with one barbell and just few bumper plates.

“The Bear” consists of the power clean, front squat, overhead press, back squat, and another dose of the overhead press.

Power Clean

  • How to Do it: Stand with your feet hip-width apart. Hold the barbell at knee-height (the “hang position”) with a shoulder-width overhand grip. Push with your legs as you guide the bar toward your hips. Once the bar reaches mid-thigh, rapidly shrug and pull the bar up. Drop under the bar and shoot your elbows forward to receive the bar on the fronts of your shoulders in the “front rack” position. 
  • Sets and Reps: 5 x 5-7
  • Rest time: No rest before moving to the next exercise.

Front Squat

  • How to Do it: Maintain the front rack position with the bar resting across the fronts of your shoulders. Adjust your grip to comfortably maintain control of the bar. Squat down while keeping your torso upright and your elbows aimed forward. After descending as far as your mobility will allow, stand up forcefully.
  • Sets and Reps: 5 x 5-7
  • Rest time: No rest before moving to the next exercise.

Overhead Press

  • How to Do it: Standing with the bar in the front rack position, perform a slight countermovement or mini-squat and immediately drive upward to push the bar toward the ceiling. Lock your arms overhead before lowering the weight to shoulder-level. Repeat the mini-squat prior to each press. On the last rep of each set, carefully guide the bar to rest across your traps and the backs of your shoulders.
  • Sets and Reps: 5 x 5-7
  • Rest time: No rest before moving to the next exercise.

Back Squat

  • How to Do it: Secure the barbell across your upper back. Ensure your feet are approximately shoulder-width apart. Squat down as far as your mobility allows. Return to standing. On the last rep of each set, drive the weight overhead with a press and carefully lower it to the front of your shoulders.
  • Sets and Reps: 5 x 5-7
  • Rest time: No rest before moving to the next exercise.

Overhead Press

  • How to Do it: Standing with the bar in the front rack position, perform a slight countermovement or mini-squat and immediately drive upward to push the bar toward the ceiling. Lock your arms overhead before lowering the weight to shoulder-level. Repeat the mini-squat prior to each press.
  • Sets and Reps: 5 x 5-7
  • Rest time: Rest up to five minutes before repeating the first exercise.

Complexes with Kettlebells, Dumbbells, and Sandbags

Who says complexes need be limited to barbells? People who don’t understand complexes. That’s who. Dumbbells, kettlebells, and even sandbags are great tools for complexes.

These alternative implements build brute strength, total-body coordination, and unrelenting conditioning. Give these complexes a try when you need a break from traditional barbell training or when you’re working with limited equipment. 

Javorek Dumbbell Complex 1

Coach Javorek programmed dumbbell complexes using two dumbbells, although a single dumbbell is a viable option provided you repeat the complex on the other side after performing all exercises on the first side. (3)

Complex 1 with dumbbells is similar to Javorek’s barbell Complex 1. Aside from the obvious use of dumbbells instead of a barbell, the dumbbell version eliminates the good morning. It consists of the dumbbell upright row, dumbbell snatch, dumbbell squat push press, bent-over dumbbell row, and a repeat of the dumbbell snatch.

Dumbbell Upright Row

  • How to Do it: Begin bent slightly forward at the hips with the dumbbells hanging at knee-height. Forcefully extend your hips, knees, and ankles and transfer the momentum into a vertical pull of the dumbbells. In the top position, your elbows should be near shoulder-height and the weights should be near chest-level. Control the negative (lowering phase) to the starting position.
  • Sets and Reps: 3-6 x 6
  • Rest time: No rest before moving to the next exercise.

Dumbbell Snatch

  • How to Do it: Start in a hip-width stance with the dumbbells hanging in front of your knees with your palms facing your body. Powerfully drive through your legs and carry the momentum through the dumbbells. Draw the dumbbells along the front of your body and receive them overhead with your arms straight. Control the negative and return the weights to knee-height. On the last rep of the set, lower the weights only to shoulder-level.
  • Sets and Reps: 3-6 x 6
  • Rest time: No rest before moving to the next exercise.

Dumbbell Squat Push Press

  • How to Do it: Start in a shoulder-width stance with the dumbbells on the tops of your shoulders. Drop into a full squat, then immediately drive back to standing. Use the momentum to propel the dumbbells into the overhead lockout position. Lower the weight to shoulder-level and repeat. One the last rep of the set, bring the dumbbells to waist-height with straight arms. 
  • Sets and Reps: 3-6 x 6
  • Rest time: No rest before moving to the next exercise.

Dumbbell Bent-Over Row

  • How to Do it: Bend forward at your hips with a slight bend in your knees. Allow the dumbbells to hang from your straight arms, slightly in front of your knees. Row the dumbbells up and out by pulling the elbows out in line with your shoulders. Return to the stretched position under control. After the last rep of the set, stand upright with the weights in front of you.
  • Sets and Reps: 3-6 x 6
  • Rest time: No rest before moving to the next exercise.

Dumbbell Snatch

  • How to Do it: Start in a hip-width stance with the dumbbells hanging in front of your knees with your palms facing your body. Powerfully drive through your legs and carry the momentum through the dumbbells. Draw the dumbbells along the front of your body and receive them overhead with your arms straight. Control the negative and return the weights to knee-height.
  • Sets and Reps: 3-6 x 6
  • Rest time: Rest one to three minutes before repeating the first exercise.

Kettlebell Complex

This kettlebell complex is performed with two kettlebells and uses a descending repetition scheme. Repetitions are reduced with each successive exercise, allowing you to maintain intensity as fatigue accumulates.

The exercises in this complex are the double kettlebell swing, kettlebell front squat, and kettlebell push press. If you’re only using a single kettlebell, perform the same series while holding the kettlebell with both hands for each exercise.

Double Kettlebell Swing

  • How to Do it: Start in a wide stance (one-and-a-half times your shoulder-width) holding the kettlebells in front of your body. Brace your midsection muscles and “hike” both kettlebells back between your legs as you “break” or flex at the hips. Your forearms should contact your inner thighs. Explosively extend your hips, projecting your arms and the kettlebells forward. Allow the momentum from your hip drive to carry the kettlebells. Allow the downward motion of the kettlebells to dictate the timing of the next repetition — at the last moment, break at the hips again and repeat the swing. On the last repetition, bring the weights to shoulder-level using a “cheat curl” or power clean-motion.
  • Sets and Reps: 12 x 8
  • Rest time: No rest before moving to the next exercise.

Kettlebell Front Squat

  • How to Do it: Bring your stance in to shoulder-width, with the kettlebells “racked” atop your upper chest region and your palms facing down. Keep your elbows pointed up and out as you drop into a squat with an upright torso. Return to standing. 
  • Sets and Reps: 12 x 6
  • Rest time: No rest before moving to the next exercise.

Kettlebell Push Press

  • How to Do it: Maintain a shoulder-width stance and keep the kettlebells “racked” near your upper chest. Perform a rapid quarter-squat and quickly drive back to standing. Use the momentum from your leg drive to push the kettlebells overhead. Lower the weights to shoulder-level under control and repeat.
  • Sets and Reps: 12 x 4
  • Rest time: Rest approximately the same amount of time the entire three-exercise cycle took to complete, for a 1:1 work-to-rest ratio. 

Sandbag Complex

Sandbags are an unstable and downright awkward training implement — and that’s what makes them fun for complexes. Whether you shell out money for a professionally made, loadable sandbag or use a homemade version with a duffel bag and some play sand from the hardware store, sandbag workouts always end up more challenging than you expect.

This sandbag complex includes the sandbag clean, sandbag front squat, and sandbag reverse lunge.

Sandbag Clean

  • How to Do it: Start with your feet at hip-width with the sandbag on the ground in front of you. Grab the sandbag at the corners or, if available, hold the handles on the long side of the bag. Extend your hips, knees, and ankles to accelerate the bag upwards while keeping the sandbag close to your body. Drop under the bag, shoot your elbows forward, and “catch” the sandbag in the front rack position across the front of your shoulders. Stand fully upright before returning the bag to the ground. On the last rep of the set, hold the bag in position and don’t place it on the ground.
  • Sets and Reps: 4-6 x 3
  • Rest time: No rest before moving to the next exercise.

Sandbag Front Squat

  • How to Do it: Stand upright with the sandbag racked across the fronts of your shoulders. Drop into a squat while keeping your elbows high and your back straight. Drive back to standing. Repeat for repetitions.
  • Sets and Reps: 4-6 x 5
  • Rest time: No rest before moving to the next exercise.

Sandbag Reverse Lunge

  • How to Do it: Stand upright with the sandbag in the front rack position across your shoulders. Take a large step backwards with one leg and lower your back knee toward the ground. Return to the starting position with your feet together and repeat using the other leg. Alternate legs with each repetition. 
  • Sets and Reps: 4-6 x 5 per leg
  • Rest time: Rest one to three minutes before repeating the first exercise.

Benefits of Using Complexes

Now that you’ve seen a couple of classic complexes, consider the training effects of this style training. Complexes provide varied, high volume, metabolically demanding training. Because you never put down the weight, some muscles tend to be trained throughout the entire complex.

These typically include the forearm (“grip”) muscles and postural muscles of your spine. Complexes thereby enable lifters to improve local muscle endurance in areas that commonly limit performance.  

Modern complexes stem from Olympic weightlifting, a sport of quick lifts — the clean & jerk and the snatch. Therefore, each repetition in the complex should be performed with maximum intent for velocity. This promotes high power outputs and speed-strength training adaptations. 

Person in gym doing barbell Olympic lift.

Credit: Mix Tape / Shutterstock

Complexes are essentially high-volume sets divided into shorter sets, or clusters, of each exercise. These clusters are linked together without pause. Breaking longer sets into shorter clusters is known to promote power and performance. (4)

While you are certainly not “resting” between clusters of each exercise during a complex, many muscles get relative rest. For example, during Complex 1, your shoulders get a break during the good morning and your legs get a bit of break during the bent-over rows. This feature allows power output to be preserved throughout high-volume workouts. 

Although complexes are great for training muscular strength and power, don’t fail to appreciate their cardiovascular training demands. By minimizing rest, complexes pack plenty of productive training in short periods of time. Complexes ultimately train multiple energy systems. The quick-energy phosphagen and anaerobic glycolysis systems are trained during initial repetitions of ballistic exercises, and the all-important aerobic system is trained in the latter repetitions and throughout recovery between complexes.

Complexes are also useful for reenforcing exercise technique. Exercise derivatives, often representing key components of a more complex lift such as the clean & jerk or snatch, can be linked together in a complex to enhance learning. (5) In addition to the technical demands of each exercise, the athlete is tasked with seamlessly transitioning from one exercise to the next. These fluid transitions build new coordination and enhance motor control. 

Toward the end of the complex, the athlete must continue to demonstrate crisp technique despite growing fatigue. This is a common demand of many sports. As such, complexes are thought to promote sport performance and injury prevention. (2)(6)(7)(8)

Who Should Perform Workout Complexes?

While complexes were originally used for competitive strength sport athletes, they’re not only for advanced lifters. When properly programmed with the right exercises and training volume, many lifters can incorporate complexes into their training program.

Complexes as Warm-Ups

No matter what your workout holds, a complex can serve as an invigorating and effective warm-up. Use a light weight (or even an empty barbell). Perform two sets of a complex near the beginning of your session. (3) Any complex can raise your body temperature, but the best warm-ups are specific to the ensuing workout. (2)

person at home doing squat with kettlebell

Credit: baranq / Shutterstock

Attempt to use complexes with movement patterns similar to the demands, goals, and exercises of the session’s workout. A complex comprised of lower body movements before a big leg workout, for example, or dumbbell Complex 1 before a back or shoulder workout.

Complexes for Weightlifting Prep and Motor Learning

If a complex includes movements complimentary to the primary lift of the workout, the complex can serve as specific movement prep. (2) By combining exercise variations and assistance exercises in a complex, you reinforce positions and movement patterns required for your primary lift of the day. 

For example, a complex consisting of a Romanian deadlift (RDL), jump shrug, and hang clean is excellent movement prep for the higher complexity clean exercise. The complex re-enforces key technical aspects of the clean in simpler forms via a learning strategy called “chunking.” (9)

The complex serves to activate and mobilize muscles like the hamstrings and potentiate the triple extension movement pattern used in the clean. Altogether, these features are expected to enhance subsequent exercise performance. 

Complexes for Sports Performance, Post-Rehabilitation Training, and Injury Prevention

Because complexes may be progressively intensified by manipulating the weight, volume, rest intervals, and complexity of the exercises, they are wonderful tools for training for the physiological demands of sport. 

Complexes are commonly used to recondition previously injured athletes for the demands of sports. (7)(8) Although it is best to work with your sports medicine provider for individualized recommendations, post-rehabilitation complexes typically involve  progressive intensities and volumes. A common post-rehabilitation recommendation is to begin with a weight of 10-15% of your body weight for Javorek Complex 1 and progress to 35% of body weight over the course of a month. (7)(8)

Developing strength, power, and coordination via complexes may minimize the risk of athletic injury, but consistent and progressive programming is absolutely essential. Complexes are typically performed three times per week and progressed by gradually adding weight or gradually adding cycles to the complex. (3)(7)(8)

Complexes for Conditioning

Due to their high volume nature, complexes are an effective form of metabolic conditioning. Choose a complex using barbells, kettlebells, dumbbells, or even a landmine unit for an effective general physical preparedness (GPP) and cardiovascular training stimulus.  

Here’s an example of conditioning complex requiring only a single dumbbell. Perform four repetitions per movement:

  • Dumbbell Snatches
  • Dumbbell Reverse Lunge
  • Dumbbell Push Press
  • Overhead Squat

Repeat immediately with the dumbbell in the other hand and that’s one cycle of the complex. Rest 90 seconds after the second side. Perform three to five cycles with each arm.

Programming Recommendations for Workout Complexes

While complexes can deliver a variety of benefits, some programming goals will ensure an efficient training session with maximal intensity and recovery.

Anchor Intensity on the Most Challenging Movement

When stringing together a chain of exercises, you’re only as strong as your weakest movement. Therefore, the weakest movement must dictate the weight used for any complex. 

For example, Coach Javorek programs the weight used for Complexes 1 and 2 on the upright row, because it is more challenging than the other movements (high pull snatch, push press, good morning, or bent-over row). (6) Start by identifying the weakest link in the complex, then program your working weight according to your goal. 

Program According to Your Primary Training Goal

From movement prep to performance training, complexes can be effective for a wide variety of goals. The parameters of your programing (exercise selection, intensity, volume, and rest intervals) should reflect the primary purpose of your complex. 

For power and strength training, most of your complexes should be performed with moderate weights. Perform all repetitions with maximum intent for movement velocity. (10) Repetitions for each exercise within the complex should be kept relatively low. Clusters of two to five repetitions are effective for building strength and power. (4)

Person doing dumbbell squat in gym

Credit: BLACKDAY / Shutterstock

Ensure your reps stay quick and crisp throughout the complex, as greater velocity loss may result in diminished power adaptations. (11) If your final reps of each exercise are losing speed, reduce the weight and/or repetitions. 

For conditioning, consider the rest intervals between complexes. To prioritize aerobic training adaptations, use shorter rest intervals (e.g. one minute). Recognize that short rest intervals will also necessitate lighter weights and/or lower repetition volumes. To prioritize adaptations in the phosphagen and glycolytic energy systems, allow longer rest between complexes (e.g. 90 seconds to five minutes). 

For coordination and motor learning, light loads are initially recommended. Moderate-to-high repetition volume (e.g. eight to 12 repetitions per exercise) may be most effective, provided the technique does not break down due to fatigue. (9

Complexes, Simplified

Complexes are one of the most invigorating training methods. They’re also incredibly versatile, facilitating the development of strength, power, coordination, conditioning, and resiliency. Although traditional complexes are performed exclusively with barbells, you should feel empowered to use equipment of your choice, including, but not limited to dumbbells, kettlebells, landmines, medicine balls, and sandbags. 

References

  1. Javorek, I. (1988). Exercise techniques: General conditioning with complex I and II. Strength & Conditioning Journal10(1), 34-37.
  2. Judge, L. W. (2008). Core Training for Superior Sports Preparation. Journal of Coaching Education1(2), 38-63.
  3. Javorek, I. S. (1998). The benefits of combination lifts. Strength & Conditioning Journal20(3), 53-57.
  4. Moreno, S. D. et al. (2014). Effect of cluster sets on plyometric jump power. The Journal of Strength & Conditioning Research28(9), 2424-2428.
  5. Duba, J., Kraemer W.J., & Gerard Martin, M. A. (2007). A 6-step progression model for teaching the hang power clean. Strength and Conditioning Journal29(5), 26.
  6. Javorek, I. (1990). All-sports conditioning: Six-week training program. Strength & Conditioning Journal12(4), 62-69.
  7. Panariello, R. A., Stump, T. J., & Cordasco, F. A. (2017). The lower extremity athlete: postrehabilitation performance and injury prevention training. Operative Techniques in Sports Medicine25(3), 231-240.
  8. Lorenz, D., & Maddalone, D. (2017). Postrehabilitation performance enhancement training and injury prevention in the upper extremity. Operative Techniques in Sports Medicine25(3), 220-230.
  9. Morris, S. J., et al. (2020). Taking a long-term approach to the development of weightlifting ability in young athletes. Strength & Conditioning Journal42(6), 71-90.
  10. Behm, D. G., & Sale, D. G. (1993). Intended rather than actual movement velocity determines velocity-specific training response. Journal of Applied Physiology74(1), 359-368.
  11. Pareja‐Blanco, F., et al. (2017). Effects of velocity loss during resistance training on athletic performance, strength gains and muscle adaptations. Scandinavian Journal of Medicine & Science in Sports27(7), 724-735.

Featured Image: Ground Picture / Shutterstock

Source

April 21, 2021

Why Gyms Are Coming Back More Essential Than Ever

It was the year of the at-home workout—Peloton, Nordic Track, and Beach Body. Or maybe you just got on craigslist and outfitted the garage. Over and over, I’ve heard people raving about how much they love their home workout routine and predicting the death of traditional gyms. Why would anyone go back? 

Because Humans Are a Social Species 

Forces that sometimes drift outside the cold logic of practicality and efficiency compel we human folk. We buy paperback books because we prefer the feeling, live and die with our favorite sports team, wave strangers on at four-way stops, and spend energy each day sifting through our ever-expanding collections of shirts, pants, and shoe options to find the right outfit. We are a social species that cannot thrive or even define ourselves in isolation.

Read Why Gyms Are Coming Back More Essential Than Ever at its original source Breaking Muscle:

https://breakingmuscle.com/fitness/why-gyms-are-coming-back-more-essential-than-ever

Source

Powered by WordPress