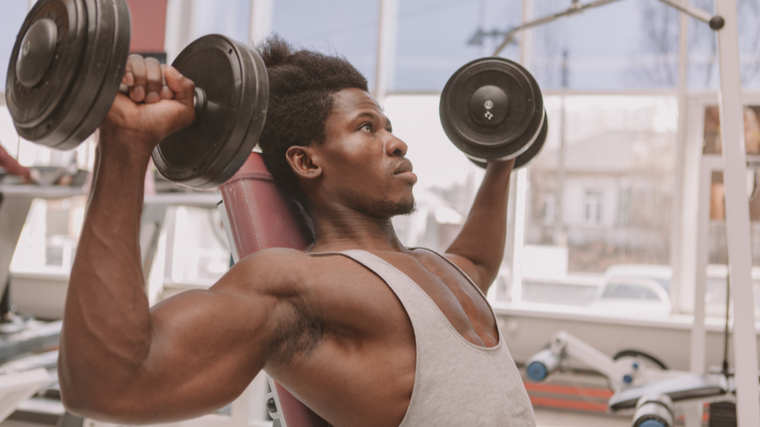
It’s been decades since Arnold Schwarzenegger stood on top of the fitness world as a dynastic Mr. Olympia. In the time since, he’s earned a Hollywood reputation as the famed “Terminator,” become the governor of the state of California, and generally morphed into a larger-than-life personality. However, even at the age of 75, he still knows what it takes to rip your body up in the gym.
On May 24, 2023, Schwarzenegger appeared in a video partnering with Men’s Health. The clip features the fitness legend dispensing a short arm workout, shoulder workout, and some of his favorite training secrets.
More from Breaking Muscle:
While working out at the famous Gold’s Gym in Venice Beach, CA, Schwarzenegger broke down an arms and shoulders routine typical of what he does every day.
“This is what I do every morning. I come in here [Gold’s Gym] and do 25 to 30 sets in a half an hour,” Schwarzenegger said. “In the old days we did 30 sets for shoulders. Now I do 15 sets.”
Arnold Schwarzenegger | Arm and Shoulder Workout May 2023
Here is an overview of both of Schwarzenegger’s arm and shoulder workouts:
Arm Workout
Machine Preacher Curl: One set of 30 reps, four sets of 10-12 reps
Machine Dip: One set of 30 reps, four sets of 10-12 reps
Shoulder Workout
Schwarzenegger explained he ends every set with a five-second hold on the last rep.
More from Breaking Muscle:
As for Schwarzenegger’s advice on a proper approach to training, he maintained it’s about consistent dedication and all the benefits that it can provide. Provided an athlete stays committed to their routine, Schwarzenegger says they’ll eventually see results. He told an anecdote about his peak fitness days to use as proof.
“When you train it is not just that your body gets pumped up and gets stimulated with blood but it’s also your mind and you have a much more positive kind of outlook on the day and on life when you’ve had a pump behind you,” Schwarzenegger started. “I was in good shape [in the 1980s]. I worked out two hours a day. Because after having had several heart surgeries and then having had surgeries on my shoulders and knees and all those kind of things, it’s important to protect my body and do therapy training at the same time.
In other words, Schwarzenegger said not to overthink it and keep chugging along in the gym, no matter your adversity.
“If you want to go to the gym every day and do your bike ride, train every day, then you roll out of bed and you don’t think,” Schwarzenegger said. “The important thing is don’t think, just do.”
Simple bodybuilding programs are a little too easy to find. You could pull them from fitness magazines — those ghost-written workouts that your favorite bodybuilders supposedly follow. You could roll the dice and ask an artificial intelligence chatbot to generate one for you. Or, you could attempt to develop one for yourself.
Just a few problems there. The high intensity, high volume programs used by the pros do not tend to be sustainable for the rest of us due to some physiological (and often pharmaceutical) reasons. Most people also aren’t ready to trust their potential gains to an algorithm-fueled robot, so that leaves you creating a program for yourself.
Consider a time-tested axiom before diving in: It’s not hard to create a good bodybuilding workout program, but it’s also not hard to create a bad one. Fortunately, we’ve got your back. And your chest, shoulders, arms, and legs.
Credit: Jacob Lund / Shutterstock
Here you will find evidence-based workouts to build every major area of an aesthetic physique. These workouts assume you’re a relatively healthy lifter with at least some experience in the gym (i.e. not a true beginner who could benefit from a more generalized approach). These plans work best with a body part split across the week.
The chest muscles play a prominent role in our physique. They are most often trained by multi-joint, upper body pushing exercises. The angle the “push” can be used to bias certain portions of the chest, allowing us to fully develop this region. In addition to pushing exercises, single joint exercises can also be used to target the chest. Single-joint exercise serves as “icing on the cake,” providing a touch of additional training stimulus.
The Complete Chest Workout
Just about any repetition range can build muscle. (1)(2) This engaging workout begins with the heaviest exercise. As the workout progresses, moderate repetition, moderate weight exercises are introduced as compound sets — a time-efficient superset technique that pairs movements targeting the same muscles back-to-back without rest. The workout ends with high repetition “pump work,” leaning into the metabolic mechanisms of muscle hypertrophy. (3) This general format is repeated for workouts for all body parts.
This chest workout is designed to be performed once per week. Select weights that allow completion of repetitions is near the lower end of the repetition range. Sets need not be taken to failure but should flirt with it. Meaning, sets must reach a high level of effort. (4)(5) When you end the set, you should feel like you have three or fewer repetitions remaining “in the tank.”
When you’re able to complete sets at the top end of the repetition range, add five to 10 pounds. This progression method “resets” your sets back toward the lower bound of the repetition range, allowing your to progress repetition volume once again in subsequent weeks.
Barbell Bench Press
How to Do it: Lie on a bench with your back arched and shoulder blades pulled down and together (“in your back pockets”). Unrack the bar and lower it to your chest. Press the bar upward until your elbows are straight but not locked.
Sets and Reps: 3 x 6-8
Rest time: Rest three minutes seconds between sets.
Dip
How to Do it: Support your body from a dip bar and lean slightly forward. Lower yourself until you feel a stretch across the front of your chest and shoulders or until your upper arms break parallel. Add weight or assistance as needed to achieve the target repetition range.
Sets and Reps: 3 x 8-12
Rest time: Move immediately to the next exercise without rest.
Incline Dumbbell Flye Press
How to Do it: Lie on a 30- to-45-degree incline bench and begin with the dumbbells pressed locked out above your chest. Face your palms together and lower the weights in a flye, keeping a slight bend in your arms. From the bottom position, pull the weights in toward your shoulders and press the weights up to lockout.
Sets and Reps: 3 x 12-16
Rest time: Rest two minutes before repeating the previous exercise.
Machine Incline Press
How to Do it: Sit with your back and buttocks supported on an incline press machine. Push the handles along the arc of the machine’s path until your elbows are straight but not locked. Control back to the start position.
Sets and Reps: 2 x 16-20
Rest time: Rest 90 seconds between sets.
Muscles Trained on Chest Day
Chest day often draws added attention because the pecs are featured so prominently when you check the mirror, even more so once you get an awesome pump going mid-session. The majority of chest movements will also recruit “the pressing muscles” — your shoulders and triceps — for assistance.
Pectorals
When viewed from the front, the upper bodies of modern bodybuilders are dominated by well-developed chest muscles. The pectoralis major is the largest and most superficial chest muscle. All parts of the pectoralis major act to draw the arms toward the body, pull the arms together in front of the body, and internally rotate the arms. The upper portion of the pectoralis major also raises the arm. Therefore, a wide variety of exercises target the pecs.
Anterior Deltoids
The anterior deltoids, or “front delts,” share the same actions as the pectoralis major. Conveniently, this means that anterior deltoids are trained during chest workouts, such as the one above, and during direct shoulder workouts.
Triceps
The triceps brachii primarily serve to extend your elbows (straighten your arms). Because of this, compound movements such as pressing and dips can be counted toward total triceps training volume. This aesthetic “three-headed” muscle fills t-shirt sleeves more readily than any other arm muscle.
How to Warm-Up Your Chest
A traditional warm-up has two components: 1) the “general warm-up” and 2) the “specific warm-up.” The general warm-up elevates body temperature, improves oxygen delivery to muscle and other body tissues, and improves joint freedom of motion. It typically consists of short duration, low-to-moderate intensity cardiovascular exercise (e.g. air bike, rowing, jogging, or jumping rope).
The specific warm-up primes areas of the body and movement patterns to be used in the subsequent workout for improved technique and performance. It is also a good time for dedicated mobility exercises and/or exercises intended to reduce risk of injury.
A specific warm-up for the chest may consist of exercises to prepare the upper body and spine for proper positions during pressing, stimulate muscle contractions of the muscles to be trained, and reinforce shoulder stability. It is wise to include lower intensity sets of the workout’s first exercise at the tail end of the specific warm-up.
Chest Warm-Up
Cardio: Five minutes, low-to-moderate intensity effort
Band Pull-Apart: 2 x 15
Foam Roller Thoracic (Upper Back) Extensions: 2 x 10
Bench Press: 3 x 6–10, work-up sets at light to moderate weight (e.g. approximately 40%, 60%, and 80% of the weight to be used for the first set of the workout’s first exercise).
Best Bodybuilding Workout for Back
A muscular back supports a confident posture, adds width to your upper body, and provides visual interest for those who happen to be walking behind your statuesque physique. That visual interest will come from the various muscles of the back, which converge on the shoulder blades and shoulders.
To create desirable definition and size, training the back from multiple angles using a variety of exercises may be useful. each exercise variation biases certain areas of the back and may result in distinct patterns of muscular development. (6)(7)
Back Width and Thickness Workout
Complete this full back workout once per week. Select weights that allow you to complete repetitions on the lower end of the repetition range. Sets to failure are not necessary to build muscle. (8) However, each set should reach a high level of effort. (4) When you’re able to complete all sets at the top end of the repetition range, add five to 10 pounds.
Three-Point Dumbbell Row
How to Do it: Perform the three-point dumbbell row with the knee and hand of your non-working side on a flat bench. Initiate the movement by pulling your shoulder blade toward your spine, and row toward the outside of your hip. Lower to a full stretch without rotating or sinking your hips
Sets and Reps: 3 x 6-8
Rest time: No rest between sides. Rest three minutes between sets.
Neutral-Grip Lat Pulldown
How to Do it: As the name implies, the neutral-grip lat pulldown is performing using a handles attachment that faces your palms toward each other. Begin in a full overhead position and pull your elbows down to the midline of your ribcage — don’t force the bar to reach your chin or chest.
Sets and Reps: 3 x 8-12
Rest time: Rest two and a half minutes between sets.
Machine Wide Row
How to Do it: Set up on a machine with a chest support, grasping the handles with a wide, overhand grip. Initiate movement with your shoulder blades and pull toward your chest. Return to a fully stretched position.
Sets and Reps: 3 x 12-16
Rest time: Move immediately to the next exercise without rest.
Cable Flexion Row
How to Do it: Perform this seated row variation on a low cable machine. Allow resistance to pull your trunk and shoulder blades toward the machine — your spine should round forward, promoting a massive stretch through your back muscles. Begin by pulling the shoulder blades together and down. As you row the bar toward your torso, extend your spine but do not use momentum from the trunk to drive the movement. Reverse the movement and repeat.
Sets and Reps: 3 x 16-20
Rest time: Rest two minutes before repeating the previous exercise.
Muscles Trained on Back Day
Your back is one of the largest muscle groups on your body because a number of various individual muscles coordinate during each movement. This comprehensive workout will address and train a large number of muscles on your posterior torso including the lats, rear shoulders, and upper and mid-back. Your biceps and gripping muscles are also recruited during most exercises.
Mid-Back and Lats
Mid-back muscles, which act on the shoulder blades, create the appearance of a raised, central diamond-shape. Your latissimus dorsi (lats) sweep from the small of the back toward the outsides of your armpits and enhances the appearance of a “V-shaped” torso. These muscles comprise the bulk of the back musculature and are trained by upper-body pulling exercises.
Rear Deltoids
While your rear deltoids are traditionally trained via shoulder-specific exercises (e.g. reverse flyes and cable external rotations), wide and narrow-grip pulling movements also hit the rear deltoids. When considering total weekly training volume for the rear deltoids, it is appropriate to include pulldowns, pullovers, and rows.
Biceps and Other Elbow Flexors
Drawing a resistance toward your body, as performed during pulldowns, trains your elbow flexors. As the most visible elbow flexor, the biceps brachii gets all the glory; however, the brachialis is a deep elbow flexor that boosts the appearance of the biceps by pushing it up — kind of like the supportive parent or friend whom you should probably call and thank (after your workout, of course).
How to Warm-Up Your Back
Once again, it’s a good policy to raise the body’s temperature with some general movement and prime the areas of the body to be trained before jumping into the workout. On top of that, “back day” is a great time to incorporate some direct exercise for the midsection, as many workout splits don’t allocate ab training to one specific day.
Back Warm-Up
Cardio: Five minutes, low-to-moderate intensity effort
Three-Point Dumbbell Row: 3 x 6–10, work-up sets at light to moderate weight (e.g. approximately 40%, 60%, and 80% of the weight to be used for the first set of the workout’s first exercise).
Best Bodybuilding Workout for Shoulders
The deltoids are the muscles that envelop your shoulders. Well-developed deltoids appear full and rounded, “capping” the shoulders. The deltoid has three functional parts — anterior, middle, and posterior.
The anterior deltoid is primarily responsible for raising the arms in front of the body (e.g. pressing), pulling the raised arms in toward your midline, and internally rotating the arms. The middle deltoid raises the arms out the sides (e.g. lateral raises and overhead presses) and assists with pulling the raised arms away from your midline (e.g. reverse flye). The posterior deltoid assists with the reverse flye movement in addition to external rotation and driving your arms behind your body (e.g. rows).
While your shoulders clearly get some work on chest day and back day, a dedicated shoulder workout helps to ensure each part receives adequate training. The diverse actions of the deltoids open the door for efficient use of supersets on shoulder day.
The 3D Delt Workout
Perform once per week using weights that allow repetitions at or near the lower boundary of the stated repetition range. Once again, the majority of working sets should be high level of effort with three or fewer repetitions remaining before failure. Machine-based overhead pressing is included to allow lifters to safely approach or achieve failure without a spotter.
Once you reach the top of any repetition range, add five to 10 pounds to the exercise. Be vigilant for stagnating progress or drops in performance, as these features might indicate that it’s time for a deload.
Seated Dumbbell Overhead Press
How to Do it: Sit on a bench with a vertical back support. Rest a dumbbell on each thigh before “kicking” each weight into position at shoulder-level with your palms facing forward or angled slightly in. Press both weights overhead to full lockout before returning to shoulder-level.
Sets and Reps: 3 x 6-8
Rest time: Move immediately to the next exercise without rest.
Dumbbell Reverse Flye
How to Do it: Stand with a dumbbell in each hand at arm’s length by your sides. Hinge forward at the waist and slightly bend your legs. Slightly bend your elbows and maintain the arm angle throughout the set. Draw your upper arms toward the ceiling, stopping the your elbows are roughly in line with your shoulders. Lower under control — don’t allow the weights to build momentum in the bottom position.
Sets and Reps: 3 x 12-16
Rest time: Rest three minutes before repeating the previous exercise.
Machine Shoulder Press
How to Do it: Sit in an shoulder press machine and adjust the seat height to allow you hands to reach shoulder-height in the bottom position. Take a palms-forward grip and drive the weight up to near-lockout before lowering with control. Aim to move at a steady pace and maintain continuous tension through each repetition.
Sets and Reps: 3 x 12-16
Rest time: Rest two minutes between sets.
Face Pull
How to Do it: Set a resistance band or cable pulley at roughly eye-level. Take a palm-down grip and step back to create tension in the stretched position. Begin the face pull by driving your elbows back in line with your shoulders while pulling your hands in line with your eyes or ears. From the contracted position, reach forward until full lockout.
Sets and Reps: 3 x 12-16
Rest time: Move immediately to the next exercise without rest.
Lateral Raise
How to Do it: Stand with a dumbbell in each hand at arm’s length, resting the weights on the front of your thighs. Keep a slight bend in your arms and raise the weights “up and out” until your hands are slightly above shoulder-height. Maintain a tight core and stable torso — don’t allow your hips or back to swing. Lower to the starting position with your hands in front of your thighs.
Sets and Reps: 3 x 20-24
Rest time: Rest two minutes before repeating the previous exercise.
Dumbbell Shrug
How to Do it: Stand with a pair of dumbbells at arm’s length by your sides. Drive your shoulders toward the ceiling as high as possible — move vertically without “rolling” your shoulders or pulling your shoulder blades together. Lower to a full stretch.
Sets and Reps: 2 x 20-24
Rest time: Rest 90 seconds between sets.
Muscles Trained on Shoulder Day
The shoulder joint is arguably one of the most precarious joints in the body, responsible for a long range of motion in a variety of directions. The deltoids may be your primary “shoulder muscle,” but several muscle groups play a role in completing most shoulder-focused movements.
Shoulders
The middle deltoids widen the appearance of the shoulders, so they are an important target for physique-focused bodybuilding training. Your middle and anterior deltoids are trained by the presses in this workout. Middle deltoids get direct, high-repetition work during the lateral raises.
As previously discussed, it is fair to consider rows, pulldowns, and pullovers as rear deltoid exercises; however, these exercises alone may not result in adequate stimulation of this relatively small part of the shoulder — reverse flyes can be superior in that regard. (9) As a bonus for shoulder health, face pulls hit the rear deltoids, middle deltoids, rotator cuff, and some of the muscles acting on the scapula.
Trapezius
The traps are a diamond-shaped muscle of your mid- and upper back. The upper and lower fibers of trapezius (e.g. the top and bottom portions of the “diamond”) are trained during presses, as they act to upwardly rotate your shoulder blades. Shrugs are included in the shoulder workout to further develop the upper trapezius.
Triceps
Your triceps brachii receive additional training volume during the shoulder workout, owing to the muscle’s role as an elbow extensor. These extra sets are beneficial, especially if you’re reasonably well-trained. Recent research suggests the triceps brachii are among the muscles that grow more rapidly with higher training volumes. (10)
How to Warm-Up Your Shoulders
Prepare your shoulders for peak performance by increasing your body temperature with a small dose of rhythmic cardiovascular exercise, such as rowing, jumping rope (ideally with a heavy rope to further activate your upper body), or riding an air bike. Then, perform exercises to mobilize your shoulder joints, shoulder blades, and spine through essential ranges of motion. Wrap up the warm-up with light sets of the first exercise of the workout.
Shoulder Warm-Up
Cardio: Five minutes, low-to-moderate intensity effort
Band Pull-Apart: 2 x 15
Foam Roller Thoracic (Upper Back) Extensions: 2 x 10
Band Over and Backs: 2 x 10-12
Seated Dumbbell Overhead Press: 3 x 6–10, work-up sets at light to moderate weight (e.g. approximately 40%, 60%, and 80% of the weight to be used for the first set of the workout’s first exercise).
Best Bodybuilding Workout for Arms
Although your arms undoubtedly receive training during chest, back, and shoulder workouts, a dedicated arm day may help to accelerate muscle gain. But arm day need not be exclusively single-joint (isolation) exercises. In this workout, a pull-up variation is used as the first exercise, because it targets your biceps with the bonus of additional training volume for your lats and rear deltoids. (11)
Single-joint exercises for your biceps and triceps come next in the workout. These are performed back-to-back on the same incline bench to promote a searing stretch and enhanced growth. (12)(13) The workout concludes with training for lesser-appreciated muscles for arm thickness.
Gun Day Isn’t Only Sunday
Complete the arm workout once per week. Use weights that allow you to complete of repetitions on the lower end of the repetition range. When you’re able to complete all sets with repetitions at or exceeding the repetition range, add five pounds.
Neutral-Grip Pull-Up
How to Do it: Hang from a neutral-grip pull-up bar or freely moving handles with palms facing each other. Pull your chest toward the bar by driving your shoulders back and flexing your elbows. Lower with control.
Sets and Reps: 2 x 6-8
Rest time: Rest three minutes between sets.
Incline Dumbbell Curls
How to Do it: Perform incline dumbbell curls on a bench set at an approximately 45-degree angle. With underhanded grips on the dumbbells, allow your arms to hang vertically beneath your shoulders. Without swinging your upper arms forward, curl the dumbbells.
Sets and Reps: 3 x 12-16
Rest time: Move immediately to the next exercise without rest.
Incline Skull Crusher
How to Do it: Take a palms-down grip on the inner handles of an EZ-bar and lie on a 45-degree incline bench. Point your elbows toward the ceiling and allow the bar to lower just behind your head without moving your upper arms. Feel your triceps stretch and then straighten your arms to return to the start position.
Sets and Reps: 3 x 16-20
Rest time: Rest two minutes before repeating the previous exercise.
Reverse Biceps Curl
How to Do it: Perform the standing reverse biceps curl with an overhand grip on an EZ-bar or straight bar. Keeping your arms at your sides, curl the weight by bringing your knuckles toward your shoulders. Return to the start position.
Sets and Reps: 3 x 12-16
Rest time: Move immediately to the next exercise without rest.
Gripper
How to Do it: Hold grip trainers, or the handles of a grip machine, using a power grip with the fingers and thumb of each hand wrapped fully around each handle. Close your hands against the resistance, then slowly control the opening of the grip trainers or machine as far as possible without losing control of the implements.
Sets and Reps: 3 x 20-24
Rest time: Rest 90 second before repeating the previous exercise.
Muscles Trained on Arm Day
Arm training has a misconception of being only for vanity and appearance, but well-developed biceps and triceps can contribute to overall strength as well as shoulder and elbow joint health.
Biceps and Elbow Flexors
Your biceps brachii and brachialis add upper arm size, while the brachioradialis adds dimension to the forearm. All three of these muscles are trained via elbow flexion (bending your arms against resistance), whether in single-joint fashion as in the curl variations, or within compound pulling movements like the neutral-grip pull-up.
Triceps
The three heads of your triceps brachii can be trained via resisted elbow extension (arm straightening). Since the long head of the triceps crosses behind the shoulder, triceps exercises that place the shoulder in flexion (e.g. overhead movements including incline skull crushers) may expose the triceps to more mechanical tension. Ultimately, this can result in enhanced growth. (12)(13)
Forearms
When you train your grip, forearm muscles that flex the fingers contract forcefully. These muscles tend to bend your wrists as well. To counteract wrist flexion, the muscles on the opposite side of the forearm (i.e. wrist extensors along the top of your forearm) contract. The result is a robust forearm-training stimulus.
How to Warm-Up Your Arms
Your arm day warm-up can be straightforward: Simply get your body moving. Special attention is given to the wrists, forearms, and elbows. The exercises should be non-fatiguing.
Arm Warm-Up
Cardio: Five minutes, low-to-moderate intensity effort
Dumbbell Wrist Extension (Reverse Wrist Curl): 1 x 8-12
Neutral-Grip Pull-Up: 2 x 6–10, work-up sets at light to moderate difficulty (e.g. on an assisted pull-up machine if necessary, using a greater amount of assistance than you’d use for your working sets).
Best Bodybuilding Workout for Legs
Leg day is a longer, often more grueling workout compared to other body parts, and rightfully so. If you’re only going to train lower body once per week, you’d better make it count.
While there is debate regarding whether deadlifts belong with back day or leg day, the hamstring-dominant Romanian deadlift (RDL) is programmed in this leg workout, as this variation reduces the overall load required by reducing leg drive without sacrificing training stimulus to the target muscles. Supersets and compound sets are used extensively during this 24-set workout to save time.
The Ultimate Leg Day
Complete once per week. Select weights that allow you to complete repetitions on the lower end of the repetition range. Each set should reach a high level of effort. If you are accustomed to high-volume leg training (e.g. 25+ sets), you may consider adding a set or two to front squats, the squat machine exercise, or leg extensions, as the quadriceps have been shown to respond favorably to higher training volume among well-trained lifters. (10) When you’re able to complete all sets at the top end of the repetition range, add 10 to 20 pounds.
Front Squat
How to Do it: Support a barbell across the front of your shoulders with a palms-up or cross-arm grip. Keep your trunk as upright as possible as you squat to a comfortable depth.
Sets and Reps: 3 x 6-8
Rest time: Move immediately to the next exercise without rest.
Prone Hamstring Curl
How to Do it: Lie on a prone hamstring machine with the roller pad contacting just above your heels. Flex your knees through the longest range of motion you can achieve, then control back to the stretched starting position.
Sets and Reps: 3 x 8-12
Rest time: Rest three minutes before repeating the previous exercise.
Romanian Deadlift
How to Do it: Hold a barbell in front of your thighs. Begin by lowering from the hips, keeping your knees slightly bent throughout the exercise. Aim to feel a strong stretch in your hamstrings before returning to standing upright.
Sets and Reps: 3 x 8-12
Rest time: Move immediately to the next exercise without rest.
Leg Extension
How to Do it: Sit in a leg extension machine with your knee joint aligned with the pivot point of the moving part of the machine. Straighten your knees, pause very briefly at lockout and then lower slowly with control. Keeping your feet pulled up toward your shins (ankle dorsiflexion) may help you feel a stronger quadriceps contraction.
Sets and Reps: 3 x 12-16
Rest time: Rest two and a half minutes before repeating the previous exercise.
Machine Squat
How to Do it: Pendulum or lever-style squat machines are becoming more popular in gyms; however, if your gym does not have one, a hack squat or leg press machine is an acceptable substitute. Set up under the padded “yoke” of the squat machine, keep your feet flat as you lower into a deep squat. Use a controlled motion at your hips, knees, and ankles. Push back to a nearly locked out position.
Sets and Reps: 3 x 12-16
Rest time: Move immediately to the next exercise without rest.
Calf Machine
How to Do it: Locate a calf machine that allows a relatively straight knee position during operation (e.g. standing calf machine or leg press). Lower slowly through your entire ankle range of motion. Without bouncing out of the bottom position, push through the ball of your foot and big toe until you’ve reached the top of your available ankle range of motion. Pause briefly in both the fully stretched and fully contracted positions.
Sets and Reps: 3 x 16–20
Rest time: Rest two and a half minutes before repeating the previous exercise.
Back Extension
How to Do it: Hit your lower back, hamstrings, and glutes by setting up in a glute-ham developer (GHD), as shown, or in a 45-degree Roman chair (back extension) with the top of the pad set just below your hip joints. Lower and raise your trunk primarily from the hips; however, it is acceptable to permit some low back movement as well.
Sets and Reps: 3 x 12-16
Rest time: Move immediately to the next exercise.
Seated Calf Machine
How to Do it: Set the pads atop your thighs with your knees bent approximately 90-degrees. Lower to the bottom position by allowing your ankles to full dorsiflex. Without bouncing out of the bottom position, raise to the top position of full plantar flexion (rising onto the ball of your foot).
Sets and Reps: 3 x 20-24
Rest time: Rest 90 seconds before repeating the previous exercise.
Muscles Trained on Leg Day
Working entire lower body, leg day involves a significant number of separate body parts working in unison for many movements. Targeted isolation exercises will emphasize your quadriceps, hamstrings, or calves for further muscle-building stimulus.
Quadriceps
The quadriceps femoris, or “quads,” refers to the four muscles on the front of your thigh. All four act to extend your knee, and the centermost quadriceps muscle also contributes to hip flexion. You can train these muscles with squats, squat-type movements, and isolated knee extension exercises. For safety and confidence, machine-based exercises may be helpful, especially toward the end of the workout as fatigue sets in.
Glutes
Few muscle groups enhance the image of athleticism like the glutes. Therefore, the glutes are a common target for physique-based training. Although the glutes have various actions at the hip, all three “glutes” — gluteus maximus, gluteus medius, and gluteus minimus — act to extend your hips.
Hamstrings
While your quadriceps are prominent when the legs are viewed from the front, well-developed hamstrings steal the show when the legs are viewed from the side. Composed of four muscles, the hamstrings act to flex the knee, and three of them act to extend the hip. Leg curls train the hamstrings as knee flexors, while the Romanian deadlift and back extension are the primary exercises in the workout for training hamstrings as hip extensors.
Calves
Even if you favor baggy cargo shorts as your go-to warm weather attire, your calves are likely to be the most readily visible lower body muscle group. Although they may receive a modest training stimulus during squats and other squat-like movements, direct calf exercises are typically needed to stimulate meaningful growth.
How to Warm-Up Your Legs
Prepare your lower body for this leg workout with a warm-up that mobilizes stiff hips and lengthens tight muscles. Use front squat warm-up sets to hone technique and dial-in a strong squat stance.
Leg Warm-Up
Cardio: Five minutes, low-to-moderate intensity effort
Front Squat: 3 x 6–10, work-up sets at light to moderate weight (e.g. approximately 40%, 60%, and 80% of the weight to be used for the first set of the workout’s first exercise).
On the Road to Ripped
You’ve probably heard of the “Stairway to Heaven” and the “Highway to Hell,” but the roadmap provided here gets you on the Road to Ripped. When all five workouts are performed once per week, total training per major muscle group is consistent with current best practice recommendations for building muscle. (1)(14) Those accustomed to lengthy or convoluted training sessions will find this program to be refreshingly simple. Simple, but not easy.
References
Schoenfeld, B., et al. (2021). Resistance training recommendations to maximize muscle hypertrophy in an athletic population: Position stand of the IUSCA. International Journal of Strength and Conditioning, 1(1).
Lacio, M., et al. (2021). Effects of resistance training performed with different loads in untrained and trained male adult individuals on maximal strength and muscle hypertrophy: a systematic review. International Journal of Environmental Research and Public Health, 18(21), 11237.
Schoenfeld, B. J. (2013). Potential mechanisms for a role of metabolic stress in hypertrophic adaptations to resistance training. Sports Medicine, 43, 179-194.
Helms, E. R., et al. (2016). Application of the repetitions in reserve-based rating of perceived exertion scale for resistance training. Strength and Conditioning Journal, 38(4), 42-49.
Refalo, M. C., et al. (2022). Influence of resistance training proximity-to-failure on skeletal muscle hypertrophy: A systematic review with meta-analysis. Sports Medicine, 1-17.
Lehman, G. J., et al. (2004). Variations in muscle activation levels during traditional latissimus dorsi weight training exercises: An experimental study. Dynamic Medicine, 3, 1-5.
Wakahara, T., et al. (2012). Association between regional differences in muscle activation in one session of resistance exercise and in muscle hypertrophy after resistance training. European Journal of Applied Physiology, 112, 1569-1576.
Grgic, J., et al. (2022). Effects of resistance training performed to repetition failure or non-failure on muscular strength and hypertrophy: a systematic review and meta-analysis. Journal of Sport and Health Science, 11(2), 202-211.
Franke, A. R., et al. (2015). Analysis of anterior, middle and posterior deltoid activation during single and multijoint exercises. J Sports Med Phys Fitness, 55, 714-721.
Brigatto, F. A., et al. (2022). High resistance-training volume enhances muscle thickness in resistance-trained men. Journal of Strength and Conditioning Research, 36(1), 22-30.
Youdas, J. W., et al. (2010). Surface electromyographic activation patterns and elbow joint motion during a pull-up, chin-up, or perfect-pullup™ rotational exercise. The Journal of Strength & Conditioning Research, 24(12), 3404-3414.
Wackerhage, H., et al. (2019). Stimuli and sensors that initiate skeletal muscle hypertrophy following resistance exercise. Journal of Applied Physiology, 126(1):30-43.
Maeo, S., et al. (2022). Triceps brachii hypertrophy is substantially greater after elbow extension training performed in the overhead versus neutral arm position. European Journal of Sport Science, 1-11.
Schoenfeld, B. J., et al. (2019). Calculating set-volume for the limb muscles with the performance of multi-joint exercises: implications for resistance training prescription. Sports, 7(7), 177.
Everyone talks about “International bench day,” but there’s nothing quite like pressing something heavy overhead. It’s pretty much the most innate display of strength. When little kids want to impress their parents with how strong they’re getting, they lift something overhead.
Most lifters should be able to press something relatively heavy overhead. If you can’t, it often means you’re missing the full use of your shoulders. Maybe you can’t move your shoulder through its full range of motion or maybe the stabilizing muscles of your shoulder blades and trunk can’t create stability to safely produce force.
Credit: Gorodenkoff / Shutterstock
The strict standing barbell press involves the shoulders, upper back, triceps, and even upper chest. It trains the entire body to create a stable base to push from, but it can be difficult to steadily improve and progress tends to stall much sooner relative to other barbell lifts. That’s why it’s important to know and use many different variations to help continue building muscle and strength. Here are eight overhead variations that will help you impress mom, again.
Best Overhead Press Variations
Landmine Press
Sometimes, pushing weight directly overhead can cause more harm than good. It may be because of an injury or just a lack of flexibility in the shoulder, triceps, lats, or wrists. The landmine press is unique because the pattern of movement is between a straight vertical and horizontal path.
This hybrid type of motion gives many of the benefits of direct overhead pressing while reducing the joint angle that may be putting a dangerous demand on your shoulder.
When to Use It
The landmine press is great to use when recovering from injury and building back strength and function from time off training. It allows you to still develop strength and muscle while you work to restore full function of the shoulders to press directly overhead.
It’s also a good variation to use when doing an intense phase of bench press training, as it won’t fatigue your shoulders excessively or affect recovery quite like straight overhead barbell pressing.
How to Do it
If you don’t have a landmine holder, you can wedge a regular barbell in any corner where it won’t cause damage. Load the bar and pick it up by the head (the end of the sleeve where you load the plates).
The landmine press can be performed with just one arm or both together. If you’re using two arms, cup the end of the barbell sleeve with both of your hands. Place the head of the bar near your sternum with your torso leaning slightly forward. Set your feet between hip and shoulder-width apart. Keep your elbows close and pulled in as you press. As your elbows lock with the bar almost at the crown of your head, shrug your shoulders up before returning the bar back to the starting position.
If you’re using the one-arm variation, grab the end of the sleeve with one hand and place the bar at the front of your shoulder. Stand and press the same way, driving the bar forward and up to lockout, followed by a shoulder shrug. Make sure you keep your elbow in, so the bar stays in line with your shoulder throughout the entire movement. Flaring your elbow will alter the pressing angle, reduce power, and shift stress to the joint.
Landmine Push Press
The push press is a great way to increase overhead stability with weights you couldn’t otherwise strict press. You use your legs to help to drive the weight up in a push press, allowing you to use heavier weights.
But a standard barbell push press can be difficult to learn and to do efficiently. The landmine push press is easier for people to grasp because of both the path you drive the bar and the position of your shoulders relative to the bar.
When to Use It
The landmine push press is a great exercise to add whenever your pressing progress slows or hits a plateau. The exercise can be included on either bench or overhead press days as a way to overload the pressing muscles with more volume while still moving relatively big weights.
How to Do it
Just like the landmine strict press, if you don’t have a holder you can wedge the bar in a corner and load it the same way. Because using heavier weights is a specific benefit of the landmine push press, it’s best performed with both hands on the bar. Cup your hands and place the head of the bar almost directly on your sternum. Set your feet between hip and shoulder-width apart and flare your toes out very slightly.
Brace your core and dip your knees as if you were preparing to jump as high as possible. Drive your feet into the ground and explosively extend your knees and hips as if you were trying to jump. Your heels will lift from the floor from this aggressive ankle extension, but keep the balls of your feet in contact with the ground — don’t actually jump into the air.
As your ankles extend, shrug your shoulders toward the bar. Try to make the bar fly off your chest from your leg drive and shoulder shrug. Then, push with your arms to extend your elbows. Let your heels touch back to the floor right as your elbows extend with the bar over the crown of your head. Control the bar as you bend your arms and absorb the momentum with your legs and trunk as you lower it.
Bottoms-Up Press
This is one of the best, but most challenging, pressing exercises for shoulder and scapular function and stability. It’s often used as a rehab or “prehab” drill because it engages most of the postural muscles like those of the rotator cuff that stabilize and move the shoulder blade.
Balancing the bell upside down trains you to find the most stable path of motion and forces you to control the movement. Sometimes, the dominant muscles responsible for pressing overhead are restricted by how well your shoulders are stabilized. Improve those muscles and you can improve how much force you can create.
When to Use It
These are great to do on deload weeks or at the very beginning of a new phase of training. You can think of them as a developmental exercise to prepare the shoulders for heavier, more intense training ahead.
How to Do it
The bottoms-up press can be done standing or sitting, but a half-kneeling position actually puts you in a great mechanical position to do the exercise. Kneel down with the kettlebell in one hand and that side leg kneeling on the ground, with the opposite leg forward. Squeeze the handle and turn the weight upside down so the bottom of the bell is facing the ceiling. Crush your grip to maintain the weight in this vertical position.
Move your elbow toward your center so your thumb is in front of your face and your elbow is at a right angle with the floor. Slowly extend your elbow up to the ceiling and move your upper arm slightly back to put it in line (or covering) your ear as you lock out overhead. Stabilize the weight overhead briefly before slowly returning back down to your face.
Kettlebell Z Press
The Z press is an excellent choice for increasing the tension and demand on your shoulders and upper back without necessarily increasing the load used. Often you’ll see a lifter arch their spine or lean back during a standing overhead press because they lack the postural control and trunk or upper back strength needed to keep their spine neutral while pressing.
Sitting upright on the floor with no possible leg drive or back support helps you feel any change in your spinal position, so you can focus on preventing the problem. Pressing from the floor with the offset weight of kettlebells challenges your trunk and shoulder stabilizers in a way other exercises can’t.
When to Use It
Use the kettlebell Z press at the beginning of a workout to warm up your entire shoulder complex. One or two sets with light to moderate weight is enough to get your shoulders moving freely without causing fatigue that could affect your main training.
Adding it to the end of a hard pressing workout is also a great way to add more volume, because you don’t need to use much weight or too many reps for the movement to be effective.
How to Do it
Sit on the floor with your legs straight while keeping an upright torso. Hold a pair of kettlebells with your palms facing each other at shoulder-level. Exhale hard through your mouth trying to force the air out of your torso to make it as narrow as possible. You should feel your ribcage drop down and the muscles in the front and sides of your torso, around your core, contracting.
Keep these muscles engaged to prevent your back from arching or your ribs flaring up as you press overhead. Keep your upper arms in line with your ears and rotate your hands palms-forward as you lock your elbows. Shrug your shoulders as your elbows lock before returning to the starting position.
Earthquake Bar Overhead Press
The earthquake bar is a bridge between training stability and increasing pressing power. The bar is designed to shake and swing, which engages the deepest and smallest shoulder stabilizers. Because it’s one straight bar, you can use relatively heavier weights than you could with dumbbells or kettlebells.
If you don’t have access to an earthquake bar, hanging resistance bands from the ends of both sleeves of a standard barbell and attaching weight plates is an effective alternative.
When to Use It
You can think of this like a secondary lift which can be done right after a heavy overhead barbell press or bench press. Though you will use much less weight, you can use a similar weekly progression of set and reps that you’d use for your main pressing lift. The instability will be the key challenging element to this exercise.
How to Do it
Set the bar on a rack just as you’d do for a standing overhead press. Start with relatively light weight and gradually slowly add more as you feel comfortable and learn to control the movement. Grab the bar with your thumbs just outside your shoulders. Angle your elbows just slightly in front of the bar. Shrug your shoulders forward and up to create a support for the bar, whether you have the mobility to rest the bar on top of your shoulders or not.
Step back from the rack and set your feet hip-width apart with your knees just slightly unlocked. Wait until the initial swinging stops and pull your chin back (think of giving yourself a “double-chin”). Press the weight up slowly, keeping the bar as close to your face as possible.
Once the bar passes the crown of your head, very slightly push your head and sternum forward so your elbows lock overhead as the bar is directly over the base of your neck. Shrug your shoulders upward and stabilize the bar at the top. Lower the weight by pulling your chin back and returning the bar to the starting position.
Snatch-Grip Behind-the-Neck Press
Usually you’d only see Olympic weightlifters use this as an accessory exercise, but it can be very beneficial to anyone looking to improve overhead strength or build their upper back and traps.
The ultra-wide grip challenges your rear delts and upper back in a very unique way. If you start with relatively light weight and progress slowly, the snatch-grip behind-the-neck press can actually improve your shoulders’ working range of motion and strengthen the muscles and connective tissue that support good shoulder function.
When to Use It
These can be pretty difficult, so instead of adding them as an accessory exercise after heavy standard overhead pressing, take a few weeks to prioritize the exercise by progressively working heavier instead of performing the standard barbell overhead press. Do them as the first main lift on a pressing or upper-body focused day.
How to Do it
Place a bar on a rack at your back squat-height (roughly upper-chest level). Walk under the bar and place it on your back as if you would for a high bar squat. Unrack the weight and step back. Slide both hands out until your index fingers are generally outside of the knurl marks on the barbell (smooth rings).
Angle your elbows directly under the bar, keep your neck straight, and brace your trunk while keeping your ribs from flaring up. Press the bar while keeping it in line with the base of your neck until your elbows lockout overhead. Don’t let the bar sway forward or behind your neckline. Shrug your shoulders at the top before returning the bar all the way back to the top of your traps.
Swiss Bar Overhead Press
The Swiss bar is one of the best tools to use if you’ve had any shoulder or elbow pain, or pre-existing injuries. Its key benefit is multiple handles that let you place your hands close or wide while keeping a neutral-grip (palms facing each other) position.
This neutral position gives even those rotator cuff dysfunction a way to press without causing more strain in problematic areas in the shoulder or upper back.
When to Use It
The Swiss bar press is great to do when your shoulders, elbows, or wrists get cranky from other types of pressing. You can use the exercise in place of other overhead pressing options until you fully rehab an injury or recover from whatever nagging pain is causing issues.
How to Do it
Decide which grip-width feels most comfortable use and set the bar on a rack, the same you would for any overhead barbell press. Grab the handles and rotate the bar so your thumbs face toward your head. Unrack the weight and step back to your standard press foot position, roughly hip-width apart. Start with the bar about chin height.
Pull your neck in, as if you were giving yourself a double-chin, and keep the bar close to your face as you press overhead. Push your head slightly forward as you lock your elbows overhead. Shrug at the top as your elbows lock before lowering to the starting position.
Overhead Pin Press
Part of the reason overhead pressing can be so hard to improve is because you push from a static position, particularly on the first rep. In many other lifts, like the bench press, you have the eccentric (lowering portion) of the lift which helps store force that you use to press the weight back up.
Because you don’t lower the bar first in an overhead press, you have to be able to muster a large amount of force suddenly without momentum. This is called “starting strength” and a pin press is one of the most effective ways to specifically train this quality.
When to Use It
If you can’t create a stiff and stable base of tension, you can’t suddenly create this force. And if you’re shifting your torso back and forth as you press, you definitely don’t have a good base of support.
Consider swapping all barbell overhead pressing for pin pressing until you improve this stability. Because the bar is supported on the safeties, you can better focus on setting your trunk and keeping it stiff and fixed in place as you push hard against the bar to lift it from the starting position.
How to Do it
Set the bar on strong safety bars at the height you would start your press from, generally around neck-height. Set your feet hip- to shoulder-width apart and grab the barbell with your standard overhead grip. Get in position under the bar and brace your entire trunk and back so your ribs won’t flare up and your spine is locked in place.
Keep this static position as you press as hard and fast as possible, brining the bar to lockout overhead. Return back to the pins and let the weight settle there before re-bracing and repeating for another repetition.
Muscles Worked by the Overhead Press
The overhead press is primarily a “shoulder exercise,” but it cannot be completed without assistance from several key body parts. Each of these body parts will be put under training stress during the exercise.
Shoulders
Your shoulders (deltoids or “delts”) are the primary movers during the overhead press. These muscles are responsible for flexing your arms overhead. The shoulder muscles consist of three heads — the front, side, and rear — which are involved in moving the arm in those respective planes of motion relative to your body.
All three muscle heads are used to press the weight overhead, but can be emphasized with various types of lateral raises.
Triceps
The triceps work to extend your arms, which is the latter portion of any shoulder press. The lockout portion of any overhead press, specifically, strongly activates your triceps. (1) The triceps are worked through a long range of motion during any overhead press variation, with the muscle recruited maximally in the top half of the movement.
Core
Your abs and lower back work together to form a strong, stabilizing core which supports overhead pressing. Any degree of sideways or backward lean is prevented through strong core stabilization. (2) It’s not unusual to feel sore abs after an intense overhead pressing session, which is one indicator of how significantly the core muscles work during the movement.
Overhead Press Form Tips
A few key technique cues can turn your basic overhead press from pain into progress. If you’re performing the lift from a power rack, set the safeties near shoulder or neck-level, not near your chest. Beginning the press from a position that’s too low leaves you with poor leverage that shifts more strain to the shoulder joint than the shoulder musculature.
Credit: Jacob Lund / Shutterstock
During any press exercise, grip the bar as hard as possible. This will start a chain reaction of strength from your wrist and forearm muscles, through your upper arms, into your shoulders and upper back. (3) It’s a surprisingly effective way to stay tight while producing more power and minimizing joint strain.
Similarly, don’t stand up “passively.” Before each repetition, flex your core, glutes, legs, and calves. Imagine gripping the ground with your feet. This will help to establish total-body stability to drive a strong upward press.
Press More Over Your Head
Bench press variations are fairly commonplace. Without giving it much thought, lifters tend to do much more horizontal pressing than vertical, but too much horizontal work and not enough vertical pressing can lead you to develop deficiencies in the muscular development and control of the entire shoulder girdle.
Learning and trying new overhead variations not only increases the potential weights you can use for your barbell overhead press, but also reduces the gap between these two pressing patterns making you much stronger and more balanced. Diversify your overhead training and reap the strength, stability, and muscle-building results.
References
Kholinne, E., Zulkarnain, R. F., Sun, Y. C., Lim, S., Chun, J. M., & Jeon, I. H. (2018). The different role of each head of the triceps brachii muscle in elbow extension. Acta orthopaedica et traumatologica turcica, 52(3), 201–205. https://doi.org/10.1016/j.aott.2018.02.005
Shinkle, J., Nesser, T. W., Demchak, T. J., & McMannus, D. M. (2012). Effect of core strength on the measure of power in the extremities. Journal of strength and conditioning research, 26(2), 373–380. https://doi.org/10.1519/JSC.0b013e31822600e5
Gontijo, L. B., Pereira, P. D., Neves, C. D., Santos, A. P., Machado, D.deC., & Bastos, V. H. (2012). Evaluation of strength and irradiated movement pattern resulting from trunk motions of the proprioceptive neuromuscular facilitation. Rehabilitation research and practice, 2012, 281937. https://doi.org/10.1155/2012/281937
If you care about creating an aesthetic physique, then you have engaged in the quest of the coveted v-taper — broad shoulders and a wide back leading down to a slim but hardened midsection.
The “swimmer’s look” is often admired, and if you want to achieve it, you need well-developed shoulders. In particular, the lateral head of the deltoid gives your shoulders visible width.
Credit: Nejron Photo / Shutterstock
The trick is that this particular body part is easily overlooked and there aren’t many exercises that directly focus on it. The lateral raise is the prime boulder-shoulder builder, but the basic movement is often poorly performed. This useful exercise is great for improving your shoulders’ size, strength, and joint health, but you can take things even further.
Here are 10 lateral raise variations to refresh your workouts and provide your muscles new stimuli to help you get rounded delts.
Best Lateral Raise Variations
Cable Lateral Raise
The cable lateral raise provides constant tension and shifts the hardest part of the range of motion from the top position — in a dumbbell lateral raise — to the bottom, stretched position.
Switching the equipment from a dumbbell to a cable pulley also changes the stimulus of the exercise and delivers a serious deltoid stretch, which is almost nonexistent with the dumbbell variation.
When to Do It
This is a great movement for working on your general technique and your mind-muscle connection, improving muscle-growth at the same time. (1) Program this exercise the same way you would do dumbbell lateral raises — at the end of a shoulder workout or “push” workout. Keep the reps relatively high, use pristine form, and focus on the muscle burn.
How to Do It
Stand next to a cable station set to the lowest point. Grab a single handle with the hand farthest from the station and flex your abs. Keep a rigid upper body and raise your arm out to your side while keeping your shoulder blade down and your wrist lower than your elbow.
Stop around shoulder-level, when you feel the load shifting away from your shoulder and to your traps. Exhale and lower with control to the starting position. Start light and avoid using momentum. If the cable station is big enough, you can do the exercise with both arms at the same time.
Leaning Lateral Raise
The leaning lateral raise emphasizes the shortened position or peak contraction. Because of the leaning position, a portion of the side delt’s range of motion is not trained because gravity’s pull doesn’t significantly affect the weight, but this allows you to use a relatively heavier weight and trigger new growth. (2)
Along with the lateral head of the deltoid, this differently emphasized range of motion also works the rotator cuff muscles, notably the supraspinatus.
When to Use It
Even though you can use more weight than the standard lateral raise, this variation is best performed after your heavier compound (multi-joint) lifts of the workout. Use it as your primary lateral deltoid exercise of the day or in a spicy superset combining this exercise, which targets the peak contraction, and a delt exercise focusing on the stretched contraction, like the cable lateral raise.
How to Do It
Grab a sturdy power rack with one hand, place your feet near the support, and lean away at an angle supporting yourself from a locked arm. Hold a dumbbell in your free hand and lift the weight sideways from a straight hanging position. You can raise the weight higher than shoulder-level without worrying about muscle recruitment, because the goal is to emphasize the shortened range of motion which means your traps will be recruited no matter what. Make sure you control the movement speed to optimize time under tension. Don’t swing the weight from the bottom position.
Seated Lateral Raise
This variation is for the “accidental” cheaters out there or anyone who has trouble controlling a strict movement. The stable, upright position makes it almost impossible to swing your torso without noticing.
The bench support ensures strict form for better muscle tension and a complete range of motion to trigger hypertrophy (muscle growth).
When to Use It
The seated lateral raise is a great way to learn the standing variation without interference from the rest of your body. It prevents involuntary cheating, as well as helping to focus with laser precision on your lateral delts. Perform it in lieu of standing raises until you feel your form is impeccable or when you want to go heavier while still avoiding any cheating.
How to Do It
Sit on a bench with a dumbbell in each hand and assume an upright torso position. Raise your hands out to your sides, near shoulder-level, without succumbing to the temptation of swinging your torso or shrugging your traps to compensate for this more challenging execution. Lower the weights with control to avoid momentum in the bottom position.
Machine Lateral Raise
Some exercise machines can be scoffed by experienced gym goers for their simplicity or design, but the fact is that they can often be as efficient as free weight exercises for building muscle. (4)
Certain machines might not be as useful for improving strength or coordination, but as long as your primary goal is building muscle, you’re covered with a well-designed machine. It might be even better in some cases. For instance, beginners can find some machine exercises easier to perform that with barbells or dumbbells. Many machines are also designed to minimize interference from non-target muscles.
When to Do It
If you’re a beginner or advanced lifter, or just want to change things to refresh your workouts and prime new growth, give this variation a try. For beginners, machines are usually very easy to use and they can ensure proper form, so you’re training the desired muscles. Advanced lifters will appreciate the fact that machines will isolate and fatigue a specific head of the deltoid, more easily accumulating quality training volume for a body part.
How to Do It
Sit down in the machine and place your elbows under the pads. Raise your elbows to your sides until they are parallel to the ground, then lower them with control. The machine lateral raise can serve as a great teaching tool for learning to “lead with your elbows” and not your wrists, focusing more on the lateral head of your shoulders and less on straining the joints of your shoulders, elbows, and wrists.
Partial Lateral Raise
You’re used to light weights when you perform lateral raises, right? It’s time to shock your muscles into growth. Research has shown that using a limited range of motion can be useful for promoting strength and hypertrophy under the right conditions. (3)
Use a shortened range of motion to your advantage and provide the lateral delts something they never experienced to promote hypertrophy — very heavy weights and super-high tension.
When to Do It
Partial movements and “calculated cheating” can be beneficial, but should be reserved for experienced lifters who’ve already mastered the full movement with good form. If you’re using heaving weights just for the sake of it, and start swinging the dumbbells like a monkey with a pair of cymbals, you might trigger injuries instead of growth.
If you’re a gym veteran that has lagging shoulders, give this high-intensity variation a go. You can use it earlier in your shoulder or upper body push workout without trouble, because it’s a heavy-duty exercise.
How to Do It
Just because it’s a partial range of motion doesn’t mean you can just whack away at it without care. Stand up holding a pair of relatively heavy dumbbells. Keep your torso stable and rigid without swaying your hips. Raise your arms to your sides, similar to performing regular lateral raises. Stop at roughly half of your usual range of motion, when your arms are at an angle toward the ground.
Even though you’re using heavier weights, it’s still an isolation exercise. To prevent trap activation and emphasize you shoulders, think about pushing the weights to the side walls and not up in the air. Avoid shrugging your shoulders with the heavy weights. Do not be afraid of trying longer duration sets of 15 to 20 repetitions to compensate for the shorter time under tension.
Landmine Lateral Raise
The landmine is a versatile tool which can provide countless exercise variations, and the lateral raise is no exception. The thick handle will challenge your grip and the unique barbell path will train your core to a greater extent than other lateral raises.
If you’re concerned with athleticism or being functional while also increasing shoulder size, this variation will provide an effective upper body stimulus.
When to Do It
This unique single-arm movement can be used either at the start of a workout to prime you for a heavy pushing exercise, during a circuit combining different athletic attributes, or at the end of your session to focus on hypertrophy.
How to Do It
Set a barbell in a landmine unit and grab the sleeve with a palm-down grip. Stand tall with the weight around pelvis-level. Brace your core, briefly hold your breath, and lift your arm “up and out” to the side. Lead with your elbow to ensure maximum deltoid engagement and keep your arm straight. In the top position, your palm should be facing forward. Slowly lower the weight to its initial position. Perform all reps with one arm before switching to the other side.
Y-Raise
This exercise is often used in rehab or “prehab” because it is restorative and not strenuous on the shoulder joint, but that doesn’t mean it can’t be used for building muscle.
The Y-raise is an effective deltoid-builder and it will also reinforce other key muscles responsible for shoulder health, such as the middle and lower trapezius and the supraspinatus.
When to Do It
This variation is relatively harder than many others on this list, so you’ll have to refrain from using heavy weights. As such, use it at the very beginning of a workout, to warm-up your shoulders, or at the end of your session to finish the lateral head of the deltoid.
If you have a history of joint pain, or if basic lateral raises leave you feeling achy (in a bad way, not simple muscle soreness), then make the Y-raise your middle-delt builder of choice. It’s one of the least stressful movements on your joints.
How to Do It
Get an adjustable bench and set it at a low incline, around 30 degrees. Lay face down on it with a dumbbell in each hand, hanging your arms down toward the ground. Keep your arms mostly straight as you raise your arms up and out. At the top of the motion, your body should resemble a giant “Y” if viewed from above. If you can’t lift your arms until they’re in line with your head, reduce the weight. This exercise is not meant for moving heavy weight, so aim for sets of 10 to 20 repetitions.
6-Way Raise
The 6-way raise takes the basic lateral raise up a notch by increasing the range of motion and recruiting even more muscles.
This exercise, popularized by late bodybuilding legend John Meadows, is a combination of shoulder raises in various directions. It’s designed for complete development of the deltoids and trapezius. This is the variation you want to employ if you desire to build an impressive “yoke” — the muscles of the shoulders, upper back, and neck.
When to Do It
Consider this exercise if you have a bit of experience under your belt, after you’ve mastered standard lateral and front raises. It is a great finisher, performed as the last exercise of your workout. Try this exercise at the very end of a shoulder or push session, to provide a burning session and terminate the deltoids. It’s also the perfect fit when you don’t have time or energy to perform several shoulder exercises after your main work.
How to Do It
Sit on a bench holding relatively light dumbbells and perform a strict lateral raise, bringing the weights from your sides your to shoulder-levels. From there, bring your thumbs together while keeping the weights horizontal to the ground. Next, raise your arms over your head. Then, you have to execute all of these motions in reverse — lower your arms in front of you, then bring them to your sides, and lower them down straight. That’s one single repetition.
You can understand why it would be nearly impossible to use heavy weights. Each repetition is very long, so you can’t go crazy with the load, but it provides a very long time under tension for your whole shoulders and upper traps, which is amazing for muscle growth.
Barbell Upright Row
The upright row isn’t technically a lateral raise variation, but the exercise follows the same anatomical motion — humerus abduction, or lifting your upper arm out to the side — and it trains the same target muscles in pretty much the same fashion. Using both arms to lift a barbell will also allow you to use a heavier weight, triggering more muscle growth.
This movement does have a reputation as a “shoulder wrecker,” but it actually depends upon the individual and the context. It may put stress on your shoulders and wrists, but avoiding a close-grip movement and adjusting the range of motion can help reduce the risks.
When to Do It
If you want to embark on a muscle-building, bulking phase while lifting some heavy weights, this movement is perfect for you. The barbell upright row will recruit slightly more muscles overall, but it is still focusing on the side deltoids and upper trapezius. As such, you can perform it in a full-body workout, or during your shoulder or push sessions. More weight and more muscle recruited means that you’ll trigger a greater anabolic response from the body, leading to better growth.
How to Do It
Grab a barbell or EZ-curl bar with a shoulder-width, palm-down grip and stand tall with your arms straight down in front of you. Raise your elbows to the sides to lift the barbell while keeping it close to your body. Lead the movement with your elbows, like you would do with a lateral raise. Stop when your upper arms are around parallel to the ground or near shoulder-level.
You can often go heavier with this movement, but that doesn’t mean you should shift the focus of the exercise away from the key muscled. Don’t start swinging the weight up or excessively shrugging your shoulders. Keep your shoulder blades down and think of your elbows as the prime movers. Don’t get too crazy with super-heavy weights. Sets of eight to 12 reps will do the trick for building size and strength.
Rope Upright Row
If you have persistent joint problems and can’t find a way to safely or comfortably perform the barbell upright row, try this cable variation to enjoy the same feeling and benefits.
The rope handle allows more freedom of movement in your wrists and shoulders, while the constant tension from the cable allows a good training stimulus without heavy weights.
When to Do It
With this exercise, you can’t and shouldn’t go as heavy as with a barbell. So perform it at the end of your shoulder sessions, to finish off your delts. If you’ve been afraid of the barbell upright row, or if you have generally painful joints, think about giving this exercise a go. You should be able to trigger hypertrophy with a longer range of motion and with less pain.
How to Do It
Stand in front of a cable station set at the lowest point. Attach to it a rope, grab it with your thumbs pointed down and your palms facing your body. Drive your elbows up and out, as high as you comfortably can without feeling pain. Keep your elbows higher than your wrists during the movement.
Do not specifically think about your hands, just let them move freely so you can focus solely on your deltoids. If you want to get spicy, pause at the top for several seconds.
Muscles Worked by the Lateral Raise
The lateral raise is an isolation movement focusing on the lateral head of the deltoid, but other muscles also contribute to the exercise. In fact, no exercise can technically “isolate” a single muscle, it just emphasizes one. Here are all the muscles trained by these variations.
Deltoids
The deltoids, or shoulder muscles, are composed of the three heads, all attached to the humerus (arm bone). The anterior head is on the front of the shoulder, attached to the clavicle, and shares function with the pecs — internally rotating the arm, raising it forward, and adducting it (bringing the arms together).
The lateral head is located on the middle of the shoulder and its fibers arise from the acromion process of the scapula (shoulder blade). This is the prime mover during the lateral raise, because it is responsible for arm abduction (raising it to the side). Finally, the posterior deltoid, also attached to the scapula, can be found at the rear of the shoulder and is involved in externally rotating and extending the arm.
Credit: Paul Aiken / Shutterstock
When you perform a lateral raise, all three heads will contribute to the movement, but the focus should be on the side delts. Rotating your arm internally or externally will make the front or rear delts contribute a bit more, so you can also use that to target your weakness.
Trapezius
This big and strong back muscle, going from the base of your neck to the middle of your spine, is a big contributor to the lateral raise. The traps are composed of several regions having slightly different functions, but they’re all responsible for scapular motion and stability.
Your middle and lower traps hold your shoulder blades back together and down, while the upper traps are recruited extensively because the motion of raising your arm also involves raising your scapulae, to allow full range of motion. Unless you don’t move your scapulae at all, which is almost impossible, you will feel the exercise in your upper traps.
Supraspinatus
This tiny shoulder muscle is one of the four members of the rotator cuff. It’s located on the scapula in a cavity between the acromion and clavicle and it attaches to the humerus. The supraspinatus assists the deltoids in arm adduction and will be involved during the lateral raise. Having a strong and healthy rotator cuff is key for injury prevention, strength, and longevity. (5)
Lateral Raise Form Tips
The lateral is often butchered for the sake of ego-lifting and moving more weight. This creates the typical blunder of shrugging the weight up as your arms are raised, which uses the traps assist the delts.
The problem is that the traps will then overshadow the shoulders, because they are a relatively stronger muscle, which leaves the shoulders undertrained. Keep your shoulder blades down and limit scapular motion to a minimum. A good cue is to try to lift the weight outward, not upward. This will cue your lateral delts to be recruited first.
Credit: Kzenon / Shutterstock
Hand and arm position can also be difficult. If you’re not careful, you can very easily ask for the assistance of a closely related muscle: the anterior deltoid. The front delts are already overstimulated by many pressing movements, so it’s often best to focus on your side delts with this exercise. To do that, drive the weight with your elbows and have your wrists lower than your elbows at all times. You can even slightly rotate your arms internally (forward) to focus more on the outer delts. And keep your elbow close to in-line with your shoulder, not far in front of your body.
Finally, another mistake caused by ego is to employ excessive momentum. This increases the risk of injuries, recruits the traps too much, and diminishes the range of motion. Flex your abs hard to stabilize your upper body and prevent swinging. Use your shoulders, not your lower back, to lift the weight.
Raise Your Shoulders to the Next Level
The lateral raise is a must for any lifter who desires broad shoulders. Focusing on your side delt is the best way to get there and achieve the coveted v-taper look. If the simplicity of the classic dumbbell lateral raise isn’t enough and you’re ready for more challenges, include one of these variations in your training plan to get your delts to the next level.
References
Calatayud J, Vinstrup J, Jakobsen MD, Sundstrup E, Brandt M, Jay K, Colado JC, Andersen LL. Importance of mind-muscle connection during progressive resistance training. Eur J Appl Physiol. 2016 Mar;116(3):527-33. doi: 10.1007/s00421-015-3305-7. Epub 2015 Dec 23. PMID: 26700744.
Peterson MD, Pistilli E, Haff GG, Hoffman EP, Gordon PM. Progression of volume load and muscular adaptation during resistance exercise. Eur J Appl Physiol. 2011 Jun;111(6):1063-71. doi: 10.1007/s00421-010-1735-9. Epub 2010 Nov 27. PMID: 21113614; PMCID: PMC4215195.
Schoenfeld BJ, Grgic J. Effects of range of motion on muscle development during resistance training interventions: A systematic review. SAGE Open Med. 2020 Jan 21;8:2050312120901559. doi: 10.1177/2050312120901559. PMID: 32030125; PMCID: PMC6977096.
Schwanbeck SR, Cornish SM, Barss T, Chilibeck PD. Effects of Training With Free Weights Versus Machines on Muscle Mass, Strength, Free Testosterone, and Free Cortisol Levels. J Strength Cond Res. 2020 Jul;34(7):1851-1859. doi: 10.1519/JSC.0000000000003349. PMID: 32358310.
Schwanbeck SR, Cornish SM, Barss T, Chilibeck PD. Effects of Training With Free Weights Versus Machines on Muscle Mass, Strength, Free Testosterone, and Free Cortisol Levels. J Strength Cond Res. 2020 Jul;34(7):1851-1859. doi: 10.1519/JSC.0000000000003349. PMID: 32358310.
After conquering his division at the 2021 Olympia, 212 Mr. O Derek Lunsford has shifted his focus to a bigger (literally) goal. On the weekend of Dec. 16, Lunsford will travel to Las Vegas, NV, and compete in the Men’s Open division for the Mr. Olympia title — which is considered the ultimate achievement in bodybuilding.
The American bodybuilder is already considered big for his previous division. Still, he’ll have to size up to ensure he isn’t dwarfed by the likes of 2020-21 Mr. Olympia Mamdouh “Big Ramy” Elssbiay, who weighed nearly 340 pounds in his offseason.
Throughout his prep, Lunsford has been sharing highlights of his training. On Nov. 7, 2022, the Indiana native posted a video of himself training shoulders on his YouTube channel. The day the video was filmed wasn’t shared, but it can be seen in its entirety below.
During the offseason — which, for IFBB Pro League bodybuilders of the highest level, runs from the end of the Olympia until 16 weeks prior — rumors began circulating that Lunsford would opt-in to the Mr. Olympia if given the chance.
And then, in September 2022, Mr. Olympia and Lunsford announced on Instagram that he would receive an invite for the show. Another former 212 Olympia, Shaun Clarida (2020), is qualified for the Men’s Open division at the 2022 Olympia. Though, it’s not yet confirmed which division he’ll be competing in.
If Lunsford won the 2022 Mr. Olympia, he’d be the first man to win two Olympia titles in two different divisions.
Lunsford’s Shoulder Workout
Here’s Lunsford’s workout in full, followed by a breakdown of each movement he used.
Lunsford’s first exercise was the seated lateral raise machine to target the side delts. After his first set, he mentioned taking a few sets to get warmed up.
“It takes me several sets to get my muscles livened up.”
Only two of his sets were shown in its entirety, and he performed 12 reps in one and 12 plus forced reps in another. He was seen using the machine for five sets. After the fourth and fifth sets, he could be seen hitting poses to analyze his progress.
Dumbbell Lateral Raise
The second exercise was another lateral raise, but this time with dumbbells. The current, but not defending, Olympia 212 winner is focusing on width with these exercises. He opted to use the seated version to enforce proper form and use less weight. In between sets of 10-12 reps, he could be seen talking to another Olympia 212 winner — 2019 champion Kamal Elgargni.
For his third set, Lunsford started seated, then stood up to get a few extra reps without having to lower the weight.
Smith Machine Shoulder Press
The third movement for this session was the Smith machine shoulder press, which emphasizes the front delts. He started with one 45-pound plate on each side of the bar, then two, then three plates per side for two sets. Lunsford explained why he stuck with the same weight for the last two sets.
“I don’t feel like I need to set any PR’s…Today, I don’t feel like that’s necessary or even a good idea to be honest.”
Dumbbell Front Raise
Lunsford then performed another front delt movement. He did dumbbell front raises by bringing both dumbbells up and in front of him simultaneously. He kept the range of motion to shoulder level to focus on the shoulders instead of the traps. He explained that his motion helped target the upper chest as well.
He changed his motion on the third set to mimic a “Y” formation to focus on the delts a little differently.
Rear Delt Work
Lunsford and his training partner stayed in the same place for the next exercise, but they changed the focus to the rear delts.
After three sets of that exercise, they changed to the reverse pec-deck machine, where they performed three sets as well. Lunsford had only planned on doing two movements for the rear delts, but he chose to add face pulls to make it three exercises for that area.
Biceps
The 2017 NPC USA champion added biceps to the agenda on this day, and he chose cable curls to work with. He hit additional poses in between his three sets. This was the conclusion of the training session.
Lunsford will be looking to dethrone defending Mr. Olympia Mamdouh “Big Ramy” Elssbiay to become the 17th man to win bodybuilding’s biggest title in December. If he wins, he will be the first man to win the Olympia in two different divisions. If you want to try a similar version of Lunsford’s workout, you can follow the sample routine above. Olympia qualification not guaranteed.
Most shoulder exercises involve pressing a weight overhead, while most back exercises involve pulling a weight toward your body. The upright row is a little bit of both. This unique vertical pulling exercise targets your shoulders as well as your upper back.
Credit: Benoit Daoust / Shutterstock
This movement forms the basis of the Olympic lifts and other vertical pulling variations. It’s versatile and can be performed nearly any tool including a barbell, EZ-curl bar, resistance bands, even one or two dumbbells or kettlebells.
The classic and most common movement is the standard barbell upright row. This allows you to build the most vertical strength and power while packing size onto your “yoke” — the trapezius, upper back, and shoulders. Here’s everything you need to know to thrive with this weightlifting staple.
How to Do the Upright Row
The upright row is a vertical pulling exercise, moving the weight from your waist to near your shoulders. This movement can simultaneously improve upper body coordination and power for sports performance, while building some beefy shoulders and upper back.
Step 1 — Nail Your Starting Position
Credit: Breaking Muscle / YouTube
Stand up straight, holding a barbell with a shoulder-width grip at arm’s length. Drop your shoulders down, lift your chest up, and engage your glutes. Have your knuckles facing the ground and flex your thighs for the entire set. Tuck in your chin and keep a forward gaze to help maintain good posture throughout the entire set.
Form Tip: You can adjust your grip width to change the muscle recruitment. (1) A closer than shoulder-width grip will emphasize your front deltoids (shoulders). Lifting with a much wider grip will hit your upper traps harder.
Step 2 — Lead With Your Elbows
Credit: Breaking Muscle / YouTube
Bend your elbows and pull them up to shoulder-height. Keep the barbell close to your body and bring it up until you reach roughly chest-level. Maintain an upright torso and don’t let your hips swing the weight up. Keep your core, quads, and glutes engaged to keep a strong, stable posture. Squeeze your shoulder blades, trapezius, and shoulder muscles as you pause briefly in the top position. Don’t lean too far back when the weight is at the top.
Form Tip: In the top position, your elbows should be nearly level with your shoulders. Your wrists should be slightly below your shoulders, and the barbell should be below your wrists. This will help to keep your joints in strong and healthy positions.
Step 3 — Lower the Weight with Control
Credit: Breaking Muscle / YouTube
Keep the weight close to your body as you slide it back down toward the starting position. Grip the barbell tightly to maintain full control. When your arms are straight, pause and reset to ensure a good posture before doing the next rep.
Form Tip: Take three seconds to lower the barbell. This will help you control the eccentric (lower phase) and increase muscular tension for more growth.
Upright Row Mistakes to Avoid
The upright row may seem easy — you pull the barbell up and down your body and let the upper body gains begin. But, hang on, there is more than meets the eye here. Avoid these mistakes to get the most out of this exercise.
Lifting Too Heavy
As tempting as it is to load up an exercise to see how much you can lift, the upright row isn’t that exercise. It needs to be treated as an “accessory” to support your vertical pulls and to build muscle in your shoulders and upper back. It shouldn’t be trained for “absolute strength,” or the most amount of weight you can lift for a single repetition.
Trying to pull too much weight will encourage you to swing your body for momentum, which can strain your lower back. Excessively heavy weights can also stress your shoulder joints in the top position.
Avoid it: If you find yourself needing body English to pull the weight up, and if you cannot control the eccentric for two or three seconds, don’t be a hero. Lighten the load and lift with good form and proper control for better results.
Lifting Your Elbows Too High
Bringing your elbows higher than parallel to the floor may cause shoulder issues like impingement or bursitis when repeated over time. (2) Rather than driving your elbows up to your ears and trying to pull the bar to your neck, stop when your elbows have reached shoulder-level.
Credit: MDV Edwards / Shutterstock
More range of motion is not better in this case because, as your elbows rise above shoulder-level, your shoulder joint is put into an awkward and potentially dangerous position as the smaller tissues within the joint capsule can be compressed and potentially damaged.
Avoid it: Pay attention to where your elbows are in relation to your shoulders. As you raise the weight, focus on reaching the appropriate height and not any farther.
Leaning Back
If you’re pushing the limits with too much load or trying (inefficiently) to create a longer range of motion, you may end up leaning too far back and extending your lower back while pulling the weight upwards.
When that happens, you lose good posture and put yourself at risk for a potential injury. You also add a “diagonal” movement to what should be a vertical pull, which changes your leverage and reduces the difficulty of the lift.
Avoid it: Keep your core tight, and engage your quads (thighs) and glutes for the entire set. When you lose that muscular engagement, end the set and consider lightening the load.
Letting The Bar Drift Away
If you get tired and begin using momentum to finish your set, or if you’ve got too much weight loaded, the barbell may drift away from your torso because you’re using too much body English and can’t maintain control over the bar.
Credit: MDV Edwards / Shutterstock
As the bar gets farther in front of your body, your smaller rotator cuffs are put under more stress, your wrist and elbow joints are put under more strain, and your overall leverage decreases which removes muscular activation from your upper back.
Avoid it: Keep your shoulders down and your chest up. This should help to recruit your shoulder and upper back muscles, which will help keep the barbell close to your torso as you lift and lower the weight.
How to Progress the Upright Row
The upright row may not always be the ideal movement for a vertical pulling exercise depending on your individual mobility. You may benefit from working up to the full barbell upright row. Here’s how to get started.
Two-Dumbbell Upright Row
The barbell can sometimes be unforgiving for lifters with existing wrist or elbow joint problems. A barbell also locks your hands into a fixed width and a position that may be uncomfortable for your current wrist or forearm mobility. Performing dumbbell upright rows is an excellent way to build size and strength while working around any mobility issues.
Dumbbells allow your hands and wrists to naturally rotate during the exercise, and this freedom of movement is more forgiving on your joints while still applying tension on the target muscles.
Tempo Upright Row
Every rep of every exercise technically has has four “parts” — the eccentric or lowering portion, the stretched position, the concentric or lifting portion, and the lockout or peak contraction. Manipulating how long each part takes is called tempo lifting, and it can be the key to getting more results from lighter weights.
For example, you might work with 3-1-2-3. This would mean you take three seconds to lower the weight, hold a one-second pause in the stretched position, lift the weight in two seconds, and pause for three full seconds in the contracted position. This puts the working muscles through more time under tension, and more time under tension leads to more growth. (3)
Unilateral Smith Machine Upright Row
While you can perform a single-arm dumbbell upright row, the weight can become problematic and unwieldy as the dumbbells get bigger and bulkier. This is an excellent time to turn to the Smith machine for an unconventional but highly effective movement.
With the fixed range of motion provided by the guided rails, the Smith machine provides extra stability. This allows you to go heavier than any dumbbell variation. The long barbell is also easier and more comfortable to grab than a relatively smaller dumbbell.
Benefits of the Upright Row
The upright row has excellent carryover to other vertical pulling movements like the snatch and clean & jerk. It’s also a great exercise to build a big “yoke” — the muscles across your shoulders and upper back.
Upper Body Muscle
Because the upright row works your deltoid muscles, upper back, and traps, bodybuilders and physique-focused lifters should include this exercise to train their entire shoulder area. It is an effective exercise for shoulder hypertrophy (growth), and building the “yoke” helps you look fit, muscular, and athletic even when you’re wearing a baggy sweatshirt.
Strength Carryover
If you’re a strength athlete involved in CrossFit or Olympic weightlifting, you are regularly performing lifts such as power cleans or high pulls. Training the upright row will have a direct carryover to the performance of these lifts because it trains the same muscle groups and supports overall development.
The upright row is also a good accessory exercise for Olympic weightlifting because it mimics the movement path of the snatch and clean. Although the full Olympic lifts train total-body power, the upright row helps to build the muscles involved, which helps to strengthen the entire movement.
Credit: The Art Of Life / Shutterstock
During the snatch and the clean & jerk, it’s essential to keep the barbell close to your torso when it travels at full speed. Doing the barbell upright row as an accessory exercise will improve the strength needed to keep the barbell close to your body.
Improved Posture
The barbell upright row targets the upper back and upper traps, which are essential for good posture. Improving postural strength has excellent carryover when keeping a neutral spine for barbell squats and deadlifts, or when simply walking in daily activity.
Improved Core Strength
The upright row is primarily an upper body exercise, so your anterior core (abs and hips) and posterior core (lower back and glutes) work hard to maintain a neutral posture. With the weight being in front of your body, your six-pack muscles are working hard so you don’t round forward or tilt sideways, while your posterior core ensures you don’t extend your lower back as you pull the load up toward your chest.
Muscles Worked by the Upright Row
The upright row is predominantly an upper body movement with your core and lower body muscles playing a supporting role. Here are the major muscles trained by the upright row.
Trapezius
The trapezius muscle’s primary function is controlling your shoulder blades, which occurs when pulling the barbell up. The scapulae (shoulder blades) outwardly rotate to pull the barbell up your torso. The vertical pulling motion of the upright row is in the trap’s wheelhouse.
Deltoids
All three heads of the deltoids — the front, side, and rear — are trained in shoulder abduction when your upper arm rises out to your sides. This is seen most significantly in the peak contraction at the top of the upright row.
Upper Back
The upper back (including your rhomboids and teres) plays two roles during the upright row. It controls the upward rotation of the scapula, as you reach the top part of the repetition, and it works to keep a good lifting posture with a neutral spine from top to bottom.
Biceps
Because your elbows bend and flex during the upright row, your biceps are also trained. However, they play a supportive role and aren’t the primary target. If your biceps are fatiguing before other muscles, adjust your grip width and focus on driving your elbows up — don’t overfocus on pulling with your hands.
Core
Your abdominals, obliques, and lower back work surround your torso to support your spine. This allows you to remain in a good overall posture so you can focus on the rest of the upper body muscles doing their job to move the weight.
How to Program the Upright Row
The upright row can be customized by adjusting sets and reps to suit your personal goals. The upright row cops some flack in lifting circles because it can put the shoulders in a potentially vulnerable position. But when the movement is programmed properly and performed correctly, it can be an extremely beneficial exercise with limited risk.
For Strength
Like many barbell exercises, the upright row can increase overall upper body strength. This is done by performing fewer reps and a few more sets at a relatively heavier weight. To focus on improving your upper back strength, perform three to five sets of four to six repetitions. However, the movement should remain strict and without any swinging. If you have to heave the weight up, you’ve gone too heavy.
For Performance
The barbell upright row can be performed when weightlifting athletes want to improve their bar path, coordination, and strength for Olympic lifts. When this is the case, use a moderate weight with a higher volume — three to four sets of 10 repetitions works well.
For Muscle
When looking to build your yoke, relatively higher reps with a light to moderate weight should be your go-to. This lets you emphasize your shoulders and upper back with higher volume to overload the tissue for better potential muscle growth. Here, anywhere from three to five sets of 10 to 15 repetitions works well.
Upright Row Variations
Although the barbell upright row is a great exercise to build your shoulders and upper back, it helps to have a few variations in your back pocket to pull out for variety, to reduce boredom, and to avoid overuse injuries. Here are three such variations.
Kettlebell Upright Row
The kettlebell upright row can be performed with one or two kettlebells. Holding one kettlebell with both hands doesn’t favor the shoulder joint, so either perform is with one weight in one hand or one weight in each hand.
Working unilaterally (a weight in each hand) can help strengthen imbalances between sides. The kettlebell also offers a different feel compared to a dumbbell because the weight’s center of gravity is lower. This can help to reinforce keeping the weight close to your body during the lift.
Snatch Pull
The snatch pull is an Olympic lift variation that trains lower- and upper body power. Because you’re driving the weight with your lower body, more weight can be used than with a strict upright row.
The snatch pull mimics a deadlift setup combined with the pulling part of the upright row, but using a wide snatch-grip will further strengthen your upper back. The explosive nature of the lift also helps to develop power and strength.
Single-Arm Upright Row
If you haven’t got access to a kettlebell, the single-arm upright row with a dumbbell is an effective and reliable variation.
The focus on unilateral strength will help strengthen each side of the body to improve overall bilateral performance. This is one of the most joint-friendly variations because you can easily adjust the range of motion and your hand position to your individual mobility needs.
FAQs
It’s perfectly fine if you’re unsure about the pros and cons of the upright barbell row, because it’s earned a slightly “controversial” reputation over the years — partly due to its demands on the shoulder joint, and partly due to lifters simply performing it incorrectly and negating its benefits.
Why do my wrists bend during the upright row?
Your wrist will flex or bend toward your body when the load gets heavy as you pull the weight up toward your chest. While some wrist flexion is okay at the end range of motion, you should reduce the weight if your wrists hurt.
The older lifters at the gym say the upright row will grind my shoulders into dust. Are they right?
The barbell upright row is not for everybody. Because the shoulders are internally rotated, a fixed range of motion and good shoulder mobility is required, and some will feel pain, particularly at the top of the lift. If this is the case, perform kettlebell or dumbbell upright rows while improving your shoulder mobility. Work around the issue and not through it.
Know Your Row
The upright row is a time-tested movement for adding size to your shoulders, traps, and back and building pulling strength that carries over to almost every upper body exercise. It’s short-sighted to dismiss the upright row as simply being potentially dangerous. When performed with good technique, following proper programming, it can be a critical player in building a more muscular and more powerful upper body.
References
McAllister, M. J., Schilling, B. K., Hammond, K. G., Weiss, L. W., & Farney, T. M. (2013). Effect of grip width on electromyographic activity during the upright row. Journal of strength and conditioning research, 27(1), 181–187. https://doi.org/10.1519/JSC.0b013e31824f23ad
Schoenfeld, Brad MSc, CSCS1; Kolber, Morey J PT, PhD, CSCS2; Haimes, Jonathan E BS, CSCS2. The Upright Row: Implications for Preventing Subacromial Impingement. Strength and Conditioning Journal: October 2011 – Volume 33 – Issue 5 – p 25-28 doi: 10.1519/SSC.0b013e31822ec3e3
Burd, N. A., Andrews, R. J., West, D. W., Little, J. P., Cochran, A. J., Hector, A. J., Cashaback, J. G., Gibala, M. J., Potvin, J. R., Baker, S. K., & Phillips, S. M. (2012). Muscle time under tension during resistance exercise stimulates differential muscle protein sub-fractional synthetic responses in men. The Journal of physiology, 590(2), 351–362. https://doi.org/10.1113/jphysiol.2011.221200
Featured Image: YAKOBCHUK VIACHESLAV / Shutterstock
An exercise’s name doesn’t usually hold too much value beyond summarizing what it is or how it’s done. The bench press has you lying on a bench while pressing. The barbell row has you, well, rowing a barbell. Squat’s gonna squat.
But when a specific exercise variation is named after an individual lifter or coach, it’s usually an indicator that the movement is next-level and should be used accordingly. John Meadows’ Meadows row, Glenn Pendlay’s Pendlay Row, Steve Romania’s Romanian deadlift (Kidding. Although, the more accurate “Nicu Vlad deadlift” would sound pretty cool, too.)
When it comes to eponymous shoulder training, the Arnold press is named after the quintessential bodybuilder of all bodybuilders — the Austrian Oak, the Governator, Arnold Schwarzenegger. Here’s an in-depth look at this delt-builder from the seven-time Mr. Olympia.
How to Do the Arnold Press
The Arnold press is a variation of the standard seated overhead dumbbell press. It uses a different path of resistance and longer range of motion to recruit more muscles into the exercise.
Step 1 — Get Into the Starting Position
Credit: MDV Edwards / Shutterstock
Sit on a bench with a dumbbell in each hand, resting on your thighs with a thumbs-up grip. “Kick” the weight straight up to rest the thumb-side of each weight on the fronts of your shoulders. When both weights are up, slightly lower your elbows and rotate your hands to have your palms facing your mouth.
You should almost be in the top position of a curl, with your arms fully bent and your pinkies facing each other. Keep your shoulder blades pulled back, don’t allow the weights to pull your body forward.
Form Tip: Pretend you’re extra-shy and focus on covering your mouth with the weights in this position. This is a good target for the bottom position and will help to encourage a full stretch and complete range of motion.
Step 2 — Press and Rotate
Credit: MDV Edwards / Shutterstock
In a coordinated motion, begin pressing the weights up and back while gradually rotating your hands and arms. As the weights move overhead, your elbows should come to the sides in-line with your shoulders and your palms should turn to face forward.
Continue pressing the weights entirely overhead, bringing them together at the top. In the locked out position, the weights should be nearly touching and your palms should be facing forwards, identical to a standard dumbbell overhead press.
Form Tip: Some lifters have trouble performing the necessary movements simultaneously. Perform the lift slowly and focus on blending the upwards and backwards movement while rotating your hands. The exercise should eventually feel smooth and natural.
Step 3 — Lower to Your Chin
Credit: MDV Edwards / Shutterstock
From the locked out position, reverse the entire process. Bring the weights down while shifting your elbows to the front and rotating your palms towards your face. In the bottom position, the weights should again be in front of your mouth.
The bottom position should again resemble the top part of a curl with your arms bent and your palms facing your head.
Form Tip: Like the pressing motion, some lifters have trouble performing the movement in reverse order. Go slowly and focus on blending each step to bring your elbows down and forward.
Arnold Press Mistakes to Avoid
Because the Arnold press involves so many moving parts, there are several common technique mistakes which can reduce the effectiveness.
Rotating Your Hands, Not Your Arms
The Arnold press isn’t simply “turning your hands while you press the weight,” because turning your hands doesn’t necessarily change the angle of your shoulder, which means you’re not necessarily recruiting more parts of the deltoid (shoulder).
Credit: Maridav / Shutterstock
The upper arms, not just the hands and wrists, need to move during the press. Moving the upper arm, which is controlled by the shoulder and upper back, is what changes the pressing angle and increases muscle recruitment.
Avoid It: Make sure your elbows transition from pointing forwards (in the bottom position) to pointing to the sides (in the top position). Your hands should rotate as a natural side effect of shifting your elbows.
Using a Short Range of Motion
Performing an exercise with a short range of motion has been shown to build less size and strength compared to a full range of motion. (1) The extended range of motion of an Arnold press is one of its defining features, and cutting that range of motion short will significantly reduce its benefits.
Credit: MDV Edwards / Shutterstock
Some lifters keep the weights at eye-level rather than lowering to their mouth, or they don’t rotate their elbows back in-line with their shoulders and instead keep them angled slightly forwards, or they may avoid locking out at the top. All of these are mistakes that can reduce the overall muscle-building stimulus.
Avoid it: Remember three key points: Get your hands in front of your face at the bottom, have your elbows in-line with your shoulders at the midpoint, and have the weights nearly touching at lockout.
Benefits of the Arnold Press
The Arnold press is named after one of the greatest bodybuilders of all time and it’s been used consistently for decades, so it’s going to be a “pretty good” choice for adding muscle.
Credit: Ihor Bulyhin / Shutterstock
Here are a few more reasons to add this complete muscle-builder to any upper body workout.
Long Range of Motion
Compared to the standard dumbbell shoulder press, the Arnold press extends the range of motion several extra inches. This added range increases the stretch, particularly on the front delt muscle, and is a strong stimulus for more growth.
Shoulder Size
The Arnold press is a serious delt-building exercise. The range of motion and long time under tension trigger muscle growth in the entire shoulder, specifically the front and side heads, with some assistance in the upper back and traps.
Muscles Worked by the Arnold Press
The Arnold press is primarily a shoulder exercise, but due to the weight’s path of motion, the upper back and even the biceps play a role in executing the movement.
Credit: Prostock-studio / Shutterstock
By controlling the weights from in front of the body to the sides, muscles are recruited in a unique way, which requires a degree of shoulder and upper back mobility but also delivers more muscle growth.
Deltoids
The deltoids, or shoulders, are composed of three separate heads of the muscle — the anterior/front, lateral/side , and rear. Each head has a slightly different role dictated by the arm’s position relative to the body. The front delt lifts the arm in front of the body, the lateral delt controls the arm out to the side, and the rear pulls the arm back behind the body.
Due to the motion of the weights, the Arnold press recruits all three delt heads significantly, with increased emphasis on the front delts which work extremely hard when the weight is in the bottom position.
Triceps
The triceps are made of three separate heads — the long, the lateral, and the medial. While the lateral and medial heads attach to the upper arm, the long head connects to the scapulae (shoulder blades), with each head being recruited when the arm is in various positions relative to the body (down by your sides, straight in front of your body, overhead, etc.). (2)
The triceps become highly activated during the Arnold press when the weights are roughly ear-level and are recruited to press into the lockout position.
Biceps
The biceps, consisting of the long head and the short head, are involved in bending or flexing the arm as well as rotating the forearms. The long head, specifically, also plays a role in raising the upper arm in front of the body.
The biceps aren’t activated during standard shoulder presses, however, the Arnold press recruits the biceps as stabilizers to control the weight during the lower half of the exercise when the arm is bent and rotated into the overhead position.
Upper Back
The upper back is a collective term for multiple muscles running from shoulder to shoulder and around the shoulder blades, including the trapezius, teres major and minor, rhomboids, and rear deltoids.
The upper back provides stability during the press and is actively engaged to pull the arms backwards during the Arnold press.
Who Should Do the Arnold Press
The Arnold press is a relatively advanced shoulder press variation that can be used by any lifter who can master its performance.
Lifters Training to Build Muscle
The Arnold press puts the shoulder through a long time under tension, which is shown to be a significant factor for building muscle. (3) This intense exercise will add size to your shoulders, arms, and upper back.
How to Program the Arnold Press
The Arnold press can play a role in any muscle-building routine, especially as one of the first exercises performed in a shoulder-focused workout.
Moderate Weight, Moderate Reps
Training this classic bodybuilding exercise with a classic bodybuilding method of three to four sets of eight to 12 reps is a reliable plan to grow wider delts. Be sure to use a steady, or slightly slow, rep speed and take each set to thorough muscular fatigue.
Mechanical Drop Set Technique
One advanced muscle-building technique that can be very effective with the Arnold Press is mechanical drop sets. It’s a way to continue training a body part after reaching muscular failure on a specific exercise.
While traditional drop sets allow continued training by using a lighter weight, mechanical drop sets use the same weight and switch to a slightly less challenging, nearly identical, exercise to immediately continue training.
For example, if you performed a set of Arnold presses to muscular failure using 40-pound dumbbells, instead of quickly grabbing 25-pound dumbbells and performing more Arnold presses, you would immediately begin performing standard overhead dumbbell presses using the same 40-pound dumbbells.
Because the range of motion with standard overhead dumbbell presses is shorter than with Arnold presses, the exercise is relatively less challenging and you will be able to perform several additional repetitions before hitting muscular failure again. This high-intensity technique allows more total volume to be performed, which can increase the workout’s muscle-building stimulus.
This same technique works for any related exercises, like front squats and back squats, incline bench press and flat bench press, or dumbbell curls and hammer curls.
Arnold Press Variations
The Arnold press can be relatively advanced, but there are several options to train the shoulders with similar size and strength benefits.
Seated Overhead Dumbbell Press
The seated overhead dumbbell press is a classic movement to train the shoulders and triceps. It’s a direct pressing exercise to work the shoulders and triceps.
This exercise is a simple and effective way to train the overhead press without excessive technique cues like standing stability, increased range of motion, or other variables.
Arnold Push Press
The Arnold push press is a standing variation which uses deliberate leg drive, as opposed to unconscious cheating leg drive, to move the weight from the bottom position.
This assistance allows you to use heavier weights while incorporating more total body strength and power.
Arnold Z Press
The Arnold Z press combines an exercise named after one of the greatest bodybuilders of all time (Arnold Schwarzenegger) with an exercise named after one of the greatest strongmen of all time (Zydrunas “Big Z” Savickas). So, yeah, it’s probably worth trying out.
Sitting unsupported on the floor forces your core to be active throughout the exercise and eliminates the ability to cheat the movement with momentum, making it an extremely focused shoulder exercise.
Arnold Press Alternatives
Not all lifters can perform the Arnold press, often due to shoulder mobility issues. There are some effective alternatives to deliver comparable results.
Neutral-Grip Overhead Press
The neutral-grip overhead press maintains your palms facing each other and your shoulders angled towards the front throughout the movement.
This adjusted hand and elbow position reduces shoulder joint strain and is the preferred pressing movement for any lifters dealing with shoulder mobility restrictions.
Landmine Overhead Press
The landmine overhead press is a unique and effective way to train the shoulders at an angle, rather than directly overhead. This makes it more suitable for lifters with mobility issues.
The angled pressing path slightly changes the muscle recruitment, increases core engagement, and reduces joint stress.
FAQs
I hear my shoulder “clicking” during the exercise. Is that bad?
Generally speaking, any noisy joints are a nuisance, but not a real concern. (4) It’s often air moving around the cartilage of the joint, not necessarily the joint grinding itself into oblivion.
However, hearing noises in the joint accompanied by pain and/or inflammation is an entirely different situation and can be an indicator of impending problems. When in doubt, get checked by an orthopedist, physiotherapist, or qualified professional.
It’s named after a bodybuilder, so is it only for big, jacked bodybuilders?
No, any lifter who wants more muscular-looking shoulders can benefit from the Arnold press. Just like any lifter who wants stronger glutes and hamstrings can benefit from the deadlift even though it’s one of the competitive powerlifts. You don’t need to be a competitive powerlifter to benefit from it.
The more exercises you have in your toolbox, the more options you have to fine-tune your own training program to reach whatever goals you’ve set. Experiment and learn plenty of movements – “bodybuilding” exercises, Olympic lift variations, gymnastic-type bodyweight exercises, whatever you think might be useful.
Just be sure to use good technique and sound training principles, and you’ll only get better in the long run.
Do The Arnold Press. Do It Now.
The Arnold press won’t necessarily turn you into an elite bodybuilder, and it certainly won’t turn you into an action star, but it will give you an intense shoulder workout and pack size onto your delts. So it’s time to terminate the excuses and get to work.
References
Pallarés JG, Hernández-Belmonte A, Martínez-Cava A, Vetrovsky T, Steffl M, Courel-Ibáñez J. Effects of range of motion on resistance training adaptations: A systematic review and meta-analysis. Scand J Med Sci Sports. 2021 Oct;31(10):1866-1881. doi: 10.1111/sms.14006. Epub 2021 Jul 5. PMID: 34170576.
Kholinne E, Zulkarnain RF, Sun YC, Lim S, Chun JM, Jeon IH. The different role of each head of the triceps brachii muscle in elbow extension. Acta Orthop Traumatol Turc. 2018;52(3):201-205. doi:10.1016/j.aott.2018.02.005
Burd NA, Andrews RJ, West DW, et al. Muscle time under tension during resistance exercise stimulates differential muscle protein sub-fractional synthetic responses in men. J Physiol. 2012;590(2):351-362. doi:10.1113/jphysiol.2011.221200
Pazzinatto, M. F., de Oliveira Silva, D., Faria, N. C., Simic, M., Ferreira, P. H., Azevedo, F. M., & Pappas, E. (2019). What are the clinical implications of knee crepitus to individuals with knee osteoarthritis? An observational study with data from the Osteoarthritis Initiative. Brazilian journal of physical therapy, 23(6), 491–496. https://doi.org/10.1016/j.bjpt.2018.11.001