World Fitness Blog : Leading Global Bloggers

June 8, 2023

Low-Bar vs. High-Bar Squats: What’s the Best Lower-Body Builder for You?

Filed under: Fitness,Training — Tags: , , , , — admin @ 7:13 am

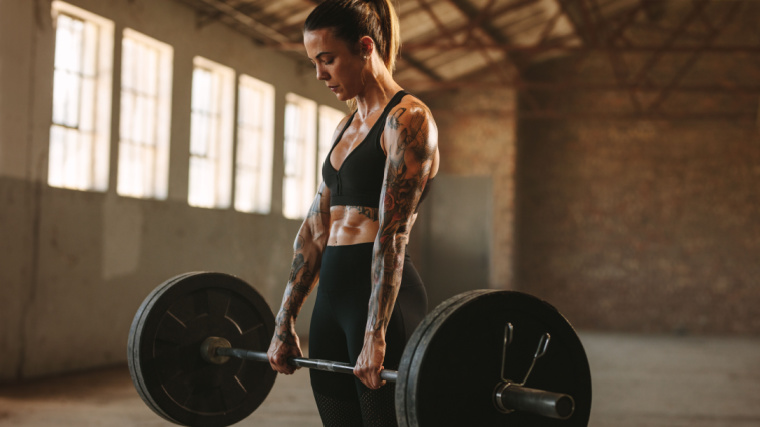
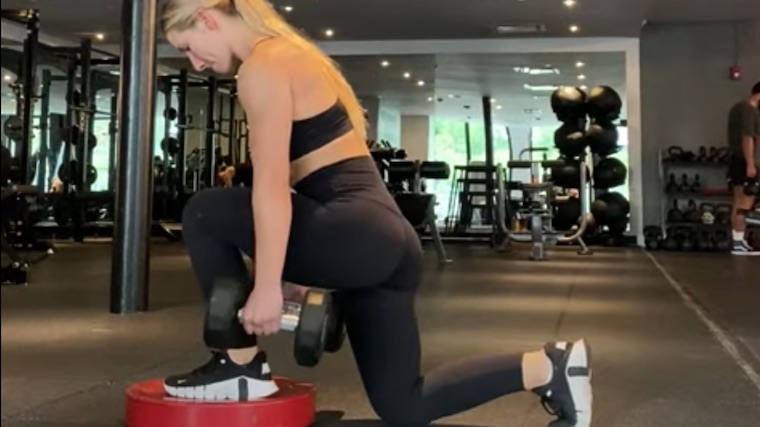
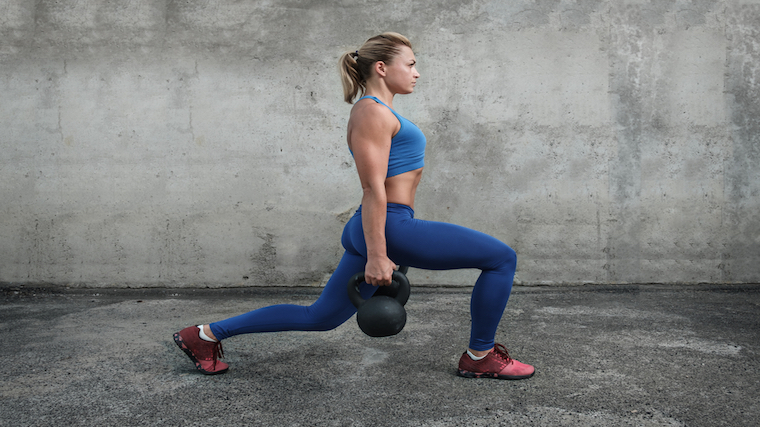
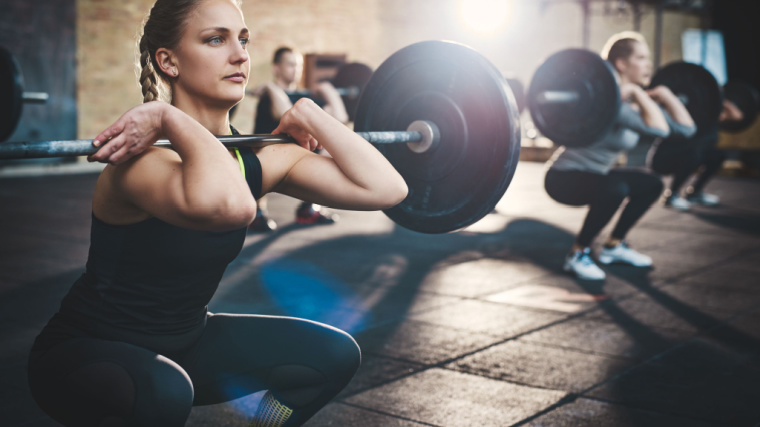
Squats are probably the first exercise a person ever performs — simply standing up from the ground. This is likely why squats are often dubbed as the king of exercises. Indeed, they are one of the best, if not the best exercises to develop lower body size, strength, and power while making you a universally stronger athlete with a core of steel. 

Man in white sleeveless t-shit squatting with a loaded barbell across his back

Ivan Kochergin / Shutterstoc

When lifters talk about squats, they’re generally referring to the barbell back squat, even though there are many different ways to perform “a squat.” But there are even two primary types of back squats — the low-bar squat and the high-bar squat. In the high-bar squat, the barbell is resting on your upper traps, while the low-bar position nestles the bar across your posterior deltoids or even lower in some extreme cases.

Even though the two exercises might look similar from a distance, they have their own benefits and one or the other might better suit your specific goals. To figure out which squat setup is best for you, let’s compare them.

Low-Bar Squat and High-Bar Squat

Exercise Differences

At first glance, there are only a few inches of difference in bar placement. Surely that can’t make a dramatic difference, can it? It can. Here’s how each squat best serves a different purpose.

Strength Potential

Setting the barbell in a lower position decreases the moment arm between the bar and your hips. As such, you can use heavier loads with the low-bar squat. The lever is shorter, which means the same amount of force generated by your hips and back muscles, you can move more weight.

muscular person performing barbell squat

Credit: Dragon Images / Shutterstock

Your core is also more compact and resilient, and your upper back is stronger in a low-bar position. You face less risk of bending forward or having your upper back collapse with the low-bar squat.

This is why this variation is favored by powerlifters and most strength athletes. Some of them even put the barbell as low on their back as it can be without sliding down — to decrease the moment arm as much as possible, improve their leverage, and lift as much weight as possible. If you’re concerned with lifting as much weight as possible, then you should probably make the low-bar squat your primary choice. (1)

Muscle Recruitment

One consequence of having the barbell lower is that you have to adopt a more forward-leaning torso position. This increases your hip angle and, the greater it is, the more you’ll recruit your hip muscles: glutes, lower back, and hamstrings.

On the other hand, with the high-bar squat, you can maintain a more upright posture, but it increases knee flexion. You’ll put more stress on your quadriceps and it will be easier to feel them working. You also target the abs more because they’re more strongly recruited in an upright position.

This makes the low-bar squat more of a “posterior chain”-dominant movement (emphasizing your glutes, lower back, and hamstrings) while the high-bar squat also recruits your “anterior chain” (emphasizing your quadriceps and abdominals).

This is why the high-bar squat is the more common choice for bodybuilders and physique-focused lifters.The exercise suits those interested in building more muscular legs, particularly the relatively larger quadriceps.

Go with the high-bar squat if you want to emphasize your quads, but use low-bar squats if you’re more concerned with targeting your glutes and hamstrings.

Technique and Mobility

It can be difficult to find your ”groove” and adapt to low-bar squatting. You have to find your own ideal torso angle, decide an optimal barbell position, determine how much to sit back, etc. And this is emphasized because mobility requirements in your shoulders and hips will dictate the limits of your form.

Indeed, the barbell position in a low-bar squat requires a good deal of shoulder mobility to hold the bar in position, as well as external rotation and wrist stability. Low-bar squats are notorious for putting a relatively high degree of stress on your wrists and shoulders. This is why some powerlifters wear wrist wraps when squatting, or avoid the low-bar squat to save shoulder strain for their bench press.

If you have no mobility issues or old injuries nagging you, you’re good to go. But if you’re a battered gym veteran, or if your shoulders and elbows are tender, stick to the high-bar squat — at least until the pain and issues are gone and you have developed adequate mobility to squat pain-free.

Exercise Similarities

With both exercises being squats, they do share many similarities and overlapping benefits.

Bilateral Development

Both types of squats are multi-joint leg exercises that involve hip, knee, and ankle joints to work many muscle groups including the quadriceps, hamstrings, glutes, and even your back and core. (2) Squats will mainly grow your legs, but they can actually contribute to making your whole body bigger and stronger. (3)

Because these squats work both lower body limbs at the same time, you’re more stable, and can generate more strength, lift more weight, and potentially stimulate more hypertrophy. They also help save time since you don’t have to switch legs with every set you perform.

Posterior Loading

Compared to other squats variations, both the low-bar and the high-bar squat are back squats, meaning that the loading is focused on your posterior chain because the bar is resting on your upper back muscles. This isn’t the case, for instance, with the Zercher squat or front squat which load the front half of your body and emphasize your anterior chain.

As such, both the low-bar squat and high-bar squat have the potential to load relatively heavy weight and they are effective for building strength. Compared to front-loaded squat movements, your torso is less upright and you undergo more hip flexion and less knee flexion.

Shirtless muscular person in gym doing barbell squat

Credit: antoniodiaz / Shutterstock

The back-focused bar position, whether it’s low-bar or high-bar, implies more recruitment in the posterior chain — hamstring, glutes, and lower back — and less recruitment in the anterior chain — quadriceps and abs. (4) If you’re interested in developing your posterior chain and lifting plenty of weight, then one of these back squat variations are your go-to.

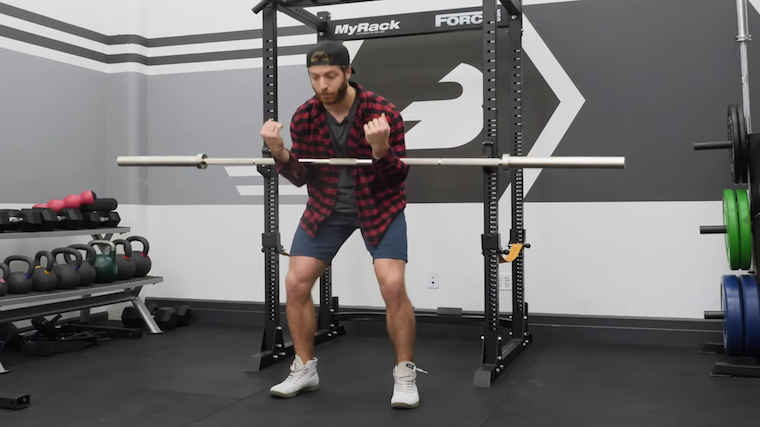
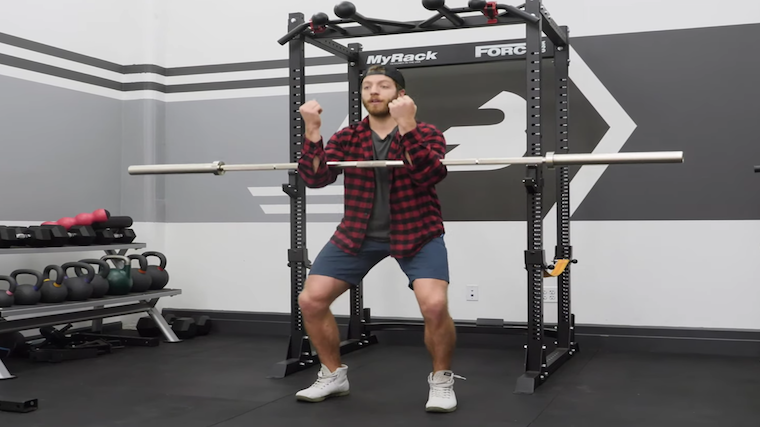
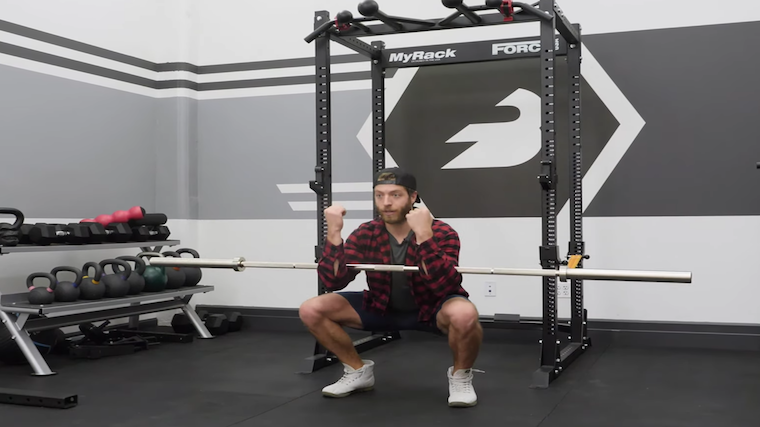
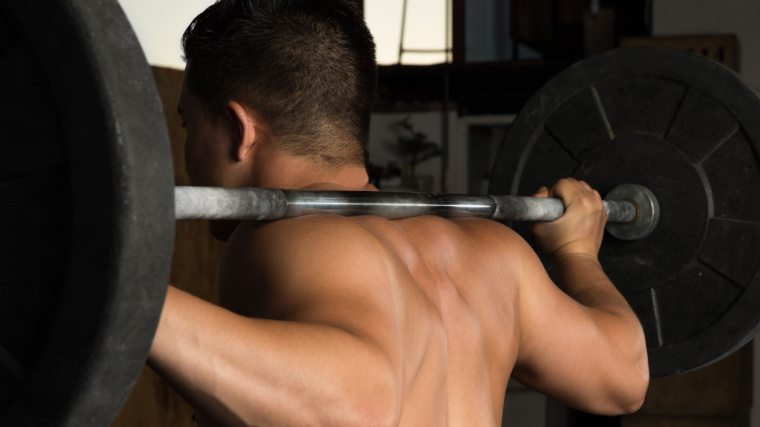
How to Do the Low-Bar Squat

With the low-bar squat, the barbell is not placed on the traps. Get under a barbell and position it even lower, on your posterior deltoid (the rear of your shoulders) above the top of your armpits. Squeeze your shoulder blades as much as possible to create a “shelf” needed to hold the barbell in place. Bend forward slightly at the waist to prevent the bar from moving around or possibly falling.

Once the barbell is secure, step back and adopt a shoulder-width (or slightly wider) stance. Bend at your hips and knees until your thighs break parallel with the floor. Aim to keep the barbell over your midfoot at all times. This keeps you in a powerful position of leverage.. Push back up until your legs are straight.

Form tip: To help create the cushion of arm, shoulder, and upper back muscles necessary to hold the barbell in position, bring your hands slightly closer. This will help you squeeze your shoulder blades even more. It might prove uncomfortable at first, so make sure to properly warm-up your shoulders and back before low-bar squatting.

Benefits of the Low-Bar Squat

  • The low-bar squat puts you in a position to lift the most weight of any squat variation. This is the one you want to prioritize if you want to compete in strength sports like powerlifting or strongman/strongwoman contests, or if you’re simply interested in lifting really heavy weights for fun.
  • Low-bar squats deliver more posterior chain recruitment. Your glutes, hamstrings, and lower back will be activated more than with other squat variations.

Low-Bar Squat Variations

If you want to give your shoulders a break, or want to attack the squat from another angle, here are some variations you might want to try.

Safety Bar Squat

If you have access to a safety bar, it can be an excellent piece of gym equipment. Its main purpose is to make the exercise less stressful on your shoulders, elbows, and neck. In summary, it’s a very accessible squat for people who have joint mobility issues. You can mimic the low-bar squat torso angle and general technique, while sitting back farther and bending forward with less trouble.

The safety bar squat also has the benefits of overloading your traps, upper back, and abs. (5) If the low-bar squat irritates your shoulders or if you want to improve your upper back strength, give this variation a go. 
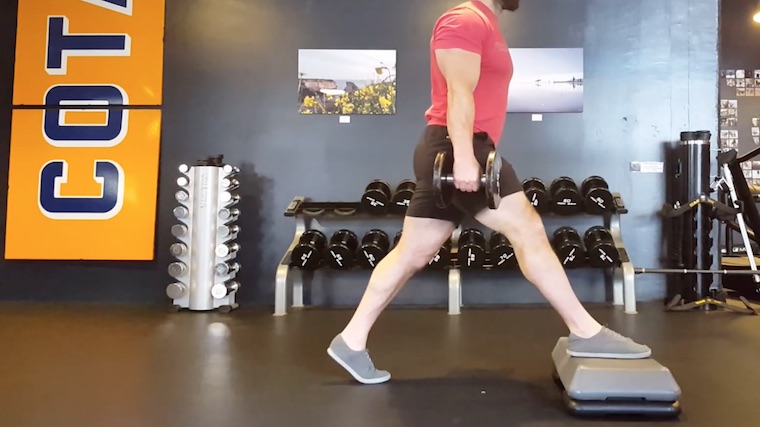
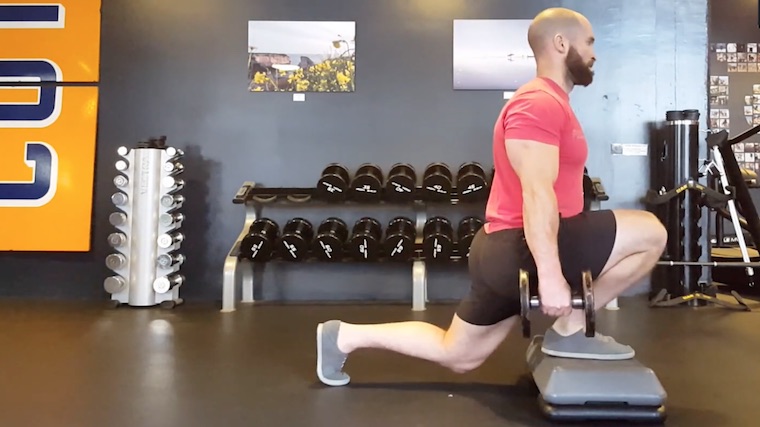
Box Squat

Technically, you could do box squats with a high-bar position, but the overall mechanics and purpose of box squats are better suited with the low-bar position. For this variation, you use a box or a bench, sit back, and squat down. Pause for a second on the bench or box, then contract your glutes and hamstrings to explode upwards. Don’t allow yourself to crash down uncontrolled onto the box.

This movement is a favorite among powerlifters because it’s a great way to teach proper squatting mechanics and consistent depth. The box squat also recruits your posterior chain more efficiently and teaches you to improve explosive power out of the bottom position.

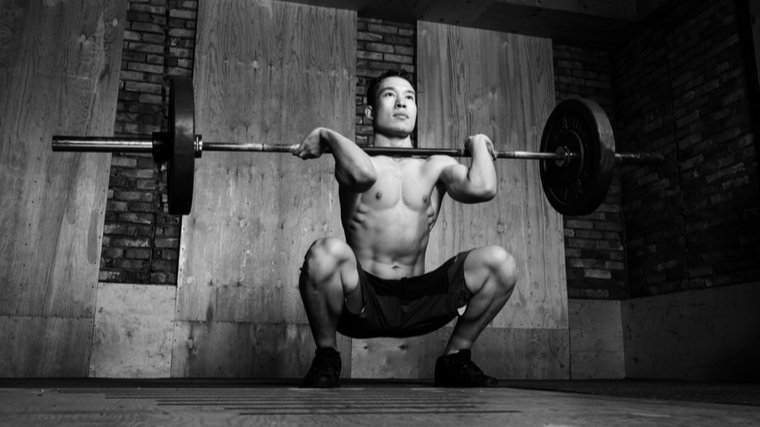
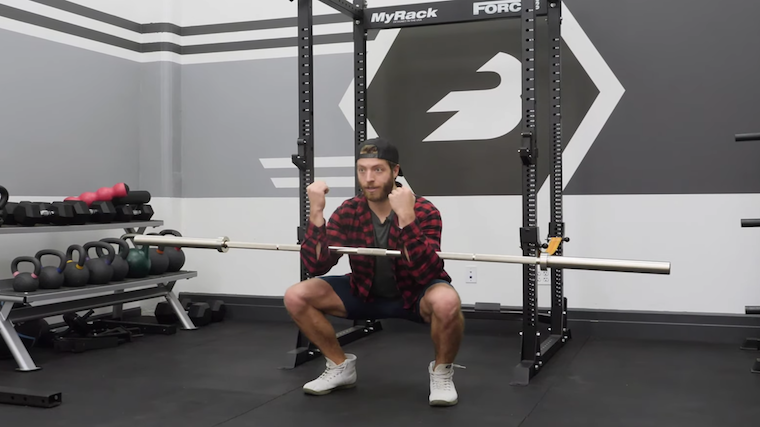
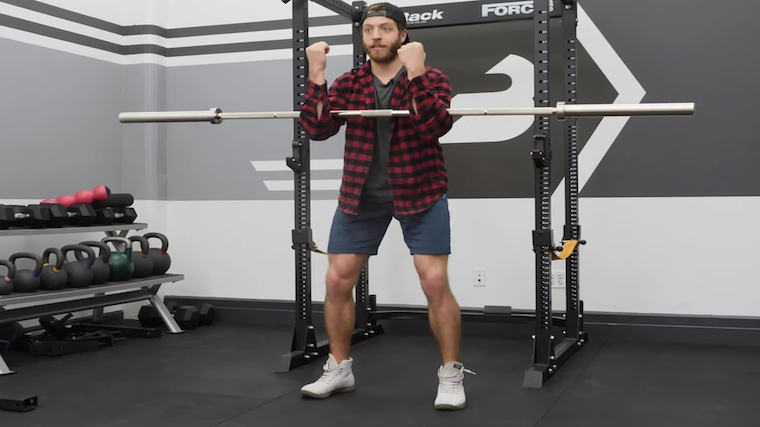
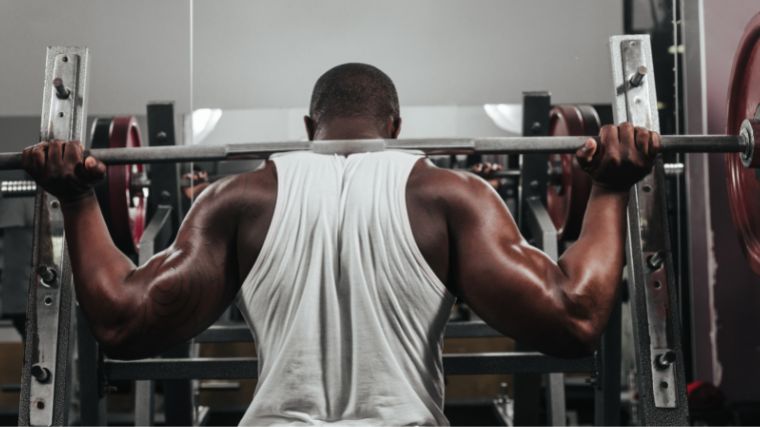
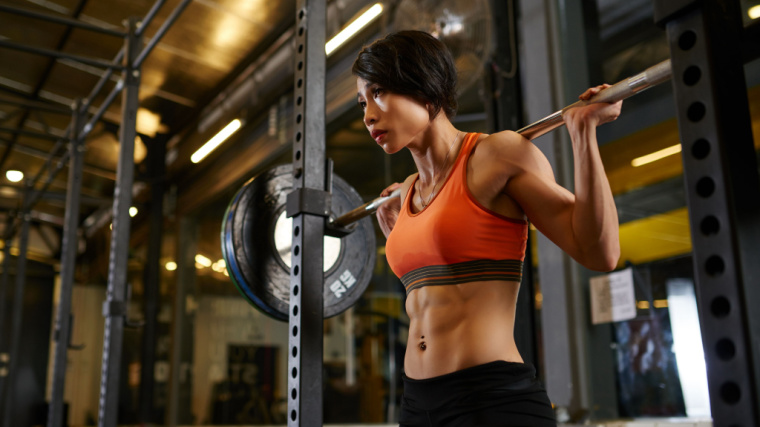
How to Do the High-Bar Squat

Position yourself in front of a barbell in a rack, then duck under and position the bar to sit in the “shelf” of your upper back and traps. Do not rest the bar on your neck or cervical spine. When you have a somewhat comfortable position, grip the bar tightly and unrack it.

Take one step back, then another small step to adjust your position. Your feet should be around shoulder-width, but your exact stance will vary slightly depending on your individual morphology. If you have longer legs, you may be more comfortable with a slightly wider stance.

Take a deep breath and brace your core. Bend your knees and hips simultaneously until the crease of your hips is lower than your knees. Stand up with the weight, exhaling as you pass the midpoint of the repetition.

Form tip: Make sure that your big toes, little toes, and heels are always in contact with the ground. It will help you engage your glutes and should prevent bending forward during the ascent.

Benefits of the High Bar Squat

  • This is one of the best exercises to develop muscle throughout your lower body, especially your quadriceps. The powerful stimulus of this total-body exercise is an incredible trigger for overall size and strength.
  • High-bar squats are a relatively simple and beginner-friendly barbell squatting variation.
  • This movement will put relatively low stress on your joints, particularly sparing your hips from excessive strain.

High-Bar Squat Variations

If you want to take things to the next level and go beyond the traditional high-bar squat, try these variations. Each has its own benefits and could be a better suit for your training goal once you master the initial exercise. 

Smith Machine Squat

The Smith machine has the advantage of being more stable since the bar is on a guided rail. As such, this variation will require less stability and coordination, and you can push yourself harder with reduced risk of injury (from dropping the bar of fatiguing your core and upper body). This is a useful variation if you want to turn up the intensity and approach or reach muscular failure.

It also allows you to focus on the mind-muscle connection and really feel your legs working. This is an ideal exercise if you prioritize hypertrophy or overall safety above strength and heavy weights.

Front Squat

With the high-bar squat, you’re standing quite upright, but the front squat takes things to the next level by demanding super-strict form — if you bend forward, the bar will roll away. This is a useful exercise for teaching good general squat mechanics. The front squat also prevents the lifter from bending too far forward, which would turn the squat into a lower-back focused good morning exercise.

The front-loaded position of the front squat will also emphasize your quadriceps and core even more than other squat variations. It’s a prime choice to boost your Olympic lifts and has direct carryover to the clean & jerk. However, a proper front squat requires a degree of thoracic (upper back), shoulder, and wrist mobility, so it may not be an immediate option for all lifters without doing some mobility work. Choose the front squat if you want to grow your quadriceps as much as possible, improve your core strength, or support your Olympic lifts.

How to Program the Best Squat For You

Both of these lifts are bilateral multi-joint exercises, recruiting a ton of muscles. As such, they can be an effective fit in many training programs for a variety of purposes.

Building Strength

To get as strong as possible, your best bet is to use three to five sets of one to five repetitions with a heavy weight. Both variations are suited for this kind of programming. Which one you employ will depend on your goals. If you’re a powerlifter or a strongman/strongwoman, stick to the low-bar squat, as it is the one with which you lift the most overall weight.

If you’re an Olympic weightlifter or a CrossFitter, the high-bar squat will be your variation of choice, as it has more carryover to the Olympic lifts and the movements you’ll find in competition. If you’re a general gym-goer, pick the variation that feels most natural.

Growing Muscle

For maximal muscle growth, use a classic repetition scheme of three to four sets of eight to 12 repetitions. The lower rep range will deliver a moderately heavy stress on the body, while the longer duration sets create a burning sensation for muscle growth.

If your goal is to build muscle, either squat setup could be useful, but most experienced bodybuilders and physique-focused lifters stick with the high-bar squat. Why? They’re not concerned with putting the biggest weights on the bar, but with getting the biggest muscles.

The high-bar squat will target your quadriceps, which are among the biggest muscles on the human body. High-bar squats also put relatively less stress on your shoulders and elbows, which sometimes take a beating from various presses, extensions, and assorted upper body training.

Explosive Power

If you’re an athlete trying to run faster or jump higher, it’s a good idea to add some explosive, power-based squats to your training regimen. Five to 10 sets of two to five reps, using a moderately heavy weight that you can still accelerate, will be your best bet. Stick to the high-bar squat. The general technique and muscle recruitment will have the most carryover to improving jumping and running.

Don’t End Up With Diddly Squat

Squats are dubbed the king of exercises for a reason. Don’t miss out on back squats. Use the bar position best suited to your body and goals, whether you want to build an impressive set of wheels, lift a pile of weight, become a better athlete, or boost your overall fitness.

References

  1. Glassbrook, Daniel J.1; Brown, Scott R.1; Helms, Eric R.1; Duncan, Scott1; Storey, Adam G.1,2. The High-Bar and Low-Bar Back-Squats: A Biomechanical Analysis. Journal of Strength and Conditioning Research 33():p S1-S18, July 2019. | DOI: 10.1519/JSC.0000000000001836
  2. Ribeiro, Alex S. PhD1,2; Santos, Erick D. MSc1,2; Nunes, João Pedro MSc2; Nascimento, Matheus A. PhD2,3; Graça, Ágatha MSc3; Bezerra, Ewertton S. PhD4; Mayhew, Jerry L. PhD5. A Brief Review on the Effects of the Squat Exercise on Lower-Limb Muscle Hypertrophy. Strength and Conditioning Journal 45(1):p 58-66, February 2023. | DOI: 10.1519/SSC.0000000000000709
  3. Myer GD, Kushner AM, Brent JL, Schoenfeld BJ, Hugentobler J, Lloyd RS, Vermeil A, Chu DA, Harbin J, McGill SM. The back squat: A proposed assessment of functional deficits and technical factors that limit performance. Strength Cond J. 2014 Dec 1;36(6):4-27. doi: 10.1519/SSC.0000000000000103. PMID: 25506270; PMCID: PMC4262933.
  4. Yavuz HU, Erdağ D, Amca AM, Aritan S. Kinematic and EMG activities during front and back squat variations in maximum loads. J Sports Sci. 2015;33(10):1058-66. doi: 10.1080/02640414.2014.984240. Epub 2015 Jan 29. PMID: 25630691.
  5. Hecker KA, Carlson LA, Lawrence MA. Effects of the Safety Squat Bar on Trunk and Lower-Body Mechanics During a Back Squat. J Strength Cond Res. 2019 Jul;33 Suppl 1:S45-S51. doi: 10.1519/JSC.0000000000002912. PMID: 30363042.

Featured Image: Dusan Petkovic / Shutterstock

Source

March 24, 2023

The Best Bodybuilding Workout for Each Body Part

Simple bodybuilding programs are a little too easy to find. You could pull them from fitness magazines — those ghost-written workouts that your favorite bodybuilders supposedly follow. You could roll the dice and ask an artificial intelligence chatbot to generate one for you. Or, you could attempt to develop one for yourself.

Just a few problems there. The high intensity, high volume programs used by the pros do not tend to be sustainable for the rest of us due to some physiological (and often pharmaceutical) reasons. Most people also aren’t ready to trust their potential gains to an algorithm-fueled robot, so that leaves you creating a program for yourself.

Consider a time-tested axiom before diving in: It’s not hard to create a good bodybuilding workout program, but it’s also not hard to create a bad one. Fortunately, we’ve got your back. And your chest, shoulders, arms, and legs.

Long-haired person sweating in gym holding barbell

Credit: Jacob Lund / Shutterstock

Here you will find evidence-based workouts to build every major area of an aesthetic physique. These workouts assume you’re a relatively healthy lifter with at least some experience in the gym (i.e. not a true beginner who could benefit from a more generalized approach). These plans work best with a body part split across the week.

Bookmark these workouts for your next hypertrophy training block and support the workouts with enough food to fuel performance, recovery, and growth so you can get started adding size. 

Best Bodybuilding Workouts for Each Body Part

Best Bodybuilding Workout for Chest

The chest muscles play a prominent role in our physique. They are most often trained by multi-joint, upper body pushing exercises. The angle the “push” can be used to bias certain portions of the chest, allowing us to fully develop this region. In addition to pushing exercises, single joint exercises can also be used to target the chest. Single-joint exercise serves as “icing on the cake,” providing a touch of additional training stimulus. 

The Complete Chest Workout

Just about any repetition range can build muscle. (1)(2) This engaging workout begins with the heaviest exercise. As the workout progresses, moderate repetition, moderate weight exercises are introduced as compound sets — a time-efficient superset technique that pairs movements targeting the same muscles back-to-back without rest. The workout ends with high repetition “pump work,” leaning into the metabolic mechanisms of muscle hypertrophy. (3) This general format is repeated for workouts for all body parts. 

This chest workout is designed to be performed once per week. Select weights that allow completion of repetitions is near the lower end of the repetition range. Sets need not be taken to failure but should flirt with it. Meaning, sets must reach a high level of effort. (4)(5) When you end the set, you should feel like you have three or fewer repetitions remaining “in the tank.”

When you’re able to complete sets at the top end of the repetition range, add five to 10 pounds. This progression method “resets” your sets back toward the lower bound of the repetition range, allowing your to progress repetition volume once again in subsequent weeks. 

Barbell Bench Press

  • How to Do it: Lie on a bench with your back arched and shoulder blades pulled down and together (“in your back pockets”). Unrack the bar and lower it to your chest. Press the bar upward until your elbows are straight but not locked.
  • Sets and Reps: 3 x 6-8
  • Rest time: Rest three minutes seconds between sets.

Dip

  • How to Do it: Support your body from a dip bar and lean slightly forward. Lower yourself until you feel a stretch across the front of your chest and shoulders or until your upper arms break parallel. Add weight or assistance as needed to achieve the target repetition range.
  • Sets and Reps: 3 x 8-12
  • Rest time: Move immediately to the next exercise without rest.

Incline Dumbbell Flye Press

  • How to Do it: Lie on a 30- to-45-degree incline bench and begin with the dumbbells pressed locked out above your chest. Face your palms together and lower the weights in a flye, keeping a slight bend in your arms. From the bottom position, pull the weights in toward your shoulders and press the weights up to lockout.
  • Sets and Reps: 3 x 12-16
  • Rest time: Rest two minutes before repeating the previous exercise.

Machine Incline Press

  • How to Do it: Sit with your back and buttocks supported on an incline press machine. Push the handles along the arc of the machine’s path until your elbows are straight but not locked. Control back to the start position.
  • Sets and Reps: 2 x 16-20
  • Rest time: Rest 90 seconds between sets.

Muscles Trained on Chest Day

Chest day often draws added attention because the pecs are featured so prominently when you check the mirror, even more so once you get an awesome pump going mid-session. The majority of chest movements will also recruit “the pressing muscles” — your shoulders and triceps — for assistance.

Pectorals

When viewed from the front, the upper bodies of modern bodybuilders are dominated by well-developed chest muscles. The pectoralis major is the largest and most superficial chest muscle. All parts of the pectoralis major act to draw the arms toward the body, pull the arms together in front of the body, and internally rotate the arms. The upper portion of the pectoralis major also raises the arm. Therefore, a wide variety of exercises target the pecs. 

Anterior Deltoids

The anterior deltoids, or “front delts,” share the same actions as the pectoralis major. Conveniently, this means that anterior deltoids are trained during chest workouts, such as the one above, and during direct shoulder workouts. 

Triceps

The triceps brachii primarily serve to extend your elbows (straighten your arms). Because of this, compound movements such as pressing and dips can be counted toward total triceps training volume. This aesthetic “three-headed” muscle fills t-shirt sleeves more readily than any other arm muscle.

How to Warm-Up Your Chest

A traditional warm-up has two components: 1) the “general warm-up” and 2) the “specific warm-up.” The general warm-up elevates body temperature, improves oxygen delivery to muscle and other body tissues, and improves joint freedom of motion. It typically consists of short duration, low-to-moderate intensity cardiovascular exercise (e.g. air bike, rowing, jogging, or jumping rope).  

The specific warm-up primes areas of the body and movement patterns to be used in the subsequent workout for improved technique and performance. It is also a good time for dedicated mobility exercises and/or exercises intended to reduce risk of injury.

A specific warm-up for the chest may consist of exercises to prepare the upper body and spine for proper positions during pressing, stimulate muscle contractions of the muscles to be trained, and reinforce shoulder stability. It is wise to include lower intensity sets of the workout’s first exercise at the tail end of the specific warm-up.  

Chest Warm-Up

  • Cardio: Five minutes, low-to-moderate intensity effort
  • Band Pull-Apart: 2 x 15 
  • Foam Roller Thoracic (Upper Back) Extensions: 2 x 10
  • Push-Up: 2 x 10
  • Bench Press: 3 x 6–10, work-up sets at light to moderate weight (e.g. approximately 40%, 60%, and 80% of the weight to be used for the first set of the workout’s first exercise).

Best Bodybuilding Workout for Back

A muscular back supports a confident posture, adds width to your upper body, and provides visual interest for those who happen to be walking behind your statuesque physique. That visual interest will come from the various muscles of the back, which converge on the shoulder blades and shoulders.

To create desirable definition and size, training the back from multiple angles using a variety of exercises may be useful. each exercise variation biases certain areas of the back and may result in distinct patterns of muscular development. (6)(7)

Back Width and Thickness Workout

Complete this full back workout once per week. Select weights that allow you to complete repetitions on the lower end of the repetition range. Sets to failure are not necessary to build muscle. (8) However, each set should reach a high level of effort. (4) When you’re able to complete all sets at the top end of the repetition range, add five to 10 pounds. 

Three-Point Dumbbell Row

  • How to Do it: Perform the three-point dumbbell row with the knee and hand of your non-working side on a flat bench. Initiate the movement by pulling your shoulder blade toward your spine, and row toward the outside of your hip. Lower to a full stretch without rotating or sinking your hips
  • Sets and Reps: 3 x 6-8
  • Rest time: No rest between sides. Rest three minutes between sets.

Neutral-Grip Lat Pulldown

  • How to Do it: As the name implies, the neutral-grip lat pulldown is performing using a handles attachment that faces your palms toward each other. Begin in a full overhead position and pull your elbows down to the midline of your ribcage — don’t force the bar to reach your chin or chest.
  • Sets and Reps: 3 x 8-12
  • Rest time: Rest two and a half minutes between sets.

Machine Wide Row

  • How to Do it: Set up on a machine with a chest support, grasping the handles with a wide, overhand grip. Initiate movement with your shoulder blades and pull toward your chest. Return to a fully stretched position.
  • Sets and Reps: 3 x 12-16
  • Rest time: Move immediately to the next exercise without rest.

Cable Flexion Row

  • How to Do it: Perform this seated row variation on a low cable machine. Allow resistance to pull your trunk and shoulder blades toward the machine — your spine should round forward, promoting a massive stretch through your back muscles. Begin by pulling the shoulder blades together and down. As you row the bar toward your torso, extend your spine but do not use momentum from the trunk to drive the movement. Reverse the movement and repeat.
  • Sets and Reps: 3 x 16-20
  • Rest time: Rest two minutes before repeating the previous exercise.

Muscles Trained on Back Day

Your back is one of the largest muscle groups on your body because a number of various individual muscles coordinate during each movement. This comprehensive workout will address and train a large number of muscles on your posterior torso including the lats, rear shoulders, and upper and mid-back. Your biceps and gripping muscles are also recruited during most exercises.

Mid-Back and Lats

Mid-back muscles, which act on the shoulder blades, create the appearance of a raised, central diamond-shape. Your latissimus dorsi (lats) sweep from the small of the back toward the outsides of your armpits and enhances the appearance of a “V-shaped” torso. These muscles comprise the bulk of the back musculature and are trained by upper-body pulling exercises

Rear Deltoids

While your rear deltoids are traditionally trained via shoulder-specific exercises (e.g. reverse flyes and cable external rotations), wide and narrow-grip pulling movements also hit the rear deltoids. When considering total weekly training volume for the rear deltoids, it is appropriate to include pulldowns, pullovers, and rows

Biceps and Other Elbow Flexors

Drawing a resistance toward your body, as performed during pulldowns, trains your elbow flexors. As the most visible elbow flexor, the biceps brachii gets all the glory; however, the brachialis is a deep elbow flexor that boosts the appearance of the biceps by pushing it up — kind of like the supportive parent or friend whom you should probably call and thank (after your workout, of course). 

How to Warm-Up Your Back

Once again, it’s a good policy to raise the body’s temperature with some general movement and prime the areas of the body to be trained before jumping into the workout. On top of that, “back day” is a great time to incorporate some direct exercise for the midsection, as many workout splits don’t allocate ab training to one specific day. 

Back Warm-Up

  • Cardio: Five minutes, low-to-moderate intensity effort
  • Abdominal Crunches: 3 x 15-20 
  • Medicine Ball or Landmine Rotations: 3 x 10-12
  • Band Over and Backs: 2 x 10-12
  • Three-Point Dumbbell Row: 3 x 6–10, work-up sets at light to moderate weight (e.g. approximately 40%, 60%, and 80% of the weight to be used for the first set of the workout’s first exercise).

Best Bodybuilding Workout for Shoulders

The deltoids are the muscles that envelop your shoulders. Well-developed deltoids appear full and rounded, “capping” the shoulders. The deltoid has three functional parts — anterior, middle, and posterior.

The anterior deltoid is primarily responsible for raising the arms in front of the body (e.g. pressing), pulling the raised arms in toward your midline, and internally rotating the arms. The middle deltoid raises the arms out the sides (e.g. lateral raises and overhead presses) and assists with pulling the raised arms away from your midline (e.g. reverse flye). The posterior deltoid assists with the reverse flye movement in addition to external rotation and driving your arms behind your body (e.g. rows).

While your shoulders clearly get some work on chest day and back day, a dedicated shoulder workout helps to ensure each part receives adequate training. The diverse actions of the deltoids open the door for efficient use of supersets on shoulder day. 

The 3D Delt Workout

Perform once per week using weights that allow repetitions at or near the lower boundary of the stated repetition range. Once again, the majority of working sets should be high level of effort with three or fewer repetitions remaining before failure. Machine-based overhead pressing is included to allow lifters to safely approach or achieve failure without a spotter.

Once you reach the top of any repetition range, add five to 10 pounds to the exercise. Be vigilant for stagnating progress or drops in performance, as these features might indicate that it’s time for a deload

Seated Dumbbell Overhead Press

  • How to Do it: Sit on a bench with a vertical back support. Rest a dumbbell on each thigh before “kicking” each weight into position at shoulder-level with your palms facing forward or angled slightly in. Press both weights overhead to full lockout before returning to shoulder-level.
  • Sets and Reps: 3 x 6-8
  • Rest time: Move immediately to the next exercise without rest.

Dumbbell Reverse Flye

  • How to Do it: Stand with a dumbbell in each hand at arm’s length by your sides. Hinge forward at the waist and slightly bend your legs. Slightly bend your elbows and maintain the arm angle throughout the set. Draw your upper arms toward the ceiling, stopping the your elbows are roughly in line with your shoulders. Lower under control — don’t allow the weights to build momentum in the bottom position.
  • Sets and Reps: 3 x 12-16
  • Rest time: Rest three minutes before repeating the previous exercise.

Machine Shoulder Press

  • How to Do it: Sit in an shoulder press machine and adjust the seat height to allow you hands to reach shoulder-height in the bottom position. Take a palms-forward grip and drive the weight up to near-lockout before lowering with control. Aim to move at a steady pace and maintain continuous tension through each repetition.
  • Sets and Reps: 3 x 12-16
  • Rest time: Rest two minutes between sets.

Face Pull

  • How to Do it: Set a resistance band or cable pulley at roughly eye-level. Take a palm-down grip and step back to create tension in the stretched position. Begin the face pull by driving your elbows back in line with your shoulders while pulling your hands in line with your eyes or ears. From the contracted position, reach forward until full lockout.
  • Sets and Reps: 3 x 12-16
  • Rest time: Move immediately to the next exercise without rest.

Lateral Raise

  • How to Do it: Stand with a dumbbell in each hand at arm’s length, resting the weights on the front of your thighs. Keep a slight bend in your arms and raise the weights “up and out” until your hands are slightly above shoulder-height. Maintain a tight core and stable torso — don’t allow your hips or back to swing. Lower to the starting position with your hands in front of your thighs.
  • Sets and Reps: 3 x 20-24
  • Rest time: Rest two minutes before repeating the previous exercise.

Dumbbell Shrug

  • How to Do it: Stand with a pair of dumbbells at arm’s length by your sides. Drive your shoulders toward the ceiling as high as possible — move vertically without “rolling” your shoulders or pulling your shoulder blades together. Lower to a full stretch.
  • Sets and Reps: 2 x 20-24
  • Rest time: Rest 90 seconds between sets.

Muscles Trained on Shoulder Day

The shoulder joint is arguably one of the most precarious joints in the body, responsible for a long range of motion in a variety of directions. The deltoids may be your primary “shoulder muscle,” but several muscle groups play a role in completing most shoulder-focused movements.

Shoulders

The middle deltoids widen the appearance of the shoulders, so they are an important target for physique-focused bodybuilding training. Your middle and anterior deltoids are trained by the presses in this workout. Middle deltoids get direct, high-repetition work during the lateral raises.

As previously discussed, it is fair to consider rows, pulldowns, and pullovers as rear deltoid exercises; however, these exercises alone may not result in adequate stimulation of this relatively small part of the shoulder — reverse flyes can be superior in that regard. (9) As a bonus for shoulder health, face pulls hit the rear deltoids, middle deltoids, rotator cuff, and some of the muscles acting on the scapula. 

Trapezius

The traps are a diamond-shaped muscle of your mid- and upper back. The upper and lower fibers of trapezius (e.g. the top and bottom portions of the “diamond”) are trained during presses, as they act to upwardly rotate your shoulder blades. Shrugs are included in the shoulder workout to further develop the upper trapezius. 

Triceps

Your triceps brachii receive additional training volume during the shoulder workout, owing to the muscle’s role as an elbow extensor. These extra sets are beneficial, especially if you’re reasonably well-trained. Recent research suggests the triceps brachii are among the muscles that grow more rapidly with higher training volumes. (10)

How to Warm-Up Your Shoulders

Prepare your shoulders for peak performance by increasing your body temperature with a small dose of rhythmic cardiovascular exercise, such as rowing, jumping rope (ideally with a heavy rope to further activate your upper body), or riding an air bike. Then, perform exercises to mobilize your shoulder joints, shoulder blades, and spine through essential ranges of motion. Wrap up the warm-up with light sets of the first exercise of the workout.

Shoulder Warm-Up

  • Cardio: Five minutes, low-to-moderate intensity effort
  • Band Pull-Apart: 2 x 15 
  • Foam Roller Thoracic (Upper Back) Extensions: 2 x 10
  • Band Over and Backs: 2 x 10-12
  • Seated Dumbbell Overhead Press: 3 x 6–10, work-up sets at light to moderate weight (e.g. approximately 40%, 60%, and 80% of the weight to be used for the first set of the workout’s first exercise).

Best Bodybuilding Workout for Arms

Although your arms undoubtedly receive training during chest, back, and shoulder workouts, a dedicated arm day may help to accelerate muscle gain. But arm day need not be exclusively single-joint (isolation) exercises. In this workout, a pull-up variation is used as the first exercise, because it targets your biceps with the bonus of additional training volume for your lats and rear deltoids. (11)

Single-joint exercises for your biceps and triceps come next in the workout. These are performed back-to-back on the same incline bench to promote a searing stretch and enhanced growth. (12)(13) The workout concludes with training for lesser-appreciated muscles for arm thickness.

Gun Day Isn’t Only Sunday

Complete the arm workout once per week. Use weights that allow you to complete of repetitions on the lower end of the repetition range. When you’re able to complete all sets with repetitions at or exceeding the repetition range, add five pounds.

Neutral-Grip Pull-Up

  • How to Do it: Hang from a neutral-grip pull-up bar or freely moving handles with palms facing each other. Pull your chest toward the bar by driving your shoulders back and flexing your elbows. Lower with control.  
  • Sets and Reps: 2 x 6-8
  • Rest time: Rest three minutes between sets.

Incline Dumbbell Curls

  • How to Do it: Perform incline dumbbell curls on a bench set at an approximately 45-degree angle. With underhanded grips on the dumbbells, allow your arms to hang vertically beneath your shoulders. Without swinging your upper arms forward, curl the dumbbells. 
  • Sets and Reps: 3 x 12-16
  • Rest time: Move immediately to the next exercise without rest.

Incline Skull Crusher

  • How to Do it: Take a palms-down grip on the inner handles of an EZ-bar and lie on a 45-degree incline bench. Point your elbows toward the ceiling and allow the bar to lower just behind your head without moving your upper arms. Feel your triceps stretch and then straighten your arms to return to the start position.
  • Sets and Reps: 3 x 16-20
  • Rest time: Rest two minutes before repeating the previous exercise.

Reverse Biceps Curl

  • How to Do it: Perform the standing reverse biceps curl with an overhand grip on an EZ-bar or straight bar. Keeping your arms at your sides, curl the weight by bringing your knuckles toward your shoulders. Return to the start position. 
  • Sets and Reps: 3 x 12-16
  • Rest time: Move immediately to the next exercise without rest.

Gripper

  • How to Do it: Hold grip trainers, or the handles of a grip machine, using a power grip with the fingers and thumb of each hand wrapped fully around each handle. Close your hands against the resistance, then slowly control the opening of the grip trainers or machine as far as possible without losing control of the implements.
  • Sets and Reps: 3 x 20-24
  • Rest time: Rest 90 second before repeating the previous exercise.

Muscles Trained on Arm Day

Arm training has a misconception of being only for vanity and appearance, but well-developed biceps and triceps can contribute to overall strength as well as shoulder and elbow joint health.

Biceps and Elbow Flexors

Your biceps brachii and brachialis add upper arm size, while the brachioradialis adds dimension to the forearm. All three of these muscles are trained via elbow flexion (bending your arms against resistance), whether in single-joint fashion as in the curl variations, or within compound pulling movements like the neutral-grip pull-up. 

Triceps

The three heads of your triceps brachii can be trained via resisted elbow extension (arm straightening). Since the long head of the triceps crosses behind the shoulder, triceps exercises that place the shoulder in flexion (e.g. overhead movements including incline skull crushers) may expose the triceps to more mechanical tension. Ultimately, this can result in enhanced growth. (12)(13)

Forearms

When you train your grip, forearm muscles that flex the fingers contract forcefully. These muscles tend to bend your wrists as well. To counteract wrist flexion, the muscles on the opposite side of the forearm (i.e. wrist extensors along the top of your forearm) contract. The result is a robust forearm-training stimulus. 

How to Warm-Up Your Arms

Your arm day warm-up can be straightforward: Simply get your body moving. Special attention is given to the wrists, forearms, and elbows. The exercises should be non-fatiguing. 

Arm Warm-Up

  • Cardio: Five minutes, low-to-moderate intensity effort
  • Push-Up: 2 x 8-12
  • Zottman Curl: 2 x 8-12
  • Dumbbell Wrist Flexion (Wrist Curl): 1 x 8-12
  • Dumbbell Wrist Extension (Reverse Wrist Curl): 1 x 8-12
  • Neutral-Grip Pull-Up: 2 x 6–10, work-up sets at light to moderate difficulty (e.g. on an assisted pull-up machine if necessary, using a greater amount of assistance than you’d use for your working sets).

Best Bodybuilding Workout for Legs

Leg day is a longer, often more grueling workout compared to other body parts, and rightfully so. If you’re only going to train lower body once per week, you’d better make it count.

While there is debate regarding whether deadlifts belong with back day or leg day, the hamstring-dominant Romanian deadlift (RDL) is programmed in this leg workout, as this variation reduces the overall load required by reducing leg drive without sacrificing training stimulus to the target muscles. Supersets and compound sets are used extensively during this 24-set workout to save time. 

The Ultimate Leg Day

Complete once per week. Select weights that allow you to complete repetitions on the lower end of the repetition range. Each set should reach a high level of effort. If you are accustomed to high-volume leg training (e.g. 25+ sets), you may consider adding a set or two to front squats, the squat machine exercise, or leg extensions, as the quadriceps have been shown to respond favorably to higher training volume among well-trained lifters. (10) When you’re able to complete all sets at the top end of the repetition range, add 10 to 20 pounds. 

Front Squat

  • How to Do it: Support a barbell across the front of your shoulders with a palms-up or cross-arm grip. Keep your trunk as upright as possible as you squat to a comfortable depth. 
  • Sets and Reps: 3 x 6-8
  • Rest time: Move immediately to the next exercise without rest.

Prone Hamstring Curl

  • How to Do it: Lie on a prone hamstring machine with the roller pad contacting just above your heels. Flex your knees through the longest range of motion you can achieve, then control back to the stretched starting position.
  • Sets and Reps: 3 x 8-12
  • Rest time: Rest three minutes before repeating the previous exercise.

Romanian Deadlift

  • How to Do it: Hold a barbell in front of your thighs. Begin by lowering from the hips, keeping your knees slightly bent throughout the exercise. Aim to feel a strong stretch in your hamstrings before returning to standing upright.
  • Sets and Reps: 3 x 8-12
  • Rest time: Move immediately to the next exercise without rest.

Leg Extension

  • How to Do it: Sit in a leg extension machine with your knee joint aligned with the pivot point of the moving part of the machine. Straighten your knees, pause very briefly at lockout and then lower slowly with control. Keeping your feet pulled up toward your shins (ankle dorsiflexion) may help you feel a stronger quadriceps contraction. 
  • Sets and Reps: 3 x 12-16
  • Rest time: Rest two and a half minutes before repeating the previous exercise.

Machine Squat

  • How to Do it: Pendulum or lever-style squat machines are becoming more popular in gyms; however, if your gym does not have one, a hack squat or leg press machine is an acceptable substitute. Set up under the padded “yoke” of the squat machine, keep your feet flat as you lower into a deep squat. Use a controlled motion at your hips, knees, and ankles. Push back to a nearly locked out position. 
  • Sets and Reps: 3 x 12-16
  • Rest time: Move immediately to the next exercise without rest.

Calf Machine

  • How to Do it: Locate a calf machine that allows a relatively straight knee position during operation (e.g. standing calf machine or leg press). Lower slowly through your entire ankle range of motion. Without bouncing out of the bottom position, push through the ball of your foot and big toe until you’ve reached the top of your available ankle range of motion. Pause briefly in both the fully stretched and fully contracted positions.
  • Sets and Reps: 3 x 16–20
  • Rest time: Rest two and a half minutes before repeating the previous exercise.

Back Extension

  • How to Do it: Hit your lower back, hamstrings, and glutes by setting up in a glute-ham developer (GHD), as shown, or in a 45-degree Roman chair (back extension) with the top of the pad set just below your hip joints. Lower and raise your trunk primarily from the hips; however, it is acceptable to permit some low back movement as well. 
  • Sets and Reps: 3 x 12-16
  • Rest time: Move immediately to the next exercise.

Seated Calf Machine

  • How to Do it: Set the pads atop your thighs with your knees bent approximately 90-degrees. Lower to the bottom position by allowing your ankles to full dorsiflex. Without bouncing out of the bottom position, raise to the top position of full plantar flexion (rising onto the ball of your foot).
  • Sets and Reps: 3 x 20-24
  • Rest time: Rest 90 seconds before repeating the previous exercise.

Muscles Trained on Leg Day

Working entire lower body, leg day involves a significant number of separate body parts working in unison for many movements. Targeted isolation exercises will emphasize your quadriceps, hamstrings, or calves for further muscle-building stimulus.

Quadriceps

The quadriceps femoris, or “quads,” refers to the four muscles on the front of your thigh. All four act to extend your knee, and the centermost quadriceps muscle also contributes to hip flexion. You can train these muscles with squats, squat-type movements, and isolated knee extension exercises. For safety and confidence, machine-based exercises may be helpful, especially toward the end of the workout as fatigue sets in.

Glutes

Few muscle groups enhance the image of athleticism like the glutes. Therefore, the glutes are a common target for physique-based training. Although the glutes have various actions at the hip, all three “glutes” — gluteus maximus, gluteus medius, and gluteus minimus — act to extend your hips.  

Hamstrings

While your quadriceps are prominent when the legs are viewed from the front, well-developed hamstrings steal the show when the legs are viewed from the side. Composed of four muscles, the hamstrings act to flex the knee, and three of them act to extend the hip. Leg curls train the hamstrings as knee flexors, while the Romanian deadlift and back extension are the primary exercises in the workout for training hamstrings as hip extensors.  

Calves

Even if you favor baggy cargo shorts as your go-to warm weather attire, your calves are likely to be the most readily visible lower body muscle group. Although they may receive a modest training stimulus during squats and other squat-like movements, direct calf exercises are typically needed to stimulate meaningful growth.  

How to Warm-Up Your Legs

Prepare your lower body for this leg workout with a warm-up that mobilizes stiff hips and lengthens tight muscles. Use front squat warm-up sets to hone technique and dial-in a strong squat stance. 

Leg Warm-Up

  • Cardio: Five minutes, low-to-moderate intensity effort
  • Walking Lunge: 2 x 10 per leg 
  • Hamstring Sweep: 2 x 10 per leg
  • Deep Squat plus Trunk Rotations: 2 x 10
  • Front Squat: 3 x 6–10, work-up sets at light to moderate weight (e.g. approximately 40%, 60%, and 80% of the weight to be used for the first set of the workout’s first exercise).

On the Road to Ripped

You’ve probably heard of the “Stairway to Heaven” and the “Highway to Hell,” but the roadmap provided here gets you on the Road to Ripped. When all five workouts are performed once per week, total training per major muscle group is consistent with current best practice recommendations for building muscle. (1)(14) Those accustomed to lengthy or convoluted training sessions will find this program to be refreshingly simple. Simple, but not easy.

References

  1. Schoenfeld, B., et al. (2021). Resistance training recommendations to maximize muscle hypertrophy in an athletic population: Position stand of the IUSCA. International Journal of Strength and Conditioning1(1).
  2. Lacio, M., et al. (2021). Effects of resistance training performed with different loads in untrained and trained male adult individuals on maximal strength and muscle hypertrophy: a systematic review. International Journal of Environmental Research and Public Health18(21), 11237.
  3. Schoenfeld, B. J. (2013). Potential mechanisms for a role of metabolic stress in hypertrophic adaptations to resistance training. Sports Medicine43, 179-194.
  4. Helms, E. R., et al. (2016). Application of the repetitions in reserve-based rating of perceived exertion scale for resistance training. Strength and Conditioning Journal38(4), 42-49.
  5. Refalo, M. C., et al. (2022). Influence of resistance training proximity-to-failure on skeletal muscle hypertrophy: A systematic review with meta-analysis. Sports Medicine, 1-17.
  6. Lehman, G. J., et al. (2004). Variations in muscle activation levels during traditional latissimus dorsi weight training exercises: An experimental study. Dynamic Medicine3, 1-5.
  7. Wakahara, T., et al. (2012). Association between regional differences in muscle activation in one session of resistance exercise and in muscle hypertrophy after resistance training. European Journal of Applied Physiology112, 1569-1576.
  8. Grgic, J., et al. (2022). Effects of resistance training performed to repetition failure or non-failure on muscular strength and hypertrophy: a systematic review and meta-analysis. Journal of Sport and Health Science11(2), 202-211.
  9. Franke, A. R., et al. (2015). Analysis of anterior, middle and posterior deltoid activation during single and multijoint exercises. J Sports Med Phys Fitness55, 714-721.
  10. Brigatto, F. A., et al. (2022). High resistance-training volume enhances muscle thickness in resistance-trained men. Journal of Strength and Conditioning Research36(1), 22-30.
  11. Youdas, J. W., et al. (2010). Surface electromyographic activation patterns and elbow joint motion during a pull-up, chin-up, or perfect-pullup™ rotational exercise. The Journal of Strength & Conditioning Research24(12), 3404-3414.
  12. Wackerhage, H., et al. (2019). Stimuli and sensors that initiate skeletal muscle hypertrophy following resistance exercise. Journal of Applied Physiology, 126(1):30-43.
  13. Maeo, S., et al. (2022). Triceps brachii hypertrophy is substantially greater after elbow extension training performed in the overhead versus neutral arm position. European Journal of Sport Science, 1-11.
  14. Schoenfeld, B. J., et al. (2019). Calculating set-volume for the limb muscles with the performance of multi-joint exercises: implications for resistance training prescription. Sports7(7), 177.

Featured Image: Prostock-studio / Shutterstock

Source

February 23, 2023

How to Do the Front Foot Elevated Split Squat for Size, Strength, and Athleticism

Filed under: Fitness,Training — Tags: , , , , — admin @ 7:48 pm

When it comes to building muscle one leg at a time, the Bulgarian split squat, also known as the rear foot elevated split squat, usually gets all the praise and attention. But the real ones know how underrated the front foot elevated split squat truly is.

person outdoors performing leg exercise on street

Credit: Zoran Pucarevic / Shutterstock

The unfairly overlooked front foot elevated split squat is gaining quite the popularity surge, especially from its use in rehab and athletic settings. This upgraded split squat variation is typically a little more comfortable to set up than the rear foot elevated option and it can skyrocket your lower body muscle, strength, and athleticism. Here’s a closer look at this unique exercise.

Front Foot Elevated Split Squat

The front foot elevated split squat, or FFESS, requires a high-level of stability across a long range of motion, which can make the exercise difficult to master. Follow these technique cues to tackle this single-leg exercise.

Step 1 — Set Up Your Platform

Person in gym standing on aerobic step

Credit: Balance in Motion / YouTube

You will notice a massive benefit from even the slightest elevation. Any platform that is at least two to four inches high will be sufficient. A small aerobic step or one or two weight plates work nicely. Use bumper plates, if possible, to prevent sliding. If your gym has an Olympic lifting platform with a raised edge, that can work too.

Form Tip: A staircase might seem like a convenient option, but it’s likely too high to start with and can make the movement too awkward. It will end up feeling more like an indecisive hybrid between a split squat and a step-up while delivering the results of neither.

Step 2 — Elevate Your Front Foot

person in gym elevating one foot on weight plate

Credit: Iron Monk / YouTube

Having a strong and stable front foot is, obviously, key to the front foot elevated split squat. Stand upright and set one foot flat on the platform. Keep your entire foot in contact throughout each repetition. Don’t raise up onto your toes or heel.

Form Tip: Supportive shoes can play a surprisingly significant role in your mobility, stability, and force production. (1) Old school Chuck Taylor sneakers, dedicated weightlifting shoes, or any stable-soled shoe is preferable. Super-floppy, extremely cushioned running shoes are not ideal because stability will be compromised as your foot compresses into the cushioning.

Step 3 — Set Your Back Foot

muscular person in gym doing foot-elevated lunge exercise

Credit: PriorityStrength / YouTube

Your back foot should be as secure and stable as your front foot. Keep your front foot in place and step back a comfortable distance for you, depending on your leg length and general mobility.

Depending on your ankle mobility, your back foot will likely be on the ball rather than flat on the ground. This is acceptable because this foot is primarily for support and balance, and will not be producing much force into the floor.

Form Tip: For maximum balance and stability, make sure your back foot is in its own “lane,” not directly in line with your front foot. You shouldn’t feel like you’re perched on a thin balance beam. You should feel stable and grounded.

Step 4 — Lower Yourself With Control

muscular person in gym doing foot-elevated lunge exercise

Credit: PriorityStrength / YouTube

Take a deep breath and feel both feet securely in place before descending into the rep. Feel your lower body and your core being still before descending. Keep your upper body upright with your shoulders pulled back.

Bend your front leg and lower yourself with control. Descend as low as possible, ideally reaching your back knee to the ground.

Form Tip: Depending on your mobility, your back knee should gently graze the ground — with an emphasis on gently. Some lifters fail to pay attention during the descent and quickly smash their back knee into the ground. Don’t do that.

Step 5 — Drive Up to the Starting Position

muscular person in gym doing foot-elevated lunge exercise

Credit: PriorityStrength / YouTube

When you’ve reached the deepest position your hip and leg mobility allows, push through your front leg to drive up to a standing position

Keep your upper body close to vertical as you drive up. Don’t allow yourself to bend forward at the waist. Repeat all repetitions with one leg before switching sides.

Form Tip: It can be tempting to bounce out of the bottom by leveraging the stretch reflex — a muscle’s ability to “rebound” during the transition from a stretched position to a full contraction for increased momentum and power. (2) Avoid it to allow your glutes and quads to do all the work. This will build more muscle by increasing the time under tension, while keeping you safer by reducing ballistic forces.

This exercise can feel tricky, especially when you’re awkwardly setting up for the first time. Here are some common mistakes to avoid.

Not Being Mobile Enough

While this exercise can be great for building mobility, if your hip and ankle mobility resemble the Tin Man, you will struggle to go deep enough to reap the muscle- and strength-building benefits. (3)

person in gym doing front foot elevated squat

Credit: GrowFormance / YouTube

If you’re unable to descend near full-depth, the exercise won’t be any different for building size or strength than a standard split squat, but it can still be beneficial as a mobility drill if you focus on improving your depth instead of adding reps or weight.

Avoid it: To perform the exercise efficiently, do a dynamic warm-up prior to your leg workout to ensure your hips and ankles are thoroughly mobilized and prepared for training. Over time, this should help to get into the deeper positions of knee flexion and hip flexion needed to reach the bottom position.

Not Going Low Enough

The purpose of the platform elevation is to increase the range of motion. It lets you get into degrees of knee and hip flexion that you couldn’t access with other exercises.

Person in gym doing single-leg lunge with kettlebell

Credit: Kevin Maxen / YouTube

However, it’s common to see people do the first few reps with a perfect deep reps but, when the pump sets in, they start to compromise the range of motion. Soon enough, the “front foot elevated split squats” appear to be using less range than traditional split squats with both feet on the ground.

Avoid it: Choose an elevation level that works for you and keep every rep consistent. Try to lightly touch your back knee to the ground each rep, or at least get close. Using a folded towel or padded mat under your back knee can serve as a reliable target as long as it allows your back knee to reach lower than your front foot.

Being Too Wobbly

The elevated front foot-position will make balance more challenging. The more wobbly you are, the less muscle-building force you can generate. Not to mention, you’ll feel self-conscious if you topple over while holding a pair of light dumbbells.

If you’re focused on maintaining balance more than you’re focused on actually training your legs, the overall stimulus will be reduced and you’ll waste energy.

long-haired person in gym doing single-leg squat

Credit: kristifitnick / YouTube

Avoid it: Take your time to secure your foot position before doing a couple of warm-up sets. Even if your working weight will be relatively light, a warm-up set or two with only your body weight can be a game changer in preparing your nervous system and core musculature to stabilize the load effectively. 

Consider including the FFESS in your program because it’s simple to progress. It also never runs out of progression because, if you do manage to run out of weights, your legs will be beyond elite status at that point.

Begin with Bodyweight

The bodyweight-only FFESS can be quite humbling. Even for some advanced lifters, the exercise can be challenging especially when done toward the latter part of a workout. Performing the exercise as a “finisher” when your legs are pre-fatigued from heavy training can be an eye-opening, leg-burning experience.

The bodyweight FFESS is also an excellent go-to exercise when you have limited equipment, like when you’re training at home or on the road.

Loading with Dumbbells

Once you master bodyweight FFESS, consider adding load via dumbbells. This is the easiest and most common setup for loading — simply hold a pair of dumbbells at your sides.

Using a narrow platform helps prevent the dumbbells from clashing with the platform, especially if you have longer arms and reach maximum depth. Controlling the weight and not allowing the dumbbells to hit the platform works fine, as well.

As the weights get heavier, and as you’re able to do more reps per set, your grip will likely fatigue quite a bit over the course of multiple sets. Once you feel it kick in, you should use lifting straps or some sort of assistance to eliminate your grip as a weak link.

Barbell Front Foot Elevated Split Squat

Barbells allow for the most loading, but they are also the most time consuming to set up along with adding more instability. However, this is a necessary compromise once you get strong.

Make sure you have a strong, stable platform to support the added weight. Set up in a rack with safety pins, similar to performing squats. Progress like most barbell exercises, adding a little more weight and a few more reps from week to week.

This exercise has some unique ways of delivering its benefits. Here’s why you should incorporate the FFESS as soon as possible.

Hypertrophy and Strength

The front foot elevated split squat will produce single-leg strength and hypertrophy thanks to a long range of motion and unique positioning compared to other exercise options. The front foot elevation allows you to push your center of mass forward, bringing your hamstring against your calf without compromising torso position.

This stretches the muscles of the quads and glutes under load and increases mechanical tension compared to bilateral squat variations. The unilateral (single-leg) nature helps with addressing potential imbalances and also maximizes range of motion, which increases hypertrophy. (3)

The strength you gain from this exercise translates efficiently to many other exercises. You’ll notice your single-leg and bilateral (two-leg) lower body exercises getting stronger after focusing on the FFESS as an accessory movement. 

Pain-Free Training

One of the main benefits people explore this exercise in the first place is to find pain-free alternatives to barbell squatting. If your joints are achy, this exercise can be a perfect option.

gray-haired person outdoors doing leg exercise

Credit: Anatoliy Karlyuk / Shutterstock

It allows you to lighten the load while achieving ranges of motions you likely didn’t have access to. Over time, you achieve pain-free muscle building. In addition, the FFESS reinforces new degrees of hip, knee, and ankle mobility. 

The FFESS prioritizes your lower body muscles — perfect for your favorite leg day. Some core stability and upper body stability is trained as well, especially when using added load.

Quadriceps 

The front foot elevated split squat primarily trains your quads. The front thigh muscle gets worked through a long range of motion as you get into deep angles of knee flexion (bending). With your front foot elevated, you have the opportunity to drive your knee forward for a deep weighted stretch in the quads. 

Glutes

Similar to many squat variations, your glutes are also going to get a significant stimulus during the FFESS, especially in the bottom stretched position.

person holding kettlebells during lunge exercise

Credit: Sergii Gnatiuk / Shutterstock

You’ll likely feel more glute soreness, especially if you’re used to a relatively shortener range of motion from traditional squats and split squats.

Adductors

The FFESS will also nail your inner thighs (adductors), particularly in your front leg. This muscle gets a high degree of stabilizing action during the exercise, along with some dynamic contraction to extend your hips at the top of the movement.

Generally speaking, it’s best to do unilateral exercises after heavier bilateral exercises to avoid fatiguing important stabilizers. You can program the FFESS after your heavy sets of squats, possibly as the second or third exercise of a lower body day.

However, the stimulus from the FFESS is effective and comprehensive for the quads, glutes, and adductors, so it’s can also be valid to program them as your first exercise. This is ideal, for example, for lifters with achy knees who don’t do well with heavy bilateral movements early in the workout. Prioritizing the front foot elevated split squat allows your hips, knees, and ankles to be more thoroughly warmed up before proceeding to relatively heavier lifting.

Moderate to Light Weight, High Reps

This exercise is best suited for moderate to light weight. This allows for less joint strain and connective tissue stress, and allows you to better control the weight which can give you a better mind-muscle connection.

front foot elevated split squat stance

Credit: BarBend / YouTube

Most people will prefer to do these with relatively light weight and higher reps to create a strong pump and an even stronger mind-muscle connection. With this approach, some lifters may even be able skip any warm-up sets, depending on how they feel and how their body responds. Pick a load you can do for at least 12 reps, and crank out two or three sets of 10 to 20 per leg.

Heavy Weight, Low Reps

If you do FFESS early in the workout, you can go heavier. Your nervous system will be fresh and you can stabilize heavier loads. Three or four sets of five to 10 reps (per leg) is already pretty heavy for this exercise. You will still need one or two warm-up sets, especially if you’re strong and plan on approaching your limits.

Using extremely heavy weights for very low reps is not advisable because the stability required for them may not be worth it. It’s not the type of exercise to test your one-rep max because the risk:reward just isn’t worth it.

There’s a couple of effective variations of the front foot elevated split squat for those that are more adventurous or want to progress beyond the standard movement.

Heel-Elevated Split Squat 

Instead of just elevating your front foot, add an additional plate or ramp to elevate your heel even higher. This puts your foot into a steep angle, creating even more knee flexion and makes an already quad-dominant split squat even more quad-dominant.

This is great for those in need of serious quad growth or for athletes who want to get used to deeper ranges of knee flexion, including combat sports athletes, strength sports athletes, football players, or sprinters.

Double-Elevated Split Squat

If you want to maximize your mobility and range of motion, you can elevate both the front and back foot. Essentially, you are combining the FFESS with a Bulgarian split squat. More range of motion for both the front leg and the back leg can help to skyrocket your quad and glute gains.

Setting this up can be cumbersome and requires some extra space, but once you’ve determined a good set up and know an effective distance to set each platform, it should be pretty smooth each time you’re in the gym.

Frequently Asked Questions

What makes the front foot elevated split squat different than the rear foot elevated split squat (Bulgarian split squat)?

Depending on your structure and mobility level, the two exercises might not be all that different. However, most people will feel their quads more during the FFESS. You can think of the front foot elevated split squat as a more “quad-dominant version” of Bulgarian split squats.
FFESS are also easier to setup and generally feel more comfortable to perform. Elevating your back foot with Bulgarian split squats usually requires more hip and ankle mobility and can be a bigger challenge to maintain balance.

Why don’t I see more people in the gym doing the front foot elevated split squat?

Bulgarian split squats are simply more popular in recent years. They’ve garnered a reputation for being painful — the “good kind” of pain from post-workout soreness — and more “hardcore.” They are a great exercise, but the front foot elevated split squat is starting to catch up in popularity thanks to the rehab world.
Many physiotherapists assign the FFESS as a way to train deep ranges of motion with reduced knee pain. Many people learn the movement and end up realizing, “Oh, snap, these are great even if I’m not trying to rehab my knee thanks to the gnarly quad pump.”

Single-leg training is often overlooked in many training routines. Performing exercises with an increased range of motion, even moreso. The FFESS is a straightforward solution to both of these deficiencies. This comprehensive exercise will payoff with more size, more strength, better mobility, and improved all-around performance. You just need to step up to the challenge.

References

  1. Legg, H. S., Glaister, M., Cleather, D. J., & Goodwin, J. E. (2017). The effect of weightlifting shoes on the kinetics and kinematics of the back squat. Journal of sports sciences, 35(5), 508–515. https://doi.org/10.1080/02640414.2016.1175652
  2. Seiberl, W., Hahn, D., Power, G. A., Fletcher, J. R., & Siebert, T. (2021). Editorial: The Stretch-Shortening Cycle of Active Muscle and Muscle-Tendon Complex: What, Why and How It Increases Muscle Performance?. Frontiers in physiology, 12, 693141. https://doi.org/10.3389/fphys.2021.693141
  3. Schoenfeld, B. J., & Grgic, J. (2020). Effects of range of motion on muscle development during resistance training interventions: A systematic review. SAGE open medicine, 8, 2050312120901559. https://doi.org/10.1177/2050312120901559

Featured Image: Balance in Motion / YouTube

Source

January 9, 2023

Try These 11 Front Squat Alternatives for Powerful Legs and a Stronger Core

Filed under: Fitness,Training — Tags: , , , , , , , — admin @ 12:20 am

The front squat is a staple movement for Olympic weightlifters, CrossFit athletes, and countless other strength-focused lifters. However, some find the unique bar position to be a limiting factor because it requires ample shoulder and wrist mobility.

group of lifters performing barbell squats
Credit: Ground Picture / Shutterstock

Other lifters shy away from the front squat because they can move relatively more weight with other squat variations. Regardless of the reason, while the front squat has plenty of benefits to offer, there are some equally effective alternatives to consider which let you work around any restrictions and find comparable results.

Bruce Lee once talked about “the art of fighting without fighting,” so consider these exercises “how to front squat without front squatting.”

Best Front Squat Alternatives

Front Squat with Straps

One of the biggest limiting factors for many lifters, when it comes to performing the front squat, is holding the bar in the “rack position” — held across the fronts of your shoulders with your arms flexed and your fingertips under the bar.

This position requires flexibility and mobility throughout your wrists, elbows, and shoulders. While those attributes can be improved over time with dedicated work, you can reduce the mobility requirements without compromising results by attaching a pair of lifting straps to the bar. These serve as makeshift handles to offer a slightly adjusted hand and arm position.

When to Use It

The front squat with straps can be used identically to the classic front squat, or any time you need to support the bar in the rack position (across the front of your shoulders). The strapped movement can be programmed with the same sets and reps, and often with the same weights. This exercise is particularly useful for any lifters with pre-existing upper-body joint issues which may restrict their mobility.

How to Do It

Set a barbell in a rack at roughly upper chest-level. Secure a pair of lifting straps to the bar just outside shoulder-width. Grab one strap in each hand with your palms facing each other.

Step to the bar, bending your arms as you unrack the weight with your thumbs near the front of your shoulders. Keep tension on the straps without lifting the bar off your shoulders. Take a small step back and squat, keeping your elbows aimed forward and your torso upright.

Front Squat to Box

While the front squat with straps addresses upper body mobility restrictions, the front squat to box can be used to address lower body mobility restrictions. By using a box to limit your range of motion, you change the muscle recruitment and alter the stress on muscles and joints. (1)

When to Use It

Program the front squat to box if you have hip or ankle mobility issues which prevent you from achieving a deep front squat position. A box can also be used by beginners as a target to ingrain consistent squat depths and technique.

How to Do It

Set up a stable box or series of aerobic steps at a comfortable height, generally above knee-level, a few feet behind a barbell set in a rack. Setup for a standard front squat and carefully step back to position yourself above the box.

Descend under control, lowering your glutes to the box. Don’t rest your full weight on the box — pretend it’s a deck of cards that you don’t want to knock down. Pause very briefly without losing tension. Explode upwards to a powerful lockout.

Safety Bar Squat

If your gym has a safety bar, easily spotted with its thick pads and jutting handles, it can be a key player in building your lower body without straining your joints. (2) The safety bar squat allows a more upright torso and increased upper back engagement, which can reduce lower back stress. The forward-facing handles allow a more natural arm position which reduces stress on your shoulder and elbow joints.

When to Use It

The safety bar squat is an ideal alternative if you cannot maintain the elevated arm position required for front squats. This exercise is also an efficient way to increase upper back training because the thick pads offset the center of gravity and increase trapezius and upper back activation.

How to Do It

Set a safety bar in a rack at roughly shoulder-height. Duck under the bar and position the padded cradle around your trapezius, upper back, and shoulders. Grab the handles and pull your elbows toward your ribs.

Brace your core and pinch your shoulder blades together before unracking the weight. Step back and squat down. Don’t allow the weight to tip your upper body forward. Squeeze the handles and keep you elbows near your ribs as you drive upward to lockout.

Zercher Squat

The unconventional bar position of the Zercher squat, named after American weightlifter Ed Zercher, almost looks like a very poorly attempted front squat. By cradling the barbell in the crook of your arms, you can hold it very close to your body, which  improves your leverage and power output. While the Zercher squat requires little-to-no shoulder or elbow mobility, the strain of the bar on your forearms and elbows can be uncomfortable for some lifters.

When to Use It

Perform the Zercher squat in place of the front squat if you have significant upper body mobility restrictions. The Zercher squat can also be used toward the end of a workout, after first fatiguing your legs with other movements. This will let you get an efficient training stimulus with relatively lighter (and likely more comfortable) weights.

How to Do It

Set the bar in a rack near your belly button or lower chest-level. Step up to the bar and place your elbows on it, curling your arms around the barbell, with your palms up. Brace your core and stand up before taking a step back.

Squat down until either the bar or your elbows gently touch your thighs. Pause briefly before standing upright. Keep your elbows tight to your body and don’t allow the weight to pull you forward.

High-Bar Back Squat

Strangely, sometimes the best front squat alternative is a back squat variation. The high-bar back squat is a useful choice for competitive powerlifters, who must perform the back squat at meets. This exercise allows increased quadriceps recruitment and relatively less lower back strain while maintaining a sport-specific movement.(3)

When to Use It

The high-bar back squat can be used at any point in a training program to emphasize the quadriceps muscles, which can benefit leg size as well as carry over to improved squat and deadlift strength.

How to Do It

Place a bar at upper chest-level in a rack. Position the bar across your trapezius and upper back. Unrack the back and take a roughly shoulder-width stance. Brace your core, pull your shoulder blades together, and squat as low as possible.

Keep your upper body mostly vertical as you descend. Aim to reach a depth with your hips nearly in line with your knees (thighs roughly parallel to the ground) before returning upright.

Trap Bar Squat

A trap bar can be a versatile piece of equipment, but is commonly used to perform the trap bar deadlift. The neutral hand position (palms facing your body) keeps the weight in line with your body’s center, which helps to reduce joint strain in your back and shoulders. Shifting your body position to keep a more upright torso when performing a trap bar squat will further emphasize the front of your thighs (quadriceps).

When to Use It

Use the trap bar for any type of squat or deadlift variation to decrease joint strain without reducing muscular stress. The trap bar squat can be particularly beneficial for sneaking extra upper body recruitment into your leg training, because your grip, arms, shoulders, and back help support the load during the exercise.

How to Do It

If your trap bar has two sets of handles, one “high” and one “low,” begin using the high handles and save the low handles for a more challenging progression. Stand in the center of the bar with your feet roughly shoulder-width. Squat down to grab the handles.

Be sure to bend at your knees and dip your hips down, to put your legs in an optimal pulling position. Puff your chest up and pull your shoulders back. Think about keeping your head over your tailbone as you drive upward to lockout.

Front Rack Lunge

To reap the core stability and upper back strengthening benefits of a front squat, with increased focus on each individual leg, performing a front rack lunge can be an extremely useful movement. You can build upper and lower body strength with less total load, because the movement is primarily performed unilaterally (with one leg at a time).

When to Use It

Unilateral movements like the lunge help to address strength and developmental discrepancies that can occur from exclusively bilateral (two-leg) exercises. Lunges can also build more complete athleticism and power than over-focusing on two-legged squat movements.(4)

How to Do It

Set up a barbell in a rack at shoulder-height. Grab the bar in the rack position and take a two or three steps backward. Stabilize the weight and brace your core.

Take one longer than normal step forward and plant your foot flat. Squat down until your rear knee lightly touches the floor. Keep your shoulders back and your upper body close to vertical. Drive up through your front foot with maximum force and return both feet together in a standing position. Perform all reps with one foot before switching legs. Re-rack the bar after performing the exercise with each leg.

Goblet Squat

While the front squat supports the bar across your shoulders, the goblet squat is as close as you can get to an identical movement using a single dumbbell. By supporting the weight in front of your chest, you train the same type of front-loaded squat movement which builds core strength and overall mobility.

However, the goblet squat doesn’t require a large degree of shoulder mobility because your upper arms remain pointed mostly downward instead of forward.

When to Use It

The goblet squat is a much more convenient and practical exercise for many lifters, requiring only a single dumbbell instead of a barbell and power rack. It can be performed as part of a general warm-up prior to heavy front squats or it can be trained heavily on its own to deliver a shoulder-sparing squat workout.

How to Do It

Place a dumbbell vertically on its end atop a flat bench. Squat down and place your palms on the bottom side of the top weight plate, getting your chest as close to the dumbbell as possible. Brace your core and pull your shoulder blades back.

Stand upright, supporting the weight with bent arms. The dumbbell should be near your collarbones or neck. Squat as deep as possible while keeping your torso vertical. Don’t allow the weight to pull your arms down or forward during the movement.

Dumbbell Front Squat

The dumbbell front squat could be seen as the next-step progression from the goblet squat. Instead of holding a single dumbbell as your chest, you’re supporting a weight in each hand. This more closely mimics a barbell from squat.

In fact, it puts you in nearly an identical hand and arm position as the front squat with straps, because your hands are in a neutral position (palms facing each other). This reduces the mobility requirements needed to perform the exercise,

When to Use It

Choose the dumbbell front squat if you’re training with limited equipment (such in a hotel gym or limited home gym) because you don’t need a barbell and rack. The dumbbell front squat is also an effective choice for lifters training around wrist or shoulder issues, since the joints are less stressed during the movement.

How to Do It

Stand with a dumbbell in each hand, resting at your sides. Bring the dumbbells up to the front of each shoulder in a hammer curl-type motion. Using some body English to control the swing of the weights is acceptable as long as it’s done with leg drive (as a quick jump), not bending at the waist or heaving with your lower back.

Hold the weights in the shoulder-supported position throughout the exercise. In a wider than shoulder-width stance, squat as deeply as possible. Aim your elbows forward and lean back to keep your upper body vertical. Don’t allow the weights to fall forward or sideways off your shoulders. 

Single-Arm Kettlebell Front Squat

A classic kettlebell exercise, the single-arm kettlebell front squat emphasizes core strength just as much as (possibly more than) leg strength. The “imbalanced,” single-sided load forces your abs and lower back to fire constantly to resist the sideways pull. This builds serious core stability which can play a key role in reducing the risk of lower back injuries. (5)

When to Use It

Because your core strength will likely be the limiting factor for most lifters, it may be more beneficial to treat the single-arm kettlebell front squat primarily as a core-building exercise that delivers leg size and strength as an added benefit, rather than primarily as “a leg exercise.” Improved core strength and stability can carry over to stronger lifts.

How to Do It

Bring a kettlebell to shoulder-height, either by performing a kettlebell clean or using your free hand to get the weight into position. Your thumb should be nearly resting on the front of your shoulder with the ball of the kettlebell resting on your forearm.

Stand upright, without leaning sideways into the weight or excessively counterbalancing to the opposite side. Take a relatively wide stance, beyond shoulder-width, and descend into a deep squat. Hold the kettlebell close to your body and don’t allow it to shift your torso. Perform all reps on one side before switching hands.

Front Squat Hold

This front squat alternative doesn’t actually involve any squatting at all. By reinforcing the locked out position, you create significant tension in your core stabilizers, as well as actively stretching the muscles directly involved in holding the rack position. This cumulative effect can lead to a stronger and more stable front squat.

Because static holds put you in the strongest mechanical position, you can also “overload” your system with heavier than normal weights, which can stimulate strength gains.

When to Use It

The front squat hold should be the first exercise performed on a lifting day, after a general warm-up. Not only will it help to recruit more muscle units in the training to follow, but performing the hold with any muscle fatigue can drastically increase the risk and decrease the benefits.

How to Do It

Set up for a standard front squat, with the bar in a rack near shoulder-level. Unrack the bar and take one or two small steps back. Instead of commencing a squat, hold the top position with maximum focus.

Concentrate on fully engaging your core and upper back. Flex your glutes and legs to further reinforce the lockout position. This exercise is typically performed “for time” (often three to five seconds, up to 10 seconds) rather than for multiple repetitions.

Benefits of Front Squat Alternatives

While the front squat is an essential movement for certain strength athletes like Olympic weightlifters and CrossFit athletes, front squat alternatives can be used by many lifters to deliver key benefits when the primary movement is no longer an option.

Reduced Mobility Requirements

Some lifters have crossed the front squat off their list of potential exercises because they cannot get their arms into the rack position needed to support the weight or because their hips or knees don’t allow the type of deep front squat commonly associated with the exercise.

black and white photo of person performing front squat
Credit: xamyak / Shutterstock

Several front squat alternatives allow lifters of any mobility level to benefit from the squat squat movement by reducing the mobility and flexibility requirements. These alternatives can also address and improve restrictions over time, which can progress to a full front squat.

Decreased Lower Back Strain

One key benefit of the front squat is its reduced lower back strain compared to the back squat. Each front squat alternative preserves that back-sparing advantage, making each movement a potential exercise choice for lifters prone to lower back issues.

Quadriceps Size and Strength

Front squat alternatives continue to emphasize the quadriceps, on the front of the thighs, relatively more than the glutes or hamstrings. (6) This is a key reason why many physique-focused lifters prioritize the front squat over the back squat. These alternatives are equally effective in emphasizing the quads, while back squats and deadlift variations are more commonly used to focus on the hamstrings and glutes.

Get Back to Front Squatting

The front squat can be beneficial for strength athletes, physique-conscious lifters, and any gym-goer looking to build lower body strength and muscle, a stable core, and a stronger lower back. If you’re not yet ready to tackle the Olympic-level movement, choose the variation that best suits your individual needs and start racking up the results.

References

  1. Kubo, K., Ikebukuro, T., & Yata, H. (2019). Effects of squat training with different depths on lower limb muscle volumes. European journal of applied physiology, 119(9), 1933–1942. https://doi.org/10.1007/s00421-019-04181-y
  2. Hecker, Kara & Carlson, Lara & Lawrence, Michael. (2018). Effects of the Safety Squat Bar on Trunk and Lower-Body Mechanics During a Back Squat. Journal of Strength and Conditioning Research. 33 Suppl 1. 1. 10.1519/JSC.0000000000002912. 
  3. Glassbrook, D. J., Brown, S. R., Helms, E. R., Duncan, S., & Storey, A. G. (2019). The High-Bar and Low-Bar Back-Squats: A Biomechanical Analysis. Journal of strength and conditioning research, 33 Suppl 1, S1–S18. https://doi.org/10.1519/JSC.0000000000001836
  4. Speirs, Derrick E.1,2; Bennett, Mark A.3; Finn, Charlotte V.4; Turner, Anthony P.2. Unilateral vs. Bilateral Squat Training for Strength, Sprints, and Agility in Academy Rugby Players. Journal of Strength and Conditioning Research 30(2):p 386-392, February 2016. | DOI: 10.1519/JSC.0000000000001096
  5. Huxel Bliven, K. C., & Anderson, B. E. (2013). Core stability training for injury prevention. Sports health, 5(6), 514–522. https://doi.org/10.1177/1941738113481200
  6. Coratella, G., Tornatore, G., Caccavale, F., Longo, S., Esposito, F., & Cè, E. (2021). The Activation of Gluteal, Thigh, and Lower Back Muscles in Different Squat Variations Performed by Competitive Bodybuilders: Implications for Resistance Training. International journal of environmental research and public health, 18(2), 772. https://doi.org/10.3390/ijerph18020772

Featured Image: Berkomaster / Shutterstock

Source

November 1, 2022

The 12 Best Hamstring Exercises for Muscle Mass, Strength, and More

“Don’t skip leg day” has almost become a meme in the gym, warning dedicated lifters to give lower body training as much emphasis, intensity, and attention as their upper body.

That’s all well and good, but even when it comes to “leg day,” many lifters still end up skipping a relatively large portion of their lower body. Not even addressing the flamingo-legged elephant in the room that is calf training. The more urgent body part that deserves your attention is the hamstrings.

Credit: Microgen / Shutterstock

Whether it’s for athletic performance, total-body power, or a complete and well-developed set of legs, here are some must-do movements to target the backs of your thighs.

Best Hamstring Exercises

Romanian Deadlift

While the conventional deadlift is known for building serious power and size in the entire posterior chain (lower back, glutes, and hamstrings), the Romanian deadlift zones in even further on that growth stimulus by adjusting the range of motion and body positioning.

By keeping your legs very slightly bent, put your hamstrings into a longer stretched position while also forcing them to contract harder during hip extension, which both contribute to greater growth.(1)

How to Do the Romanian Deadlift

Stand holding a barbell with a slightly wider than shoulder-width, overhand grip. Pull your shoulder blades back and raise your chest. Slightly bend your knees and push your glutes toward the wall behind you.

Focus on feeling your hamstrings stretch as you “reach” your tailbone to the wall. When the bar reaches as low as possible without rounding your back, drive your heels “through” the ground and push your hips forward to return upright.

Benefits of the Romanian Deadlift

  • As a barbell movement, the Romanian deadlift allows the use of potentially heavy weights, which contributes to strength gains.
  • This movement puts the target muscle through a long range of motion with a deep stretch, which benefits muscle growth.

Split-Stance Dumbbell Romanian Deadlift

Single-leg training can be highly beneficial for strength, power, and muscle growth.(2) However, many lifters struggle with balance to the detriment of any single-leg exercise. Taking a staggered or split-stance drastically reduces the balance demands while maintaining the single-leg emphasis.

The split-stance dumbbell Romanian deadlift allows you to focus on working the hamstrings of your lead leg, while your rear leg provides just enough stability to stay steady. Using dumbbells instead of a barbell allows a longer range of motion while reducing lower back strain.

How to Do the Split-Stance Dumbbell Romanian Deadlift

Stand with a dumbbell in each hand by your sides. Take a shoulder-width stance with the toes of one foot in line with the heel of the lead foot. Keep your back straight while pushing your hips and glutes behind you. Allow your hands to face each other as the weights lower toward your front foot. Pull with your front leg, not the rear foot, to stand upright. Perform all reps on one leg before switching sides.

Benefits of the Split-Stance Dumbbell Romanian Deadlift

  • This movement pairs the benefits of single-leg training with the stability of a bilateral (two-legged) exercise.
  • The split-stance dumbbell Romanian deadlift allows a significant muscle-building stimulus from relatively light weights, due to the stance and leverage.

Single-Leg Single-Arm Romanian Deadlift

The single-leg, single-arm Romanian deadlift might look, or even sound, more like a circus trick than a serious training exercise. But it’s a top-level choice for muscle-building tension and high-performance athleticism.

By requiring one leg to provide stability and the opposite arm to carry the weight, you’re creating a total-body movement that hits your legs, core, and back like nothing else.

How to Do the Single-Leg Single-Arm Romanian Deadlift

Stand with a dumbbell in your left hand, by your side with your palm facing your body. Slightly bend your right knee, lean forward at your hips, and let your left leg raise into the air as the weight moves toward the ground. Avoid twisting your shoulders or rounding your spine. Move slowly to control the weight and maintain balance. When you’re reached as far as your mobility allows, slowly return to the starting position. Perform all reps on one side before switching hands and legs.

Benefits of the Single-Leg Single-Arm Romanian Deadlift

  • This comprehensive exercise works the “posterior oblique sling” — a series of muscles which play a key role in posture, especially when walking and moving.
  • The single-leg, single arm Romanian deadlift strongly works the oblique muscles of the abs and core.
  • Stabilizer muscles in the ankles, knees, hips, and shoulders are recruited, making the exercise an efficient way to improve joint health.(3)

Standing Leg Curl

The standing leg curl machine can be found in several different but similar varieties. Some allow your non-working foot to be planted firmly on the ground in a fully standing position while other machines, sometimes called “kneeling leg curls” have a specialized pad to support your non-working leg in a bent position. The overall result and performance is the same with either.

Standing leg curls allow you to emphasize knee flexion (bending your leg), a key function of the hamstring muscle. An added benefit of the standing machine is performing the work unilaterally, targeting each leg on its own.

How to Do the Standing Leg Curl

Setup in the machine with the curl pad placed just above the ankle of the working leg. Secure your torso in position using any available handles. Brace your core and squeeze the heel of your leg toward your glutes. Achieve a complete range of motion. Lower the weight under control until your leg is fully straightened. Perform all reps on one side before switching legs.

Benefits of the Standing Leg Curl

  • The standing leg curl applies constant tension to the target muscle, unlike free weight movements which apply varying levels of resistance due to gravity.
  • Unilateral (single-leg) training can help to address and correct muscular imbalances between sides.
  • The design of the machine limits your ability to reduce muscle activation by using full-body momentum to swing the weight.

Seated Leg Curl

The seated leg curl, like many machines, requires some individualized setup for the most productive training experience. Most machines have an adjustable back pad, thigh support, and ankle pad which must be correctly set in place to keep your body in the most efficient position. Most people, however, skip this crucial step.

This strict movement can provide an intense hamstring contraction with little to no contribution from other body parts, making it an ideal muscle-builder.

How to Do the Seated Leg Curl

Adjust the back pad to position your knee joint in line with the pivoting leg attachment. Set the thigh pad to secure against the tops of your quadriceps. Adjust the ankle pad to sit just above your heel. Brace your core and drive through your heels to reach a full contraction, with your feet well-under the seat of the machine. Straighten your legs under control.

Benefits of the Seated Leg Curl

  • The seated leg curl puts the body in nearly identical positioning as the quadriceps-focused leg extension while training the direct opposite muscle group, making the two movements an ideal superset.
  • This machine provides significant support which eliminates momentum and removes your ability to lift the weight using anything but strict hamstring activation, leading to a greater muscle-building stimulus.
  • The seated position changes the stretch on your hamstring muscles, which may contribute to greater growth compared to a lying leg curl.(4

Lying Leg Curl

The lying leg curl may be the most popular hamstring exercise, but it’s also one often done incorrectly. Many lifters hike their hips off the pad as they curl, which shifts focus away from their hamstrings and onto their glutes and hip flexors.

To maximize hamstring recruitment, it’s essential to keep your hips pinned to the pad throughout the entire repetition. Some lifters find it necessary to raise their upper body onto their forearms, or even hold themselves up using straight arms, to keep their hips in position.

How to Do the Lying Leg Curl

Lie face down on the machine with the pad resting above your ankles. Flex your abs to ensure a stable upper body. Steadily bring your heels as close as possible to your glutes. Ideally, they should be able to touch briefly. Lower the weight under control.

Benefits of the Lying Leg Curl

  • The lying position puts your hamstrings into a long stretched position, which can help improve hamstring flexibility and growth.
  • The lying leg curl allows for a strong peak contraction, which can contribute to building strength and muscle.

High Leg Press

The leg press is a common and effective exercise for quadriceps growth, but a slight foot adjustment can shift muscle recruitment and emphasize your hamstrings.

Setting your feet relatively higher on the pressing platform than in the traditional leg press will emphasize the hamstrings (and glutes) more than the quadriceps.(5) This turns the exercise into a highly effective hamstring movement which also allows relatively heavy weights.

How to Do the High Leg Press

Sit in a leg press machine and place your feet shoulder-width apart with your toes near the top of the foot platform. Keep your feet flat as you lower the weight as far as your mobility allows. Your lower back should remain in contact with the pad at all times. From the bottom position, straighten your legs to near lockout. 

Benefits of the High Leg Press

  • The high leg press allows you to work the hamstrings using heavy weights, which contributes to muscle growth and strength gains.
  • This leg press variation can be performed toward the end of a hamstring-focused workout, to fully exhaust the fatigued muscle, or at the beginning of a hamstring workout to overload the target muscle with heavy weights.

Kettlebell Swing

The kettlebell swing is one of the most widely known kettlebell exercises and can be programmed for muscle-building, strength, conditioning, or fat loss.

Unlike many exercises in the gym, the kettlebell swing primarily emphasizes the concentric (lifting) phase of each repetition with relatively less emphasis on the eccentric (lowering) phase. This helps to improve power output while also stimulating muscle growth.

How to Do the Kettlebell Swing

Stand with your feet well-beyond shoulder-width apart, with a kettlebell on the ground several inches in front of your toes. Bend your legs slightly and drive your hips back as you grab the top handle of the kettlebell using a palm-down grip with both hands. Pull the kettlebell back toward your body, letting it swing just behind your legs. Brace your core and keep your back straight as you contract your lower body to bring the weight near chest-height using the hip drive, not actively lifting with your arms. Allow the weight to fall back along its path just behind your legs and repeat.

Benefits of the Kettlebell Swing

  • The kettlebell swing is shown to improve overall strength and explosive power.(6)
  • This dynamic movement builds grip strength, core strength, cardiovascular conditioning, and metabolic stress for a muscle-building stimulus.
  • Because it requires minimal equipment and limited space, the swing is a convenient and space-efficient way to train your lower body. This makes it ideal for home gyms or those with limited access to weights.

Slider Leg Curl

If your home gym doesn’t have a pair of furniture sliders, you’re missing out on an extremely effective addition that opens up plenty of new exercises for the entire body. For your leg workouts, specifically, they’re a perfect alternative to any leg curl machine.

The sliders allow you to perform knee flexion on nearly any surface (rug, tile, gym flooring, etc.). Because they’re designed to literally slide on the ground, they also require increased core engagement, so your abs and hips will be working harder than during any machine-based curl.

How to Do the Slider Leg Curl

Lie on the ground with your legs straight and a slider under each heel. Keep your head and shoulders on the ground as you curl your feet toward your glutes while driving your hips up. Imagine a steel rod running from your chest to your knees — don’t allow your body to bend at the waist. Pause briefly and control both feet as you return to the starting position.

Benefits of the Slider Leg Curl

  • The slider leg curl is one of the only hamstring curl options in a home gym without a dedicated leg curl machine.
  • The instability of the sliders increases the core stability demands of the exercise.
  • The slider leg curl can be progressed like other bodyweight movements using added load, changes in rep speed, or using a single-leg.

Seated Resistance Band Curl

Resistance bands are more commonly associated with upper body exercises, but this lower body alternative is another highly effective machine alternative when you’re in a home gym or traveling.

With the seated resistance band curl, you only need a band, a stationary object to serve as anchor point, and a bench, box, or chair to sit on. This delivers a high-tension exercise targeting the hamstrings with little to no help from other muscles.

How to Do the Seated Resistance Band Curl

Attach a resistance band to an immovable object several feet in front of a box, bench, or chair. Sit on the box with the band behind your ankles and your torso upright. Brace your upper body and extend your legs until they’re nearly straight. Keep your feet close to the ground as you drive your heels back under your body as far as possible. Don’t allow your upper legs to rise, which would take tension off your hamstrings. Hold the contraction for one second before straightening your legs and repeating.

Benefits of the Seated Resistance Band Curl

  • The seated resistance band curl is an efficient hamstring exercise when training with limited equipment.
  • Resistance bands offer “accommodating resistance” — more challenging as the band is stretched farther and relatively less challenging in the stretched position— which can reduce strain on the knee joint.

Nordic Hamstring Curl

The Nordic hamstring curl is a relatively advanced exercise because it is, essentially, a leg curl performed with your own bodyweight. However, simple modifications and adjustments can be made so lifters of any experience and strength level can benefit from this powerful movement/

The Nordic hamstring curl is also supported by a significant amount of research showing its benefits for reducing the risk of hamstring injuries in athletes in a number of sports.(7)

How to Do the Nordic Hamstring Curl

Kneel on the ground with your heels locked into position under an immovable object, such as a Smith machine on a very low setting or a heavily loaded barbell. Begin in a “tall kneeling position”, sitting upright with your shins on the ground and a straight line from your knees through your torso to your neck. Maintain a stiff body position as you slowly lower yourself forward to the ground. Keep your hands up and ready to catch yourself. Focus on feeling tension in your hamstrings. When you feel tension reducing, Pull yourself back to an upright position. Alternatively, 

Benefits of the Nordic Hamstring Curl

  • The Nordic hamstring curl is supported by research to help reduce the risk of hamstring injuries in athletes.
  • Because this movement emphasizes the eccentric (lowering) portion of the range of motion, it creates a significant growth stimulus. However, be aware that any eccentric emphasis can also lead to significant post-exercise muscle soreness.(8)
  • This is one of the few bodyweight exercises to particularly target the hamstrings with knee flexion (curling), making it effective for exercise variety.

SHELC

The supine hip extension leg curl, or SHELC, is a thorough bodyweight exercise targeting the hamstrings and glutes. It is typically done on an exercise ball, but a similar movement can be done on a large foam roller.

The general movement is similar to the slider leg curl, however, the SHELC is performed through a longer range of motion. The “softness” of the exercise ball also makes the exercise more unstable and recruits more stabilizer muscles in the core, hips, and ankles.

How to Do the SHELC

Lie on the ground with your calves on an exercise ball. Keep your head, shoulders, and elbows flat on the ground throughout the exercise. Press your lower legs into the ball as you raise your hips to the ceiling. Keep a straight line through your entire body as you pull your feet toward your body. Pause briefly at the peak contraction. Slowly straighten your legs and briefly pause, supporting your body in a straight line before repeating the next repetition. Keep your hips elevated until the end of the set.

Benefits of the SHELC

  • This bodyweight exercise works the hamstrings during hip extension as well as knee flexion, the two key functions of the muscle, which can lead to a greater growth stimulus compared to other exercises.
  • The instability of the exercise ball increases core stability requirements, as well as recruitment of smaller lower body muscles, which can help improve joint health. 

The Hamstring Muscles

While certain “hamstring exercises” isolate and emphasize the specific hamstring muscles, other movements will recruit other leg muscles including the glutes, quadriceps, and calves.

Hamstrings

Your hamstrings, on the backs of your thighs, are a collection of several similar-functioning muscles including the biceps femoris, on the outer portion of the leg, and the semitendinosus and semimembranosus, both along the inner part of the leg.

Credit: Svitlana Hulko / Shutterstock

Your hamstrings are worked during two primary types of movements. They’re recruited during hip extension — moving your thigh from in front of your body in line under your torso — which is performed during Romanian deadlift variations. The hamstrings are also responsible for knee flexion, or bending your leg, during any type of leg curl.

Glutes

The glutes are a relatively strong muscle involved primarily in hip flexion. They will be recruited to assist during many hamstring movements, particularly hip extension exercises performed with a straight or relatively straight leg. The glutes are minimally involved during leg flexion, making those leg curl variations a higher priority when you want to emphasize the hamstrings over the glutes.

Quadriceps

The muscles on the front of the thigh — the quadriceps — are anatomically opposite from the hamstrings. Not only are they located on the opposite side of the upper leg bone, but they work in an opposite (or antagonistic) role for knee extension or straightening the leg.

However, in certain multi-joint exercises like the high leg press, the quadriceps are recruited to help extend the leg and lift the weight. Similarly, your quads are recruited in exercises like the slider leg curl to control your descent as you straighten your leg and stretch your hamstrings.

Calves

The calf muscles on the back of your lower legs are primarily responsible for flexing and extending your feet. However, part of the calf muscle extends over the knee joint and is recruited during hip flexion. This is why, on certain exercises performed with straight or nearly straight legs, you may feel tension in the back of your knees or your calves.

How Often Should You Train the Hamstrings

In an ideal training scenario, hamstring training would receive as much attention as quadriceps training. However, in reality, many lifters tack on one or two hamstring exercises after a large number of quad-focused movements.

person in gym doing single-leg deadlift

Credit: Maridav / Shutterstock

An effective solution to this less-than-attentive approach to hamstring training is to simply separate the quadriceps and hamstrings into two workouts. Rather than having “leg day,” design a quadriceps workout including squat and lunge variations and perform a separate workout focused on the types of exercises listed above.

While each session will be relatively shorter and can be paired with another body part depending on your training split, attacking each side of your thigh with more focus allows greater training intensity, relatively more volume, and it decreases the chances of “forgetting” to train them.

Whether you’re addressing them directly on their own or as part of a more comprehensive lower body workout, directly training your hamstrings once or twice per week can be an effective way to build muscle and strength while recovering sufficiently.

How to Progress Your Hamstring Training

No matter how often you’re targeting your hamstrings, it’s important to use a variety of exercises which address both functions of the muscle. In any workout, be sure to include Romanian deadlift variations which train hip flexion, as well as performing leg curl variations to work knee flexion.

To prioritize hamstrings during any workout, use several sets of any leg curl as the very first exercise of the day. This pre-exhaust technique fatigues your hamstrings and makes them more likely to reach muscular failure before other body parts trained in additional movements.

This helps to emphasize the hamstrings during exercises in which other muscle groups may receive relatively greater attention (such as the high leg press or even during the traditional squat) and helps to ensure optimal recruitment of the hamstrings.

How to Warm-Up Your Hamstrings

“Hamstring tear” is a phrase that can strike fear into any experienced lifter or athlete. Not only can a hamstring injury require significant recovery time, but it may potentially become a recurring issue requiring ongoing attention and adaptation.

Properly warming up your hamstring muscles, glutes, hips, knees, and ankles can allow for more training intensity with a reduced risk of injury. Beginning each hamstring workout with a simple, low-intensity series of bodyweight squats, unweighted single-leg Romanian deadlifts (modified toe touches), and classic standing leg swings (side to side as well as front to back) can go a long way toward preparing your muscles and joints for more intense training.

No Back Seat for the Hammies

Just because you can’t flex your hamstrings and see them in the mirror is no excuse to pretend they’re not there, literally supporting every step you take and (almost) every move you make in the gym. It’s well-past time to put the back of your thighs front and center, and give your leg development, lower body strength, and athletic power a real kick in the pants.

References

  1. Van Every, D. W., Coleman, M., Rosa, A., Zambrano, H., Plotkin, D., Torres, X., Mercado, M., De Souza, E. O., Alto, A., Oberlin, D. J., Vigotsky, A. D., & Schoenfeld, B. J. (2022). Loaded inter-set stretch may selectively enhance muscular adaptations of the plantar flexors. PloS one, 17(9), e0273451. https://doi.org/10.1371/journal.pone.0273451
  2. Speirs, Derrick E.1,2; Bennett, Mark A.3; Finn, Charlotte V.4; Turner, Anthony P.2. Unilateral vs. Bilateral Squat Training for Strength, Sprints, and Agility in Academy Rugby Players. Journal of Strength and Conditioning Research: February 2016 – Volume 30 – Issue 2 – p 386-392 doi: 10.1519/JSC.0000000000001096
  3. Vleeming, A., Pool-Goudzwaard, A. L., Stoeckart, R., van Wingerden, J. P., & Snijders, C. J. (1995). The posterior layer of the thoracolumbar fascia. Its function in load transfer from spine to legs. Spine, 20(7), 753–758.
  4. Maeo, S., Huang, M., Wu, Y., Sakurai, H., Kusagawa, Y., Sugiyama, T., Kanehisa, H., & Isaka, T. (2021). Greater Hamstrings Muscle Hypertrophy but Similar Damage Protection after Training at Long versus Short Muscle Lengths. Medicine and science in sports and exercise, 53(4), 825–837. https://doi.org/10.1249/MSS.0000000000002523
  5. Escamilla, R. F., Fleisig, G. S., Zheng, N., Lander, J. E., Barrentine, S. W., Andrews, J. R., Bergemann, B. W., & Moorman, C. T., 3rd (2001). Effects of technique variations on knee biomechanics during the squat and leg press. Medicine and science in sports and exercise, 33(9), 1552–1566. https://doi.org/10.1097/00005768-200109000-00020
  6. Lake, Jason P.; Lauder, Mike A.. Kettlebell Swing Training Improves Maximal and Explosive Strength. Journal of Strength and Conditioning Research: August 2012 – Volume 26 – Issue 8 – p 2228-2233 doi: 10.1519/JSC.0b013e31825c2c9b
  7. van Dyk, N., Behan, F. P., & Whiteley, R. (2019). Including the Nordic hamstring exercise in injury prevention programmes halves the rate of hamstring injuries: a systematic review and meta-analysis of 8459 athletes. British journal of sports medicine, 53(21), 1362–1370. https://doi.org/10.1136/bjsports-2018-100045
  8. Hody, S., Croisier, J. L., Bury, T., Rogister, B., & Leprince, P. (2019). Eccentric Muscle Contractions: Risks and Benefits. Frontiers in physiology, 10, 536. https://doi.org/10.3389/fphys.2019.00536

Featured Image: baranq / Shutterstock

Source

April 29, 2022

How to Do the Zercher Squat for Lower Body Size and Power

A simple barbell in a squat rack may not seem like a piece of modern-day technology, but it kinda is. Up until a few decades ago, lifters were either making their own racks by hand from scrap metal and wood, or they were figuring out how to get the bar lifted by any means necessary.

One popular method was created by Ed Zercher, a St. Louis-based weightlifter from the 1930s. Rather than get the bar onto his back, he developed a technique to get the bar from the floor into the crook of his arms so he could squat while clutching the weight to his torso.

This type of squat was dubbed “the Zercher squat.” Even if you’re a full-fledged 21st-century lifter, you can benefit from this old-school exercise.

How to Do the Zercher Squat

While the Zercher squat was originally intended as a solution for lifters without a squat rack, this approach does require the bar to begin either in a rack or set on benches, blockers, or another elevated surface. A Zercher movement for the rack-less lifter will be explained later in the Variations section.

Step 1 — Unrack the Bar

Man holding barbell in elbows

Credit: BarBend / Youtube

Set a barbell between your belly button and your chest, either in a rack or supported on benches, steps, or blocks. Stand as close as possible, with your feet directly under the bar at shoulder-width. Keep your shoulders back. Squat down just low enough to get your elbows under the bar.

Cradle the bar in your elbows, between your forearms and biceps, and curl both hands as close to your shoulders as possible. The palms of your hands should be pointed towards your face and your elbows should be tight to your ribs. Lift the weight by standing up. Lock your legs and stabilize your entire body. Take one full step backwards. Step one foot sideways to set your stance outside of shoulder-width.

Form Tip: For many lifters, physical discomfort from holding the bar in position is the biggest challenge. Wrapping the bar in a towel or bar pad (often meant to cushion the neck during back squats) is a solution as your body adapts to the pressure. Keeping your hands palms-up, not thumbs-up, will also help to disperse stress onto the muscles of the forearm instead of the bones of the forearm.

Step 2 — Squat Down

Men performing squat holding barbell in arms

Credit: BarBend / Youtube

Maintain a stable and wide stance, beyond shoulder-width. Take a breath into your belly and tense your abs. Shift your hips backwards to squat down until your elbows or the barbell (depending on arm length) barely touch your thighs. Keep your torso as upright as possible throughout the movement.

Don’t allow the weight to pull your elbows forward or your arms to straighten. Your hands should remain near your shoulders or your chin during the movement. Pause very briefly in the bottom position.

Form Tip: Maintain full-body tension in the bottom position. Don’t relax your legs, core, or arms. Don’t allow the weight to “unload” onto your legs, which decreases muscular tension and increases overall joint strain.

Step 3 — Stand Up to Lockout

Man in gym standing while holding barbell in arms

Credit: BarBend / Youtube

From the bottom position, keep your feet flat while pressing upwards to a standing position. Keep your shoulders back and squeeze your elbows into your sides to encourage upper body tension. As your legs lockout, squeeze your glutes to increase tension and ensure a strong standing position.

Form Tip: Pause very briefly in the locked out position to ensure total-body tightness. Don’t rise explosively to prevent the bar from bouncing in your arms; move with steady power and control.

Zercher Squat Mistakes to Avoid

Because the Zercher squat involves a unique and often unfamiliar bar position, there are several common mistakes many lifters may make which can reduce effectiveness and increase the risk of injury.

Leaning Forward

Much like the front squat, the Zercher squat supports the barbell in front of the body. This requires an upright torso position during the entire movement. Leaning forward shifts your center of gravity and pulls your upper body into a weakened position.

Man performing squat with poor technique

Credit: BarBend / Youtube

When the upper body falls forward, either the bar will roll out of your arms or you’ll manage to keep control of the weight while grinding out a rep with a serious leverage disadvantage, exposing your lower back to potential injury.

Avoid It: Maintain a vertical torso by keeping your shoulder blades pinched back and, even more importantly, by keeping the bar as close to your body as possible. Create tension through your arms, abs, shoulders, and back to hold the bar in position.

Short Range of Motion

The lower one descends into a squat position, the more glute and hamstring muscles are recruited. (1) Squatting to a relatively higher position may offer specific benefits, such as competitive powerlifters who only need to reach a parallel-thigh position and not any lower.

Man in gym squatting with barbell in arms

Credit: BarBend / Youtube

However, when a lifter unknowingly squats high or deliberately squats high as an “easier” option, they shortchange their overall results. Partial rep squatting can also increase stress on the knee and hip joints compared to squatting to lower depths. (2)

Avoid it: Because the bar is held relatively low on the body during the Zercher squat, the barbell acts as a built-in boundary, offering an unwavering target for depth. Make sure the bar reaches your thighs at the bottom of each rep.

Bouncing Off Your Legs

Maintaining control of the weight during an exercise is essential for developing muscle and power. Uncontrolled, explosive movements also open the door for unexpected injuries.

Man performing deep squat holding barbell in arms

Credit: BarBend / Youtube

While a guideline for proper Zercher squat technique is to reach the bar to the tops of your legs, some lifters descend so quickly that the bar impacts their legs and rebounds upwards. Clearly, smashing your thighs with 100-plus pounds at a fairly high rate of speed isn’t the best idea.

Avoid it: Lower yourself under control, don’t free fall. Imagine your phone resting on your legs and touch the bar as softly as possible without breaking it.

Benefits of the Zercher Squat

The Zercher squat is more taxing, and slightly more complicated, than other squat variations. That extra effort can pay dividends with increased muscle recruitment and more overall strength gains.

Leg Strength

The Zercher squat allows the legs to move significantly heavy weight with a stable and engaged core, reducing potential lower back strain (compared to other squat variations). Power output is optimized due to overall leverage, making the legs the primary mover and the most significantly recruited muscle group.

Leg Size

The Zercher squat has been shown to activate the quadriceps comparable to several popular squat variations, while also activating the glutes and hamstrings to a higher degree. (3) This increased muscle activation can directly lead to more muscle growth.

Upper Back Strength

While the upper back isn’t worked through a significant range of motion, it is heavily activated to keep your shoulders back while maintaining a stable upper body position. This constant work, resisting the barbell’s forward and downward pull, leads to a stronger upper back.

Core Strength

The abs and lower back are essential for preventing your upper body from collapsing forward under the stress of the weight. Coordinating the abs and lower back in this type of supportive role is essential for building total core strength.

Sport-Specific Training

The front-loaded barbell position of the Zercher squat can offer direct carryover for strength athletes who compete in similar front-loaded events. In strongman/strongwoman contests, this would include atlas stones, stone carries, and, most specifically, the “Conan’s Wheel” event.

Training Around Lower Back Pain

All types of squats can help to build lower body strength, but many squat variations require intensive lower back stress which can be a limiting factor for some lifters. Due to the unique bar position and increased overall core recruitment, the Zercher squat doesn’t significantly strain the lower back, allowing lifters to target their legs with reduced back pain.

Muscles Worked by Zercher Squat

The Zercher squat is predominantly a lower body exercise, but it involves multiple large muscles in the upper body as well.

Quadriceps

The quads are significantly recruited during any squat, particularly as you reach the bottom position of the Zercher squat. The quads are responsible for straightening the leg and extending the knee, which helps you rise from the bottom position and get to a standing position.

Glutes

The glute muscles play a key role to “extend” the hips and bring the legs directly under the upper body. Performing a complete lockout in the top position allows the glutes to maximally contract.

Hamstrings

The hamstrings consist of several different muscles heads, each of which coordinate to flex or bend the knee. The hamstrings are recruited and act as “brakes” while lowering yourself into the bottom of the squat position.

Upper Back

The upper back (consisting of the trapezius, rhomboids, rear deltoids, and other smaller muscles) is highly activated from the moment you unrack the barbell until the set is completed. The upper back works to keep your shoulder blades retracted (pinched together) and prevents your upper body from rounding forward into a dangerous position.

Spinal Erectors

The spinal erectors, or technically “erector spinae”, are more commonly referred to as the “lower back” although they’re a pair of muscles which run the entire length of the spine. They work primarily to prevent the rounding of the back and to maintain a straight upper body posture.

Abs

The abdominal muscles are responsible for more than just flexing or “crunching” the upper body. They control all basic movement from the hips up, including rotation, bending to either side, and to prevent bending backwards.

Biceps

The biceps, like the upper back, aren’t worked through any significant range of motion during a Zercher squat but they are highly activated to maintain a static position while holding the bar in place. It’s not uncommon for a lifter to feel muscular fatigue in their biceps after a set of hard Zercher squats.

Who Should Do the Zercher Squat

The Zercher squat can offer specific benefits for any lifter who can overcome or acclimate to the initial physical discomfort of the bar position.

Strength Athletes

Competitive strength athletes who perform front-loaded events can benefit directly from the Zercher squat. Athletes in any strength sport can benefit from the Zercher squat’s carryover to overall strength and core stability. Because of its significant upper back recruitment, it’s well-suited as an accessory exercise for either the squat or deadlift.

Training for Muscle

The Zercher squat isn’t a common exercise for muscle-building purposes, but it can serve as an effective squat variation to target the legs without excessive strain on the back.

How to Program the Zercher Squat

The Zercher squat can be programmed in line with multiple goals, but lower rep ranges are typically preferred to prevent fatigue as a limiting factor.

Heavy Weight, Low Repetition

The classic set and rep scheme of three to five sets of three to five reps is a reliable approach to build strength in any big lift, like the Zercher squat. The key to moving heavy weights is taking the time to adjust to the physical pressure at the elbows in the support position.

Moderate Weight, Low Repetition

Slightly reducing the weight while maintaining a lower rep range can shift the focus from leg strength to strength in the core and upper back. Two to four sets of four to six reps is an efficient way to train these total-body stabilizer muscles.

Zercher Squat Variations

Lifters may progressively work towards a full Zercher squat while adjusting to the bar position. Here are the most comparable options.

Goblet Squat

The goblet squat is a similar front-loaded squat variation, holding a dumbbell or kettlebell in the hands near chest-level. It offers reduced lower back stress, making it ideal for any lifter with back issues.

The goblet squat also allows for a complete range of motion, letting the lifter squat as deep as their hip and ankle mobility will allow. While the goblet squat is sometimes used by beginner lifters, it can be progressed heavily and can benefit even the most advanced lifter.

Sandbag Zercher Squat

Training with a sandbag offers countless benefits ranging from increased core stability to overall calorie-burning. It’s also an excellent callback to homemade training equipment, in the true spirit of Ed Zercher.

Using a sandbag instead of a barbell does compromise on potential load, since you don’t often find 300-pound sandbags, but the thicker diameter makes the support position extremely more comfortable, which allows you to focus on basic exercise technique and intensity.

Zercher Carry

The Zercher carry removes the squat portion and swaps it for a nice, long walk. Anytime you move while carrying a load, your core activation will light up. Zercher carries, in particular, will also involve your upper back (specifically the traps) to a very high degree.

A word of warning: Be sure to pay attention to your surroundings when Zercher carrying a barbell. You’ll be moving a wide load and the last thing you need is to have the seven-foot long barbell clip an object on one side and throw yourself into a spin.

Zercher Deadlift

The literal granddaddy of all Zercher lifts, the Zercher deadlift starts with the barbell on the floor rather than a rack, just the way Ed did them.

Sometimes called a “full cycle Zercher,” this movement is a multi-step process requiring you to deadlift the weight, hold the bar in position while squatting your body down, rest the bar on your legs, take the bar into the crooks of your arms, and then squat up.

This drawn-out technique involves so many moving parts, literally, that many lifters may not find it efficient for their goals. It is, however, a purebred piece of weightlifting history and is worth an experience, if only with an empty barbell.

Zercher Squat Alternatives

Not all lifters may need to incorporate the Zercher squat into their routine. There are several exercises which can offer similar benefits.

Front Squat

The front squat may appear to be a “Zercher squat while holding the bar higher on your body.” That’s a fair assessment. By using a “rack position,” the front squat keeps the weight in front of the body, supported across the front of the shoulders.

This allows the legs to be trained with drastically reduced lower back stress. The wrist and shoulder mobility needed to achieve a strong rack position can be relatively quickly trained with minimal direct attention.

High-Bar Squat

A simple variation of the basic back squat, placing the bar high on the shoulders and traps allows the lifter to maintain a more vertical torso, which reduces lower back strain.

This squat variation also offers much more direct carryover to competitive powerlifters, compared to the Zercher squat, because the bar is placed nearly identical to their contest lift. (Though, many competitive powerlifters opt to use a low-bar squat position, which places the bar more on the middle traps.)

Safety Bar Squat

The key benefit of the safety bar squat is the hand position, which accommodates lifters whose shoulder problems prevent holding a bar across their back.

A significant secondary benefit of the safety bar squat is increased upper back recruitment, due to the way the specialized handle offsets the barbell from your center of gravity. This upper back recruitment can offer comparable benefits to Zerchers.

FAQs

The bar hurts my arms. What’s the solution?

Probably the single most common issue with Zercher squats is the initial discomfort of holding the barbell in the elbow-supported position. There are a number of very effective workarounds that allow you to gradually adapt to the feeling while working on the exercise.

You can cushion yourself by wearing long-sleeve shirts and/or elbow sleeves (some lifters wear knee sleeves on their arms because the knee sleeves are larger and more comfortable). You can also cushion the bar with a bad pad typically used when the bar’s on your neck, or by wrapping a towel around the barbell.

Increasing the diameter of the bar also reduces the direct pressure. If your gym has thick barbells or axles, those work very well. Attaching removable thick-grip handles can also work.

Lastly, if you don’t feel that adapting to the movement is a good investment of your time in the gym, and presuming you’re not a competitive athlete performing Zercher-type movements in competition, it’s entirely acceptable to simply choose a different exercise.

Will the barbell crush the tendons in my elbows?

No, it won’t. Biceps tendon injuries at the elbow are relatively rare in the gym and, even then, they most often occur at the shoulder, not at the elbow. (4)(5)

While the biceps tendon does attach to the elbow joint, it’s not being strained in the Zercher position because it’s under a static contraction. Biceps tendon injuries typically occur when the tendon is “overstretched” with too much weight, too much speed, or too much range of motion. During a Zercher squat, the tendon isn’t put through any of those conditions.

However, if you have pre-existing elbow pain or inflammation issues, the exercise becomes a different scenario. In that case, as with any exercise, you should choose movements which do not aggravate your condition or affect recovery.

References

  1. Kubo, K., Ikebukuro, T., & Yata, H. (2019). Effects of squat training with different depths on lower limb muscle volumes. European journal of applied physiology, 119(9), 1933–1942. https://doi.org/10.1007/s00421-019-04181-y
  2. Hartmann H, Wirth K, Klusemann M. Analysis of the load on the knee joint and vertebral column with changes in squatting depth and weight load. Sports Med. 2013 Oct;43(10):993-1008. doi: 10.1007/s40279-013-0073-6. PMID: 23821469.
  3. Erdağ, Deniz & Yavuz, Hasan. (2020). Evaluation of Muscle Activities During Different Squat Variations Using Electromyography Signals. 10.1007/978-3-030-35249-3_114.
  4. Golshani K, Cinque ME, O’Halloran P, Softness K, Keeling L, Macdonell JR. Upper extremity weightlifting injuries: Diagnosis and management. J Orthop. 2017;15(1):24-27. Published 2017 Nov 7. doi:10.1016/j.jor.2017.11.005
  5. Lavallee ME, Balam T. An overview of strength training injuries: acute and chronic. Curr Sports Med Rep. 2010 Sep-Oct;9(5):307-13. doi: 10.1249/JSR.0b013e3181f3ed6d. PMID: 20827099.

Featured Image: BarBend / Youtube

Source

Powered by WordPress