World Fitness Blog : Leading Global Bloggers

December 22, 2022

How to Do the Renegade Row for Conditioning and Core Strength

Filed under: Fitness,Training — Tags: , , , , , — admin @ 11:36 pm

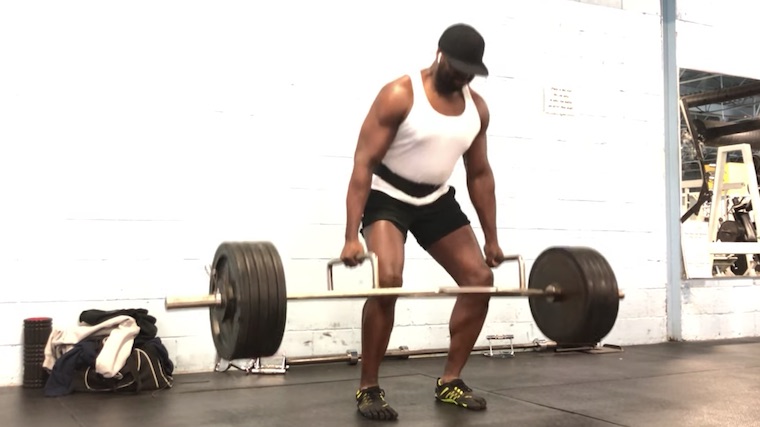
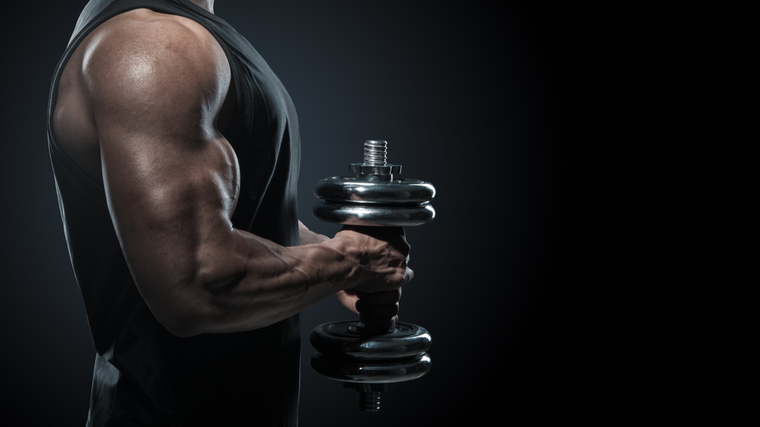
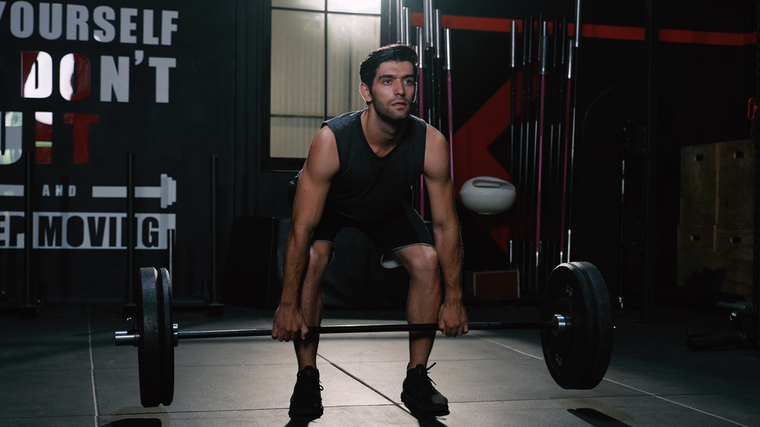
The recent rise (and arguably unnecessary obsession) with “functional training” has seen the renegade row become a staple in CrossFit, fitness boot camps, and bodyweight workouts across the world.

It’s likely that many gym-goers or home-gym lifters have done this ground-based exercise at least a few times before — holding a straight-arm plank while performing alternating dumbbell rows — to build conditioning and head-to-toe strength and stability.

tattooed person in home gym doing dumbbell row exercise on floor

Credit: Dragon Images / Shutterstock

If you’re going to do the renegade row, it’s time to make sure you’re performing it properly. Here’s how and when to include it in your workout routine, plus a few effective variations to take this popular movement up a notch.

Renegade Row

How to Do the Renegade Row

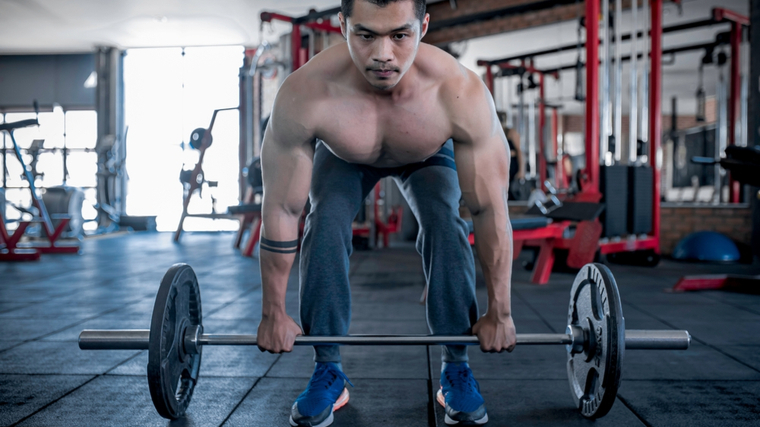
The renegade row is a type of combination exercise — performing a static plank while simultaneously performing a rowing motion. So before you try the renegade row, you should have some basic experience performing both of those exercises separately. Then grab two dumbbells or kettlebells and get ready to work. 

Step 1 — Set Your Hands and Feet

muscular person in outdoor gym in straight-arm plank

Credit: MDV Edwards / Shutterstock

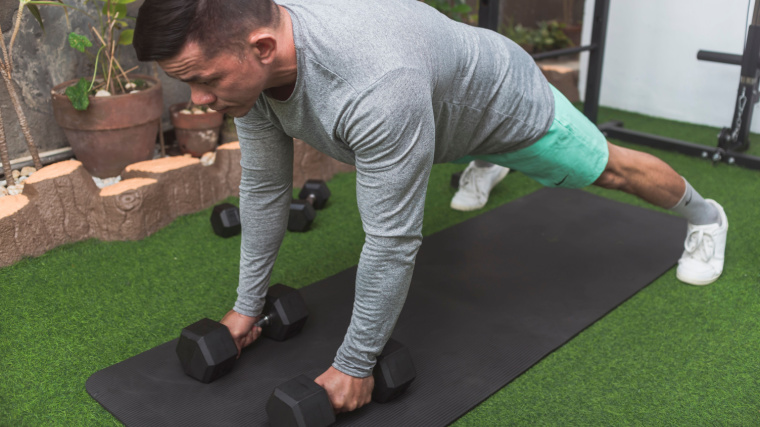
Get on the ground with a dumbbell in each hand, placed just inside shoulder-width. Set your feet slightly wider than hip-width and straighten your legs. Make sure you can really push into the ground with your feet, which will help you successfully create tension in your whole body. Don’t let your hips sag down or arch high. Hold a straight line from your ankles to your neck. This stable plank position is the “base” for each repetition of the exercise.

Form tip: Placing your hands directly under shoulders would be great technique for a standard plank, but remember this is not just a plank. Having your hands a bit closer is going to help your stability by reducing the weight transfer from side to side as you switch arms during each repetition. This will make it much easier to create tension in your plank while keeping your hips nearly level.

Step 2 – Press and Pull

muscular person in outdoor gym doing dumbbell row

Credit: MDV Edwards / Shutterstock

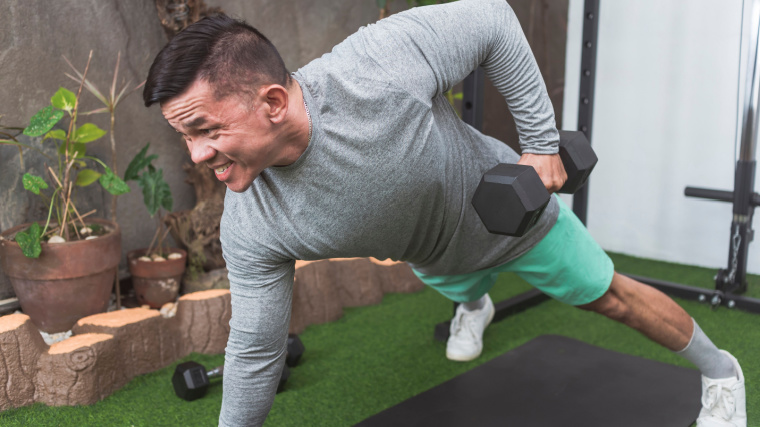
Squeeze both dumbbells extra-hard and actively push one arm toward the ground without bending it. This will create more stability through your upper body. (1) As you drive that arm down, lift the opposite elbow up and back, moving the weight toward your front pocket in an arching motion, not in a straight line to the ceiling. Maintain total-body tension and fight the weight pulling you off-balance.

When the dumbbell is near your torso, return it back to the floor slowly. The exercise is about control and consistency, not rushing through reps as quickly as possible. Drive your second arm toward the ground and row the first dumbbell. Repeat the movement, alternating sides with each repetition.

Form tip: As you row your elbow up and back, it’s going to be tempting to lift that same side hip and shoulder because rotating your body might assist you with the lift. Instead, move toward the challenge, literally. If you are rowing on the right side, your body will naturally want to lift your right hip. Instead, as you pull your elbow up, actively push your right hip down to resist the twist and keep your hips level. This will also help you to stay more braced through your midsection and recruit more abdominal muscles.

Renegade Row Mistakes to Avoid

The exercise involves head-to-toe coordination and stability, so there are some common mistake that can occur with such a big movement. Here are some issues to watch out for.

Keeping Your Feet Too Close

When your feet are set too narrow, it will be nearly impossible to do anything other than simply shift your weight from side to side as you move through the rep. It’s extremely difficult to maintain a plank position because close feet create a very small base of support, so you end up just doing a row in a really inefficient position.

long-haired person in gym holding plank position

Credit: SOK Studio / Shutterstock

Keeping your feet set slightly wider than your hands will put you in a powerful stance to perform the movement without sacrificing stability. If your feet are too close, you’ll be off-balance from the start and unable to generate enough force to efficiently lift the dumbbell.

Avoid it: When you get into the starting position, make sure your feet are more than hip-width apart to provide a wide enough point of contact for stability. When you row, you shouldn’t be at risk of tipping to one side or the other.

Twisting Your Body

Rotating your body to get the weight moving means you’re using momentum to help pull the dumbbell off the floor instead of using your back muscles. When this happens, you end up with a very poor row and a very poor plank. That’s a lose-lose situation.

long-haired person in gym doing dumbbell row exercise

Credit: Anel Alijagic / Shutterstock

When you shift your body to one side, you drastically reduce the need to stabilize your core, which takes away from the entire point of the exercise. You might end up doing extra reps, but each rep is less effective at building strength and conditioning.

Avoid it: Try to focus on body awareness and feel your shoulders and hips staying nearly level throughout the entire exercise, as you lift and lower the weights. Fighting to keep your body in position is what’s going to deliver the results you’re after.

Tapping the Weight to Your Chest

When you’re performing the renegade row, focus on the movement of your elbow instead of what’s happening with the dumbbell itself. If your elbow starts and finishes in the right place, the dumbbell will follow.

person outdoors performing dumbbell floor exercise

Credit: Maridav / Shutterstock

When the load gets too heavy or when you focus on “bringing the dumbbell to your ribs,” you lose range of motion because the focus shifts away from the most effective technique

Avoid it: Pay attention to each individual repetition and perform it properly, without regard to the specific weight you’re moving. Go step by step and follow the technique tips, and avoid any instinct to make the dumbbell a key player in the movement.

How to Progress the Renegade Row

Deciding how and when to progress this movement can be difficult and there need to be some special considerations because it is a combination we are not just progressing one movement. 

Technique Over Weight or Volume

The renegade row isn’t well-suited for handling heavy weights, training with extreme intensities (muscle failure), or using high volume (many sets and reps). Instead, performing the exercise with greater competency and crisp form is the real key to long-term success and results.

Gradually adding even one or two reps per set, or one or two sets, each workout would give you a great opportunity to perform some very effective, high-quality work.

Plank Shoulder Tap

One modification to the renegade row is to swap the dumbbell row for an unweighted shoulder tap, reaching one arm across your body to lightly tough the shoulder of your base arm.

This bodyweight-only exercise trains similar total-body stability and strength by teaching you how to stay tight in a plank position while alternating between single-hand support. You’ll also build core strength to keep your body level and avoid twisting as you move.

Unilateral Renegade Row

Another effective modification the renegade row would be to do all reps unilaterally (with one arm) before switching arms. This creates more localized fatigue in the muscles on the specific side you’re working.

While the unilateral renegade row emphasizes the back muscles and core stability, it can be slightly less challenging rotationally because your body isn’t repeatedly adjusting from between alternating sides.

Benefits of the Renegade Row

The renegade row is not a great exercise choice for improving absolute strength because you can’t move heavy weights. It’s also not ideal for hypertrophy (muscle-building) because it doesn’t focus a specific body part with the time under tension needed to stimulate growth. (2) However, it can be an incredibly useful exercise to address often overlooked aspects of many training plans.

Core Control

The renegade row is a complete core exercise that can build strength and stability, while also improving your ability to move your upper body limbs around the rib cage. This carries over to athletic performance and big lifts.

A stronger core may help reduce the risk of back injuries and can boost performance, especially in sports where running and change of direction are involved. (3) Training your body to maintain trunk stability while manipulating your arms can be a big factor in avoiding “strength leaks,” which can reduce power output.

Strength-Endurance (aka Conditioning)

To perform the renegade row competently, you need to take your time with a relatively moderate to light load and moderate to higher repetitions because the exercise isn’t conducive to very heavy weights or very low reps.

The duration of each set creates a stimulus that is more endurance-based, which contributes to muscle-specific endurance in the recruited body parts (especially the back, shoulders, arms, and abs). The total-body exercise also contributed to overall cardiovascular endurance — after your first set of 15 or more reps, you’ll notice what kind of cardio shape you’re really in.

Muscles Worked by the Renegade Row

The combination of the plank position and single-arm row will recruit a large number of muscle groups across the body, even though the renegade row is sometimes considered either an ab exercise or a back exercise.

Internal Obliques

These deep core muscles are responsible for controlling your pelvis and creating posterior tilt, along with the hamstrings. The internal obliques help you to create and maintain tension with the other core muscles, like the transverse abdominals and the rectus abdominis. They also work significantly to resist rotation when you raise the dumbbell on either side during the renegade row.

Chest, Shoulders, and Triceps

These muscles work together during the exercise, as they are recruited in an isometric action (without any significant range of motion) as you push into the ground and keep the arms fully extended. The chest, shoulders, and triceps of your base arm fire as you row the opposite side, although the rear portion of the shoulder on the working side also assists to lift the weight.

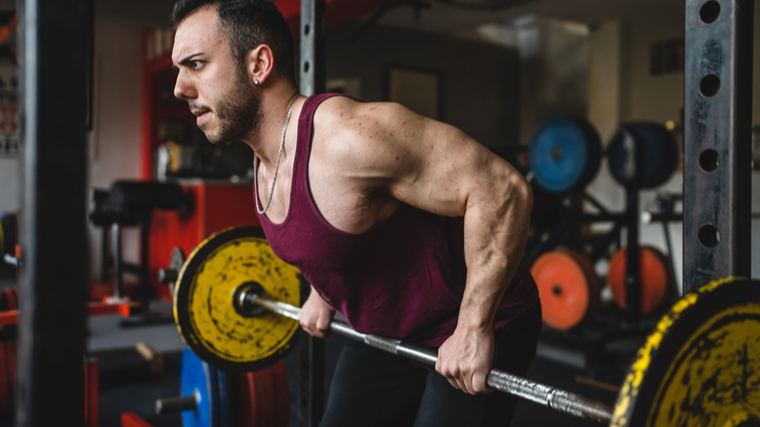
Lats, Rhomboids, and Trapezius

This series of separate back muscles work together to put the row in “renegade row.” They are recruited during the concentric (lifting) action and they control the weight back to the ground during the eccentric (lowering) phase.

Depending on your arm length and range of motion, not all of the muscles may achieve the type of full stretch and peak contraction that contribute to major muscle growth.

How to Program the Renegade Row

The renegade row is often performed either as a standalone exercise or as part of a complex with other bodyweight or basic dumbbell exercises. It is essentially a core exercise, and fits well at either the beginning of a workout (similar to a full-body warm-up to improve movement quality) or at the end of a workout as a high intensity core finisher.

Light to Moderate Weight, Moderate to High Repetition

To maintain an emphasis on strict technique, stick with a weight that’s challenging for no fewer than 8-10 reps — if you go much heavier than that, you’re likely to compromise form to move the weight. Generally, training the renegade row with two or three sets of 12 to 20 reps can deliver a major stimulus for conditioning and muscular stimulation.

Movement Quality

One unique way to incorporate the renegade row at the start of your workout is with a quick circuit, pairing the exercise with two or three core-focused bodyweight movements. Perform three to five sets of the entire sequence, with no rest between each exercise and 30 to 60 seconds rest between each circuit.

  • Renegade Row — 10 reps
  • Deadbug — 10 reps
  • Side Plank — 30 seconds per side
  • Medicine Ball Throw — 10 reps

Core Finisher

You can also end your training session with a finisher that features the renegade row and emphasizes the abs. Repeat the series for as many rounds as possible within five minutes.

  • Renegade Row — 10 reps
  • Leg Raise — 10 reps
  • Sit-Up — 10 reps
  • Hollow Hold — 20 seconds

Renegade Row Variations

The renegade row can be pretty complete on its own, but there are a few variations that can take it even further. By adding the right movements to the basic renegade row, you can get more muscle recruitment and a bigger overall training stimulus.

Renegade Row Push-Up

One of the most challenging renegade row variations involves adding a push-up between each row. Special consideration needs to be taken here because now you need to be highly competent at three different exercises (the plank, dumbbell row, and push-up), so it’s definitely not a beginners-level movement.

This variation works very well as part of a circuit with two or three other exercises, such as mountain climbers and the dumbbell deadlift, where the renegade row could be performed with lower reps but repeated for more total sets.

Renegade Row Burpee

The burpee itself has a strong “love it or hate it” reputation with many lifters, but it can flow smoothly at the end of a renegade row because the plank also the bottom position of a burpee.

Transitioning from the renegade row to the burpee can either be done with a quick and seamless transition, for a high intensity conditioning effect, or you can briefly pause in the plank position after the second row before jumping your feet in. This can help prevent form breakdown.

FAQs

Can you build strength with the renegade row?

Yes, you can build a degree of strength, but it’s technically relative strength rather than absolute strength. Meaning, it will get you generally stronger overall, but not necessarily closer to doing barbell rows with 300 pounds.
Similar to doing air squats compared to barbell squats, you will see some improvements in strength and work capacity (conditioning), but those improvements will be relative to the load and intensity you can use during the exercise. With the renegade row, load and intensity are limiting factors — you can’t train with heavy weights and you can’t safely reach muscular failure.
Regardless, you can definitely include the exercise in your routine and benefit from improved relative strength, but if getting super-strong is a priority, focus on improving absolute strength with heavy weights and low reps with exercises deadlifts, rows, and pull-ups.

My hands hurt while resting on the dumbbells. What can I do?

This is actually very common. The simplest solution is to place your hands on the floor, with the dumbbells just inside your wrists. Then, only pick the dumbbell up when performing the rowing portion of the rep. Each repetition will take slightly longer and you might not be able to do as many reps, but it will still be an effective core exercise.

Be a Renegade

The renegade row is definitely not for beginning lifters because there are so many moving parts. Once you’re mastered form on the component exercises like the plank, dumbbell row, and even push-ups, then you’re ready to add this full-body exercise to your program and start building rock-solid stability and off-the-charts conditioning.

References

  1. Gontijo, L. B., Pereira, P. D., Neves, C. D., Santos, A. P., Machado, D.deC., & Bastos, V. H. (2012). Evaluation of strength and irradiated movement pattern resulting from trunk motions of the proprioceptive neuromuscular facilitation. Rehabilitation research and practice2012, 281937. https://doi.org/10.1155/2012/281937
  2. Burd, N. A., Andrews, R. J., West, D. W., Little, J. P., Cochran, A. J., Hector, A. J., Cashaback, J. G., Gibala, M. J., Potvin, J. R., Baker, S. K., & Phillips, S. M. (2012). Muscle time under tension during resistance exercise stimulates differential muscle protein sub-fractional synthetic responses in men. The Journal of physiology590(2), 351–362. https://doi.org/10.1113/jphysiol.2011.221200
  3. McGill, Stuart PhD. Core Training: Evidence Translating to Better Performance and Injury Prevention. Strength and Conditioning Journal 32(3):p 33-46, June 2010. | DOI: 10.1519/SSC.0b013e3181df4521

Featured Image: MDV Edwards / Shutterstock

Source

November 19, 2022

How to Do the Dumbbell Deadlift for Size and Strength

Filed under: Fitness,Training — Tags: , , , , , — admin @ 5:34 am

The barbell deadlift is the king of the jungle when it comes to pulling exercises. It’s a primary movement with the potential to move the most weight. Plus, it’s a competition lift in powerlifting, along with the back squat and bench press. The classic deadlift will always be popular.

But if you’re looking for a deadlift variation that’s easier on the spine, builds muscle in your upper and lower body, improves posture, and helps to boost your barbell deadlift, trade the bar for a pair of dumbbells. 

two people in gym doing dumbbell deadlift

Credit: MDV Edwards / Shutterstock

The dumbbell deadlift is an overlooked exercise that can increase muscle and strength while providing less compressive load on your spine. It allows you to train the same movement pattern with reduced lower back strain compared to the barbell exercise.

Here’s a closer look at the dumbbell deadlift including how and why it’s done, what not to do, programming tips, and more. mistakes to avoid. It’s time to be reminded why “the deadlift” is not all about the barbell.

How to Do the Dumbbell Deadlift

Here’s a step-by-step guide for performing the dumbbell deadlift with safe and effective technique. This movement is performed “suitcase-style” with a pair of dumbbells by your sides.

Step 1 — Nail the Setup

person in gym holding two dumbbells

Credit: MDV Edwards / Shutterstock

Stand up straight with a dumbbell in each hand, facing your hips with your arms down by your sides. Pull your shoulders down away from your ears, puff your chest up, and firmly grip the weights. Begin with your legs straight but not fully locked out and grip the floor with your feet to create tension in your glutes.

Form Tip: Starting this exercise with good posture is vital. Pinch your shoulder blades together to open your chest and create a neutral spine. Stand “tall” looking straight ahead.

Step 2 — Control the Descent

person in gym doing dumbbell leg exercise

Credit: MDV Edwards / Shutterstock

Push your glutes toward the wall behind you and hinge at your hips. Keep your arms straight and allow the weights to “slide” alongside your legs. Keep your shoulders back and down — don’t allow the weights to pull your arms out of position.

Focus on feeling your hamstrings stretch as you lower the weights. As the weights approach your knees, bend your legs to reach a lower position. Don’t force your way to the bottom or sacrifice form, but if you can touch the weights to the ground without losing your posture, that’s an excellent goal.

Form Tip: The barbell deadlift has no significant eccentric contraction (lowering phase), but the dumbbell deadlift is all about the eccentric. Feeling tension in your hamstrings is critical because, if you are not, it means the movement isn’t coming from the target muscles.

Step 3 — Pull and Lockout

long-haired person in gym doing deadlift with dumbbells

Credit: Undrey / Shutterstock

Push your feet through the floor to reverse the movement. Drive your hips forward and keep your shoulders pulled back to “un-hinge.” Ensure you finish at the top by squeezing your glutes, not your lower back. The dumbbells should remain near the sides of your legs throughout the repetition.

Form Tip: When returning upright, avoid simply “standing up” like a squat. Imagine squeezing your armpits together to ensure a neutral spine and to prevent your hips from shooting up too quickly.

Dumbbell Deadlift Mistakes to Avoid

The main thing to remember with the dumbbell deadlift is performing a hinge, not a squat. This requires using your glutes and hamstrings as intended, and keeping your body in the proper position. Lifting out of position creates most problems.

Squatting the Weight

There is nothing “wrong” with doing a dumbbell squat, unless you actually intended to do a dumbbell deadlift and performed a squat accidentally. You end up changing the exercise focus and not achieving your goal.

long-haired person in gym squatting with dumbbells

Credit: lunamarina / Shutterstock

Some lifters tend to move the weight by squatting with a deep knee bend and an upright torso. Instead, you should be hinging at the hips and getting your torso nearly parallel to the ground while keeping their knees only slightly bent. When the dumbbell deadlift is performed correctly, it’s a glute and hamstring exercise. When it’s performed incorrectly, with a squat, it becomes an exercise for the quadriceps.

Avoid it: Pay attention to the muscles you feel stretching and contracting during each repetition. Your hamstrings and glutes should be doing much more work than the quads on the front of your thighs. Performing this exercise sideways to a mirror, or recording a video of your training, may also help you determine whether you’re squatting and not hinging.

Losing Tension

Maintaining muscular tension is the key with most strength exercises, and the dumbbell deadlift is no different. Keeping your upper back engaged, maintaining a neutral spine, and feeling your feet screwed into the floor are keys to a properly performed dumbbell deadlift.

muscular person in gym doing dumbbell back exercise

Credit: MDV Edwards / Shutterstock

As you lower and lift the weight, the entire back side of your body should feel tense — from your feet up through your hamstrings and glutes, to your abs, lower back, and shoulders.

Avoid it: Squeeze your arms to your sides, like you’re bringing your armpits together through your body. This will engage your upper back and lats, which helps to keep your upper body in a strong position. Trying to grip the floor with your feet, even when you’re wearing shoes, will also help to provide a stable base with good total-body position.

How to Progress the Dumbbell Deadlift

The key to the dumbbell deadlift and most other strength exercises is adding more muscle-building tension and providing progressive overload (gradually challenging yourself by doing more work). Here are a few ways to progress other than adding weight or doing extra reps.

Bodyweight Hip Hinge

If you have yet to master the hinge movement, go back to bodyweight training before adding the dumbbell deadlift. Using a wall as a reference point is a good way to learn how to lead with your hips.

This simple-looking drill will help teach your body the difference between a true hinge movement and a squat. Focus on pushing your hips back and keeping your hands sliding along your legs while keeping your spine stiff.

Tempo Dumbbell Deadlift

Every repetition of an exercise has four components: the eccentric or lowering portion, the stretched position, the concentric or lifting portion, and the lockout. Manipulating how long each component takes is called tempo lifting, and it can be an effective training method when the dumbbells at your gym only go so high. 

For example, perform a dumbbell deadlift with a 4-3-3-1 tempo. You take four seconds to lower the weight, hold the bottom position for a three-second pause, take three seconds to stand upright, and pause for one second. This puts your glutes and hamstrings through a longer time under tension which can increase muscle growth. (1)

Single-Arm Suitcase Deadlift

Holding the weight in one hand does two things. First, you must train each side independently, which means more opportunities to strengthen any imbalances between sides and, hopefully, add more overall muscle and strength.

Second, you add an anti-rotation, anti-lateral flexion component to the exercise because the single-sided load with try to pull, rotate, and shift your core toward the weight. Resisting this pull and maintaining a stable torso can improve core stability and strength.

B-Stance Dumbbell Deadlift

Single-leg deadlifts are challenging because you must have great balance to perform them well. Enter the B-stance dumbbell deadlift, which helps your stability and balance while still putting more focus on the front working leg.

This modified stance delivers all the benefits of a single-leg deadlift without having to worry about losing your balance. Focusing the work on each leg separately will also help to address any strength or muscle discrepancies between sides.

Benefits of the Dumbbell Deadlift

The dumbbell deadlift can deliver some big benefits when the exercise is performed as a consistent part of your training program. Here are some reasons to grab the dumbbells instead of the barbell.

Better Hinge Technique

The dumbbell deadlift helps develop the hinge technique using relatively lighter weights because some lifters struggle to maintain a neutral spine once the load gets heavy. Dumbbell deadlifts can make you more aware of any form deviations, like when the dumbbells’ path may change.

The dumbbells act independently as opposed to the barbell deadlift, which keeps you more aware of your body’s position throughout the lift. This develops better total-body awareness and control.

Increased Upper Back Engagement

The dumbbell deadlift requires rock-solid upper back strength because the dumbbells can swing and cause you to lose position. Locking in your upper back and shoulder muscles can prevent this.

The dumbbell position, with a neutral-grip alongside your legs, can make you aware of your shoulder and back position compared to a barbell. Ultimately, this leads to a stronger back and better, safer deadlift technique.

Better Grip Strength

Performing dumbbell deadlifts, especially for higher reps, can deliver gains in grip strength. Your grip strength is challenged by holding onto individual dumbbells, rather than so your stronger hand can’t pick up the slack to perform each rep.

Decreased Joint Strain

Holding dumbbells with a neutral-grip at your sides, instead of holding a barbell with a palm-down grip in front of your body, puts your shoulders and upper body in a more stabilized position.

This decreases the strain on your lower back by reducing the compression and shearing forces. This is a similar benefit of the trap bar deadlift, but can be accomplished much easier with dumbbells since not all gyms provide a trap bar.

Muscles Worked by the Dumbbell Deadlift

There is almost no a muscle untouched when performing the deadlift movement, but there are a few primary muscles emphasized with the dumbbell deadlift in particular.

Hamstrings

The hamstrings assist your glutes with hip extension (straightening your legs and standing up straight) during the lifting and lockout portion of the dumbbell deadlift, and their eccentric strength allows you to control the weight’s descent. Feeling your hamstrings stretch and contract is the exact feedback needed to know you are performing the exercise correctly.

Glutes

Your glutes are primarily responsible for extending your hips during the deadlift, bringing your lower body straight in-line with your upper body. They significantly engage and contract during in the upper portion of the movement, as you approach a complete lockout.

The glutes work together with the hamstrings, and the upper and lower back, to ensure good hip hinge technique. Driving your hips back and “pushing” them through are important steps for activating the glutes.

Upper Back

Your upper back — which includes the rhomboids, trapezius, and parts of the latissimus dorsi, among other smaller muscles — is trained almost as a single unit while performing the dumbbell deadlift.

The primary function of the upper back is to keep a safe and strong neutral spine by maintaining a stable thoracic position. The upper back also helps to control your shoulder blades and keeps them pulled back when controlling the weight.

Lower Back

The erector spinae, a.k.a. “the lower back,” is actually a long column of muscles along the full length of your back. This powerful muscles works together with your glutes, hamstrings, and upper back for strength and stability during the dumbbell deadlift.

The lower back muscles’ primary responsibility is stabilizing your spine, supporting torso, and resisting spinal flexion (bending) under load. If you deadlift with a rounded back, you limit the strength and stability of these important muscles and expose them to significant (and potentially dangerous) direct stress.

How to Program the Dumbbell Deadlift

How you program the dumbbell deadlift depends on your actual goal. Below are some goal-specific set and rep schemes to incorporate the movement into your training program.

To Improve Hinge Technique and Deadlift Form

When you want to improve your deadlift form, it pays to spend more time drilling the hinge position. With its reduced load compared to the barbell, the dumbbell deadlift is helpful for beginners looking to improve general technique and strength the movement-related muscles. Perform three to five sets of six to 10 repetitions, using a controlled eccentric and focusing on good posture.

For Hypertrophy

Because it’s not well-suited to moving hundreds of pounds, the dumbbell deadlift is best used to build muscle size. This exercise can be performed for more reps and, potentially, through a longer range of motion than a barbell because the diameter of the dumbbells is smaller than barbell weight plates.

Increased training volume and a greater range of motion leads to more time under tension for hypertrophy gains. Start by performing three to four sets of eight to 16 reps, using a moderate-to-heavy weight and taking each set close to technical failure — the point at which you can’t perform another rep with good form, as opposed to muscular failure when the target muscles cannot control the weight.

For Muscular Endurance

To improve muscular endurance in the legs, back, and core, training in the higher rep ranges for fewer sets and shorter rest periods is the name of the game. Two to three sets of 15-20 repetitions with less than one minute between sets will have you feeling the burn.

Dumbbell Deadlift Variations

Adding variety to your training keeps you more engaged, reduces the likelihood of picking up an overuse injury, and gives you ways to progress when you can no longer increase the load. These three variations of the dumbbell deadlift will keep you guessing and progressing.

Single-Leg Dumbbell Deadlift

The single-leg dumbbell deadlift is one of the more challenging leg exercises, requiring total-body strength, stability, and coordination. If, or when, you can perform these with good form, you can end up with performance benefits ranging from addressed muscle imbalances, better balance, and improved glute hypertrophy. (2)

You may need to work on B-stance dumbbell deadlifts, explained above, as an intermediary step toward this difficult exercises. The time and effort is well worth it.

Dumbbell Sumo Deadlift

The dumbbell sumo deadlift is a wide-stance deadlift that focuses a little more on your quadriceps, along with your glutes and hamstrings, and without as much lower back stress because you are not as bent-over or hinged forward compared to other deadlifts.

The movement can be performed with a dumbbell in each hand or holding a single dumbbell with both hands.

Dumbbell Stiff-Legged Deadlift

The dumbbell stiff-leg deadlift minimizes knee flexion and focuses almost entirely on hip flexion to put the hamstring and glutes under a little more tension. This is an ideal exercise for lifters looking to emphasize the back halves of their legs.

This simple variation is also effective for lifters who have “outgrown” the dumbbell deadlift in terms of potential load but want to keep progressing.

FAQs

Can I hold the dumbbells in front, like a barbell, instead of at my sides?

This is a matter of personal preference, as both grips offer different benefits. Holding the dumbbells at your front, like a conventional barbell deadlift, forces you to stay over the load longer while minimizing knee flexion. But this is tougher on your grip and it works your core and lower back a bit more.
With the dumbbells by your sides, your upper back position is more neutral, allowing you to train the lats differently. Plus, holding the dumbbells with a neutral grip is a stronger mechanical position and may allow you to eke out a few more reps before forearm fatigue.

Do the dumbbells need to reach the ground on every rep?

There is no hard and fast rule for depth. Range of motion depends on your hip mobility, the range with which you can maintain muscle control, and your general level of workout experience.
If your goal is hypertrophy, try to get as low as you can control without sacrificing form. This will increase the time under tension on the muscles. If your priority is building strength, use an effective range of motion that balances moving the most weight with the longest range of motion possible.

References

  1. Burd, N. A., et al. Muscle time under tension during resistance exercise stimulates differential muscle protein sub-fractional synthetic responses in men. The Journal of Physiology, 590(Pt 2), 351-362. https://doi.org/10.1113/jphysiol.2011.221200
  2. Diamant, W., Geisler, S., Havers, T., & Knicker, A. (2021). Comparison of EMG Activity between Single-Leg Deadlift and Conventional Bilateral Deadlift in Trained Amateur Athletes – An Empirical Analysis. International journal of exercise science14(1), 187–201.

Featured Image: YAKOBCHUK VIACHESLAV / Shutterstock

Source

November 11, 2022

How to Do the Straight-Arm Pushdown for a Wider Back

Exercises like the chin-up and the deadlift are seen as the kings of back-builders by many lifters, but they are only the meat and potatoes. You have to add some seasoning if you want the best final product, and the extra flavor (and extra results) will come from your exercise choices.

The problem is that compound (multi-joint or “polyarticular”) exercises like chins, deadlifts, and rows not only train the large lat muscle of your back, but also many other muscles in your whole body. The lats are a notoriously hard to target body part, and these big lifts have the risk of shifting the work to other supporting muscles.

muscular person doing chin-ups outdoors

Credit: Iryna Inshyna / Shutterstock

The straight-arm pushdown, sometimes called a stiff-arm pushdown or pulldown, is one the most effective movements to work just the lats because it is an isolation (single-joint) exercise. This allows you to really focus on the target body part with minimal assistance from other muscles.

Adding this exercise might just be the key to unlock new growth and a better mind-muscle connection. Here’s why and how to add it to your training plan.

How to Do the Straight-Arm Pushdown

As a single-joint exercise, the straight-arm pushdown is a fairly straightforward to perform. These types of movements typically require less coordination and technique than multi-joint exercises, but you still need to use proper form if you want the best results.

Step 1 — Set up at the Cable Station

Person in gym doing cable machine exercise.

Credit: ANRproduction / Shutterstock

Set a cable pulley at the maximum height so that you can enjoy a full range of motion, and attach a straight or EZ-curl bar. 

Grab the bar using a palms-down, shoulder-width grip, and fully extend your arms toward the pulley. Step back until the weight starts floating off the stack and you feel tension pulling you toward it. Lean forward at the waist and slightly bend your knees to adopt a stable position from which to pull. Your hands should be slightly above shoulder-height.

Form tip: Keep your shoulders down and your chest puffed up. This will diminish the stress on your shoulders and reduce interference from non-target muscles like your shoulders or traps.

Step 2 — Pull the Weight Down

Person in gym doing cable back exercise.

Credit: ANRproduction / Shutterstock

Exhale and squeeze your lats as much as you can while driving the bar down towards your thighs. Keep your arms straight or slightly-bent for the duration of the lift. Nothing should move but your arms. Keep your wrists neutral, don’t allow them to curl down or bend back.

Form tip: Imagine you have an orange under each of your armpits and you’re squeezing them for their juice. This will help you recruit your back more and shift focus away from your arms.

Step 3 — Control the Stretch

Person in gym doing back exercise with cable machine.

Credit: ANRproduction / Shutterstock

When the bar is nearly touching your legs, slowly reverse the motion and let your arms come up. Keep your torso still and don’t stand up straight at the weight comes up. Once you’re at the top of the range of motion and your back is fully stretched, repeat for the desired amount of reps. 

Form tip: If you feel your arms overpowering your lats, and your triceps or shoulders fatigue before your back muscles, use a “false grip” by placing your thumb on top of the bar next to your fingers. This will reduce arm involvement.

Straight-Arm Pushdown Mistakes to Avoid

The straight-arm pushdown requires focus to reap all the benefits. You have to nail the technique if you want to progress safely, and that means avoiding these common mistakes.

Swinging the Weight

Ego should never have a place in the gym, especially not when doing an isolation movement. If you start using body English to move more weight, you’ll end up working your hips, abs, and arms more than your back. If you want to move more weight and use as many muscles as possible, then skip the straight-arm pushdowns and do some barbell rows.

muscular person in gym doing cable exercise

Credit: martvisionlk / Shutterstock

Moreover, using momentum will put more stress on your connective tissue and joints, possibly causing injuries. (1)

Avoid it: Only your arms should move during the exercise, and they should only move at the shoulder, not the elbow. If you have to move anything else, it’s either because you used too much weight or that your initial set up (stance and body position) wasn’t stable enough. Reduce the weight, bend your knees a bit more, and widen your stance to lower your center of gravity and increase stability.

Using Your Arms

You might not expect it, but the long head of your triceps (posterior muscle of the arm) will assist your back during this exercise because it’s partially responsible for moving your arm at the shoulder joint. However, it should remain a lat-focused exercise.

person in gym bent forward holding handle attached to cable

Credit: Vladimir Sukhachev / Shutterstock

If you bend and extend your arms during the exercise, you’ll turn the exercise from a straight-arm pushdown into a wrongly-performed triceps pushdown, resulting in less muscle gains for each body part.

Avoid it: Don’t let your arms bend. Remember that it’s called a “straight-arm” movement and maintain the same elbow angle during the duration of the lift. To further reduce arm involvement, use a false grip by moving your thumbs on top of the bar near your fingers.

Going Too Heavy

Yes, there’s a recurring theme in this mistake session: do not chase weight. Keep the heavy weights and maximal efforts for the big compound exercises. If you use too much weight, you can end up compensating with other muscles and you’ll stop feeling the intended muscles, leading to less muscle growth. (2)

person wearing red tank top performing cable triceps exercise

Credit: vladee / Shutterstock

Avoid it: When you perform the exercise, if you stop feeling tension in your lats, it’s likely because other muscles have taken over. Reduce the weight immediately and double-check your stance, torso position, and arm angle.

How to Progress the Straight-Arm Pushdown

The cable station used for straight-arm pushdowns usually allows you to use very light or heavy weights, but that’s not always the case. Some pulleys have limited weights or other issues that affect your performance. In those cases, you can use progressions to either make the exercise easier or harder.

Resistance Band Straight-Arm Pushdown

Bands are versatile and easy to use. Strap a resistance band to a sturdy object at roughly head-height and perform the exercise as you would with a cable pulley. The band resistance starts very low and can be adjusted by standing closer or farther from the anchor point, which is perfect if you don’t yet feel confident enough to tackle more challenging resistance. 

One benefit of bands is that the resistance curve increases during the range of motion — as the band is stretched, it becomes more challenging — which can be beneficial for you to feel your lats working. This is also a great variation if you don’t have access to a cable station.

Slow Tempo Straight-Arm Pulldown

Whether you can’t put more weight on the station or you just have trouble feeling the correct muscles working during this exercise, you can use a slower tempo (lifting and lower speed) to make to movement more challenging with lighter weights.

One great way to do this is by taking three to five seconds on the concentric phase (when you lift the weight) and three to five seconds for the eccentric (when you reverse the motion). This will make the exercise tremendously harder, increase the time under tension, and improve your mind-muscle connection as well. 

Banded Dumbbell Pullover

If you’re an experienced lifter who already mastered the dumbbell pullover, which is itself a free-weight variation of the straight-arm pushdown, then you can take things to the next level. This is one of the most intense lat isolation exercises.

The problem with the basic dumbbell pullover is that there is little-to-no resistance at the top of the movement due to gravity’s limited effect on the weight. Strapping a band around the dumbbell, with an anchor point far behind your head, results in a continuous curve of resistance with a deep stretch and a hard peak contraction, resulting in a greater stimulus for muscle growth. (3)

Benefits of the Straight-Arm Pushdown

The straight-arm pulldown is very unique among back exercises because it allows you to zero-in on your lats without much fatigue or involvement from other back muscles.

Muscle Growth

Single-joint exercises are ideal for hypertrophy (muscle growth) because their purpose is to isolate a target muscle as much as possible. Isolation movement aren’t as effective for building strength because they weight used is limited, but if when it comes to talking strictly about muscle growth, they can be just as efficient as multi-joint exercises. (4)

Isolate Your Lats

If you’re a physique enthusiast and your lats are a weak point, the straight-arm pushdown is a perfect fix to bring them up to par. The fact that the straight-arm pushdown isolates the lats means you can really focus on them and correct any imbalances. You don’t have the risk of having your biceps, shoulders, or other back muscles taking over the movement.

The exercise also generates relatively less fatigue and is easier to perform than a multi-joint back exercise, meaning you could train it more often than other movements. The high-tension exercise is also better at increasing mind-muscle connection in your lats, something many lifters struggle with, but it can result in more muscle growth.

Muscles Worked by the Straight-Arm Pushdown

The straight-arm pushdown might be an isolation exercise, but the truth is that you can never isolate a single muscle. Let’s see what it trains.

Latissimus Dorsi

The lats are the biggest back muscle, giving it all its width. It goes from your hip bone to your humerus (arm bone) and attaches to your spine. This muscle has many functions including extending or flexing your torso, and moving or rotating the shoulder.

During the straight-arm pushdown, the lats are recruited when bringing your arms down toward your body’s midline. The straight-arm pushdown is one of the few back exercises that can perform this movement with limited involvement from the biceps.

Teres Major

This upper-back muscle goes from the humerus to the scapula, and it assists the lats in almost every function. The teres is heavily recruited during the straight-arm pushdown to stabilize your shoulder blades as your shoulders rotate and move through the range of motion..

Triceps Brachii

Even though the straight-arm pushdown primarily targets the back muscles, you’ll most likely feel your triceps burn during the exercise because they’re being worked statically, to maintain the straight-arm position. This posterior arm muscle consists of three heads (the long, lateral, and medial heads).

The long head, in particular, goes from the elbow to the scapula (shoulder blade) and it assists in moving your in toward your body’s midline, similar to the lats. 

How to Program the Straight-Arm Pushdown

The straight-arm pushdown is ideally used for hypertrophy. In that regard, you should use repetition schemes conducive to muscle growth. 

Moderate Weight, Moderate Repetition

This time-tested approach is the go-to for most bodybuilders. Three to four sets of eight to 12 repetitions will provide ample muscle tension and stimulus for optimal growth. This is a staple approach for a well-rounded back workout.

Low Weight, High Repetition

You can also use longer duration sets as a “finisher” for a serious burn and to practice technique. Two to three sets of 15 to 20 repetitions at the end of a session will encourage muscle growth as well, but will provide a different feeling from relatively heavier and lower rep training. Be sure to keep good posture and avoid swinging the weights as the reps get higher.

Straight-Arm Pushdown Variations

Once you’ve mastered the standard movement, you can try these variations to provide the same benefits to your body while creating a different stimulus. While these exercises are similar, the technique and movement differences will allow you to progress even further. (5)

Kneeling Straight-Arm Pushdown

This variation can be an excellent addition if you’re a taller lifter because it lets you use a full range of motion without worrying about the weight stack hitting the top of the pulley.

The kneeling position also provides more core and stability work because it’s harder to maintain and stabilize your balance. This increased core activation can be transferable to other exercises like the pull-up or general sports activities.

Dumbbell Pullover

This old school exercise is a favorite among classic bodybuilders. You only need a dumbbell and a bench, which is invaluable when you train during peak hours in a busy gym. You can either lie fully flat on a bench, or across it resting only your upper back on the bench which will increase the difficulty, thoracic (upper back) stretching, and core recruitment of the exercise.

The dumbbell pullover is also interesting because it changes the curve of resistance of the exercise — it emphasizes the lengthened contraction and the stretch of the muscle, but there’s almost no tension at the top. This can provide a completely novel stimulus which may trigger more growth.

Bent-Arm Barbell Pullover

This exercise is as old school as its dumbbell cousin and it follows the same general principles but this time, you’re using a barbell which changes your hand position and grip width.

The other key difference is that you’re not keeping your arms straight, but bent at around 90-degrees. The angle is maintained for the entire lift. This helps to put the lats into a nice, deep stretch. A few sets of practice and you’ll be able to appreciate the unique feeling of this classic movement.

Frequently Asked Questions

How wide should my grip be to target the lats?

The standard grip with a straight-arm pushdown is around shoulder-width, but it’s more a question of comfort. Some lifters feel more natural pulling with a much wider grip, holding a lat pulldown bar attachment well-beyond shoulder-width. Other lifters use a rope handle and keep their hands almost touching each other during the exercise.
Use the grip width that allows you to feel the target muscles contract and stretch without causing any shoulder discomfort and without interference from other body parts. The most important part of the movement is maintaining a straight-arm position, not bending your arms throughout the lift.

When should I do the straight-arm pushdown in a workout?

Isolation exercises are often best performed later in a workout, especially when there is a significant stretch involved in the exercise, like the top position of the straight-arm pushdown. This helps to make sure your joints and muscles are fully warmed up to safely utilize the full range of motion.
You should do your heavier compound exercises, like rows or pull-ups, earliest in the workout when you’re fresh and can move the most weight, then finish the target muscle with the straight-arms pushdown at the end of the session.
However, you could sometimes use the this movement earlier in the session if you have trouble feeling your lats. Isolation exercises are great for “pre-exhausting” individual muscles and developing the mind-muscle connection.

Push Yourself to the Next Level

The straight-arm pushdown can help you define and reinforce your back whether you’re a beginner or an experienced lifter. If you’re looking to step up your back game, fill your shirts, and get stronger, it’s time to appreciate this rare isolation exercise.

References

  1. Faigenbaum AD, Myer GD. Resistance training among young athletes: safety, efficacy and injury prevention effects. Br J Sports Med. 2010 Jan;44(1):56-63. doi: 10.1136/bjsm.2009.068098. Epub 2009 Nov 27. PMID: 19945973; PMCID: PMC3483033.
  2. Calatayud J, Vinstrup J, Jakobsen MD, Sundstrup E, Brandt M, Jay K, Colado JC, Andersen LL. Importance of mind-muscle connection during progressive resistance training. Eur J Appl Physiol. 2016 Mar;116(3):527-33. doi: 10.1007/s00421-015-3305-7. Epub 2015 Dec 23. PMID: 26700744.
  3. Schoenfeld, Brad J. The Mechanisms of Muscle Hypertrophy and Their Application to Resistance Training. Journal of Strength and Conditioning Research: October 2010 – Volume 24 – Issue 10 – p 2857-2872 doi: 10.1519/JSC.0b013e3181e840f3
  4. Gentil P, Soares S, Bottaro M. Single vs. Multi-Joint Resistance Exercises: Effects on Muscle Strength and Hypertrophy. Asian J Sports Med. 2015 Jun;6(2):e24057. doi: 10.5812/asjsm.24057. Epub 2015 Jun 22. PMID: 26446291; PMCID: PMC4592763.
  5. Baz-Valle E, Schoenfeld BJ, Torres-Unda J, Santos-Concejero J, Balsalobre-Fernández C. The effects of exercise variation in muscle thickness, maximal strength and motivation in resistance trained men. PLoS One. 2019 Dec 27;14(12):e0226989. doi: 10.1371/journal.pone.0226989. PMID: 31881066; PMCID: PMC6934277.

Featured Image: ANRproduction / Shutterstock

Source

November 4, 2022

How to Do the Upright Row for More Upper Body Muscle

Most shoulder exercises involve pressing a weight overhead, while most back exercises involve pulling a weight toward your body. The upright row is a little bit of both. This unique vertical pulling exercise targets your shoulders as well as your upper back.

Muscular person lifting barbell to shoulders.

Credit: Benoit Daoust / Shutterstock

This movement forms the basis of the Olympic lifts and other vertical pulling variations. It’s versatile and can be performed nearly any tool including a barbell, EZ-curl bar, resistance bands, even one or two dumbbells or kettlebells.

The classic and most common movement is the standard barbell upright row. This allows you to build the most vertical strength and power while packing size onto your “yoke” — the trapezius, upper back, and shoulders. Here’s everything you need to know to thrive with this weightlifting staple.

How to Do the Upright Row

The upright row is a vertical pulling exercise, moving the weight from your waist to near your shoulders. This movement can simultaneously improve upper body coordination and power for sports performance, while building some beefy shoulders and upper back.

Step 1 — Nail Your Starting Position

Muscular person in gym holding barbell

Credit: Breaking Muscle / YouTube

Stand up straight, holding a barbell with a shoulder-width grip at arm’s length. Drop your shoulders down, lift your chest up, and engage your glutes. Have your knuckles facing the ground and flex your thighs for the entire set. Tuck in your chin and keep a forward gaze to help maintain good posture throughout the entire set.

Form Tip: You can adjust your grip width to change the muscle recruitment. (1) A closer than shoulder-width grip will emphasize your front deltoids (shoulders). Lifting with a much wider grip will hit your upper traps harder.

Step 2 — Lead With Your Elbows

Muscular person in gym lifting barbell to shoulders

Credit: Breaking Muscle / YouTube

Bend your elbows and pull them up to shoulder-height. Keep the barbell close to your body and bring it up until you reach roughly chest-level. Maintain an upright torso and don’t let your hips swing the weight up. Keep your core, quads, and glutes engaged to keep a strong, stable posture. Squeeze your shoulder blades, trapezius, and shoulder muscles as you pause briefly in the top position. Don’t lean too far back when the weight is at the top.

Form Tip: In the top position, your elbows should be nearly level with your shoulders. Your wrists should be slightly below your shoulders, and the barbell should be below your wrists. This will help to keep your joints in strong and healthy positions.

Step 3 — Lower the Weight with Control

Muscular person in gym lowering barbell from shoulders

Credit: Breaking Muscle / YouTube

Keep the weight close to your body as you slide it back down toward the starting position. Grip the barbell tightly to maintain full control. When your arms are straight, pause and reset to ensure a good posture before doing the next rep.

Form Tip: Take three seconds to lower the barbell. This will help you control the eccentric (lower phase) and increase muscular tension for more growth.

Upright Row Mistakes to Avoid

The upright row may seem easy — you pull the barbell up and down your body and let the upper body gains begin. But, hang on, there is more than meets the eye here. Avoid these mistakes to get the most out of this exercise.

Lifting Too Heavy

As tempting as it is to load up an exercise to see how much you can lift, the upright row isn’t that exercise. It needs to be treated as an “accessory” to support your vertical pulls and to build muscle in your shoulders and upper back. It shouldn’t be trained for “absolute strength,” or the most amount of weight you can lift for a single repetition.

Trying to pull too much weight will encourage you to swing your body for momentum, which can strain your lower back. Excessively heavy weights can also stress your shoulder joints in the top position.

Avoid it: If you find yourself needing body English to pull the weight up, and if you cannot control the eccentric for two or three seconds, don’t be a hero. Lighten the load and lift with good form and proper control for better results.

Lifting Your Elbows Too High

Bringing your elbows higher than parallel to the floor may cause shoulder issues like impingement or bursitis when repeated over time. (2) Rather than driving your elbows up to your ears and trying to pull the bar to your neck, stop when your elbows have reached shoulder-level.

Muscular person in gym lifting barbell to shoulders.

Credit: MDV Edwards / Shutterstock

More range of motion is not better in this case because, as your elbows rise above shoulder-level, your shoulder joint is put into an awkward and potentially dangerous position as the smaller tissues within the joint capsule can be compressed and potentially damaged.

Avoid it: Pay attention to where your elbows are in relation to your shoulders. As you raise the weight, focus on reaching the appropriate height and not any farther.

Leaning Back

If you’re pushing the limits with too much load or trying (inefficiently) to create a longer range of motion, you may end up leaning too far back and extending your lower back while pulling the weight upwards.

When that happens, you lose good posture and put yourself at risk for a potential injury. You also add a “diagonal” movement to what should be a vertical pull, which changes your leverage and reduces the difficulty of the lift.

Avoid it: Keep your core tight, and engage your quads (thighs) and glutes for the entire set. When you lose that muscular engagement, end the set and consider lightening the load.  

Letting The Bar Drift Away

If you get tired and begin using momentum to finish your set, or if you’ve got too much weight loaded, the barbell may drift away from your torso because you’re using too much body English and can’t maintain control over the bar.

Person in gym doing upright row exercise.

Credit: MDV Edwards / Shutterstock

As the bar gets farther in front of your body, your smaller rotator cuffs are put under more stress, your wrist and elbow joints are put under more strain, and your overall leverage decreases which removes muscular activation from your upper back.

Avoid it: Keep your shoulders down and your chest up. This should help to recruit your shoulder and upper back muscles, which will help keep the barbell close to your torso as you lift and lower the weight.

How to Progress the Upright Row

The upright row may not always be the ideal movement for a vertical pulling exercise depending on your individual mobility. You may benefit from working up to the full barbell upright row. Here’s how to get started.

Two-Dumbbell Upright Row

The barbell can sometimes be unforgiving for lifters with existing wrist or elbow joint problems. A barbell also locks your hands into a fixed width and a position that may be uncomfortable for your current wrist or forearm mobility. Performing dumbbell upright rows is an excellent way to build size and strength while working around any mobility issues.

Dumbbells allow your hands and wrists to naturally rotate during the exercise, and this freedom of movement is more forgiving on your joints while still applying tension on the target muscles.

Tempo Upright Row

Every rep of every exercise technically has has four “parts” — the eccentric or lowering portion, the stretched position, the concentric or lifting portion, and the lockout or peak contraction. Manipulating how long each part takes is called tempo lifting, and it can be the key to getting more results from lighter weights.

For example, you might work with 3-1-2-3. This would mean you take three seconds to lower the weight, hold a one-second pause in the stretched position, lift the weight in two seconds, and pause for three full seconds in the contracted position. This puts the working muscles through more time under tension, and more time under tension leads to more growth. (3)

Unilateral Smith Machine Upright Row

While you can perform a single-arm dumbbell upright row, the weight can become problematic and unwieldy as the dumbbells get bigger and bulkier. This is an excellent time to turn to the Smith machine for an unconventional but highly effective movement.

With the fixed range of motion provided by the guided rails, the Smith machine provides extra stability. This allows you to go heavier than any dumbbell variation. The long barbell is also easier and more comfortable to grab than a relatively smaller dumbbell.

Benefits of the Upright Row

The upright row has excellent carryover to other vertical pulling movements like the snatch and clean & jerk. It’s also a great exercise to build a big “yoke” — the muscles across your shoulders and upper back.

Upper Body Muscle

Because the upright row works your deltoid muscles, upper back, and traps, bodybuilders and physique-focused lifters should include this exercise to train their entire shoulder area. It is an effective exercise for shoulder hypertrophy (growth), and building the “yoke” helps you look fit, muscular, and athletic even when you’re wearing a baggy sweatshirt.

Strength Carryover

If you’re a strength athlete involved in CrossFit or Olympic weightlifting, you are regularly performing lifts such as power cleans or high pulls. Training the upright row will have a direct carryover to the performance of these lifts because it trains the same muscle groups and supports overall development.

The upright row is also a good accessory exercise for Olympic weightlifting because it mimics the movement path of the snatch and clean. Although the full Olympic lifts train total-body power, the upright row helps to build the muscles involved, which helps to strengthen the entire movement.

Person in gym performing barbell Olympic lift.

Credit: The Art Of Life / Shutterstock

During the snatch and the clean & jerk, it’s essential to keep the barbell close to your torso when it travels at full speed. Doing the barbell upright row as an accessory exercise will improve the strength needed to keep the barbell close to your body. 

Improved Posture

The barbell upright row targets the upper back and upper traps, which are essential for good posture. Improving postural strength has excellent carryover when keeping a neutral spine for barbell squats and deadlifts, or when simply walking in daily activity.

Improved Core Strength

The upright row is primarily an upper body exercise, so your anterior core (abs and hips) and posterior core (lower back and glutes) work hard to maintain a neutral posture. With the weight being in front of your body, your six-pack muscles are working hard so you don’t round forward or tilt sideways, while your posterior core ensures you don’t extend your lower back as you pull the load up toward your chest.   

Muscles Worked by the Upright Row

The upright row is predominantly an upper body movement with your core and lower body muscles playing a supporting role. Here are the major muscles trained by the upright row.

Trapezius

The trapezius muscle’s primary function is controlling your shoulder blades, which occurs when pulling the barbell up. The scapulae (shoulder blades) outwardly rotate to pull the barbell up your torso. The vertical pulling motion of the upright row is in the trap’s wheelhouse.

Deltoids

All three heads of the deltoids — the front, side, and rear — are trained in shoulder abduction when your upper arm rises out to your sides. This is seen most significantly in the peak contraction at the top of the upright row.

Upper Back

The upper back (including your rhomboids and teres) plays two roles during the upright row. It controls the upward rotation of the scapula, as you reach the top part of the repetition, and it works to keep a good lifting posture with a neutral spine from top to bottom. 

Biceps

Because your elbows bend and flex during the upright row, your biceps are also trained. However, they play a supportive role and aren’t the primary target. If your biceps are fatiguing before other muscles, adjust your grip width and focus on driving your elbows up — don’t overfocus on pulling with your hands. 

Core

Your abdominals, obliques, and lower back work surround your torso to support your spine. This allows you to remain in a good overall posture so you can focus on the rest of the upper body muscles doing their job to move the weight.

How to Program the Upright Row

The upright row can be customized by adjusting sets and reps to suit your personal goals. The upright row cops some flack in lifting circles because it can put the shoulders in a potentially vulnerable position. But when the movement is programmed properly and performed correctly, it can be an extremely beneficial exercise with limited risk.

For Strength

Like many barbell exercises, the upright row can increase overall upper body strength. This is done by performing fewer reps and a few more sets at a relatively heavier weight. To focus on improving your upper back strength, perform three to five sets of four to six repetitions. However, the movement should remain strict and without any swinging. If you have to heave the weight up, you’ve gone too heavy.

For Performance

The barbell upright row can be performed when weightlifting athletes want to improve their bar path, coordination, and strength for Olympic lifts. When this is the case, use a moderate weight with a higher volume — three to four sets of 10 repetitions works well.

For Muscle  

When looking to build your yoke, relatively higher reps with a light to moderate weight should be your go-to. This lets you emphasize your shoulders and upper back with higher volume to overload the tissue for better potential muscle growth. Here, anywhere from three to five sets of 10 to 15 repetitions works well.

Upright Row Variations

Although the barbell upright row is a great exercise to build your shoulders and upper back, it helps to have a few variations in your back pocket to pull out for variety, to reduce boredom, and to avoid overuse injuries. Here are three such variations.

Kettlebell Upright Row

The kettlebell upright row can be performed with one or two kettlebells. Holding one kettlebell with both hands doesn’t favor the shoulder joint, so either perform is with one weight in one hand or one weight in each hand.

Working unilaterally (a weight in each hand) can help strengthen imbalances between sides. The kettlebell also offers a different feel compared to a dumbbell because the weight’s center of gravity is lower. This can help to reinforce keeping the weight close to your body during the lift.

 Snatch Pull

The snatch pull is an Olympic lift variation that trains lower- and upper body power. Because you’re driving the weight with your lower body, more weight can be used than with a strict upright row.

The snatch pull mimics a deadlift setup combined with the pulling part of the upright row, but using a wide snatch-grip will further strengthen your upper back. The explosive nature of the lift also helps to develop power and strength.

Single-Arm Upright Row 

If you haven’t got access to a kettlebell, the single-arm upright row with a dumbbell is an effective and reliable variation.

The focus on unilateral strength will help strengthen each side of the body to improve overall bilateral performance. This is one of the most joint-friendly variations because you can easily adjust the range of motion and your hand position to your individual mobility needs.

FAQs

It’s perfectly fine if you’re unsure about the pros and cons of the upright barbell row, because it’s earned a slightly “controversial” reputation over the years — partly due to its demands on the shoulder joint, and partly due to lifters simply performing it incorrectly and negating its benefits.

Why do my wrists bend during the upright row?

Your wrist will flex or bend toward your body when the load gets heavy as you pull the weight up toward your chest. While some wrist flexion is okay at the end range of motion, you should reduce the weight if your wrists hurt.

The older lifters at the gym say the upright row will grind my shoulders into dust. Are they right?

The barbell upright row is not for everybody. Because the shoulders are internally rotated, a fixed range of motion and good shoulder mobility is required, and some will feel pain, particularly at the top of the lift.
If this is the case, perform kettlebell or dumbbell upright rows while improving your shoulder mobility. Work around the issue and not through it.

Know Your Row

The upright row is a time-tested movement for adding size to your shoulders, traps, and back and building pulling strength that carries over to almost every upper body exercise. It’s short-sighted to dismiss the upright row as simply being potentially dangerous. When performed with good technique, following proper programming, it can be a critical player in building a more muscular and more powerful upper body.

References

  1. McAllister, M. J., Schilling, B. K., Hammond, K. G., Weiss, L. W., & Farney, T. M. (2013). Effect of grip width on electromyographic activity during the upright row. Journal of strength and conditioning research27(1), 181–187. https://doi.org/10.1519/JSC.0b013e31824f23ad
  2. Schoenfeld, Brad MSc, CSCS1; Kolber, Morey J PT, PhD, CSCS2; Haimes, Jonathan E BS, CSCS2. The Upright Row: Implications for Preventing Subacromial Impingement. Strength and Conditioning Journal: October 2011 – Volume 33 – Issue 5 – p 25-28 doi: 10.1519/SSC.0b013e31822ec3e3
  3. Burd, N. A., Andrews, R. J., West, D. W., Little, J. P., Cochran, A. J., Hector, A. J., Cashaback, J. G., Gibala, M. J., Potvin, J. R., Baker, S. K., & Phillips, S. M. (2012). Muscle time under tension during resistance exercise stimulates differential muscle protein sub-fractional synthetic responses in men. The Journal of physiology590(2), 351–362. https://doi.org/10.1113/jphysiol.2011.221200

Featured Image: YAKOBCHUK VIACHESLAV / Shutterstock

Source

October 28, 2022

How to Do the Trap Bar Deadlift — Variations, Benefits, and Common Mistakes

Filed under: Fitness,Training — Tags: , , , , , — admin @ 1:37 pm

In growing numbers, most commercial gyms are adding at least one trap bar to their arsenal of available equipment. As a gym member, you should be counting your blessings.

With all of the unique benefits a trap bar can provide for almost every serious lifter, there’s a good case to make for it to become the number one tool for lower body training. Sorry, barbell, you had a good run.

person in gym doing deadlift
Credit: carlesmiro / Shutterstock

Though the trap bar can be used for a handful of different exercises, its most commonly put to use for the highly effective trap bar deadlift. Here’s how to get started.

How to Do the Trap Bar Deadlift

The trap bar is typically a hexagonal shape with two long necks on either end for plate loading and a set of handles at the sides. There are often two types of handles on each end, one elevated higher than the other depending on the bar’s orientation.

The trap bar can work well with either the higher handles facing upward or the higher handles facing the floor. In gym-speak, this is referred to as pulling “high handle” or “low handle” and each has its merits. Here’s more about the movement.

Step 1 — Get Set to Pull

Flip the trap bar with the high handles up, which provides a shorter range of motion as you get the hang of the exercise. Step inside the trap bar with a stance that fits your comfort. Something around hip-width is most common for lifters using a barbell, but when you’re lifting a trap bar, a slightly wider stance — between hip-width and shoulder-width — is a more ideal position. With your feet lined up with one another, reach down and grab the handles.

Be sure to hold the bar in the center of the handles for a balanced grip. Since it’s a large cradle, going off center by even a half an inch can cause the trap bar to tip forward or back, which can wreak havoc on your strength and stability.

Form tip: If your gym has them, load the bar with bumper plates if you’re not yet able to lift 45-pound plates on either side. Lighter bumper plates are still the same size as 45-pound iron plates; they provide the proper elevation off the ground to make for the ideal lifting point. Smaller plates will extend the lift’s range of motion, making it a harder and more limiting exercise.

Step 2 — Get Tight

muscular person in gym preparing to deadlift trap bar
Credit: boyceperformance / YouTube

Set your back position and “wedge” yourself into position. To do this, drop your hips down while keeping your heels on the floor. Think about making your spine “long” by sticking your butt out and simultaneously pushing your chest up tall. Think about squeezing your armpits tight to engage your upper back musculature at the same time.

You should feel tension building in your upper back, arms, glutes, and legs. Take a big breath in and hold it before beginning the lifting phase.

Form tip: Keep your knees in line with your toes. It’s okay if your knees end up a bit in front of them, but they must point in the same direction as your toes to reduce strain on your knee and hip joints.

Step 3 — Pull Up

muscular person in gym doing trap bar deadlift
Credit: boyceperformance / YouTube

Dig your feet into the floor, squeeze your glutes and quads, and stand tall with the weight. Your glutes will tell you when you’ve reached full extension. There’s no need to lean backward or overarch your lumbar spine. Once you’re near the top, exhale as you approach lockout.

Your shoulders, hips, and legs should end up nearly in alignment in the top position. Pause briefly to ensure a strong, stable posture and to minimize any swaying of the weights.

Form tip: Keep your arms straight throughout the entire repetition. Pulling a deadlift with bent arms not only reduces your power output, but dangerously increases stress on the relatively smaller biceps muscle and elbow joint.

Step 4 — Lower the Weight

muscular person in gym doing trap bar deadlift
Credit: boyceperformance / YouTube

Reverse the motion to lower the weight under control. It’s important to remain tight and braced the entire way back down. Think about “sticking your butt out” to ensure your back stays flat and doesn’t round as you descend.

Form tip: As you approach the ground, you have the option to either let the weight briefly glance off the ground (sometimes referred to as “touch and go”) or to freeze and let the weight settle on the floor between reps. Each is valid and perfectly acceptable. What’s not acceptable is lowering quickly and actively bouncing off the floor to use the rebound as momentum, making the next repetition easier.

Trap Bar Deadlift Mistakes to Avoid

Simply following the instructions on proper execution will leave you ahead of the game when it comes to avoiding mistakes, but there are still a few things to consider.

Losing Control of Your Knees

The safe and efficient execution of the trap bar deadlift requires your knees and toes to be aligned. It’s unfortunately very common for knees to cave inward during deadlift. This isn’t ideal as it will place stress on the wrong places (like the medial sides of your knee joint).

person in gym doing trap bar deadlift
Credit: MDV Edwards / Shutterstock

Part of the issue may be in the footwear being used. Too much cushioning, as well as too little support, can highlight the instability of a lifter’s feet and arches. Your knee will almost always follow the arch of your foot. In the event of arch collapse, your knees will be guaranteed to move in toward each other, especially if serious amounts of weight are being lifted.

Avoid it: Be sure to choose good quality, flat footwear that still offers enough support. Furthermore, help yourself by creating a “tripod” with your feet — raise your arches, spread the toes, and dig in to the ground during your initial setup.

Forgetting Your Head Position

You might get so transfixed on your lumbar and thoracic spine(lower and upper back, respectively) that your forget your head is directly connected to another crucial part of the spine — the cervical region. Respecting proper spinal alignment, from top to bottom, is integral to a safe lift.

long-haired person in gym doing deadlift
Credit: YAKOBCHUK VIACHESLAV / Shutterstock

Many lifters will use the sky or ceiling as their “target,” thinking that looking at the place they want to finish will help them through the lift. Though this might help as a visual cue, it isn’t a wise course of action to lift something heavy from the floor while your neck is in full extension (looking upward). Doing so can strain the smaller support muscles of your neck and excessively stress the cervical spine.

Avoid it: Pick a spot two meters (roughly six or seven feet) in front of you on the ground and focus on that spot. It may even help to place an object like your water bottle or cell phone there. Since your head will instinctively follow your eyes, this will keep your neck in the right position.

How to Progress the Trap Bar Deadlift

The trap bar deadlift is adaptable to lifters of many experience levels and abilities. To more finely tune your practice and master the exercise, there are a few specific progressions to consider.

Elevated Trap Bar Deadlift

Adjusting the bar height can be a critical step to customizing your range of motion. If you’re well above-average height, even the high handles might be too low to properly get into a safe and strong pulling position. Placing steps or platforms under each side of the weight plates can put the bar into better alignment.

Of course, it’s essential that you raise both sides to the same height. Double-check your bar before beginning a set to make sure it’s level. An imbalanced bar will put you in an asymmetrical pulling position which would make proper technique nearly impossible.

Deficit Trap Bar Deadlift

Once you’ve mastered the trap bar deadlift (and truly mastered it, not simply gotten tired of learning proper form), you can eventually tackle one of the most challenging progressions, provided you’ve built significant mobility and muscle control.

By standing on a plate or small platform, you increase the range of motion. This is a drastic challenge to total-body mobility, stability, and strength. This can also be used to “bridge the gap” between the high handles and low handles, allowing a more incremental change in the range of motion.

Benefits of the Trap Bar Deadlift

Any type of deadlift is, rightfully, known as an undeniable total-body strength-builder. Because of the postural differences and varied muscle recruitment between a trap bar deadlift and a barbell deadlift, these benefits can be amplified.(2)

Building Better Posture

The trap bar deadlift can be a great way to improve your posture while building strength. Particularly, maintaining a stronger spine is crucial for lifters as they age.(3) For most lifters, the trap bar will be a more accessible version of pulling from the floor and it can allow a lifter to continue training heavy without excessive lower back strain.

Better for Mobility Issues

If you’re a lifter who struggles to achieve the mobility or flexibility for a conventional barbell deadlift, the high handles of the trap bar coupled with its neutral grip will allow you to much more easily attain the correct starting position. This lets you get into a powerful and efficient pulling position with less joint strain.

Ideal Position for Tall Lifters

The trap bar deadlift is a staple movement among professional sports athletes, who often carry larger levers and taller frames. Think of the typical NBA or NFL player — big overall frames often with long limbs.

If you’re a taller or long-legged lifter, you’ll probably be counting your blessings by incorporating the trap bar deadlift instead of force-feeding your oversized body a barbell deadlift. The mobility demands and overall body position, once again, become the movement’s biggest saving grace.

Versatile Strength-Builder

Plainly put, this lift is great for everyone in the gym. Whether it’s a lifter who can’t quite get the flexibility or mobility for a barbell deadlift, a taller lifter with unfavorable leverages for the deadlift pattern, or a strength- or size-focused trainee who’s looking to get more out of a deadlift as far as quadriceps strength and development go.

The trap bar deadlift, with all things equal, is one of the few “do no wrong” exercises that can be invaluable to pretty much anyone’s program.

Muscles Worked in the Trap Bar Deadlift

The deadlift is a movement that spares very few muscles , from gripping the bar with your hands, to stabilizing your core and upper back, to driving wth your legs. However, it is predominantly a lower body movement.

Quadriceps

When performing a trap bar deadlift, there’s one major change to the muscles involved compared to the more familiar barbell deadlift. Since your body can sit a bit taller because your knees and shins can travel forward (due to no bar blocking them), it creates a deeper knee flexion and includes much more quadriceps involvement.(4)

This makes the trap bar deadlift a more complete leg exercise that, unlike the barbell deadlift, isn’t as biased toward the glutes and hamstrings. This is also important information to consider if you struggle with squatting in general, or if you’re dealing with an upper body injury that prevents barbell squatting from being on the menu.

Posterior Chain

Any deadlift movement will heavily recruit the muscles of the posterior chain — especially the glutes, hamstrings, and lower back. However, the overall body position during a trap bar deadlift actually reduces lower back recruitment compared to the barbell movement.

The neutral-grip of the trap bar disperses weight more evenly across your body, decreasing the lower back strain, while your glutes and hamstrings are significantly recruited during hip extension to lift the weight and achieve a locked out position.

How to Program the Trap Bar Deadlift

There’s a little bit less wiggle room here compared to other movements in the gym. The trap bar deadlift usually serves as a substitution to the more common deadlift and is best programmed similarly.

Heavy Weight, Lower Volume

The trap bar deadlift is a huge movement that typically enables a lifter to move the greatest amount of weight possible as far as plate-loaded free weight exercises go. It’s best positioned at or near the very beginning of your workout. That’s when your central nervous system will be the sharpest, enabling the greatest outputs of power and strength.

It’s also when your body as a whole will be the freshest compared to later in the workout. It invites a bit more risk to train a deadlift while fatigued near the end of a workout.

Apply a fair amount of intensity and volume to the trap bar deadlift as the “leading” movement in your lower body workout. Let the remaining lifts of the day serve as “assistance exercises” that take on relatively less volume with lower intensity. A heavy strength workout with the trap bar would be five sets of five, six sets of four, or even eight sets of three, using weight between 85 and 90% of your one-repetition max.

Trap Bar Deadlift Variations

Technically, the trap bar deadlift could be considered a “variation” of the barbell deadlift. However, there are other exercises the compare to the trap bar deadlift for variety and a range of separate benefits.

Low Handle Trap Bar Deadlift

Going “low handle” with the trap bar deadlift is in order once you’ve mastered the standard version of the movement. This will be the first variation most lifters progress to. Keep aware that low handles properly will mean having the requisite mobility to maintain a flat spine.

If you can’t do it, don’t sweat it. Continue going with the high handle and working on your mobility and flexibility until you can safely achieve a deep position with a flat back.

Heels-Elevated Dumbbell Squat

It can be beneficial to lower body health, strength, and size to let your knees go into deep flexion using the right movements. Many gyms have specific a slant board which puts your feet into a forward slope, creating more room for your knee to travel forward while your torso stays upright.

This is huge knee-strengthener and a major quad-developer, but the position takes some getting used to because many lifters have engrained “knees behind toes” for much of their lifting career. Practicing this exercise with light weights is a great way to prepare for the transition from straight bar deadlifts to a trap bar, especially if you’ve done a lot of barbell deadlifting in your days.

Frequently Asked Questions

What’s the difference between the trap bar deadlift and a barbell deadlift?

The trap bar involves a cradle that surrounds you, rather than a straight bar that rests in front of you when deadlifting. This distinction makes for a few major differences when it comes to the overall execution and geometry of the lift.

In any big lift, the goal should be for the weight’s center of mass to be positioned over your feet (or within the lifter’s “footprint”). This will be the strongest and most efficient way to move the weight with the lowest potential for risk.

In the case of a straight barbell, your shoulder blades need to be positioned over the bar for forces to be properly transferred up the body to support the weight’s vertical path. To achieve this starting position, your shins need to remain fairly vertical which will make for a more angled torso position (a deeper “hinge” at the hip joint).

Comparatively, the trap bar doesn’t block your shins from traveling forward, so your knees can position themselves more naturally forward and your hips can drop for a deeper seated position, resulting in a taller torso with less lumbar strain.

Also, a barbell asks for a double overhand grip (palm down) in front of the body. That keeps your shoulders in an internally rotated position while bearing load, which can strain the shoulder joints. A trap bar allows a lifter to use a neutral-grip (palms facing each other), which can be better for shoulder health and overall posture. It’s also slightly less challenging to your grip strength.

Lastly, using the high handles in the trap bar can reduce the pulling space and overall range of motion, which can suit taller lifters and beginners. All of this explains why many lifters’ trap bar deadlifts are stronger than their barbell deadlifts.

Why do some trap bars look so different from others?

When it comes to individual trap bars, the manufacturer of the bar can make a significant difference. For some trap bars, the entire cradle is longer and the bar’s total mass is heavier — one unloaded bar might weigh 40 pounds while another weighs 75 pounds before you add any plates.

Some trap bars have taller high handles, while others are lower. Some can even rotate. Some bars have a wider hexagon, making the handles farther apart, while other brands are a bit tighter to your body.

All of these things need to be taken into consideration when it comes to tracking your numbers and paving the way to progressive overload. It may end up that you’re lifting much more (or less) than you think if you’re using the guide of a classic 45-pound Olympic bar as your reference point. Do your best to know the weight and dimensions of the trap bar you most consistently use.

Step into the Trap Bar

The trap bar deadlift is a go-to movement for lower body strength and muscle development. As long as you have the key points down pat, this is a game changer for making the deadlift accessible to lifters who otherwise may be frustrated with the movement. If your gym has this wonderful piece of equipment, put it to good use rather than let it collect dust in the rack. This is the one move in the gym that deserves much more popularity and much less disrespect.

References

  1. Valleser, Christian Wisdom & Santos, Garizaldy. (2017). EFFECT OF DEADLIFT TRAINING ON CORE STRENGTH IN PREVIOUSLY-UNTRAINED MALES. Journal of Physical Education Research. 4. 10-18.
  2. Lake, J., Duncan, F., Jackson, M., & Naworynsky, D. (2017). Effect of a Hexagonal Barbell on the Mechanical Demand of Deadlift Performance. Sports (Basel, Switzerland)5(4), 82. https://doi.org/10.3390/sports5040082
  3. Carpenter, D. M., & Nelson, B. W. (1999). Low back strengthening for the prevention and treatment of low back pain. Medicine and science in sports and exercise31(1), 18–24. https://doi.org/10.1097/00005768-199901000-00005
  4. Camara, K. D., Coburn, J. W., Dunnick, D. D., Brown, L. E., Galpin, A. J., & Costa, P. B. (2016). An Examination of Muscle Activation and Power Characteristics While Performing the Deadlift Exercise With Straight and Hexagonal Barbells. Journal of strength and conditioning research30(5), 1183–1188. https://doi.org/10.1519/JSC.0000000000001352

Featured Image: MDV Edwards / Shutterstock

The post How to Do the Trap Bar Deadlift — Variations, Benefits, and Common Mistakes appeared first on Breaking Muscle.

Source

May 20, 2022

How to Do the Arnold Press for Fully Developed Shoulders

Filed under: Fitness,Training — Tags: , , , , , , — admin @ 3:01 pm

An exercise’s name doesn’t usually hold too much value beyond summarizing what it is or how it’s done. The bench press has you lying on a bench while pressing. The barbell row has you, well, rowing a barbell. Squat’s gonna squat.

But when a specific exercise variation is named after an individual lifter or coach, it’s usually an indicator that the movement is next-level and should be used accordingly. John Meadows’ Meadows row, Glenn Pendlay’s Pendlay Row, Steve Romania’s Romanian deadlift (Kidding. Although, the more accurate “Nicu Vlad deadlift” would sound pretty cool, too.)

When it comes to eponymous shoulder training, the Arnold press is named after the quintessential bodybuilder of all bodybuilders — the Austrian Oak, the Governator, Arnold Schwarzenegger. Here’s an in-depth look at this delt-builder from the seven-time Mr. Olympia.

How to Do the Arnold Press

The Arnold press is a variation of the standard seated overhead dumbbell press. It uses a different path of resistance and longer range of motion to recruit more muscles into the exercise.

Step 1 — Get Into the Starting Position

Man sitting in gym holding dumbbells at shoulders

Credit: MDV Edwards / Shutterstock

Sit on a bench with a dumbbell in each hand, resting on your thighs with a thumbs-up grip. “Kick” the weight straight up to rest the thumb-side of each weight on the fronts of your shoulders. When both weights are up, slightly lower your elbows and rotate your hands to have your palms facing your mouth.

You should almost be in the top position of a curl, with your arms fully bent and your pinkies facing each other. Keep your shoulder blades pulled back, don’t allow the weights to pull your body forward.

Form Tip: Pretend you’re extra-shy and focus on covering your mouth with the weights in this position. This is a good target for the bottom position and will help to encourage a full stretch and complete range of motion.

Step 2 — Press and Rotate

Man in gym pressing dumbbells overhead

Credit: MDV Edwards / Shutterstock

In a coordinated motion, begin pressing the weights up and back while gradually rotating your hands and arms. As the weights move overhead, your elbows should come to the sides in-line with your shoulders and your palms should turn to face forward.

Continue pressing the weights entirely overhead, bringing them together at the top. In the locked out position, the weights should be nearly touching and your palms should be facing forwards, identical to a standard dumbbell overhead press.

Form Tip: Some lifters have trouble performing the necessary movements simultaneously. Perform the lift slowly and focus on blending the upwards and backwards movement while rotating your hands. The exercise should eventually feel smooth and natural.

Step 3 — Lower to Your Chin

Woman sitting in gym holding dumbbells near shoulders

Credit: MDV Edwards / Shutterstock

From the locked out position, reverse the entire process. Bring the weights down while shifting your elbows to the front and rotating your palms towards your face. In the bottom position, the weights should again be in front of your mouth.

The bottom position should again resemble the top part of a curl with your arms bent and your palms facing your head.

Form Tip: Like the pressing motion, some lifters have trouble performing the movement in reverse order. Go slowly and focus on blending each step to bring your elbows down and forward.

Arnold Press Mistakes to Avoid

Because the Arnold press involves so many moving parts, there are several common technique mistakes which can reduce the effectiveness.

Rotating Your Hands, Not Your Arms

The Arnold press isn’t simply “turning your hands while you press the weight,” because turning your hands doesn’t necessarily change the angle of your shoulder, which means you’re not necessarily recruiting more parts of the deltoid (shoulder).

Man outdoors performing dumbbell shoulder press

Credit: Maridav / Shutterstock

The upper arms, not just the hands and wrists, need to move during the press. Moving the upper arm, which is controlled by the shoulder and upper back, is what changes the pressing angle and increases muscle recruitment.

Avoid It: Make sure your elbows transition from pointing forwards (in the bottom position) to pointing to the sides (in the top position). Your hands should rotate as a natural side effect of shifting your elbows.

Using a Short Range of Motion

Performing an exercise with a short range of motion has been shown to build less size and strength compared to a full range of motion. (1) The extended range of motion of an Arnold press is one of its defining features, and cutting that range of motion short will significantly reduce its benefits.

Man in gym lifting dumbbells

Credit: MDV Edwards / Shutterstock

Some lifters keep the weights at eye-level rather than lowering to their mouth, or they don’t rotate their elbows back in-line with their shoulders and instead keep them angled slightly forwards, or they may avoid locking out at the top. All of these are mistakes that can reduce the overall muscle-building stimulus.

Avoid it: Remember three key points: Get your hands in front of your face at the bottom, have your elbows in-line with your shoulders at the midpoint, and have the weights nearly touching at lockout.

Benefits of the Arnold Press

The Arnold press is named after one of the greatest bodybuilders of all time and it’s been used consistently for decades, so it’s going to be a “pretty good” choice for adding muscle.

Man sitting in gym pressing dumbbells overhead

Credit: Ihor Bulyhin / Shutterstock

Here are a few more reasons to add this complete muscle-builder to any upper body workout.

Long Range of Motion

Compared to the standard dumbbell shoulder press, the Arnold press extends the range of motion several extra inches. This added range increases the stretch, particularly on the front delt muscle, and is a strong stimulus for more growth.

Shoulder Size

The Arnold press is a serious delt-building exercise. The range of motion and long time under tension trigger muscle growth in the entire shoulder, specifically the front and side heads, with some assistance in the upper back and traps.

Muscles Worked by the Arnold Press

The Arnold press is primarily a shoulder exercise, but due to the weight’s path of motion, the upper back and even the biceps play a role in executing the movement.

Bodybuilder flexing back, shoulders, and arms

Credit: Prostock-studio / Shutterstock

By controlling the weights from in front of the body to the sides, muscles are recruited in a unique way, which requires a degree of shoulder and upper back mobility but also delivers more muscle growth.

Deltoids

The deltoids, or shoulders, are composed of three separate heads of the muscle — the anterior/front, lateral/side , and rear. Each head has a slightly different role dictated by the arm’s position relative to the body. The front delt lifts the arm in front of the body, the lateral delt controls the arm out to the side, and the rear pulls the arm back behind the body.

Due to the motion of the weights, the Arnold press recruits all three delt heads significantly, with increased emphasis on the front delts which work extremely hard when the weight is in the bottom position.

Triceps

The triceps are made of three separate heads — the long, the lateral, and the medial. While the lateral and medial heads attach to the upper arm, the long head connects to the scapulae (shoulder blades), with each head being recruited when the arm is in various positions relative to the body (down by your sides, straight in front of your body, overhead, etc.). (2)

The triceps become highly activated during the Arnold press when the weights are roughly ear-level and are recruited to press into the lockout position.

Biceps

The biceps, consisting of the long head and the short head, are involved in bending or flexing the arm as well as rotating the forearms. The long head, specifically, also plays a role in raising the upper arm in front of the body.

The biceps aren’t activated during standard shoulder presses, however, the Arnold press recruits the biceps as stabilizers to control the weight during the lower half of the exercise when the arm is bent and rotated into the overhead position.

Upper Back

The upper back is a collective term for multiple muscles running from shoulder to shoulder and around the shoulder blades, including the trapezius, teres major and minor, rhomboids, and rear deltoids.

The upper back provides stability during the press and is actively engaged to pull the arms backwards during the Arnold press.

Who Should Do the Arnold Press

The Arnold press is a relatively advanced shoulder press variation that can be used by any lifter who can master its performance. 

Lifters Training to Build Muscle

The Arnold press puts the shoulder through a long time under tension, which is shown to be a significant factor for building muscle. (3) This intense exercise will add size to your shoulders, arms, and upper back.

How to Program the Arnold Press

The Arnold press can play a role in any muscle-building routine, especially as one of the first exercises performed in a shoulder-focused workout.

Moderate Weight, Moderate Reps

Training this classic bodybuilding exercise with a classic bodybuilding method of three to four sets of eight to 12 reps is a reliable plan to grow wider delts. Be sure to use a steady, or slightly slow, rep speed and take each set to thorough muscular fatigue.

Mechanical Drop Set Technique

One advanced muscle-building technique that can be very effective with the Arnold Press is mechanical drop sets. It’s a way to continue training a body part after reaching muscular failure on a specific exercise.

While traditional drop sets allow continued training by using a lighter weight, mechanical drop sets use the same weight and switch to a slightly less challenging, nearly identical, exercise to immediately continue training.

For example, if you performed a set of Arnold presses to muscular failure using 40-pound dumbbells, instead of quickly grabbing 25-pound dumbbells and performing more Arnold presses, you would immediately begin performing standard overhead dumbbell presses using the same 40-pound dumbbells.

Because the range of motion with standard overhead dumbbell presses is shorter than with Arnold presses, the exercise is relatively less challenging and you will be able to perform several additional repetitions before hitting muscular failure again. This high-intensity technique allows more total volume to be performed, which can increase the workout’s muscle-building stimulus.

This same technique works for any related exercises, like front squats and back squats, incline bench press and flat bench press, or dumbbell curls and hammer curls.

Arnold Press Variations

The Arnold press can be relatively advanced, but there are several options to train the shoulders with similar size and strength benefits.

Seated Overhead Dumbbell Press

The seated overhead dumbbell press is a classic movement to train the shoulders and triceps. It’s a direct pressing exercise to work the shoulders and triceps.

This exercise is a simple and effective way to train the overhead press without excessive technique cues like standing stability, increased range of motion, or other variables.

Arnold Push Press

The Arnold push press is a standing variation which uses deliberate leg drive, as opposed to unconscious cheating leg drive, to move the weight from the bottom position.

This assistance allows you to use heavier weights while incorporating more total body strength and power.

Arnold Z Press

The Arnold Z press combines an exercise named after one of the greatest bodybuilders of all time (Arnold Schwarzenegger) with an exercise named after one of the greatest strongmen of all time (Zydrunas “Big Z” Savickas). So, yeah, it’s probably worth trying out.

Sitting unsupported on the floor forces your core to be active throughout the exercise and eliminates the ability to cheat the movement with momentum, making it an extremely focused shoulder exercise.

Arnold Press Alternatives

Not all lifters can perform the Arnold press, often due to shoulder mobility issues. There are some effective alternatives to deliver comparable results.

Neutral-Grip Overhead Press

The neutral-grip overhead press maintains your palms facing each other and your shoulders angled towards the front throughout the movement.

This adjusted hand and elbow position reduces shoulder joint strain and is the preferred pressing movement for any lifters dealing with shoulder mobility restrictions.

Landmine Overhead Press

The landmine overhead press is a unique and effective way to train the shoulders at an angle, rather than directly overhead. This makes it more suitable for lifters with mobility issues.

The angled pressing path slightly changes the muscle recruitment, increases core engagement, and reduces joint stress.

FAQs

I hear my shoulder “clicking” during the exercise. Is that bad?

Generally speaking, any noisy joints are a nuisance, but not a real concern. (4) It’s often air moving around the cartilage of the joint, not necessarily the joint grinding itself into oblivion.

However, hearing noises in the joint accompanied by pain and/or inflammation is an entirely different situation and can be an indicator of impending problems. When in doubt, get checked by an orthopedist, physiotherapist, or qualified professional.

It’s named after a bodybuilder, so is it only for big, jacked bodybuilders?

No, any lifter who wants more muscular-looking shoulders can benefit from the Arnold press. Just like any lifter who wants stronger glutes and hamstrings can benefit from the deadlift even though it’s one of the competitive powerlifts. You don’t need to be a competitive powerlifter to benefit from it.

The more exercises you have in your toolbox, the more options you have to fine-tune your own training program to reach whatever goals you’ve set. Experiment and learn plenty of movements – “bodybuilding” exercises, Olympic lift variations, gymnastic-type bodyweight exercises, whatever you think might be useful.

Just be sure to use good technique and sound training principles, and you’ll only get better in the long run.

Do The Arnold Press. Do It Now.

The Arnold press won’t necessarily turn you into an elite bodybuilder, and it certainly won’t turn you into an action star, but it will give you an intense shoulder workout and pack size onto your delts. So it’s time to terminate the excuses and get to work.

References

  1. Pallarés JG, Hernández-Belmonte A, Martínez-Cava A, Vetrovsky T, Steffl M, Courel-Ibáñez J. Effects of range of motion on resistance training adaptations: A systematic review and meta-analysis. Scand J Med Sci Sports. 2021 Oct;31(10):1866-1881. doi: 10.1111/sms.14006. Epub 2021 Jul 5. PMID: 34170576.
  2. Kholinne E, Zulkarnain RF, Sun YC, Lim S, Chun JM, Jeon IH. The different role of each head of the triceps brachii muscle in elbow extension. Acta Orthop Traumatol Turc. 2018;52(3):201-205. doi:10.1016/j.aott.2018.02.005
  3. Burd NA, Andrews RJ, West DW, et al. Muscle time under tension during resistance exercise stimulates differential muscle protein sub-fractional synthetic responses in men. J Physiol. 2012;590(2):351-362. doi:10.1113/jphysiol.2011.221200
  4. Pazzinatto, M. F., de Oliveira Silva, D., Faria, N. C., Simic, M., Ferreira, P. H., Azevedo, F. M., & Pappas, E. (2019). What are the clinical implications of knee crepitus to individuals with knee osteoarthritis? An observational study with data from the Osteoarthritis Initiative. Brazilian journal of physical therapy, 23(6), 491–496. https://doi.org/10.1016/j.bjpt.2018.11.001

Featured Image: MDV Edwards / Shutterstock

Source

May 12, 2022

Build Back Muscle and Work Up to a Pull-Up With the Lat Pulldown

Filed under: Fitness,Training — Tags: , , , , , — admin @ 2:47 pm

Many gym-goers are well aware of the pull-up, but struggle to perform their first rep. While it may be fairly easy for some, for others, it is a much longer journey that can be shortened by spending time building the strength of the back musculature.

This is where the lat pulldown, sometimes called the front pulldown, comes in. It’s equally effective for beginners, intermediates, and advanced lifters because it can be performed with a variety of attachments and requires minimal equipment to execute. Here’s how to get the most out of this fundamental back-building exercise.

How to Do the Lat Pulldown

Because the lat pulldown uses a cable machine, it provides a great opportunity for muscle development. Master the basic movement, and then you can manipulate your body position and bar attachments to target your back muscles in a variety of ways.

Step 1 — Grab the Bar and Sit Down

Muscular man performing lat pulldown in gym

Credit: martvisionlk / Shutterstock

Attach a wide bar to the pulldown cable attachment. Take a seat and adjust the kneepads to keep your lower body locked into place. Stand up and take hold of the bar wider than shoulder-width using a pronated grip (palms facing away from you).

Keep hold of the bar with slightly bent arms and use your bodyweight to descend into the seat. Shift your thighs under the pads and firmly plant your feet on the floor.

Form Tip: Stand with your thighs as close to the pads as possible before descending to help you better get into position smoothly. Locking your legs beneath the pads helps to provide stability and can reinforce a strict upper body position.

Step 2 — Pull the Weight to Your Chest

Woman performing pulldown exercise in gym

Credit: lunamarina / Shutterstock

Remain in an upright position and create a very slight arch in your lower back, opening your chest towards the ceiling. Pull your shoulder blades together and down. Engage your core and pull the bar until it is underneath your chin or touches your chest without using any momentum.

Your torso should remain mostly stationary throughout the entire rep. Rather than just thinking “pull using every muscle available,” a great cue is to think about pulling your elbows out to the sides and down into the floor.

Form Tip: Imagine you are wearing pants that have back pockets and think about pulling your shoulder blades back and down towards those pockets. This scapular retraction and depression helps to engage more upper back muscles.

Step 3 — Raise Your Arms, Lower the Weight

Woman in gym performing pulldown exercise

Credit: Slatan / Shutterstock

Once you have reached the bottom, raise your arms under control, remaining seated. When your arms are fully stretched, release your shoulder blades from the pulled back position. Don’t shift or swing your upper body while your arms move.

Form Tip: When ascending back to the top of the movement, it is common to see people moving too fast. By not controlling the weight, you decrease stress on the back muscles and allow arms to take over. Take the time to feel your back muscles as they slowly stretch and fully lengthen. This body awareness creates a sense of mindfulness and helps you to use your back muscles more effectively in this and other exercises.

Lat Pulldown Mistakes to Avoid

While your lower body is set in place, your upper body is unsupported and simple mistakes in technique can reduce muscle activation and overall effectiveness.

Pulling the Bar Behind Your Neck

While behind the neck pulldowns are technically an exercise variation and not necessarily a “mistake,” it’s important to know that the movement can put you at risk of shoulder injury.

Woman in gym performing behind the neck pulldown

Credit: Zoriana Zaitseva / Shutterstock

Due to the positioning of the shoulder joint, you may find yourself with some discomfort and irritation of the shoulders. (1)(2) Avoid this movement altogether and keep the bar in front.

Avoid It: Lifters often use the behind the neck pulldown thinking that it targets the back muscles differently. However, research has shown that this variation is no more effective at training the lats than your standard lat pulldown, yet has a higher potential for injury. (3)

Gripping the Bar Too Wide

Some lifters use an extremely wide grip, often at the extreme ends of the bar, in the hopes that it will help to build wider lats. Unfortunately, “wide grip = wide lats” doesn’t pan out.

Muscular man in gym performing wide grip pulldown

Credit: NDAB Creativity / Shutterstock

Research has shown that the wide-grip variation is not more effective than the standard lat pulldown for training your lats. (4)

Avoid It: Maintain a standard grip, slightly wider than your shoulders. To build a wider back, focus on performing the exercise properly, contracting the muscles, and achieving a complete stretch.

Swinging Your Torso

Some lifters perform the lat pulldown like a fish out of water, with their whole upper body swaying back and forth. In some cases, you will even see their lower body come up off the seat. This is not the way to get results.

Man in gym performing back exercise with cable machine

Credit: SofikoS / Shutterstock

Avoid using any weight that causes you to sway excessively. This instability of your torso will displace stress from the muscles you want to target, which will take away from the effectiveness of the exercise.

Avoid it: Engage your core musculature and flex your abs while imagining being “stuck in the mud.” You want to be so stable that if someone tried to shove you from any angle, you remain in position.

Benefits of the Lat Pulldown

The benefits of the lat pulldown begin with its simplicity in set up and potential to be progressed (made more challenging) or regressed (made easier) beyond simply increasing or reducing weight.

Older woman performing pulldown exercise

Credit: YAKOBCHUK VIACHESLAV / Shutterstock

Pulldowns can help to improve a range of qualities in the upper body such as muscular strength, muscle hypertrophy, muscular endurance, and performance.

Constant Tension

The use of the cable places a significant amount of stress on the muscles due to the constant tension being placed throughout the entire range of motion. This makes it an invaluable exercise for lifters working to build size, because a greater amount of time under tension has been shown to stimulate more muscle growth. (5)

Beginner-Friendly

The pull-up and chin-up will always reign as kings for upper body vertical pulling exercises, but the lat pulldown can still be a great exercise for lifters new to training. You may not be strong enough to perform a pull-up, but the lat pulldown will assist in developing your back musculature as you become stronger over time.

The lat pulldown places relatively less demand on your body, which means you can train with a considerable amount of volume by increasing your sets and reps each week, making it a great exercise to build muscle and strength in your back.

Muscles Worked by the Lat Pulldown

The lat pulldown works a host of muscles on your back, including the large lat muscles and the entire upper back.

Muscular man performing back exercise on pulldown machine

Credit: Nikolas_jkd / Shutterstock

This pulling movement, like most back exercises, also provides some stimulation to the forearms and biceps.

Latissimus Dorsi

The lats are the wide muscles on either side of your back. They have two functions — to bring the arm in closer to your body when it is out to the side and to bring the arm closer to the body when it is out in front. The path of your elbow and upper arm follows both of these movements, which is why pulldowns hit target the lats efficiently.

Upper Back

The trapezius, rhomboids, teres, infraspinatus, and posterior deltoid work together to form the upper back musculature. They control a variety of movements at the scapulae (shoulder blades), including raising and lowering, pinching together, extending, and pulling downwards.

Biceps Brachii

The biceps are recruited during nearly all back exercises, particularly pulldowns as the weight is lifted and your arm bends and straightens at the elbow. “Lifting with the arms” can occur when your elbows are bent too quickly and the biceps move the weight, rather than lifting with your back muscles by focusing on moving your upper arm at the shoulder.

Forearms

The forearm muscles, specifically the wrist flexors on the palm-side of the arm, are heavily activated to secure your grip to the bar while lifting and lowering the weight. Some lifters may have their grip strength become a limiting factor when pulldown weights get excessively heavy. Progressing gradually, or considering lifting straps, should help to avoid the problem.

Who Should Do the Lat Pulldown

A number of lifters can make use of the lat pulldown within their programming due to its versatility, simplicity in its set up, and ability to provide a significant amount of tension on the majority of the back muscles.

Training for Muscle

You would think by the name of the exercise that it would specifically target the lats, yet, most people are surprised that research has shown it actually trains the majority of your back muscles very effectively. (6)

Not only can you use relatively heavy weights, since this exercise recruits almost every major muscle group in your back, but you also don’t need to use multiple exercises within your workout which makes the lat pulldown an ideal, time-efficient choice.

How to Program the Lat Pulldown

To maximize muscle development and strength, a variety of rep ranges can be used on the lat pulldown. However, you should never use a weight so heavy that it takes away from executing the exercise properly.

Too many lifters pile on the weight and swing their torso to get it moving, thinking they’re overloading their back when all they’re doing is stressing their joints, not their muscles.

Moderate Weight, Moderate Repetition

To maximize muscular hypertrophy, training within a close proximity to muscular failure in the six to 12 rep range for three or four sets is the most effective way to program this exercise.

Light Weight, High Repetition

The use of the cable machine creates constant tension, increasing the muscle-building stimulus. This can be further exploited at the end of a workout to fully exhaust all muscle fibers. Using two to three sets of 12 to 20 reps will serve you best.

Lat Pulldown Variations

The lat pulldown is a highly adaptable exercise that can be used in a variety of ways by simply attaching a different handle or attachment.

V-Bar (Neutral-Grip) Pulldown

The neutral-grip variation uses a V-bar attachment to allow your palms to face each other. This adjusted grip position provides you with a mechanical advantage which allows you to lift more weight.

This is a great variation to use for working the surrounding muscles of the scapulae through a full range of motion while strengthening your back in the process.

Supinated-Grip Pulldown

The supinated variation uses a standard long bar with your palms facing you. The key difference with the supinated lat pulldown is that it trains the biceps more than the standard pulldown, with the lats being trained more in the standard movement. (7)

This can be seen as a similar relationship between the pull-up and chin-up, with the chin-up emphasizing the biceps and the pull-up emphasizing the lats

Single-Arm Pulldown

Attaching one single handle to the pulley and training each arm individually allows you to identify any muscular imbalances between sides of the body. By focusing on each side independently, you can strengthen and correct any differences.

The free movement of a single handle also allows you to use a variety of hand positions, either neutral (palm facing you), supinated, pronated, or rotating during the movement. Each hand position will slightly alter muscle recruitment and can reduce stress on elbow or shoulder joints.

Lat Pulldown Alternatives

Once you have built a solid foundation of strength on the lat pulldown, your back will be better developed to progress into more advanced exercise alternatives. It is important to note that the lat pulldown can still be used within your workouts, but the order of priority may change.

For example, you may perform more challenging exercises earlier in your back workout when your strength, focus, and energy is higher and train pulldowns later in the workout.

Pull-Up

The goal of successfully performing a pull-up (or chin-up) should be on every lifter’s mind since it works the entire back, can be done nearly anywhere, and is so easy to progressively overload.

Mastering this fundamental bodyweight exercise can benefit any lifter or athlete.

Assisted Pull-Up

The assisted pull-up, either with a machine or using resistance bands, is a great exercise to transition from pulldowns to full pull-ups This exercise allows you to practice the correct positioning of the upper body and reinforce technique that will be required when performing a pull-up.

Use this exercise to focus on feeling the back musculature throughout the eccentric (lowering)and concentric (lifting) portions of the lift while also practicing your ability to engage your core and keep your torso stable.

FAQs

Is there a “best” pulldown attachment to use?

All of the variations of the lat pulldown are very effective exercises that should be used across multiple phases of training. To maximize overall back development, it would be a good idea to rotate one or two of these variations into each phase of your programming.

This will help decrease any muscular imbalances that may occur when solely focusing on one exercise, but can also help you identify any weak points that you may have when using certain variations.

How long until I will be able to perform a bodyweight pull-up?

Every person will progress at their own ability based on a number of individual factors, so there is no set timeline to achieving your first bodyweight pull-up. However, if you are incorporating a combination of the above pulldown variations into your workouts, this will give you the best opportunity at finally achieving that bodyweight pull-up or chin-up faster.

While the pull-up may be considered as the ultimate goal, once you feel that your back is strong enough, starting with the chin-up alternative will allow you to practice the same general technique involved in the pull-up, but it is relatively easier to perform due to the slight mechanical advantage using a supinated grip.

Perfect the Pulldown

The lat pulldown is a reliable back-builder, perfect for beginners and advanced lifters. It should be a staple in any back routine, whether you’re on the way to your first pull-up or can knock them out by the dozen.

References

  1. Pagnani, M. J., & Warren, R. F. (1994). Stabilizers of the glenohumeral joint. Journal of shoulder and elbow surgery, 3(3), 173–190. https://doi.org/10.1016/S1058-2746(09)80098-0
  2. Durall, Chris & Manske, Robert & Davies, George. (2001). Avoiding Shoulder Injury From Resistance Training. Strength & Conditioning Journal. 23. 10. 10.1519/00126548-200110000-00002.
  3. Sperandei, S., Barros, M. A., Silveira-Júnior, P. C., & Oliveira, C. G. (2009). Electromyographic analysis of three different types of lat pull-down. Journal of strength and conditioning research, 23(7), 2033–2038. https://doi.org/10.1519/JSC.0b013e3181b8d30a
  4. Andersen, V., Fimland, M. S., Wiik, E., Skoglund, A., & Saeterbakken, A. H. (2014). Effects of grip width on muscle strength and activation in the lat pull-down. Journal of strength and conditioning research, 28(4), 1135–1142. https://doi.org/10.1097/JSC.0000000000000232
  5. Burd NA, Andrews RJ, West DW, et al. Muscle time under tension during resistance exercise stimulates differential muscle protein sub-fractional synthetic responses in men. J Physiol. 2012;590(2):351-362. doi:10.1113/jphysiol.2011.221200
  6. Ronai, Peter. (2019). The Lat Pulldown. ACSMʼs Health & Fitness Journal. 23. 24-30. 10.1249/FIT.0000000000000469.
  7. Lehman, G. J., Buchan, D. D., Lundy, A., Myers, N., & Nalborczyk, A. (2004). Variations in muscle activation levels during traditional latissimus dorsi weight training exercises: An experimental study. Dynamic medicine : DM, 3(1), 4. https://doi.org/10.1186/1476-5918-3-4

Featured Image: lunamarina / Shutterstock

Source

May 11, 2022

How to Do the Hammer Curl for Bigger Biceps and Forearms

Filed under: Fitness,Training — Tags: , , , , , — admin @ 4:48 pm

Bigger, stronger arms are usually high on the list of priorities for some lifters, even if they half-whisper it for fear of being labeled “a bodybuilder,” as if there’s anything wrong with training specifically to add muscle.

While there are countless varieties of curls to work the biceps with different angles or equipment, most lifters overlook how simply holding a dumbbell differently can affect muscle recruitment and overall growth.

The hammer curl uses a simple thumbs-up position to more directly work the forearm muscles and emphasize a different part of the biceps, leading to more growth, bigger arms, and a stronger grip. Here’s why this fundamental dumbbell curl shouldn’t be overlooked.

How to Do the Hammer Curl

There’s a good chance that anyone who’s picked up a pair of dumbbells has performed a hammer curl, or something that was supposed to be a hammer curl. It’s an instinctive movement that can be made even more effective when following some simple technique guidelines.

Step 1 — Grab Dumbbells Correctly

Woman in home gym standing holding dumbbells

Credit: antoniodiaz / Shutterstock

Begin standing with a pair of dumbbells at your sides with your palms facing your body and your thumbs pointing forward. Rather than gripping directly in the center of the handle, slightly offset your grip to have your pinky near the lower weight plate. This requires greater grip and forearm recruitment during the exercise. (You can center your hand on the handle if you prefer.) Flex your triceps to ensure a straight arm and fully locked out starting position.

Form Tip: The offset grip slightly shifts the dumbbell’s center of gravity forward and requires you to squeeze harder during each rep to maintain control of the weight. Gripping with a standard, perfectly centered grip requires less gripping strength. Offsetting your grip to have your thumb touching the top weight requires even less grip strength. Experiment with each slight variation as a way of adjusting the exercise’s intensity.

Step 2 — Curl the Dumbbells to Your Shoulders

Woman at home performing dumbbell curl

Credit: antoniodiaz / Shutterstock

Bend your knees slightly, pull your shoulder blades back, and flex your abs to ensure an upright posture. Flex your biceps to curl the weight to your front deltoids.

The “hammer curl” gets its name from the visual cue of hammering a nail, so keep your wrists neutral, your palms facing each other, and your fingers in a vertical line throughout the exercise. As the weights approach your shoulders, allow your elbows to come forward slightly, letting the dumbbells touch the front of your shoulders.

Form Tip: With most curls, the elbows should remain pinned to your ribs for optimal tension. However, the hammer curl significantly recruits the long head of the biceps, which also plays a role in moving the upper arm at the shoulder. Allowing the elbows to come forward, slightly, by moving at the shoulder lets the long head contract even more strongly. (1) Don’t allow the shoulder movement to become a wild swing. Use a controlled motion.

Step 3 — Lower to Full Extension

Muscular woman in gym performing dumbbell curl

Credit: Jasminko Ibrakovic / Shutterstock

Once the weights touch your shoulders, reverse direction. Keep your hands pointed in the same direction, with your palms facing each other and your fingers stacked vertically. Lower the weights under control until your arms are fully extended in the starting position.

Form Tip: Resetting at the bottom of each rep and achieving a full stretch by contracting the triceps may seem like “resting” the biceps, but it allows a maximum range of motion which contributes to overall growth. It also helps to prevent cheating by making it more difficult to swing the weights into a curled position.

Hammer Curl Mistakes to Avoid

The hammer curl may seem like a simple movement, which it certainly is, but that means there’s even less reason to cheat and less room for error. Here are the most common technique errors.

Rotating Your Hands

A “hammer curl” with your hands positioned any way other than thumbs-up is no longer a hammer curl. Changing your hand and wrist position isn’t necessarily wrong, it’s just a different exercise emphasizing different muscles.

Man in gym performing dumbbell curl in mirror

Credit: TheCorgi / Shutterstock

It’s like performing a barbell flat bench press, but gripping the bar with your hands nearly touching instead of being slightly outside shoulder-width. It’s still a valid exercise, but it’s now a close-grip bench press which emphasizes the triceps, not a barbell flat bench press which emphasizes the chest.

The same principle applies to hammer curls; it’s meant to be done with your hands vertical and your palms facing each other. A different grip creates a different exercise.

Avoid It: Make sure you’re doing hammer curls, not pronated (palms down) curls, supinated (palms up) curls, or an angled grip in-between. Keep the “hammering a nail” visualization on your mind. You wouldn’t, couldn’t, and shouldn’t hammer a nail with an angled swing, so be sure to keep your thumbs up.

Swinging Your Body

One of the most common mistakes with hammer curls is swinging your torso to bring the weights up from the bottom. Not only does this increase strain on the lower back, but it reduces biceps activation by starting the exercise with momentum rather than muscular strength.

Muscular shirtless man performing dumbbell curl

Credit: Jasminko Ibrakovic / Shutterstock

Upper body swinging can sometimes be caused by trying to lift too heavy, but many lifters instinctively swing their body for every rep of every set regardless of the weight, as if it’s the way the exercise “should” be done.

This unconscious movement is an indicator that they’re not treating the hammer curl with the same deliberate intention as they likely do for squats, deadlifts, or other more involved exercises.

Avoid it: Begin each rep from a strict upright posture with your arms at your sides, your abs tense, and your shoulders pulled back. Bracing and contracting your abs while curling can make upper body swinging more noticeable and more preventable. Raising the weights at a slightly slower speed will also discourage swinging.

Benefits of the Hammer Curl

The hammer curl recruits the muscles of the upper arm as well as the lower arm, delivering more overall results than many other curl variations.

Man in gym performing curl with two dumbbells

Credit: MDV Edwards / Shutterstock

The increased muscle activation and potential for relatively heavier weights make the hammer curl suitable for a wide variety of goals.

Bigger Biceps

Because the biceps are responsible for elbow flexion (curling and bending), the biceps are directly activated during hammer curls. This makes them a key player to adding size to your upper arms.

Bigger Forearms

Few lifters do direct forearm work, but hammer curls are a simple and effective way to build the muscles below the elbow as well as above it. The neutral (thumbs up) hand position increases stress on several muscles of the forearm compared to supinated (palms up) curls.

Increased Grip Strength

Building a stronger grip can not only carryover to improvement in other exercises, it has also been associated with improved overall health. (2) Hammer curls are an efficient way to improve grip strength without needing to add specific grip-building exercises into your general workout program.

Muscles Worked by Hammer Curl

Curls are to bigger biceps what coffee is to mornings — simply necessary. The hammer curl, however, works more than just the biceps.

Muscular arm in shadows holding dumbbell

Credit: Improvisor / Shutterstock

The specific hand position recruits a variety of muscles in the upper and lower arm, making it an important addition to an arm workout.

Biceps Brachii

The biceps brachii is “the biceps muscle” on the front of the upper arm. It’s composed of two separate heads, the long head on the outer part of the biceps and the short head found running along the inner part of the biceps.

Both heads are connected to the elbow, with the short head attaching to the upper arm bone and the long head attaching to the shoulder blade just behind the shoulder joint. Because of this, both parts of the biceps are involved in flexing or bending the elbow, and the long head is also activated when raising the arm at the shoulder. Both heads are also strongly activated when rotating the wrist palm up and palm down (supination and pronation).

Brachialis

The brachialis is considered a “hidden” muscle because it’s not often visible and is located beneath biceps brachii, near the elbow. When the brachialis increases in size, it can essentially “push” the biceps higher, contributing to a larger arm size overall.

Its primary function is to flex and bend the elbow and it is not involved in supination or pronation. For this reason, a neutral-grip (palms facing each other) puts the brachialis in a strong mechanical position. (3) This is also why you can typically use more weight with any neutral-grip curling, rowing, or pulling compared to a pronated or supinated grip.

Brachioradialis

The brachioradialis runs along the thumb-side of the forearm, contributing significant muscle size particularly near the elbow. It stabilizes the forearm during arm movement and directly acts as an elbow flexor.

Forearms

The wrist flexors make up the bulk of the lower arm on the palm-side of the forearm, while the wrist extensors are found on the top side of the forearm. Both muscles are heavily involved in any grip-intensive exercise, like the hammer curl. The wrist flexors work actively to hold the weight in place while the wrist flexors provide stability.

Who Should Do the Hammer Curl

The hammer curl isn’t just used for increasing arm size. It certainly does play a big role in arm training, but it also carries over to help other lifts, making it useful for strength-focused lifters as well as those prioritizing muscle size.

Lifters Training for More Muscle

The hammer curl will help to pack size onto your arms, including the often neglected forearms. While some lifters may be reluctant to include direct arm training in their workout due to time or efficiency concerns, the hammer curl is an excellent choice to reap maximum size benefits from just one exercise.

Lifters Training for Strength

Stronger arms and a stronger grip can carry over to any exercise that puts weight in your hands. Having a more secure grip on the bar, regardless of the specific exercise, can help to improve bar control and stability. A stronger grip also directly benefits all types of pulling exercises, from deadlifts and pull-ups to barbell or dumbbell rows.

How to Program the Hammer Curl

Just because it’s an “arm curl” doesn’t mean the hammer curl should be treated with light weights and high reps. Here’s how to fit hammer curls into your plan for better results.

Heavy Weight, Low to Moderate Reps

Because the hammer curl uses a neutral-grip, the arms are put into a significantly stronger pulling position than if the hands were palm-up. This lets you move heavier weights without sacrificing technique. Four to five sets of six to eight reps turns the hammer curl into a serious strength-builder without needing to swing the weights around.

Moderate Weight, Moderate Reps

Training hammer curls with a classic bodybuilding-style approach using three to four sets of 8 to 12 reps is a reliable way to build arm size with this fundamental exercise. This type of workout should deliver an excellent pump in the forearms and biceps.

Hammer Curl Variations

The hammer curl is primarily unique for its specifically neutral hand position. There are several simple and effective variations of the basic hammer curl to fine-tune the results to your specific needs.

Single-Arm Hammer Curl

Training unilaterally (one side at a time) allows you to use a slightly heavier weight in either hand compared to lifting both sides together. (4) Training each side separately also allows you to more specifically address natural strength discrepancies, since one side of the body is typically stronger than the other.

Another significant benefit of the single-arm hammer curl is stricter technique. Specifically, by bracing the non-working arm on the back of a bench, upright post, or stable object, you can create more stability and ensure that you don’t use any upper-body momentum.

Cable Rope Hammer Curl

Curling using a cable provides constant tension and increases the overall muscle-building stimulus. The rope attachment allows you to use a neutral-grip, compared to straight-bar attachments.

Cable hammer curls also make it more difficult to cheat with your torso because the cable disperses much of the momentum that would be moving the weight and keeps stress on the target muscles.

Pinwheel Curl

The pinwheel curl, sometimes called the cross-body curl, changes the range of motion by sliding the weight across the body rather than remaining extended in front. This slightly shortened range of motion changes the stress on the muscles, recruiting the brachialis and further emphasizing the long head of the biceps.

Because the weight is closer to your body’s center of gravity, a heavier weight can be used compared to standard hammer curls. Pinwheel curls are typically done one arm at a time or alternating arms with each repetition.

Hammer Curl Alternatives

Most lifters can be overwhelmed with curling options. Here are a handful of options to incorporate in addition to, or instead of, the hammer curl.

Supinating Curl

The classic supinating curl involves rotation during the exercise, beginning with the weights facing the body in the bottom and the palms facing up in the top position. This recruits both heads of the biceps brachii more significantly because they work to rotate the forearm.

By focusing on “twisting the pinky up” at the top of the curl, the biceps contract fully. Most lifters are surprised by the intense muscle activation from this simple technique adjustment.

Reverse Dumbbell Curl

Reverse dumbbell curls use a palms-down grip throughout the exercise. This de-emphasizes the biceps brachii and puts increased muscular stress on the brachioradialis, brachialis, and wrist extensors.

This overlooked exercise is an excellent choice for prioritizing lower arm size and strength, because the biceps are not significantly activated.

Incline Curl

The incline curl is a bodybuilding staple. Using a high-angle incline bench allows the arms to stretch behind the torso in the bottom position, which significantly activates the long head of the biceps.

Incline curls also encourage strict form, due to the stretch in the bottom position as well as the fully supported seat back which helps to prevent swinging. Be sure not to lean forward, which reduces the incline and defeats the purpose of the exercise. Keep your head and shoulders in contact with the pad.

FAQs

How many different curls should I do in each workout?

Programming direct arm training, like curls, into a workout plan means walking a fine line between efficiency and effectiveness. Few lifters need to dedicate a huge chunk of time (multiple exercises on multiple days per week) to training arms. However, the other extreme (zero direct arm training) can compromise results and eventually lead to arms that do require a significant amount of attention.

Generally speaking, if your goal is to build larger arms, incorporating one or two different exercises two to three days per week should be sufficient, depending on your overall training split and the specific sets and reps. If your goal is primarily strength, not size, directly training biceps with one or two exercises once or twice per week can be an effective and efficient plan.

Why does my elbow hurt during the exercise?

If hammer curls aggravate pre-existing elbow pain, you’re likely not keeping your wrists in a neutral position during the curl. By rotating the wrist palm up or palm down, you may be increasing strain on the tendons and supportive tissues of the elbow.

Reduce the weight and focus on maintaining a vertically stacked hand when raising and lowering the weight. Lifting with a slower tempo can also help to dial in perfect technique.

Pick Up The Hammer Curls

To paraphrase an old saying, “Whosoever performs hammer curls, if they be consistent, shall possess bigger and stronger arms.” It’s a useful lift for physique-focused lifters as well as performance-based lifters, and is an ideal choice for blending size and strength into a single arm exercise.

References

  1. Chalmers PN, Cip J, Trombley R, et al. Glenohumeral Function of the Long Head of the Biceps Muscle: An Electromyographic Analysis. Orthop J Sports Med. 2014;2(2):2325967114523902. Published 2014 Feb 26. doi:10.1177/2325967114523902
  2. Bohannon RW. Grip Strength: An Indispensable Biomarker For Older Adults. Clin Interv Aging. 2019;14:1681-1691. Published 2019 Oct 1. doi:10.2147/CIA.S194543
  3. Plantz MA, Bordoni B. Anatomy, Shoulder and Upper Limb, Brachialis Muscle. [Updated 2022 Feb 22]. In: StatPearls [Internet]. Treasure Island (FL): StatPearls Publishing; 2022 Jan-. Available from: https://www.ncbi.nlm.nih.gov/books/NBK551630/
  4. Costa E, Moreira A, Cavalcanti B, Krinski K, Aoki M. Effect of unilateral and bilateral resistance exercise on maximal voluntary strength, total volume of load lifted, and perceptual and metabolic responses. Biol Sport. 2015;32(1):35-40. doi:10.5604/20831862.1126326

Featured Image: MDV Edwards

Source

May 5, 2022

Build Explosive Pulling Power With the Pendlay Row

Glenn Pendlay was one of the leading coaches in American weightlifting — he held a Level 5 accreditation from USA Weightlifting (the highest available) and coached many high-level athletes to medals in national and international competitions.

In addition to his lifters’ success on the platform, he’s known for popularizing a strength-building exercise known as the Pendlay row — a barbell row performed from the floor to the stomach each rep. The movement has been used to build back strength and size in strength athletes and lifters of all levels. Here’s how to perform this highly effective movement.

Pendlay Row Technique Video

Coach Greg Walsh demonstrates a textbook Pendlay Row. Note the nearly horizontal torso, stationary upper body, and full stop at the bottom.

How to Do the Pendlay Row

The barbell row has been a long-running staple for building size and strength in the back, shoulders, and arms. The Pendlay row enforces specific technique to increase power output and make the target muscles work even harder.

Step 1 — Get Into the Starting Position

Muscular man in gym bending down to grab barbell

Credit: kittirat roekburi / Shutterstock

Begin with a loaded barbell on the floor directly above your toes. Stand with your feet slightly wider than shoulder-width. With a slight bend in your knees, push your hips back and bend at the waist until your upper body is parallel to the ground.

Arch your lower back and grab the bar with an overhand grip. Your grip width will be determined by your arm length. The priority is maintaining a parallel torso, so grabbing the bar wider than shoulder-width should be necessary.

Form Tip: You should feel tightness, not discomfort, in your hamstrings from holding the correct upper body position. If you feel pain, thoroughly warm-up your hips, hamstrings, glutes, and lower back to achieve the position more comfortably.

Step 2 — Perform an Explosive Pull

Man in gym performing barbell row

Credit: Breaking Muscle / Youtube

Flex your abs and squeeze the bar to create tension and stability. Pinch your shoulder blades together and quickly drive your elbows up while pulling the bar to your lower chest. Your torso should not lift from the parallel position.

The bar should physically touch your lower chest or upper abdomen before you allow it to return quickly to the ground. Don’t try to deliberately slow the barbell on the descent. Let the bar come to a complete rest on the ground before beginning the next rep.

Form Tip: If your torso moves significantly, reduce the weight on the bar and focus on maintaining a tight posture. Keeping a strict upper body position while lifting explosively is more important than swinging heavy weights.

Pendlay Row Mistakes to Avoid

The Pendlay row is specifically used to avoid technique issues more common with traditional barbell rows. Make sure you’re performing it correctly by avoiding these problems.

Moving Your Upper Body

One of the most noticeable differences with a Pendlay row is the significantly bent-over position, keeping the upper body parallel to the ground throughout the exercise. This allows maximum stress to be placed on the upper back and lat muscles, without using the lower back, glutes, and hamstrings to move the weight.

Muscular man performing barbell row exercise

Credit: Miljan Zivkovic / Shutterstock

If your torso shifts to get the weight moving, you’re dissipating stress from the target muscles and reducing the strength and size benefit of the exercise.

Avoid It: Remember that the body position is deliberately bent forward in order to get optimal results. Be conscious of maintaining a strict parallel position. Never trade technique for more weight on the bar.

Bouncing Off the Floor

Each rep of a Pendlay row should be performed with the bar starting from a rested position on the floor. This requires your body to produce maximum force for each individual rep, instead of relying on the stretch-shortening cycle (a muscular phenomenon which uses a stretched position to increase strength). (1) This technique is sometimes referred to as “dead-stop training.”

Man in gym performing barbell exercise

Credit: Qilin’s prance Filmmaker / Shutterstock

Eliminating this full rest at the bottom allows momentum to build, which decreases the body’s force production and reduces the exercise’s effectiveness.

Avoid it: Allow the bar to come to a complete stop on the ground after each rep. Releasing the bar and resetting your grip between each rep can also help to ensure a full stop. Approach any given set as a series of individual reps, not one group of several reps. For example, instead of “a set of five reps,” think of performing “five single reps” with one second between each.

Benefits of the Pendlay Row

The Pendlay row was initially used to support good old-fashioned strength gains. Like all barbell rows, it also delivers plenty of muscular growth as well. Here are all the reasons to train with this big, basic lift.

Muscular athletes holding barbell

Credit: Yupa Watchanakit / Shutterstock

Back Strength

A strong back is essential for maximal strength production during pressing exercises and for reducing the risk of shoulder injuries. (2) The Pendlay row directly trains all the muscles of the back to directly increase pulling strength, as well as to carryover to bench and overhead pressing.

Explosive Power

Because the Pendlay row is performed from a dead-stop, an explosive lift is required to move the weight. This helps to increase muscle recruitment and has been shown to increase overall power and strength gains. (3)

Back Size

Directly training the lats and upper back with heavy weights is an ideal way to trigger muscle growth. The Pendlay row applies muscular stress to these body parts, along with the biceps and forearms, making it an excellent cornerstone for any back-building workout.

Muscles Worked by Pendlay Row

The Pendlay row is a compound (multi-joint) exercise coordinating a number of muscles to complete the lift. This intense exercise hits nearly every muscle on the back half of the body, and then some.

black and white phot of bodybuilder preparing to lift a barbell from the ground

Credit: SOK Studio / Shutterstock

Upper Back

The upper back — consisting of the trapezius, rear deltoids (shoulders), rhomboids, and other smaller muscles — works primarily to control the shoulder blades (scapulae). The Pendlay row activates the upper back on each repetition, helping to lift the bar from the ground and pull the bar into the top position.

Lats

The latissimus dorsi (lats) are the largest muscles on the back, running near your ribs and from under your arms to your lower back. They work to bring your arm in towards your body from an extended position, making them the primary mover during any rowing exercise.

Spinal Erectors

The spinal erectors are a pair of muscular columns running the length of your spine. They work to control your torso position at the waist (bending forwards or sideways, and rotating). During the Pendlay row, the spinal erectors work to maintain a static upper body position.

Biceps

The biceps brachii (biceps) control flexion at the elbow, bending your arm into a closed position. While they don’t undergo a complete contraction during a Pendlay row (a wider grip on the bar prevents a full biceps contraction), the biceps help to pull the weight towards your body and complete the lift in the top position.

Forearms

The forearms are technically composed of two separate muscles — the flexors on the bottom side of the forearm and the extensors on the top side. Maintaining a secure grip on the barbell during Pendlay rows heavily activates the flexors, while controlling the bar during the upwards lift recruits the extensors.

Who Should Do the Pendlay Row

Like many compound exercises, lifters with a variety of goals can benefit from incorporating the Pendlay row into their workouts.

Strength and Power Athletes

Lifters focused on moving serious weights in competition (or, really, for recreation too) can benefit from the strength and power built from Pendlay rows. Coach Pendlay initially used the exercise to assist the powerlifts and eventually used it as a staple for his Olympic weightlifting champions.

Training for Muscle

Heavy rowing exercises have consistently built large, muscular backs. The Pendlay row develops thicker, wider lats and an upper back to match.

How to Program the Pendlay Row

To efficiently train for size and strength without excessive fatigue in the support muscles of the lower back, which would compromise technique, the Pendlay row is best trained with relatively lower reps. Here are some effective guidelines

Moderate Weight, Low Repetition

Focusing on the Pendlay row’s explosive performance can sometimes mean applying more force to less weight. Training for two to six sets of two to four reps can prioritize maximum force production, which leads to more power development.

Heavy Weight, Low Repetition

Three to five sets of three to five reps is a time-tested way to move heavy weights on big compound lifts, delivering size and strength gains. When you begin lifting heavier weights while keeping strict form, you open a very big door to very big results. Remember that you may not be able to lift as much with the Pendlay row as you can with a traditional bent-over row.

Pendlay Row Variations

The Pendlay row delivers plenty of benefits, but not all lifters may be ready to dive into this big lift. Here are the best ways to work up to Pendlay rows.

Chest-Supported Row

The chest-supported row allows the back to be trained without requiring any lower body stabilization. This makes it ideal for lifters working around a lower back issue or lifters who may have mobility restrictions preventing them from reaching the parallel torso position needed for Pendlay rows.

Another benefit of many chest-supported row machines is a variety of gripping handles, which can slightly alter recruitment by emphasizing different muscles of the back.

Neutral-Grip Two Dumbbell Row

While the single-arm dumbbell row is common, performing the movement with two dumbbells at once is an excellent “gateway” to barbell rowing. By requiring both sides of the body to carry their share of the load (no weightlifting pun intended), strength discrepancies in muscles on either side can be more easily noticed and addressed.

Using a neutral-grip also reduces strain on the shoulder joint and allows increased muscular stress on the biceps and upper back.

Reverse-Grip Barbell Row

The reverse-grip barbell row involves a supinated (palms up) grip which significantly increases biceps activation and changes the exercise’s range of motion, which affects the back muscles.

The trapezius is more significantly activated due to a more upright torso angle and the lats are kept under constant tension with a significant stretch in the bottom position.

Pendlay Row Alternatives

There are a handful of exercises which can build size, strength, and power like the Pendlay row. Here are some of the top choices.

Barbell Row

While the Pendlay row involves a strict, parallel torso position and pulling each repetition from the ground, “breaking” those rules turns the barbell row into a different back-building beast.

The same muscle groups are activated to varying degrees. A slightly angled torso position reduces the hip and hamstring mobility requirement or Pendlay rows, while the muscles are kept under constant tension without resting the barbell. This makes the exercise more suitable for moderate to higher repetitions without fatiguing the supportive muscles.

Kroc Row

If a Pendlay row is considered a “strict barbell row,” a Kroc row could be considered a “controlled chaos dumbbell row.” It’s typically performed using heavy weights for high-rep sets and is often mistaken for standard single-arm rows being done with poor form.

Kroc rows can be very effective for building upper back strength and size even though they involve leg drive and body English rather than super-strict upper body pulling.

Power Clean

The power clean is arguably one of the most beneficial exercises that an athlete can perform in the gym. (4) It’s a classic staple in strength and conditioning programs for contact sports and is a variation of the clean and jerk from competitive Olympic weightlifting.

The power clean builds explosive total-body strength while packing size onto the upper back and traps, specifically. Note: When performing power cleans (or any Olympic lift variation), the bar should only be dropped from the top position if you’re using bumper plates and a specific lifting platform.

FAQs

My grip fatigues before the end of my set. Should I use lifting straps?

With many rowing exercises, and back exercises in general, muscular fatigue setting into the smaller muscles of your grip and forearms before the larger back muscles is a common issue. While grip strength often improves relatively quickly, it shouldn’t affect the primary goal of any exercise.

Supporting your grip with lifting straps during the heaviest and most challenging sets can improve performance overall. Over-relying on lifting straps, however, such as wearing them when lifting less-challenging weights, can prevent the development of grip strength.

Why does my lower back hurt during the exercise?

Keeping your torso in a parallel position is essential in the Pendlay row. However, some lifters may find that this position aggravates lower back pain or they may be unable to achieve sufficient depth in the first place.

The solution is to address flexibility and mobility in the lower back, hamstrings, glutes, and hips. Depending on your specific needs, it could be as simple as performing light weight single-leg deadlifts at the start of each workout or as thorough as consistently practicing a complete hip mobility series.

Pendlay Rows for Power

The Pendlay row has supported strength and power development for nearly three decades and has been used by top lifters around the world. With a simple barbell, and more than a few weight plates, you can add it to your own workouts and build world-class strength and size.

References

  1. Seiberl, Wolfgang et al. “Editorial: The Stretch-Shortening Cycle of Active Muscle and Muscle-Tendon Complex: What, Why and How It Increases Muscle Performance?.” Frontiers in physiology vol. 12 693141. 20 May. 2021, doi:10.3389/fphys.2021.693141
  2. Escalante, Guillermo DSc, MBA, ATC, CSCS, CISSN1; Fine, Daniel SPT, CSCS2; Ashworth, Kyle SPT, CSCS2; Kolber, Morey J. PT, PhD, CSCS2 Progressive Exercise Strategies to Mitigate Shoulder Injuries Among Weight-Training Participants, Strength and Conditioning Journal: February 2021 – Volume 43 – Issue 1 – p 72-85 doi: 10.1519/SSC.0000000000000547
  3. Aagaard P, Simonsen EB, Andersen JL, Magnusson P, Dyhre-Poulsen P. Increased rate of force development and neural drive of human skeletal muscle following resistance training. J Appl Physiol (1985). 2002 Oct;93(4):1318-26. doi: 10.1152/japplphysiol.00283.2002. PMID: 12235031.
  4. Huyghe, Thomas & Goriss, Brent & DeLosAngeles, Ernest & Bird, Stephen. (2021). Exploring The Power Clean. International Journal of Strength and Conditioning. 1. 10.47206/ijsc.v1i1.95.

Featured Image: kittirat roekburi / Shutterstock

Source

April 29, 2022

How to Do the Zercher Squat for Lower Body Size and Power

A simple barbell in a squat rack may not seem like a piece of modern-day technology, but it kinda is. Up until a few decades ago, lifters were either making their own racks by hand from scrap metal and wood, or they were figuring out how to get the bar lifted by any means necessary.

One popular method was created by Ed Zercher, a St. Louis-based weightlifter from the 1930s. Rather than get the bar onto his back, he developed a technique to get the bar from the floor into the crook of his arms so he could squat while clutching the weight to his torso.

This type of squat was dubbed “the Zercher squat.” Even if you’re a full-fledged 21st-century lifter, you can benefit from this old-school exercise.

How to Do the Zercher Squat

While the Zercher squat was originally intended as a solution for lifters without a squat rack, this approach does require the bar to begin either in a rack or set on benches, blockers, or another elevated surface. A Zercher movement for the rack-less lifter will be explained later in the Variations section.

Step 1 — Unrack the Bar

Man holding barbell in elbows

Credit: BarBend / Youtube

Set a barbell between your belly button and your chest, either in a rack or supported on benches, steps, or blocks. Stand as close as possible, with your feet directly under the bar at shoulder-width. Keep your shoulders back. Squat down just low enough to get your elbows under the bar.

Cradle the bar in your elbows, between your forearms and biceps, and curl both hands as close to your shoulders as possible. The palms of your hands should be pointed towards your face and your elbows should be tight to your ribs. Lift the weight by standing up. Lock your legs and stabilize your entire body. Take one full step backwards. Step one foot sideways to set your stance outside of shoulder-width.

Form Tip: For many lifters, physical discomfort from holding the bar in position is the biggest challenge. Wrapping the bar in a towel or bar pad (often meant to cushion the neck during back squats) is a solution as your body adapts to the pressure. Keeping your hands palms-up, not thumbs-up, will also help to disperse stress onto the muscles of the forearm instead of the bones of the forearm.

Step 2 — Squat Down

Men performing squat holding barbell in arms

Credit: BarBend / Youtube

Maintain a stable and wide stance, beyond shoulder-width. Take a breath into your belly and tense your abs. Shift your hips backwards to squat down until your elbows or the barbell (depending on arm length) barely touch your thighs. Keep your torso as upright as possible throughout the movement.

Don’t allow the weight to pull your elbows forward or your arms to straighten. Your hands should remain near your shoulders or your chin during the movement. Pause very briefly in the bottom position.

Form Tip: Maintain full-body tension in the bottom position. Don’t relax your legs, core, or arms. Don’t allow the weight to “unload” onto your legs, which decreases muscular tension and increases overall joint strain.

Step 3 — Stand Up to Lockout

Man in gym standing while holding barbell in arms

Credit: BarBend / Youtube

From the bottom position, keep your feet flat while pressing upwards to a standing position. Keep your shoulders back and squeeze your elbows into your sides to encourage upper body tension. As your legs lockout, squeeze your glutes to increase tension and ensure a strong standing position.

Form Tip: Pause very briefly in the locked out position to ensure total-body tightness. Don’t rise explosively to prevent the bar from bouncing in your arms; move with steady power and control.

Zercher Squat Mistakes to Avoid

Because the Zercher squat involves a unique and often unfamiliar bar position, there are several common mistakes many lifters may make which can reduce effectiveness and increase the risk of injury.

Leaning Forward

Much like the front squat, the Zercher squat supports the barbell in front of the body. This requires an upright torso position during the entire movement. Leaning forward shifts your center of gravity and pulls your upper body into a weakened position.

Man performing squat with poor technique

Credit: BarBend / Youtube

When the upper body falls forward, either the bar will roll out of your arms or you’ll manage to keep control of the weight while grinding out a rep with a serious leverage disadvantage, exposing your lower back to potential injury.

Avoid It: Maintain a vertical torso by keeping your shoulder blades pinched back and, even more importantly, by keeping the bar as close to your body as possible. Create tension through your arms, abs, shoulders, and back to hold the bar in position.

Short Range of Motion

The lower one descends into a squat position, the more glute and hamstring muscles are recruited. (1) Squatting to a relatively higher position may offer specific benefits, such as competitive powerlifters who only need to reach a parallel-thigh position and not any lower.

Man in gym squatting with barbell in arms

Credit: BarBend / Youtube

However, when a lifter unknowingly squats high or deliberately squats high as an “easier” option, they shortchange their overall results. Partial rep squatting can also increase stress on the knee and hip joints compared to squatting to lower depths. (2)

Avoid it: Because the bar is held relatively low on the body during the Zercher squat, the barbell acts as a built-in boundary, offering an unwavering target for depth. Make sure the bar reaches your thighs at the bottom of each rep.

Bouncing Off Your Legs

Maintaining control of the weight during an exercise is essential for developing muscle and power. Uncontrolled, explosive movements also open the door for unexpected injuries.

Man performing deep squat holding barbell in arms

Credit: BarBend / Youtube

While a guideline for proper Zercher squat technique is to reach the bar to the tops of your legs, some lifters descend so quickly that the bar impacts their legs and rebounds upwards. Clearly, smashing your thighs with 100-plus pounds at a fairly high rate of speed isn’t the best idea.

Avoid it: Lower yourself under control, don’t free fall. Imagine your phone resting on your legs and touch the bar as softly as possible without breaking it.

Benefits of the Zercher Squat

The Zercher squat is more taxing, and slightly more complicated, than other squat variations. That extra effort can pay dividends with increased muscle recruitment and more overall strength gains.

Leg Strength

The Zercher squat allows the legs to move significantly heavy weight with a stable and engaged core, reducing potential lower back strain (compared to other squat variations). Power output is optimized due to overall leverage, making the legs the primary mover and the most significantly recruited muscle group.

Leg Size

The Zercher squat has been shown to activate the quadriceps comparable to several popular squat variations, while also activating the glutes and hamstrings to a higher degree. (3) This increased muscle activation can directly lead to more muscle growth.

Upper Back Strength

While the upper back isn’t worked through a significant range of motion, it is heavily activated to keep your shoulders back while maintaining a stable upper body position. This constant work, resisting the barbell’s forward and downward pull, leads to a stronger upper back.

Core Strength

The abs and lower back are essential for preventing your upper body from collapsing forward under the stress of the weight. Coordinating the abs and lower back in this type of supportive role is essential for building total core strength.

Sport-Specific Training

The front-loaded barbell position of the Zercher squat can offer direct carryover for strength athletes who compete in similar front-loaded events. In strongman/strongwoman contests, this would include atlas stones, stone carries, and, most specifically, the “Conan’s Wheel” event.

Training Around Lower Back Pain

All types of squats can help to build lower body strength, but many squat variations require intensive lower back stress which can be a limiting factor for some lifters. Due to the unique bar position and increased overall core recruitment, the Zercher squat doesn’t significantly strain the lower back, allowing lifters to target their legs with reduced back pain.

Muscles Worked by Zercher Squat

The Zercher squat is predominantly a lower body exercise, but it involves multiple large muscles in the upper body as well.

Quadriceps

The quads are significantly recruited during any squat, particularly as you reach the bottom position of the Zercher squat. The quads are responsible for straightening the leg and extending the knee, which helps you rise from the bottom position and get to a standing position.

Glutes

The glute muscles play a key role to “extend” the hips and bring the legs directly under the upper body. Performing a complete lockout in the top position allows the glutes to maximally contract.

Hamstrings

The hamstrings consist of several different muscles heads, each of which coordinate to flex or bend the knee. The hamstrings are recruited and act as “brakes” while lowering yourself into the bottom of the squat position.

Upper Back

The upper back (consisting of the trapezius, rhomboids, rear deltoids, and other smaller muscles) is highly activated from the moment you unrack the barbell until the set is completed. The upper back works to keep your shoulder blades retracted (pinched together) and prevents your upper body from rounding forward into a dangerous position.

Spinal Erectors

The spinal erectors, or technically “erector spinae”, are more commonly referred to as the “lower back” although they’re a pair of muscles which run the entire length of the spine. They work primarily to prevent the rounding of the back and to maintain a straight upper body posture.

Abs

The abdominal muscles are responsible for more than just flexing or “crunching” the upper body. They control all basic movement from the hips up, including rotation, bending to either side, and to prevent bending backwards.

Biceps

The biceps, like the upper back, aren’t worked through any significant range of motion during a Zercher squat but they are highly activated to maintain a static position while holding the bar in place. It’s not uncommon for a lifter to feel muscular fatigue in their biceps after a set of hard Zercher squats.

Who Should Do the Zercher Squat

The Zercher squat can offer specific benefits for any lifter who can overcome or acclimate to the initial physical discomfort of the bar position.

Strength Athletes

Competitive strength athletes who perform front-loaded events can benefit directly from the Zercher squat. Athletes in any strength sport can benefit from the Zercher squat’s carryover to overall strength and core stability. Because of its significant upper back recruitment, it’s well-suited as an accessory exercise for either the squat or deadlift.

Training for Muscle

The Zercher squat isn’t a common exercise for muscle-building purposes, but it can serve as an effective squat variation to target the legs without excessive strain on the back.

How to Program the Zercher Squat

The Zercher squat can be programmed in line with multiple goals, but lower rep ranges are typically preferred to prevent fatigue as a limiting factor.

Heavy Weight, Low Repetition

The classic set and rep scheme of three to five sets of three to five reps is a reliable approach to build strength in any big lift, like the Zercher squat. The key to moving heavy weights is taking the time to adjust to the physical pressure at the elbows in the support position.

Moderate Weight, Low Repetition

Slightly reducing the weight while maintaining a lower rep range can shift the focus from leg strength to strength in the core and upper back. Two to four sets of four to six reps is an efficient way to train these total-body stabilizer muscles.

Zercher Squat Variations

Lifters may progressively work towards a full Zercher squat while adjusting to the bar position. Here are the most comparable options.

Goblet Squat

The goblet squat is a similar front-loaded squat variation, holding a dumbbell or kettlebell in the hands near chest-level. It offers reduced lower back stress, making it ideal for any lifter with back issues.

The goblet squat also allows for a complete range of motion, letting the lifter squat as deep as their hip and ankle mobility will allow. While the goblet squat is sometimes used by beginner lifters, it can be progressed heavily and can benefit even the most advanced lifter.

Sandbag Zercher Squat

Training with a sandbag offers countless benefits ranging from increased core stability to overall calorie-burning. It’s also an excellent callback to homemade training equipment, in the true spirit of Ed Zercher.

Using a sandbag instead of a barbell does compromise on potential load, since you don’t often find 300-pound sandbags, but the thicker diameter makes the support position extremely more comfortable, which allows you to focus on basic exercise technique and intensity.

Zercher Carry

The Zercher carry removes the squat portion and swaps it for a nice, long walk. Anytime you move while carrying a load, your core activation will light up. Zercher carries, in particular, will also involve your upper back (specifically the traps) to a very high degree.

A word of warning: Be sure to pay attention to your surroundings when Zercher carrying a barbell. You’ll be moving a wide load and the last thing you need is to have the seven-foot long barbell clip an object on one side and throw yourself into a spin.

Zercher Deadlift

The literal granddaddy of all Zercher lifts, the Zercher deadlift starts with the barbell on the floor rather than a rack, just the way Ed did them.

Sometimes called a “full cycle Zercher,” this movement is a multi-step process requiring you to deadlift the weight, hold the bar in position while squatting your body down, rest the bar on your legs, take the bar into the crooks of your arms, and then squat up.

This drawn-out technique involves so many moving parts, literally, that many lifters may not find it efficient for their goals. It is, however, a purebred piece of weightlifting history and is worth an experience, if only with an empty barbell.

Zercher Squat Alternatives

Not all lifters may need to incorporate the Zercher squat into their routine. There are several exercises which can offer similar benefits.

Front Squat

The front squat may appear to be a “Zercher squat while holding the bar higher on your body.” That’s a fair assessment. By using a “rack position,” the front squat keeps the weight in front of the body, supported across the front of the shoulders.

This allows the legs to be trained with drastically reduced lower back stress. The wrist and shoulder mobility needed to achieve a strong rack position can be relatively quickly trained with minimal direct attention.

High-Bar Squat

A simple variation of the basic back squat, placing the bar high on the shoulders and traps allows the lifter to maintain a more vertical torso, which reduces lower back strain.

This squat variation also offers much more direct carryover to competitive powerlifters, compared to the Zercher squat, because the bar is placed nearly identical to their contest lift. (Though, many competitive powerlifters opt to use a low-bar squat position, which places the bar more on the middle traps.)

Safety Bar Squat

The key benefit of the safety bar squat is the hand position, which accommodates lifters whose shoulder problems prevent holding a bar across their back.

A significant secondary benefit of the safety bar squat is increased upper back recruitment, due to the way the specialized handle offsets the barbell from your center of gravity. This upper back recruitment can offer comparable benefits to Zerchers.

FAQs

The bar hurts my arms. What’s the solution?

Probably the single most common issue with Zercher squats is the initial discomfort of holding the barbell in the elbow-supported position. There are a number of very effective workarounds that allow you to gradually adapt to the feeling while working on the exercise.

You can cushion yourself by wearing long-sleeve shirts and/or elbow sleeves (some lifters wear knee sleeves on their arms because the knee sleeves are larger and more comfortable). You can also cushion the bar with a bad pad typically used when the bar’s on your neck, or by wrapping a towel around the barbell.

Increasing the diameter of the bar also reduces the direct pressure. If your gym has thick barbells or axles, those work very well. Attaching removable thick-grip handles can also work.

Lastly, if you don’t feel that adapting to the movement is a good investment of your time in the gym, and presuming you’re not a competitive athlete performing Zercher-type movements in competition, it’s entirely acceptable to simply choose a different exercise.

Will the barbell crush the tendons in my elbows?

No, it won’t. Biceps tendon injuries at the elbow are relatively rare in the gym and, even then, they most often occur at the shoulder, not at the elbow. (4)(5)

While the biceps tendon does attach to the elbow joint, it’s not being strained in the Zercher position because it’s under a static contraction. Biceps tendon injuries typically occur when the tendon is “overstretched” with too much weight, too much speed, or too much range of motion. During a Zercher squat, the tendon isn’t put through any of those conditions.

However, if you have pre-existing elbow pain or inflammation issues, the exercise becomes a different scenario. In that case, as with any exercise, you should choose movements which do not aggravate your condition or affect recovery.

References

  1. Kubo, K., Ikebukuro, T., & Yata, H. (2019). Effects of squat training with different depths on lower limb muscle volumes. European journal of applied physiology, 119(9), 1933–1942. https://doi.org/10.1007/s00421-019-04181-y
  2. Hartmann H, Wirth K, Klusemann M. Analysis of the load on the knee joint and vertebral column with changes in squatting depth and weight load. Sports Med. 2013 Oct;43(10):993-1008. doi: 10.1007/s40279-013-0073-6. PMID: 23821469.
  3. Erdağ, Deniz & Yavuz, Hasan. (2020). Evaluation of Muscle Activities During Different Squat Variations Using Electromyography Signals. 10.1007/978-3-030-35249-3_114.
  4. Golshani K, Cinque ME, O’Halloran P, Softness K, Keeling L, Macdonell JR. Upper extremity weightlifting injuries: Diagnosis and management. J Orthop. 2017;15(1):24-27. Published 2017 Nov 7. doi:10.1016/j.jor.2017.11.005
  5. Lavallee ME, Balam T. An overview of strength training injuries: acute and chronic. Curr Sports Med Rep. 2010 Sep-Oct;9(5):307-13. doi: 10.1249/JSR.0b013e3181f3ed6d. PMID: 20827099.

Featured Image: BarBend / Youtube

Source

« Newer PostsOlder Posts »

Powered by WordPress