These days, Dorian Yates happily spends most of his time in a deserved retirement in Brazil. However, there was a time when the six-time Mr. Olympia champion (1992-1997) constructed one of the greatest runs in bodybuilding history. As the 61-year-old continues to coast into the sunset, he’s been sharing more and more training tidbits that helped a one-time superstar become a living legend.
On June 7, 2023, Yates took to his Instagram page to break down a rather simple but effective ab workout from his Olympia heyday. Yates maintained that he was once inspired by the physique of the legendary Bruce Lee, who, in Yates’ opinion, had “great abs.”
More from Breaking Muscle:
When boiled down, Yates’ prime ab routine probably doesn’t reinvent the wheel. Even from a glance, it appears pretty standard and accessible for athletes of any skill level. All one really needs to perform Yates’ ab workout is a focused commitment to their training.
Yates made sure to clarify that each rep was done with a “hard contraction” and a big exhalation of air at the peak contraction to maximize the potential benefits. Yates wrote that in the early parts of his career, he placed more of a premium on weight-training with his abs. That, in turn, led to a “blocky” look that he didn’t appreciate, and he transitioned to contraction-focused work utilizing just his body weight as a result.
In the end, Yates leaned on what he believed were natural gifts, proper nutrition, and low body fat that let him give his abs the requisite attention without going too far.
“In my opinion, it wasn’t really that important to train my abs as they were always visible due to my low body fat year-round,” Yates wrote. “And my genetics did play a part here in helping me stay lean. Everyone has abs. It’s just a case of revealing them by lowering your body fat.”
More from Breaking Muscle:
In what can be a rigid and demanding sport like bodybuilding, there can be a natural tendency to believe that every segment of preparation needs to be complex. As Yates proves with a look at how he chiseled his abs, some workouts can be very simple and help an athlete achieve their goals anyway.
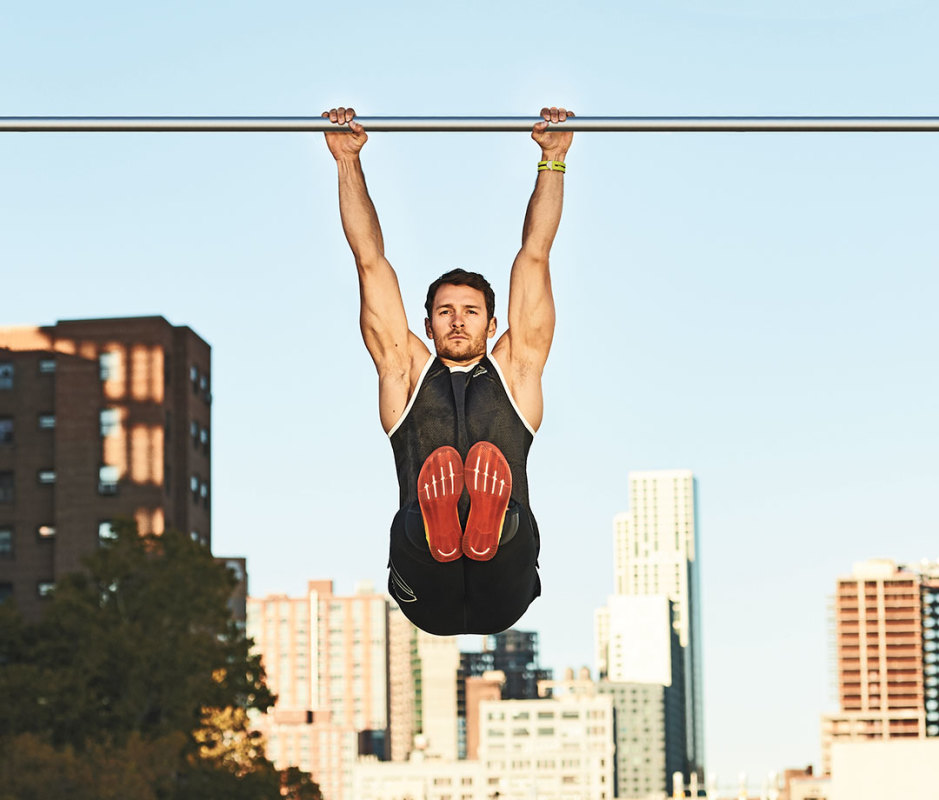
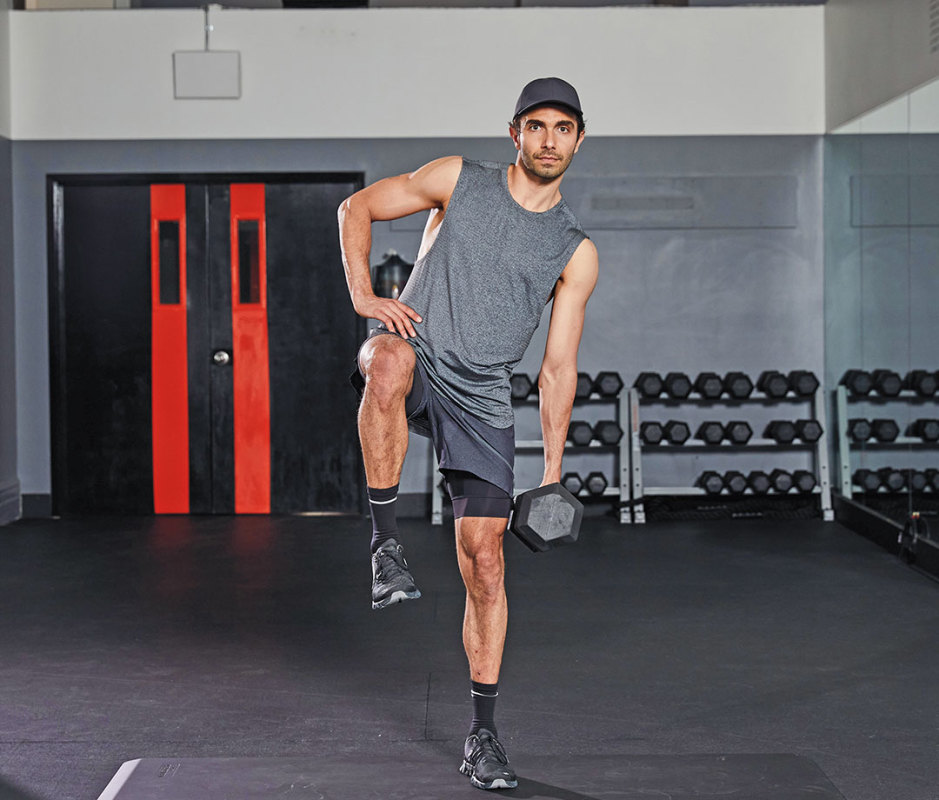
The best ab workouts aren’t just for those seeking chiseled physiques. Anyone looking to improve their core strength can utilize compound movements to maximize gains. Learning how to engage your core is crucial for protecting the spine during everyday movements, as well as while engaged in physical activity.
We’ve highlighted 50 abs exercises that you can mix and match to create an endless array of core workouts, including suggested reps and sets.
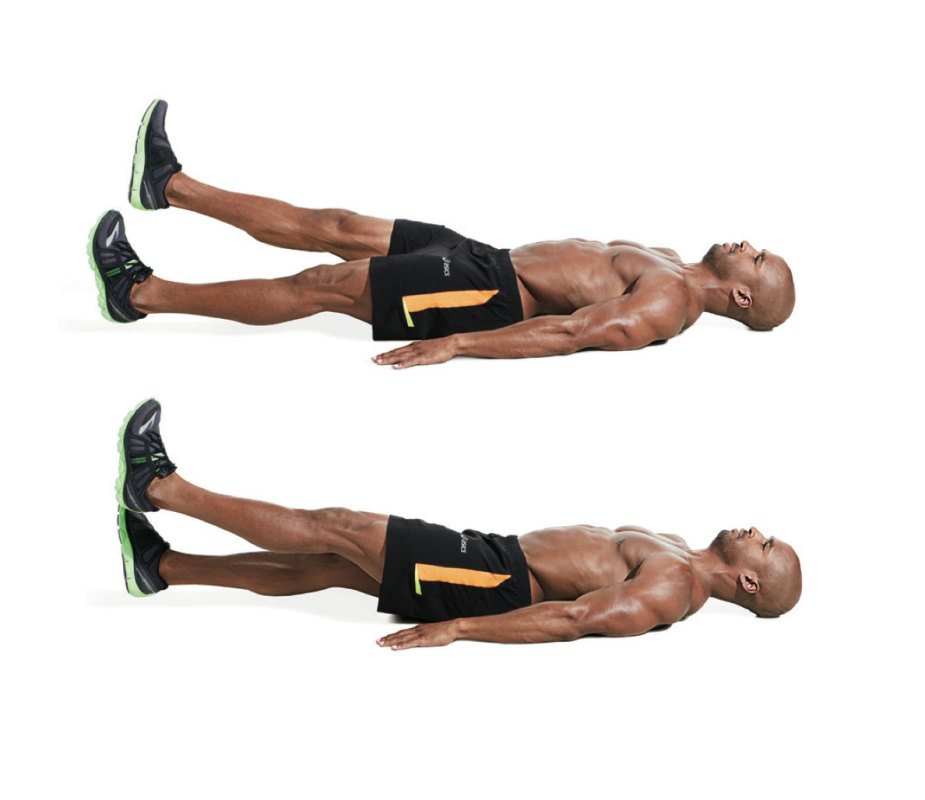
Lie on your back with legs straight and arms extend out at your sides.
Lift your heels about 6 inches off the floor and rapidly kick your feet up and down in a quick, scissor-like motion.
8. Getups
How to do it
From a sitting position, raise your right hand in the air and stand using (at most) your left hand. If you have sufficient core strength, get up without the use of your arms.
Do the prescribed number of reps on one side and switch sides.
Work to the point where you get up without the use of your arms.
Stand with feet shoulder width apart, perpendicular to the anchor point, and arms extended, far enough away from the machine so there’s tension on the cable.
Twist away from the machine as if you were chopping into a tree.
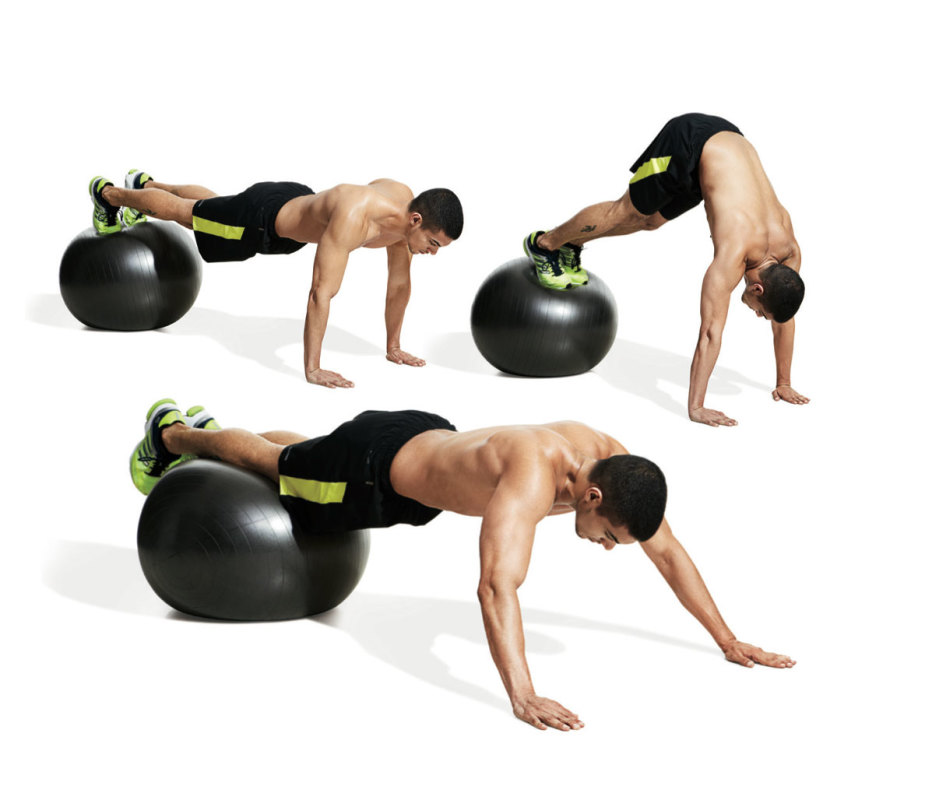
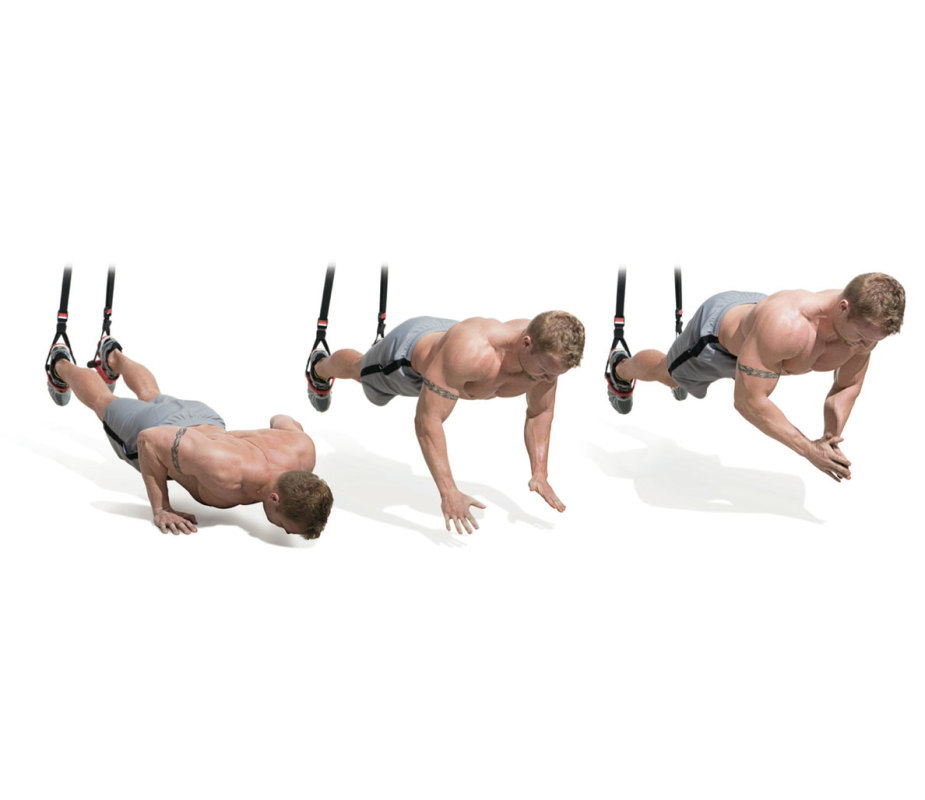
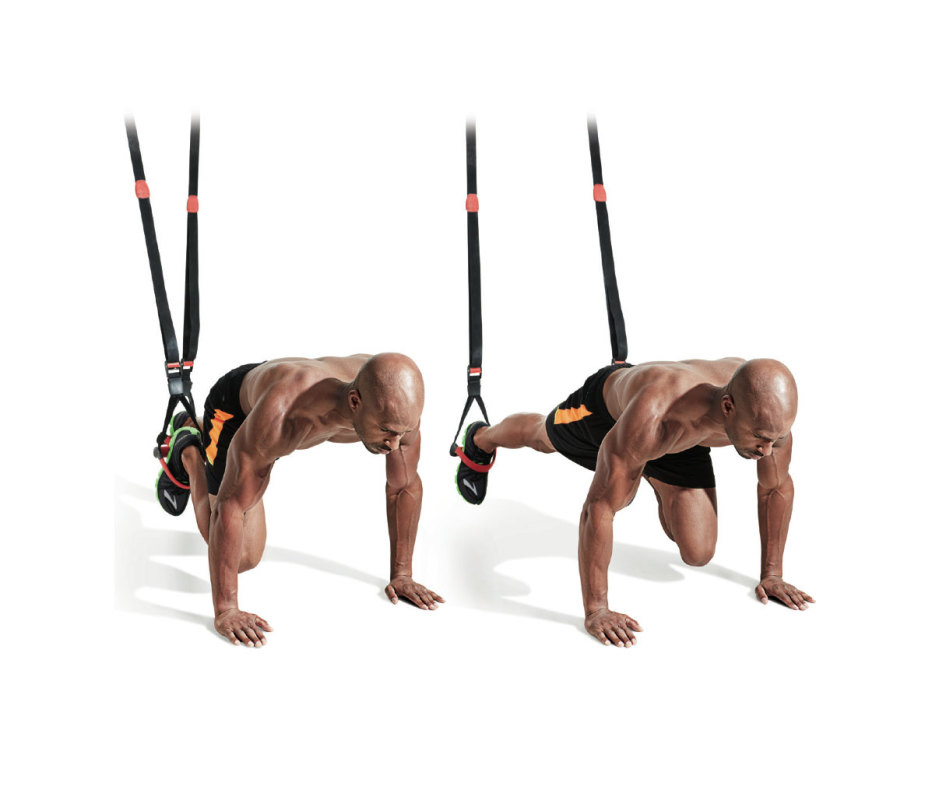
Get into pushup position with your toes on the stability ball.
Bend your hips and roll the ball toward you so your torso becomes vertical.
Roll back so your body is straight again and extend your spine, then roll the ball up your legs so your body forms a straight line with arms extended overhead but hands still on the floor. You should look like Superman flying downward. That’s one rep.
Pull with your lats to return to the pushup position and begin the next rep.
Keeping your torso tall and shoulders back, lean back until core engages, making sure your lower back doesn’t slump.
Bend elbows at 90 degrees, and lift left knee toward ceiling, allowing left hand to come up and right hand to go back, like a runner, to start.
Switch arm and leg positions back and forth continuously and fast, as if sprinting.
Perform 40-sec. reps.
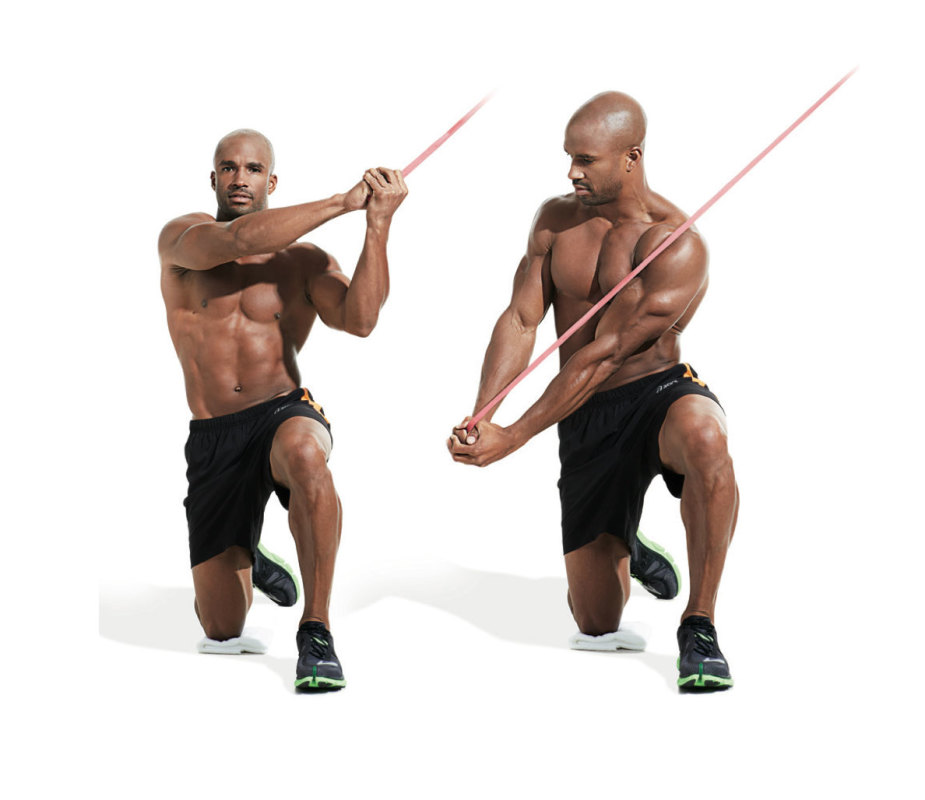
30. Half Kneeling Chop
How to do it
Get into the bottom of a lunge position with your left leg forward and reach up over your left shoulder to grasp the resistance band.
Pull it diagonally downward across your body to the outside of your right hip.
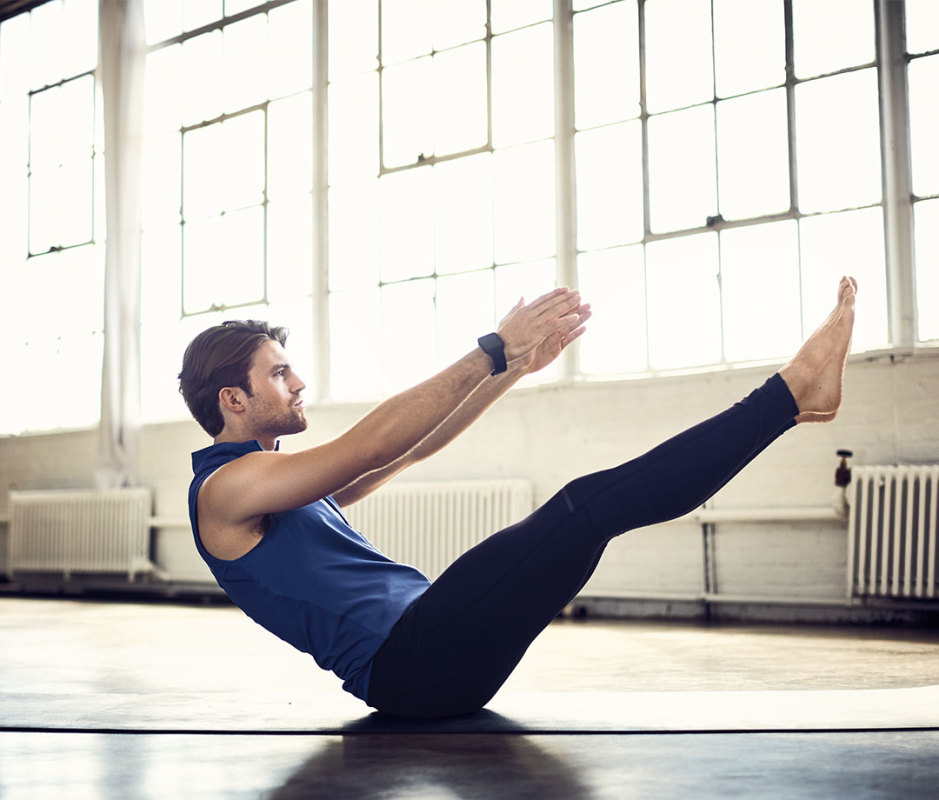
31. Boat Pose
How to do it
From a sitting position, extend your arms out, palms facing each other.
Extend and lift both legs.
If keeping your legs straight is too tough at first, bend at the knees, with the insides of your feet touching to do half boat.
Keep your arms extended on either side of your legs.
Use your abs to keep your back straight.
Stay in this position for five deep breaths, roughly 10 seconds.
32. Oblique Mountain Climbers
How to do it
Start in pushup position, with the balls of your feet on the ground.
Alternate driving your knees toward the opposite arm, twisting your body to that side, for 30 seconds.
Keep your hips down for the entire motion.
33. Hanging Windshield Wiper
How to do it
While hanging from a bar, pull your toes toward the bar.
Keeping control with your obliques and toes together, rotate your legs side to side.
If this is too challenging at first, you can do a hanging leg lift.
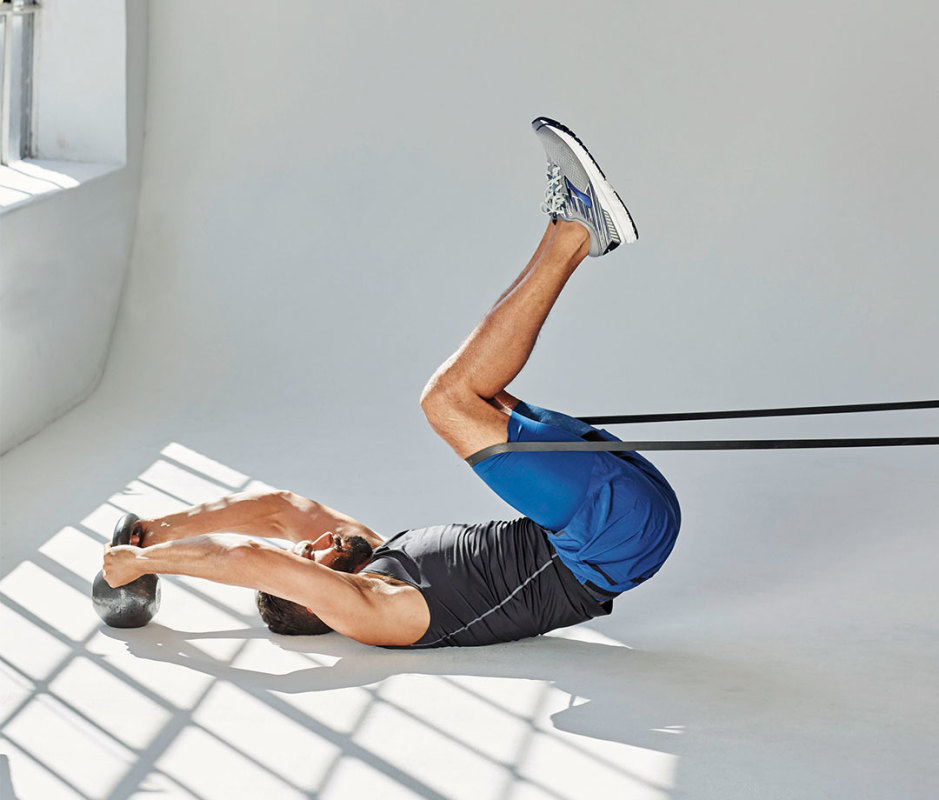
34. Banded Reverse Crunch
How to do it
Attach a light resistance band to a pole at shin height.
Sit on the floor facing the anchor, knees bent, the free end of the band across thighs.
Scooch back until the band is taut, then lie back and grasp a heavy kettlebell behind your head to anchor the upper body.
Draw belly in, lift lower back off the floor, and roll hips and knees toward shoulders, then reverse.
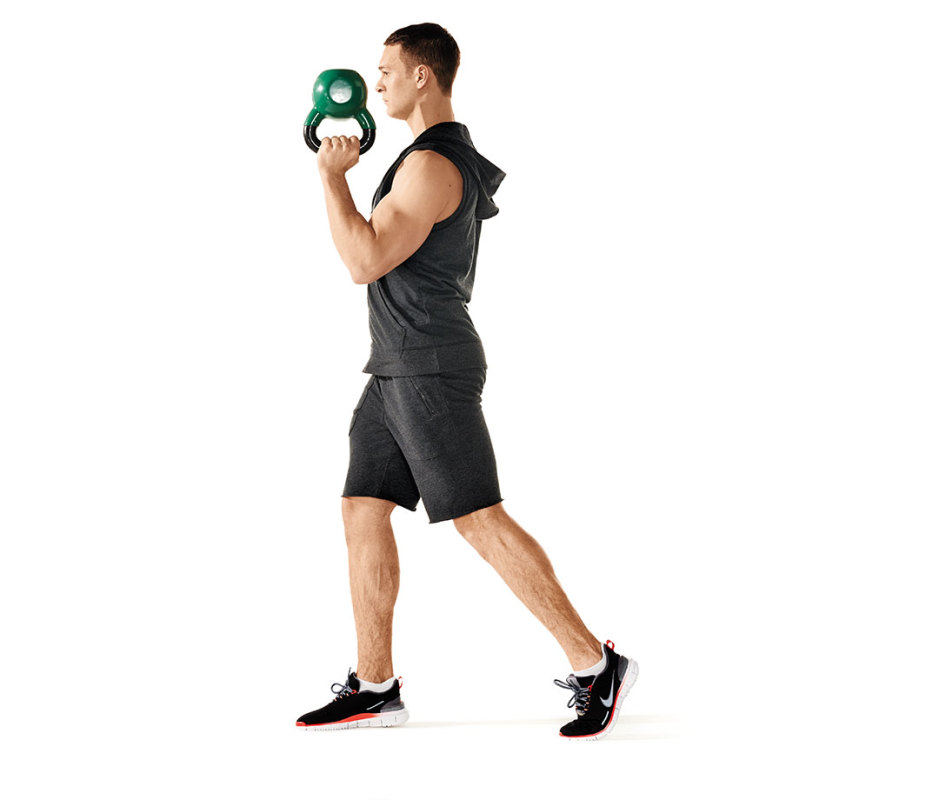
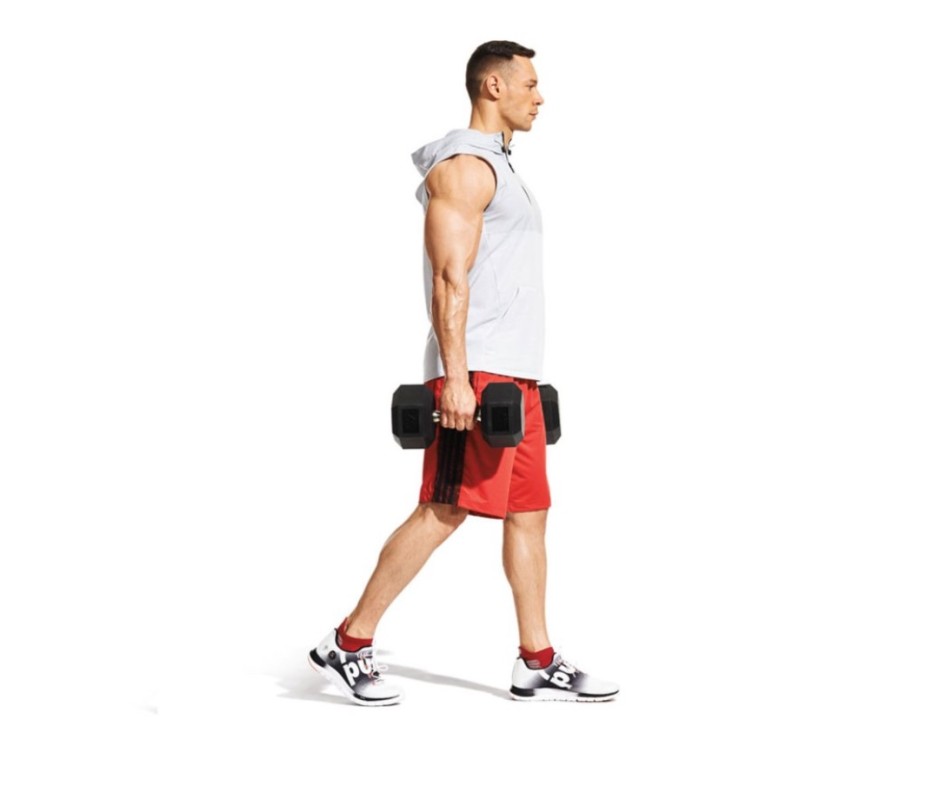
35. Waiter’s Walk
How to do it
Grab a dumbbell or kettlebell in one hand and hold it either overhead or with your elbow bent so it’s near your face.
Keep your shoulder blades pulled back and down and fire your glutes as you walk.
Keep your wrists straight, as if you were waiting tables and holding a tray.
Walk 10 yards out and 10 yards back.
Switch hands and repeat.
36. T Pushup
How to do it
Start in pushup position, arms straight, with hands on light dumbbells (or start without weights, as shown).
Lower yourself and as you push back up, lift your left arm and rotate to the left until your left arm is straight up and your right side faces the floor.
Your body should look like a “T” on its side.
Return to starting position and repeat on the other side.
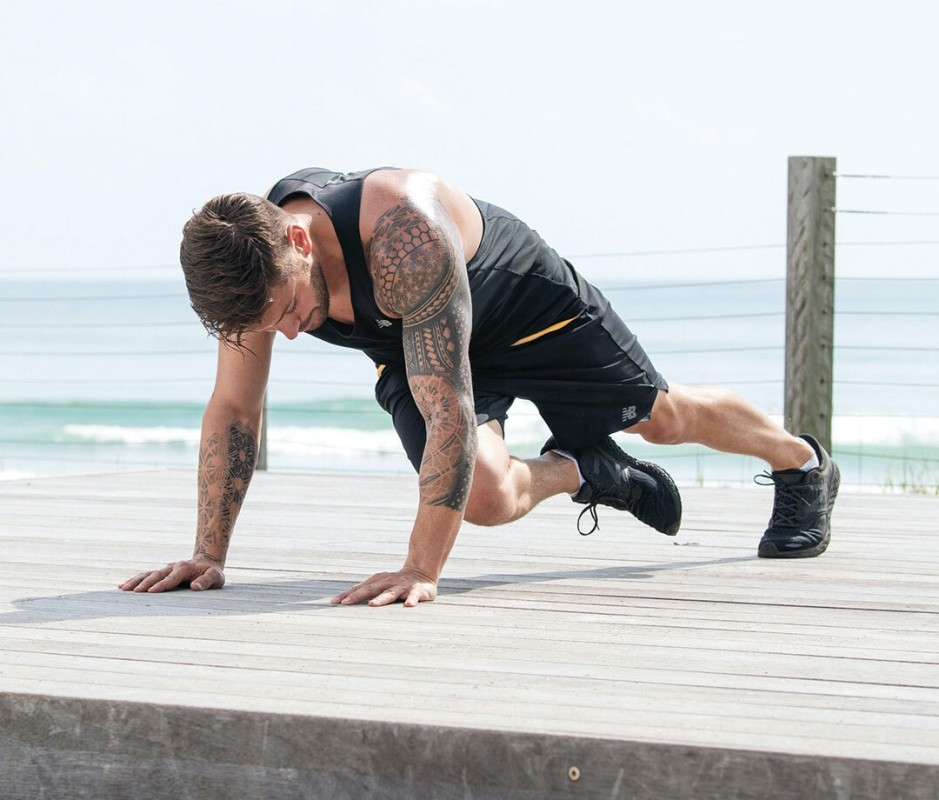
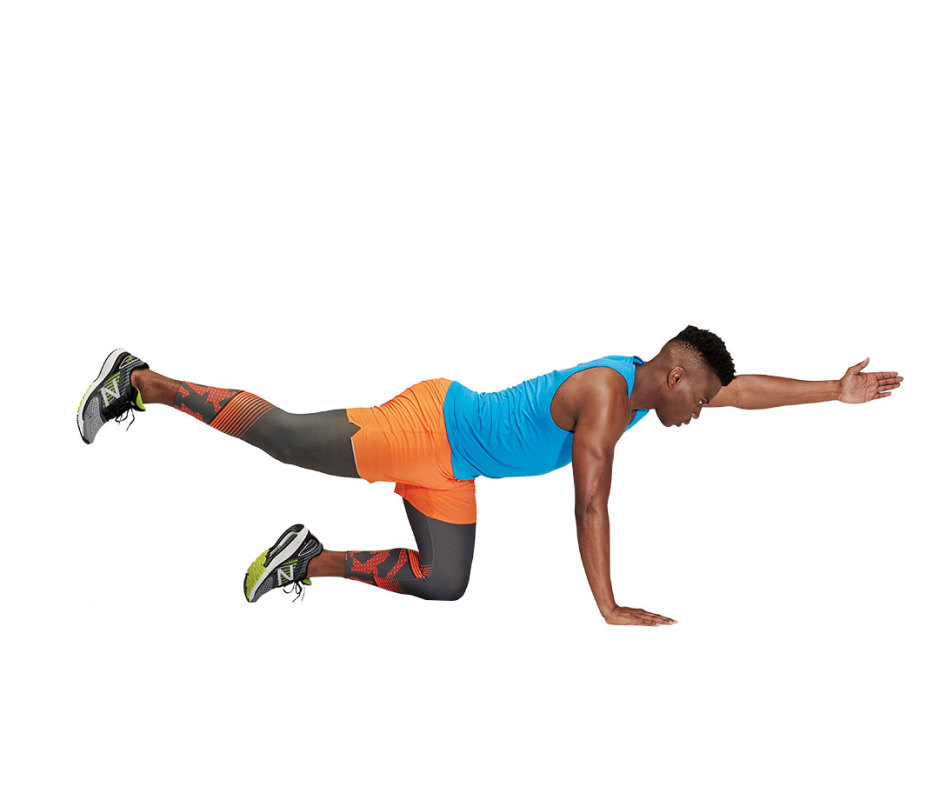
37. Bird Dog Crunch
How to do it
Kneel on all fours.
Reach one arm as far as possible forward and the opposite foot as far as possible behind.
Bring your elbow and knee together to crunch, drawing in the abs.
38. One-Arm Farmer’s Carry
How to do it
Carrying just one dumbbell forces the abs to work overtime to keep you stabilized.
While carrying a dumbbell in one hand, walk 10 yards out and 10 yards back. Don’t hunch over.
Keep your shoulder blades pulled down and back, and fire your glutes as you walk.
Switch hands and repeat.
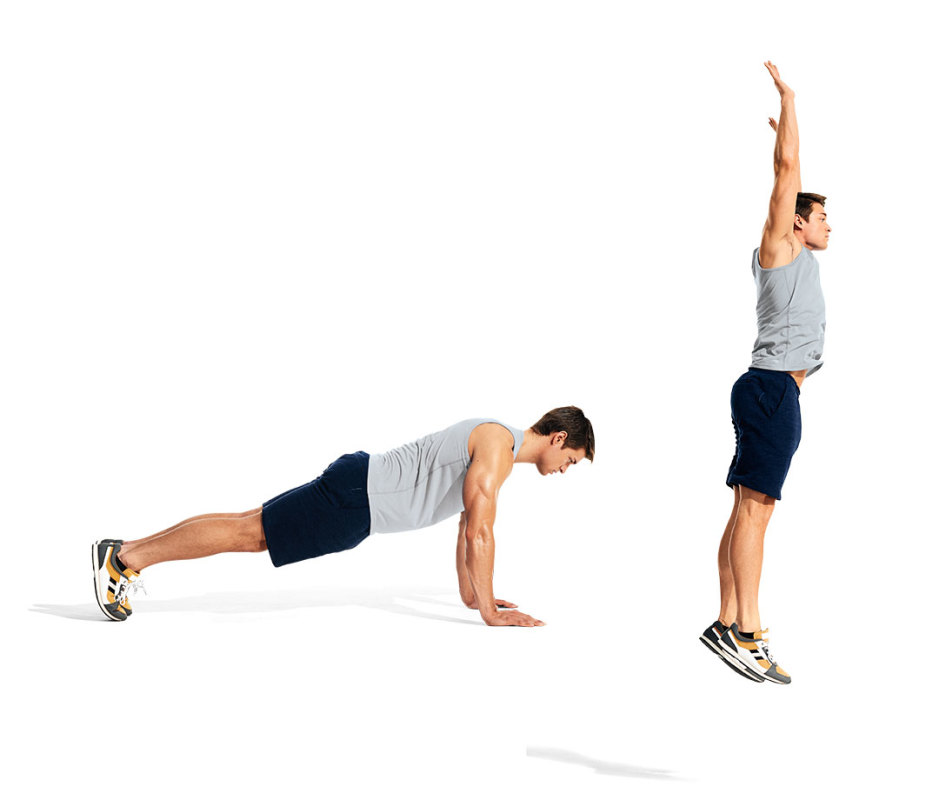
39. Burpee
How to do it
This is a full-body move that’s an underrated abs exercise.
From a standing position, squat, place your hands on the ground, and “jump” your feet out into a pushup position.
Perform a pushup, then jump your feet to your hands.
Explosively jump as high as you can, throwing your hands over your head.
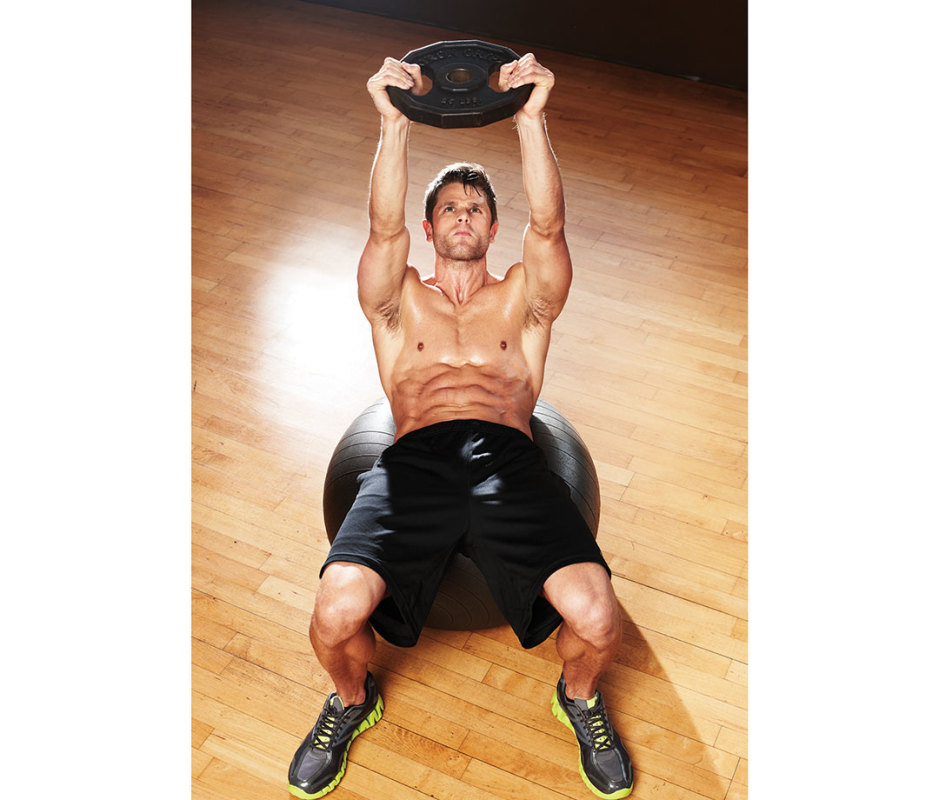
40. Swiss Ball Plate Crunch
How to do it
Lie supine on a Swiss ball with your torso arched over the ball.
Touch your shoulders, back, and glutes to the ball so your abs are stretched.
Hold a weight plate over your head.
Roll your hips and chest up, crunching from the top of your torso.
Lower your hips and chest to the starting position.
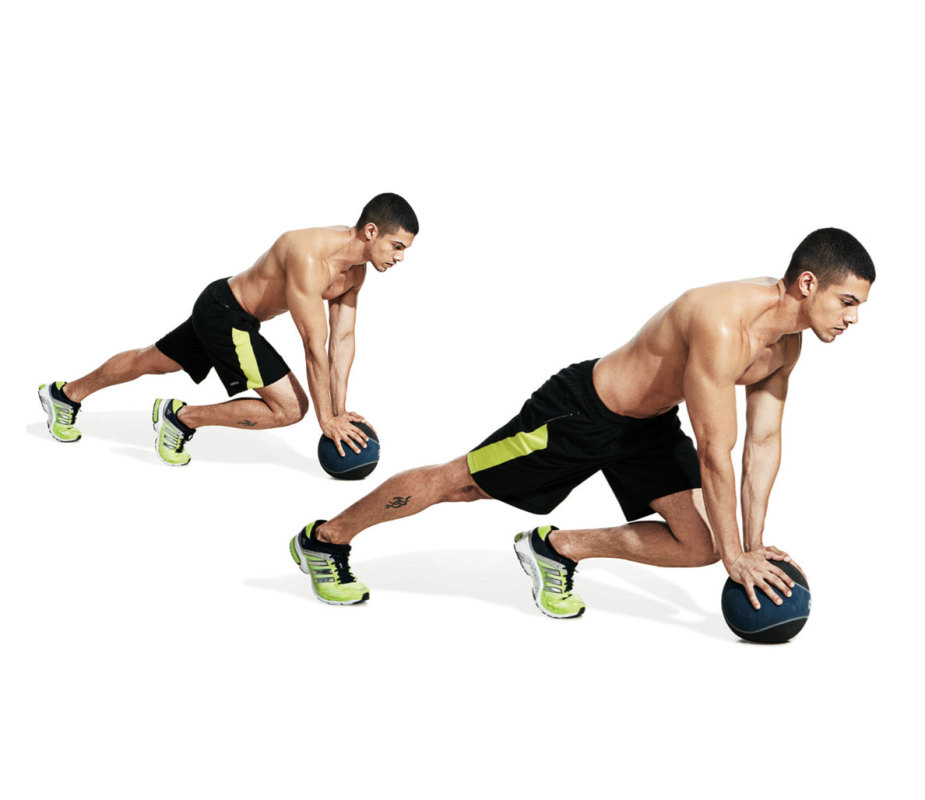
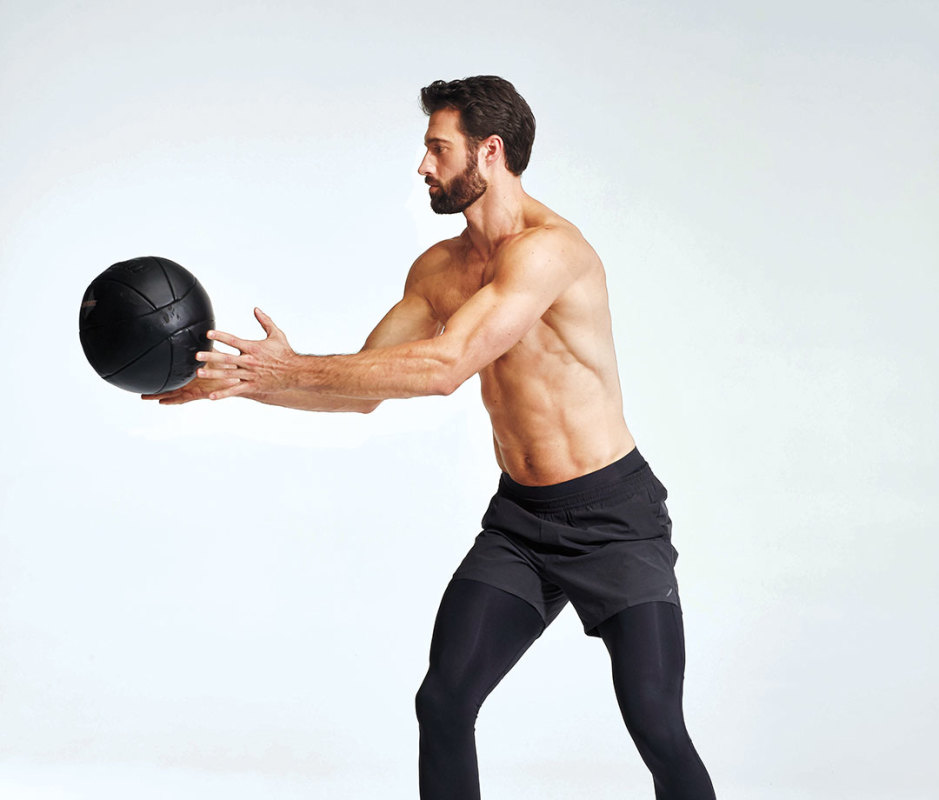
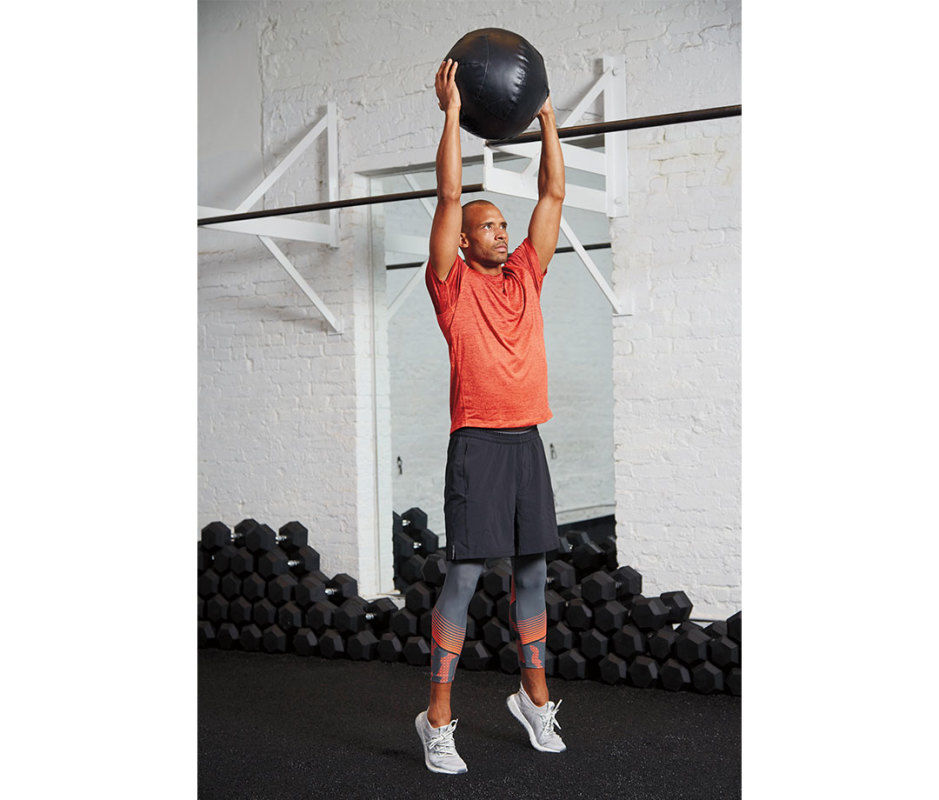
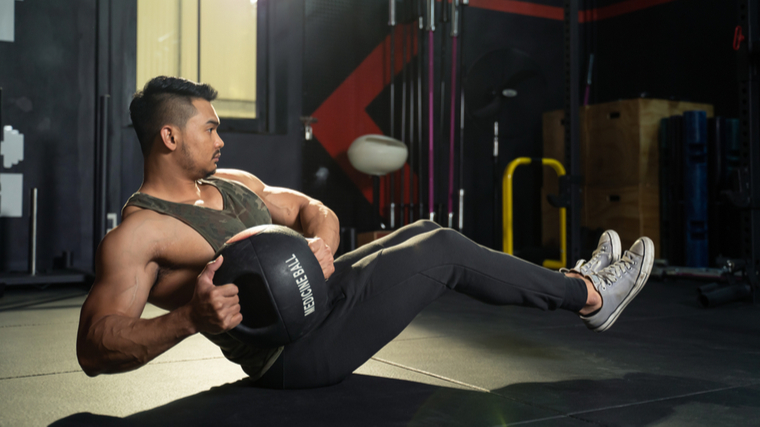
41. Medicine Ball Rotational Throw
How to do it
Stand facing a wall with feet shoulder-width apart, holding a medicine ball in both hands.
Rotate your shoulders, hips, and torso away from the wall, taking the ball behind your hip.
Turn your hip back to the wall and rotate the rest of your body, throwing the ball to the wall.
Switch sides.
42. Medicine Ball Slam
How to do it
With knees slightly bent, raise the medicine ball with two hands overhead with arms extended.
Rise on the balls of your feet and bend at the waist to slam the ball to the ground.
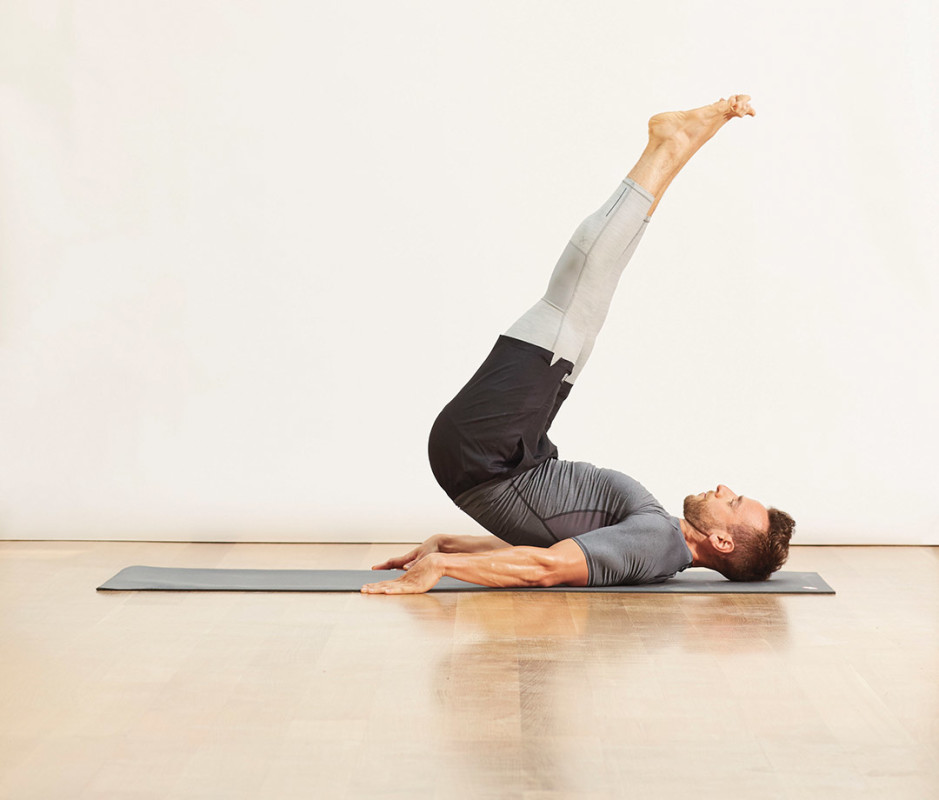
43. Corkscrew
How to do it
Lie on your back, arms along sides, legs straight at a 45-degree angle to floor to start.
Inhale, bring legs toward torso and roll spine off mat into a hover position—hips are off the ground and tipped back, feet are overhead.
Exhale, press through hands and tilt legs to left as you roll down the spine through the center at a 45-degree angle.
Tilt legs to right and roll back up to hover to complete a circle.
44. Cable Crunch
How to do it
Attach a rope to a high pulley.
Kneel in front of it, grabbing the rope handles on either side of your neck.
Contract your abs to bring your elbows to your thighs.
Pause briefly and return to starting position.
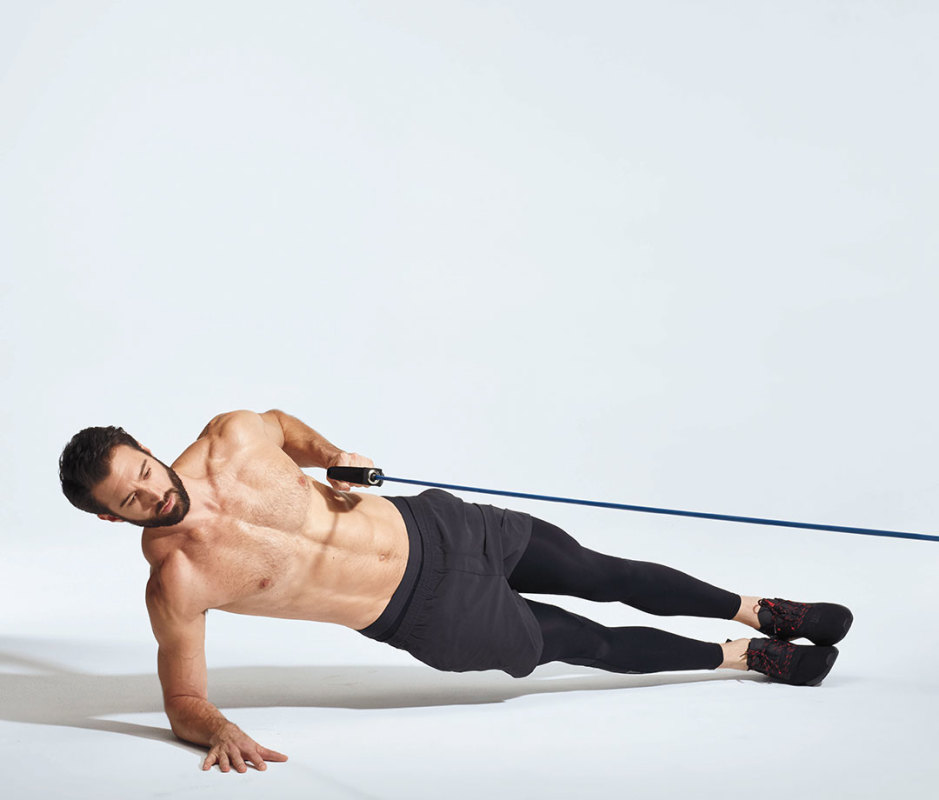
45. Side Plank Row
How to do it
Start in a right forearm-down side plank, feet stacked, left hand holding a resistance band anchored in front of body.
Pull left elbow back, then release for one rep.
Do all reps on the left side, then switch sides.
46. Single-leg Oblique Dip
How to do it
Stand on left leg with right leg bent at 90 degrees, foot flexed, holding a heavy dumbbell in left hand.
Don’t rush: Keep obliques and glutes engaged as you dip toward the left.
47. Plyo Plank Shuffle
How to do it
Start in a high plank, hands under shoulders, toes on a BOSU.
Keeping your upper body still, and arms and legs straight, step left foot to the side, a foot away from the BOSU, then return foot to the ball.
Repeat on the right side for 1 rep.
For a challenge, move legs in unison.
Start with the left leg a foot away from the BOSU, then engage hips and push off with both feet, so the left foot lands on the ball and right foot on the floor.
Hold a high plank with a kettlebell just outside your left hand.
Reach under your torso to grab the kettlebell with your right hand and “sweep” or drag the KB back and forth with a full range of motion.
Keep your core tight, glutes engaged, and hips level.
Your obliques should power this exercise.
Perform 60-sec. reps.
Tips for Maximizing Your Abs Workouts
Whether you’re a pro athlete or just want to get ripped abs—a comprehensive core workout should comprise three planes of motion: frontal, sagittal, and transverse to hit your rectus abdominis, external and internal obliques, and transversus abdominis.
An endless number of total-body exercises light up your core muscles, but targeted ab workouts can really make a difference in strengthening your core from every angle. And doing core exercises in a circuit keeps the intensity high and will likely lead to more fat loss.
But we need to acknowledge a hard truth: Not all six-packs are created equal. Some guys need to work their belly to exhaustion before they can carve out abs, while other dudes seem to get a six-pack to pop without a single sit-up or side plank. Yes, genetics play a significant role here, too.
Your meals are also crucial. The visibility of your six-pack “really comes down to the amount of body fat that covers them,” says strength coach Lee Boyce. “This will mainly be affected by diet, though proper core training is still beneficial for the health and function of your abdominal region.”
Once you’ve cleaned up your diet, be patient with progress, and stay consistent. Of course, ab exercises aren’t just hitting your upper abs, rectus abdominis, and deep core muscles. Some of these exercises also hit the upper body, lower body, or total body to help prevent injury by bolstering muscles like erector spinae (muscles along the spine) and hip flexors.
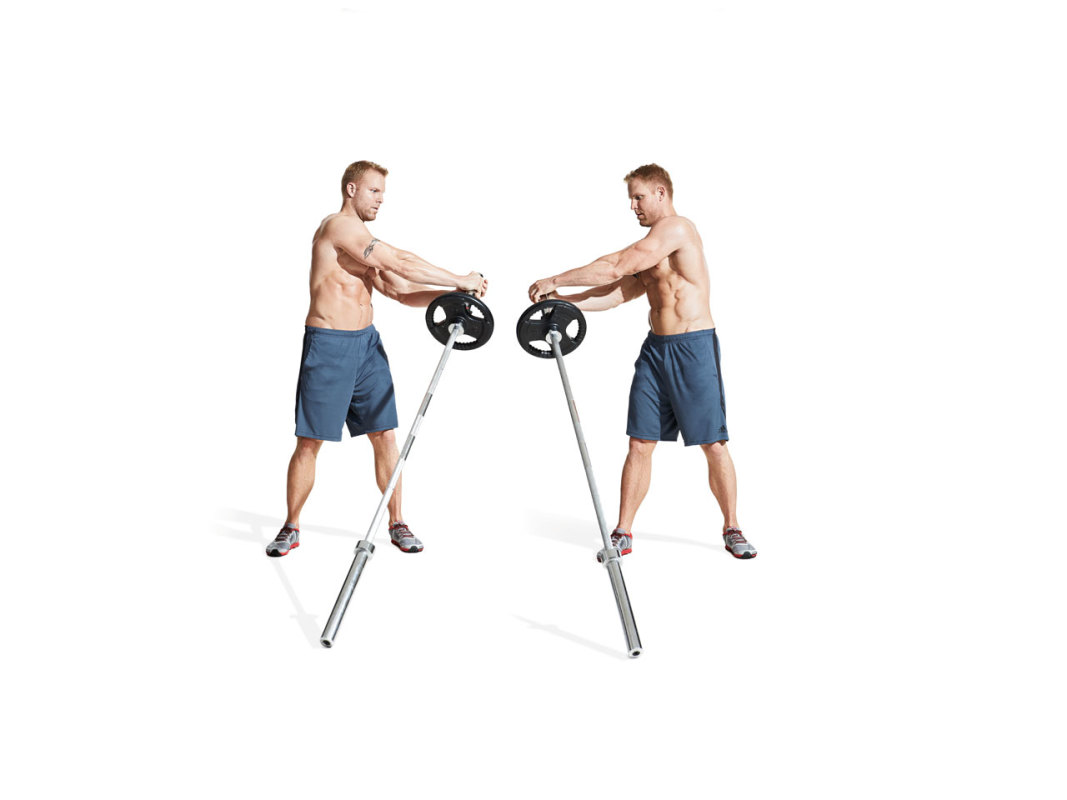
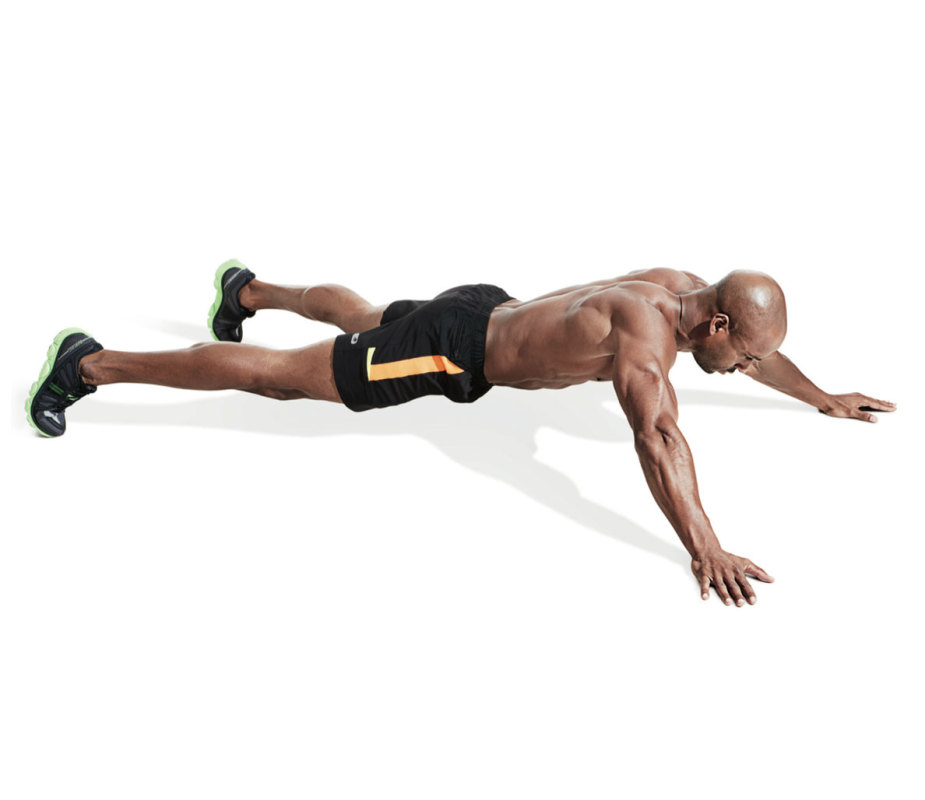
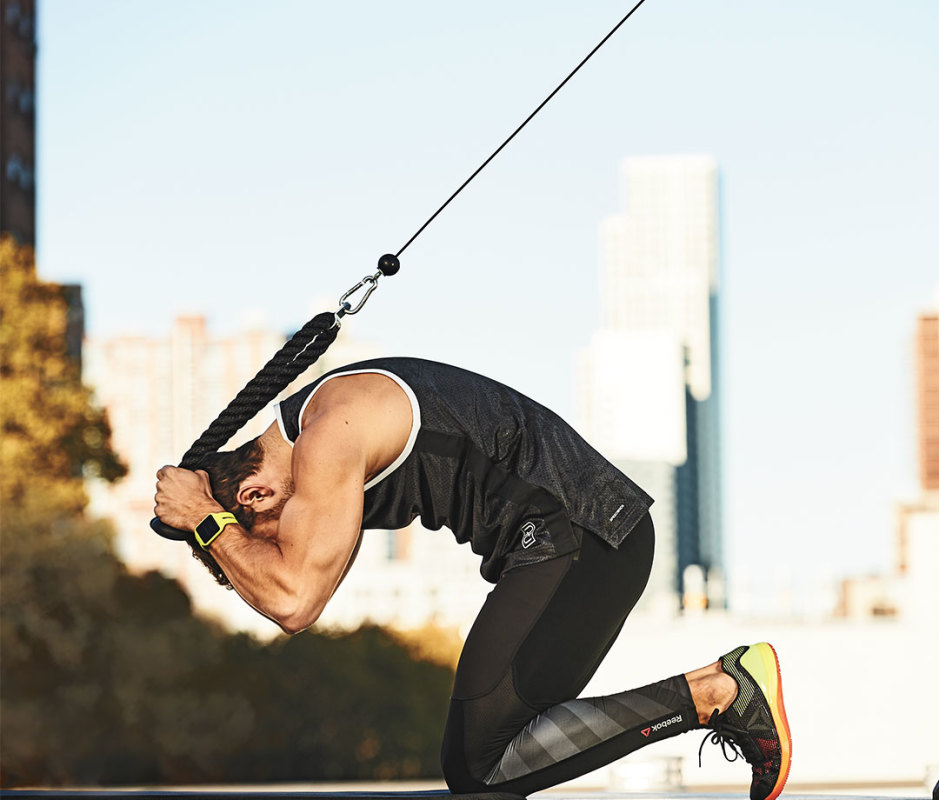
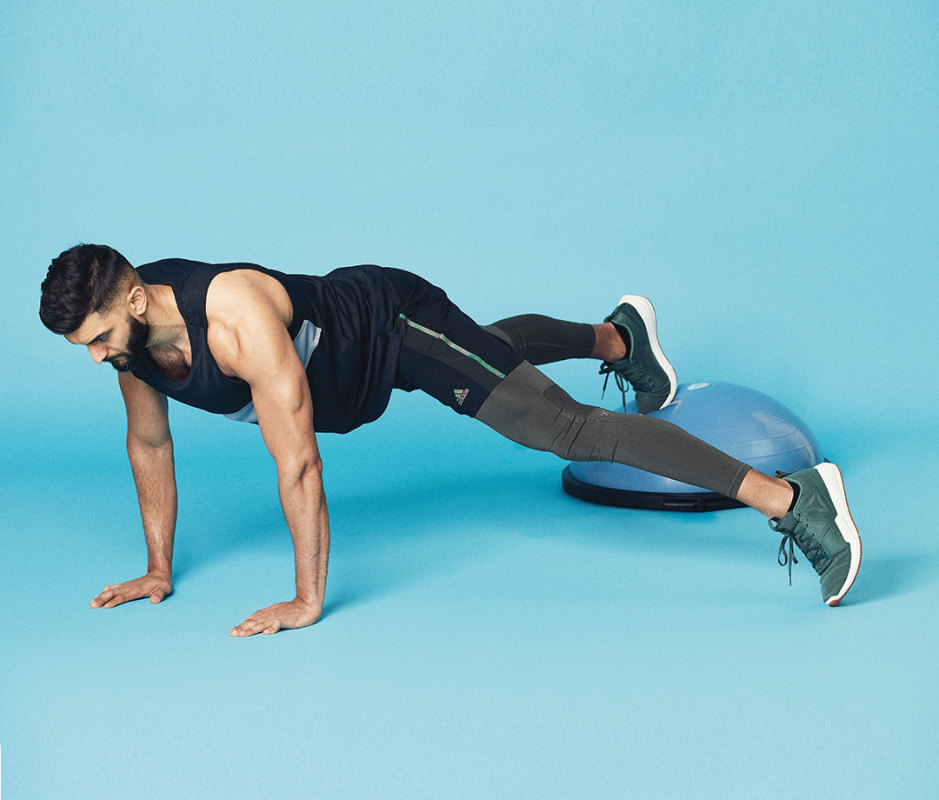
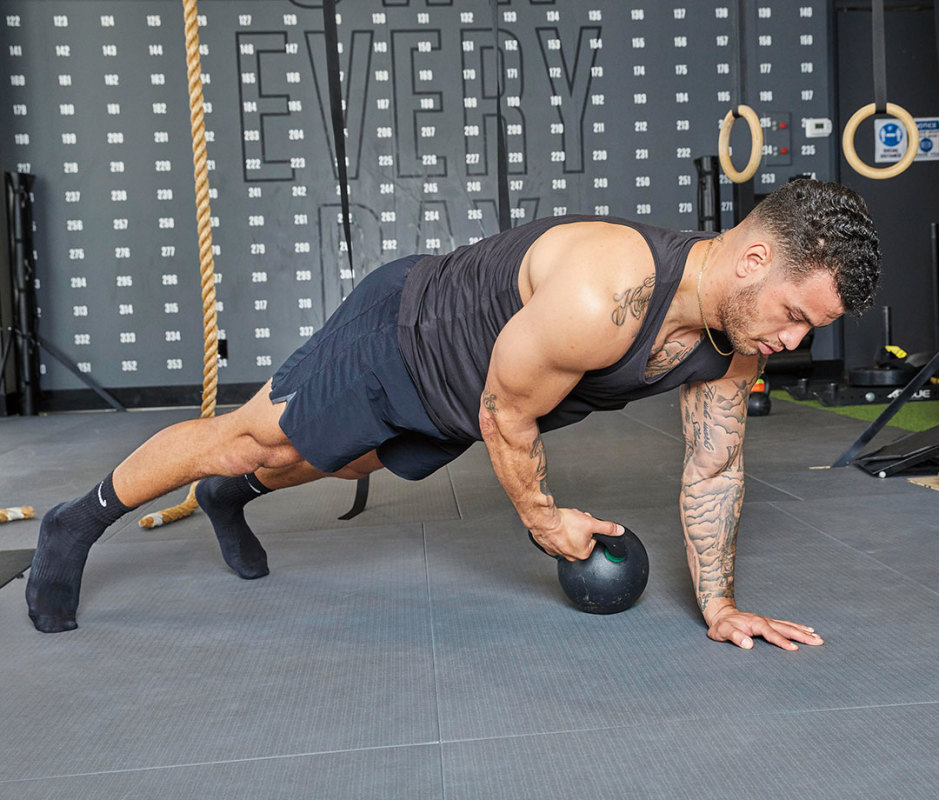
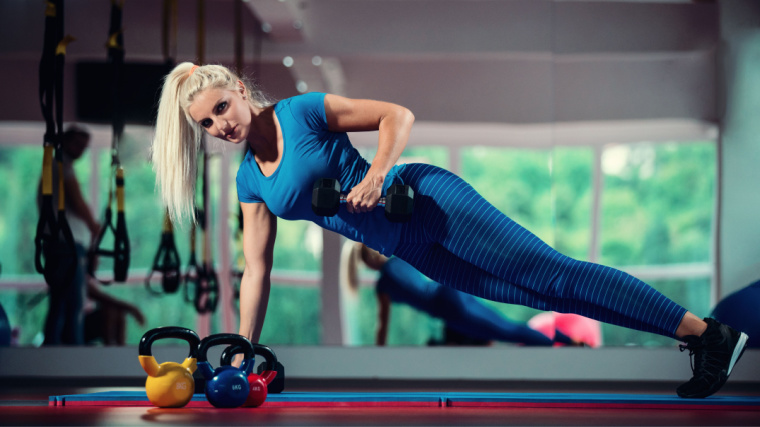
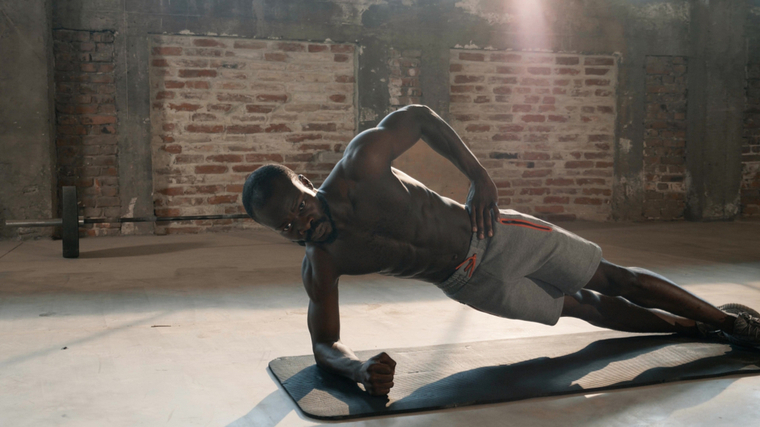
The recent rise (and arguably unnecessary obsession) with “functional training” has seen the renegade row become a staple in CrossFit, fitness boot camps, and bodyweight workouts across the world.
It’s likely that many gym-goers or home-gym lifters have done this ground-based exercise at least a few times before — holding a straight-arm plank while performing alternating dumbbell rows — to build conditioning and head-to-toe strength and stability.
Credit: Dragon Images / Shutterstock
If you’re going to do the renegade row, it’s time to make sure you’re performing it properly. Here’s how and when to include it in your workout routine, plus a few effective variations to take this popular movement up a notch.
Renegade Row
How to Do the Renegade Row
The renegade row is a type of combination exercise — performing a static plank while simultaneously performing a rowing motion. So before you try the renegade row, you should have some basic experience performing both of those exercises separately. Then grab two dumbbells or kettlebells and get ready to work.
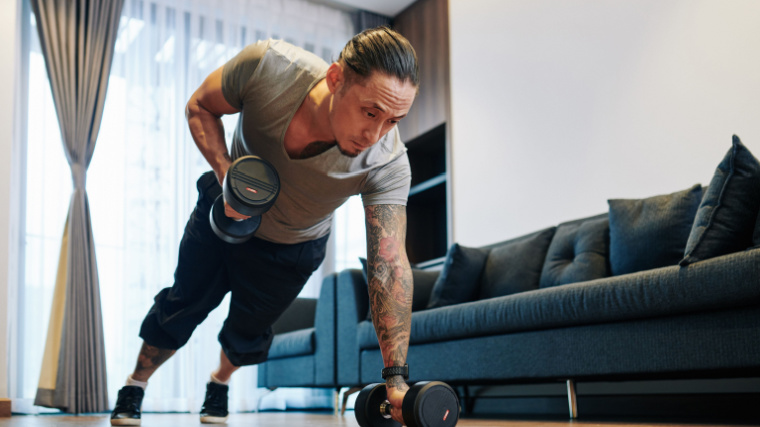
Step 1 — Set Your Hands and Feet
Credit: MDV Edwards / Shutterstock
Get on the ground with a dumbbell in each hand, placed just inside shoulder-width. Set your feet slightly wider than hip-width and straighten your legs. Make sure you can really push into the ground with your feet, which will help you successfully create tension in your whole body. Don’t let your hips sag down or arch high. Hold a straight line from your ankles to your neck. This stable plank position is the “base” for each repetition of the exercise.
Form tip: Placing your hands directly under shoulders would be great technique for a standard plank, but remember this is not just a plank. Having your hands a bit closer is going to help your stability by reducing the weight transfer from side to side as you switch arms during each repetition. This will make it much easier to create tension in your plank while keeping your hips nearly level.
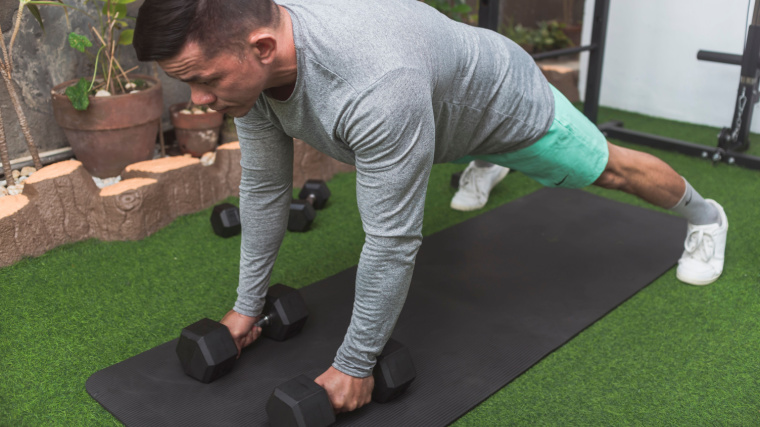
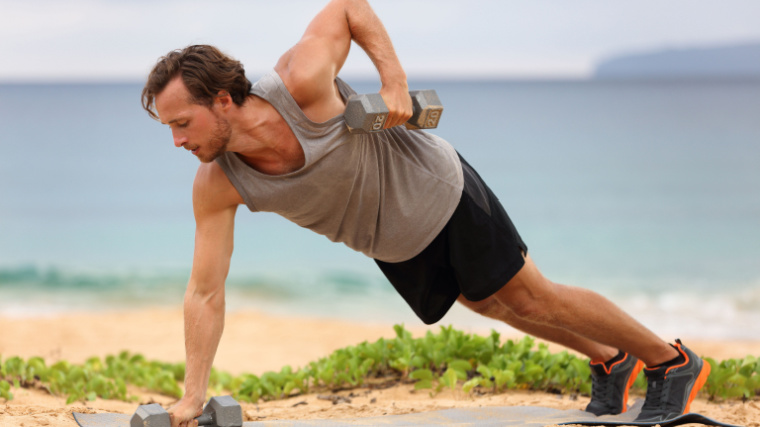
Step 2 – Press and Pull
Credit: MDV Edwards / Shutterstock
Squeeze both dumbbells extra-hard and actively push one arm toward the ground without bending it. This will create more stability through your upper body. (1) As you drive that arm down, lift the opposite elbow up and back, moving the weight toward your front pocket in an arching motion, not in a straight line to the ceiling. Maintain total-body tension and fight the weight pulling you off-balance.
When the dumbbell is near your torso, return it back to the floor slowly. The exercise is about control and consistency, not rushing through reps as quickly as possible. Drive your second arm toward the ground and row the first dumbbell. Repeat the movement, alternating sides with each repetition.
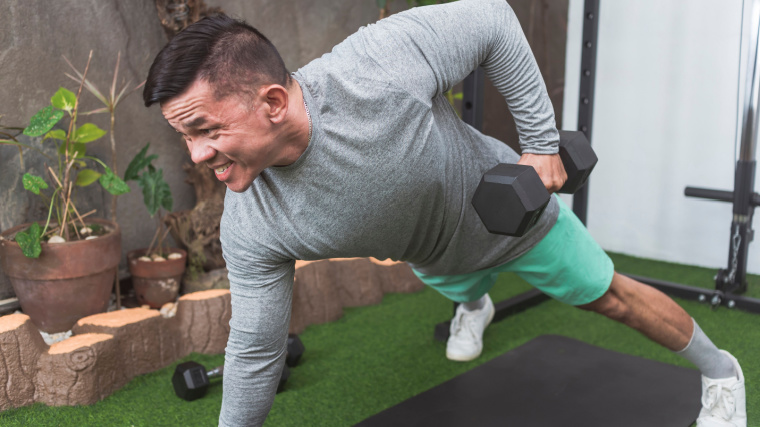
Form tip: As you row your elbow up and back, it’s going to be tempting to lift that same side hip and shoulder because rotating your body might assist you with the lift. Instead, move toward the challenge, literally. If you are rowing on the right side, your body will naturally want to lift your right hip. Instead, as you pull your elbow up, actively push your right hip down to resist the twist and keep your hips level. This will also help you to stay more braced through your midsection and recruit more abdominal muscles.
Renegade Row Mistakes to Avoid
The exercise involves head-to-toe coordination and stability, so there are some common mistake that can occur with such a big movement. Here are some issues to watch out for.
Keeping Your Feet Too Close
When your feet are set too narrow, it will be nearly impossible to do anything other than simply shift your weight from side to side as you move through the rep. It’s extremely difficult to maintain a plank position because close feet create a very small base of support, so you end up just doing a row in a really inefficient position.
Credit: SOK Studio / Shutterstock
Keeping your feet set slightly wider than your hands will put you in a powerful stance to perform the movement without sacrificing stability. If your feet are too close, you’ll be off-balance from the start and unable to generate enough force to efficiently lift the dumbbell.
Avoid it: When you get into the starting position, make sure your feet are more than hip-width apart to provide a wide enough point of contact for stability. When you row, you shouldn’t be at risk of tipping to one side or the other.
Twisting Your Body
Rotating your body to get the weight moving means you’re using momentum to help pull the dumbbell off the floor instead of using your back muscles. When this happens, you end up with a very poor row and a very poor plank. That’s a lose-lose situation.
Credit: Anel Alijagic / Shutterstock
When you shift your body to one side, you drastically reduce the need to stabilize your core, which takes away from the entire point of the exercise. You might end up doing extra reps, but each rep is less effective at building strength and conditioning.
Avoid it: Try to focus on body awareness and feel your shoulders and hips staying nearly level throughout the entire exercise, as you lift and lower the weights. Fighting to keep your body in position is what’s going to deliver the results you’re after.
Tapping the Weight to Your Chest
When you’re performing the renegade row, focus on the movement of your elbow instead of what’s happening with the dumbbell itself. If your elbow starts and finishes in the right place, the dumbbell will follow.
Credit: Maridav / Shutterstock
When the load gets too heavy or when you focus on “bringing the dumbbell to your ribs,” you lose range of motion because the focus shifts away from the most effective technique.
Avoid it: Pay attention to each individual repetition and perform it properly, without regard to the specific weight you’re moving. Go step by step and follow the technique tips, and avoid any instinct to make the dumbbell a key player in the movement.
How to Progress the Renegade Row
Deciding how and when to progress this movement can be difficult and there need to be some special considerations because it is a combination we are not just progressing one movement.
Technique Over Weight or Volume
The renegade row isn’t well-suited for handling heavy weights, training with extreme intensities (muscle failure), or using high volume (many sets and reps). Instead, performing the exercise with greater competency and crisp form is the real key to long-term success and results.
Gradually adding even one or two reps per set, or one or two sets, each workout would give you a great opportunity to perform some very effective, high-quality work.
Plank Shoulder Tap
One modification to the renegade row is to swap the dumbbell row for an unweighted shoulder tap, reaching one arm across your body to lightly tough the shoulder of your base arm.
This bodyweight-only exercise trains similar total-body stability and strength by teaching you how to stay tight in a plank position while alternating between single-hand support. You’ll also build core strength to keep your body level and avoid twisting as you move.
Unilateral Renegade Row
Another effective modification the renegade row would be to do all reps unilaterally (with one arm) before switching arms. This creates more localized fatigue in the muscles on the specific side you’re working.
While the unilateral renegade row emphasizes the back muscles and core stability, it can be slightly less challenging rotationally because your body isn’t repeatedly adjusting from between alternating sides.
Benefits of the Renegade Row
The renegade row is not a great exercise choice for improving absolute strength because you can’t move heavy weights. It’s also not ideal for hypertrophy (muscle-building) because it doesn’t focus a specific body part with the time under tension needed to stimulate growth. (2) However, it can be an incredibly useful exercise to address often overlooked aspects of many training plans.
Core Control
The renegade row is a complete core exercise that can build strength and stability, while also improving your ability to move your upper body limbs around the rib cage. This carries over to athletic performance and big lifts.
A stronger core may help reduce the risk of back injuries and can boost performance, especially in sports where running and change of direction are involved. (3) Training your body to maintain trunk stability while manipulating your arms can be a big factor in avoiding “strength leaks,” which can reduce power output.
Strength-Endurance (aka Conditioning)
To perform the renegade row competently, you need to take your time with a relatively moderate to light load and moderate to higher repetitions because the exercise isn’t conducive to very heavy weights or very low reps.
The duration of each set creates a stimulus that is more endurance-based, which contributes to muscle-specific endurance in the recruited body parts (especially the back, shoulders, arms, and abs). The total-body exercise also contributed to overall cardiovascular endurance — after your first set of 15 or more reps, you’ll notice what kind of cardio shape you’re really in.
Muscles Worked by the Renegade Row
The combination of the plank position and single-arm row will recruit a large number of muscle groups across the body, even though the renegade row is sometimes considered either an ab exercise or a back exercise.
Internal Obliques
These deep core muscles are responsible for controlling your pelvis and creating posterior tilt, along with the hamstrings. The internal obliques help you to create and maintain tension with the other core muscles, like the transverse abdominals and the rectus abdominis. They also work significantly to resist rotation when you raise the dumbbell on either side during the renegade row.
Chest, Shoulders, and Triceps
These muscles work together during the exercise, as they are recruited in an isometric action (without any significant range of motion) as you push into the ground and keep the arms fully extended. The chest, shoulders, and triceps of your base arm fire as you row the opposite side, although the rear portion of the shoulder on the working side also assists to lift the weight.
Lats, Rhomboids, and Trapezius
This series of separate back muscles work together to put the row in “renegade row.” They are recruited during the concentric (lifting) action and they control the weight back to the ground during the eccentric (lowering) phase.
Depending on your arm length and range of motion, not all of the muscles may achieve the type of full stretch and peak contraction that contribute to major muscle growth.
How to Program the Renegade Row
The renegade row is often performed either as a standalone exercise or as part of a complex with other bodyweight or basic dumbbell exercises. It is essentially a core exercise, and fits well at either the beginning of a workout (similar to a full-body warm-up to improve movement quality) or at the end of a workout as a high intensity core finisher.
Light to Moderate Weight, Moderate to High Repetition
To maintain an emphasis on strict technique, stick with a weight that’s challenging for no fewer than 8-10 reps — if you go much heavier than that, you’re likely to compromise form to move the weight. Generally, training the renegade row with two or three sets of 12 to 20 reps can deliver a major stimulus for conditioning and muscular stimulation.
Movement Quality
One unique way to incorporate the renegade row at the start of your workout is with a quick circuit, pairing the exercise with two or three core-focused bodyweight movements. Perform three to five sets of the entire sequence, with no rest between each exercise and 30 to 60 seconds rest between each circuit.
Renegade Row — 10 reps
Deadbug — 10 reps
Side Plank — 30 seconds per side
Medicine Ball Throw — 10 reps
Core Finisher
You can also end your training session with a finisher that features the renegade row and emphasizes the abs. Repeat the series for as many rounds as possible within five minutes.
The renegade row can be pretty complete on its own, but there are a few variations that can take it even further. By adding the right movements to the basic renegade row, you can get more muscle recruitment and a bigger overall training stimulus.
Renegade Row Push-Up
One of the most challenging renegade row variations involves adding a push-up between each row. Special consideration needs to be taken here because now you need to be highly competent at three different exercises (the plank, dumbbell row, and push-up), so it’s definitely not a beginners-level movement.
This variation works very well as part of a circuit with two or three other exercises, such as mountain climbers and the dumbbell deadlift, where the renegade row could be performed with lower reps but repeated for more total sets.
Renegade Row Burpee
The burpee itself has a strong “love it or hate it” reputation with many lifters, but it can flow smoothly at the end of a renegade row because the plank also the bottom position of a burpee.
Transitioning from the renegade row to the burpee can either be done with a quick and seamless transition, for a high intensity conditioning effect, or you can briefly pause in the plank position after the second row before jumping your feet in. This can help prevent form breakdown.
FAQs
Can you build strength with the renegade row?
Yes, you can build a degree of strength, but it’s technically relative strength rather than absolute strength. Meaning, it will get you generally stronger overall, but not necessarily closer to doing barbell rows with 300 pounds. Similar to doing air squats compared to barbell squats, you will see some improvements in strength and work capacity (conditioning), but those improvements will be relative to the load and intensity you can use during the exercise. With the renegade row, load and intensity are limiting factors — you can’t train with heavy weights and you can’t safely reach muscular failure. Regardless, you can definitely include the exercise in your routine and benefit from improved relative strength, but if getting super-strong is a priority, focus on improving absolute strength with heavy weights and low reps with exercises deadlifts, rows, and pull-ups.
My hands hurt while resting on the dumbbells. What can I do?
This is actually very common. The simplest solution is to place your hands on the floor, with the dumbbells just inside your wrists. Then, only pick the dumbbell up when performing the rowing portion of the rep. Each repetition will take slightly longer and you might not be able to do as many reps, but it will still be an effective core exercise.
Be a Renegade
The renegade row is definitely not for beginning lifters because there are so many moving parts. Once you’re mastered form on the component exercises like the plank, dumbbell row, and even push-ups, then you’re ready to add this full-body exercise to your program and start building rock-solid stability and off-the-charts conditioning.
References
Gontijo, L. B., Pereira, P. D., Neves, C. D., Santos, A. P., Machado, D.deC., & Bastos, V. H. (2012). Evaluation of strength and irradiated movement pattern resulting from trunk motions of the proprioceptive neuromuscular facilitation. Rehabilitation research and practice, 2012, 281937. https://doi.org/10.1155/2012/281937
Burd, N. A., Andrews, R. J., West, D. W., Little, J. P., Cochran, A. J., Hector, A. J., Cashaback, J. G., Gibala, M. J., Potvin, J. R., Baker, S. K., & Phillips, S. M. (2012). Muscle time under tension during resistance exercise stimulates differential muscle protein sub-fractional synthetic responses in men. The Journal of physiology, 590(2), 351–362. https://doi.org/10.1113/jphysiol.2011.221200
McGill, Stuart PhD. Core Training: Evidence Translating to Better Performance and Injury Prevention. Strength and Conditioning Journal 32(3):p 33-46, June 2010. | DOI: 10.1519/SSC.0b013e3181df4521
Your abs may be under a layer or two of fat but the solution isn’t only in the kitchen. Yes, nutrition has a lot to do with how lean you can get and how quickly you can view your coveted abs, but the right training can move things along and will ensure a great-looking midsection waits on the other side of all that hard work.
Here are some ab workouts to get your midsection in shape while your diet does its job. Whether you’re training in a fully equipped gym or at home with the bare minimum, when it’s time to reveal your new look, you’ll have the shape and muscularity ready to show off.
Best Ab Workouts
Ab Workout in the Gym
Most commercial gyms are stocked with countless ab machines and other core training equipment. The options may seem overwhelming, but you can benefit from training your abs with a variety of angles for complete development.
Credit: lucky boy studio / Shutterstock
Instead of throwing in a few sets of simple crunches and calling it a day, hit your abs with a comprehensive plan to get well-rounded results from high-intensity training.
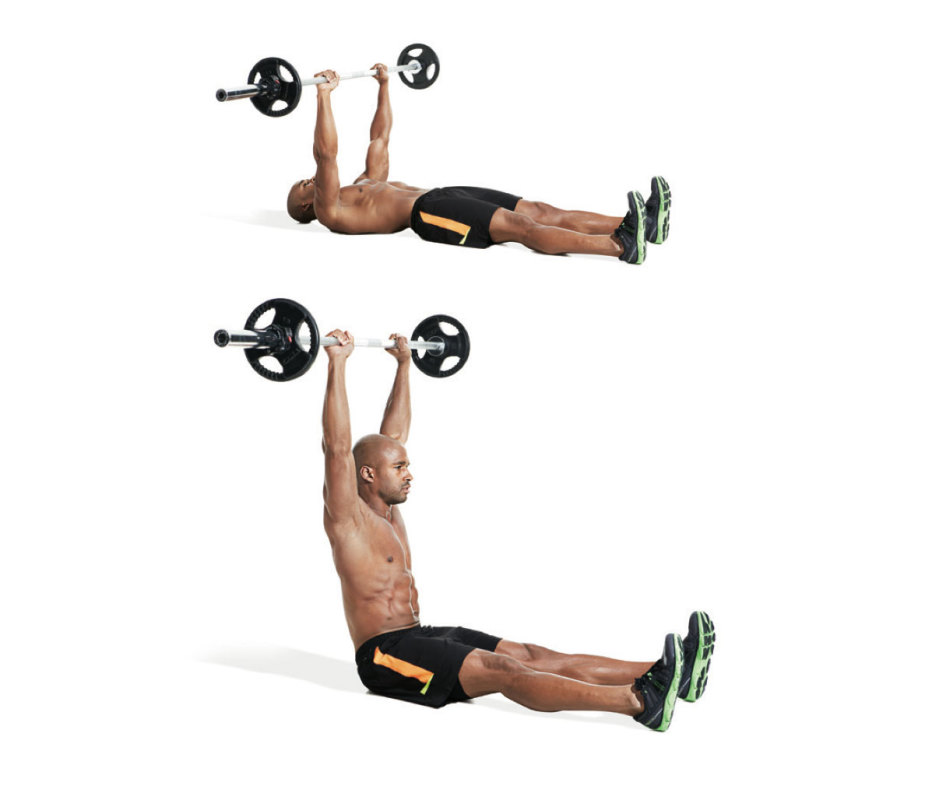
The Complete Ab Workout
Take advantage of some of the most common pieces of ab equipment found in a typical gym. Pay special attention to execution and treat your abs as you would any other body part. Too many lifters dismiss ab training as an afterthought and rush through exercises without focus or intensity.
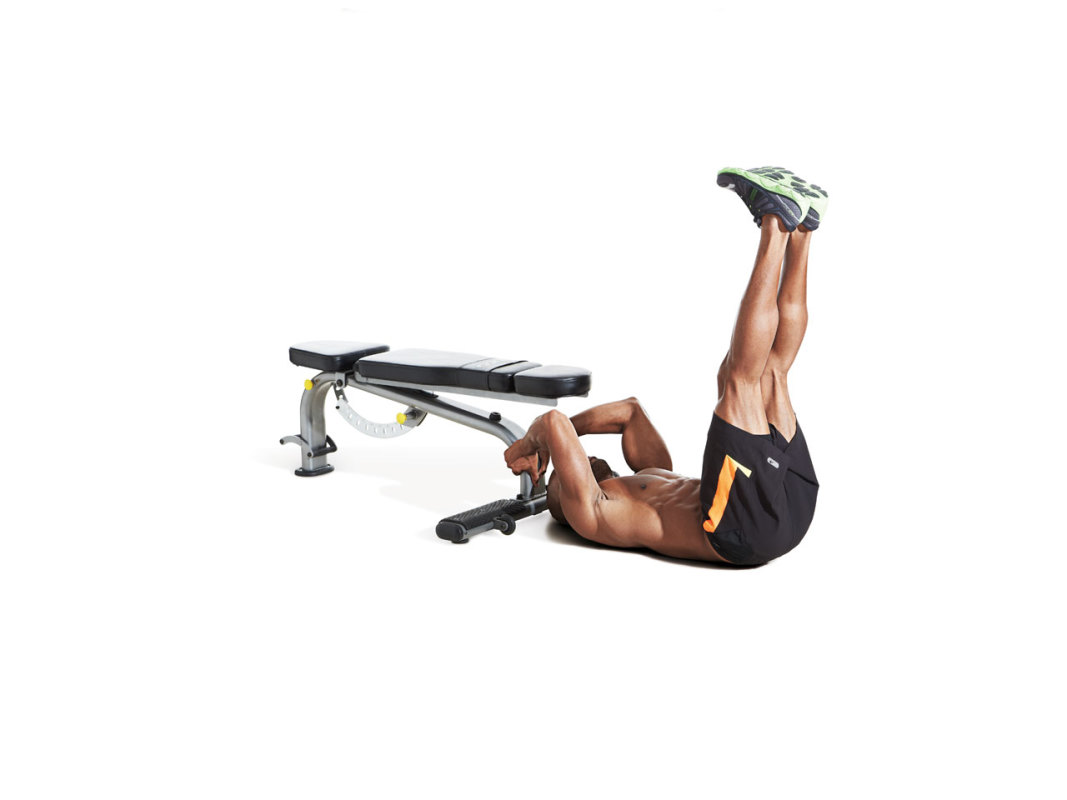
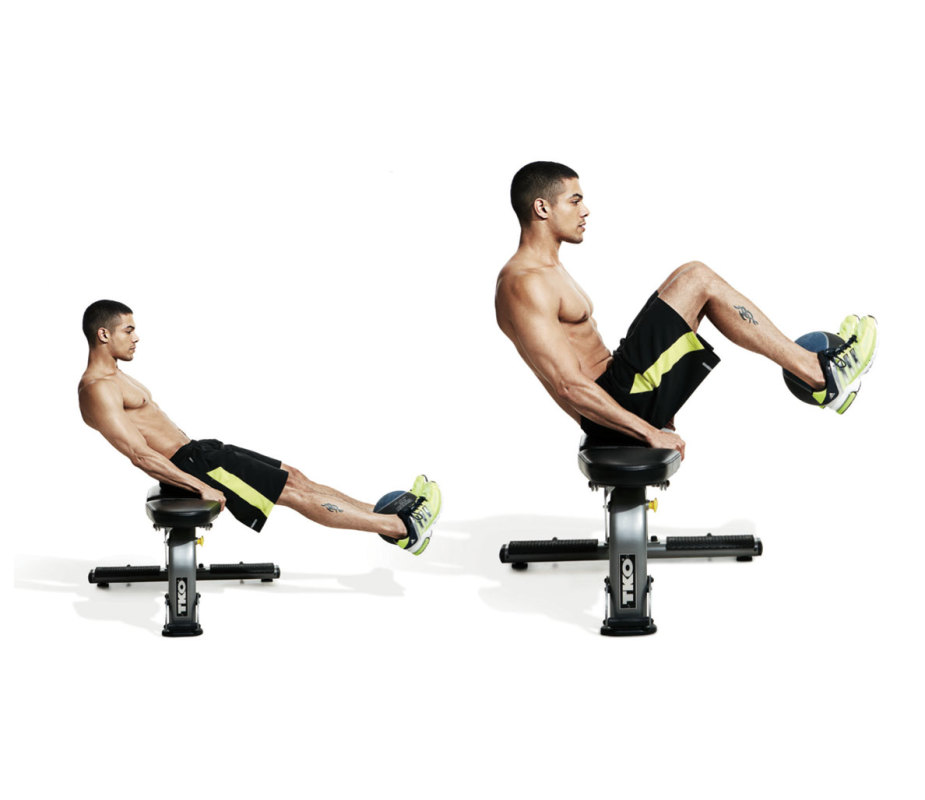
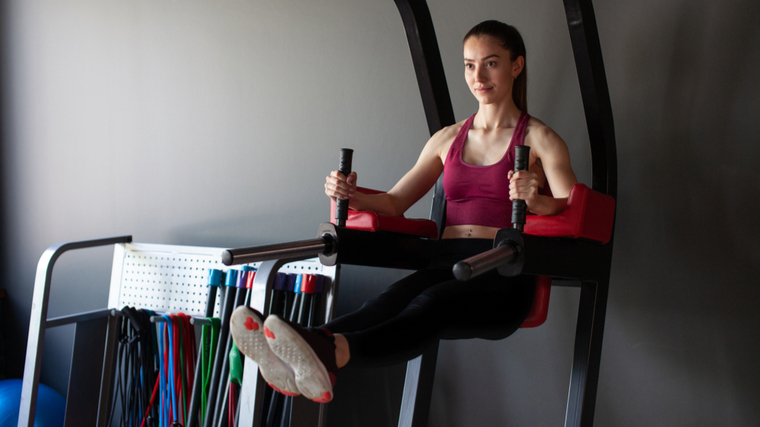
Roman Chair Leg Raise
How to Do It: Climb into a Roman chair (also known as a dip/chin station or hanging leg raise station) and support your bodyweight using the elbow pads with your upper body against the back pad. Tilt your pelvis forward slightly and bend your legs. The more your legs are bent, the less challenging the exercise; the more they’re straight, the more difficult the movement becomes. Raise your legs up until they are even with your waist before lowering them back down. Move slowly and use control throughout the entire rep.
Sets and Reps: 3 x 10-15
Rest Time: 30 seconds between sets.
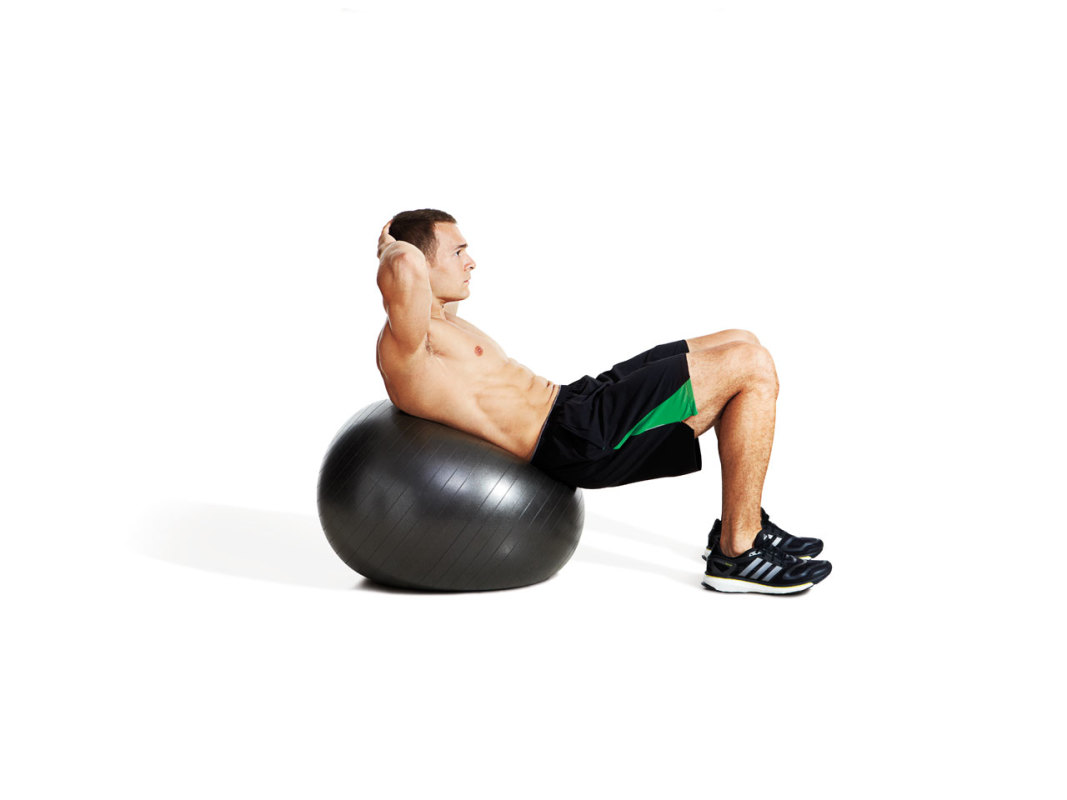
Hyperextension Bench or GHD Sit-Up
How to Do It: Sit “backwards” on a horizontal hyperextension bench or GHD (glute-ham developer), facing upwards with your shins fixed under the pads and your legs relatively straight. Cross your arms over your chest and keep them in place to avoid swinging for assistance. Lean back slowly until your torso is almost parallel with the floor and you’re facing the ceiling. Contract your abs to curl your upper body into an upright position.
Sets and Reps: 3 x 15
Rest Time: 20 seconds between sets.
Cable Woodchop
How to Do It: Attach a single handle to a high cable pulley. Stand sideways to the handle and grab it with both hands. Keeping your arms slightly bent, bring the handle down and across your body until it’s at your waist on the opposite side. Slightly twist your torso and crunch down towards the handle using your obliques (side ab muscles). Slowly return to the starting position. Perform all reps for one side before flipping your stance to work the other side.
Sets and Reps: 3 x 10 per side.
Rest Time: None
Machine Crunch
How to Do It: Sit in a crunch machine and grab the handles above your head. Focus on contracting your abs by bringing your ribcage and pelvis together. Pause in the crunched position and squeeze your abs before returning slowly to the starting position.
Sets and Reps: 3 x 10-15
Rest Time: 20 seconds between sets.
Ab Workout at Home
Even in the smallest home gym, there are plenty of ways to get an effective ab workout. Exercise balls and resistance bands are convenient, space-saving staples.
Credit: RomarioIen / Shutterstock
All it takes is some creativity to create a great program. While basic bodyweight exercises are one option, increasing the challenge using the most simple equipment can deliver better results.
The Home Gym Ab Workout
This simple and effective at-home workout uses just an exercise ball and resistance bands for a serious ab session. This lets you work the abs with more intensity than basic bodyweight exercises and without breaking the bank on any specialized equipment.
Banded Crunch
How to Do It: Wrap the center of a resistance band around a stable object around waist-height. Lie on the floor in front of the band and hold both ends near your shoulders. With your legs bent and feet flat on the ground, crunch your upper body to pull the band. Hold the top position for one second before returning down slowly.
Reps and Sets: 3 x 10
Rest: 20 seconds between sets.
Exercise Ball Leg Raise
How to Do It: Lie on the floor with your arms flat and your hands next to your hips. Squeeze an exercise ball between your feet and calves. Lift your legs to raise the ball up and over your pelvis, then lower it close to the floor. Don’t allow the ball to touch the floor until the entire set is completed.
Sets and Reps: 3 x 10
Rest: 20 seconds between sets.
Banded Twist
How to Do It: Secure a band to a stable, upright object around waist-height (heavy table, chest or dresser, etc.). Stand sideways to the band and grasp it, keeping your elbows by your sides bent at 90-degrees. With your hips and feet stationary, “pull” the band by twisting your upper body while actively contracting your obliques and abs for stability. Return to the starting position. Repeat all reps for one side before switching.
Sets and Reps: 3 x 10 per side.
Rest: None
Ab Workout for Functional Strength
Crunches and sit-ups are great for ab development, but they aren’t the only tools to use. Some lifters and athletes can benefit from more “functional” ab training — which translates to fewer static movements and more exercises that engage the core in motion. (1)
This requires a more “total-body” approach to training your abs. It not only will be a unique training experience, it’ll also force you to adapt to various angles not achieved through traditional strength training methods.
The Athlete’s Ab Workout
For a functional ab workout, you may need to shift your mindset on how to perform some of these movements. You’ll be coordinating stability, balance, and explosiveness to stimulate your abs in new and different ways.
Credit: Hananeko_Studio / Shutterstock
This approach to ab training involves more than just your abs, which helps to carryover to strength in other exercises, while building a stronger complete core.
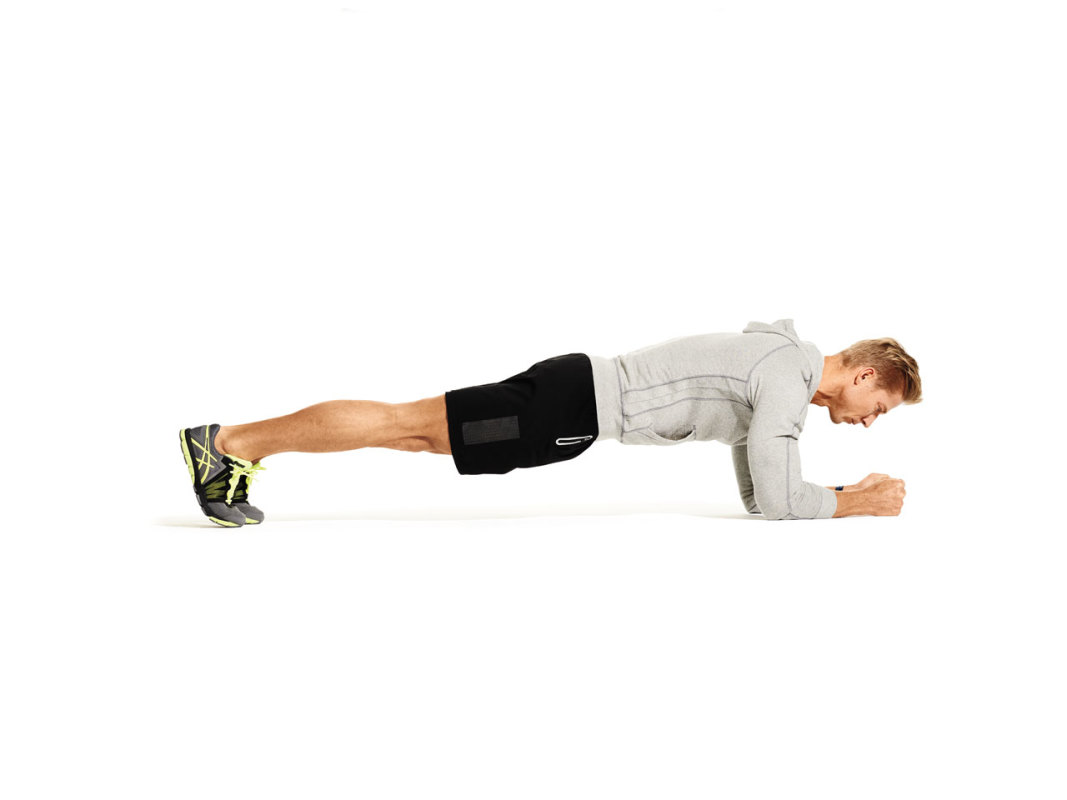
Plank
How to Do It: Lie on the floor face-down, supporting your body on your elbows and toes. Maintain a straight line from your feet to your shoulders. Contract your abs and stabilize your entire midsection. Hold this position and maintain head-to-to tension for the duration of the exercise.
Sets and Reps: Three sets of 30 seconds per set.
Rest: 30 seconds between sets.
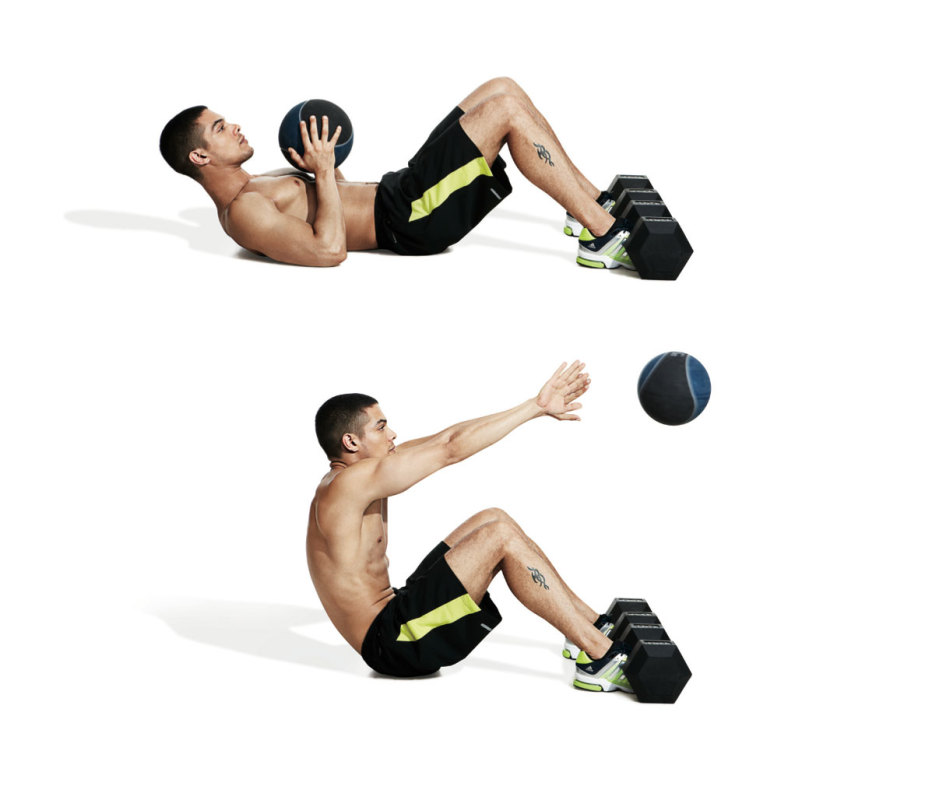
Medicine Ball Sit-Up Throw
How to Do It: Sit on the ground in the top of a sit-up position with your knees bent, feet flat on the floor, and your upper body near your thighs. Have a partner stand two to three steps away holding a light medicine ball. Have them gently throw you the medicine ball. Catch the ball at chest-level, lower your upper body to the floor, and immediately reverse direction, coming up to toss the ball back to your partner.
Sets and Reps: 3 x 8
Rest: 30 seconds between sets.
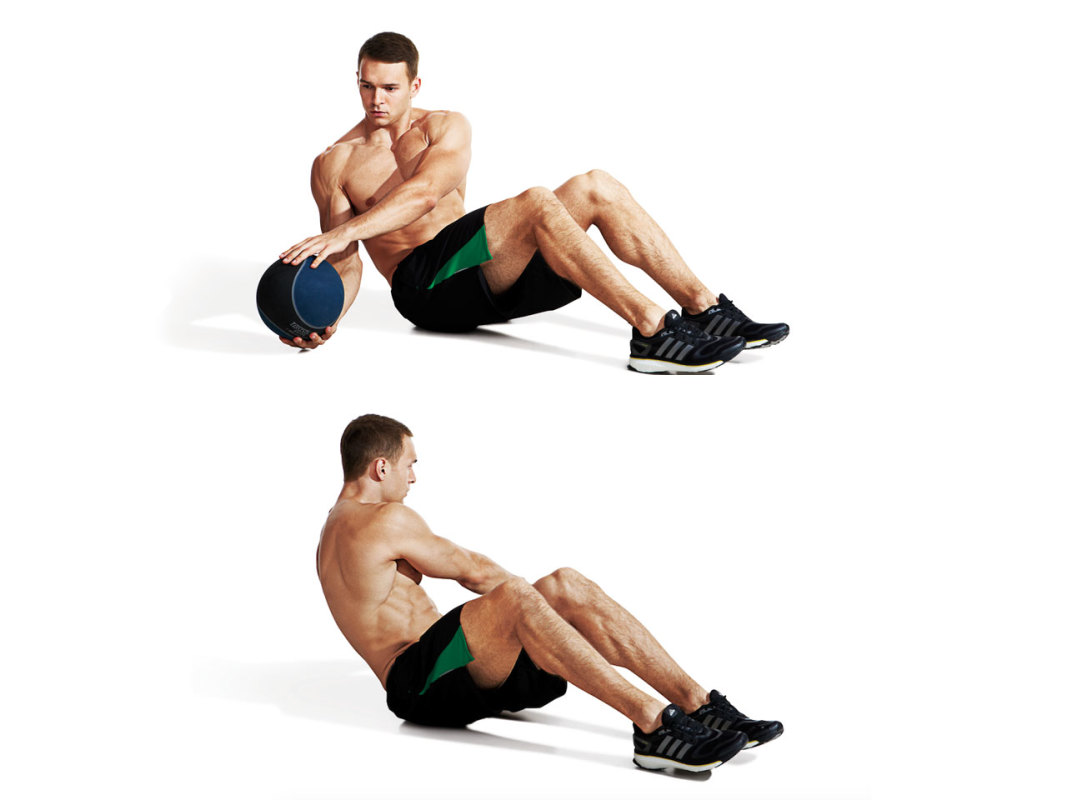
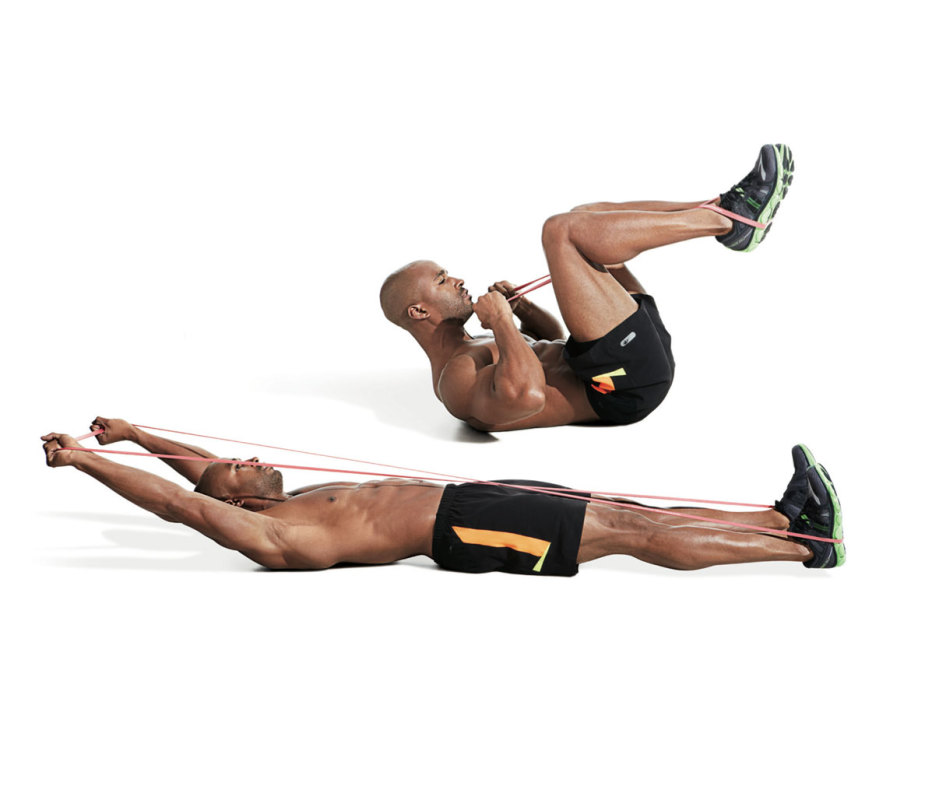
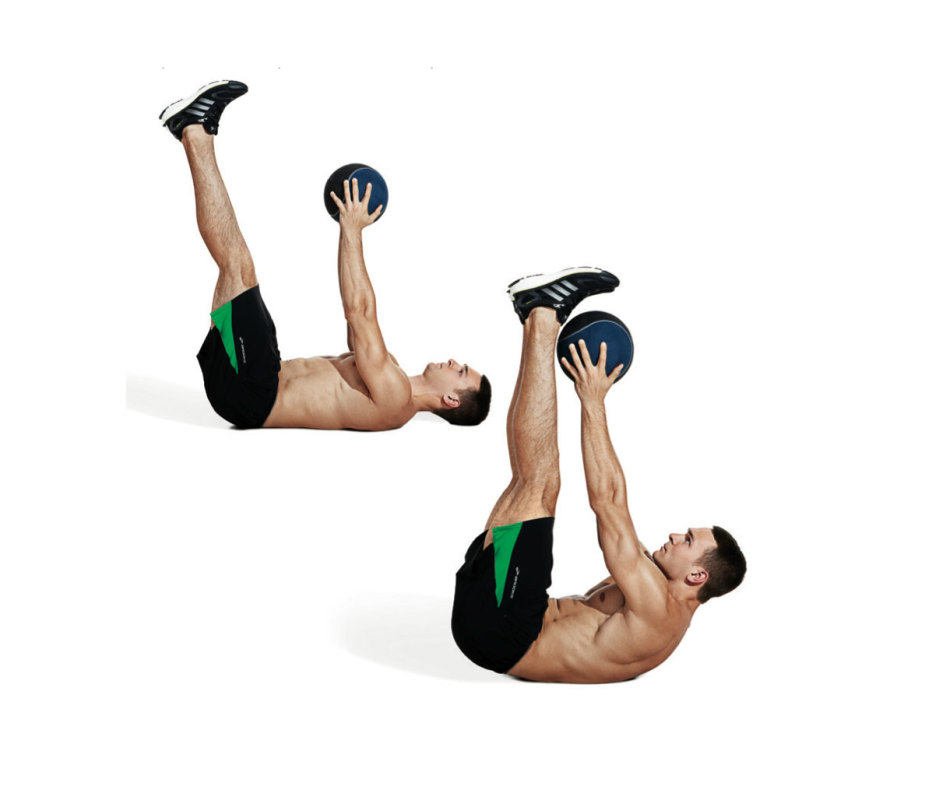
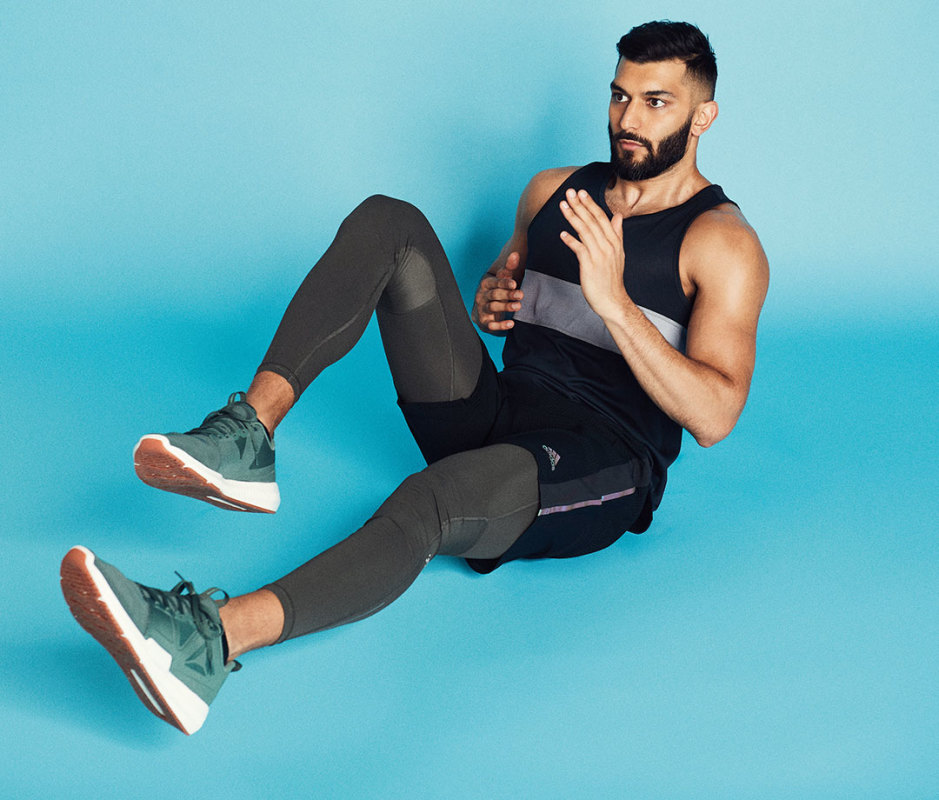
Russian Twist
How to Do It: Take a medicine ball and assume a sit-up position. Straighten your legs and pick your feet off the floor. Only your glutes should be touching the ground. Twist your upper body from side to side, touching the ball to the floor on repetition.
Sets and Reps: 3 x 20 touches to the floor (10 per side).
Rest: 60 seconds between sets.
Bodyweight Ab Workout
The great thing about ab workouts, unlike many other body parts, is that they’re easy to adapt to wherever you end up and can be done anywhere, anytime.
Credit: puhhha / Shutterstock
If you’re home, on the road, or even in the office, an ab workout is only limited by your imagination. You can get a lot done with no equipment.
The Bodyweight-Only Ab Workout
Some equipment can be useful, but you don’t need any “stuff” to get a good ab workout. The plan below allows you to train your abs directly and effectively wherever you may be.
Floor Crunch
How to Do It: Lie on the floor with your knees bent at 90-degrees and feet flat on the floor. Cross your arms over your chest and slightly tuck your chin. Raise your upper body while keeping your lower back in contact with the floor. Squeeze at the top and then slowly return to the starting position.
Sets and Reps: 3 x 20
Rest: 30 seconds between sets.
Partial Lying Leg Raise
How to Do It: Lie on the floor and place your hands flat under your glutes to relieve pressure from your lower back. Keep a slight bend in your knees while slowly raising your legs up until they are about 45-degrees from the floor (roughly halfway to a vertical position). Slowly return to the starting position.
Sets and Reps: 3 x 20
Rest: 30 seconds between sets.
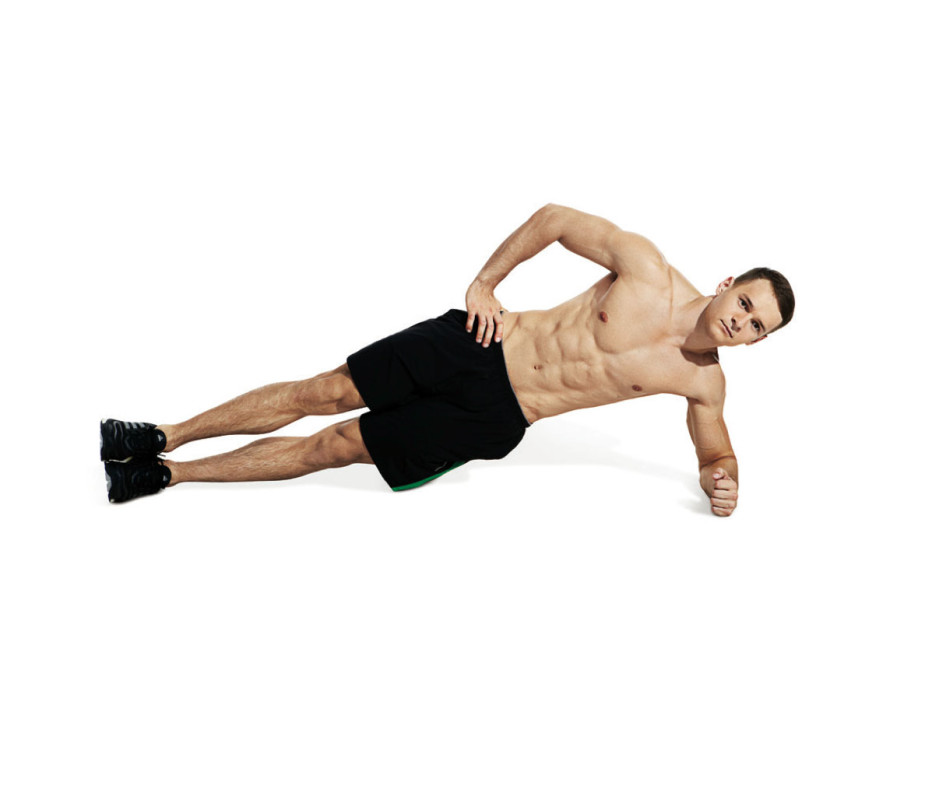
Three-Way Plank
How to Do It: Begin on the ground supporting your body on your elbows, forearms, and toes. Maintain a straight body position without sinking or arching your lower back. Hold for 20 seconds. Rotate to one side by shifting your weight to one shoulder and forearm and stacking your feet on top of each other. Don’t allow your hips to sink down. Hold the position for 20 seconds before rotating to the opposite side and holding for 20 seconds. Holding each position — center, one side, and opposite side — completes “one rep.”
Sets and Reps: 3 sets of one rep.
Rest: 30 seconds between sets.
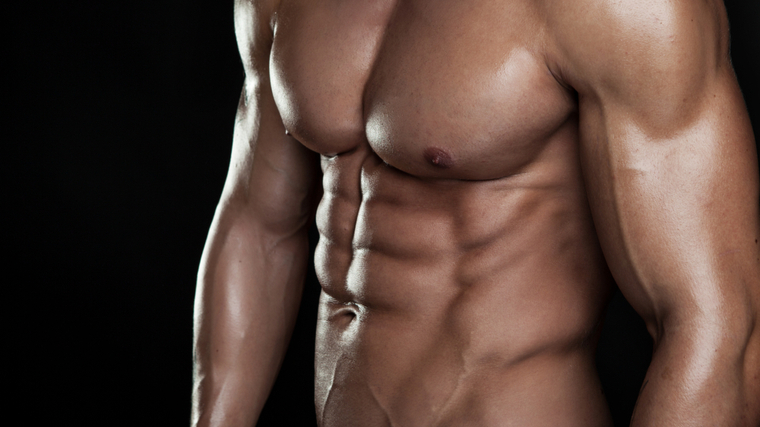
Muscles of Your Abs
The abdominals are more than just the “six-pack abs” you might hope to see in the mirror. They consist of a group of muscles, some visible and some equally important below the surface. It’s important to know that the actual “six-pack” separation is determined by fibrous tissues, not any actual muscles, and they can’t be specifically trained.
Credit: I T A L O / Shutterstock
This is why, no matter what exercises or diet are used, some people may not be anatomically capable of building six or eight separate abdominals. Regardless, hard training and a cleaned-up diet can help reveal how your own abs will look.
Rectus Abdominis
This muscle group is best known as the coveted six-pack (or eight-pack, if your genetics allow it) that plenty of people desire. It originates from your ribs to the front of your pelvis. It helps keep your body stable and brings your ribs and pelvis closer when contracted, like during the classic ab crunch or sit-up exercise.
Transversus abdominis
This muscle is found underneath the rectus abdominis and helps to stabilize the trunk. It’s an important postural muscle working to provide tension, stability, and support for the upper body. They also help to maintain internal abdominal pressure, which offers support for the spine.
External Obliques
This pair of muscles sit on each side of your rectus abdominus, above the hips. They run from the sides of your body towards your midline, working to rotate your trunk and “crunch” sideways, as well as stabilize your body during those types of twisting movements.
Internal obliques
This pair of muscles sit below the external obliques and also sit on the sides of your rectus abdominis. They also help rotate and twist your trunk, flex or “crunch” sideways, and provide overall stability.
All About Abs
Whether you have little to no equipment or you’re training at a traditional gym, hitting your abs is possible wherever you are, no matter your goal. All it takes is some discipline, organization, and a consistency. Follow these workouts and you’ll improve your abs in no time. But if you really want to see them shine, you’ll still need to clean up your diet.
References
Kibler, W. B., Press, J., & Sciascia, A. (2006). The role of core stability in athletic function. Sports medicine (Auckland, N.Z.), 36(3), 189–198. https://doi.org/10.2165/00007256-200636030-00001
Your lower abs are high maintenance. It takes a clean diet and consistent regimen to make them pop. While your total-body sessions hit your core, it’s equally important to do a targeted lower ab workout at least once a week. Doing so can reduce and prevent low-back pain, and help correct posture and pelvic tilt issues. A strong core connection and understanding how to engage your lower abs will improve your everyday movements but also unlock greater strength gains whether you’re training at home or in the gym.
Over time, you’ll stop overworking the muscles you’re not trying to target—but often take over—and see more defined lower abs. Some tips before you attack the lower ab workout below: Targeting the lower abs can be thwarted by tight, overactive hip flexors; overdoing an exercise’s range of motion; and moving too quickly. But don’t get disheartened! The circuit below will give you the tips and confidence to get where you’re trying to go.
Best of all, this workout entirely comprises bodyweight exercises. All you need is a yoga mat and some will power.
Directions: Perform 1 round for a quick fire up or 3 rounds total for a full roast.
The Best At-Home Lower Ab Workout
1. Toe Taps x 10 reps each side
Lie on your back with arms actively pressing into the ground, head and neck relaxed. (Bonus: This move activates your triceps and opens up your chest). Raise legs into tabletop position with knees stacked above hips, shins parallel to the ground, feet relaxed. Inhale, then lower one foot at a time toward the floor, keeping the 90-degree bend at the knee. Tap the floor, then exhale to draw the leg back to the starting position. Alternate and perform on the other side; that’s 1 rep. To make it harder, take hands behind your head with elbows wide, lifting your shoulder blades off the floor. This spicy variation works the upper abs at the same time and add a stability challenge. Watch a video demonstration here on slide 1 (go to slide 2 for the advanced variation).
Pro tips: Go as slow as possible, and let a steady, consistent breath control the movement. A deep exhale will help engage your lower abs more. Watch that you don’t draw your knees in too close to your chest, always stop the knees a little farther away than you think (no closer than directly above hips) to keep the core engaged.
2. Forearm Plank With Knee Taps x 10 reps each side
Come into a forearm plank with forearms directly under shoulders, legs extended long. Activate your quads, engage your glutes, and stay on your toes by flexing feet and shifting weight forward. Draw your lower abs up and in—almost like you have an invisible tuck. This is subtle, but helps keep your back safe and engages your abs more. With everything fired up, start to gently lower one knee at a time to tap the floor. Use your lower abs and breath to control the movement. Your upper and lower body should remain still and stable. Alternate and perform on the other side; that’s 1 rep. Continue alternating on every rep. Watch a video demonstration here on slide 4.
Pro tip: To engage your serratus (the large muscle that extends from the outside of your ribs to just beneath your shoulder blades) and lats more, imagine you’re drawing your elbows back toward your hips.
3. Diagonal Dead Bugs x 10 reps each side
Lie on your back with arms straight up above shoulders, head and neck relaxed, knees stacked above hips, shins parallel to the ground, and feet flexed. Inhale, then extend your left arm and right leg away from you on a diagonal while keeping your right arm and left leg completely still. Exhale to come back to center. Alternate and perform on the other side, extending right arm and left leg; that’s 1 rep. Watch a video demonstration here on slide 4.
Pro tip: Move slow and controlled to get the most out of this exercise and keep your black flat to the ground but not fully pressed to the floor. This exercise will work your lower abs with the bonus of hitting your entire core. If you really nail the diagonal angle, you’ll feel your obliques fire fast!
4. Slow Reverse Crunch x 20 reps
Lie on your back with arms pressed firmly into the floor, knees bent and feet close to glutes. It’s key you keep them here the entire time. With a tilt of your pelvis, use your lower abs to lift your hips an inch off the floor with knees coming in toward your chest. Lower back slowly with control so you can’t use momentum for your next rep (this is not a rocking movement). Watch a video demonstration here on slide 8.
Pro tip: Try not to shrug your shoulders or use your arms too much so you can really hit your core. You can get as little or as much as you want from this exercise so my top advice is to slow it down and control each rep.
5. Single-Leg Lower to Hip Lift x 10 reps each side
Lie on your back and raise legs into tabletop position with knees stacked above hips. Extend your left leg straight up toward the ceiling. Take both hands behind your head and roll up to the tips of your shoulder blades. Inhale, then extend your left leg down toward the floor as low as you can control it, then exhale and draw it straight back up. Once back at the starting position, use that pelvic tilt to lift the hips just off the floor. Complete all reps on one side, then switch. Watch a video demonstration here on slide 6.
Pro tip: Stay on the tips of your shoulder blades. This provides a killer stability challenge and upper ab scorcher from the head and shoulders being lifted. You’re welcome.
Finally, 2020 is officially in the history books. Needless to say, the past year has been challenging for just about everyone. With a global pandemic changing our way of life in profound ways, just making it through that year felt like an accomplishment.
Unfortunately, the start of 2021 is showing no signs of letting up. Covid-19 continues to ravage our communities and most folks are under some type of stay-at-home order. But just because our conditions have not changed, we still have the power to change our mindset.
Instead of moping around and falling into the same bad habits, decide to make the most of a bad situation. One of the best ways to accomplish this is by focusing on your physical health. If you fell off the health wagon in 2020––you wouldn’t be the only one––now is the perfect time to get back into shape.
A simple cardio routine is a great way to get back into working out. These three cardio workouts will not only blast your gut, but can be done anywhere and require no equipment. A strong and healthy year awaits, all you need to do is get moving.
For access to exclusive gear videos, celebrity interviews, and more, subscribe on YouTube!